2010 NISSAN QASHQAI air condition
[x] Cancel search: air conditionPage 4 of 297
Downloaded from www.Manualslib.com manuals search engine ContentsIllustrated table of contents0
Safety — seats, seat belts and supplemental
restraint system1
Instruments and controls2
Pre-driving checks and adjustments3
Display screen, heater and air conditioner, and
audio system4
Starting and driving5
In case of emergency6
Appearance and care7
Maintenance and do-it-yourself8
Technical information9
Index10
Page 31 of 297
Downloaded from www.Manualslib.com manuals search engine WARNING
The pre-tensioner seat belt cannot be reused
after activation. It must be replaced together
with the retractor as a unit.
If the vehicle is involved in a frontal collision
but the pre-tensioner is not activated, be sure
to have the pre-tensioner system checked
and, if necessary, replaced by a NISSAN
dealer or qualified workshop.
No unauthorised changes should be made to
any components or wiring of the pre-tensioner
seat belt system. This is to prevent accidental
activation of the pre-tensioner seat belt or
damage to the pre-tensioner seat belt opera-
tion. Tampering with the pre-tensioner seat
belt system may result in serious personal in-
jury.
Work on and around the pre-tensioner system
should be done by an authorised NISSAN
dealer or qualified workshop. Installation of
electrical equipment should also be done by a
NISSAN dealer or qualified workshop. Unau-
thorised electrical test equipment and prob-
ing devices should not be used on the pre-
tensioner seat belt system.
If you need to dispose of the pre-tensioner or
scrap the vehicle, contact a NISSAN dealer or
qualified workshop. Correct pre-tensioner
disposal procedures are set forth in the ap-propriate NISSAN Service Manual. Incorrect
disposal procedures could cause personal in-
jury.
The front seat pre-tensioner seat belt system is acti-
vated in conjunction with the front air bag system. It
helps tighten the seat belt when the vehicle is in-
volved in certain types of collisions by restraining
the seat occupants via the seat belt retractor.
The pre-tensioner is encased with the seat belt’s
retractor. These seat belts are used in the same way
as conventional seat belts.
Additionally, the driver’s side pre-tensioner seat belt
system is also equipped with a lap pre-tensioner.
Both the retractor pre-tensioner and lap pre-ten-
sioner provide significant protection against injury in
an accident and increase the safety performance of
your vehicle.
When the pre-tensioner seat belt system activates,
smoke is released and a loud noise may be heard.
The smoke is harmless, but care should be taken
not to inhale it as it may cause irritation and choking.
When the ignition switch is in the ON or START
position, the Supplemental Restraint System (SRS)
air bag warning light will illuminate. The SRS air bag
warning light will turn off after approximately 7 sec-
onds if the system is operational. If any of the follow-
ing conditions occur, the air bag and/or pre-ten-
sioner seat belt need servicing and your vehicle must
be taken to the nearest NISSAN dealer or qualified
workshop.
The air bag warning light remains on after ap-
proximately 7 seconds.
The air bag warning light flashes intermittently.
The air bag warning light does not come on at
all.
Unless checked and repaired, the Supplemental Re-
straint System (SRS) and/or pre-tensioner seat belt
may not function properly. It must be checked and
repaired.
When selling your vehicle, we request that you in-
form the buyer about the pre-tensioner seat belt sys-
tem and guide the buyer to the appropriate sections
in this Owner’s Manual.
PRE-TENSIONER SEAT BELT
SYSTEM
1-12Safety — seats, seat belts and supplemental restraint system
Page 35 of 297
Downloaded from www.Manualslib.com manuals search engine AIR BAG WARNING LABELS
Warning labels about the air bag system are placed
in the vehicle. Warning labels are for your safety and
the safety of your passengers; do not remove them.
Child restraint on front passenger seat
NISSAN recommends that infants or small children
be seated in a child restraint system on the rear seat
if available. According to accident statistics, chil-
dren are safer when properly restrained in the rear
seat rather than in the front seat.
Front passenger air bag:
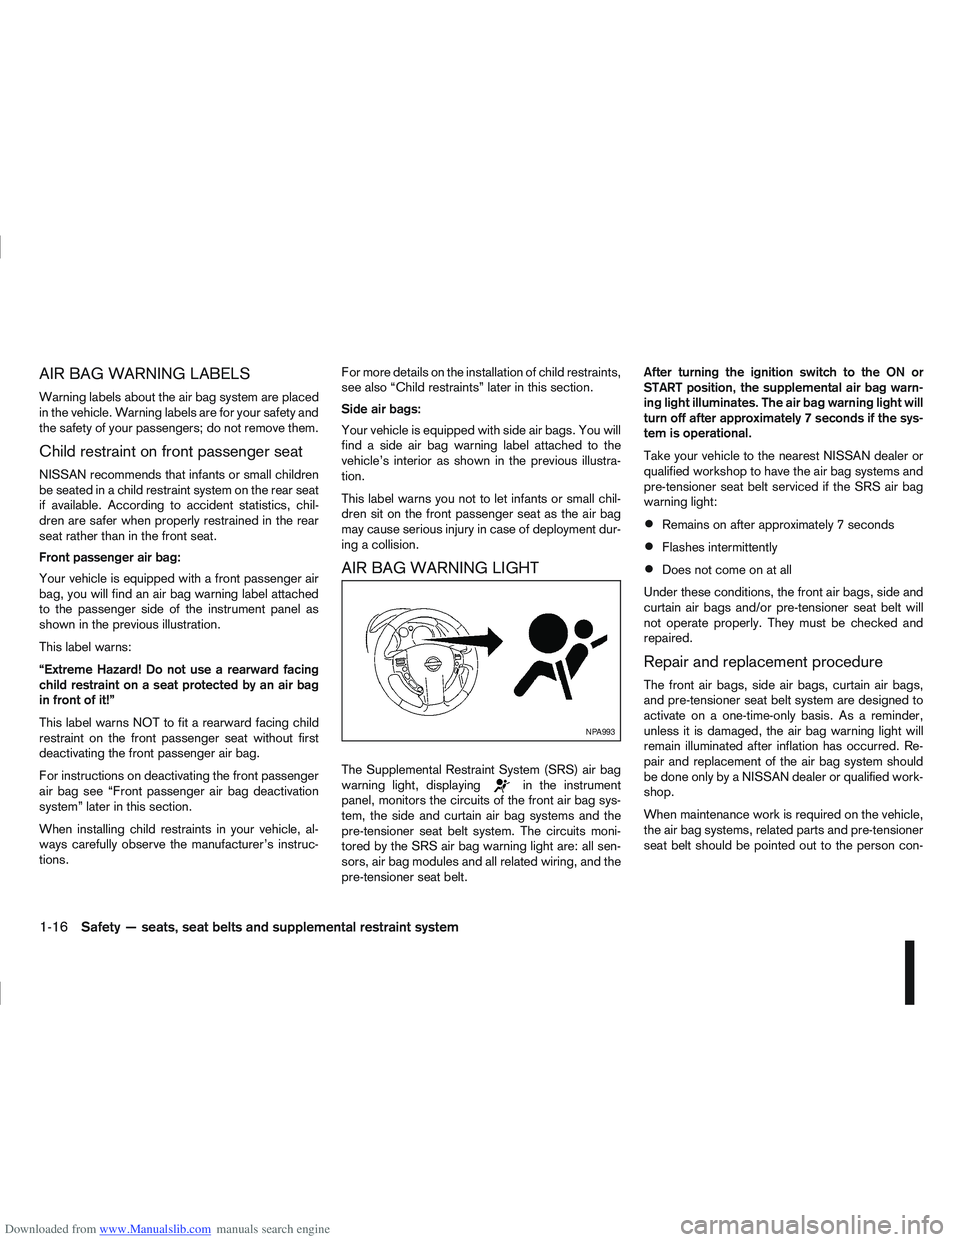
Your vehicle is equipped with a front passenger air
bag, you will find an air bag warning label attached
to the passenger side of the instrument panel as
shown in the previous illustration.
This label warns:
“Extreme Hazard! Do not use a rearward facing
child restraint on a seat protected by an air bag
in front of it!”
This label warns NOT to fit a rearward facing child
restraint on the front passenger seat without first
deactivating the front passenger air bag.
For instructions on deactivating the front passenger
air bag see “Front passenger air bag deactivation
system” later in this section.
When installing child restraints in your vehicle, al-
ways carefully observe the manufacturer’s instruc-
tions.For more details on the installation of child restraints,
see also “Child restraints” later in this section.
Side air bags:
Your vehicle is equipped with side air bags. You will
find a side air bag warning label attached to the
vehicle’s interior as shown in the previous illustra-
tion.
This label warns you not to let infants or small chil-
dren sit on the front passenger seat as the air bag
may cause serious injury in case of deployment dur-
ing a collision.
AIR BAG WARNING LIGHT
The Supplemental Restraint System (SRS) air bag
warning light, displayingin the instrument
panel, monitors the circuits of the front air bag sys-
tem, the side and curtain air bag systems and the
pre-tensioner seat belt system. The circuits moni-
tored by the SRS air bag warning light are: all sen-
sors, air bag modules and all related wiring, and the
pre-tensioner seat belt. After turning the ignition switch to the ON or
START position, the supplemental air bag warn-
ing light illuminates. The air bag warning light will
turn off after approximately 7 seconds if the sys-
tem is operational.
Take your vehicle to the nearest NISSAN dealer or
qualified workshop to have the air bag systems and
pre-tensioner seat belt serviced if the SRS air bag
warning light:
Remains on after approximately 7 seconds
Flashes intermittently
Does not come on at all
Under these conditions, the front air bags, side and
curtain air bags and/or pre-tensioner seat belt will
not operate properly. They must be checked and
repaired.
Repair and replacement procedure
The front air bags, side air bags, curtain air bags,
and pre-tensioner seat belt system are designed to
activate on a one-time-only basis. As a reminder,
unless it is damaged, the air bag warning light will
remain illuminated after inflation has occurred. Re-
pair and replacement of the air bag system should
be done only by a NISSAN dealer or qualified work-
shop.
When maintenance work is required on the vehicle,
the air bag systems, related parts and pre-tensioner
seat belt should be pointed out to the person con-
NPA993
1-16Safety — seats, seat belts and supplemental restraint system
Page 37 of 297

Downloaded from www.Manualslib.com manuals search engine cal key (Intelligent Key models)” later in this sec-
tion) in the front passenger air bag switch on the
side of the dashboard, press then turn the key to
the OFF position.
3. Turn the ignition switch to the ON position and make sure the front passenger air bag indicator
light
remains illuminated.
The
indicator light remains continuously illumi-
nated to warn you of front passenger air bag status.
See “Child restraints” later in this section for child
seat appropriate fitting.
Activating the front passenger air bag
You should reactivate the front passenger air bag
system as soon as the child restraint is not in use on
the front passenger seat to ensure protection of the
front passenger seat occupant in the event of an
impact.
To reactivate the front passenger air bag system:
1. With the ignition switch in the LOCK position and the engine off, open the front passenger
door.
2. Insert the ignition key/emergency key (Intelligent Key equipped models) in the front passenger air
bag switch and turn the key to the ON position.
3. Turn the ignition switch to the ON position and make sure the front passenger air bag indicator
light
illuminates for a few seconds and then
turns off.
WARNING
If any of the following conditions occur after the
ignition switch has been turned to the ON posi-
tion, the front passenger air bag system needs
servicing and your vehicle must be taken to the
nearest NISSAN dealer or qualified workshop.
The front passenger air bag indicator light
comes on and remains illuminated after ap-
proximately 7 seconds while the front pas-
senger air bag switch is ON.
The front passenger air bag indicator light
does not come on at all while the front pas-
senger air bag switch is ON.
Unless checked and repaired, the front passenger
air bag system may not function properly.
PRECAUTIONS ON CHILD
RESTRAINT USAGE
Infants and small children should alwaysbe placed
in an infant or child restraint while riding in the ve-
hicle.
WARNING
Infants and small children should never be
carried on your lap. It is not possible for even
the strongest adult to resist the forces of an
accident. The child could be crushed between
the adult and parts of the vehicle. Also, do not
put the same seat belt around a child and
yourself. In general, child restraints are de-
signed to be installed with the lap portion of a
three-point type seat belt.
NISSAN recommends installing the child re-
straint on the rear seat. According to accident
statistics, children are safer when properly re-
strained in the rear seat than in the front seat.
SSS0099Z
CHILD RESTRAINTS
1-18Safety — seats, seat belts and supplemental restraint system
Page 51 of 297
Downloaded from www.Manualslib.com manuals search engine NOTE
For an overview see “Instrument and control
layout” in the “0. Illustrated table of contents”
section and see “Meters and gauges” in the “0. Il-
lustrated table of contents” section.
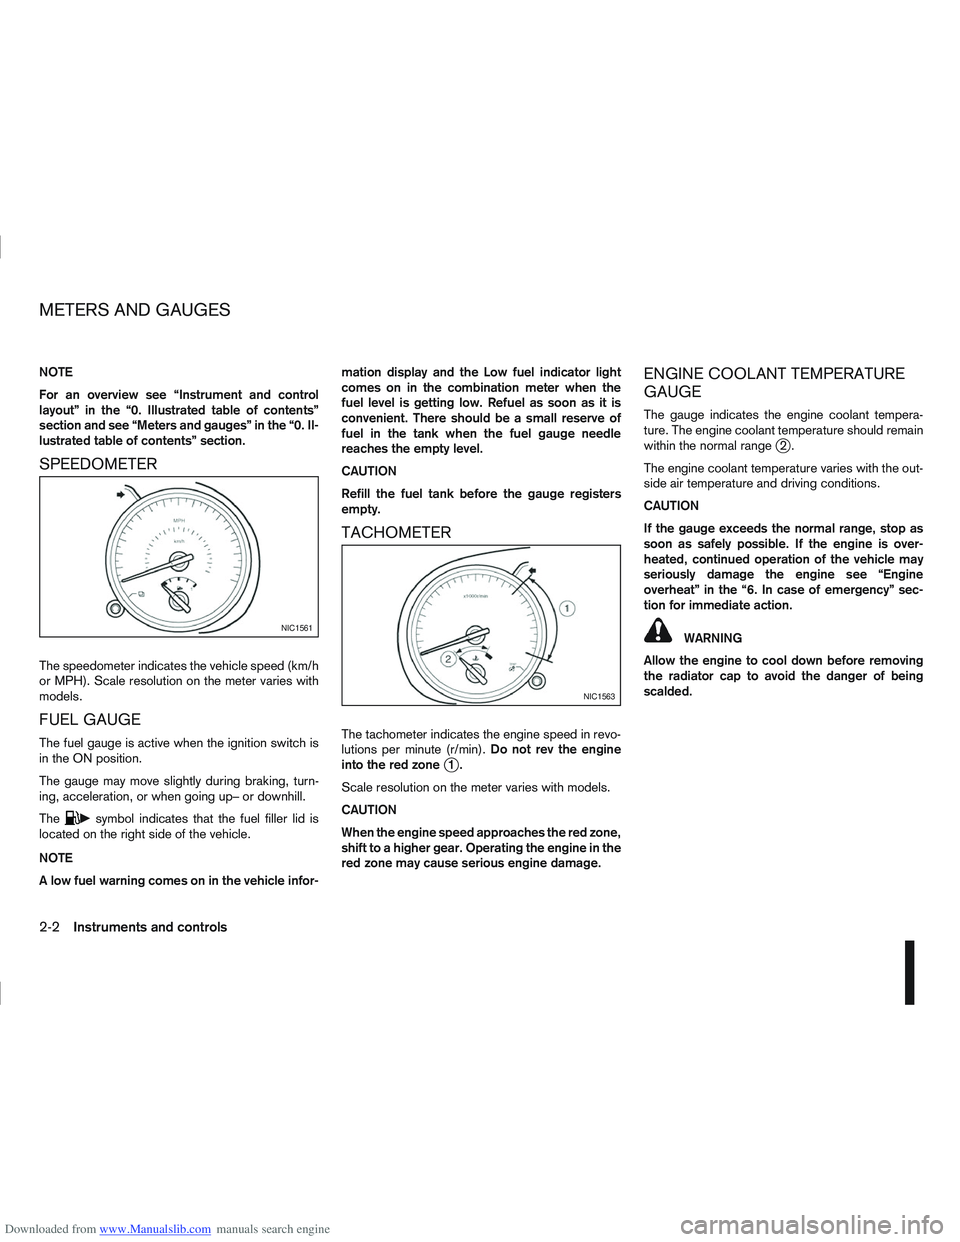
SPEEDOMETER
The speedometer indicates the vehicle speed (km/h
or MPH). Scale resolution on the meter varies with
models.
FUEL GAUGE
The fuel gauge is active when the ignition switch is
in the ON position.
The gauge may move slightly during braking, turn-
ing, acceleration, or when going up– or downhill.
The
csymbol indicates that the fuel filler lid is
located on the right side of the vehicle.
NOTE
A low fuel warning comes on in the vehicle infor- mation display and the Low fuel indicator light
comes on in the combination meter when the
fuel level is getting low. Refuel as soon as it is
convenient. There should be a small reserve of
fuel in the tank when the fuel gauge needle
reaches the empty level.
CAUTION
Refill the fuel tank before the gauge registers
empty.
TACHOMETER
The tachometer indicates the engine speed in revo-
lutions per minute (r/min).
Do not rev the engine
into the red zone
j1.
Scale resolution on the meter varies with models.
CAUTION
When the engine speed approaches the red zone,
shift to a higher gear. Operating the engine in the
red zone may cause serious engine damage.
ENGINE COOLANT TEMPERATURE
GAUGE
The gauge indicates the engine coolant tempera-
ture. The engine coolant temperature should remain
within the normal range
j2.
The engine coolant temperature varies with the out-
side air temperature and driving conditions.
CAUTION
If the gauge exceeds the normal range, stop as
soon as safely possible. If the engine is over-
heated, continued operation of the vehicle may
seriously damage the engine see “Engine
overheat” in the “6. In case of emergency” sec-
tion for immediate action.
WARNING
Allow the engine to cool down before removing
the radiator cap to avoid the danger of being
scalded.NIC1561
NIC1563
METERS AND GAUGES
2-2Instruments and controls
Page 54 of 297
Downloaded from www.Manualslib.com manuals search engine burns-off the accumulated carbon. This regenera-
tion process is normally automatic and not visible to
the driver.
Regeneration restrictions:
Driving conditions such as frequent short journeys
or stop/start driving can result in excessive build up
of carbon in the filter. When this happens the DPF
warning light will illuminate (and a message will ap-
pear in the vehicle information display, see “Vehicle
information display” later in this section) to inform
you that the vehicle must be driven in a particular
manner to begin regeneration.
When the DPF warning light is illuminated, provided
that legal and safety conditions allow, the vehicle
should be driven at a speed of over 60 km/h (37.5
MPH) until the DPF warning light turns off. This pro-
cess can take up to 30 minutes to complete.
If regeneration fails:
Failure to react to the DPF warning light may lead to
saturation of the DPF system. If this happens the
Malfunction Indicator (MI)
will illuminate indi-
cating that a Service Regeneration by a NISSAN
dealer or qualified workshop is required. The engine
speed may also be limited to 3,000 rpm to protect
the DPF system.
NOTE
Contact a NISSAN dealer or qualified workshop
to perform a forced regeneration.
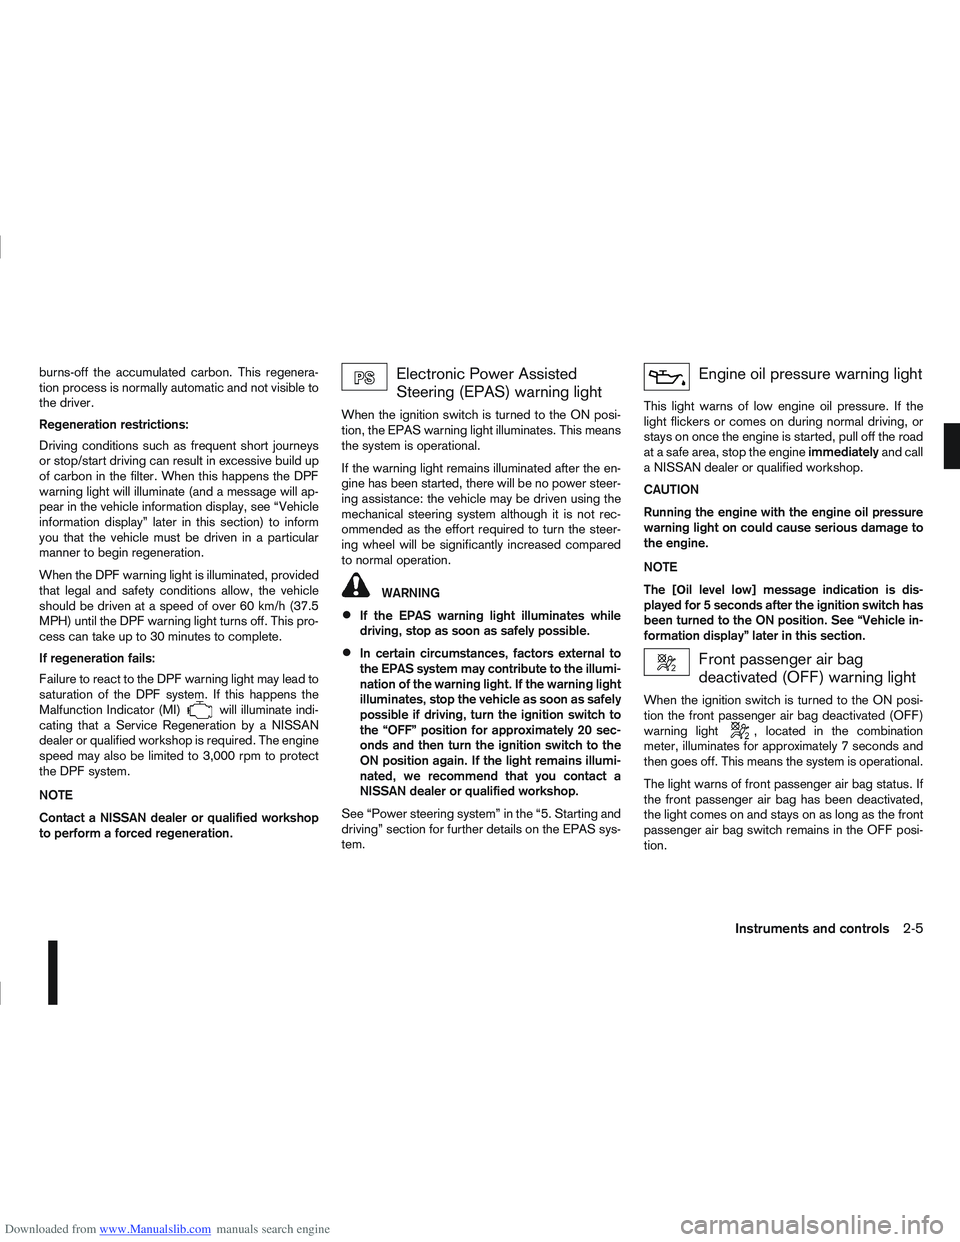
Electronic Power Assisted
Steering (EPAS) warning light
When the ignition switch is turned to the ON posi-
tion, the EPAS warning light illuminates. This means
the system is operational.
If the warning light remains illuminated after the en-
gine has been started, there will be no power steer-
ing assistance: the vehicle may be driven using the
mechanical steering system although it is not rec-
ommended as the effort required to turn the steer-
ing wheel will be significantly increased compared
to normal operation.
WARNING
If the EPAS warning light illuminates while
driving, stop as soon as safely possible.
In certain circumstances, factors external to
the EPAS system may contribute to the illumi-
nation of the warning light. If the warning light
illuminates, stop the vehicle as soon as safely
possible if driving, turn the ignition switch to
the “OFF” position for approximately 20 sec-
onds and then turn the ignition switch to the
ON position again. If the light remains illumi-
nated, we recommend that you contact a
NISSAN dealer or qualified workshop.
See “Power steering system” in the “5. Starting and
driving” section for further details on the EPAS sys-
tem.
Engine oil pressure warning light
This light warns of low engine oil pressure. If the
light flickers or comes on during normal driving, or
stays on once the engine is started, pull off the road
at a safe area, stop the engine immediatelyand call
a NISSAN dealer or qualified workshop.
CAUTION
Running the engine with the engine oil pressure
warning light on could cause serious damage to
the engine.
NOTE
The [Оil lеvеll оw] message indication is dis-
played for 5 seconds after the ignition switch has
been turned to the ON position. See “Vehicle in-
formation display” later in this section.
Front passenger air bag
deactivated (OFF) warning light
When the ignition switch is turned to the ON posi-
tion the front passenger air bag deactivated (OFF)
warning light
, located in the combination
meter, illuminates for approximately 7 seconds and
then goes off. This means the system is operational.
The light warns of front passenger air bag status. If
the front passenger air bag has been deactivated,
the light comes on and stays on as long as the front
passenger air bag switch remains in the OFF posi-
tion.
Instruments and controls2-5
Page 64 of 297
![NISSAN QASHQAI 2010 Owners Manual Downloaded from www.Manualslib.com manuals search engine However reset is possible (only after the oil was
changed) using the [Service] menu item in the
[Settings] menu. See “[Maintenance]” later NISSAN QASHQAI 2010 Owners Manual Downloaded from www.Manualslib.com manuals search engine However reset is possible (only after the oil was
changed) using the [Service] menu item in the
[Settings] menu. See “[Maintenance]” later](/manual-img/5/56766/w960_56766-63.png)
Downloaded from www.Manualslib.com manuals search engine However reset is possible (only after the oil was
changed) using the [Service] menu item in the
[Settings] menu. See “[Maintenance]” later in this
section
Have the vehicle inspected by a NISSAN dealer
or qualified workshop if these conditions occur.
j20Distance to maintenance alert
(where fitted)
This alert reminds when maintenance is due in the
shown distance. The alert is shown for 10 seconds
at ignition ON, when the distance to the next main-
tenance interval is below 5000 km (3100 Miles).
The message is shown until the steering wheel
switch
ji (where fitted) is pressed.
NOTE
Visit a NISSAN dealer or qualified workshop
before the maintenance due alertj19reaches
0 km (miles) to perform maintenance (oil
change).
The maintenance interval will reduce faster
with certain types of driving, especially at low
speeds in urban conditions.
j21Tyre change alert
You can set a distance for changing tyres. See
“[Maintenance]” later in this section
j22Maintenance alert
You can set a distance for a non specific mainte-
nance item. See “[Maintenance]” later in this sec-
tion
j23Low temperature warning
If, during driving, the temperature falls below 4ºC
this alert will appear to indicate low outside air tem-
perature. You can switch the low temperature warn-
ing [On] or [Off]. See “[Units]” later in this section
CAUTION
Even if the alert is not on, there is no guarantee
that the road is free of hazards caused by in-
clement weather.
NOTE
The outside air temperature sensor is located at
the front of the vehicle. At low speeds the sensor
can be affected by engine heat, heat reflected
from the road surface and exhaust from other
vehicles, these influences can cause the display
to be inaccurate. To compensate, the outside air
temperature display is designed to react slowly
to increasing temperatures, but quickly to falling
temperatures.
j24Low fuel warning
This warning appears when the fuel level in the tank
is getting low. Refuel as soon as it is convenient,
preferably before the fuel gauge reaches the empty
position. For more information, see “Fuel gauge”
earlier in this section.
j25Driver alert
This warning appears when the previously set time
for a break is reached. You can set the time for up
to 6 hours in the setting menu. (See “Settings menu”
later in this section.)
Stop/Start System (where fitted)
For more information, see “Stop/Start System
(where fitted)” in the “5. Starting and driving” sec-
tion
j26Engine stop:
If the engine stops when the Stop/Start System is
activated, the message is shown.
j27Auto start deactivation:
If the engine stops when the Stop/Start System is
activated, and will not start automatically, the mes-
sage is shown.
j28System fault:
If the Stop/Start System is activated, but does not
operate correctly, the message is shown. Visit a
NISSAN dealer or qualified workshop.
Activating or deactivating using the Stop/Start
System OFF switch:
Using the Stop/Start System OFF switch activates
or deactivates the Stop/Start System. This is shown
in the vehicle information display:
j29 :The Stop/Start System OFF switch is
pushed to the “ON” position.
j30 :The Stop/Start System OFF switch is pushed to
the “OFF” position.
Instruments and controls2-15
Page 72 of 297
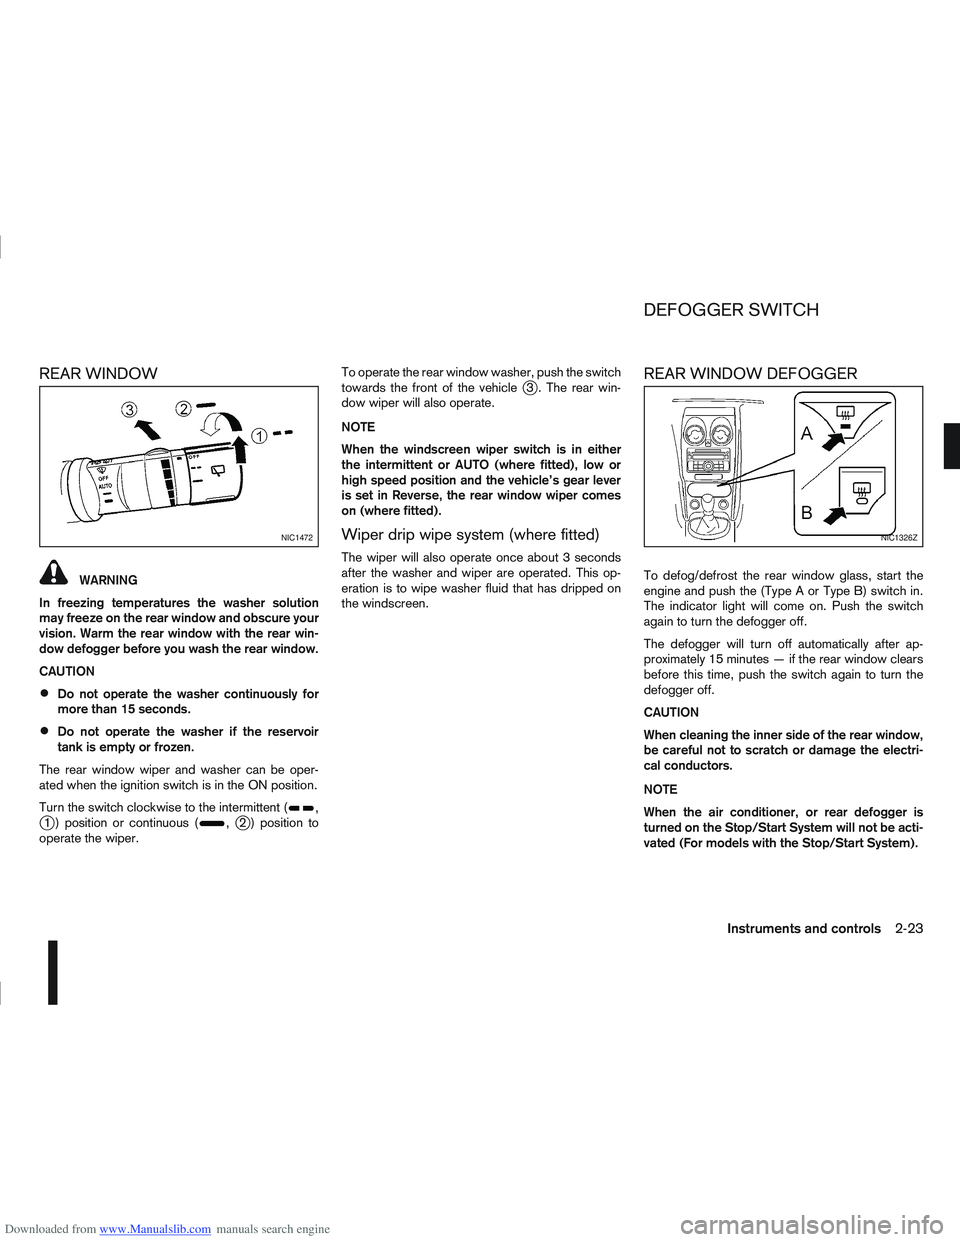
Downloaded from www.Manualslib.com manuals search engine REAR WINDOW
WARNING
In freezing temperatures the washer solution
may freeze on the rear window and obscure your
vision. Warm the rear window with the rear win-
dow defogger before you wash the rear window.
CAUTION
Do not operate the washer continuously for
more than 15 seconds.
Do not operate the washer if the reservoir
tank is empty or frozen.
The rear window wiper and washer can be oper-
ated when the ignition switch is in the ON position.
Turn the switch clockwise to the intermittent (
,j1 ) position or continuous (,j2 ) position to
operate the wiper. To operate the rear window washer, push the switch
towards the front of the vehicle
j3 . The rear win-
dow wiper will also operate.
NOTE
When the windscreen wiper switch is in either
the intermittent or AUTO (where fitted), low or
high speed position and the vehicle’s gear lever
is set in Reverse, the rear window wiper comes
on (where fitted).
Wiper drip wipe system (where fitted)
The wiper will also operate once about 3 seconds
after the washer and wiper are operated. This op-
eration is to wipe washer fluid that has dripped on
the windscreen.
REAR WINDOW DEFOGGER
To defog/defrost the rear window glass, start the
engine and push the (Type A or Type B) switch in.
The indicator light will come on. Push the switch
again to turn the defogger off.
The defogger will turn off automatically after ap-
proximately 15 minutes — if the rear window clears
before this time, push the switch again to turn the
defogger off.
CAUTION
When cleaning the inner side of the rear window,
be careful not to scratch or damage the electri-
cal conductors.
NOTE
When the air conditioner, or rear defogger is
turned on the Stop/Start System will not be acti-
vated (For models with the Stop/Start System).
NIC1472NIC1326Z
DEFOGGER SWITCH
Instruments and controls2-23