2010 NISSAN MURANO change wheel
[x] Cancel search: change wheelPage 72 of 425

Black plate (68,1)
Model "Z51-D" EDITED: 2009/ 8/ 3
(indicating that the air bag is OFF) , it could be
that the person is a small adult, or is not sitting
on the seat properly.
If a child restraint must be used in the front seat,
the passenger air bag status light may or may
not be illuminated, depending on the size of the
child and the type of child restraint being used. If
the air bag status light is not illuminated
(indicating that the air bag might inflate in a
crash) , it could be that the child restraint or seat
belt is not being used properly. Make sure that
the child restraint is installed properly, the seat
belt is used properly and the occupant is
positioned properly. If the air bag status light is
not illuminated, reposition the occupant or child
restraint in a rear seat.
If the passenger air bag status light will not
illuminate even though you believe that the child
restraint, the seat belts and the occupant are
properly positioned, the system may be sensing
an unoccupied seat (in which case the air bag is
OFF) . Your NISSAN dealer can check that the
system is OFF by using a special tool. However,
until you have confirmed with your dealer that
your air bag is working properly, reposition the
occupant or child restraint in a rear seat.
The air bag system and passenger air bag status
light will take a few seconds to register a change
in the passenger seat status. However, if the
seat becomes unoccupied, the air bag status
light will remain off.If a malfunction occurs in the front passenger air
bag system, the supplemental air bag warning
light
, located in the meter and gauges area,
will blink. Have the system checked by a
NISSAN dealer.
Other supplemental front-impact air bag
precautions
WARNING
. Do not place any objects on the
steering wheel pad or on the instru-
ment panel. Also, do not place any
objects between any occupant and
the steering wheel or instrument
panel. Such objects may become
dangerous projectiles and cause
injury if the front air bags inflate.
. Do not place objects with sharp
edges on the seat. Also, do not
place heavy objects on the seat that
will leave permanent impressions in
the seat. Such objects can damage
the seat or occupant classification
sensor (pattern sensor) . This can
affect the operation of the air bag
system and result in serious perso-
nal injury.
. Do not use water or acidic cleaners (hot steam cleaners) on the seat.
This can damage the seat or occu-
pant classification sensor. This can
also affect the operation of the air
bag system and result in serious
personal injury.
. Immediately after inflation, several
front air bag system components
will be hot. Do not touch them; you
may severely burn yourself.
. No unauthorized changes should be
made to any components or wiring
of the supplemental air bag system.
This is to prevent accidental infla-
tion of the supplemental air bag or
damage to the supplemental air bag
system.
. Do not make unauthorized changes
to your vehicle’s electrical system,
suspension system or front end
structure. This could affect proper
operation of the front air bag sys-
tem.
. Tampering with the supplemental
air bag system may result in serious
personal injury. Tampering includes
changes to the steering wheel and
the instrument panel assembly by
1-54
Safety — Seats, seat belts and supplemental restraint system
Page 73 of 425

Black plate (69,1)
Model "Z51-D" EDITED: 2009/ 8/ 3
placing material over the steering
wheel pad and above the instrument
panel or by installing additional trim
material around the air bag system.
. Modifying or tampering with the
front passenger seat may result in
serious personal injury. For exam-
ple, do not change the front seats by
placing material on the seat cushion
or by installing additional trim ma-
terial, such as seat covers, on the
seat that is not specifically designed
to assure proper air bag operation.
Additionally, do not stow any ob-
jects under the front passenger seat
or the seat cushion and seatback.
Such objects may interfere with the
proper operation of the occupant
classification sensor.
. No unauthorized changes should be
made to any components or wiring
of the seat belt system. This may
affect the front air bag system.
Tampering with the seat belt system
may result in serious personal in-
jury.
. Work on and around the front air
bag system should be done by a
NISSAN dealer. Installation of elec- trical equipment should also be
done by a NISSAN dealer. The
Supplemental Restraint System
(SRS) wiring harnesses* should not
be modified or disconnected. Un-
authorized electrical test equipment
and probing devices should not be
used on the air bag system.
. A cracked windshield should be
replaced immediately by a qualified
repair facility. A cracked windshield
could affect the function of the
supplemental air bag system.
* The SRS wiring harness connectors are
yellow and orange for easy identifica-
tion.
When selling your vehicle, we request that you
inform the buyer about the front air bag system
and guide the buyer to the appropriate sections
in this Owner’s Manual.
SSS0848
FRONT SEAT-MOUNTED SIDE-IM-
PACT SUPPLEMENTAL AIR BAG AND
ROOF-MOUNTED CURTAIN SIDE-IM-
PACT AND ROLLOVER SUPPLEMEN-
TAL AIR BAG SYSTEMSThe side air bags are located in the outside of
the seatback of the front seats. The curtain and
rollover air bags are located in the side roof rails.
These systems are designed to meet voluntary
guidelines to help reduce the risk of injury to out-
of-position occupants. However, all of the
information, cautions and warnings in this
manual still apply and must be followed.
The side air bags and curtain and rollover air
bags are designed to inflate in higher severity
Safety — Seats, seat belts and supplemental restraint system
1-55
Page 89 of 425
Black plate (85,1)
Model "Z51-D" EDITED: 2009/ 8/ 3
blink. (See “ALL-WHEEL DRIVE (AWD)” in the
“5. Starting and driving” section.)
CAUTION
.If the warning light comes on while
driving there may be a malfunction
in the AWD system. Reduce the
vehicle speed and have your vehicle
checked by a NISSAN dealer as
soon as possible.
. If the AWD warning light blinks
when you are driving:
— blinks rapidly (about twice a
second):
Pull off the road in a safe area,
and idle the engine. The driving
mode will change to 2WD to
prevent the AWD system from
malfunctioning. If the warning
light turns off, you can drive
again.
— blinks slowly (about once every 2 seconds):
Pull off the road in a safe area,
and idle the engine. Check that
all tire sizes are the same, tire
pressure is correct and tires are not worn.
. If the warning light is still on after
the above operations, have your
vehicle checked by a NISSAN dealer
as soon as possible.
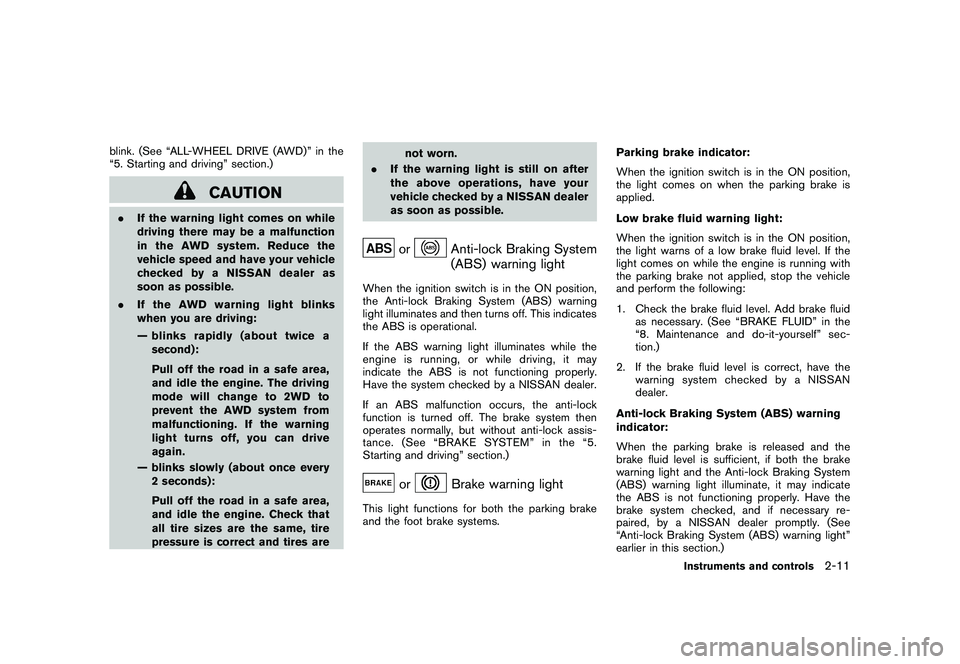
or
Anti-lock Braking System
(ABS) warning light
When the ignition switch is in the ON position,
the Anti-lock Braking System (ABS) warning
light illuminates and then turns off. This indicates
the ABS is operational.
If the ABS warning light illuminates while the
engine is running, or while driving, it may
indicate the ABS is not functioning properly.
Have the system checked by a NISSAN dealer.
If an ABS malfunction occurs, the anti-lock
function is turned off. The brake system then
operates normally, but without anti-lock assis-
tance. (See “BRAKE SYSTEM” in the “5.
Starting and driving” section.)
or
Brake warning light
This light functions for both the parking brake
and the foot brake systems. Parking brake indicator:
When the ignition switch is in the ON position,
the light comes on when the parking brake is
applied.
Low brake fluid warning light:
When the ignition switch is in the ON position,
the light warns of a low brake fluid level. If the
light comes on while the engine is running with
the parking brake not applied, stop the vehicle
and perform the following:
1. Check the brake fluid level. Add brake fluid
as necessary. (See “BRAKE FLUID” in the
“8. Maintenance and do-it-yourself” sec-
tion.)
2. If the brake fluid level is correct, have the warningsystemcheckedbyaNISSAN
dealer.
Anti-lock Braking System (ABS) warning
indicator:
When the parking brake is released and the
brake fluid level is sufficient, if both the brake
warning light and the Anti-lock Braking System
(ABS) warning light illuminate, it may indicate
the ABS is not functioning properly. Have the
brake system checked, and if necessary re-
paired, by a NISSAN dealer promptly. (See
“Anti-lock Braking System (ABS) warning light”
earlier in this section.)
Instruments and controls
2-11
Page 146 of 425
Black plate (142,1)
Model "Z51-D" EDITED: 2009/ 8/ 3
computer.
. When the vehicle is parked near a parking
meter.
In such cases, correct the operating conditions
before using the Intelligent Key function or use
the mechanical key.
Although the life of the battery varies depending
on the operating conditions, the battery’s life is
approximately 2 years. If the battery is dis-
charged, replace it with a new one.
Since the Intelligent Key is continuously receiv-
ing radio waves, if the key is left near equipment
which transmits strong radio waves, such as
signals from a TV and personal computer, the
battery life may become shorter.
For information regarding replacement of a
battery, see “BATTERY REPLACEMENT” in
the “8. Maintenance and do-it-yourself” section.
For models with a steering wheel lock mechan-
ism: Because the steering wheel is locked
electrically, unlocking the steering wheel with
the ignition switch in the LOCK position is
impossible when the vehicle battery is comple-
tely discharged. Pay special attention that the
vehicle battery is not completely discharged.
As many as 4 Intelligent Keys can be registered
and used with one vehicle. For information about
the purchase and use of additional Intelligent Keys, contact a NISSAN dealer.
CAUTION
.
Do not allow the Intelligent Key,
which contains electrical compo-
nents, to come into contact with
water or salt water. This could affect
the system function.
. Do not drop the Intelligent Key.
. Do not strike the Intelligent Key
sharply against another object.
. Do not change or modify the Intel-
ligent Key.
. Wetting may damage the Intelligent
Key. If the Intelligent Key gets wet,
immediately wipe until it is comple-
tely dry.
. Do not place the Intelligent Key for
an extended period in an area where
temperatures exceed 140 8F (60 8C) .
. Do not attach the Intelligent Key
with a key holder that contains a
magnet.
. Do not place the Intelligent Key near
equipment that produces a mag-
netic field, such as a TV, audio
equipment, personal computer or cellular phone.
If an Intelligent Key is lost or stolen, NISSAN
recommends erasing the ID code of that
Intelligent Key from the vehicle. This may prevent
the unauthorized use of the Intelligent Key to
operate the vehicle. For information regarding
the erasing procedure, contact a NISSAN deal-
er.
3-8
Pre-driving checks and adjustments
Page 172 of 425

Black plate (13,1)
4 Monitor, heater, air conditioner, audio,phone and voice recognition systems
Model "Z51-D" EDITED: 2009/ 8/ 3
Safety note ....................................................... 4-2
Center multi-function control panel
(models with color display screen) ......................... 4-2
How to use multi-function controller ................... 4-4
How to use touch screen
(models with navigation system) ........................ 4-4
Start-up screen (models with navigation system) . . . 4-6
Start menu (models with navigation system) ......... 4-6
How to select menus on the screen ................... 4-7
Vehicle information and settings ............................. 4-8
How to use STATUS button .............................. 4-8
How to use brightness control and display ON/
OFF button ................................................... 4-8
How to use INFO button. ................................. 4-8
How to use SETTING button .......................... 4-12
Rearview monitor (if so equipped) ........................ 4-19
How to read the displayed lines ....................... 4-20
How to park with predicted course lines ............ 4-20
Difference between predicted and actual
distances ................................................... 4-22
How to adjust the screen ............................... 4-24
Operating tips ............................................. 4-24
Ventilators ...................................................... 4-25
Heater and air conditioner .................................. 4-26
Automatic operation ...................................... 4-28
Manual operation ......................................... 4-29
To turn the system ON/OFF ........................... 4-30 Operating tips
............................................. 4-30
In-cabin microfilter ........................................ 4-30
Servicing air conditioner ................................ 4-30
Audio system .................................................. 4-31
Audio operation precautions ........................... 4-31
FM-AM radio with Compact Disc (CD)
changer ..................................................... 4-39
FM-AM-SAT radio with Compact Disc (CD)
changer ..................................................... 4-44
CompactFlash (CF) player operation
(models with navigation system) ...................... 4-49
iPod
®player operation (if so equipped) .............. 4-51
“MUSIC BOX” hard-disk drive
(models with navigation system) ...................... 4-52
CD/CF (CompactFlash) care and cleaning ......... 4-59
Steering-wheel-mounted controls for audio ........ 4-61
Antenna ..................................................... 4-62
NISSAN Mobile Entertainment System (MES)
(if so equipped) ............................................... 4-63
DVD player operation precautions .................... 4-63
Digital Versatile Disc (DVD) system
components ................................................ 4-64
Remote controller and headphones battery
replacement ................................................ 4-68
Before operating the DVD entertainment
system ....................................................... 4-68
Playing a Digital Versatile Disc (DVD) ............... 4-69
Page 226 of 425
Black plate (222,1)
Model "Z51-D" EDITED: 2009/ 8/ 3
SAA1615
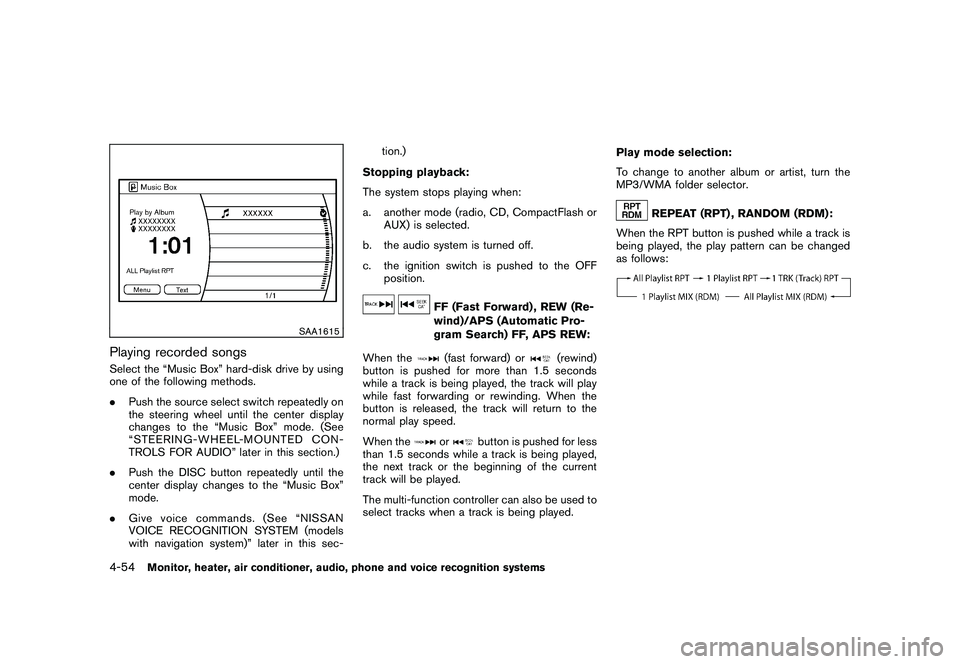
Playing recorded songsSelect the “Music Box” hard-disk drive by using
one of the following methods.
.Push the source select switch repeatedly on
the steering wheel until the center display
changes to the “Music Box” mode. (See
“STEERING-WHEEL-MOUNTED CON-
TROLS FOR AUDIO” later in this section.)
. Push the DISC button repeatedly until the
center display changes to the “Music Box”
mode.
. Give voice commands. (See “NISSAN
VOICE RECOGNITION SYSTEM (models
with navigation system)” later in this sec- tion.)
Stopping playback:
The system stops playing when:
a. another mode (radio, CD, CompactFlash or AUX) is selected.
b. the audio system is turned off.
c. the ignition switch is pushed to the OFF position.
FF (Fast Forward) , REW (Re-
wind)/APS (Automatic Pro-
gram Search) FF, APS REW:
When the(fast forward) or
(rewind)
button is pushed for more than 1.5 seconds
while a track is being played, the track will play
while fast forwarding or rewinding. When the
button is released, the track will return to the
normal play speed.
When the
or
button is pushed for less
than 1.5 seconds while a track is being played,
the next track or the beginning of the current
track will be played.
The multi-function controller can also be used to
select tracks when a track is being played. Play mode selection:
To change to another album or artist, turn the
MP3/WMA folder selector.
REPEAT (RPT) , RANDOM (RDM):
When the RPT button is pushed while a track is
being played, the play pattern can be changed
as follows:
4-54
Monitor, heater, air conditioner, audio, phone and voice recognition systems
Page 233 of 425
Black plate (229,1)
Model "Z51-D" EDITED: 2009/ 8/ 3
STEERING-WHEEL-MOUNTED CON-
TROLS FOR AUDIO
ENTER (models with navigation system)
or tuning (models without navigation
system) switchPush the switch upward or downward to select
a channel, track, CD or folder when they are
listed on the display.
Tune/Track:
RADIO
.Pushing DOWN “
”/UP “
” shorter
Next or previous preset channel
. Pushing DOWN “
”/UP “
” longer
Next or previous station
CD
. Pushing DOWN “
”/UP “
” shorter
Next track or the beginning of the current
track
. Pushing DOWN “
”/UP “
” longer
Disc change (When only one disc is loaded,
the 1st track of the disc will be selected.)
CD/CF (if so equipped) with MP3/WMA
. Pushing DOWN “
”/UP “
” shorter Next track or the beginning of the current
track
. Pushing DOWN “
”/UP “
” longer
Folder change (When the last folder on a
disc is playing, the next disc will be
selected.)
iPod
®(if so equipped)
. Pushing DOWN “
”/UP “
” shorter
Previous or next track (Start/Pause or Menu
can be selected when the ENTER button is
pushed.)
. Pushing DOWN “
”/UP “
” longer
Rewind or fast forward search
Music Box hard-disk drive audio system (if
so equipped)
. Pushing DOWN “
”/UP “
” shorter
Next track or the beginning of the current
track
. Pushing DOWN “
”/UP “
” longer
Playlist change (When the last playlist is
playing, the next playlist will be selected.)
ENTER switch operation:
You can also use the ENTER switch to select the
items on the usual setting menu screen. After selecting an MP3 folder using the up and
down switch, push the ENTER switch to
complete the selection.
While the display is in the NAVI, STATUS or
Audio setting screen, some audio functions can
also be controlled using the ENTER switch. The
function varies depending on if you push the
switch shorter (less than 1.5 seconds) or longer
(more than 1.5 seconds) .
BACK switch
Push this switch to go back to the previous
screen or cancel the selection if it is not
completed.Volume control switchesPush the upper (+) or lower (
�) side switch to
increase or decrease the volume.SOURCE select switchPush the source select switch to change the
mode, Preset A, Preset B, Preset C, “iPod
®” (if
so equipped) , “Music Box” (if so equipped) , CD,
and CompactFlash (if so equipped) . If they are
not ready to function, those modes will be
skipped.
Monitor, heater, air conditioner, audio, phone and voice recognition systems
4-61
Page 252 of 425
Black plate (248,1)
Model "Z51-D" EDITED: 2009/ 8/ 3
incoming call list.
—Delete
Delete a contact that is registered in the
phonebook.
SAA1895
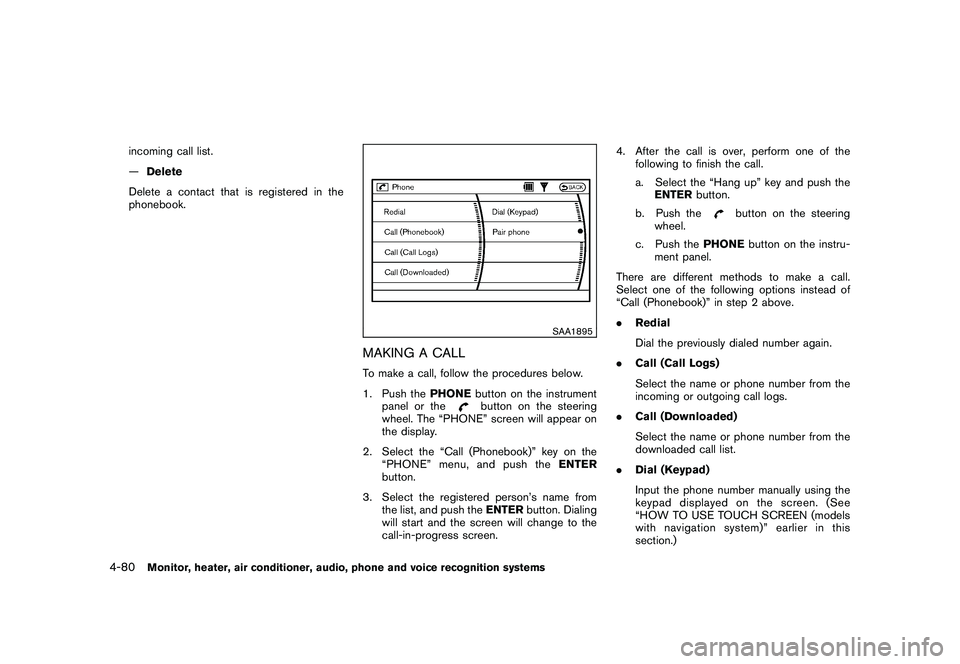
MAKING A CALLTo make a call, follow the procedures below.
1. Push the PHONEbutton on the instrument
panel or the
button on the steering
wheel. The “PHONE” screen will appear on
the display.
2. Select the “Call (Phonebook)” key on the “PHONE” menu, and push the ENTER
button.
3. Select the registered person’s name from the list, and push the ENTERbutton. Dialing
will start and the screen will change to the
call-in-progress screen. 4. After the call is over, perform one of the
following to finish the call.
a. Select the “Hang up” key and push theENTER button.
b. Push the
button on the steering
wheel.
c. Push the PHONEbutton on the instru-
ment panel.
There are different methods to make a call.
Select one of the following options instead of
“Call (Phonebook)” in step 2 above.
. Redial
Dial the previously dialed number again.
. Call (Call Logs)
Select the name or phone number from the
incoming or outgoing call logs.
. Call (Downloaded)
Select the name or phone number from the
downloaded call list.
. Dial (Keypad)
Input the phone number manually using the
keypad displayed on the screen. (See
“HOW TO USE TOUCH SCREEN (models
with navigation system)” earlier in this
section.)
4-80
Monitor, heater, air conditioner, audio, phone and voice recognition systems