2010 NISSAN MURANO warning light
[x] Cancel search: warning lightPage 128 of 425
Black plate (124,1)
Model "Z51-D" EDITED: 2009/ 8/ 3
SIC3285
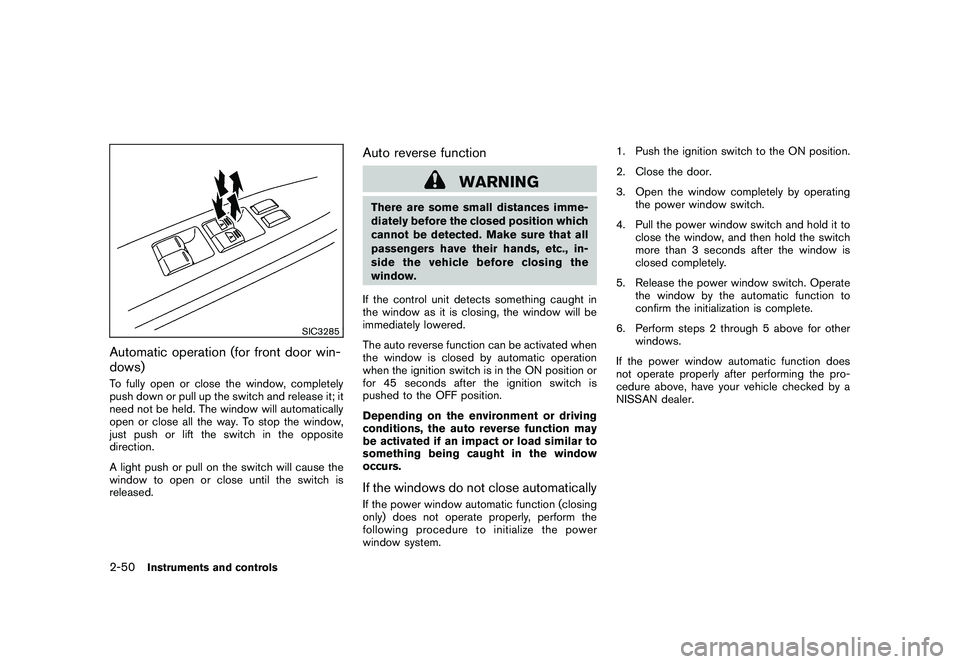
Automatic operation (for front door win-
dows)To fully open or close the window, completely
push down or pull up the switch and release it; it
need not be held. The window will automatically
open or close all the way. To stop the window,
just push or lift the switch in the opposite
direction.
A light push or pull on the switch will cause the
window to open or close until the switch is
released.
Auto reverse function
WARNING
There are some small distances imme-
diately before the closed position which
cannot be detected. Make sure that all
passengers have their hands, etc., in-
side the vehicle before closing the
window.
If the control unit detects something caught in
the window as it is closing, the window will be
immediately lowered.
The auto reverse function can be activated when
the window is closed by automatic operation
when the ignition switch is in the ON position or
for 45 seconds after the ignition switch is
pushed to the OFF position.
Depending on the environment or driving
conditions, the auto reverse function may
be activated if an impact or load similar to
something being caught in the window
occurs.If the windows do not close automaticallyIf the power window automatic function (closing
only) does not operate properly, perform the
following procedure to initialize the power
window system. 1. Push the ignition switch to the ON position.
2. Close the door.
3. Open the window completely by operating
the power window switch.
4. Pull the power window switch and hold it to close the window, and then hold the switch
more than 3 seconds after the window is
closed completely.
5. Release the power window switch. Operate the window by the automatic function to
confirm the initialization is complete.
6. Perform steps 2 through 5 above for other windows.
If the power window automatic function does
not operate properly after performing the pro-
cedure above, have your vehicle checked by a
NISSAN dealer.
2-50
Instruments and controls
Page 130 of 425
Black plate (126,1)
Model "Z51-D" EDITED: 2009/ 8/ 3
operation, push either of the OPEN
*1, CLOSE
*2
or UP
*5
of the switch.
Tilting moonroofTo tilt up the moonroof, push the moonroof
switch to the up position
*5.
To tilt down the moonroof, push the switch to the
up position
*5
or push the CLOSE side
*2
of
the switch.
When the moonroof is tilted up, push the
CLOSE side of the moonroof switch to the
second detent
*4. The moonroof will tilt down
and the sunshades will close.
Auto reverse function
WARNING
There are some small distances imme-
diately before the closed position which
cannot be detected. Make sure that all
passengers have their hands, etc., in-
side the vehicle before closing the
moonroof.
If the control unit detects something caught in
the moonroof and sunshades when they are
closing, the moonroof will be immediately
opened. The auto reverse function can be activated when
the moonroof and sunshades are closed by
automatic operation when the ignition switch is
in the ON position or for about 45 seconds after
the ignition switch is pushed to the OFF
position.
If the moonroof and sunshades cannot be
closed automatically when the auto reverse
function activates due to a malfunction, push
and hold the CLOSE side
*2
of the moonroof
switch.
Depending on the environment or driving
conditions, the auto reverse function may
be activated if an impact or load similar to
something being caught in the moonroof
occurs.
If the moonroof does not operateIf the moonroof does not operate properly,
perform the following procedure to initialize the
moonroof operation system.
1. If the moonroof is open, close it fully by
pushing the CLOSE side
*2
of the moon-
roof switch.
2. Push and hold the CLOSE side*2
of the
moonroof switch.
3. Release the moonroof switch after the moonroof or sunshade moves slightly to
the closed position. 4. Push and hold the CLOSE side
*2
of the
moonroof switch for 10 seconds.
5. The moonroof and sunshades will fully open and then close.
6. Check if the moonroof switch operates normally.
If the moonroof does not operate properly after
performing the procedure above, have your
vehicle checked by a NISSAN dealer.
2-52
Instruments and controls
Page 133 of 425
Black plate (129,1)
Model "Z51-D" EDITED: 2009/ 8/ 3
SIC2064
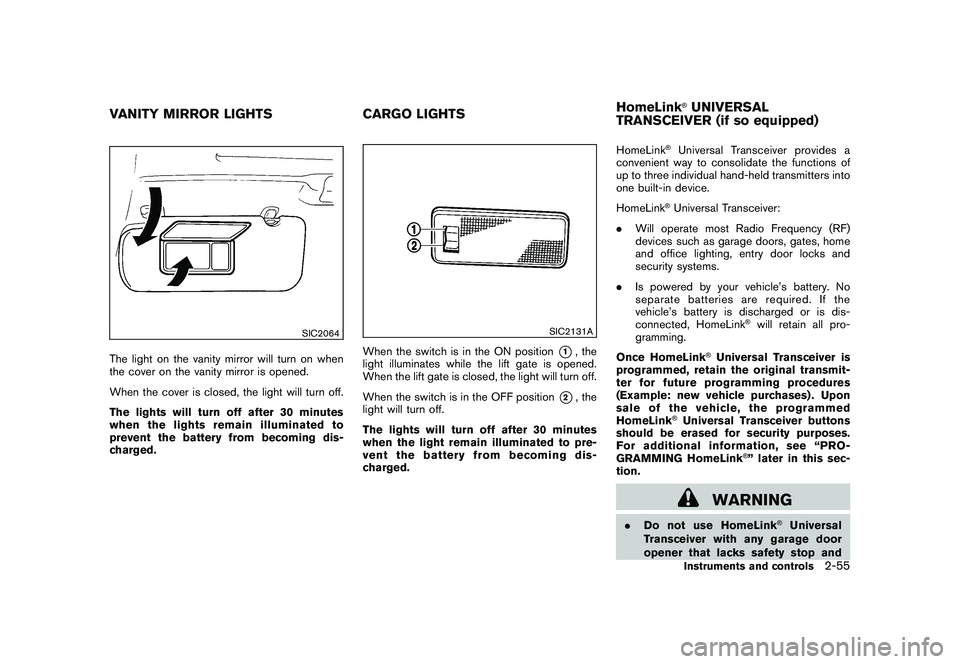
The light on the vanity mirror will turn on when
the cover on the vanity mirror is opened.
When the cover is closed, the light will turn off.
The lights will turn off after 30 minutes
when the lights remain illuminated to
prevent the battery from becoming dis-
charged.
SIC2131A
When the switch is in the ON position
*1, the
light illuminates while the lift gate is opened.
When the lift gate is closed, the light will turn off.
When the switch is in the OFF position
*2, the
light will turn off.
The lights will turn off after 30 minutes
when the light remain illuminated to pre-
vent the battery from becoming dis-
charged. HomeLink
®Universal Transceiver provides a
convenient way to consolidate the functions of
up to three individual hand-held transmitters into
one built-in device.
HomeLink®Universal Transceiver:
. Will operate most Radio Frequency (RF)
devices such as garage doors, gates, home
and office lighting, entry door locks and
security systems.
. Is powered by your vehicle’s battery. No
separate batteries are required. If the
vehicle’s battery is discharged or is dis-
connected, HomeLink
®will retain all pro-
gramming.
Once HomeLink
®Universal Transceiver is
programmed, retain the original transmit-
ter for future programming procedures
(Example: new vehicle purchases) . Upon
sale of the vehicle, the programmed
HomeLink
®Universal Transceiver buttons
should be erased for security purposes.
For additional information, see “PRO-
GRAMMING HomeLink
®” later in this sec-
tion.
WARNING
. Do not use HomeLink
®Universal
Transceiver with any garage door
opener that lacks safety stop and
VANITY MIRROR LIGHTS CARGO LIGHTSHomeLink
®UNIVERSAL
TRANSCEIVER (if so equipped)Instruments and controls
2-55
Page 145 of 425
Black plate (141,1)
Model "Z51-D" EDITED: 2009/ 8/ 3
SPA2433
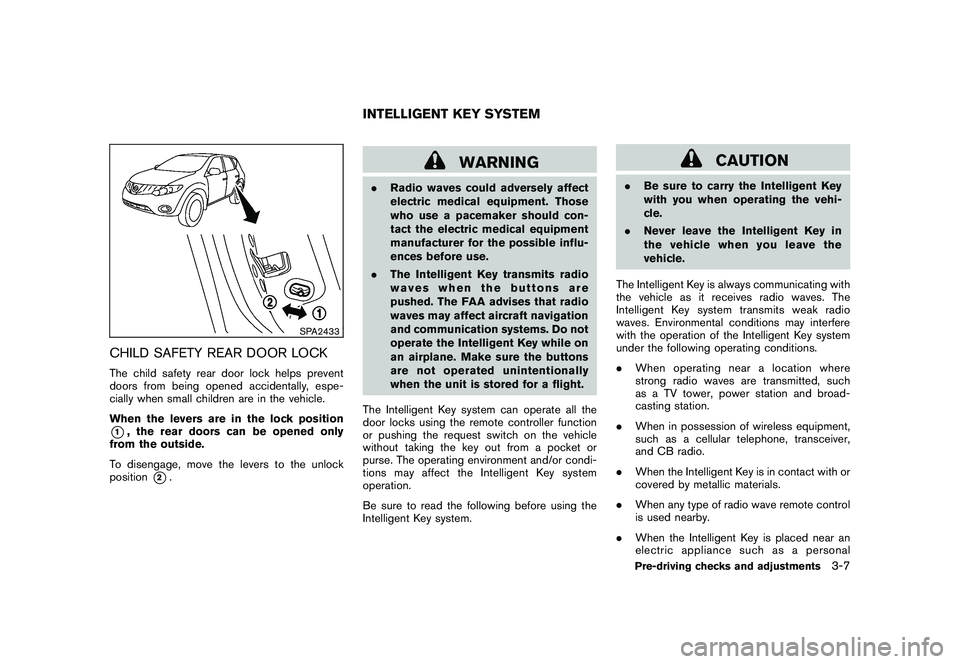
CHILD SAFETY REAR DOOR LOCKThe child safety rear door lock helps prevent
doors from being opened accidentally, espe-
cially when small children are in the vehicle.
When the levers are in the lock position*1, the rear doors can be opened only
from the outside.
To disengage, move the levers to the unlock
position
*2.
WARNING
. Radio waves could adversely affect
electric medical equipment. Those
who use a pacemaker should con-
tact the electric medical equipment
manufacturer for the possible influ-
ences before use.
. The Intelligent Key transmits radio
waves when the buttons are
pushed. The FAA advises that radio
waves may affect aircraft navigation
and communication systems. Do not
operate the Intelligent Key while on
an airplane. Make sure the buttons
are not operated unintentionally
when the unit is stored for a flight.
The Intelligent Key system can operate all the
door locks using the remote controller function
or pushing the request switch on the vehicle
without taking the key out from a pocket or
purse. The operating environment and/or condi-
tions may affect the Intelligent Key system
operation.
Be sure to read the following before using the
Intelligent Key system.
CAUTION
. Be sure to carry the Intelligent Key
with you when operating the vehi-
cle.
. Never leave the Intelligent Key in
the vehicle when you leave the
vehicle.
The Intelligent Key is always communicating with
the vehicle as it receives radio waves. The
Intelligent Key system transmits weak radio
waves. Environmental conditions may interfere
with the operation of the Intelligent Key system
under the following operating conditions.
. When operating near a location where
strong radio waves are transmitted, such
as a TV tower, power station and broad-
casting station.
. When in possession of wireless equipment,
such as a cellular telephone, transceiver,
and CB radio.
. When the Intelligent Key is in contact with or
covered by metallic materials.
. When any type of radio wave remote control
is used nearby.
. When the Intelligent Key is placed near an
electric appliance such as a personal
INTELLIGENT KEY SYSTEM
Pre-driving checks and adjustments
3-7
Page 153 of 425

Black plate (149,1)
Model "Z51-D" EDITED: 2009/ 8/ 3
WARNING
The Intelligent Key transmits radio
waves when the buttons are pushed.
The FAA advises that radio waves may
affect aircraft navigation and commu-
nication systems. Do not operate the
Intelligent Key while on an airplane.
Make sure the buttons are not operated
unintentionally when the unit is stored
for a flight.
It is possible to lock/unlock all doors, activate
the panic alarm and open the windows and lift
gate (if so equipped) by pushing the buttons on
the Intelligent Key from outside the vehicle.
Before locking the doors, make sure the
Intelligent Key is not left in the vehicle.
The LOCK/UNLOCK button on the Intelligent
Key can operate at a distance of approximately
33 ft (10 m) from the vehicle. (The effective
distance depends upon the conditions around
the vehicle.)
The lock and unlock buttons will not operate
when:
. the distance between the Intelligent Key and
the vehicle is over 33 ft (10 m) .
. the Intelligent Key battery is completely discharged.
After locking with the remote keyless entry
function, pull the door handle to make sure the
doors are securely locked.
The LOCK/UNLOCK operating range varies
depending on the environment. To securely
operate the lock and unlock buttons, approach
the vehicle to about 3 ft (1 m) from the door.
SPA2252A
Type A
SPA2436
Type B
REMOTE KEYLESS ENTRY SYSTEM
Pre-driving checks and adjustments
3-15
Page 155 of 425

Black plate (151,1)
Model "Z51-D" EDITED: 2009/ 8/ 3
2. The theft warning alarm will sound and theheadlights will flash for 25 seconds.
3. The panic alarm stops under either of the following conditions.
.It has run for 25 seconds, or
. Any of the buttons is pushed. (Note: the
panic button should be pushed for more
than 1 second.)Setting hazard indicator and horn modeThis vehicle is set in hazard indicator and horn
mode when you first receive the vehicle.
In hazard indicator and horn mode, when the
LOCK
button
*1
is pushed, the hazard
indicator flashes twice and the horn chirps once.
When the UNLOCKbutton
*2
is pushed,
the hazard indicator flashes once.
If horns are not necessary, the system can be
switched to the hazard indicator mode.
In hazard indicator mode, when the LOCK
button is pushed, the hazard indicator flashes
twice. When the UNLOCK
button is
pushed, neither the hazard indicator nor the
horn operates. Hazard indicator and horn mode:
DOOR LOCK
DOOR UNLOCK
Intelligent Key system
(Using door handle or lift gate request switch) HAZARD -
twice
OUTSIDE CHIME - twice HAZARD -
once
OUTSIDE CHIME - once
Remote keyless entry system
(Using
or
button) HAZARD -
twice
HORN - once HAZARD -
once
HORN - none
Hazard indicator mode:
DOOR LOCK DOOR UNLOCK
Intelligent Key system
(Using door handle or lift gate request switch) HAZARD -
twice HAZARD - none
Remote keyless entry system (Using
or
button) HAZARD -
twice
HAZARD - none
Pre-driving checks and adjustments
3-17
Page 156 of 425
Black plate (152,1)
Model "Z51-D" EDITED: 2009/ 8/ 3
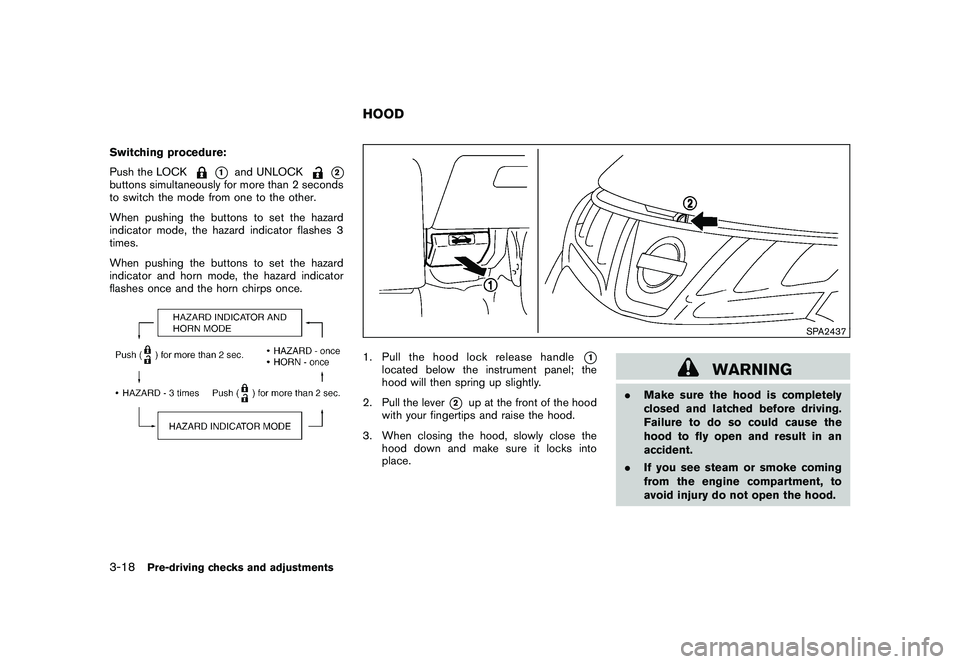
Switching procedure:
Push the LOCK
*1
and UNLOCK
*2
buttons simultaneously for more than 2 seconds
to switch the mode from one to the other.
When pushing the buttons to set the hazard
indicator mode, the hazard indicator flashes 3
times.
When pushing the buttons to set the hazard
indicator and horn mode, the hazard indicator
flashes once and the horn chirps once.
SPA2437
1. Pull the hood lock release handle
*1
located below the instrument panel; the
hood will then spring up slightly.
2. Pull the lever
*2
up at the front of the hood
with your fingertips and raise the hood.
3. When closing the hood, slowly close the hood down and make sure it locks into
place.
WARNING
.Make sure the hood is completely
closed and latched before driving.
Failure to do so could cause the
hood to fly open and result in an
accident.
. If you see steam or smoke coming
from the engine compartment, to
avoid injury do not open the hood.
HOOD
3-18
Pre-driving checks and adjustments
Page 162 of 425
Black plate (158,1)
Model "Z51-D" EDITED: 2009/ 8/ 3
FUEL-FILLER CAP
WARNING
.Gasoline is extremely flammable
and highly explosive under certain
conditions. You could be burned or
seriously injured if it is misused or
mishandled. Always stop engine
and do not smoke or allow open
flames or sparks near the vehicle
when refueling.
. Do not attempt to top off the fuel
tank after the fuel pump nozzle
shuts off automatically. Continued
refueling may cause fuel overflow,
resulting in fuel spray and possibly
a fire.
. Use only an original equipment type
fuel-filler cap as a replacement. It
has a built-in safety valve needed
for proper operation of the fuel
system and emission control sys-
tem. An incorrect cap can result in a
serious malfunction and possible
injury. It could also cause the mal-
function indicator light to come on.
. Never pour fuel into the throttle
body to attempt to start your vehi- cle.
. Do not fill a portable fuel container
in the vehicle or trailer. Static elec-
tricity can cause an explosion of
flammable liquid, vapor or gas in
any vehicle or trailer. To reduce the
risk of serious injury or death when
filling portable fuel containers:
— Always place the container on
the ground when filling.
— Do not use electronic devices when filling.
— Keep the pump nozzle in contact with the container while you are
filling it.
— Use only approved portable fuel containers for flammable liquid.
CAUTION
. If fuel is spilled on the vehicle body,
flush it away with water to avoid
paint damage.
. Insert the cap straight into the fuel-
filler tube, then tighten until the
fuel-filler cap clicks. Failure to tight-
en the fuel-filler cap properly may
cause the
malfunction indicator light (MIL) to illuminate. If the
light illuminates because the fuel-
filler cap is loose or missing, tighten
or install the cap and continue to
drive the vehicle. The
light
should turn off after a few driving
trips. If the
light does not turn
off after a few driving trips, have the
vehicle inspected by a NISSAN deal-
er.
3-24
Pre-driving checks and adjustments