Page 32 of 293
To increase your confidence in the seat belts,
check the operation as follows:● Grasp the shoulder belt and pull forward
quickly. The retractor should lock and re-
strict further belt movement.
If the retractor does not lock during this check or
if you have any questions about seat belt opera-
tion, see a NISSAN dealer.
Shoulder belt height adjustment (front
seats)
The shoulder belt anchor height should be ad-
justed to the position best for you. For additional
information, refer to “Precautions on seat belt
usage” in this section. To adjust, pull out the
adjustment button
�1and move the shoulder belt
anchor to the desired position
�2, so the belt
passes over the center of the shoulder. The belt
should be away from your face and neck, but not
falling off your shoulder. Release the adjustment
button to lock the shoulder belt anchor into posi-
tion.
Page 77 of 293
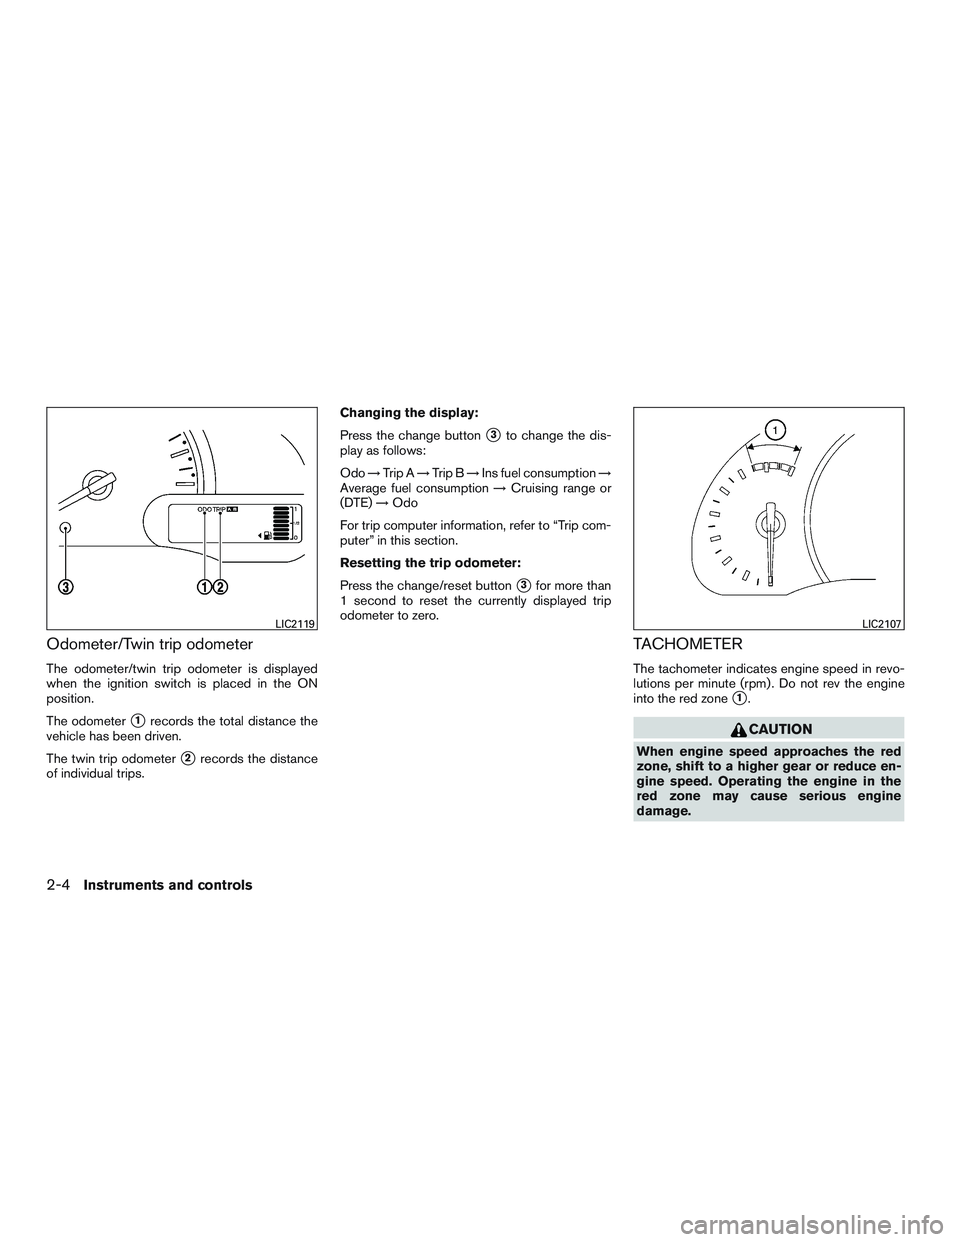
Odometer/Twin trip odometer
The odometer/twin trip odometer is displayed
when the ignition switch is placed in the ON
position.
The odometer
�1records the total distance the
vehicle has been driven.
The twin trip odometer
�2records the distance
of individual trips. Changing the display:
Press the change button
�3to change the dis-
play as follows:
Odo →Trip A →Trip B →Ins fuel consumption →
Average fuel consumption →Cruising range or
(DTE) →Odo
For trip computer information, refer to “Trip com-
puter” in this section.
Resetting the trip odometer:
Press the change/reset button
�3for more than
1 second to reset the currently displayed trip
odometer to zero.
TACHOMETER
The tachometer indicates engine speed in revo-
lutions per minute (rpm) . Do not rev the engine
into the red zone
�1.
Page 122 of 293
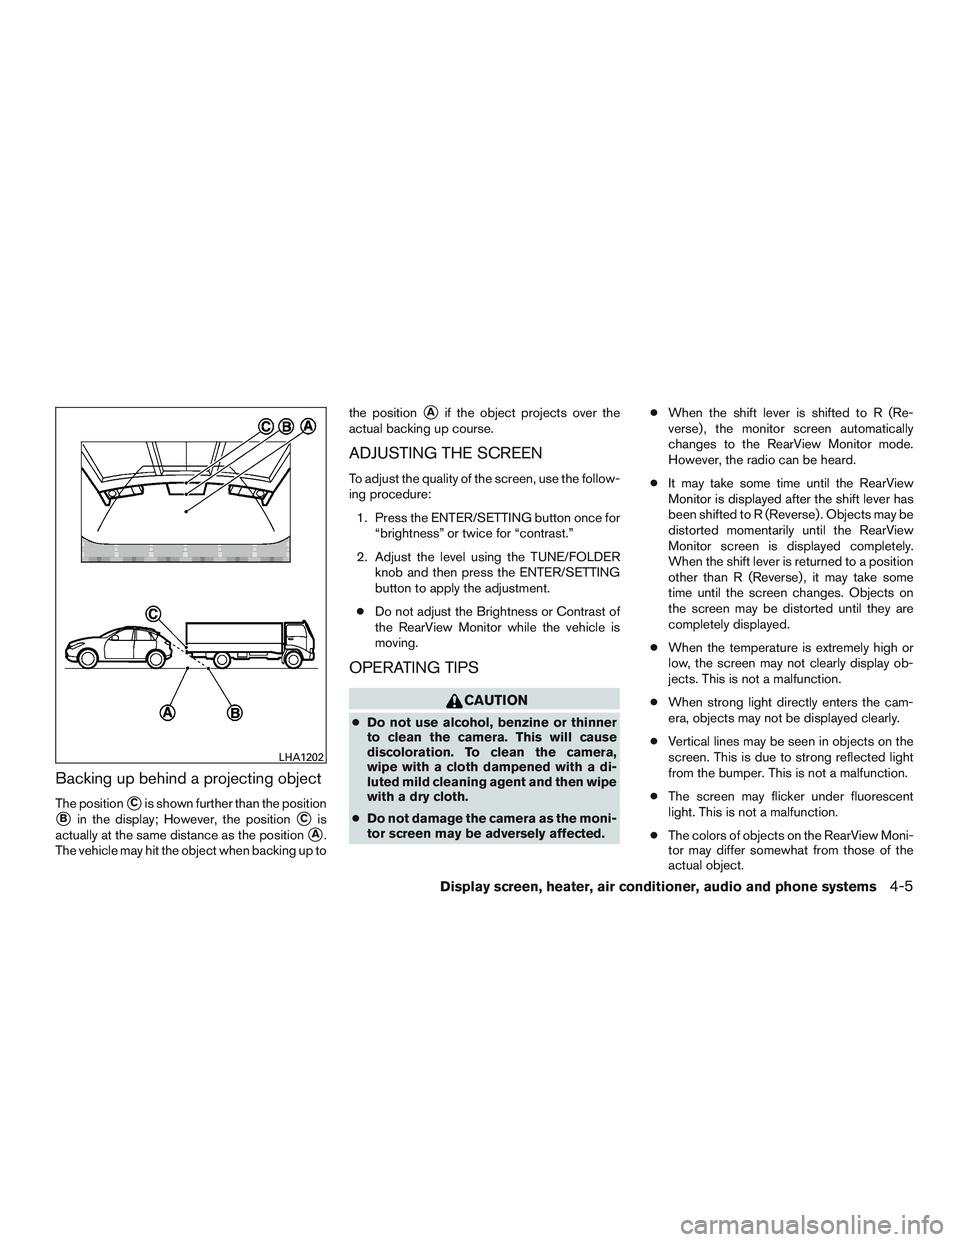
Backing up behind a projecting object
The position�Cis shown further than the position
�Bin the display; However, the position�Cis
actually at the same distance as the position
�A.
The vehicle may hit the object when backing up to the position
�Aif the object projects over the
actual backing up course.
ADJUSTING THE SCREEN
To adjust the quality of the screen, use the follow-
ing procedure:
1. Press the ENTER/SETTING button once for “brightness” or twice for “contrast.”
2. Adjust the level using the TUNE/FOLDER knob and then press the ENTER/SETTING
button to apply the adjustment.
● Do not adjust the Brightness or Contrast of
the RearView Monitor while the vehicle is
moving.
OPERATING TIPS
Page 157 of 293
Page 187 of 293
WARNING
●Be sure the parking brake is fully re-
leased before driving. Failure to do so
can cause brake failure and lead to an
accident.
● Do not release the parking brake from
outside the vehicle.
● Do not use the shift lever in place of the
parking brake. When parking, be sure
the parking brake is fully engaged.
● Do not leave children unattended in a
vehicle. They could release the parking
brake and cause an accident.
To engage:Pull the parking brake lever up
�A.
To release: 1. Firmly apply the foot brake.
2. Manual transmission models:
Place the shift lever in the N (Neutral) posi-
tion.
Automatic transmission models:
Move the shift lever to the P (Park) position. 3. While pulling up on the parking brake lever
slightly, push the button
�Band lower the
lever completely .
4. Before driving, be sure the brake warning light goes out.