2010 NISSAN CUBE lights
[x] Cancel search: lightsPage 136 of 329
Black plate (138,1)
Model "Z12-D" EDITED: 2009/ 9/ 17
WARNING
.Always be sure the back door has
been closed securely to prevent it
from opening while driving.
. Do not drive with the back door
open. This could allow dangerous
exhaust gases to be drawn into the
vehicle. See “EXHAUST GAS (car-
bon monoxide)” in the “5. Starting
and driving” section of this manual.
. Make sure that all passengers have
their hands, etc. inside the vehicle
before closing the back door.
SPA2608
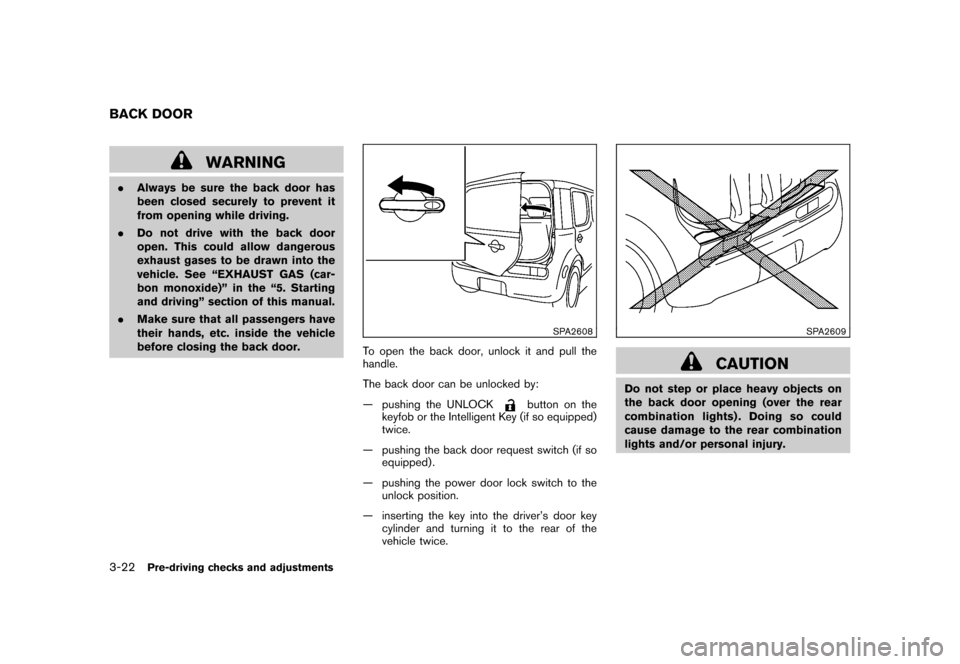
To open the back door, unlock it and pull the
handle.
The back door can be unlocked by:
— pushing the UNLOCK
button on the
keyfob or the Intelligent Key (if so equipped)
twice.
— pushing the back door request switch (if so equipped) .
— pushing the power door lock switch to the unlock position.
— inserting the key into the driver’s door key cylinder and turning it to the rear of the
vehicle twice.
SPA2609
CAUTION
Do not step or place heavy objects on
the back door opening (over the rear
combination lights) . Doing so could
cause damage to the rear combination
lights and/or personal injury.
BACK DOOR3-22
Pre-driving checks and adjustments
Page 141 of 329
Black plate (143,1)
Model "Z12-D" EDITED: 2009/ 9/ 17
SPA2143
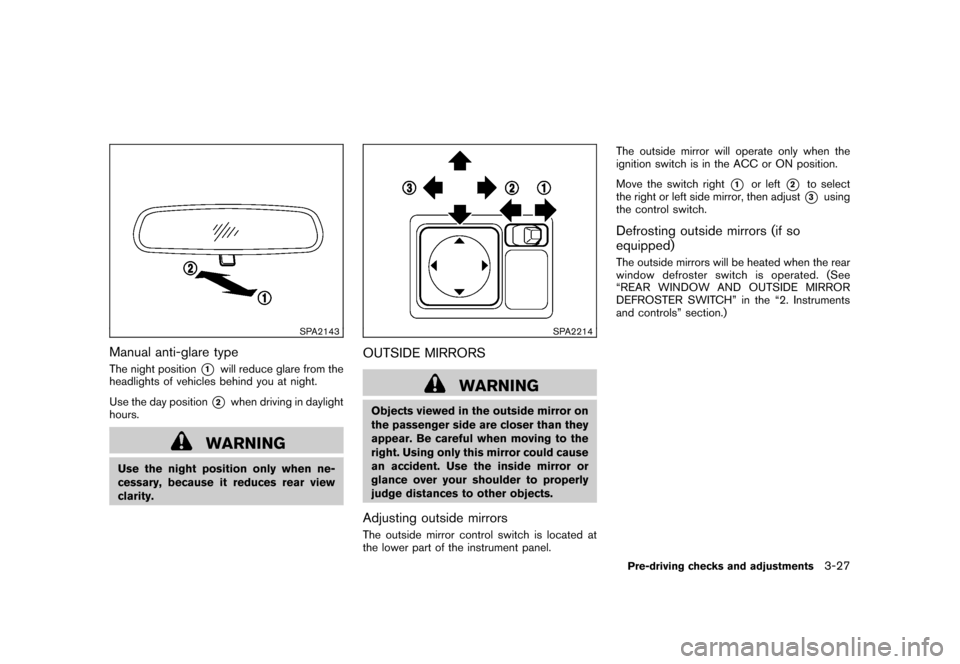
Manual anti-glare typeThe night position
*1
will reduce glare from the
headlights of vehicles behind you at night.
Use the day position*2
when driving in daylight
hours.
WARNING
Use the night position only when ne-
cessary, because it reduces rear view
clarity.
SPA2214
OUTSIDE MIRRORS
WARNING
Objects viewed in the outside mirror on
the passenger side are closer than they
appear. Be careful when moving to the
right. Using only this mirror could cause
an accident. Use the inside mirror or
glance over your shoulder to properly
judge distances to other objects.Adjusting outside mirrorsThe outside mirror control switch is located at
the lower part of the instrument panel. The outside mirror will operate only when the
ignition switch is in the ACC or ON position.
Move the switch right
*1
or left
*2
to select
the right or left side mirror, then adjust*3
using
the control switch.
Defrosting outside mirrors (if so
equipped)The outside mirrors will be heated when the rear
window defroster swi tch is operated. (See
“REAR WINDOW AND OUTSIDE MIRROR
DEFROSTER SWITCH” in the “2. Instruments
and controls” section.)Pre-driving checks and adjustments
3-27
Page 152 of 329
Black plate (156,1)
Model "Z12-D" EDITED: 2009/ 9/ 17
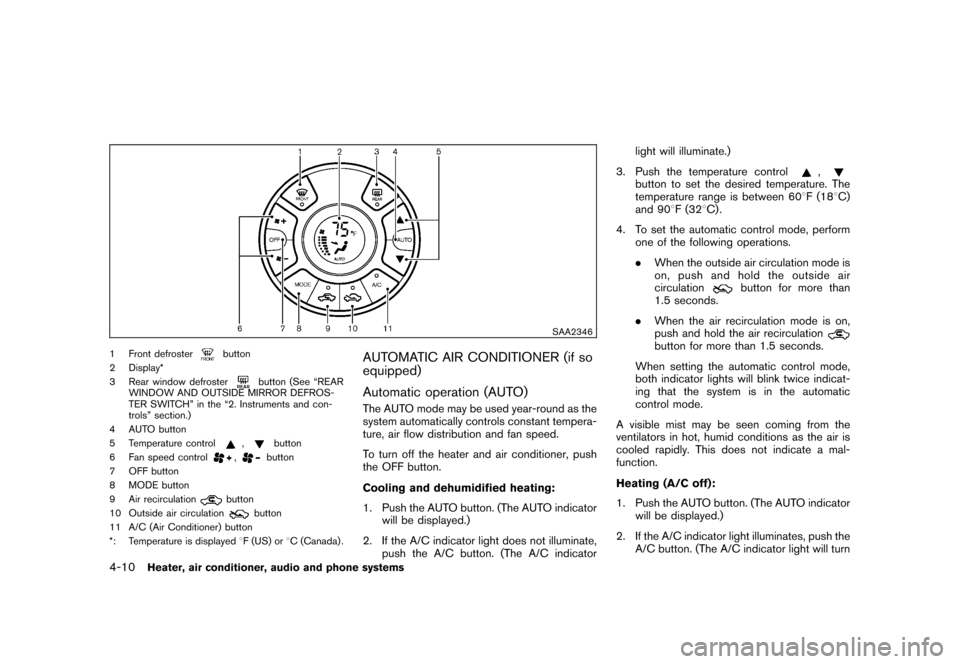
SAA2346
1 Front defroster
button
2 Display*
3 Rear window defroster
button (See “REAR
WINDOW AND OUTSIDE MIRROR DEFROS-
TER SWITCH” in the “2. Instruments and con-
trols” section.)
4 AUTO button
5 Temperature control
,
button
6 Fan speed control
,
button
7 OFF button
8 MODE button
9 Air recirculation
button
10 Outside air circulation
button
11 A/C (Air Conditioner) button
*: Temperature is displayed 8F (US) or 8C (Canada) .
AUTOMATIC AIR CONDITIONER (if so
equipped)
Automatic operation (AUTO)The AUTO mode may be used year-round as the
system automatically controls constant tempera-
ture, air flow distribution and fan speed.
To turn off the heater and air conditioner, push
the OFF button.
Cooling and dehumidified heating:
1. Push the AUTO button. (The AUTO indicator
will be displayed.)
2. If the A/C indicator light does not illuminate, push the A/C button. (The A/C indicator light will illuminate.)
3. Push the temperature control
,
button to set the desired temperature. The
temperature range is between 60 8F (18 8C)
and 90 8F (32 8C) .
4. To set the automatic control mode, perform one of the following operations.
.When the outside air circulation mode is
on, push and hold the outside air
circulation
button for more than
1.5 seconds.
. When the air recirculation mode is on,
push and hold the air recirculation
button for more than 1.5 seconds.
When setting the automatic control mode,
both indicator lights will blink twice indicat-
ing that the system is in the automatic
control mode.
A visible mist may be seen coming from the
ventilators in hot, humid conditions as the air is
cooled rapidly. This does not indicate a mal-
function.
Heating (A/C off):
1. Push the AUTO button. (The AUTO indicator will be displayed.)
2. If the A/C indicator light illuminates, push the A/C button. (The A/C indicator light will turn
4-10
Heater, air conditioner, audio and phone systems
Page 153 of 329
Black plate (157,1)
Model "Z12-D" EDITED: 2009/ 9/ 17
off.)
3. Push the temperature control
,
button to set the desired temperature. The
temperature range is between 60 8F (18 8C)
and 90 8F (32 8C) .
. Do not set the temperature lower than
the outside air temperature. Doing so
may cause the temperature to not be
controlled properly.
. If the windows fog up, use dehumidified
heating instead of the A/C off heating.
Dehumidified defrosting/defogging:
1. Push the front defroster
button. (The
indicator light will illuminate.)
2. Turn the temperature control
,
button to set the desired temperature.
. To remove moisture or fog on the front
window quickly, set the temperature to
the high temperature and the fan speed
to their maximum level.
. After the windshield is cleared, push the
front defroster
button again. (The
indicator light will turn off.)
. When the front defroster
button is
pushed, the air conditioner will auto-
matically turn on to defog the wind-
shield. The outside air circulation mode will be selected to improve the defog-
ging performance.
Manual operationThe manual mode can be used to control the
heater and air conditioner to your desired
settings.
To turn off the heater and air conditioner, push
the OFF button.
Fan speed control:
Turn the fan speed control
,
dial to
adjust the fan speed.
Air flow control:
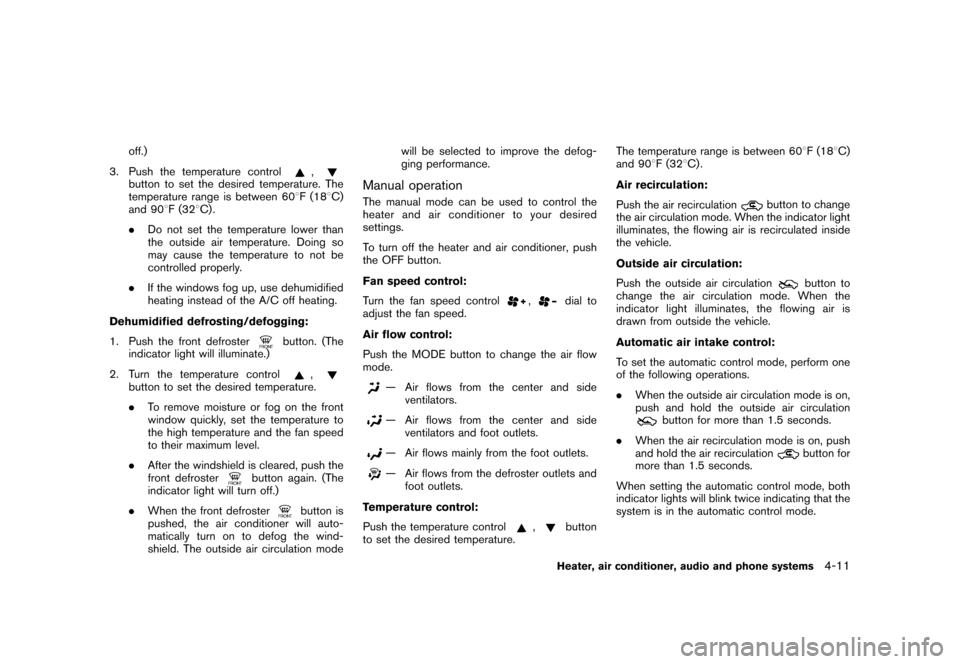
Push the MODE button to change the air flow
mode.
— Air flows from the center and side ventilators.— Air flows from the center and sideventilators and foot outlets.— Air flows mainly from the foot outlets.— Air flows from the defroster outlets andfoot outlets.
Temperature control:
Push the temperature control
,
button
to set the desired temperature. The temperature range is between 608
F (188C)
and 90 8F (32 8C) .
Air recirculation:
Push the air recirculation
button to change
the air circulation mode. When the indicator light
illuminates, the flowing air is recirculated inside
the vehicle.
Outside air circulation:
Push the outside air circulation
button to
change the air circulation mode. When the
indicator light illuminates, the flowing air is
drawn from outside the vehicle.
Automatic air intake control:
To set the automatic control mode, perform one
of the following operations.
. When the outside air circulation mode is on,
push and hold the outside air circulation
button for more than 1.5 seconds.
. When the air recirculation mode is on, push
and hold the air recirculation
button for
more than 1.5 seconds.
When setting the automatic control mode, both
indicator lights will blink twice indicating that the
system is in the automatic control mode.
Heater, air conditioner, audio and phone systems
4-11
Page 156 of 329
Black plate (160,1)
Model "Z12-D" EDITED: 2009/ 9/ 17
Static and flutter: During signal interference from
buildings, large hills or due to antenna position,
usually in conjunction with increased distance
from the station transmitter, static or flutter can
be heard. This can be reduced by lowering the
treble setting to reduce the treble response.
Multipath reception: Because of the reflective
characteristics of FM signals, direct and re-
flected signals reach the receiver at the same
time. The signals may cancel each other,
resulting in momentary flutter or loss of sound.
AM radio reception:
AM signals, because of their low frequency, can
bend around objects and skip along the ground.
In addition, the signals can be bounced off the
ionosphere and bent back to earth. Because of
these characteristics. AM signals are also
subject to interference as they travel from
transmitter to receiver.
Fading: Occurs while the vehicle is passing
through freeway underpasses or in areas with
many tall buildings. It can also occur for several
seconds during ionospheric turbulence even in
areas where no obstacles exist.
Static: Caused by thunderstorms, electrical
power lines, electric signs and even traffic lights.Satellite radio reception (if so equipped):
When the satellite radio is first installed or the
battery has been replaced, the satellite radio
may not work properly. This is not a malfunction.
Wait more than 10 minutes with the satellite
radio ON and the vehicle away from any metal or
large buildings for the satellite radio to receive all
of the necessary data.
The satellite radio mode requires an active XM
®
Satellite Radio subscription. The satellite radio is
not available in Alaska, Hawaii and Guam.
Satellite radio performance may be affected if
cargo carried on the roof blocks the satellite
radio signal.
If possible, do not put cargo near the satellite
antenna.
A buildup of ice on the satellite radio antenna
can affect satellite radio performance. Remove
the ice to restore satellite radio reception.
SAA0480
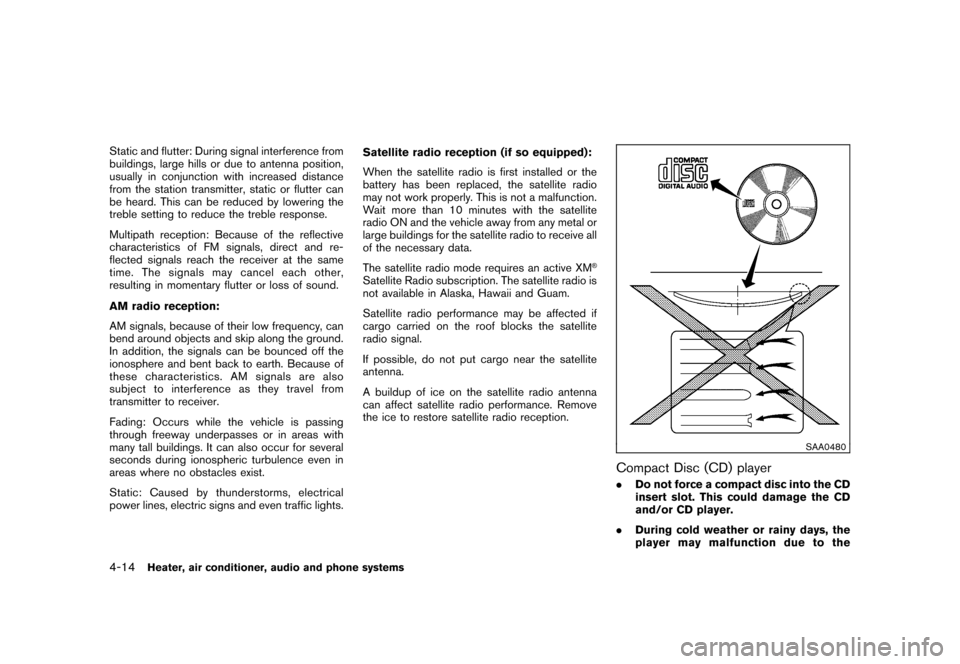
Compact Disc (CD) player.
Do not force a compact disc into the CD
insert slot. This could damage the CD
and/or CD player.
. During cold weather or rainy days, the
player may malfunction due to the
4-14
Heater, air conditioner, audio and phone systems
Page 210 of 329
Black plate (214,1)
Model "Z12-D" EDITED: 2009/ 9/ 17
SSD0859
PUSH-BUTTON IGNITION SWITCH
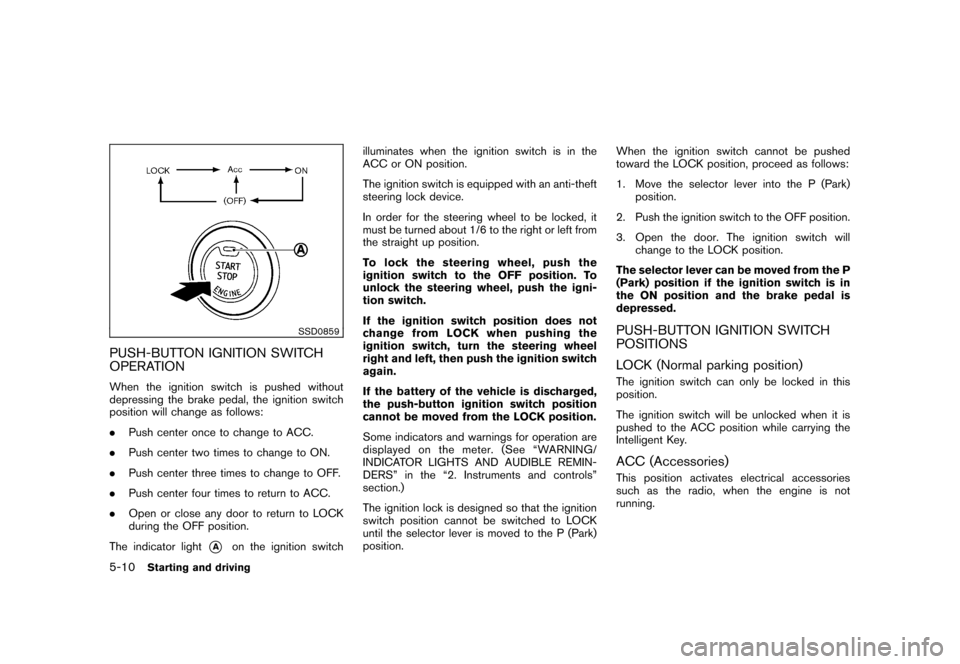
OPERATIONWhen the ignition switch is pushed without
depressing the brake pedal, the ignition switch
position will change as follows:
.Push center once to change to ACC.
. Push center two times to change to ON.
. Push center three times to change to OFF.
. Push center four times to return to ACC.
. Open or close any door to return to LOCK
during the OFF position.
The indicator light
*A
on the ignition switch illuminates when the ignition switch is in the
ACC or ON position.
The ignition switch is equipped with an anti-theft
steering lock device.
In order for the steering wheel to be locked, it
must be turned about 1/6 to the right or left from
the straight up position.
To lock the steering wheel, push the
ignition switch to the OFF position. To
unlock the steering wheel, push the igni-
tion switch.
If the ignition switch position does not
change from LOCK when pushing the
ignition switch, turn the steering wheel
right and left, then push the ignition switch
again.
If the battery of the vehicle is discharged,
the push-button ignition switch position
cannot be moved from the LOCK position.
Some indicators and warnings for operation are
displayed on the meter. (See “WARNING/
INDICATOR LIGHTS AND AUDIBLE REMIN-
DERS” in the “2. Instruments and controls”
section.)
The ignition lock is designed so that the ignition
switch position cannot be switched to LOCK
until the selector lever is moved to the P (Park)
position.
When the ignition switch cannot be pushed
toward the LOCK position, proceed as follows:
1. Move the selector lever into the P (Park)
position.
2. Push the ignition switch to the OFF position.
3. Open the door. The ignition switch will change to the LOCK position.
The selector lever can be moved from the P
(Park) position if the ignition switch is in
the ON position and the brake pedal is
depressed.
PUSH-BUTTON IGNITION SWITCH
POSITIONS
LOCK (Normal parking position)The ignition switch can only be locked in this
position.
The ignition switch will be unlocked when it is
pushed to the ACC position while carrying the
Intelligent Key.ACC (Accessories)This position activates electrical accessories
such as the radio, when the engine is not
running.
5-10
Starting and driving
Page 212 of 329
Black plate (216,1)
Model "Z12-D" EDITED: 2009/ 9/ 17
.Make sure the area around the vehicle is
clear.
. Check fluid levels such as engine oil, cool-
ant, brake fluid, and window washer fluid as
frequently as possible, or at least whenever
you refuel.
. Check that all windows and lights are clean.
. Visually inspect tires for their appearance
and condition. Also check tires for proper
inflation.
. Lock all doors.
. Position seat and adjust head restraints.
. Adjust inside and outside mirrors.
. Fasten seat belts and ask all passengers to
do likewise.
. Check the operation of warning lights when
the ignition switch is placed in the ON
position. (See “WA RNING/INDICATOR
LIGHTS AND AUDIBLE REMINDERS” in
the “2. Instruments and controls” section.)
MODELS WITHOUT INTELLIGENT KEY
SYSTEM1. Apply the parking brake.
2. Continuously Variable Transmission
(CVT) models:
Move the selector lever to the P (Park) or N
(Neutral) position. (P is recommended.)
The starter is designed so that it does not
operate unless the selector lever is in either
of the above positions.
Manual Transmission (MT) models:
Move the shift lever to the N (Neutral)
position. Depress the clutch pedal fully to
the floor.
The starter is designed not to operate unless
the clutch pedal is fully depressed.
3. Crank the engine with your foot off the
accelerator pedal by turning the ignition
switch to START. Release the switch when
the engine starts. If the engine starts, but
fails to run, repeat the above procedure.
. If the engine is very hard to start in
extremely cold weather or when restart-
ing, depress the accelerator pedal a little
(approximately 1/3 to the floor) and hold
it and then crank the engine. Release the
accelerator pedal when the engine starts.
. If the engine is very hard to start
because it is flooded, depress the
accelerator pedal all the way to the floor
and hold it. Crank the engine for 5 - 6
seconds. After cranking the engine,
release the accelerator pedal. Crank
the engine with your foot off the
accelerator pedal by turning the igni-
tion switch to START. Release the
ignition switch when the engine starts.
If the engine starts, but fails to run,
repeat the above procedure.
CAUTION
Do not operate the starter for more
than 15 seconds at a time. If the engine
does not start, turn the ignition switch
off and wait 10 seconds before cranking
again, otherwise the starter could be
damaged.
4. Warm-up
Allow the engine to idle for at least 30
seconds after starting. Do not race the
engine while warming it up. Drive at
moderate speed for a short distance first,
especially in cold weather. In cold weather,
keep the engine running for a minimum of 2 -
BEFORE STARTING THE ENGINE STARTING THE ENGINE5-12
Starting and driving
Page 217 of 329
Black plate (221,1)
Model "Z12-D" EDITED: 2009/ 9/ 17
ON position. The vehicle should return to
its normal operating condition. If it does
not return to its normal operating condi-
tion, have a NISSAN dealer check the
transmission and repair if necessary.
WARNING
When the high fluid temperature pro-
tection mode or fail-safe operation
occurs, vehicle speed may be gradually
reduced. The reduced speed may be
lower than other traffic, which could
increase the chance of a collision. Be
especially careful when driving. If ne-
cessary, pull to the side of the road at a
safe place and allow the transmission
to return to normal operation, or have it
repaired if necessary.
SSD0864
Shift lock releaseIf the battery charge is low or discharged, the
selector lever may not be moved from the P
(Park) position even with the brake pedal
depressed and the selector lever button pushed.
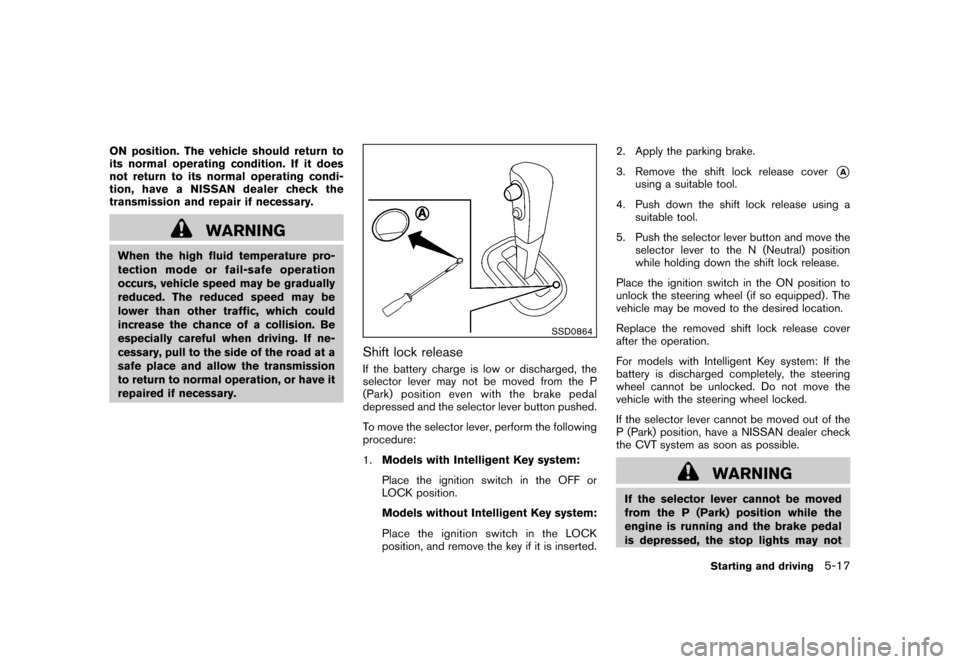
To move the selector lever, perform the following
procedure:
1.Models with Intelligent Key system:
Place the ignition switch in the OFF or
LOCK position.
Models without Intelligent Key system:
Place the ignition switch in the LOCK
position, and remove the key if it is inserted. 2. Apply the parking brake.
3. Remove the shift lock release cover
*A
using a suitable tool.
4. Push down the shift lock release using a suitable tool.
5. Push the selector lever button and move the selector lever to the N (Neutral) position
while holding down the shift lock release.
Place the ignition switch in the ON position to
unlock the steering wheel (if so equipped) . The
vehicle may be moved to the desired location.
Replace the removed shift lock release cover
after the operation.
For models with Intelligent Key system: If the
battery is discharged completely, the steering
wheel cannot be unlocked. Do not move the
vehicle with the steering wheel locked.
If the selector lever cannot be moved out of the
P (Park) position, have a NISSAN dealer check
the CVT system as soon as possible.
WARNING
If the selector lever cannot be moved
from the P (Park) position while the
engine is running and the brake pedal
is depressed, the stop lights may not
Starting and driving
5-17