Page 350 of 422
1. Brake fluid reservoir
2. Engine oil filler cap
3. Air cleaner
4. Fuse/Fusible link box/Jump-startlocation
5. Fuse box
6. Inverter coolant reservoir
7. Engine oil dipstick
8. Radiator cap
9. Drive belt location
10. Engine coolant reservoir
11. Windshield–washer fluid reservoir
LDI0577
ENGINE COMPARTMENT CHECK
LOCATIONS
Maintenance and do-it-yourself8-7
Page 353 of 422
CHECKING INVERTER COOLANT
LEVEL
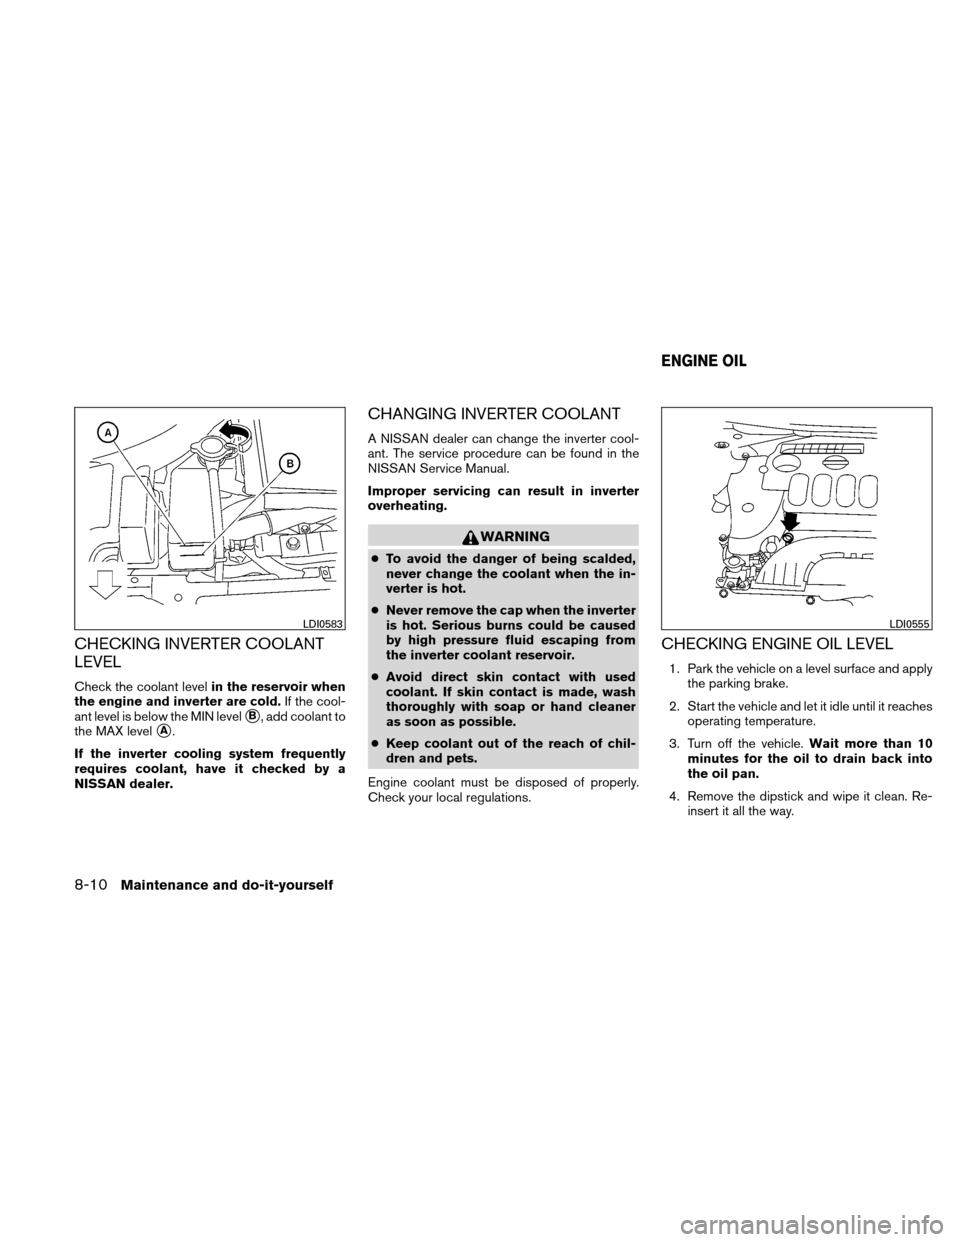
Check the coolant levelin the reservoir when
the engine and inverter are cold. If the cool-
ant level is below the MIN level
�B, add coolant to
the MAX level
�A.
If the inverter cooling system frequently
requires coolant, have it checked by a
NISSAN dealer.
CHANGING INVERTER COOLANT
A NISSAN dealer can change the inverter cool-
ant. The service procedure can be found in the
NISSAN Service Manual.
Improper servicing can result in inverter
overheating.
WARNING
● To avoid the danger of being scalded,
never change the coolant when the in-
verter is hot.
● Never remove the cap when the inverter
is hot. Serious burns could be caused
by high pressure fluid escaping from
the inverter coolant reservoir.
● Avoid direct skin contact with used
coolant. If skin contact is made, wash
thoroughly with soap or hand cleaner
as soon as possible.
● Keep coolant out of the reach of chil-
dren and pets.
Engine coolant must be disposed of properly.
Check your local regulations.
CHECKING ENGINE OIL LEVEL
1. Park the vehicle on a level surface and apply the parking brake.
2. Start the vehicle and let it idle until it reaches operating temperature.
3. Turn off the vehicle. Wait more than 10
minutes for the oil to drain back into
the oil pan.
4. Remove the dipstick and wipe it clean. Re- insert it all the way.
LDI0583LDI0555
ENGINE OIL
8-10Maintenance and do-it-yourself
Page 354 of 422
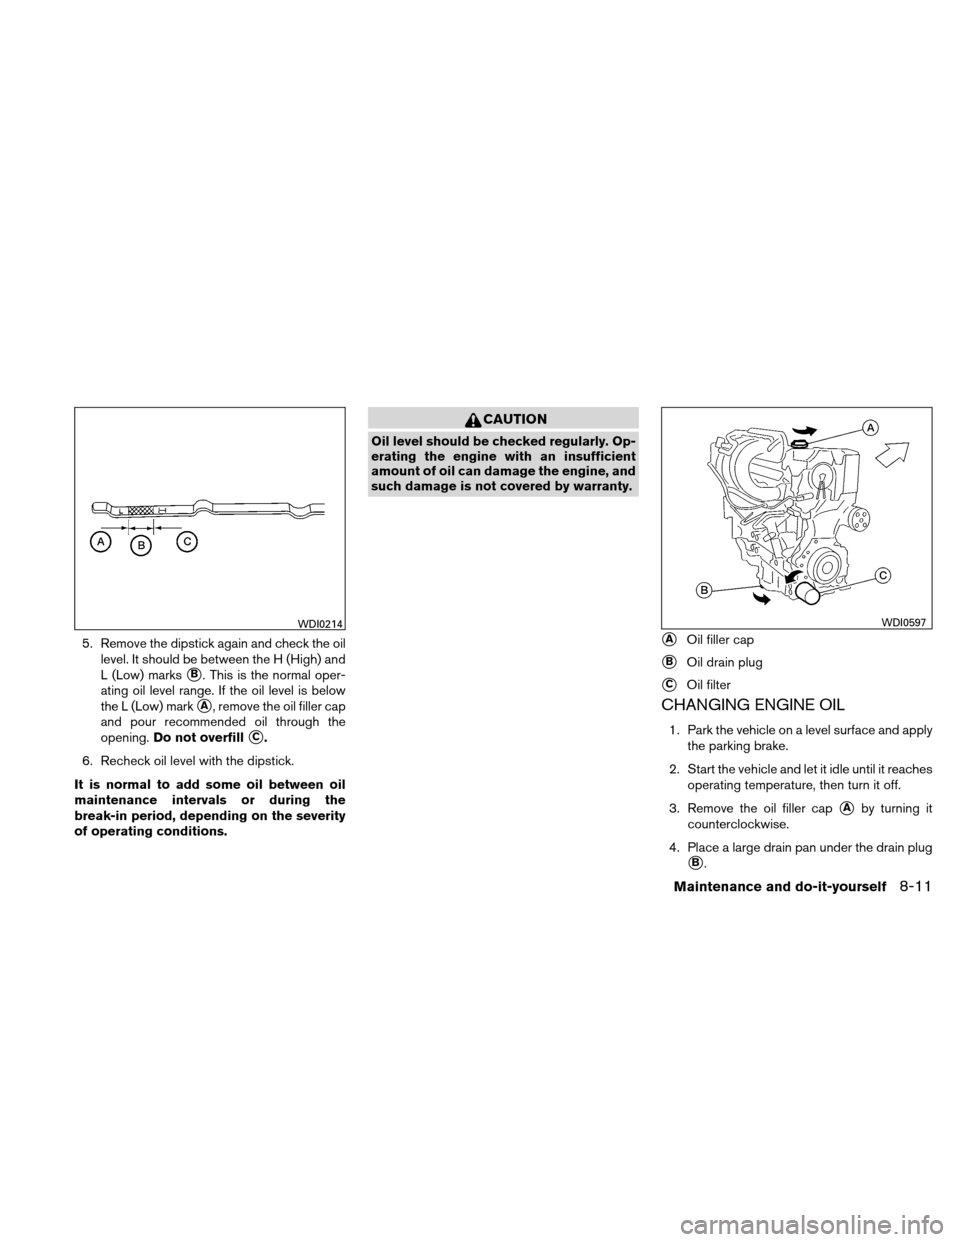
5. Remove the dipstick again and check the oillevel. It should be between the H (High) and
L (Low) marks
�B. This is the normal oper-
ating oil level range. If the oil level is below
the L (Low) mark
�A, remove the oil filler cap
and pour recommended oil through the
opening. Do not overfill
�C.
6. Recheck oil level with the dipstick.
It is normal to add some oil between oil
maintenance intervals or during the
break-in period, depending on the severity
of operating conditions.
CAUTION
Oil level should be checked regularly. Op-
erating the engine with an insufficient
amount of oil can damage the engine, and
such damage is not covered by warranty.
CHANGING ENGINE OIL
1. Park the vehicle on a level surface and apply the parking brake.
2. Start the vehicle and let it idle until it reaches operating temperature, then turn it off.
3. Remove the oil filler cap
�Aby turning it
counterclockwise.
4. Place a large drain pan under the drain plug
�B.
WDI0214
�AOil filler cap
�BOil drain plug
�COil filter
WDI0597
Maintenance and do-it-yourself8-11
Page 355 of 422
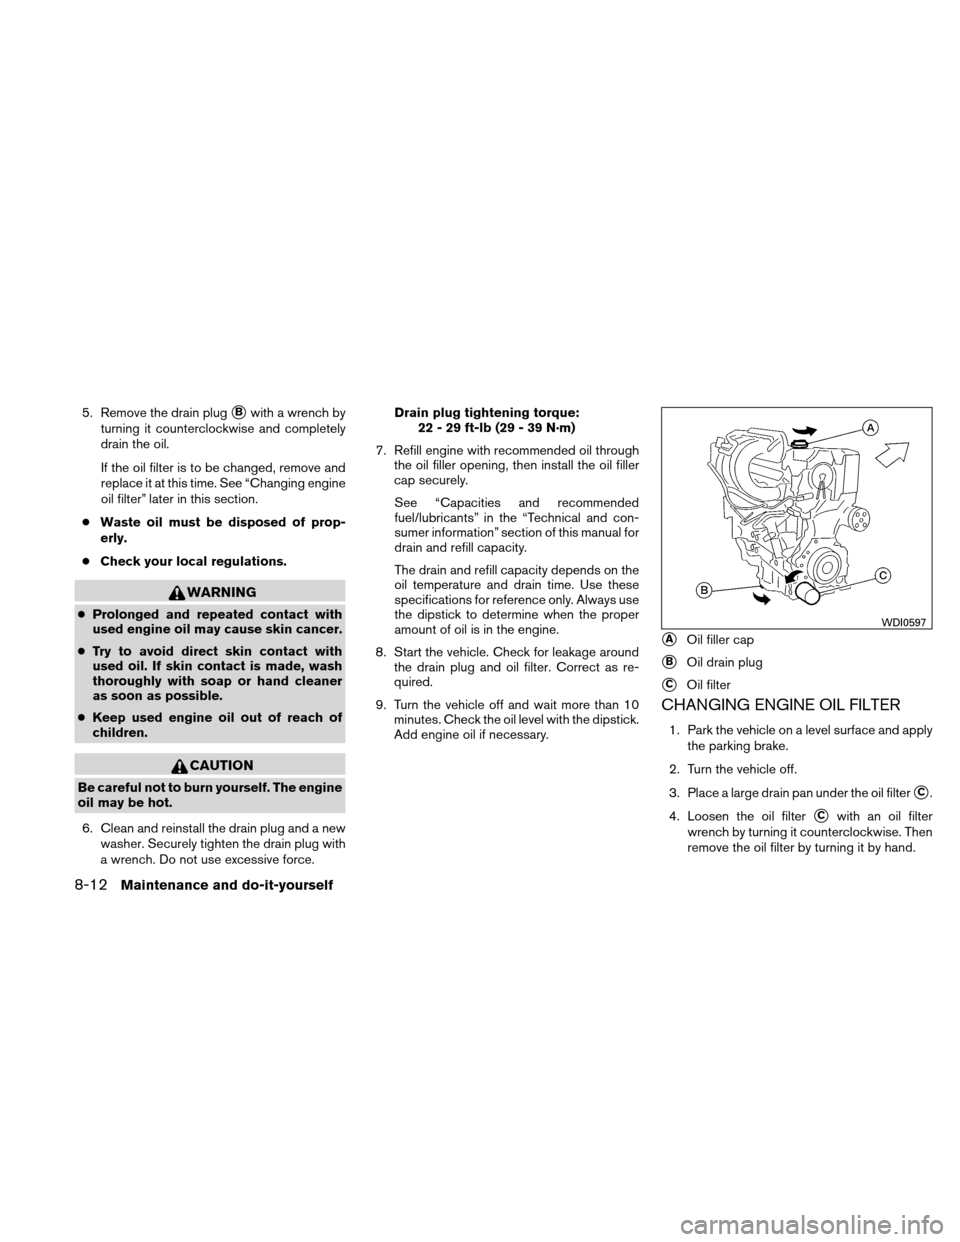
5. Remove the drain plug�Bwith a wrench by
turning it counterclockwise and completely
drain the oil.
If the oil filter is to be changed, remove and
replace it at this time. See “Changing engine
oil filter” later in this section.
● Waste oil must be disposed of prop-
erly.
● Check your local regulations.
WARNING
●Prolonged and repeated contact with
used engine oil may cause skin cancer.
● Try to avoid direct skin contact with
used oil. If skin contact is made, wash
thoroughly with soap or hand cleaner
as soon as possible.
● Keep used engine oil out of reach of
children.
CAUTION
Be careful not to burn yourself. The engine
oil may be hot.
6. Clean and reinstall the drain plug and a new washer. Securely tighten the drain plug with
a wrench. Do not use excessive force. Drain plug tightening torque:
22 - 29 ft-lb (29 - 39 N·m)
7. Refill engine with recommended oil through the oil filler opening, then install the oil filler
cap securely.
See “Capacities and recommended
fuel/lubricants” in the “Technical and con-
sumer information” section of this manual for
drain and refill capacity.
The drain and refill capacity depends on the
oil temperature and drain time. Use these
specifications for reference only. Always use
the dipstick to determine when the proper
amount of oil is in the engine.
8. Start the vehicle. Check for leakage around the drain plug and oil filter. Correct as re-
quired.
9. Turn the vehicle off and wait more than 10 minutes. Check the oil level with the dipstick.
Add engine oil if necessary.
CHANGING ENGINE OIL FILTER
1. Park the vehicle on a level surface and apply
the parking brake.
2. Turn the vehicle off.
3. Place a large drain pan under the oil filter
�C.
4. Loosen the oil filter
�Cwith an oil filter
wrench by turning it counterclockwise. Then
remove the oil filter by turning it by hand.
�AOil filler cap
�BOil drain plug
�COil filter
WDI0597
8-12Maintenance and do-it-yourself
Page 356 of 422
CAUTION
Be careful not to burn yourself. The engine
oil may be hot.5. Wipe the engine oil filter sealing surface with a clean rag.
CAUTION
Be sure to remove any old gasket material
remaining on the sealing surface of the
engine. Failure to do so could lead to
engine damage.
6. Coat the gasket on the new filter with clean engine oil.
7. Screw on the oil filter until a slight resistance is felt, then tighten an additional 2/3 turn.
8. Start the vehicle and check for leakage around the oil filter. Correct as required.
9. Turn the vehicle off and wait more than 10 minutes. Check the oil level. Add engine oil if
necessary.
CAUTION
●Use only Genuine NISSAN Matic W ATF.
Do not mix with other fluids.
● Using transmission fluid other than
Genuine NISSAN Matic W ATF will dam-
age the transmission, which is not cov-
ered by the NISSAN new vehicle limited
warranty.
When checking or replacement is required, we
recommend your NISSAN dealer for servicing. For further brake fluid specification information,
refer to “Capacities and recommended
fuel/lubricants” in the “Technical and consumer
information” section of this manual.
WARNING
●
Use only new fluid from a sealed con-
tainer. Old, inferior or contaminated
fluid may damage the brake system.
The use of improper fluids can damage
the brake system and affect the vehi-
cle’s stopping ability.
● Clean the filler cap before removing.
● Brake fluid is poisonous and should be
stored carefully in marked containers
out of reach of children.
CAUTION
Do not spill the fluid on any painted sur-
faces. This will damage the paint. If fluid is
spilled, immediately wash the surface
with water.
ELECTRONICALLY CONTROLLED
CONTINUOUSLY VARIABLE
TRANSMISSION (eCVT) FLUID BRAKE FLUID
Maintenance and do-it-yourself8-13
Page 357 of 422
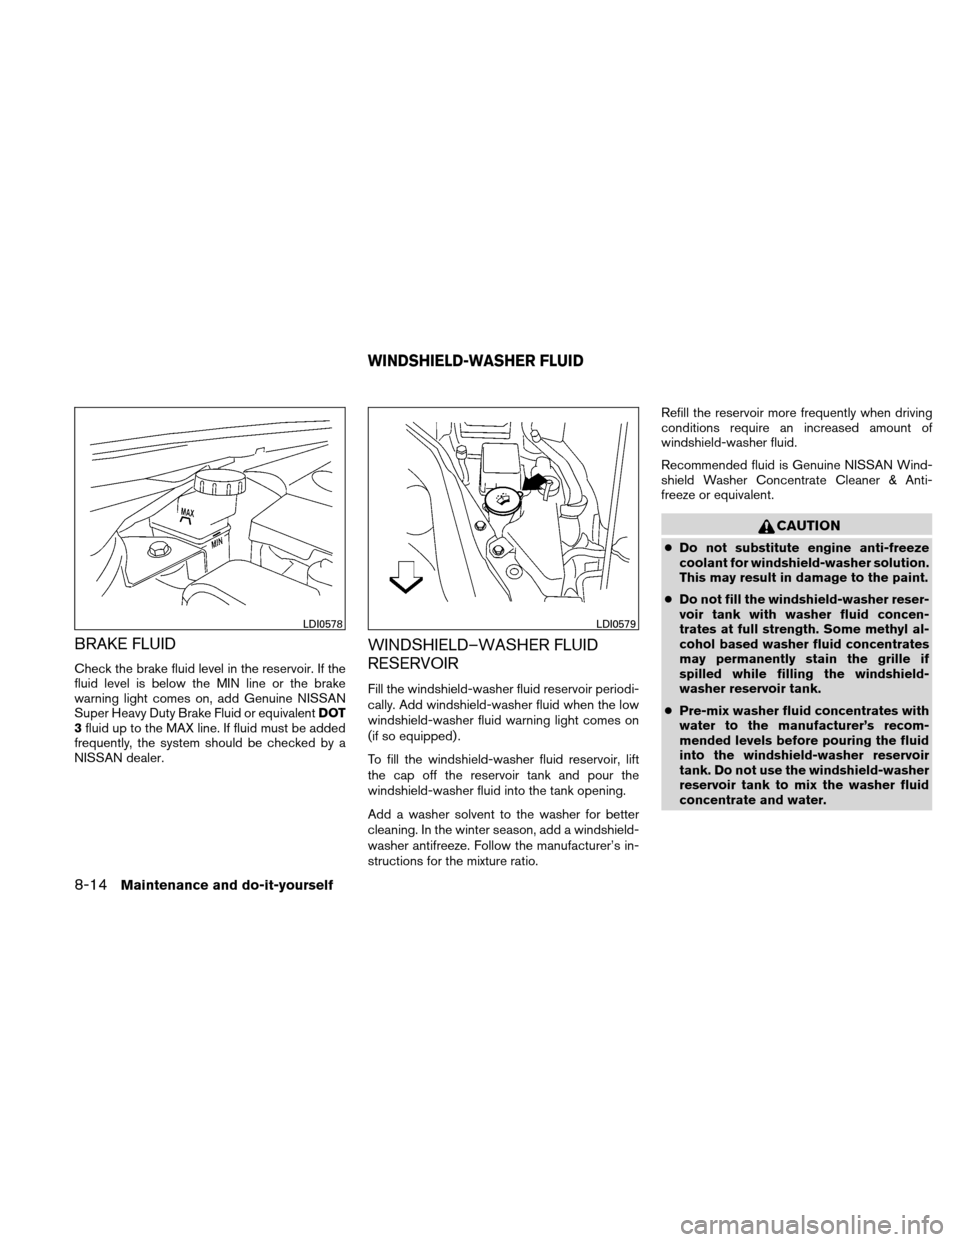
BRAKE FLUID
Check the brake fluid level in the reservoir. If the
fluid level is below the MIN line or the brake
warning light comes on, add Genuine NISSAN
Super Heavy Duty Brake Fluid or equivalentDOT
3 fluid up to the MAX line. If fluid must be added
frequently, the system should be checked by a
NISSAN dealer.
WINDSHIELD–WASHER FLUID
RESERVOIR
Fill the windshield-washer fluid reservoir periodi-
cally. Add windshield-washer fluid when the low
windshield-washer fluid warning light comes on
(if so equipped) .
To fill the windshield-washer fluid reservoir, lift
the cap off the reservoir tank and pour the
windshield-washer fluid into the tank opening.
Add a washer solvent to the washer for better
cleaning. In the winter season, add a windshield-
washer antifreeze. Follow the manufacturer’s in-
structions for the mixture ratio. Refill the reservoir more frequently when driving
conditions require an increased amount of
windshield-washer fluid.
Recommended fluid is Genuine NISSAN Wind-
shield Washer Concentrate Cleaner & Anti-
freeze or equivalent.
CAUTION
●
Do not substitute engine anti-freeze
coolant for windshield-washer solution.
This may result in damage to the paint.
● Do not fill the windshield-washer reser-
voir tank with washer fluid concen-
trates at full strength. Some methyl al-
cohol based washer fluid concentrates
may permanently stain the grille if
spilled while filling the windshield-
washer reservoir tank.
● Pre-mix washer fluid concentrates with
water to the manufacturer’s recom-
mended levels before pouring the fluid
into the windshield-washer reservoir
tank. Do not use the windshield-washer
reservoir tank to mix the washer fluid
concentrate and water.
LDI0578LDI0579
WINDSHIELD-WASHER FLUID
8-14Maintenance and do-it-yourself
Page 359 of 422
2. Have the belt checked regularly for condi-tion and tension in accordance with the
maintenance schedule found in the
“NISSAN Service and Maintenance Guide”.
REPLACING SPARK PLUGS
Iridium-tipped spark plugs
It is not necessary to replace iridium-tipped�A
spark plugs as frequently as conventional type
spark plugs because they last much longer. Fol-
low the maintenance log shown in the “NISSAN
Service and Maintenance Guide”. Do not service
iridium-tipped spark plugs by cleaning or regap-
ping.
● Always replace spark plugs with rec-
ommended or equivalent ones.
WARNING
Be sure the engine and ignition switch are
off and that the parking brake is engaged
securely.
CAUTION
Be sure to use the correct socket to re-
move the spark plugs. An incorrect socket
can damage the spark plugs.
If replacement is required, see your NISSAN
dealer for assistance.
SDI1895
SPARK PLUGS
8-16Maintenance and do-it-yourself
Page 362 of 422
If the brakes do not operate properly, have the
brakes checked by a NISSAN dealer.
SELF-ADJUSTING BRAKES
Your vehicle is equipped with self-adjusting
brakes.
The front and rear disc-type brakes self-adjust
every time the brake pedal is applied.
WARNING
See a NISSAN dealer for a brake system
check if the brake pedal height does not
return to normal.
BRAKE PAD WEAR INDICATORS
The disc brake pads on your vehicle have audible
wear indicators. When a brake pad requires re-
placement, a high pitched scraping or screech-
ing sound will be heard when the vehicle is in
motion. The noise will be heard whether or not the
brake pedal is depressed. Have the brakes
checked as soon as possible if the wear indicator
sound is heard.
Under some driving or climate conditions, occa-
sional brake squeak, squeal or other noise may
be heard. Occasional brake noise during light to
moderate stops is normal and does not affect the
function or performance of the brake system.Proper brake inspection intervals should
be followed.
For more information regarding
brake inspections, see the appropriate mainte-
nance schedule information in the “NISSAN Ser-
vice and Maintenance Guide”.
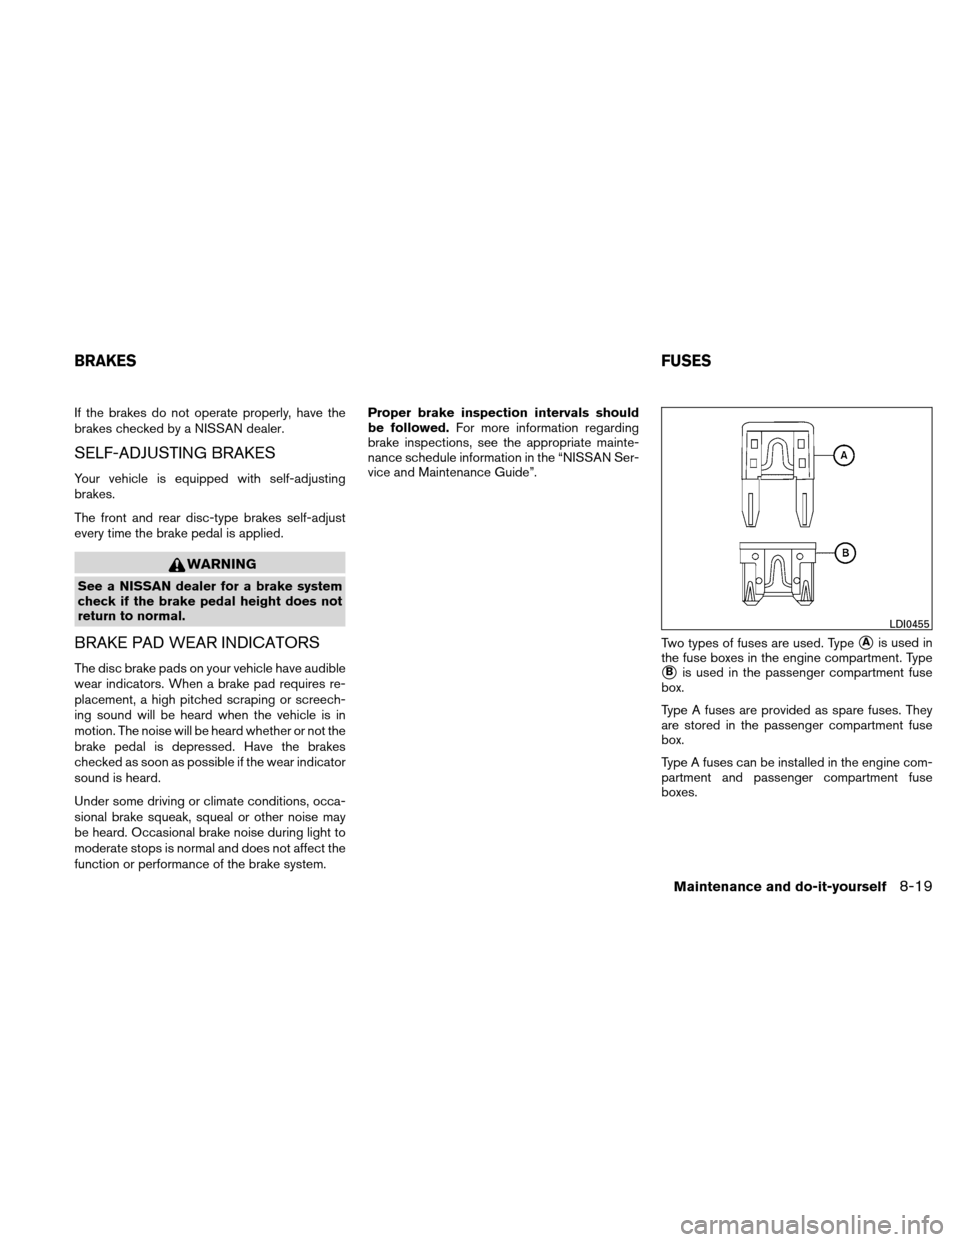
Two types of fuses are used. Type
�Ais used in
the fuse boxes in the engine compartment. Type
�Bis used in the passenger compartment fuse
box.
Type A fuses are provided as spare fuses. They
are stored in the passenger compartment fuse
box.
Type A fuses can be installed in the engine com-
partment and passenger compartment fuse
boxes.
LDI0455
BRAKES FUSES
Maintenance and do-it-yourself8-19