2010 NISSAN ALTIMA COUPE door lock
[x] Cancel search: door lockPage 3 of 40

TABLe Of cOnTenTS
ni SSAn intelligent k ey™........................................... 2
Automatic door Locks ............................................. 3
Windshield Wiper/Washer Switch ................................... 3
Headlight and Turn Signal control ................................... 4
Steering Wheel Switches for Audio control/Bluetooth
® (if so equipped) ... 5
cruise control .................................................... 5
Automatic climate control (if so equipped) ............................6
f M/AM/XM
®* Radio with cd Player (vehicles with navigation) ............8
u SB Jack with iPod® connectivity (if so equipped) ..................... 9
Music BoxTM Hard drive Audio System (if so equipped) .................10
Bluetooth® Streaming Audio (if so equipped) ......................... 11
Vehicle information display ........................................ 11
clock Set/Adjustment ............................................ 12
RearView Monitor (if so equipped) .................................. 12
Twin Trip Odometer .............................................. 12
continuously Variable Transmission (cVT) (if so equipped) ..............13
6-Speed Manual Transmission (if so equipped) ........................14
Vehicle dynamic control (Vdc) Off Switch ...........................14
front Passenger Air Bag Status Light ............................... 14
Tire Pressure Monitoring System (TPMS) ............................ 15
Seat Belt Warning Light and chime ................................. 15
child Safety Rear door Locks (Sedan only) .......................... 15
fuel-filler door Release ........................................... 15
fuel-filler cap ................................................... 15
Trunk Lid cancel Switch (if so equipped) .............................16
Moonroof controls (if so equipped) ................................. 16
front Seat Adjustments ........................................... 16
Passenger Rear Seat entry (coupe only) .............................17
f olding down the Rear Seats . . . . . . . . . . . . . . . . . . . . . . . . . . . . . . . . . . . .\
. . 18
HomeLink
® universal Transceiver (if so equipped) ..................... 18
Bluetooth® Hands-free Phone System (vehicles without navigation -
if so equipped) .................................................. 19
Bluetooth
® Hands-free Phone System (vehicles with navigation -
if so equipped) .................................................. 22
ni SSAn Voice Recognition System (vehicles with navigation -
if so equipped) .................................................. 25
navigation System (if so equipped) ................................. 30
This easy-to-use Quick Reference Guide is intended to help you more fully
appreciate some of the unique features and functions of your new vehicle.
However, it is not intended to replace your Owner’s Manual. The Owner’s
Manual contains more detailed information to help you better understand
the important safety warnings, features, operation and maintenance of your
vehicle. All information, specifications, photographs and illustrations in this
publication are those in effect at the time of printing. niSSA n reserves the
right to change specifications or design without notice and without obligation.
Page 4 of 40

NISSAN INTELLIGENT KEY™
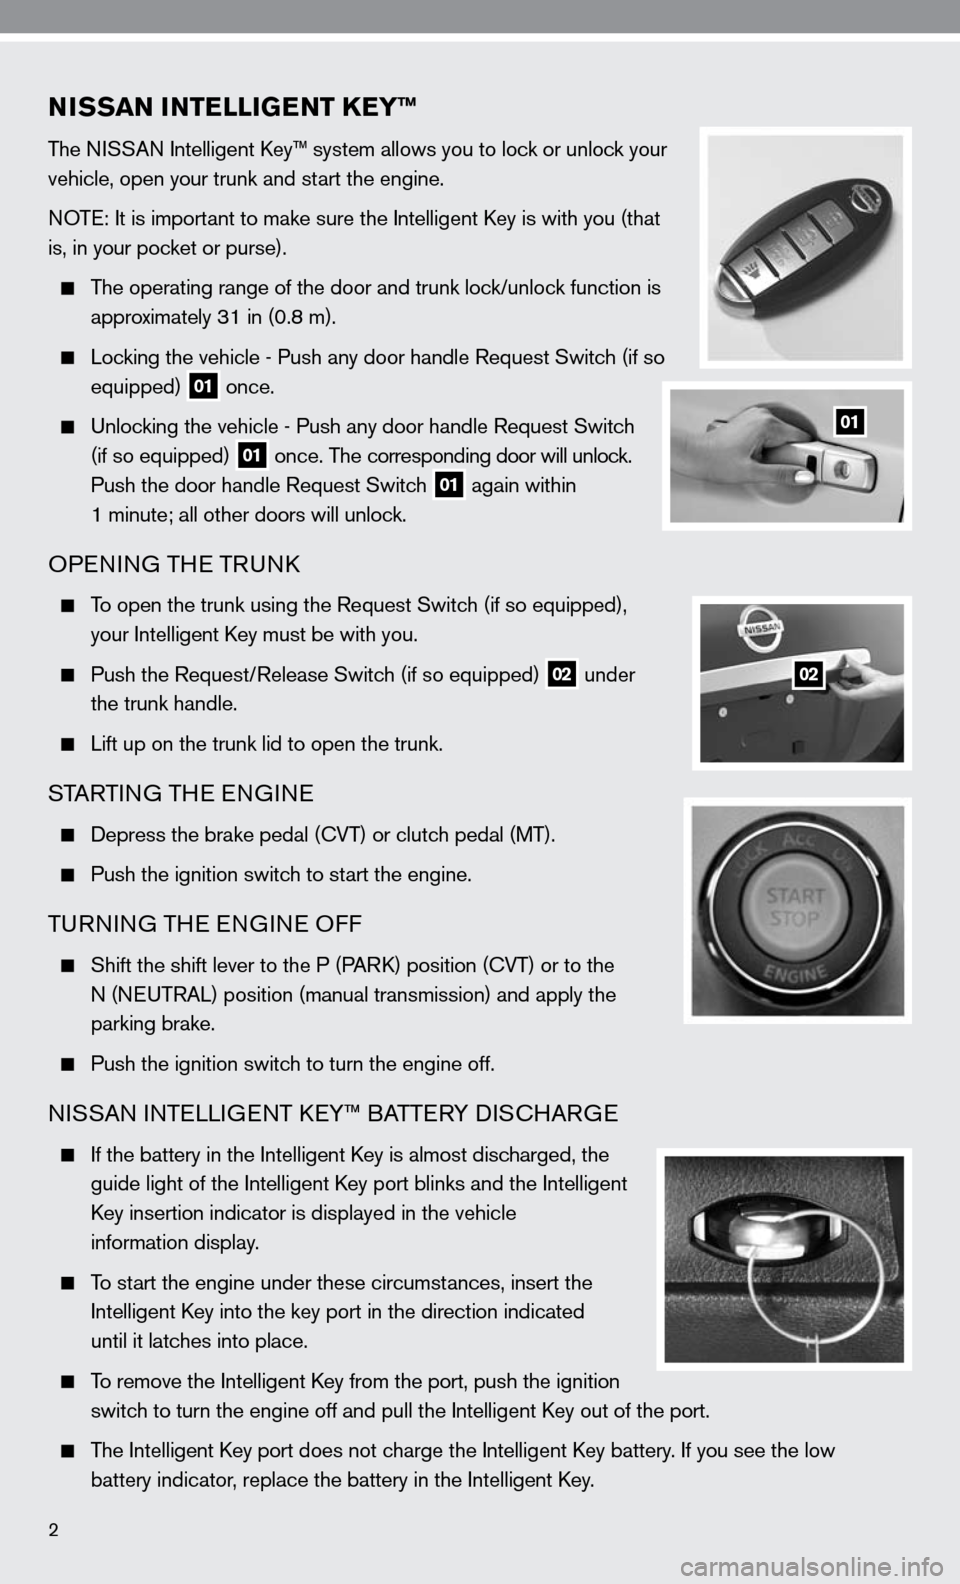
The niSSAn intelligent k ey™ system allows you to lock or unlock your
vehicle, open your trunk and start the engine.
n OTe: it is important to make sure the intelligent k ey is with you (that
is, in your pocket or purse).
The operating range of the door and trunk lock/unlock function is
approximately 31 in (0.8 m).
Locking the vehicle - Push any door handle Request Switch (if so
equipped)
01 once.
u nlocking the vehicle - Push any door handle Request Switch
(if so equipped)
01 once. The corresponding door will unlock.
Push the door handle Request Switch
01 again within
1 minute; all other doors will unlock.
OPenin G THe TRunk
To open the trunk using the Request Switch (if so equipped),
your intelligent k ey must be with you.
Push the Request/Release Switch (if so equipped)
02 under
the trunk handle.
Lift up on the trunk lid to open the trunk.
STARTin G THe enGine
depress the brake pedal (cVT) or clutch pedal (MT).
Push the ignition switch to start the engine.
Tu Rnin G TH e enGine O ff
Shift the shift lever to the P (PAR k) position ( cVT) or to the
n (neu TRAL) position (manual transmission) and apply the
parking brake.
Push the ignition switch to turn the engine off.
ni SSAn inTe LLiGenT keY™ BATTe RY diSc HARG e
if the battery in the intelligent k ey is almost discharged, the
guide light of the intelligent k ey port blinks and the intelligent
k ey insertion indicator is displayed in the vehicle
information display.
To start the engine under these circumstances, insert the
intelligent k ey into the key port in the direction indicated
until it latches into place.
To remove the intelligent k ey from the port, push the ignition
switch to turn the engine off and pull the intelligent k ey out of the port.
The intelligent k ey port does not charge the intelligent k ey battery. if you see the low
battery indicator, replace the battery in the intelligent k ey.
2
01
02
Page 5 of 40

AUTOMATIC DOOR LOCKS
All doors lock automatically when the vehicle speed reaches 15 MPH (24 km/h).
All doors unlock automatically when the ignition switch is placed in the O ff position.
The automatic unlock function can be deactivated or activated. To deactivate or activate
the automatic door unlock system, perform the following procedure:
1. close all doors.
2. Place the ignition switch in the O n position.
3. Within 20 seconds of performing Step 2, push and hold the power door lock switch to the
position (un
LOck) for more than 5 seconds.
4. When activated, the hazard indicator will flash twice. When deactivated, the hazard indicator
will flash once.
5. The ignition switch must be placed in the O ff and On position again between each setting
change.
When the automatic door unlock system is deactivated, the doors do not unlock when the ignition
switch is placed in the O ff position. To unlock the door manually, use the inside lock knob or the
power door lock switch (driver’s or front passenger’s side).
WINDSHIELD WIPER/WASHER SWITCH
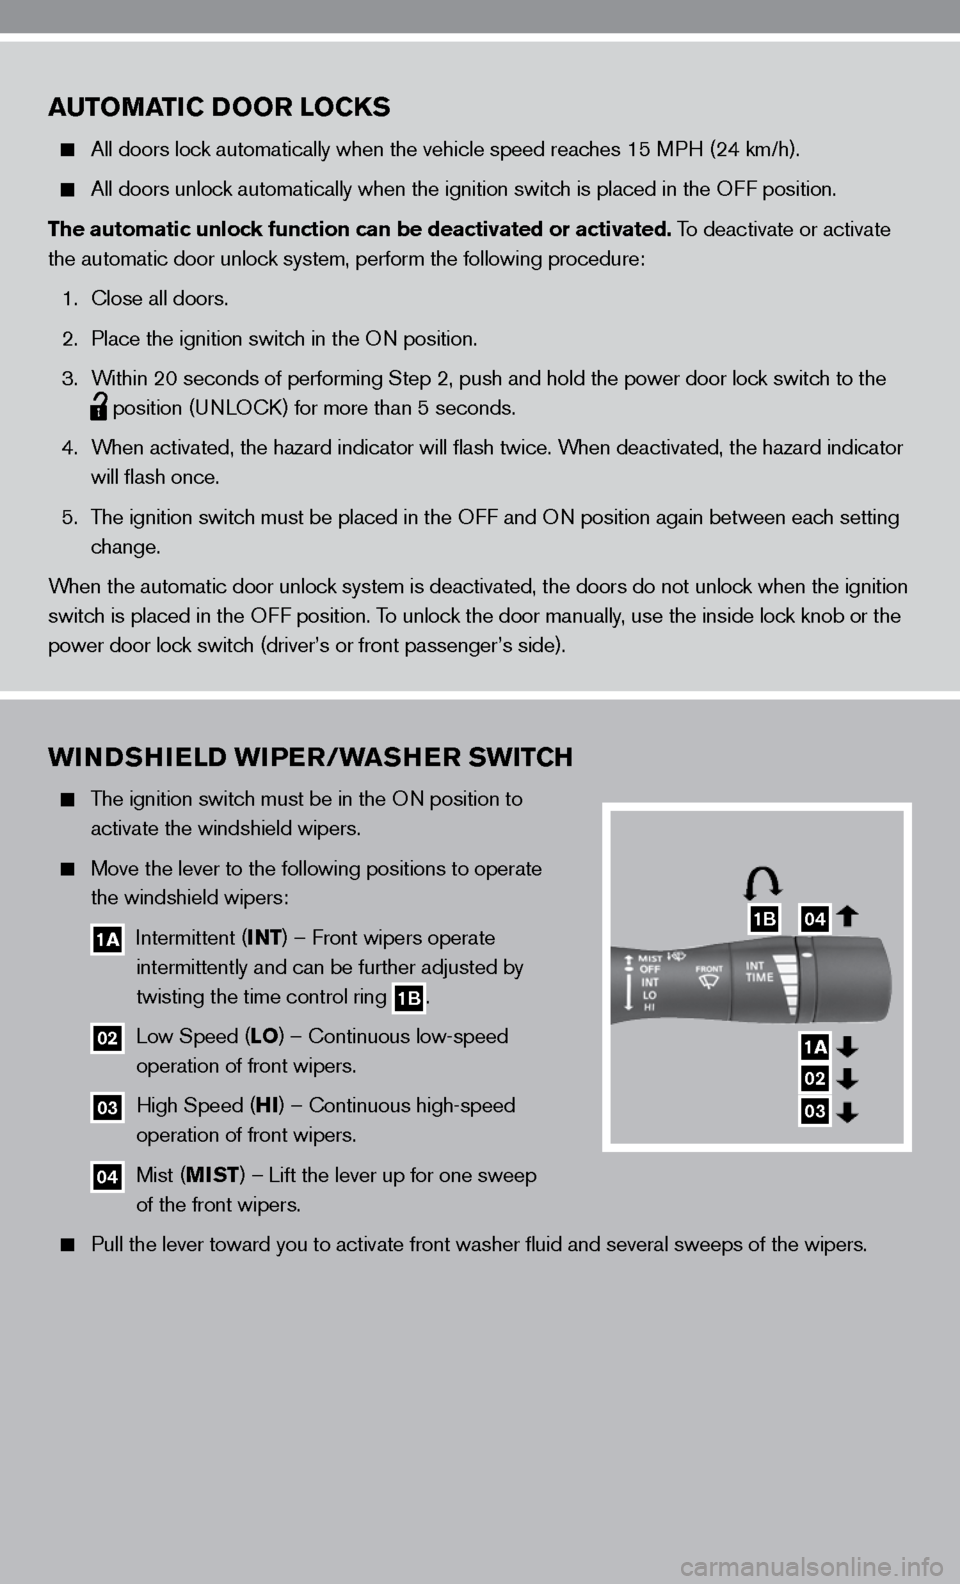
The ignition switch must be in the O n position to
activate the windshield wipers.
Move the lever to the following positions to operate
the windshield wipers:
1A intermittent (INT) – front wipers operate
intermittently and can be further adjusted by
twisting the time control ring
1B.
02 Low Speed (LO ) – continuous low-speed
operation of front wipers.
03 High Speed (HI ) – continuous high-speed
operation of front wipers.
04 Mist (MIST ) – Lift the lever up for one sweep
of the front wipers.
Pull the lever toward you to activate front washer fluid and several s\
weeps of the wipers.
1B04
1A
02
03
Page 17 of 40

15
TIRE PRESSURE MONITORING SYSTEM (TPMS)
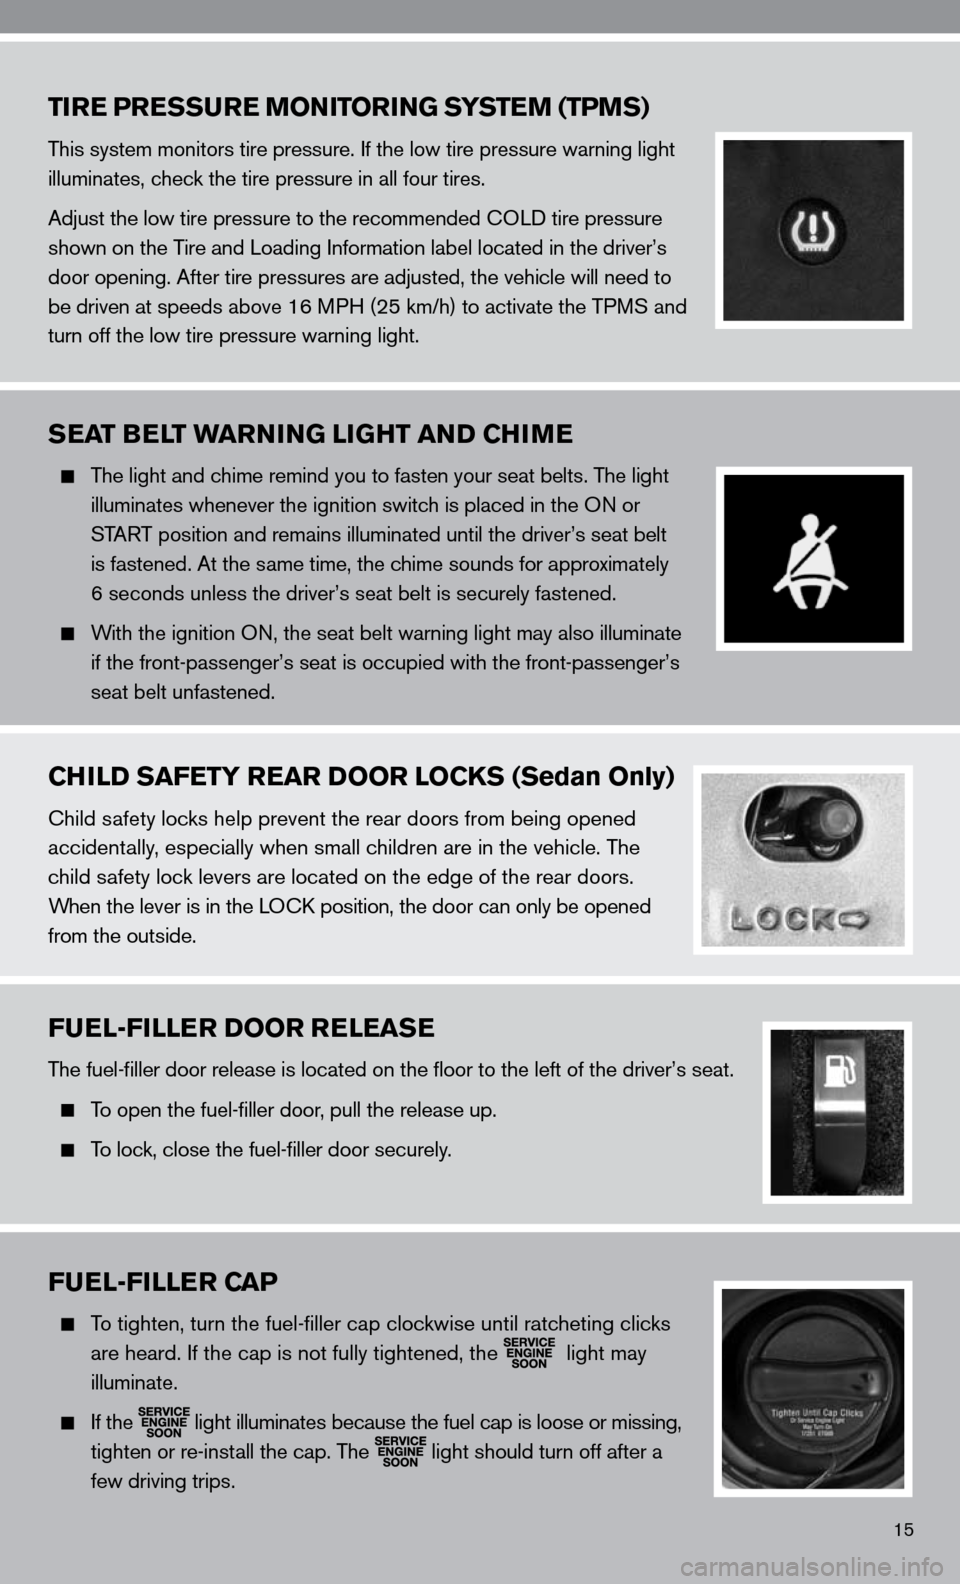
This system monitors tire pressure. if the low tire pressure warning light
illuminates, check the tire pressure in all four tires.
Adjust the low tire pressure to the recommended cOL d tire pressure
shown on the Tire and Loading information label located in the driver’s
door opening. After tire pressures are adjusted, the vehicle will need to
be driven at speeds above 16 MPH (25 km/h) to activate the TPMS and
turn off the low tire pressure warning light.
SEAT BELT WARNING LIGHT AND CHIME
The light and chime remind you to fasten your seat belts. The light
illuminates whenever the ignition switch is placed in the O n or
START position and remains illuminated until the driver’s seat belt
is fastened. At the same time, the chime sounds for approximately
6 seconds unless the driver’s seat belt is securely fastened.
With the ignition O n, the seat belt warning light may also illuminate
if the front-passenger’s seat is occupied with the front-passenger’s
seat belt unfastened.
CHILD SAFETY REAR DOOR LOCKS (Sedan Only)
child safety locks help prevent the rear doors from being opened
accidentally, especially when small children are in the vehicle. The
child safety lock levers are located on the edge of the rear doors.
When the lever is in the LO ck position, the door can only be opened
from the outside.
FUEL-FILLER DOOR RELEASE
The fuel-filler door release is located on the floor to the left of t\
he driver’s seat.
To open the fuel-filler door, pull the release up.
To lock, close the fuel-filler door securely.
FUEL-FILLER CAP
To tighten, turn the fuel-filler cap clockwise until ratcheting clicks
are heard. if the cap is not fully tightened, the
light may
illuminate.
if the
light illuminates because the fuel cap is loose or missing,
tighten or re-install the cap. The
light should turn off after a
few driving trips.
Page 20 of 40

18
HOMELINK® UNIVERSAL TRANSCEIVER (if so equipped)
SYSTeM OPeRATin G TiPS
Garage doors, electrical gates, entry doors, etc., will be activated during programming. To avoid
injury, make sure that people and objects are clear of all doors or gates duri\
ng programming.
Your vehicle’s engine should be turned off while programming the HomeL\
ink
® Transceiver.
To program your HomeLink® Transceiver to operate a garage door, gate, or entry door
opener, home or office lighting, you need to be at the same location as the device.
NOTE: Garage door openers (manufactured after 1996) have “rolling code protection.”
To program a garage door opener equipped with “rolling code protection\
,” you will
need to use a ladder to get to the garage door opener motor to be able to access the
“smart” or “learn” program button.
PROGRAMMin G YOuR HOMeL ink® uni Ve RSAL TRA nScei Ve R
(Mirror, Sun Visor or Overhead console)
1. To begin, press and hold the two outer
HomeLink® buttons (to clear the memory)
until the indicator light blinks slowly (after
20 seconds). Release both buttons.
2. Position the end of the hand-held transmitter
1-3 in (26-76 mm) away from the HomeLink
®
surface.
3. using both hands, simultaneously press and hold both the HomeLink
® button you want to
program and the hand-held transmitter button. DO NOT release the buttons until step 4
has been completed.
FOLDING DOWN THE REAR SEATS
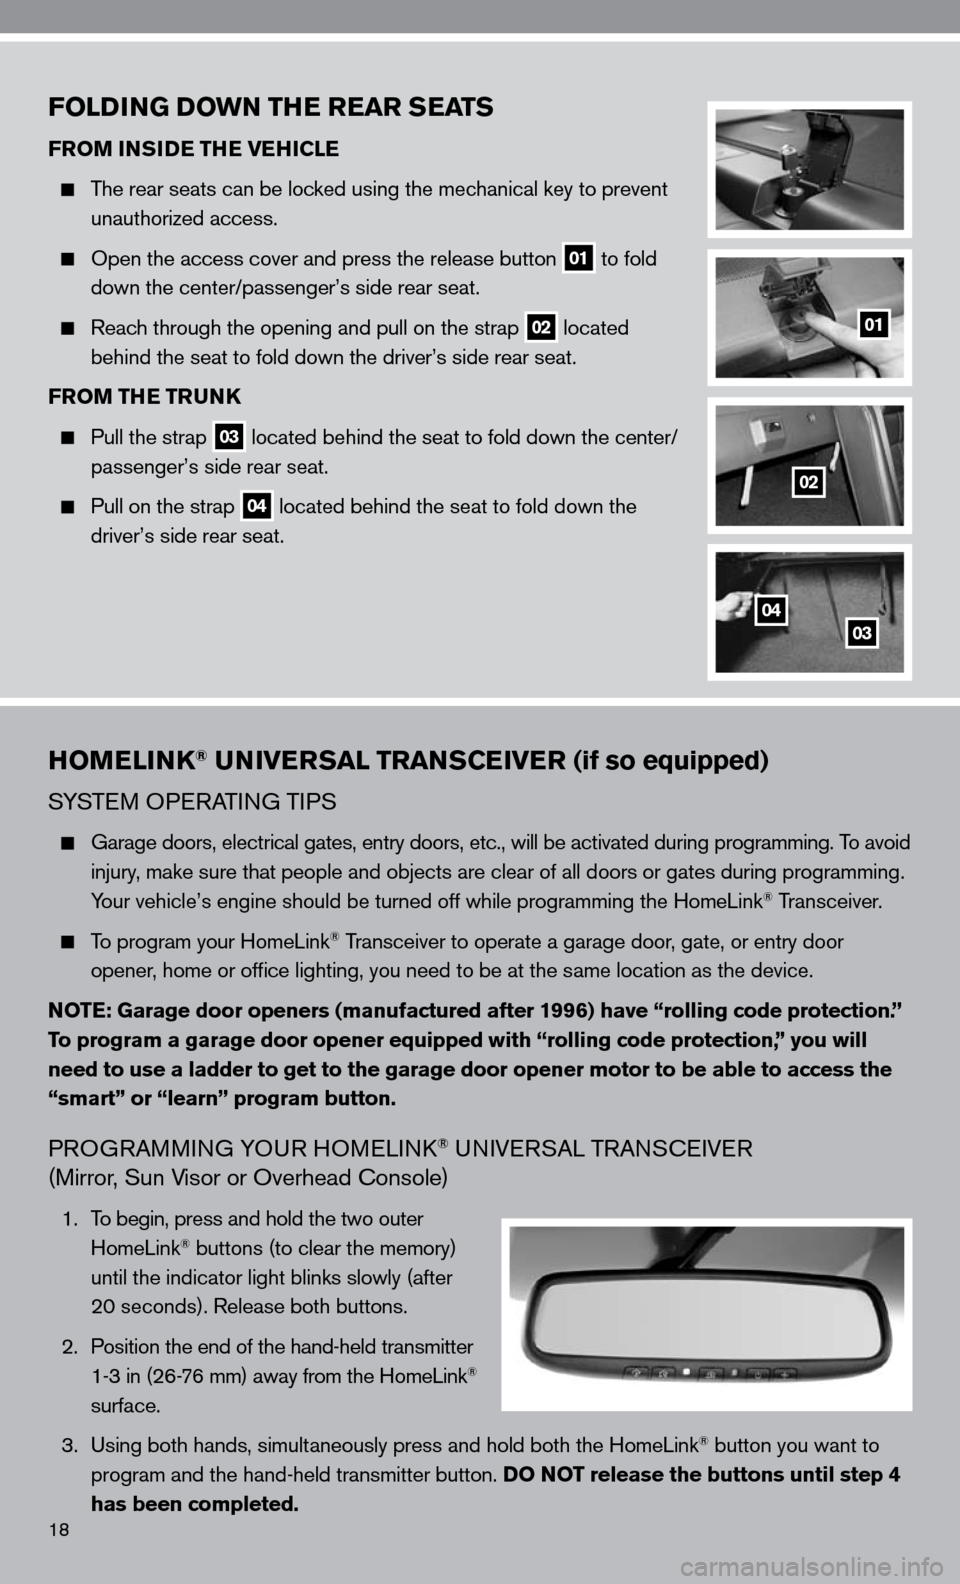
FROM INSIDE THE VEHICLE
The rear seats can be locked using the mechanical key to prevent
unauthorized access.
Open the access cover and press the release button 01 to fold
down the center/passenger’s side rear seat.
Reach through the opening and pull on the strap 02 located
behind the seat to fold down the driver’s side rear seat.
FROM THE TRUNK
Pull the strap 03 located behind the seat to fold down the center/
passenger’s side rear seat.
Pull on the strap 04 located behind the seat to fold down the
driver’s side rear seat.
01
02
0304