2010 NISSAN 370Z COUPE manual radio set
[x] Cancel search: manual radio setPage 118 of 409
Black plate (118,1)
Model "Z34-D" EDITED: 2009/ 9/ 10
3. Within 20 seconds of performing Step 2,push and hold the power door lock switch to
the
position (UNLOCK) for more than 5
seconds.
4. When activated, the hazard indicator will flash twice. When deactivated, the hazard
indicator will flash once.
5. The ignition switch must be placed in the OFF and ON position again between each
setting change.
When the automatic door unlock system is
deactivated, the doors do not unlock when the
ignition switch is placed in the OFF position. To
unlock the door manually, use the inside lock
knob or the power door lock switch (driver’s or
front passenger’s side) .
WARNING
. Radio waves could adversely affect
electric medical equipment. Those
who use a pacemaker should con-
tact the electric medical equipment
manufacturer for the possible influ-
ences before use.
. The Intelligent Key transmits radio
waves when the buttons are
pushed. The FAA advises that the
radio waves may affect aircraft na-
vigation and communication sys-
tems. Do not operate the
Intelligent Key while on an airplane.
Makesurethebuttonsarenot
operated unintentionally when the
unit is stored during a flight.
The Intelligent Key system can operate all the
door and rear hatch/trunk lid locks using the
remote controller function or pushing the re-
quest switch on the vehicle without taking the
key out from a pocket or purse. The operating
environment and/or conditions may affect the
Intelligent Key system operation.
Be sure to read the following before using the
Intelligent Key system.
CAUTION
. Be sure to carry the Intelligent Key
with you when operating the vehi-
cle.
. Never leave the Intelligent Key in
the vehicle when you leave the
vehicle.
The Intelligent Key is always communicating with
the vehicle as it receives radio waves. The
Intelligent Key system transmits weak radio
waves. Environmental conditions may interfere
with the operation of the Intelligent Key system
under the following operating conditions.
. When operating near a location where
strong radio waves are transmitted, such
as a TV tower, power station and broad-
casting station.
. When in possession of wireless equipment,
such as a cellular telephone, transceiver,
and CB radio.
. When the Intelligent Key is in contact with or
covered by metallic materials.
. When any type of radio wave remote control
is used nearby.
. When the Intelligent Key is placed near an
electric appliance such as a personal
INTELLIGENT KEY SYSTEM
3-6
Pre-driving checks and adjustments
Page 189 of 409
Black plate (189,1)
Model "Z34-D" EDITED: 2009/ 9/ 10
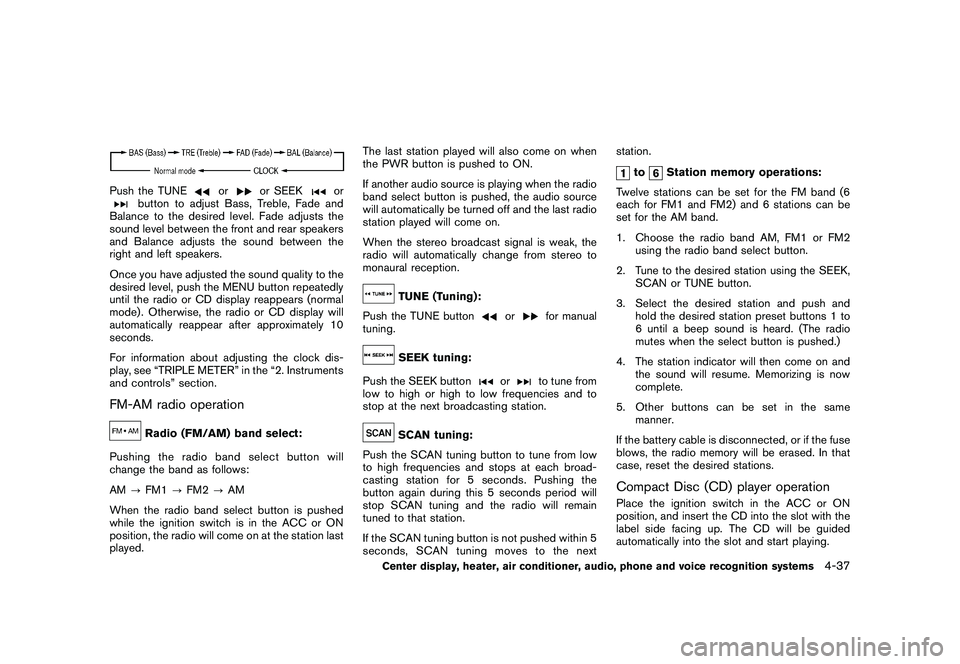
Push the TUNE
or
or SEEK
or
button to adjust Bass, Treble, Fade and
Balance to the desired level. Fade adjusts the
sound level between the front and rear speakers
and Balance adjusts the sound between the
right and left speakers.
Once you have adjusted the sound quality to the
desired level, push the MENU button repeatedly
until the radio or CD display reappears (normal
mode) . Otherwise, the radio or CD display will
automatically reappear after approximately 10
seconds.
For information about adjusting the clock dis-
play, see “TRIPLE METER” in the “2. Instruments
and controls” section.
FM-AM radio operation
Radio (FM/AM) band select:
Pushing the radio band select button will
change the band as follows:
AM ?FM1 ?FM2 ?AM
When the radio band select button is pushed
while the ignition switch is in the ACC or ON
position, the radio will come on at the station last
played. The last station played will also come on when
the PWR button is pushed to ON.
If another audio source is playing when the radio
band select button is pushed, the audio source
will automatically be turned off and the last radio
station played will come on.
When the stereo broadcast signal is weak, the
radio will automatically change from stereo to
monaural reception.
TUNE (Tuning):
Push the TUNE button
or
for manual
tuning.
SEEK tuning:
Push the SEEK button
or
to tune from
low to high or high to low frequencies and to
stop at the next broadcasting station.
SCAN tuning:
Push the SCAN tuning button to tune from low
to high frequencies and stops at each broad-
casting station for 5 seconds. Pushing the
button again during this 5 seconds period will
stop SCAN tuning and the radio will remain
tuned to that station.
If the SCAN tuning button is not pushed within 5
seconds, SCAN tuning moves to the next station.
to
Station memory operations:
Twelve stations can be set for the FM band (6
each for FM1 and FM2) and 6 stations can be
set for the AM band.
1. Choose the radio band AM, FM1 or FM2 using the radio band select button.
2. Tune to the desired station using the SEEK, SCAN or TUNE button.
3. Select the desired station and push and hold the desired station preset buttons 1 to
6 until a beep sound is heard. (The radio
mutes when the select button is pushed.)
4. The station indicator will then come on and the sound will resume. Memorizing is now
complete.
5. Other buttons can be set in the same manner.
If the battery cable is disconnected, or if the fuse
blows, the radio memory will be erased. In that
case, reset the desired stations.
Compact Disc (CD) player operationPlace the ignition switch in the ACC or ON
position, and insert the CD into the slot with the
label side facing up. The CD will be guided
automatically into the slot and start playing.
Center display, heater, air conditioner, audio, phone and voice recognition systems
4-37
Page 194 of 409
Black plate (194,1)
Model "Z34-D" EDITED: 2009/ 9/ 10
monaural reception.
TUNE (Tuning):
. For AM and FM radio
Push the TUNE button
or
for
manual tuning.
. For XM Satellite Radio
Push the TUNE button
or
to seek
channels from all of the categories when any
CAT is not selected.
SEEK tuning/CATEGORY
(CAT):
. For AM and FM radio
Push the SEEK button
or
to tune
from low to high or high to low frequencies
and to stop at the next broadcasting station.
. For XM Satellite Radio
Push the SEEK button
or
to tune
to the first channel of the next or previous
category.
During satellite radio reception, the following
notices will be displayed under certain condi-
tions.
. NO SIGNAL (No signal is received while the SAT tuner is connected.)
. OFF AIR (Broadcasting signed off)
. CHECK ANTENNA (Antenna connection
error)
. LOADING (When the initial setting is
performed)
. UPDATING (When the satellite radio sub-
scription is not active)
SCAN tuning:
Push the SCAN tuning button to tune from low
to high frequencies and stop at each broad-
casting station/channel for 5 seconds. Pushing
the button again during this 5 seconds period
will stop SCAN tuning and the radio will remain
tuned to that station/channel.
If the SCAN tuning button is not pushed within 5
seconds, SCAN tuning moves to the next
station/channel.
*1
to
*6
Station memory operations:
Eighteen stations/channels can be set for the
SAT band (6 each for XM1, XM2 and XM3) ,
twelve can be set for the FM band (6 each for
FM1 and FM2) , and 6 can be set for the AM
band.
1. Choose the radio band using the radio band select button. 2. Tune to the desired station/channel using
the SEEK, SCAN or TUNE button.
3. Push and hold the desired radio station preset button
*1
to*6
until a beep sound
is heard. (The radio mutes when the select
button is pushed.)
4. The station indicator will then come on and the sound will resume. Memorizing is now
complete.
5. Other buttons can be set in the same manner.
If the battery cable is disconnected, or if the fuse
opens, the radio memory will be erased. In that
case, reset the desired stations.
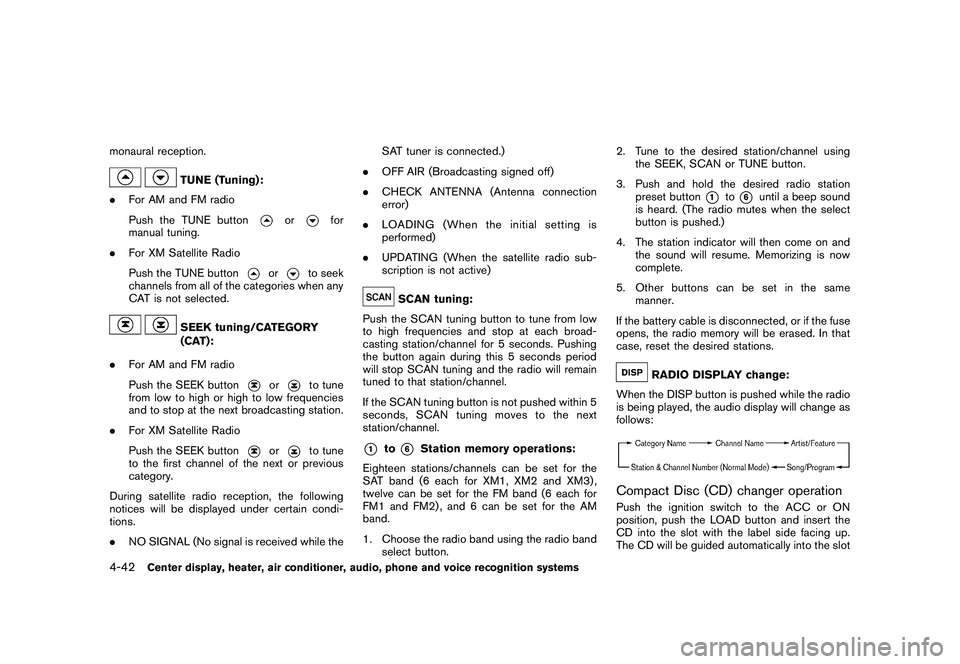
RADIO DISPLAY change:
When the DISP button is pushed while the radio
is being played, the audio display will change as
follows:
Compact Disc (CD) changer operationPush the ignition switch to the ACC or ON
position, push the LOAD button and insert the
CD into the slot with the label side facing up.
The CD will be guided automatically into the slot
4-42
Center display, heater, air conditioner, audio, phone and voice recognition systems
Page 198 of 409
Black plate (198,1)
Model "Z34-D" EDITED: 2009/ 9/ 10
ON·OFF/Volume control:
Push the ignition switch to the ACC or ON
position, and then push the ON·OFF button
while the system is off to turn on the last audio
source (i.e. FM or CD) , which was playing
immediately before the system was turned off.
While the system is on, pushing the ON·OFF
button turns the system off.
Turn the VOL control knob to adjust the volume.
Adjusting tone quality and speaker bal-
ance:
To adjust Bass, Treble, Balance and Fade, push
the Audio control knob. When the display shows
the setting you want to change (Bass, Treble,
Balance and Fade) , rotate the Audio control
knob to set the desired setting. For the other
setting methods, see “HOW TO USE SETTING
BUTTON” earlier in this section.
This vehicle has some sound effect functions as
follows:
.Speed Sensitive Vol.
For more details, see “VEHICLE INFORMATION
AND SETTINGS (models with navigation sys-
tem)” earlier in this section. Switching the display:
Pushing the DISC·AUX button will switch the
displays as follows:
iPod
®/USB
?CD/DVD ?Music Box ?
Bluetooth
®Audio ?AUX ?iPod
®/USB
FM-AM-SAT radio operation
radio (FM/AM) band select:
Pushing the radio band select button will
change the band as follows:
AM ?FM1 ?FM2 ?AMradio (SAT) band select:
Pushing the radio band select button will
change the band as follows:
XM1 ?XM2 ?XM3 ?XM1
When the radio band select button is pushed
while the ignition switch is in the ACC or ON
position, the radio will come on at the channel
last played.
The last channel played will also come on when
the ON·OFF button is pushed to ON.
The satellite radio is not available in Alaska,
Hawaii and Guam. If another audio source is playing when the radio
band select button is turned to ON, the audio
source will automatically be turned off and the
last radio channel played will come on.
When the stereo broadcast signal is weak, the
radio will automatically change from stereo to
monaural reception.
TUNE (Tuning):
.
For AM and FM radio
Turn the radio TUNE knob for manual tuning.
. For XM Satellite Radio
Turn the radio TUNE knob to seek channels
from all of the categories when any category
is not selected.
SEEK tuning/CATEGORY
(CAT):
. For AM and FM radio
Push the SEEK button
or
to tune
from low to high or high to low frequencies
and to stop at the next broadcasting station.
. For XM Satellite Radio
Push the SEEK button
or
to tune
to the first channel of the next or previous
category.
4-46
Center display, heater, air conditioner, audio, phone and voice recognition systems
Page 223 of 409
Black plate (223,1)
Model "Z34-D" EDITED: 2009/ 9/ 10
alcohol intended for industrial use.
. A new disc may be rough on the inner and
outer edges. Remove the rough edges by
rubbing the inner and outer edges with the
side of a pen or pencil as illustrated.
USB memory.Never touch the terminal portion of the USB
memory.
. Do not place heavy objects on the USB
memory.
. Do not store the USB memory in highly
humid locations.
. Do not expose the USB memory to direct
sunlight.
. Do not spill any liquids on the USB memory.
Refer to the USB memory Owner’s Manual for
the details.
SAA2555
With navigation system
SAA2556
Without navigation system
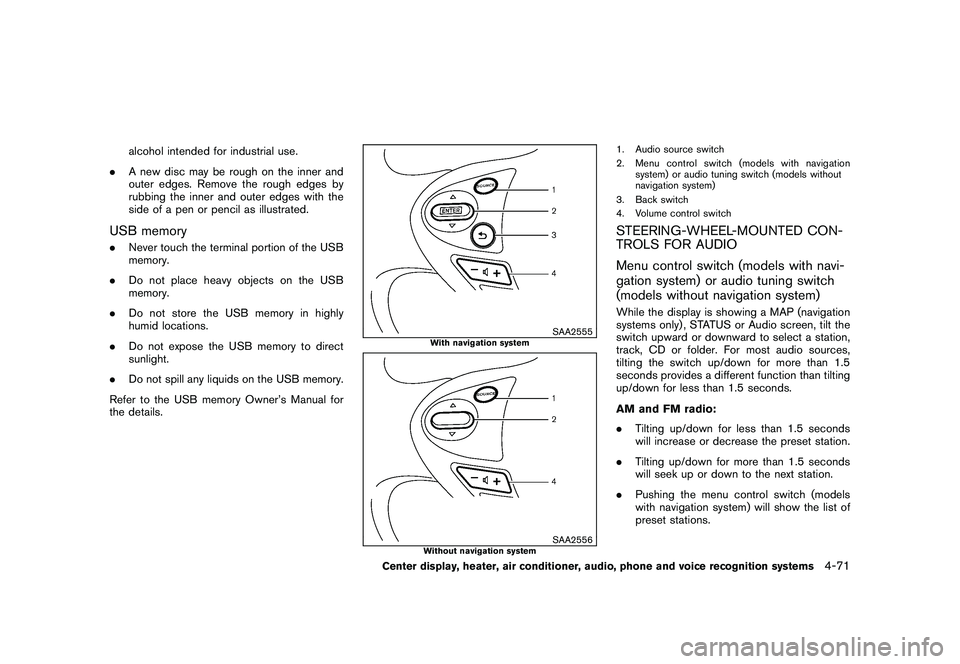
1. Audio source switch
2. Menu control switch (models with navigation system) or audio tuning switch (models without
navigation system)
3. Back switch
4. Volume control switchSTEERING-WHEEL-MOUNTED CON-
TROLS FOR AUDIO
Menu control switch (models with navi-
gation system) or audio tuning switch
(models without navigation system)While the display is showing a MAP (navigation
systems only) , STATUS or Audio screen, tilt the
switch upward or downward to select a station,
track, CD or folder. For most audio sources,
tilting the switch up/down for more than 1.5
seconds provides a different function than tilting
up/down for less than 1.5 seconds.
AM and FM radio:
. Tilting up/down for less than 1.5 seconds
will increase or decrease the preset station.
. Tilting up/down for more than 1.5 seconds
will seek up or down to the next station.
. Pushing the menu control switch (models
with navigation system) will show the list of
preset stations.
Center display, heater, air conditioner, audio, phone and voice recognition systems
4-71
Page 227 of 409
Black plate (227,1)
Model "Z34-D" EDITED: 2009/ 9/ 10
procedure is required anymore. Your phone is
automatically connected with the in-vehicle
phonemodulewhentheignitionswitchis
pushed to the ON position with the registered
cellular phone turned on and carried in the
vehicle.
You can register up to 5 different Bluetooth
®
cellular phones in the in-vehicle phone module.
However, you can talk on only one cellular phone
at a time.
The NISSAN Voice Recognition system sup-
ports the phone commands, so dialing a phone
number using your voice is possible. For more
details, see “NISSAN VOICE RECOGNITION
SYSTEM (models with navigation system)” later
in this section; page 4-98.
Before using the Bluetooth
®Hands-Free Phone
System, refer to the following notes.
. Set up the wireless connection between a
compatible cellular phone and the in-vehicle
phone module before using the Bluetooth
®
Hands-Free Phone System.
. Some Bluetooth
®enabled cellular phones
may not be recognized by the in-vehicle
phone module. Please visit
www.nissanusa.com/bluetooth for a recom-
mended phone list.
. You will not be able to use a hands-free
phone under the following conditions: — Your vehicle is outside of the telephone
service area.
— Your vehicle is in an area where it is difficult to receive radio waves; such as in
a tunnel, in an underground parking
garage, behind a tall building or in a
mountainous area.
— Your cellular phone is locked in order not to be dialed.
. When the radio wave condition is not ideal
or ambient sound is too loud, it may be
difficult to hear the other person’s voice
during a call.
. Immediatelyaftertheignitionswitchis
pushed to the ON position, it may be
impossible to receive a call for a short
period of time.
. Do not place the cellular phone in an area
surrounded by metal or far away from the in-
vehicle phone module to prevent tone quality
degradation and wireless connection dis-
ruption.
. While a cellular phone is connected through
the Bluetooth
®wireless connection, the
battery power of the cellular phone may
discharge quicker than usual.
. If the Bluetooth®Hands-Free Phone System
seems to be malfunctioning, please visit www.nissanusa.com/bluetooth for trouble-
shooting help.
. Some cellular phones or other devices may
cause interference or a buzzing noise to
come from the audio system speakers.
Storing the device in a different location
may reduce or eliminate the noise.
. Refer to the cellular phone Owner’s Manual
regarding the telephone pairing procedure
specific to your phone, battery charging,
cellular phone antenna, etc.
. The antenna display on the monitor will not
coincide with the antenna display of some
cellular phones.
. Keep the interior of the vehicle as quiet as
possible to hear the caller’s voice clearly as
well as to minimize its echoes.
. If reception between callers is unclear,
adjusting the incoming or outgoing call
volume may improve the clarity.
REGULATORY INFORMATION
FCC Regulatory information— CAUTION: To maintain compliance with
FCC’s RF exposure guidelines, use only
the supplied antenna. Unauthorized antenna,
modification, or attachments could damage
the transmitter and may violate FCC regula-
tions.
Center display, heater, air conditioner, audio, phone and voice recognition systems
4-75
Page 279 of 409
Black plate (279,1)
Model "Z34-D" EDITED: 2009/ 9/ 10
the tire (for models equipped with
the emergency tire puncture repair
kit) .
. NISSAN recommends using only
NISSAN Genuine Emergency Tire
Sealant provided with your vehicle.
Other tire sealants may damage the
valve stem seal which can cause the
tire to lose air pressure (for models
equipped with the emergency tire
puncture repair kit) .
CAUTION
.The TPMS may not function properly
when the wheels are equipped with
tire chains or the wheels are buried
in snow.
. Do not place metalized film or any
metal parts (antenna, etc.) on the
windows. This may cause poor re-
ception of the signals from the tire
pressure sensors, and the TPMS will
not function properly.
Some devices and transmitters may temporarily
interfere with the operation of the TPMS and
cause the low tire pressure warning light to
illuminate. Some examples are: — Facilities or electric devices using similar
radio frequencies are near the vehicle.
— If a transmitter set to similar frequencies is being used in or near the vehicle.
— If a computer (or similar equipment) or a DC/ AC converter is being used in or near the
vehicle.
FCC Notice:
Changes or modifications not expressly
approved by the party responsible for
compliance could void the user’s authority
to operate the equipment.
This device complies with Part 15 of the
FCC Rules and RSS-210 of Industry Cana-
da.
Operation is subject to the following two
conditions: (1) This device may not cause
harmful interference, and (2) this device
must accept any interference received,
including interference that may cause un-
desired operation of the device.
AVOIDING COLLISION AND ROLL-
OVER
WARNING
Failure to operate this vehicle in a safe
and prudent manner may result in loss
of control or an accident.
Be alert and drive defensively at all times. Obey
all traffic regulations. Avoid excessive speed,
high speed cornering, or sudden steering
maneuvers, because these driving practices
could cause you to lose control of your vehicle.
As with any vehicle, a loss of control could
result in a collision with other vehicles or
objects, or cause the vehicle to rollover,
particularly if the loss of control causes the
vehicle to slide sideways. Be attentive at all
times, and avoid driving when tired. Never drive
when under the influence of alcohol or drugs
(including prescription or over-the-counter
drugs which may cause drowsiness) . Always
wear your seat belt as outlined in the “SEAT
BELTS” in the “1. Safety — Seats, seat belts and
supplemental restraint system” section of this
manual, and also instruct your passengers to do
so.
Seat belts help reduce the risk of injury in
collisions and rollovers. In a rollover crash, an
unbelted or improperly belted person is
Starting and driving
5-5
Page 405 of 409
Black plate (5,1)
Maintenance...................................... 8-5
Seat belt usage .................................. 1-8
Supplemental restraint system ................ 1-27
When starting and driving ....................... 5-2
Push starting ....................................... 6-17
Push warning
(Automatic Transmission models) ................. 2-17
Push-button ignition switch ................... 5-7, 5-8
R
Radio ............................................... 4-24
Car phone or CB radio ........................ 4-74
FM-AM radio with Compact Disc (CD)
player ........................................... 4-36
FM-AM-SAT radio with compact disc
(CD) changer (models without navigation
system) ......................................... 4-41
FM-AM-SAT radio with compact disc
(CD) player (models with navigation
system) ......................................... 4-45
Rapid air pressure loss .............................. 5-6
Readiness for inspection/maintenance (I/M)
test (US only) ...................................... 9-22
Rear hatch .......................................... 3-17
Rear hatch opener ................................. 3-17
Rear hatch opener switch ......................... 3-17
Rear parcel box .................................... 2-40
Rear window defroster switch .................... 2-29
Recorders, Event data ............................. 9-23
Registering your vehicle in another country ...... 9-10
Remote keyless entry system ..................... 3-13
Repairing flat tire
(with emergency tire puncture repair kit) ........... 6-7
Reporting safety defects (US only) ............... 9-22
Rollover ............................................... 5-5 Roof, Soft top
...................................... 3-21
S
Safety Child seat belts ................................ 1-11
Reporting safety defects (US only) ........... 9-22
Satellite radio operation .................... 4-41, 4-46
Seat adjustment Front manual seat adjustment. .................. 1-4
Front power seat adjustment ................... 1-3
Front seats ....................................... 1-3
Seat belt(s) Child safety ..................................... 1-11
Infants ........................................... 1-11
Injured persons ................................. 1-13
Larger children ................................. 1-11
Precautions on seat belt usage ................. 1-8
Pregnant women ............................... 1-13
Seat belt cleaning ............................... 7-7
Seat belt extenders ............................ 1-16
Seat belt maintenance ......................... 1-16
Seat belt warning light and chime ............ 2-11
Seat belts ........................................ 1-8
Seat belts with pretensioners ................. 1-38
Three-point type ............................... 1-13
Seat(s) Climate controlled seats. ...................... 2-36
Heated seats ................................... 2-34
Seats .............................................. 1-2
Secondary rear hatch release ..................... 3-18
Secondary trunk lid release ....................... 3-21
Security system, Vehicle security system ........ 2-25Security system (NISSAN Vehicle Immobilizer
System) , Engine start
.............................. 2-26
Selector lever Shift lock release .............................. 5-15
Servicing air conditioner ........................... 4-24
SETTING button ................................... 4-10
Shift “P” warning
(Automatic Transmission models) ................. 2-17
Shift lock release Transmission ................................... 5-15
Shifting Automatic transmission ........................ 5-12
Manual transmission ........................... 5-16
Small light indicator light .......................... 2-14
Soft top Care and cleaning ............................... 7-3
If the top does not open or close ............ 3-28
Opening using the Intelligent Key ............ 3-26
Soft top indicator light .................. 2-14, 3-24
Soft top operation ............................. 3-21
Spare tire ............................................. 9-8
Spark plugs ........................................ 8-17
Speedometer ......................................... 2-5
Starting Before starting the engine .................... 5-10
Jump starting ................................... 6-15
Precautions when starting and driving ......... 5-2
Push starting ................................... 6-17
Starting the engine ............................ 5-11
STATUS button ...................................... 4-6
Status light, Front passenger air bag ............ 1-33
Steering Power steering fluid ........................... 8-12
Power steering system ........................ 5-24
10-5
Model "Z34-D" EDITED: 2009/ 9/ 10