Page 348 of 409

Black plate (350,1)
Model "Z34-D" EDITED: 2009/ 9/ 10
vehicle jack-up points.
. A suitable adapter should be attached to
the jack stand saddle.
5. Remove the plastic engine undercover. a. Remove the small plastic clips at thecenter of the undercover.
b. Then remove the bolts that hold the undercover in place.
CAUTION
Make sure the correct lifting and sup-
port points are used to avoid vehicle
damage.
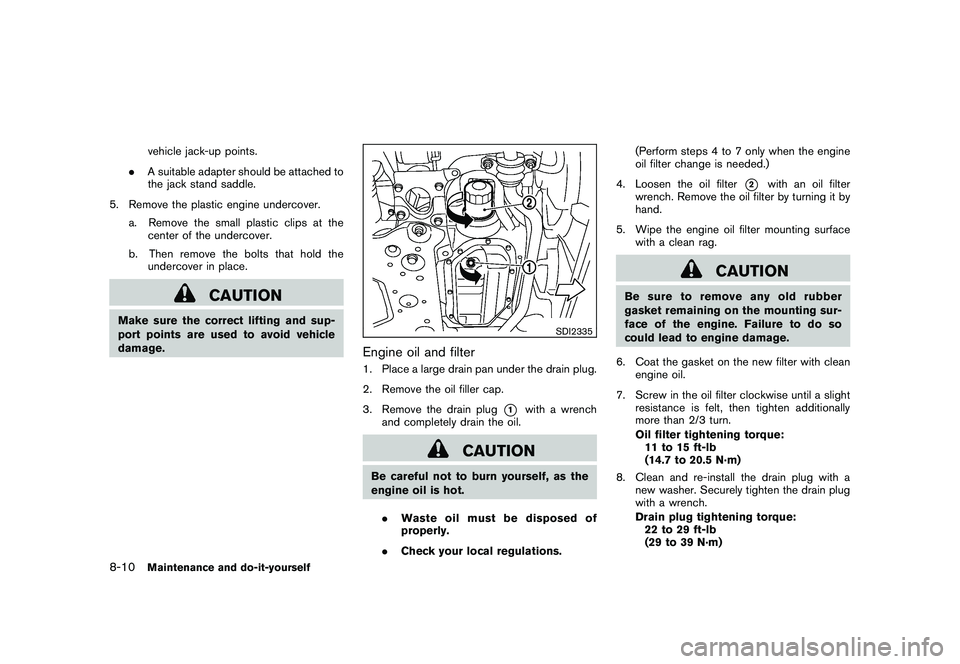
SDI2335
Engine oil and filter1. Place a large drain pan under the drain plug.
2. Remove the oil filler cap.
3. Remove the drain plug
*1
with a wrench
and completely drain the oil.
CAUTION
Be careful not to burn yourself, as the
engine oil is hot.
. Waste oil must be disposed of
properly.
. Check your local regulations. (Perform steps 4 to 7 only when the engine
oil filter change is needed.)
4. Loosen the oil filter
*2
with an oil filter
wrench. Remove the oil filter by turning it by
hand.
5. Wipe the engine oil filter mounting surface with a clean rag.
CAUTION
Be sure to remove any old rubber
gasket remaining on the mounting sur-
face of the engine. Failure to do so
could lead to engine damage.
6. Coat the gasket on the new filter with clean engine oil.
7. Screw in the oil filter clockwise until a slight resistance is felt, then tighten additionally
more than 2/3 turn.
Oil filter tightening torque:11 to 15 ft-lb
(14.7 to 20.5 N·m)
8. Clean and re-install the drain plug with a new washer. Securely tighten the drain plug
with a wrench.
Drain plug tightening torque:22 to 29 ft-lb
(29 to 39 N·m)
8-10
Maintenance and do-it-yourself
Page 351 of 409

Black plate (353,1)
Model "Z34-D" EDITED: 2009/ 9/ 10
SDI2025A
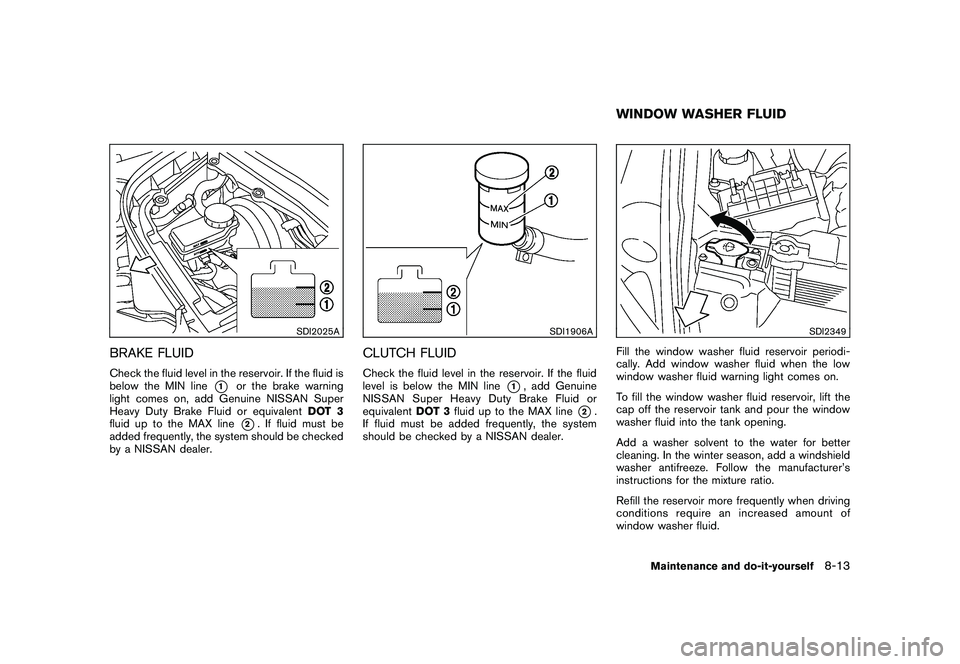
BRAKE FLUIDCheck the fluid level in the reservoir. If the fluid is
below the MIN line
*1
or the brake warning
light comes on, add Genuine NISSAN Super
Heavy Duty Brake Fluid or equivalent DOT 3
fluid up to the MAX line*2. If fluid must be
added frequently, the system should be checked
by a NISSAN dealer.
SDI1906A
CLUTCH FLUIDCheck the fluid level in the reservoir. If the fluid
level is below the MIN line
*1, add Genuine
NISSAN Super Heavy Duty Brake Fluid or
equivalent DOT 3fluid up to the MAX line
*2.
If fluid must be added frequently, the system
should be checked by a NISSAN dealer.
SDI2349
Fill the window washer fluid reservoir periodi-
cally. Add window washer fluid when the low
window washer fluid warning light comes on.
To fill the window washer fluid reservoir, lift the
cap off the reservoir tank and pour the window
washer fluid into the tank opening.
Add a washer solvent to the water for better
cleaning. In the winter season, add a windshield
washer antifreeze. Follow the manufacturer’s
instructions for the mixture ratio.
Refill the reservoir more frequently when driving
conditions require an increased amount of
window washer fluid.WINDOW WASHER FLUID
Maintenance and do-it-yourself
8-13
Page 358 of 409

Black plate (360,1)
Model "Z34-D" EDITED: 2009/ 9/ 10
If the brakes do not operate properly, have the
brakes checked by a NISSAN dealer.SELF-ADJUSTING BRAKESYour vehicle is equipped with self-adjusting
brakes.
The disc-type brakes self-adjust every time the
brake pedal is applied.
WARNING
See a NISSAN dealer for a brake
system check if the brake pedal height
does not return to normal.BRAKE PAD WEAR WARNINGThe disc brake pads have audible wear warn-
ings. When a brake pad requires replacement, it
will make a high pitched scraping sound when
the vehicle is in motion. This scraping sound will
first occur only when the brake pedal is
depressed. After more wear of the brake pad
the sound will always be heard even if the brake
pedal is not depressed. Have the brakes
checked as soon as possible if the wear warning
sound is heard.
Under some driving or climate conditions,
occasional brake squeak, squeal or other noise
may be heard. Occasional brake noise during
light to moderate stops is normal and does not affect the function or performance of the brake
system.
Proper brake inspection intervals should
be followed.
For additional information, see the
maintenance log section of your “NISSAN
Service and Maintenance Guide”.
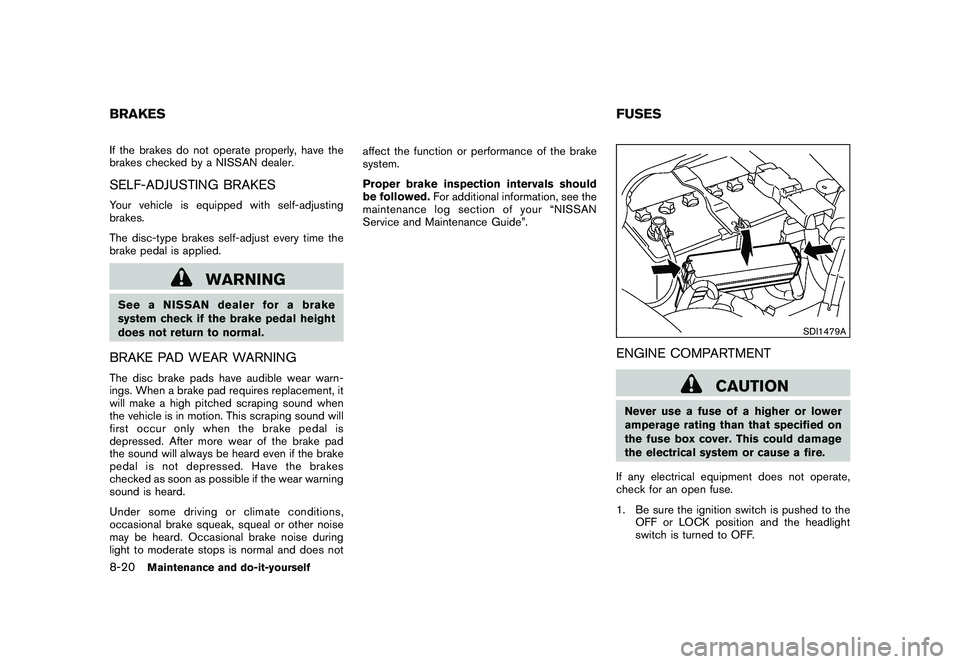
SDI1479A
ENGINE COMPARTMENT
CAUTION
Never use a fuse of a higher or lower
amperage rating than that specified on
the fuse box cover. This could damage
the electrical system or cause a fire.
If any electrical equipment does not operate,
check for an open fuse.
1. Be sure the ignition switch is pushed to the OFF or LOCK position and the headlight
switch is turned to OFF.
BRAKES FUSES8-20
Maintenance and do-it-yourself
Page 360 of 409
Black plate (362,1)
Model "Z34-D" EDITED: 2009/ 9/ 10
SDI2361
PASSENGER COMPARTMENT
CAUTION
Never use a fuse of a higher or lower
amperage rating than that specified on
the fuse box cover. This could damage
the electrical system or cause a fire.
If any electrical equipment does not operate,
check for an open fuse.
1. Be sure the ignition switch is pushed to the OFF or LOCK position and the headlight
switch is turned to OFF. 2. Open the fuse box lid.
3. Remove the fuse with the fuse puller
*A
.
4. If the fuse is open, replace it with a new fuse. Spare fuses are stored in the fuse box.
5. If a new fuse also opens, have the electrical system checked and repaired by a NISSAN
dealer.
SDI2451
CAUTION
Be careful not to allow children to
swallow the battery and removed parts.INTELLIGENT KEY BATTERY
REPLACEMENT
8-22
Maintenance and do-it-yourself
Page 362 of 409
Black plate (364,1)
Model "Z34-D" EDITED: 2009/ 9/ 10
SDI2351
COUPE1. Headlight (high- and low-beam)
2. Map light
3. Front park light
4. Front side marker light
5. Front turn signal light
6. Side turn signal light
7. High-mounted stop light
8. Cargo light
9. Rear combination light (rear turn signal/tail/stop/side marker/back-up light)
10. License plate light
11. Rear fog light (if so equipped)
LIGHTS8-24
Maintenance and do-it-yourself
Page 363 of 409
Black plate (365,1)
Model "Z34-D" EDITED: 2009/ 9/ 10
SDI2448
ROADSTER1. Headlight (high- and low-beam)
2. Map light
3. Front park light
4. Front side marker light
5. Front turn signal light
6. Side turn signal light
7. High-mounted stop light
8. Trunk light
9. Cargo area courtesy light
10. Rear combination light (rear turn signal/tail/stop/side marker/back-up light)
11. License plate light
12. Rear fog light (if so equipped)
Maintenance and do-it-yourself
8-25
Page 364 of 409

Black plate (366,1)
Model "Z34-D" EDITED: 2009/ 9/ 10
HEADLIGHTSFog may temporarily form inside the lens of the
exterior lights in the rain or in a car wash. A
temperature difference between the inside and
the outside of the lens causes the fog. This is
not a malfunction. If large drops of water collect
inside the lens, contact a NISSAN dealer.Replacing
WARNINGHIGH VOLTAGE
When xenon headlights are on, they
produce a high voltage. To prevent an
electric shock, never attempt to modify
or disassemble. Always have your xe-
non headlights replaced at a NISSAN
dealer. For additional information, see
“HEADLIGHT AND TURN SIGNAL
SWITCH” in the “2. Instruments and
controls” section.
Use the same number and wattage shown in the
following chart as originally installed.
If replacement is required, see a NISSAN dealer.
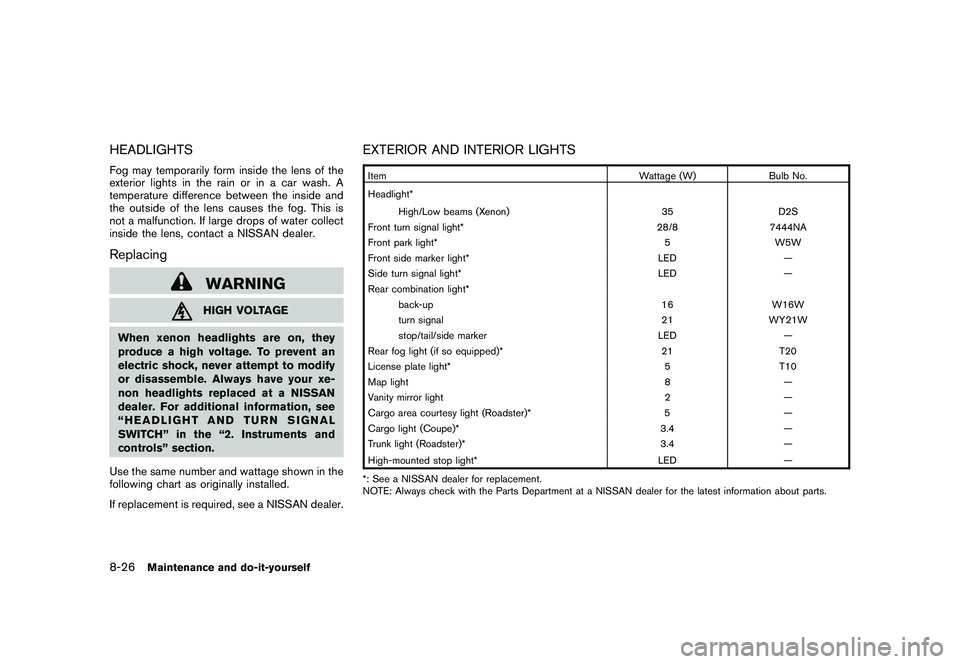
EXTERIOR AND INTERIOR LIGHTSItem Wattage (W)Bulb No.
Headlight* High/Low beams (Xenon) 35D2S
Front turn signal light* 28/87444NA
Front park light* 5W5W
Front side marker light* LED—
Side turn signal light* LED—
Rear combination light* back-up 16W16W
turn signal 21WY21W
stop/tail/side marker LED—
Rear fog light (if so equipped)* 21T20
License plate light* 5T10
Map light 8—
Vanity mirror light 2—
Cargo area courtesy light (Roadster)* 5—
Cargo light (Coupe)* 3.4—
Trunk light (Roadster)* 3.4—
High-mounted stop light* LED
—
*: See a NISSAN dealer for replacement.
NOTE: Always check with the Parts Department at a NISSAN dealer for the latest information about parts.
8-26
Maintenance and do-it-yourself
Page 365 of 409
Black plate (367,1)
Model "Z34-D" EDITED: 2009/ 9/ 10
Replacement proceduresAll other lights are either type A, B, C, D, E or F.
When replacing a bulb, first remove the lens
and/or cover.
SDI1679
SDI2352
Map light
SDI1839
Vanity mirror light
Maintenance and do-it-yourself
8-27