2010 MINI Hardtop 2 Door light
[x] Cancel search: lightPage 13 of 230

MOBILITYAT A GLANCE CONTROLS DRIVING TIPS ENTERTAINMENT
11
NAVIGATION REFERENCE
3Always Open Timer62
7Ignition lock51
8Buttons
* on steering wheel9Horn: the entire surface
10Adjusting the steering wheel47
11Releasing the bonnet176 4Tachometer12
Instrument lighting89
Resetting the trip odometer60
5
Wiper system56
6Switching the ignition on/off and
starting/stopping the engine51
Continuing cruise control
*58
Right:
Storing speed and accelerating or
decelerating
Left:
Increase or reduce volume
Activating/deactivating cruise
control
*58
Telephone
*:
>Press: accepting and ending a
call, starting dialing
* of
selected phone number and
redialing if no phone number is
selected
>Press longer: redialing
Activating/deactivating voice acti-
vation system
*21
Changing radio station
Selecting music track
Scrolling through phone book and
lists with stored phone numbers
Page 14 of 230

Cockpit
12
Displays
1Tachometer60
with indicator and warning lamps13
2Display for
>Clock60
>Outside temperature60
>Current vehicle speed60
>Indicator and warning lamps13
3Resetting the trip odometer604Display for
>Position of automatic transmission
*53
>Computer
*61
>Date of next scheduled service, and
remaining distance to be driven65
>Odometer and trip odometer60
>Initializing the Flat Tire Monitor
*79
>Resetting the Tire Pressure Monitor
*81
>Settings and information64
>Personal Profile settings26
5Instrument lighting89
6Speedometer
with indicator and warning lamps13
7Control Display16
8Fuel gauge61
Page 15 of 230

MOBILITYAT A GLANCE CONTROLS DRIVING TIPS ENTERTAINMENT
13
NAVIGATION REFERENCE
Indicator and warning
lamps
The concept
Indicator and warning lamps can light up in var-
ious combinations and colors in indicator area
1or2.
Some lamps are checked for proper functioning
and thus come on briefly when the engine is
started or the ignition is switched on.
Explanatory text messages
Text messages at the lower edge of the Control
Display explain the meaning of the displayed
indicator and warning lamps.
You can call up more information, e.g. on the
cause of a malfunction and on how to respond,
via Check Control, page70.In urgent cases, this information will be shown
as soon as the corresponding lamp comes on.
Indicator lamps without text messages
The following indicator lamps in display area 1
indicate certain functions:
High beams/headlamp flasher88
Fog lamps
*89
Rear fog lamp
*89
Lamp flashes:
DSC or DTC is regulating the drive
forces in order to maintain driving
stability76
Parking brake applied52
Engine malfunction with adverse effect
on exhaust emissions180
Cruise control58
Turn signals55
Page 17 of 230

MOBILITYAT A GLANCE CONTROLS DRIVING TIPS ENTERTAINMENT
15
NAVIGATION REFERENCE
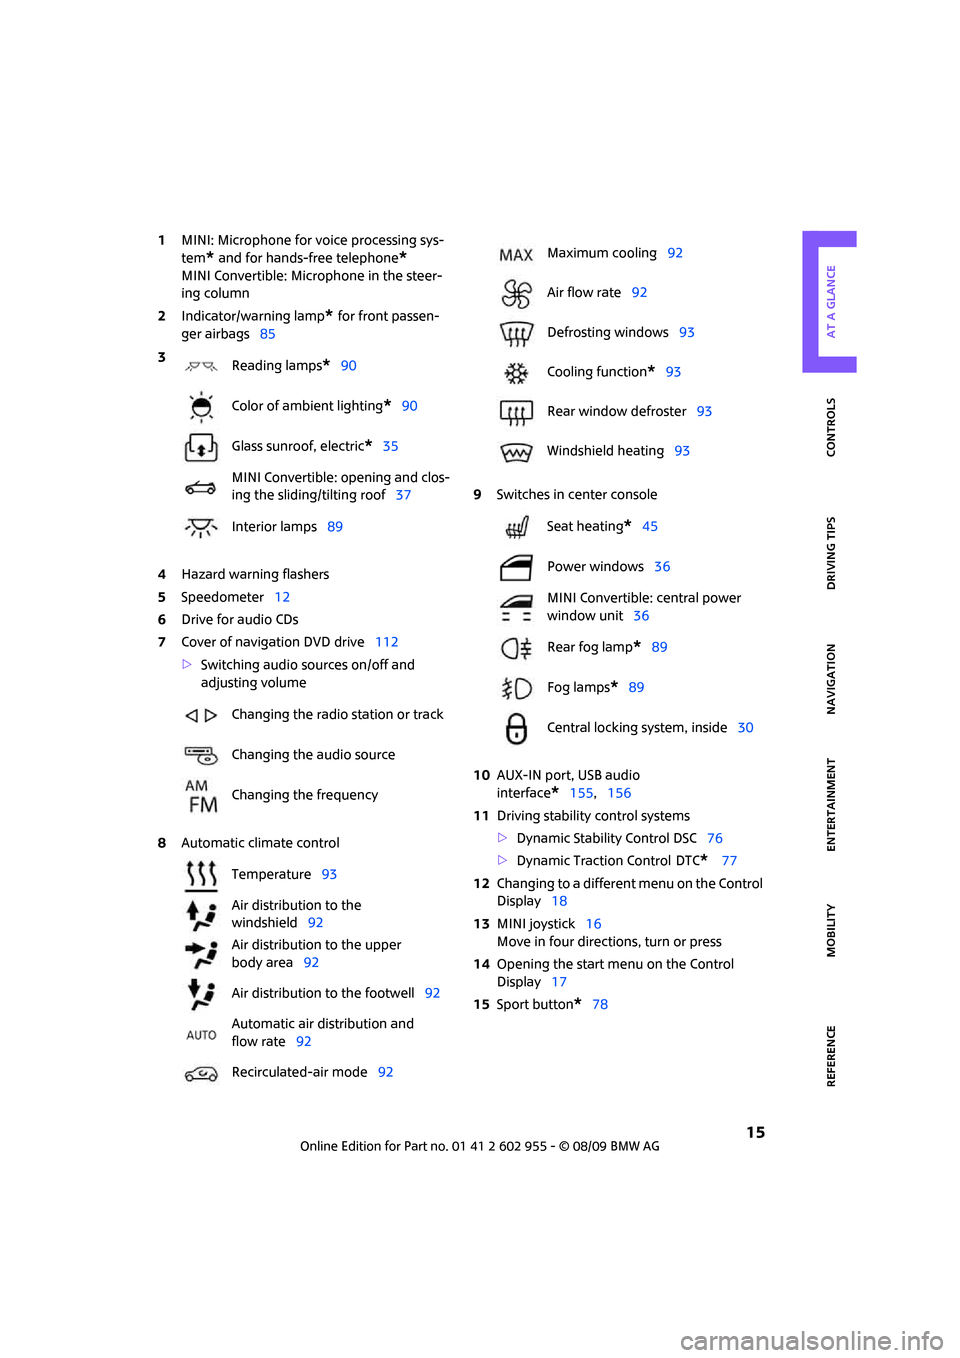
1MINI: Microphone for voice processing sys-
tem
* and for hands-free telephone*
MINI Convertible: Microphone in the steer-
ing column
2Indicator/warning lamp
* for front passen-
ger airbags85
4Hazard warning flashers
5Speedometer12
6Drive for audio CDs
7Cover of navigation DVD drive112
>Switching audio sources on/off and
adjusting volume
8Automatic climate control9Switches in center console
10AUX-IN port, USB audio
interface
*155,156
11Driving stability control systems
>Dynamic Stability Control DSC76
>Dynamic Traction Control
DTC* 77
12Changing to a different menu on the Control
Display18
13MINI joystick16
Move in four directions, turn or press
14Opening the start menu on the Control
Display17
15Sport button
*78 3
Reading lamps
*90
Color of ambient lighting
*90
Glass sunroof, electric
*35
MINI Convertible: opening and clos-
ing the sliding/tilting roof37
Interior lamps89
Changing the radio station or track
Changing the audio source
Changing the frequency
Temperature93
Air distribution to the
windshield92
Air distribution to the upper
body area92
Air distribution to the footwell92
Automatic air distribution and
flow rate92
Recirculated-air mode92
Maximum cooling92
Air flow rate92
Defrosting windows93
Cooling function
*93
Rear window defroster93
Windshield heating93
Seat heating
*45
Power windows36
MINI Convertible: central power
window unit36
Rear fog lamp
*89
Fog lamps
*89
Central locking system, inside30
Page 21 of 230

MOBILITYAT A GLANCE CONTROLS DRIVING TIPS ENTERTAINMENT
19
NAVIGATION REFERENCE
Operating principle at a glance
The following is a general description of opera-
tions using the onboard monitor.For an exemplary step-by-step application, refer
to Setting the time, page68.
1Highlighting a menu item:
>Turn the MINI joystick; the highlight
marker moves
>Menu items that are displayed in color on
the Control Display can be highlighted
2Confirming a menu item:
>Press the MINI joystick
>New menu items are displayed or the
function is executed
>Select a function by highlighting and con-
firming it
3Highlighting a menu item: refer to14Switching between fields:
>Briefly move the MINI joystick to the left,
right, forward or backward
>Release the MINI joystick
5Adjusting settings:
>Turn the MINI joystick
>Graphic display, numerical value or text
displays can be changed
>Confirm by switching to another field
Page 22 of 230

Onboard monitor
20
Status information
1Display for:
>Entertainment:
Radio, CD and external audio source
* or
>Telephone
* in "Communication":
Name of the connected mobile phone,
network search or no network
2 Entertainment audio output off or
display for traffic information
*:
>"TI":
Reception of traffic information for the navi-
gation system is possible and is switched on
3Display for:
> New entries present in "Missed
calls"
*
> Roaming active
4 It is possible to make calls
* if the mobile
phone is paired with the vehicle
Reception strength of mobile phone
network, depending on mobile phone
5Time
Other displays:
Status information is temporarily hidden during
Check Control message displays or entries via
the voice activation system
*.
Switching control
display off/on
1.Press the button.
This opens the start menu.
2.Move the MINI joystick to highlight "Setup"
and press the MINI joystick.
3.Select "Display off".
To switch on, press the MINI joystick.
Page 29 of 230

MOBILITYAT A GLANCE CONTROLS DRIVING TIPS ENTERTAINMENT
27
NAVIGATION REFERENCE
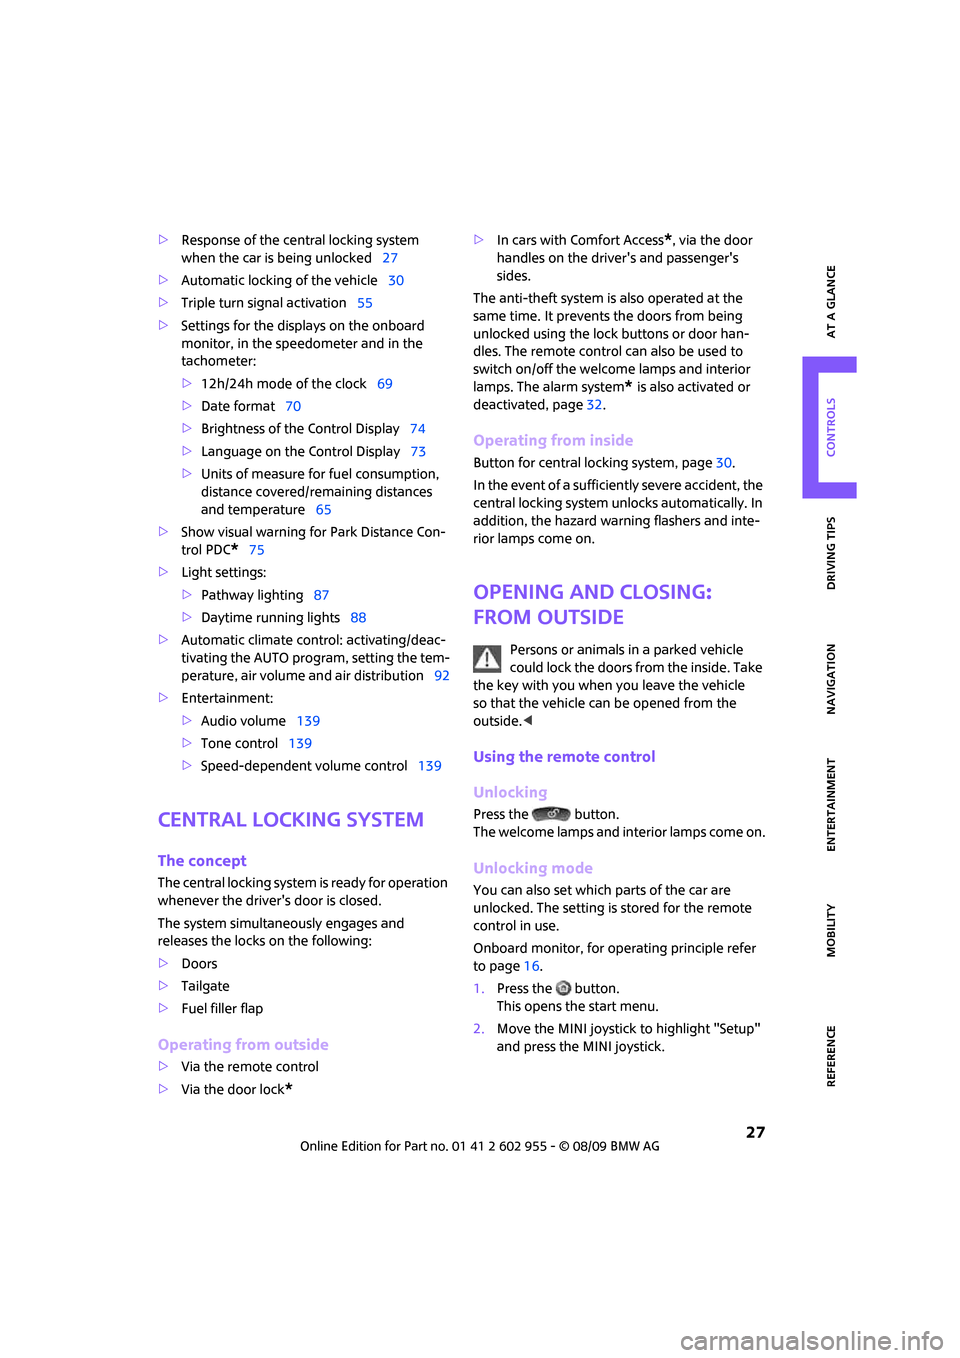
>Response of the central locking system
when the car is being unlocked27
>Automatic locking of the vehicle30
>Triple turn signal activation55
>Settings for the displays on the onboard
monitor, in the speedometer and in the
tachometer:
>12h/24h mode of the clock69
>Date format70
>Brightness of the Control Display74
>Language on the Control Display73
>Units of measure for fuel consumption,
distance covered/remaining distances
and temperature65
>Show visual warning for Park Distance Con-
trol PDC
*75
>Light settings:
>Pathway lighting87
>Daytime running lights88
>Automatic climate control: activating/deac-
tivating the AUTO program, setting the tem-
perature, air volume and air distribution92
>Entertainment:
>Audio volume139
>Tone control139
>Speed-dependent volume control139
Central locking system
The concept
The central locking system is ready for operation
whenever the driver's door is closed.
The system simultaneously engages and
releases the locks on the following:
>Doors
>Tailgate
>Fuel filler flap
Operating from outside
>Via the remote control
>Via the door lock
*
>In cars with Comfort Access*, via the door
handles on the driver's and passenger's
sides.
The anti-theft system is also operated at the
same time. It prevents the doors from being
unlocked using the lock buttons or door han-
dles. The remote control can also be used to
switch on/off the welcome lamps and interior
lamps. The alarm system
* is also activated or
deactivated, page32.
Operating from inside
Button for central locking system, page30.
In the event of a sufficiently severe accident, the
central locking system unlocks automatically. In
addition, the hazard warning flashers and inte-
rior lamps come on.
Opening and closing:
from outside
Persons or animals in a parked vehicle
could lock the doors from the inside. Take
the key with you when you leave the vehicle
so that the vehicle can be opened from the
outside.<
Using the remote control
Unlocking
Press the button.
The welcome lamps and interior lamps come on.
Unlocking mode
You can also set which parts of the car are
unlocked. The setting is stored for the remote
control in use.
Onboard monitor, for operating principle refer
to page16.
1.Press the button.
This opens the start menu.
2.Move the MINI joystick to highlight "Setup"
and press the MINI joystick.
Page 30 of 230

Opening and closing
28
3.Select "Settings".
4.Select "Vehicle and tires".
5.Select "Door locks".
6.Select "Central locking".
7.Select "Unlock button".
8.Select a menu item:
>"All doors"
Press the button once to unlock
the entire vehicle.
>"Driver's door"
Press the button once to unlock
only the driver's door and the fuel
filler flap
*.
Press the button twice to unlock the
entire vehicle.
Convenient opening
Hold the button down.
The power windows are opened and the glass
sunroof
* is raised. In the MINI Convertible, the
windows and the sliding sunroof are opened.
In order to open the convertible top of your MINI
Convertible: release button and push again until
the convertible top is completely open. The side
window remains open.
With Convenient opening
*: when you are close
to the vehicle, the windows are raised after the
convertible top opens if you continue pressing
the button.
Convenient closing is not possible by
means of the remote control.<
Locking
Press the button.
Do not lock the vehicle from the outside if
there is any person inside, because the
vehicle cannot be unlocked from inside without
special knowledge.<
MINI Convertible: Convenient closing*
When you are close to the vehicle, the remote
control for Convenient opening can be used to
close the convertible top and the windows.
Hold the button down.
The convertible top and the windows are closed.
Watch during the closing process to be
sure that no one is injured. Releasing the
button interrupts the closing process.<
Setting confirmation signals
To have the vehicle confirm when it has been
locked or unlocked.
1.Press the button.
This opens the start menu.
2.Move the MINI joystick to highlight "Setup"
and press the MINI joystick.
3.Select "Settings".
4.Select "Vehicle and tires".
5.Select "Door locks".