Page 27 of 330

TRUNK AJAR— Displayed when the trunk is not completely closed.
REMOVE OBJECTS NEAR PASS SEAT— Displayed when objects
are by the passenger seat. After the objects are moved away from the
seat, if the warning stays on or continues to come on, contact your
authorized dealer as soon as possible.
ENGINE OIL CHANGE SOON— Displayed when the engine oil life
remaining is 10% or less.
OIL CHANGE REQUIRED— Displayed when the oil life left reaches
0%.
BLIND SPOT SYSTEM FAULT (if equipped)— Displayed when a
fault with the blind spot information system has a fault. Contact your
authorized dealer as soon as possible.
CROSS TRAFFIC SYSTEM FAULT (if equipped)— Displayed when
a fault with the cross traffic alert system has a fault. Contact your
authorized dealer as soon as possible.
BLIND SPOT NOT AVAILABLE (if equipped)— Displayed when
blind spot information system is not available. SeeBlind spot
information systemin theDriver controlschapter.
CROSS TRAFFIC NOT AVAILABLE (if equipped)— Displayed
when cross traffic alert is not available. SeeBlind spot information
systemin theDriver controlschapter.
SENSOR BLOCKED SEE MANUAL (if equipped)— Displayed when
the blind spot information system/cross traffic alert system sensors are
blocked. SeeBlind spot information systemin theDriver controls
chapter.
VEHICLE COMING FROM LEFT (if equipped)— Displayed when
the blind spot information system with cross traffic alert (CTA) system is
operating and senses a vehicle. SeeBlind spot information systemin
theDriver controlschapter.
VEHICLE COMING FROM RIGHT (if equipped)— Displayed when
the blind spot information system with cross traffic alert (CTA) system is
operating and senses a vehicle. SeeBlind spot information systemin
theDriver controlschapter.
TO STOP ALARM START VEHICLE— Displayed when the perimeter
alarm system is armed and the vehicle is entered using the key on the
driver’s side door. In order to prevent the perimeter alarm system from
triggering, the ignition must be turned to start before the 12 second
chime expires. SeePerimeter alarm systemin theLocks and Security
chapter.
Instrument Cluster
27
2010 Milan(mln)
Owners Guide, 3rd Printing
USA(fus)
Page 28 of 330
CHECK AWD (if equipped)— Displayed when a problem exists with
the AWD system. Contact your authorized dealer as soon as possible.
Temporary messages:
INTKEY COULD NOT PROGRAM— Displayed when an attempt is
made to program an invalid key or more than the maximum number of
integrated keys allowed. For more information on integrated key, refer to
theLocks and Securitychapter.
Instrument Cluster
28
2010 Milan(mln)
Owners Guide, 3rd Printing
USA(fus)
Page 48 of 330

and put the vehicle’s transmission into the P (Park) gear position
(automatic transmission only) to continue to receive cool air from your
A/C system.
For maximum cooling performance in MAX A/C mode:
1. Select MAX A/C.
2. Select the coolest temperature setting.
3. Set the fan to the highest speed initially. As the interior starts to cool
down, adjust the fan speed to maintain comfort.
To aid in side window defogging/demisting in cold weather:
1. Select
.
2. Select A/C.
3. Adjust the temperature control to maintain comfort.
4. Set the fan speed to the highest setting.
5. Direct the outer instrument panel vents towards the side windows.
To increase airflow to the outer instrument panel vents, close the vents
located in the middle of the instrument panel.
DUAL AUTOMATIC TEMPERATURE CONTROL (IF EQUIPPED)
Outside temperature (if equipped):The outside temperature will
appear in the display and is labeled EXT TEMP.
Temperature conversion:To switch between Fahrenheit and Celsius,
refer toSetup menuin theMessage centersection of theInstrument
Clusterchapter.
Climate Controls
48
2010 Milan(mln)
Owners Guide, 3rd Printing
USA(fus)
Page 51 of 330

DUAL ZONE AUTOMATIC TEMPERATURE CONTROL
(NAVIGATION BASED – IF EQUIPPED)
Temperature conversion:To switch between Fahrenheit and Celsius,
refer toMessage centerin theInstrument Clusterchapter.
1.CLIMATE:Press to control the climate control system through the
touch display screen. SeeTouchscreen functionslater in this section.
2.
RRear defroster:Press to activate/deactivate the rear window
defroster. Refer toRear window defrosterlater in this chapter for more
information. If your vehicle is equipped with both rear defroster and
heated mirrors, the same button will activate both.
3.A/C:Press to activate/deactivate air conditioning. Use with
recirculated air to improve cooling performance and efficiency. A/C
engages automatically in MAX A/C,
(defrost)
and
(floor/defrost).
4.Passenger temperature:Press to activate separate passenger
temperature control to increase/decrease the air temperature on the
passenger side of the vehicle.
Climate Controls
51
2010 Milan(mln)
Owners Guide, 3rd Printing
USA(fus)
Page 53 of 330

TOUCHSCREEN FUNCTIONS
Temperature conversion:To switch between Fahrenheit and Celsius,
refer toMessage centerin theInstrument Clusterchapter.
Temperature:Press the up and down arrows on the left side of the
screen to increase/decrease the airflow temperature for the driver side of
the vehicle. This control also adjusts the passenger side temperature
when dual zone operation is disengaged. Press the up and down arrows
on the right side of the screen to increase/decrease the airflow
temperature for the passenger side of the vehicle.
•
:Distributes air through the instrument panel vents.
•
:Distributes air through the instrument panel vents, floor vents,
rear seat floor vents and de-mister vents.
•
:Distributes air through the floor vents, rear seat floor vents.
•
:Distributes air through the windshield defroster vents, de-mister
vents, floor vents and rear seat floor vents. The system will
automatically provide outside air to reduce window fogging.
To return to full automatic control, press AUTO on the main bezel.
Fan Speed:Press to decrease/increase the fan speed.
Dual:Press to activate/deactivate separate driver and passenger
temperature controls.
Max A/C:Distributes recirculated air through the instrument panel
vents to cool the vehicle. This re-cooling of the interior air is more
economical and efficient. Recirculated air may also help reduce
undesirable odors from entering the vehicle. Press theMax A/Cbutton
again for normal A/C operation.
Climate Controls
53
2010 Milan(mln)
Owners Guide, 3rd Printing
USA(fus)
Page 57 of 330

4. Turn the headlamp control to the autolamp position. The headlamps
will turn on.
5. Wait the desired amount of time for the exit delay you want (up to
three minutes), then turn the headlamps off.
SeeMessage centerin theInstrument Clustersection for more
information.
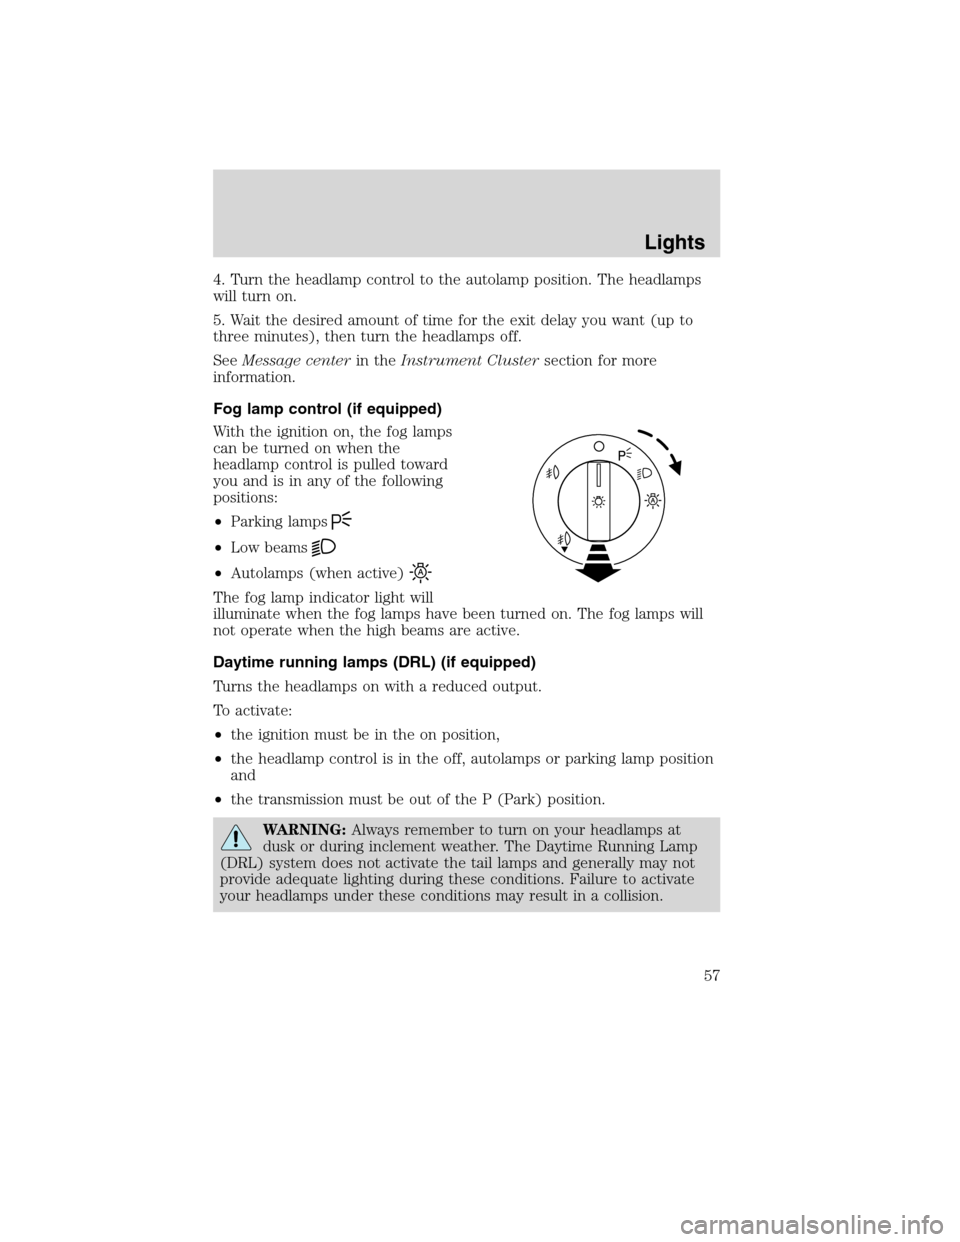
Fog lamp control (if equipped)
With the ignition on, the fog lamps
can be turned on when the
headlamp control is pulled toward
you and is in any of the following
positions:
•Parking lamps
•Low beams
•Autolamps (when active)
The fog lamp indicator light will
illuminate when the fog lamps have been turned on. The fog lamps will
not operate when the high beams are active.
Daytime running lamps (DRL) (if equipped)
Turns the headlamps on with a reduced output.
To activate:
•the ignition must be in the on position,
•the headlamp control is in the off, autolamps or parking lamp position
and
•the transmission must be out of the P (Park) position.
WARNING:Always remember to turn on your headlamps at
dusk or during inclement weather. The Daytime Running Lamp
(DRL) system does not activate the tail lamps and generally may not
provide adequate lighting during these conditions. Failure to activate
your headlamps under these conditions may result in a collision.
Lights
57
2010 Milan(mln)
Owners Guide, 3rd Printing
USA(fus)
Page 80 of 330

SPEED CONTROL
With speed control set, you can maintain a set speed without keeping
your foot on the accelerator pedal.
WARNING:Do not use the speed control in heavy traffic or on
roads that are winding, slippery or unpaved.
Using speed controls
The speed controls are located on the steering wheel. The following
buttons work with speed control:
– SET +:Press to set a speed or to
increase or decrease the set speed.
CNCL (Cancel)/RSM (Resume):
Press to return cancel or resume a
set speed.
ON/OFF:Press to turn speed
controlonoroff.
The speed control system uses
two
indicator lights in the
instrument cluster:
•an amber indicator light which illuminates when the system is on, and
•a green indicator light which illuminates when the system is engaged.
Setting speed control
To set speed control:
4. Press and release ON.
5. Accelerate to the desired speed.
6. Press and release SET +.
7. Take your foot off the accelerator pedal.
8. The green indicator
light on the instrument cluster will turn on.
Note:
•Vehicle speed may vary momentarily when driving up and down a
steep hill.
•If the vehicle speed increases above the set speed on a downhill, you
may want to apply the brakes to reduce the speed.
•If the vehicle speed decreases more than 10 mph (16 km/h) below
your set speed on an uphill, your speed control will disengage.
Driver Controls
80
2010 Milan(mln)
Owners Guide, 3rd Printing
USA(fus)
Page 88 of 330

Deactivating/activating autolock feature
Your vehicle comes with the autolock features activated; there are four
methods to enable/disable this feature:
•Through your authorized dealer,
•by using a power door unlock/lock sequence, or
•by using the keyless entry pad (if equipped).
•by using the instrument cluster message center. Refer toMessage
centerin theInstrument Clusterchapter.
Note:The autolock feature can be activated/deactivated independently
of the autounlock feature.
Before starting, ensure the ignition is in the off position and all vehicle
doors are closed. You must complete Steps 1–5 within 30 seconds or the
procedure will have to be repeated. If the procedure needs to be
repeated, wait a minimum of 30 seconds before beginning again.
1. Place the key in the ignition and
turn the ignition to the on position.
2. Press the power door unlock
control on the door panel three
times.
3. Turn the ignition from the on
position to the off position.
4. Press the power door unlock control on the door panel three times.
5. Turn the ignition back to the on position. The horn will chirp one time
to confirm programming mode has been entered and is active.
6. To enable/disable the autolock feature, press the unlock control, then
press the lock control. The horn will chirp once if autolock was
deactivated or twice (one short and one long chirp) if autolock was
activated.
7. Turn the ignition to the off position. The horn will chirp once to
confirm the procedure is complete.
Keyless entry keypad procedure
1. Turn the ignition to the 1 off
position.
2. Close all the doors.
3. Enter factory–set 5–digit entry
code.
Locks and Security
88
2010 Milan(mln)
Owners Guide, 3rd Printing
USA(fus)