2010 MERCEDES-BENZ SLK350 instrument cluster
[x] Cancel search: instrument clusterPage 228 of 312

Clearing the maintenance service
indicator message
The maintenance service indicator message
is cleared automatically
R
after approximately 10 seconds when you
switch on the ignition
R after approximately 10 seconds when
reaching
the service threshold while driving
R after approximately 30 seconds, once the
suggested maintenance service term has
passed
X Clearing the maintenance service
indicator
message manually: Press reset
button . on the instrument cluster.
The standard display appears in the
multifunction display.
Maintenance service term exceeded If you have exceeded the suggested
maintenance service term, you will see the
following message in the multifunction
display:
Service A Exceeded By XXXXX Miles
(Km)
Service A Exceeded By XXX Days
Service A Exceeded By X Day
In addition, a signal sounds when the
message appears.
Any authorized Mercedes-Benz Center will
reset the maintenance service indicator
following a completed maintenance service.
Calling up the maintenance service
indicator display
i The menu overview can be found on
(Y page 96).
You can call up the maintenance service
indicator display at any time to check when
the next maintenance service is required. X
Switch on the ignition.
X Press button V or U on the
multifunction steering wheel repeatedly
until the standard display
(Y page 96)
appears in the multifunction display.
X Press button * or & on the
multifunction steering wheel until the
maintenance
service indicator display with
the service symbol ¯ and the
maintenance service deadline appears in
the multifunction display.
i If
the battery was disconnected, the days
of disconnection will not be included in the
count shown by the maintenance service
indicator. To arrive at the true maintenance
service deadline, you will need to subtract
these days from the days shown in the
maintenance service indicator message or
maintenance service indicator display.
Do not confuse the maintenance service
indicator with the engine oil level indicator
4. Resetting the maintenance service
indicator
In
the event that the maintenance service on
your vehicle is not carried out at an authorized
Mercedes-Benz Center, you can have the
maintenance service indicator reset.
The automotive maintenance facility carrying
out the maintenance service will find the
information for resetting the maintenance
service indicator in the maintenance-relevant
literature for your vehicle.
Such literature is available at any authorized
Mercedes-Benz Center or directly from
Mercedes-Benz.
! If the maintenance service indicator was
reset inadvertently, have an authorized
Mercedes-Benz Center correct it.
Only reset the maintenance service
indicator if the proper maintenance service
has been performed. Not following the
proper maintenance service as described 226
Maintenance
Operation
171_AKB; 3; 60, en-US
d2ureepe,
Version: 2.11.8.1 2009-05-11T16:00:23+02:00 - Seite 226
Page 238 of 312
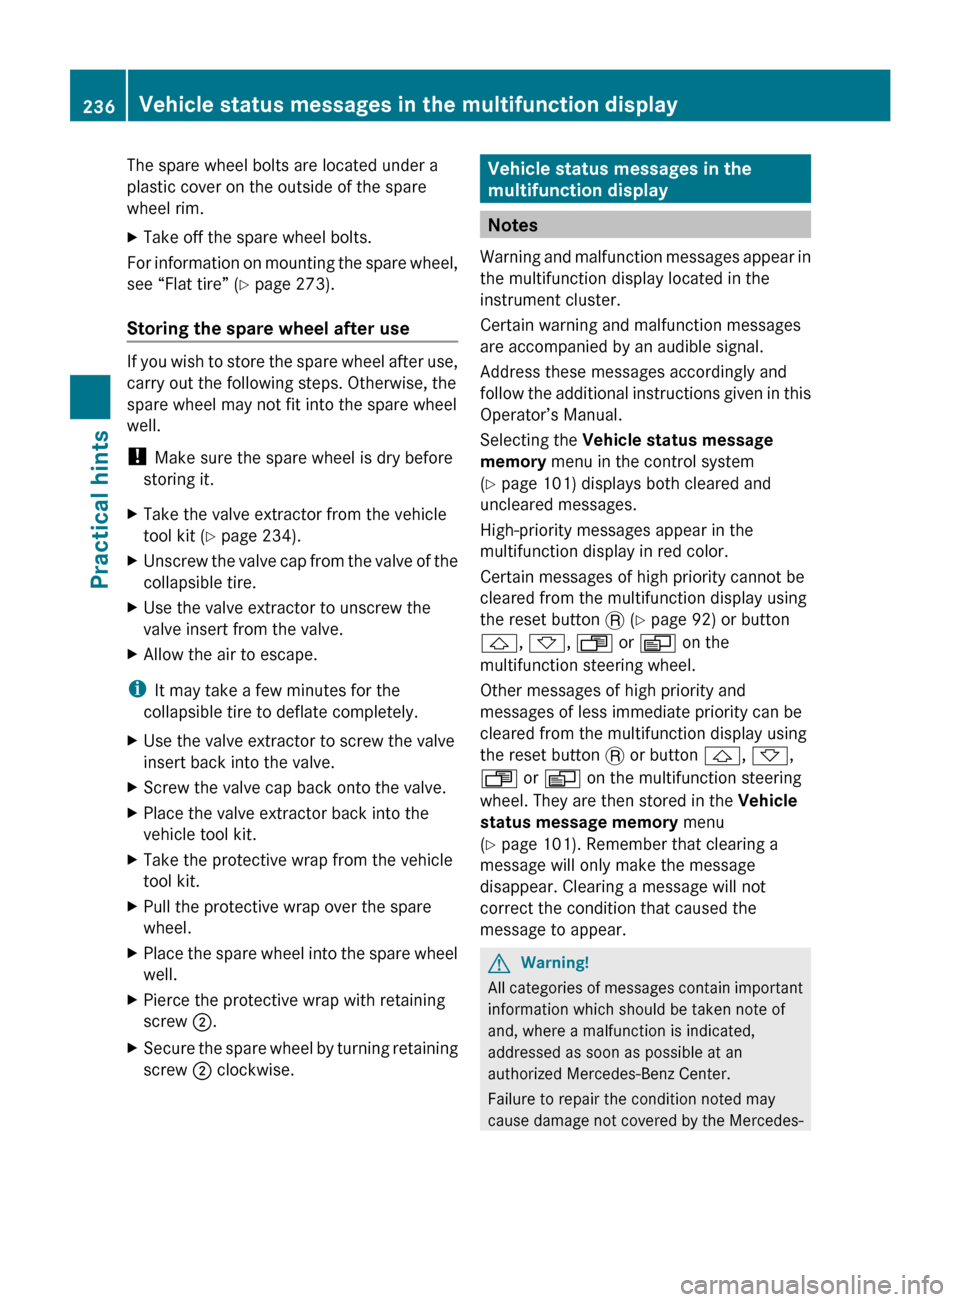
The spare wheel bolts are located under a
plastic cover on the outside of the spare
wheel rim.
X
Take off the spare wheel bolts.
For information on mounting the spare wheel,
see “Flat tire” ( Y page 273).
Storing the spare wheel after use If you wish to store the spare wheel after use,
carry out the following steps. Otherwise, the
spare wheel may not fit into the spare wheel
well.
!
Make sure the spare wheel is dry before
storing it.
X Take the valve extractor from the vehicle
tool kit ( Y page 234).
X Unscrew the valve cap from the valve of the
collapsible tire.
X Use the valve extractor to unscrew the
valve insert from the valve.
X Allow the air to escape.
i It may take a few minutes for the
collapsible tire to deflate completely.
X Use the valve extractor to screw the valve
insert back into the valve.
X Screw the valve cap back onto the valve.
X Place the valve extractor back into the
vehicle tool kit.
X Take the protective wrap from the vehicle
tool kit.
X Pull the protective wrap over the spare
wheel.
X Place the spare wheel into the spare wheel
well.
X Pierce the protective wrap with retaining
screw ;.
X Secure the spare wheel by turning retaining
screw ; clockwise. Vehicle status messages in the
multifunction display
Notes
Warning and malfunction messages appear in
the multifunction display located in the
instrument cluster.
Certain warning and malfunction messages
are accompanied by an audible signal.
Address these messages accordingly and
follow the additional instructions given in this
Operator’s Manual.
Selecting the Vehicle status message
memory menu in the control system
(Y page 101) displays both cleared and
uncleared messages.
High-priority messages appear in the
multifunction display in red color.
Certain messages of high priority cannot be
cleared from the multifunction display using
the reset button . (Y page 92) or button
&, *, U or V on the
multifunction steering wheel.
Other messages of high priority and
messages of less immediate priority can be
cleared from the multifunction display using
the reset button . or button &, *,
U or V on the multifunction steering
wheel. They are then stored in the Vehicle
status message memory menu
(Y page 101). Remember that clearing a
message will only make the message
disappear. Clearing a message will not
correct the condition that caused the
message to appear. G
Warning!
All categories of messages contain important
information which should be taken note of
and, where a malfunction is indicated,
addressed as soon as possible at an
authorized Mercedes-Benz Center.
Failure to repair the condition noted may
cause
damage not covered by the Mercedes- 236
Vehicle status messages in the multifunction display
Practical hints
171_AKB; 3; 60, en-US
d2ureepe,
Version: 2.11.8.1 2009-05-11T16:00:23+02:00 - Seite 236
Page 239 of 312
Benz Limited Warranty, or result in property
damage or personal injury.
G
Warning!
No messages will be displayed if either the
instrument cluster or the multifunction
display is inoperative.
As a result, you will not be able to see
information about your driving conditions,
such as
R speed
R outside temperature
R warning/indicator lamps R
malfunction/warning messages
R failure of any systems
Driving characteristics may be impaired.
If
you must continue to drive, do so with added
caution. Contact an authorized Mercedes-
Benz Center as soon as possible.
On the pages that follow, you will find a
compilation of the most important warning
and malfunction messages that may appear.
For your convenience the messages are
divided into text messages ( Y page 237) and
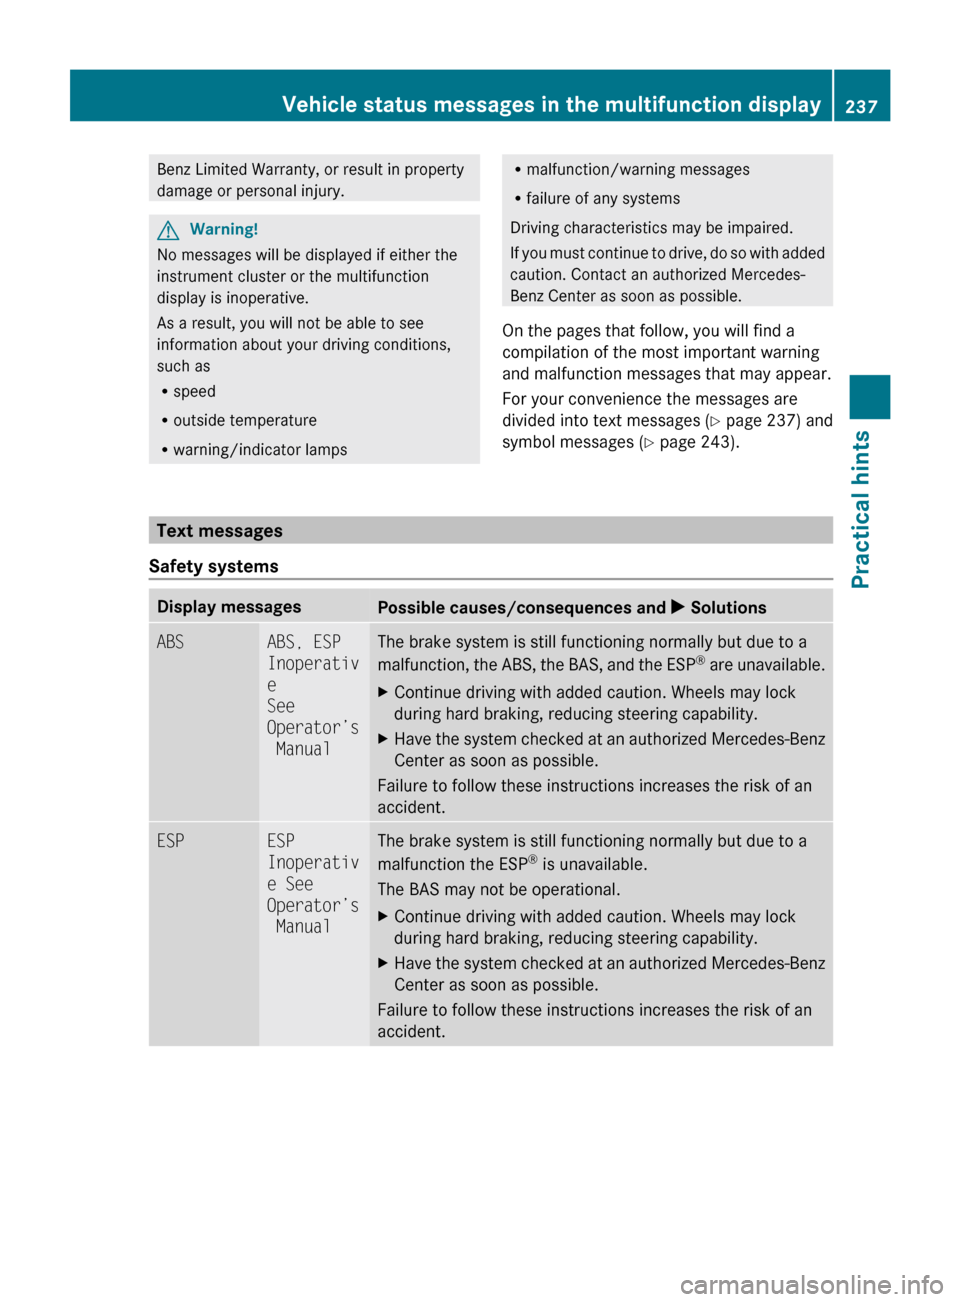
symbol messages ( Y page 243). Text messages
Safety systems Display messages
Possible causes/consequences and
X SolutionsABS ABS, ESP
Inoperativ
e
See
Operator’s
Manual The brake system is still functioning normally but due to a
malfunction,
the ABS, the BAS, and the ESP ®
are unavailable.
X Continue driving with added caution. Wheels may lock
during hard braking, reducing steering capability.
X Have the system checked at an authorized Mercedes-Benz
Center as soon as possible.
Failure to follow these instructions increases the risk of an
accident. ESP ESP
Inoperativ
e See
Operator’s
Manual The brake system is still functioning normally but due to a
malfunction the ESP
®
is unavailable.
The BAS may not be operational.
X Continue driving with added caution. Wheels may lock
during hard braking, reducing steering capability.
X Have the system checked at an authorized Mercedes-Benz
Center as soon as possible.
Failure to follow these instructions increases the risk of an
accident. Vehicle status messages in the multifunction display
237
Practical hints
171_AKB; 3; 60, en-US
d2ureepe,Version: 2.11.8.1 2009-05-11T16:00:23+02:00 - Seite 237 Z
Page 241 of 312
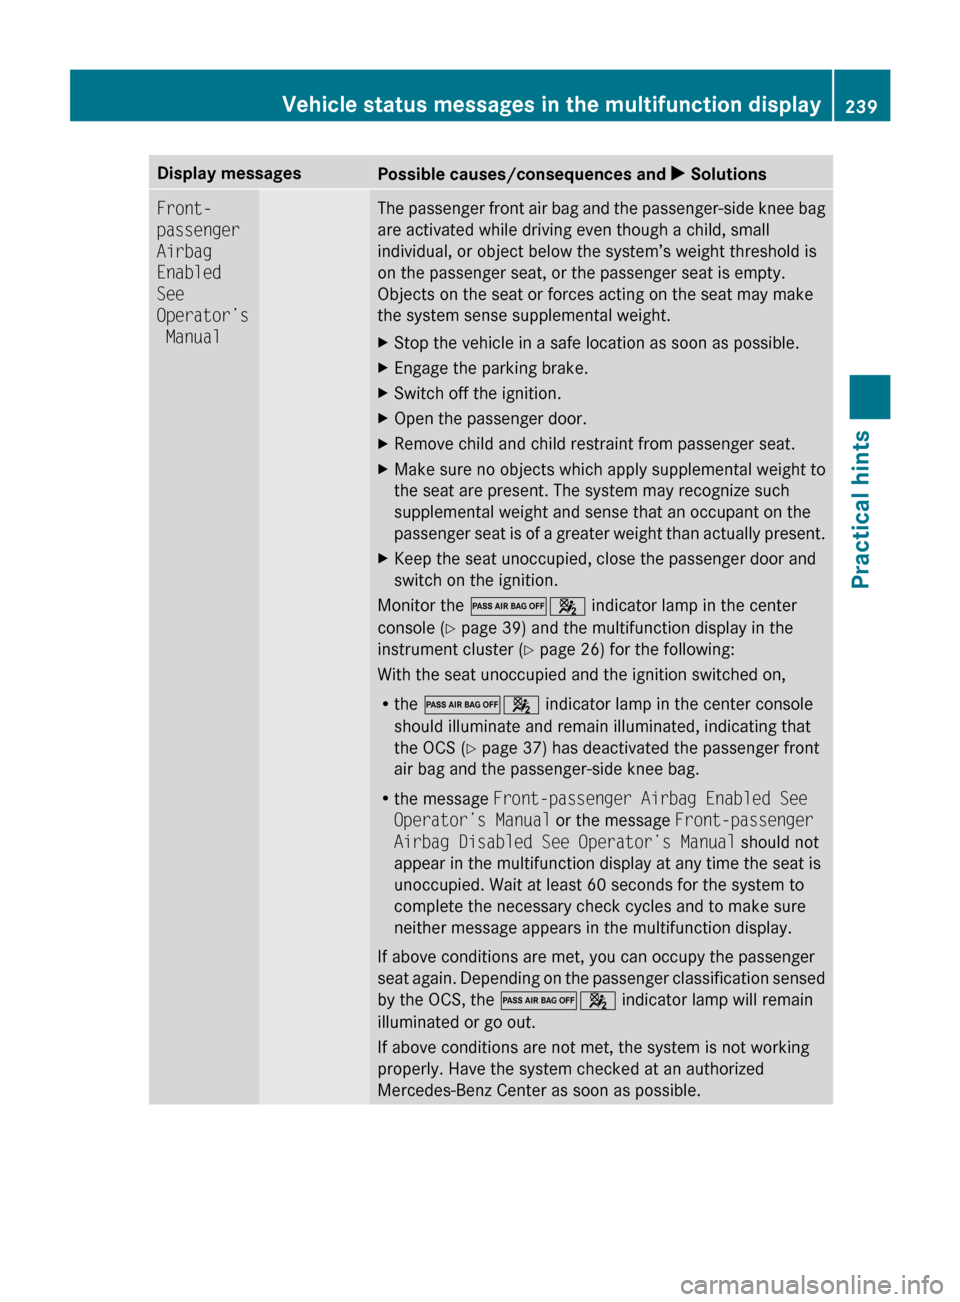
Display messages
Possible causes/consequences and
X SolutionsFront-
passenger
Airbag
Enabled
See
Operator’s
Manual The passenger front air bag and the passenger-side knee bag
are activated while driving even though a child, small
individual, or object below the system’s weight threshold is
on the passenger seat, or the passenger seat is empty.
Objects on the seat or forces acting on the seat may make
the system sense supplemental weight.
X
Stop the vehicle in a safe location as soon as possible.
X Engage the parking brake.
X Switch off the ignition.
X Open the passenger door.
X Remove child and child restraint from passenger seat.
X Make sure no objects which apply supplemental weight to
the seat are present. The system may recognize such
supplemental weight and sense that an occupant on the
passenger
seat is of a greater weight than actually present.
X Keep the seat unoccupied, close the passenger door and
switch on the ignition.
Monitor the 04 indicator lamp in the center
console (Y page 39) and the multifunction display in the
instrument cluster
(Y page 26) for the following:
With the seat unoccupied and the ignition switched on,
R the 04 indicator lamp in the center console
should illuminate and remain illuminated, indicating that
the OCS (Y page 37) has deactivated the passenger front
air bag and the passenger-side knee bag.
R the message Front-passenger Airbag Enabled See
Operator’s Manual or the message Front-passenger
Airbag Disabled See Operator’s Manual should not
appear in the multifunction display at any time the seat is
unoccupied. Wait at least 60 seconds for the system to
complete the necessary check cycles and to make sure
neither message appears in the multifunction display.
If above conditions are met, you can occupy the passenger
seat again. Depending on the passenger classification sensed
by the OCS, the 04 indicator lamp will remain
illuminated or go out.
If above conditions are not met, the system is not working
properly. Have the system checked at an authorized
Mercedes-Benz Center as soon as possible. Vehicle status messages in the multifunction display
239
Practical hints
171_AKB; 3; 60, en-US
d2ureepe,Version: 2.11.8.1 2009-05-11T16:00:23+02:00 - Seite 239 Z
Page 242 of 312
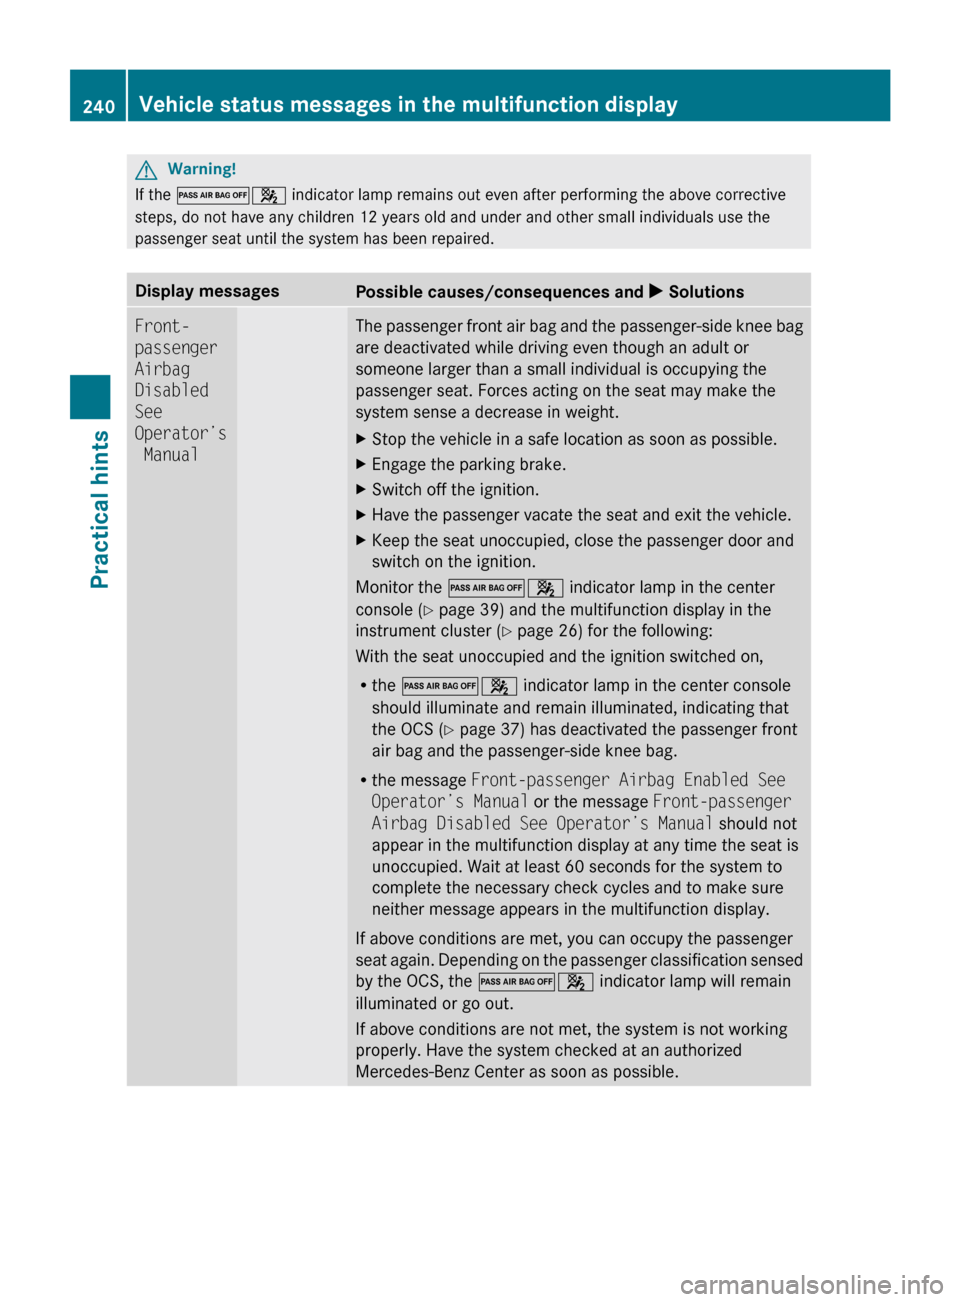
G
Warning!
If the 04 indicator lamp remains out even after performing the above corrective
steps, do not have any children 12 years old and under and other small individuals use the
passenger seat until the system has been repaired. Display messages
Possible causes/consequences and
X SolutionsFront-
passenger
Airbag
Disabled
See
Operator’s
Manual The passenger front air bag and the passenger-side knee bag
are deactivated while driving even though an adult or
someone larger than a small individual is occupying the
passenger seat. Forces acting on the seat may make the
system sense a decrease in weight.
X
Stop the vehicle in a safe location as soon as possible.
X Engage the parking brake.
X Switch off the ignition.
X Have the passenger vacate the seat and exit the vehicle.
X Keep the seat unoccupied, close the passenger door and
switch on the ignition.
Monitor the 04 indicator lamp in the center
console (Y page 39) and the multifunction display in the
instrument cluster
(Y page 26) for the following:
With the seat unoccupied and the ignition switched on,
R the 04 indicator lamp in the center console
should illuminate and remain illuminated, indicating that
the OCS (Y page 37) has deactivated the passenger front
air bag and the passenger-side knee bag.
R the message Front-passenger Airbag Enabled See
Operator’s Manual or the message Front-passenger
Airbag Disabled See Operator’s Manual should not
appear in the multifunction display at any time the seat is
unoccupied. Wait at least 60 seconds for the system to
complete the necessary check cycles and to make sure
neither message appears in the multifunction display.
If above conditions are met, you can occupy the passenger
seat again. Depending on the passenger classification sensed
by the OCS, the 04 indicator lamp will remain
illuminated or go out.
If above conditions are not met, the system is not working
properly. Have the system checked at an authorized
Mercedes-Benz Center as soon as possible. 240
Vehicle status messages in the multifunction displayPractical hints
171_AKB; 3; 60, en-US
d2ureepe,
Version: 2.11.8.1 2009-05-11T16:00:23+02:00 - Seite 240
Page 258 of 312
G
Warning!
Do not drive with a flat tire. A flat tire affects the ability to steer or brake the vehicle. You may
lose control of the vehicle. Continued driving with a flat tire will cause excessive heat build-up
and possibly a fire. G
Warning!
Follow recommended tire inflation pressures.
Do not underinflate tires. Underinflated tires wear excessively and/or unevenly, adversely affect
handling and fuel economy, and are more likely to fail from being overheated.
Do not overinflate tires. Overinflated tires can adversely affect handling and ride comfort, wear
unevenly, increase stopping distance, and result in sudden deflation (blowout) because they are
more likely to become punctured or damaged by road debris, potholes etc. What to do if …
Lamps in instrument cluster
Notes If any of the following lamps in the instrument
cluster fails to come on during the bulb self-
check when switching on the ignition, have
the respective bulb checked and replaced if
necessary.
When you switch on the ignition, all lamps in
the instrument cluster come on. The high-
beam headlamp indicator lamp and turn
signal indicator lamps will only come on if
activated. If a lamp in the instrument cluster
fails
to come on when the ignition is switched
on, have it checked and replaced if necessary. 256
What to do if …
Practical hints
171_AKB; 3; 60, en-US
d2ureepe,
Version: 2.11.8.1 2009-05-11T16:00:23+02:00 - Seite 256
Page 276 of 312
X
Foreign objects (e.g. screws or nails)
should not be removed from the tire.
X Take the TIREFIT kit, the sticker, and the
electric air pump out of the
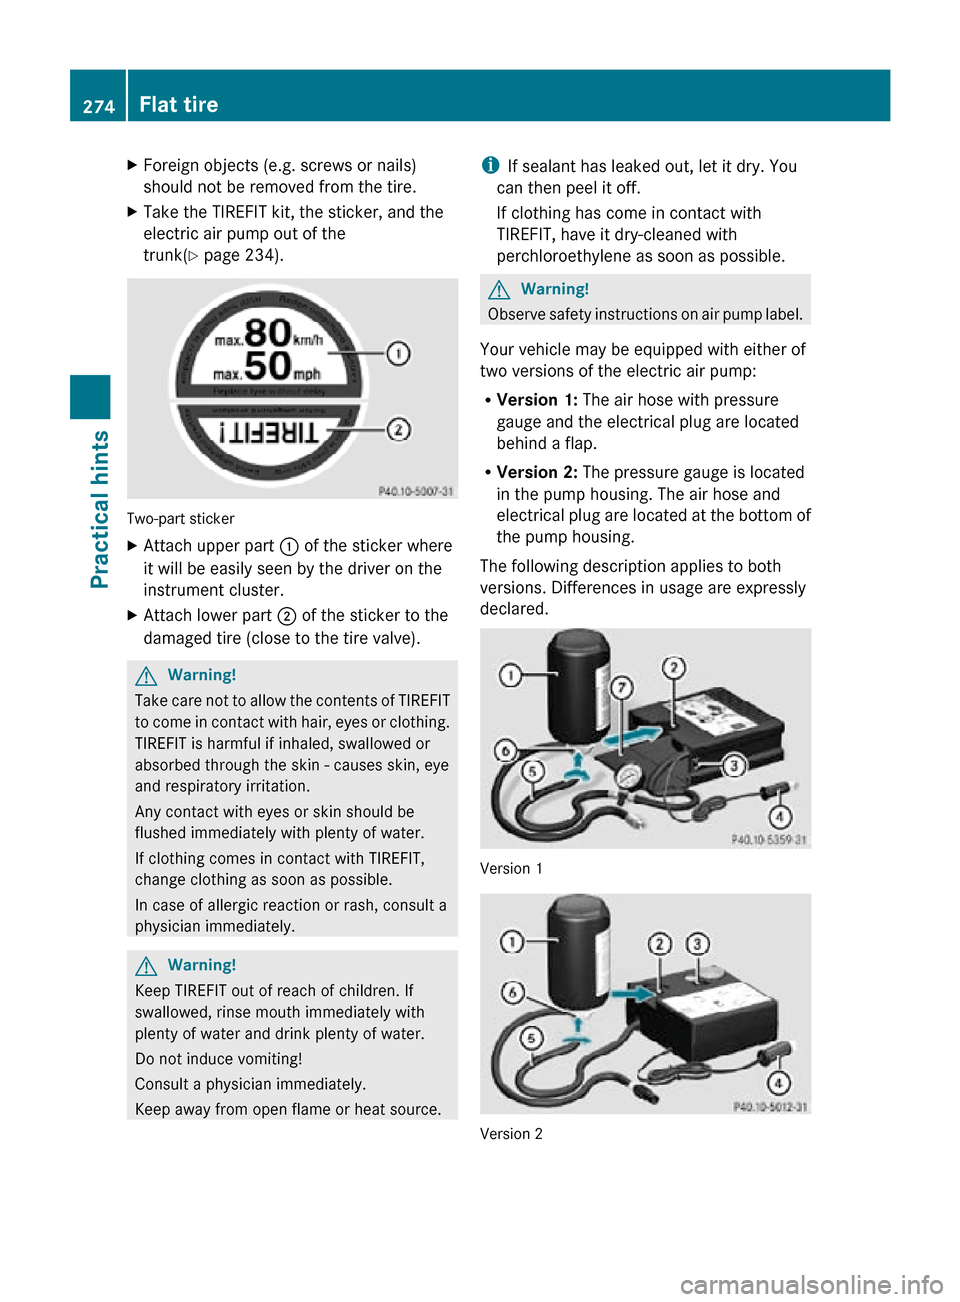
trunk(Y page 234). Two-part sticker
X
Attach upper part : of the sticker where
it will be easily seen by the driver on the
instrument cluster.
X Attach lower part ; of the sticker to the
damaged tire (close to the tire valve). G
Warning!
Take care not to allow the contents of TIREFIT
to come in contact with hair, eyes or clothing.
TIREFIT is harmful if inhaled, swallowed or
absorbed through the skin - causes skin, eye
and respiratory irritation.
Any contact with eyes or skin should be
flushed immediately with plenty of water.
If clothing comes in contact with TIREFIT,
change clothing as soon as possible.
In case of allergic reaction or rash, consult a
physician immediately. G
Warning!
Keep TIREFIT out of reach of children. If
swallowed, rinse mouth immediately with
plenty of water and drink plenty of water.
Do not induce vomiting!
Consult a physician immediately.
Keep away from open flame or heat source. i
If sealant has leaked out, let it dry. You
can then peel it off.
If clothing has come in contact with
TIREFIT, have it dry-cleaned with
perchloroethylene as soon as possible. G
Warning!
Observe safety instructions on air pump label.
Your vehicle may be equipped with either of
two versions of the electric air pump:
R Version 1: The air hose with pressure
gauge and the electrical plug are located
behind a flap.
R Version 2: The pressure gauge is located
in the pump housing. The air hose and
electrical plug are located at the bottom of
the pump housing.
The following description applies to both
versions. Differences in usage are expressly
declared. Version 1
Version 2274
Flat tirePractical hints
171_AKB; 3; 60, en-US
d2ureepe,
Version: 2.11.8.1 2009-05-11T16:00:23+02:00 - Seite 274
Page 278 of 312
After attaining a tire inflation pressure of
at least 26 psi (1.8 bar):
X
Press 0 on electric air pump switch =.
The electric air pump is switched off.
X Detach the TIREFIT kit from the tire valve. G
Warning!
The air hose may still be hot. Exercise proper
caution to avoid burning yourself when
detaching the electric air pump.
! Remaining TIREFIT sealant could escape
from the filler hose after it has been
detached from the tire valve. TIREFIT
sealant may cause stains.
Therefore, cover the filler hose, e.g. by
inserting it into the plastic bag the TIREFIT
kit was packed in.
X Drive off immediately. G
Warning!
Do not exceed a vehicle speed of 50 mph
(80 km/h). A TIREFIT repair is not designed to
operate at higher speeds.
The sticker must be attached on the
instrument cluster where it will be easily seen
by the driver.
Vehicle handling characteristics of a TIREFIT
repaired tire may change. Adapt your driving
accordingly.
X After driving the vehicle for an initial
10 minutes, check the tire inflation
pressure using pressure gauge. G
Warning!
If tire inflation pressure has fallen below
20 psi (1.3 bar) do not continue to drive the
vehicle.
Park your vehicle safely away from the
roadway and contact the nearest authorized
Mercedes-Benz Center or Roadside
Assistance.
Have the damaged tire replaced. If the tire inflation pressure is at least 20 psi
(1.3 bar), inflate or deflate the tire to the
correct tire inflation pressure (see Tire and
Loading Information placard on the driver’s
door B-pillar):
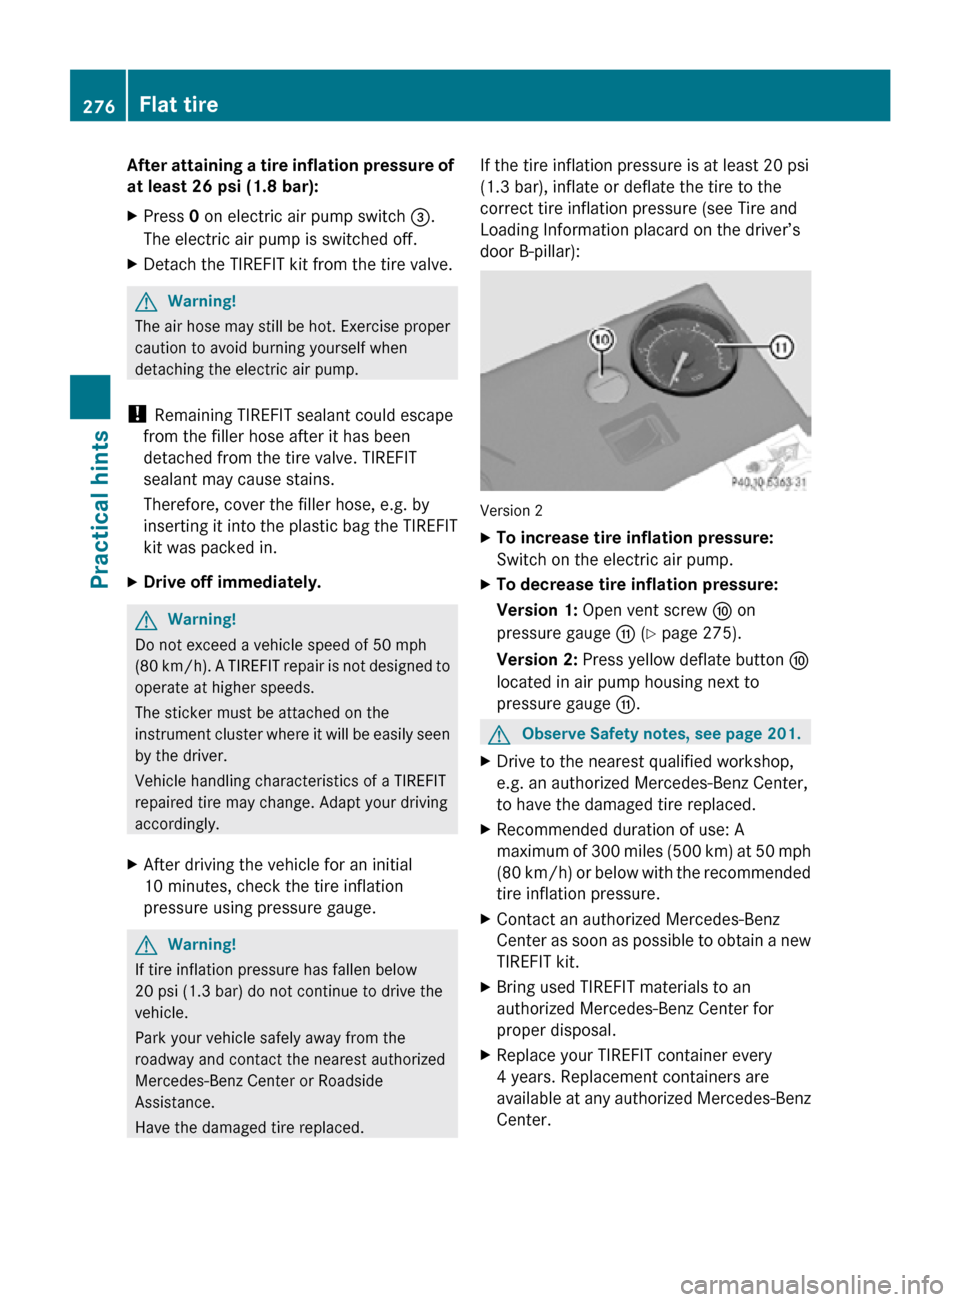
Version 2
X
To increase tire inflation pressure:
Switch on the electric air pump.
X To decrease tire inflation pressure:
Version 1: Open vent screw F on
pressure gauge G (Y page 275).
Version 2: Press yellow deflate button a
located in air pump housing next to
pressure gauge G. G
Observe Safety notes, see page 201.
X Drive to the nearest qualified workshop,
e.g. an authorized Mercedes-Benz Center,
to have the damaged tire replaced.
X Recommended duration of use: A
maximum of 300 miles (500 km) at 50 mph
(80 km/h) or below with the recommended
tire inflation pressure.
X Contact an authorized Mercedes-Benz
Center as soon as possible to obtain a new
TIREFIT kit.
X Bring used TIREFIT materials to an
authorized Mercedes-Benz Center for
proper disposal.
X Replace your TIREFIT container every
4 years. Replacement containers are
available at any authorized Mercedes-Benz
Center. 276
Flat tirePractical hints
171_AKB; 3; 60, en-US
d2ureepe,
Version: 2.11.8.1 2009-05-11T16:00:23+02:00 - Seite 276