2010 MERCEDES-BENZ SLK300 open top
[x] Cancel search: open topPage 99 of 312

The following functions are available:
R
Checking tire inflation pressure with the
Advanced TPMS (Y page 201) (USA only)
R Checking coolant temperature
(Y page 97)
R Calling up digital speedometer or outside
temperature ( Y page 97)
R Calling up maintenance service indicator
display ( Y page 226)
R Checking engine oil level (SLK 55 AMG
only) ( Y page 194)
Checking coolant temperature G
Warning!
Driving when your engine is overheated can
cause some fluids which may have leaked into
the engine compartment to catch fire. You
could be seriously burned.
Steam from an overheated engine can cause
serious burns which can occur just by opening
the engine hood. Stay away from the engine
if you see or hear steam coming from it.
Stop the vehicle in a safe location away from
other traffic. Turn off the engine, get out of the
vehicle and do not stand near the vehicle until
the engine has cooled down.
X Press button & or * repeatedly until
the coolant temperature appears in the
multifunction display. During severe operating conditions, e.g. stop-
and-go traffic, the coolant temperature may
rise close to 248‡ (120†).
!
Excessive coolant temperature triggers a
warning in the multifunction display. The engine should not be operated with a
coolant temperature above 248‡
(120†). Doing so may cause serious
engine damage which is not covered by the
Mercedes-Benz Limited Warranty.
Calling up digital speedometer or
outside temperature You can select whether the digital
speedometer or the outside temperature
appears in the multifunction display
(Y page 104).
G
Warning!
The outside temperature indicator is not
designed to serve as an ice-warning device
and is therefore unsuitable for that purpose.
Indicated temperatures just above the
freezing point do not guarantee that the road
surface is free of ice. The road may still be icy,
especially in wooded areas or on bridges.
X Press button & or * repeatedly until
the digital speedometer or the outside
temperature appears in the multifunction
display. Digital speedometer
AMG menu
This function is only available in AMG
vehicles.
X Press button V or U repeatedly until
the AMG menu appears in the
multifunction display. Control system
97Controls in detail
171_AKB; 3; 60, en-US
d2ureepe, Version: 2.11.8.1 2009-05-11T16:00:23+02:00 - Seite 97 Z
Page 110 of 312
X
Move the selection marker with button
W or X to the Lighting submenu.
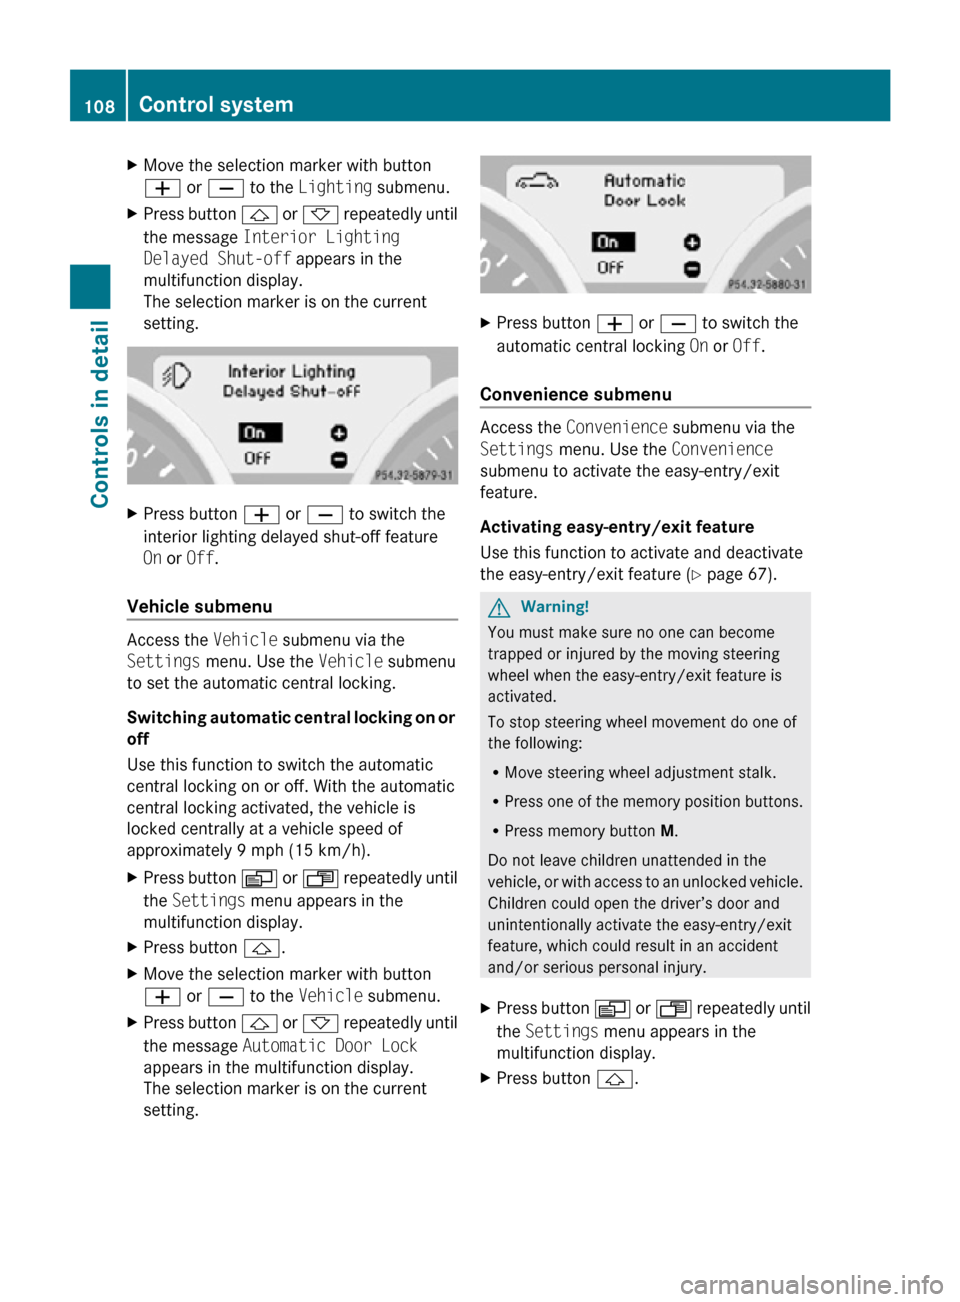
X Press button & or * repeatedly until
the message Interior Lighting
Delayed Shut-off appears in the
multifunction display.
The selection marker is on the current
setting. X
Press button W or X to switch the
interior lighting delayed shut-off feature
On or Off.
Vehicle submenu Access the
Vehicle submenu via the
Settings menu. Use the Vehicle submenu
to set the automatic central locking.
Switching automatic central locking on or
off
Use this function to switch the automatic
central locking on or off. With the automatic
central locking activated, the vehicle is
locked centrally at a vehicle speed of
approximately 9 mph (15 km/h).
X Press button V or U repeatedly until
the Settings menu appears in the
multifunction display.
X Press button &.
X Move the selection marker with button
W or X to the Vehicle submenu.
X Press button & or * repeatedly until
the message Automatic Door Lock
appears in the multifunction display.
The selection marker is on the current
setting. X
Press button W or X to switch the
automatic central locking On or Off.
Convenience submenu Access the
Convenience submenu via the
Settings menu. Use the Convenience
submenu to activate the easy-entry/exit
feature.
Activating easy-entry/exit feature
Use this function to activate and deactivate
the easy-entry/exit feature (Y page 67). G
Warning!
You must make sure no one can become
trapped or injured by the moving steering
wheel when the easy-entry/exit feature is
activated.
To stop steering wheel movement do one of
the following:
R Move steering wheel adjustment stalk.
R Press one of the memory position buttons.
R Press memory button M.
Do not leave children unattended in the
vehicle, or with access to an unlocked vehicle.
Children could open the driver’s door and
unintentionally activate the easy-entry/exit
feature, which could result in an accident
and/or serious personal injury.
X Press button V or U repeatedly until
the Settings menu appears in the
multifunction display.
X Press button &. 108
Control systemControls in detail
171_AKB; 3; 60, en-US
d2ureepe,
Version: 2.11.8.1 2009-05-11T16:00:23+02:00 - Seite 108
Page 169 of 312
i
For draft-free ventilation, move the
adjustable center and side air vents to the
middle position.
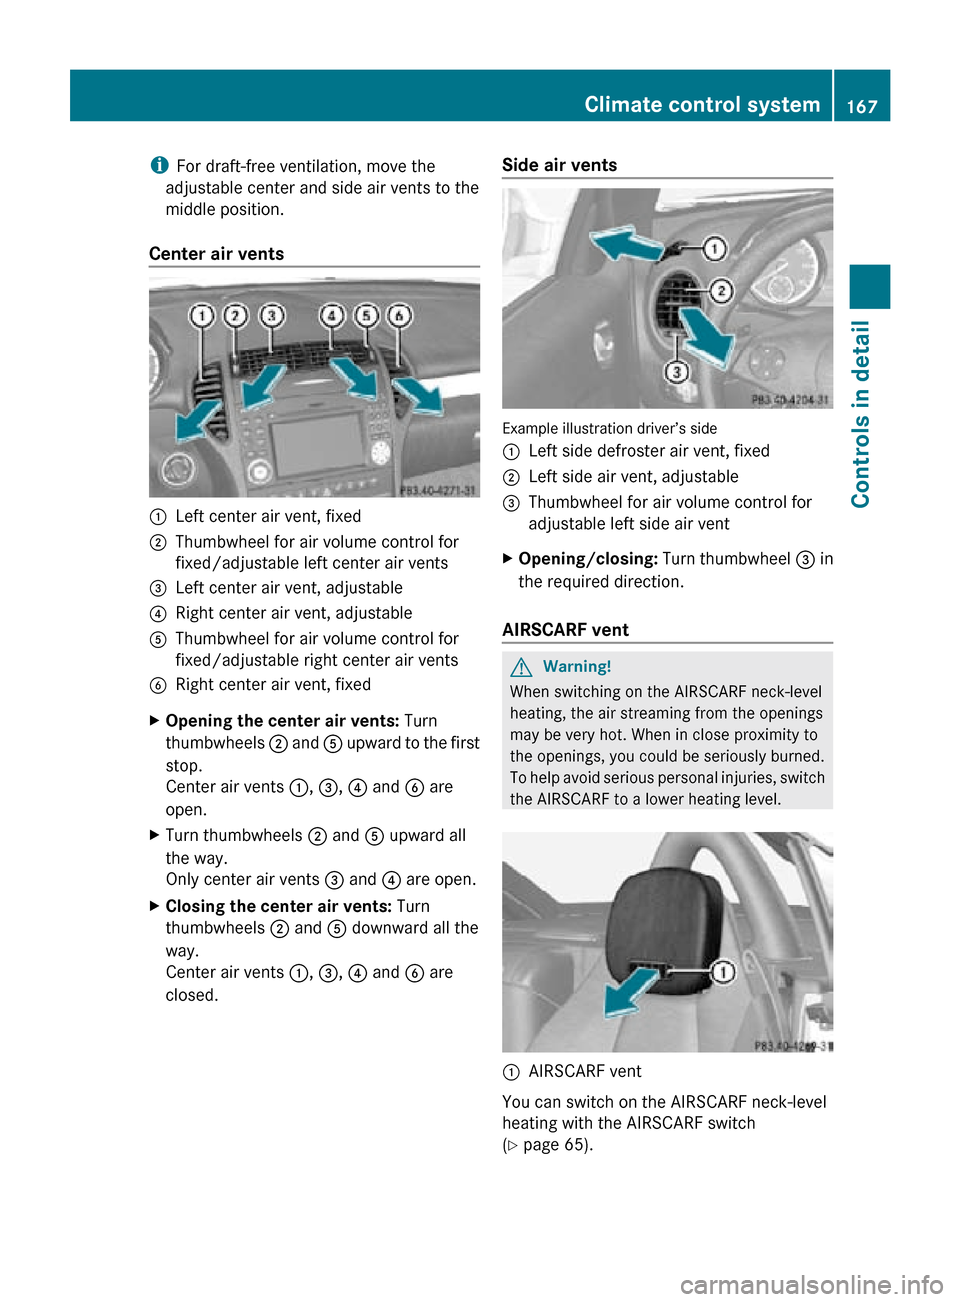
Center air vents :
Left center air vent, fixed
; Thumbwheel for air volume control for
fixed/adjustable left center air vents
= Left center air vent, adjustable
? Right center air vent, adjustable
A Thumbwheel for air volume control for
fixed/adjustable right center air vents
B Right center air vent, fixed
X Opening the center air vents: Turn
thumbwheels ; and A upward to the first
stop.
Center air vents :, =, ? and B are
open.
X Turn thumbwheels ; and A upward all
the way.
Only center air vents = and ? are open.
X Closing the center air vents: Turn
thumbwheels ; and A downward all the
way.
Center air vents :, =, ? and B are
closed. Side air vents Example illustration driver’s side
:
Left side defroster air vent, fixed
; Left side air vent, adjustable
= Thumbwheel for air volume control for
adjustable left side air vent
X Opening/closing: Turn thumbwheel = in
the required direction.
AIRSCARF vent G
Warning!
When switching on the AIRSCARF neck-level
heating, the air streaming from the openings
may be very hot. When in close proximity to
the openings, you could be seriously burned.
To help avoid serious personal injuries, switch
the AIRSCARF to a lower heating level. :
AIRSCARF vent
You can switch on the AIRSCARF neck-level
heating with the AIRSCARF switch
(Y page 65). Climate control system
167Controls in detail
171_AKB; 3; 60, en-US
d2ureepe, Version: 2.11.8.1 2009-05-11T16:00:23+02:00 - Seite 167 Z
Page 172 of 312
X
Activating: Switch off the ignition.
X Press button Á 13
/Ì 14
.
The indicator lamp in the button comes on.
X Deactivating: Press button Á 13
/
Ì 14
.
The indicator lamp in the button goes out.
The residual heat is deactivated
automatically:
R when the ignition is switched on
R after approximately 30 minutes
R if the battery voltage drops
R if the coolant temperature is too low Rear window defroster
G
Warning!
Any accumulation of snow and ice should be
removed
from the rear window before driving.
Visibility could otherwise be impaired,
endangering you and others.
The rear window defroster uses a large
amount of power. To keep the battery drain
to a minimum, switch off the defroster as
soon as the rear window is clear. The
defroster is switched off automatically after
some time of operation depending on the
outside temperature.
X Switch on the ignition.
X Switching on: Press button ¤ on the
respective climate control panel.
The
indicator lamp in the button comes on.
! The rear window defroster cannot be
switched on when the retractable hardtop
is open. The indicator lamp will start
flashing if the hardtop is open.
R Close the retractable hardtop.
The rear window defroster can then be
switched on. X
Switching off: Press button ¤ again.
The rear window defroster switches off when
the battery voltage is too low. The indicator
lamp in button ¤ flashes. Too many
electrical consumers may be operating
simultaneously.
X Switch off consumers that are currently not
needed if required. Retractable hardtop
Safety notes
For safety reasons, the retractable hardtop
can only be opened and closed when the
vehicle is standing still. G
Observe Safety notes, see page 45. G
Warning!
To prevent possible accidents, only drive the
vehicle with the retractable hardtop either
completely
closed and locked, or fully lowered
into its storage compartment.
If the retractable hardtop does not completely
open or close, the roof hydraulics will lose
pressure and the retractable hardtop is
lowered
R after approximately 7 minutes when the
ignition is switched on
R after approximately 15 seconds when the
ignition is switched off
Shortly before the retractable hardtop is
lowered, a warning will sound. In the
multifunction display you will see K and
the message Retractable Roof Lowering .
Properly lock the retractable hardtop before
continuing to drive. Otherwise, the unlocked
hardtop could open while the vehicle is in
motion and cause you to lose control of the
vehicle. You or others could be injured as a
result.
13 Vehicles with climate control
14 Vehicles with automatic climate control 170
Retractable hardtop
Controls in detail
171_AKB; 3; 60, en-US
d2ureepe,
Version: 2.11.8.1 2009-05-11T16:00:23+02:00 - Seite 170
Page 173 of 312
G
Warning!
Before operating the retractable hardtop,
make sure there is no danger of anyone being
injured by the moving parts (retractable
hardtop, roof frame, and trunk lid).
Hands must never be placed near the roof
frame, upper windshield area, hardtop, shelf
behind roll bars, or trunk lid while the
retractable hardtop is being raised or
lowered. Serious personal injury may occur.
If potential danger exists, release the
retractable hardtop switch or button % or
& on the SmartKey. This immediately
interrupts the raising or lowering procedure.
You then can operate the retractable hardtop
switch or press button % or & on the
SmartKey to raise or lower the retractable
hardtop away from the danger zone
! Never sit or place heavy objects on the
rear shelf. Doing so could cause damage to
the retractable hardtop and the rear shelf.
! Please keep in mind that weather
conditions can sometimes change rapidly.
Make sure to close the retractable hardtop
when leaving the vehicle. If water enters
the vehicle interior, vehicle electronics
could be damaged which is not covered by
the Mercedes-Benz Limited Warranty.
! When opening and closing the retractable
hardtop, make sure
R there is sufficient clearance for the
retractable hardtop to move up and for
the trunk lid to move back
R the luggage cover is installed, extended
and closed
R the trunk is loaded only to the height of
the luggage cover
R the luggage/cargo does not push up the
closed luggage cover R
the trunk lid is closed
R the outside temperature is above +5‡
(-15†)
Otherwise the retractable hardtop and
trunk as well as other parts of the vehicle
could be damaged. Opening and closing
With the retractable hardtop switch G
Observe Safety notes, see page 170.
X Engage the parking brake.
X Close the luggage cover ( Y page 173).
X Close the trunk lid.
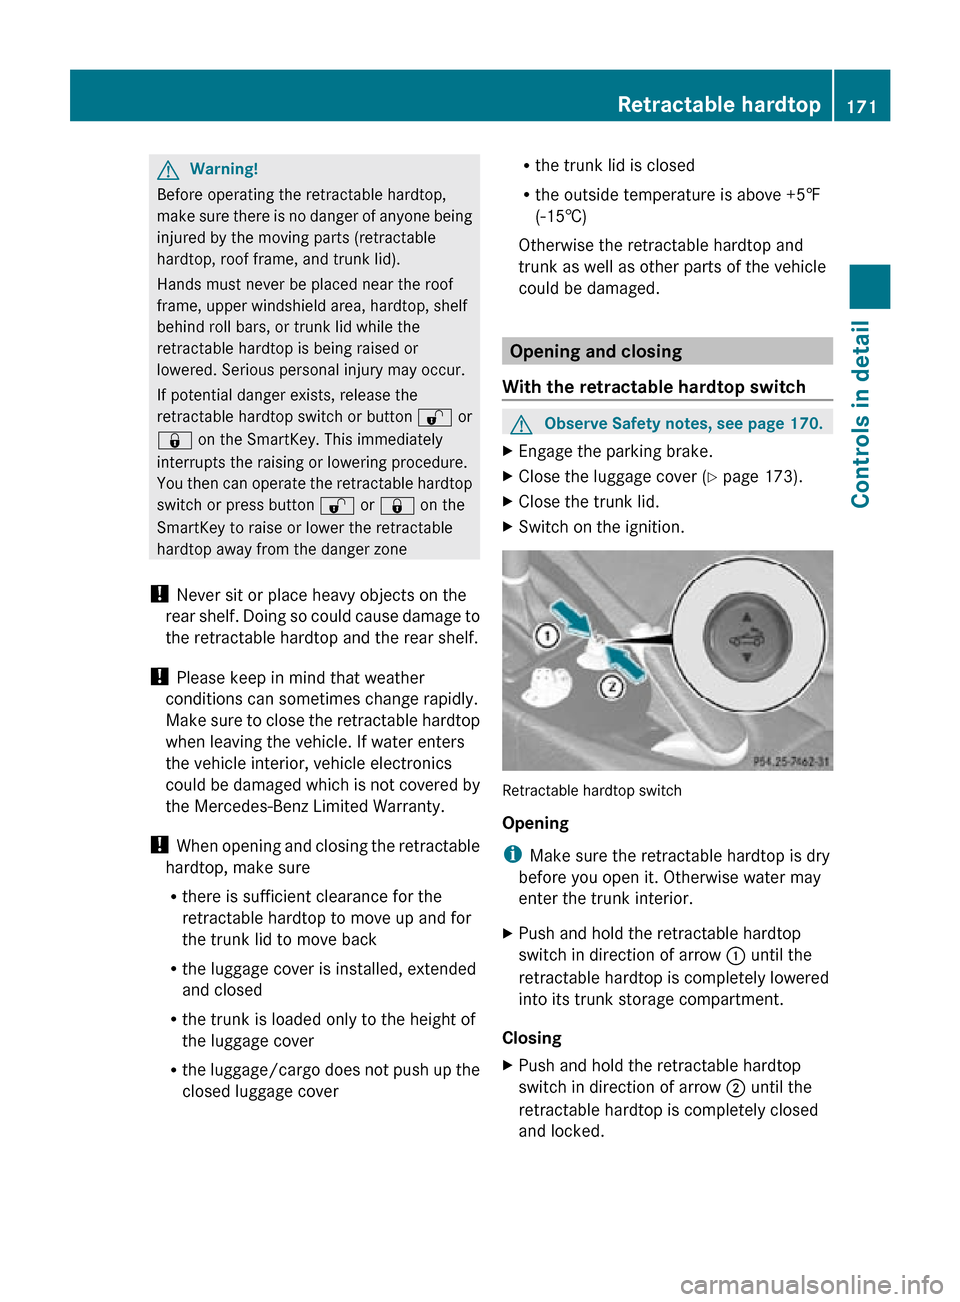
X Switch on the ignition. Retractable hardtop switch
Opening
i
Make sure the retractable hardtop is dry
before you open it. Otherwise water may
enter the trunk interior.
X Push and hold the retractable hardtop
switch in direction of arrow : until the
retractable hardtop is completely lowered
into its trunk storage compartment.
Closing
X Push and hold the retractable hardtop
switch in direction of arrow ; until the
retractable hardtop is completely closed
and locked. Retractable hardtop
171Controls in detail
171_AKB; 3; 60, en-US
d2ureepe, Version: 2.11.8.1 2009-05-11T16:00:23+02:00 - Seite 171 Z
Page 174 of 312
With the SmartKey
G
Observe Safety notes, see page 170. X
Close the luggage cover ( Y page 173).
X Close the trunk lid.
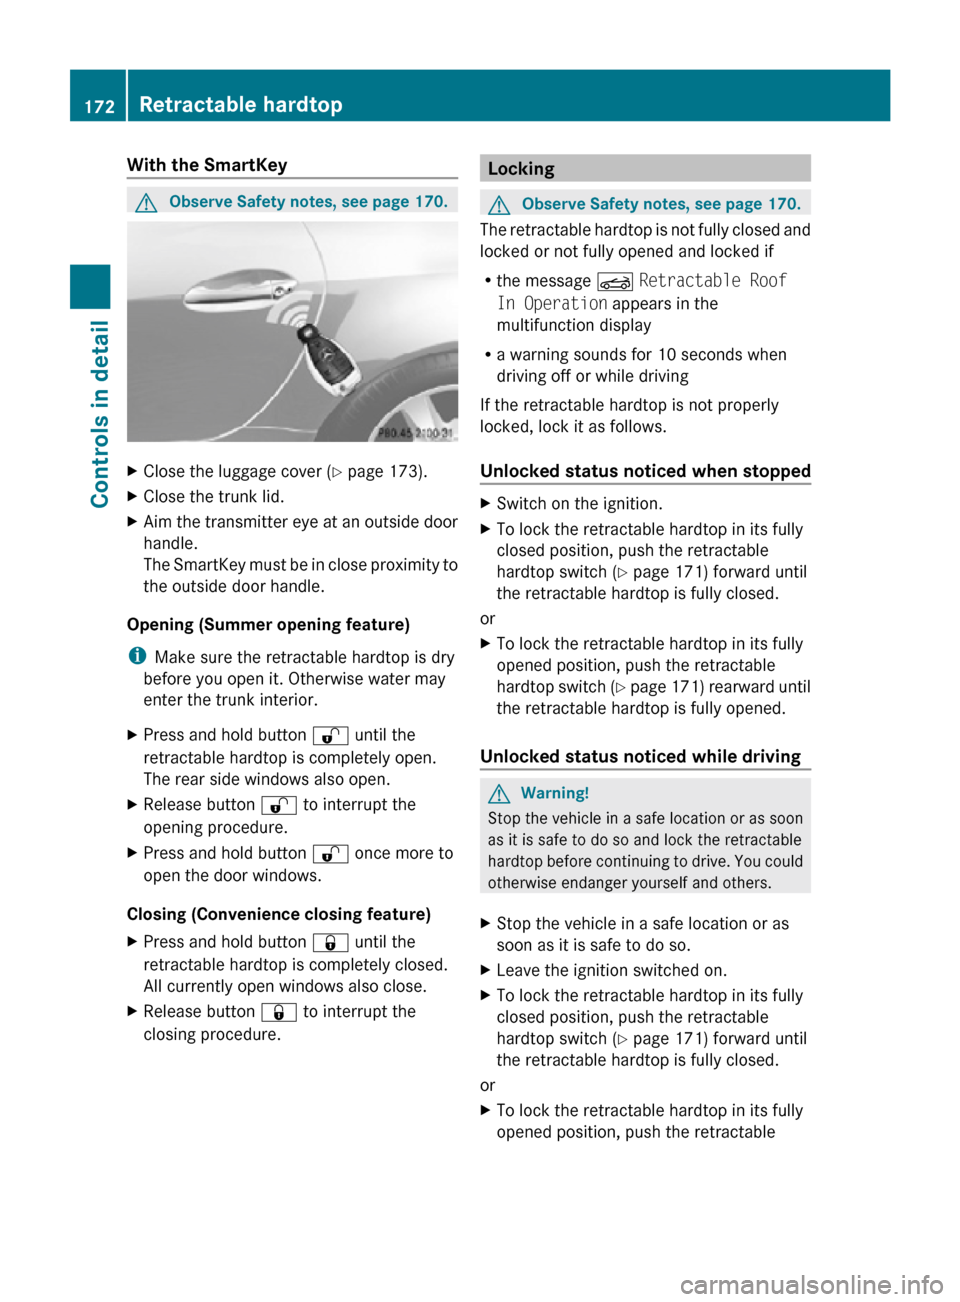
X Aim the transmitter eye at an outside door
handle.
The SmartKey must be in close proximity to
the outside door handle.
Opening (Summer opening feature)
i Make sure the retractable hardtop is dry
before you open it. Otherwise water may
enter the trunk interior.
X Press and hold button % until the
retractable hardtop is completely open.
The rear side windows also open.
X Release button % to interrupt the
opening procedure.
X Press and hold button % once more to
open the door windows.
Closing (Convenience closing feature)
X Press and hold button & until the
retractable hardtop is completely closed.
All currently open windows also close.
X Release button & to interrupt the
closing procedure. Locking
G
Observe Safety notes, see page 170.
The retractable hardtop is not fully closed and
locked or not fully opened and locked if
R the message K Retractable Roof
In Operation appears in the
multifunction display
R a warning sounds for 10 seconds when
driving off or while driving
If the retractable hardtop is not properly
locked, lock it as follows.
Unlocked status noticed when stopped X
Switch on the ignition.
X To lock the retractable hardtop in its fully
closed position, push the retractable
hardtop switch ( Y page 171) forward until
the retractable hardtop is fully closed.
or
X To lock the retractable hardtop in its fully
opened position, push the retractable
hardtop switch (Y page 171) rearward until
the retractable hardtop is fully opened.
Unlocked status noticed while driving G
Warning!
Stop the vehicle in a safe location or as soon
as it is safe to do so and lock the retractable
hardtop before continuing to drive. You could
otherwise endanger yourself and others.
X Stop the vehicle in a safe location or as
soon as it is safe to do so.
X Leave the ignition switched on.
X To lock the retractable hardtop in its fully
closed position, push the retractable
hardtop switch ( Y page 171) forward until
the retractable hardtop is fully closed.
or
X To lock the retractable hardtop in its fully
opened position, push the retractable 172
Retractable hardtopControls in detail
171_AKB; 3; 60, en-US
d2ureepe,
Version: 2.11.8.1 2009-05-11T16:00:23+02:00 - Seite 172
Page 175 of 312
hardtop switch (Y page 171) rearward until
the retractable hardtop is fully opened. Wind screen
The wind screen deflects drafts away from the
driver and passenger when the retractable
hardtop is lowered. Your vehicle may be
equipped with a cloth wind screen or a
transparent glass wind screen. This section
applies to installing and removing the cloth
wind screen. For information on the glass
wind screen, refer to the separate mounting
instructions that come with the glass wind
screen. G
Warning!
The cloth wind screen can restrict the driver’s
vision to the rear of the vehicle. To prevent a
possible accident when visibility is limited
(e.g. in darkness), the upper part of the wind
screen should be folded back.
The cloth wind screen is stored in a storage
bag located on the wall behind the seat
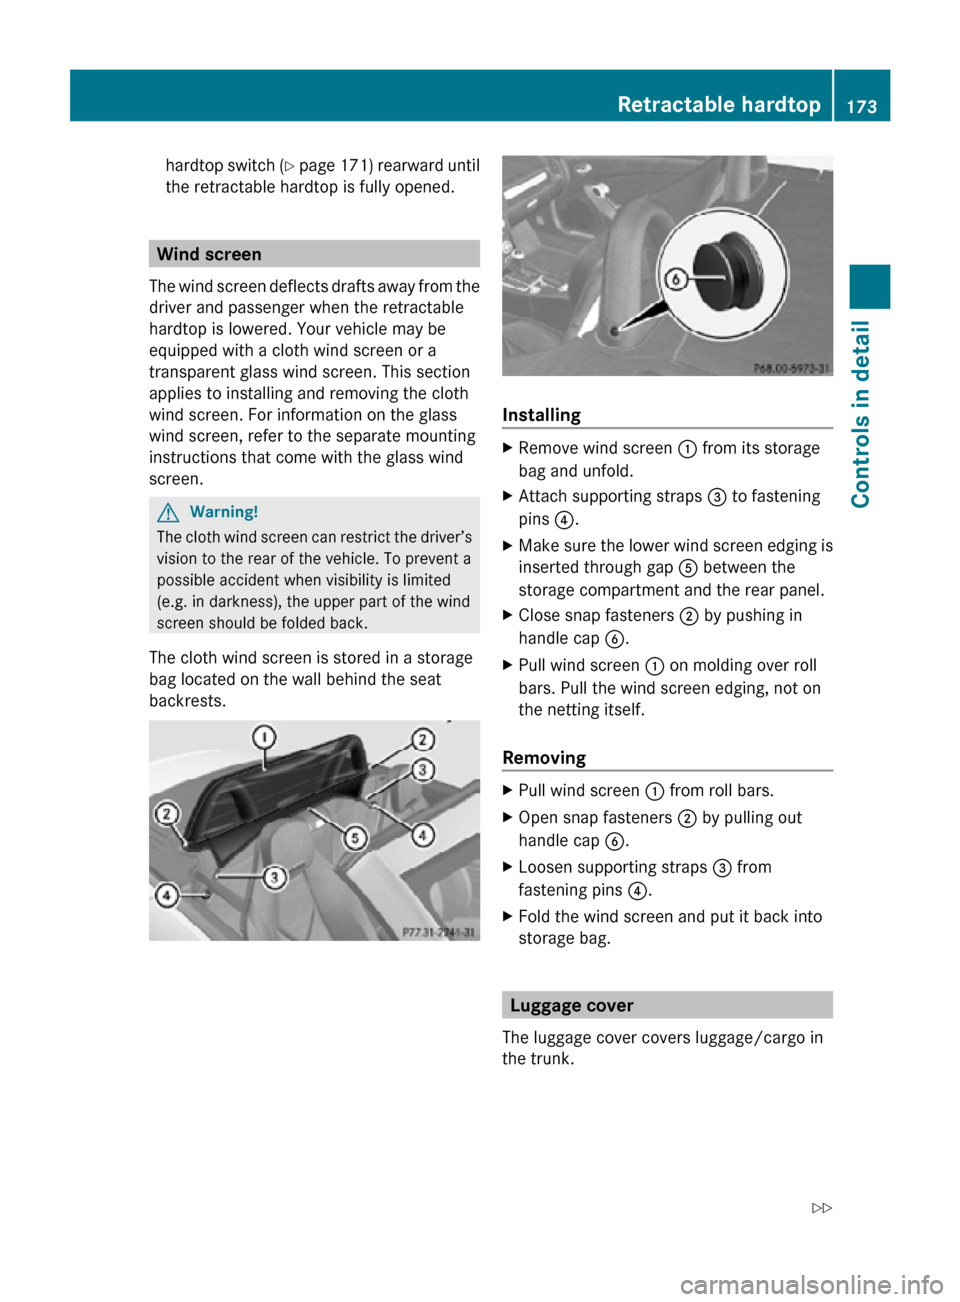
backrests. Installing
X
Remove wind screen : from its storage
bag and unfold.
X Attach supporting straps = to fastening
pins ?.
X Make sure the lower wind screen edging is
inserted through gap A between the
storage compartment and the rear panel.
X Close snap fasteners ; by pushing in
handle cap B.
X Pull wind screen : on molding over roll
bars. Pull the wind screen edging, not on
the netting itself.
Removing X
Pull wind screen : from roll bars.
X Open snap fasteners ; by pulling out
handle cap B.
X Loosen supporting straps = from
fastening pins ?.
X Fold the wind screen and put it back into
storage bag. Luggage cover
The luggage cover covers luggage/cargo in
the trunk. Retractable hardtop
173Controls in detail
171_AKB; 3; 60, en-US
d2ureepe, Version: 2.11.8.1 2009-05-11T16:00:23+02:00 - Seite 173 Z
Page 176 of 312
!
To prevent damage to the retractable
hardtop or luggage/cargo when lowering
the retractable hardtop:
R Load trunk only to the height of the
luggage cover.
R Do not permit luggage/cargo to push up
the closed luggage cover.
R Do not place anything on top of or in front
of the luggage cover.
R Do not place anything on the shelf behind
the roll bar. Closing
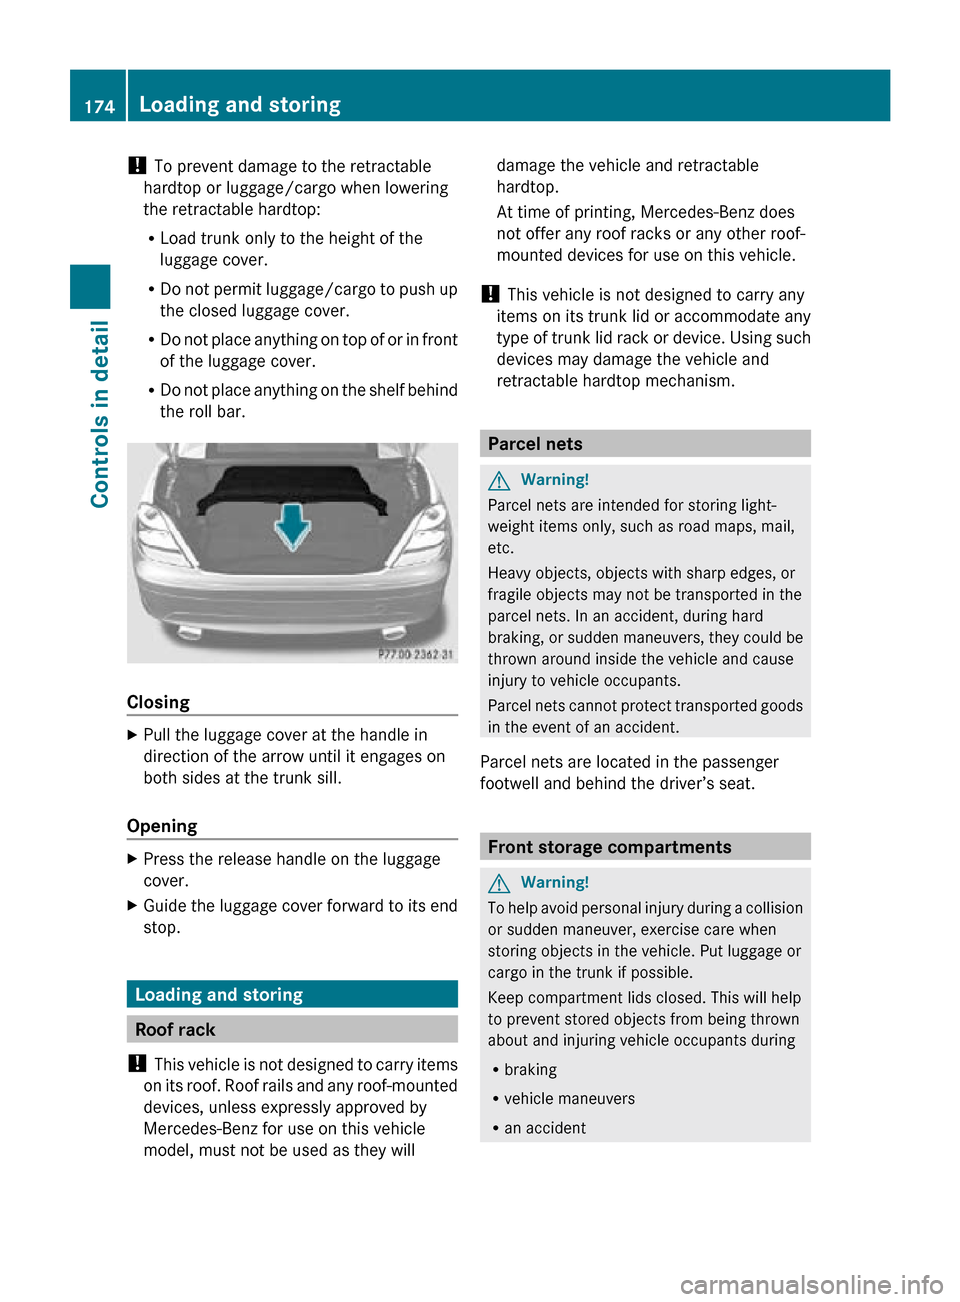
X
Pull the luggage cover at the handle in
direction of the arrow until it engages on
both sides at the trunk sill.
Opening X
Press the release handle on the luggage
cover.
X Guide the luggage cover forward to its end
stop. Loading and storing
Roof rack
! This vehicle is not designed to carry items
on its roof. Roof rails and any roof-mounted
devices, unless expressly approved by
Mercedes-Benz for use on this vehicle
model, must not be used as they will damage the vehicle and retractable
hardtop.
At time of printing, Mercedes-Benz does
not offer any roof racks or any other roof-
mounted devices for use on this vehicle.
! This vehicle is not designed to carry any
items on its trunk lid or accommodate any
type of trunk lid rack or device. Using such
devices may damage the vehicle and
retractable hardtop mechanism. Parcel nets
G
Warning!
Parcel nets are intended for storing light-
weight items only, such as road maps, mail,
etc.
Heavy objects, objects with sharp edges, or
fragile objects may not be transported in the
parcel nets. In an accident, during hard
braking, or sudden maneuvers, they could be
thrown around inside the vehicle and cause
injury to vehicle occupants.
Parcel nets cannot protect transported goods
in the event of an accident.
Parcel nets are located in the passenger
footwell and behind the driver’s seat. Front storage compartments
G
Warning!
To help avoid personal injury during a collision
or sudden maneuver, exercise care when
storing objects in the vehicle. Put luggage or
cargo in the trunk if possible.
Keep compartment lids closed. This will help
to prevent stored objects from being thrown
about and injuring vehicle occupants during
R braking
R vehicle maneuvers
R an accident 174
Loading and storingControls in detail
171_AKB; 3; 60, en-US
d2ureepe,
Version: 2.11.8.1 2009-05-11T16:00:23+02:00 - Seite 174