Page 506 of 548

The positive terminal (+) must face
downwards.
XPut the cover with engagement hooks ?
first onto the battery compartment and let
the snap-fit hook 2 snap in.
Wireless headphone
The headphone contains two batteries of size
AAA, 1.5 V.
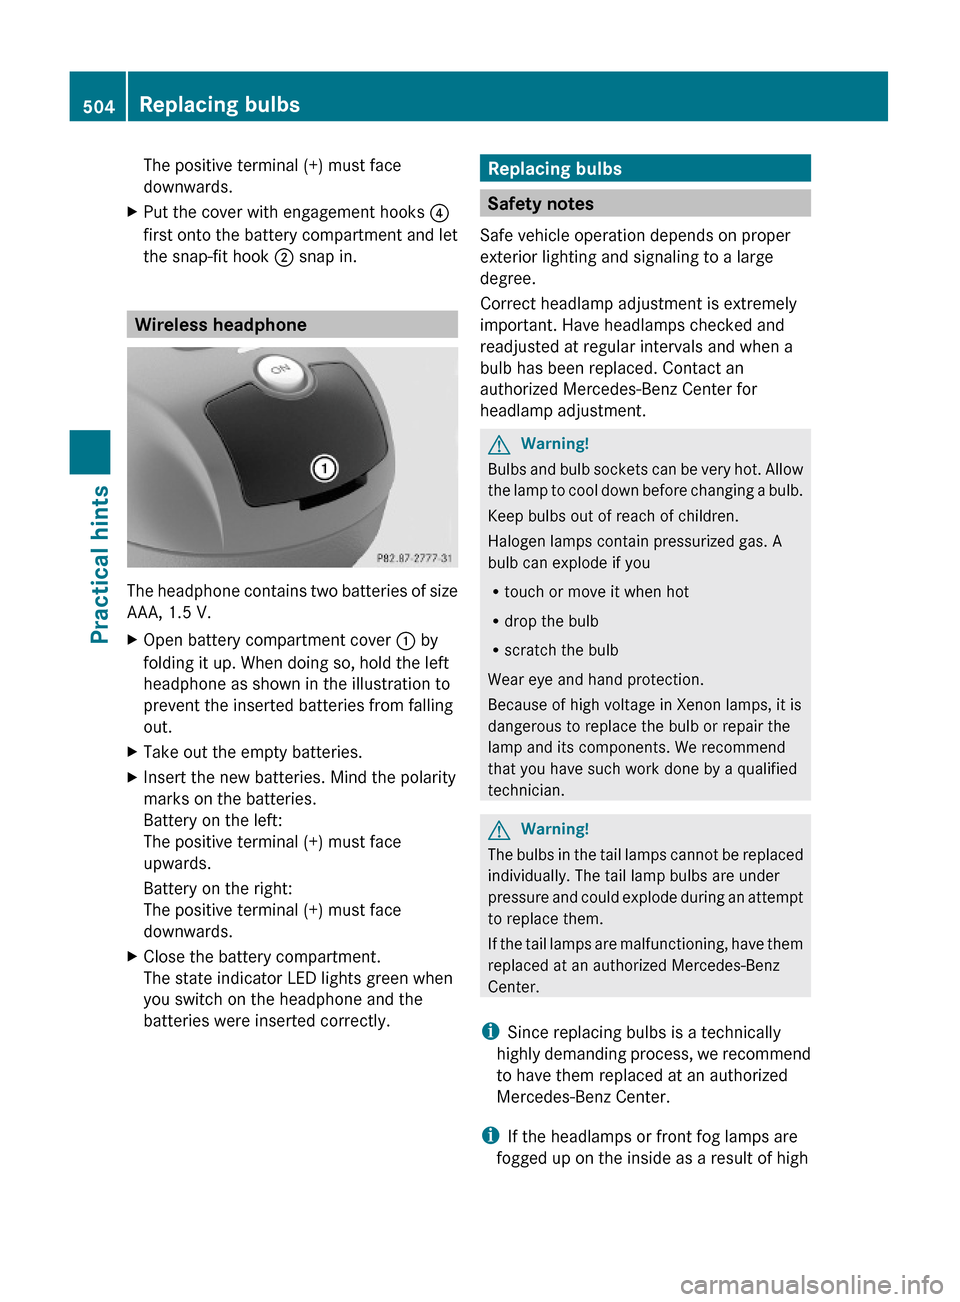
XOpen battery compartment cover : by
folding it up. When doing so, hold the left
headphone as shown in the illustration to
prevent the inserted batteries from falling
out.
XTake out the empty batteries.XInsert the new batteries. Mind the polarity
marks on the batteries.
Battery on the left:
The positive terminal (+) must face
upwards.
Battery on the right:
The positive terminal (+) must face
downwards.
XClose the battery compartment.
The state indicator LED lights green when
you switch on the headphone and the
batteries were inserted correctly.
Replacing bulbs
Safety notes
Safe vehicle operation depends on proper
exterior lighting and signaling to a large
degree.
Correct headlamp adjustment is extremely
important. Have headlamps checked and
readjusted at regular intervals and when a
bulb has been replaced. Contact an
authorized Mercedes-Benz Center for
headlamp adjustment.
GWarning!
Bulbs and bulb sockets can be very hot. Allow
the lamp to cool down before changing a bulb.
Keep bulbs out of reach of children.
Halogen lamps contain pressurized gas. A
bulb can explode if you
Rtouch or move it when hot
Rdrop the bulb
Rscratch the bulb
Wear eye and hand protection.
Because of high voltage in Xenon lamps, it is
dangerous to replace the bulb or repair the
lamp and its components. We recommend
that you have such work done by a qualified
technician.
GWarning!
The bulbs in the tail lamps cannot be replaced
individually. The tail lamp bulbs are under
pressure and could explode during an attempt
to replace them.
If the tail lamps are malfunctioning, have them
replaced at an authorized Mercedes-Benz
Center.
iSince replacing bulbs is a technically
highly demanding process, we recommend
to have them replaced at an authorized
Mercedes-Benz Center.
iIf the headlamps or front fog lamps are
fogged up on the inside as a result of high
504Replacing bulbsPractical hints
221_AKB; 6; 20, en-USd2ugruen,Version: 2.11.8.12009-09-24T13:28:17+02:00 - Seite 504
Page 507 of 548

humidity, driving the vehicle a distance with
the lights on should clear up the fogging.
Bulbs
You can replace the following bulbs yourself:
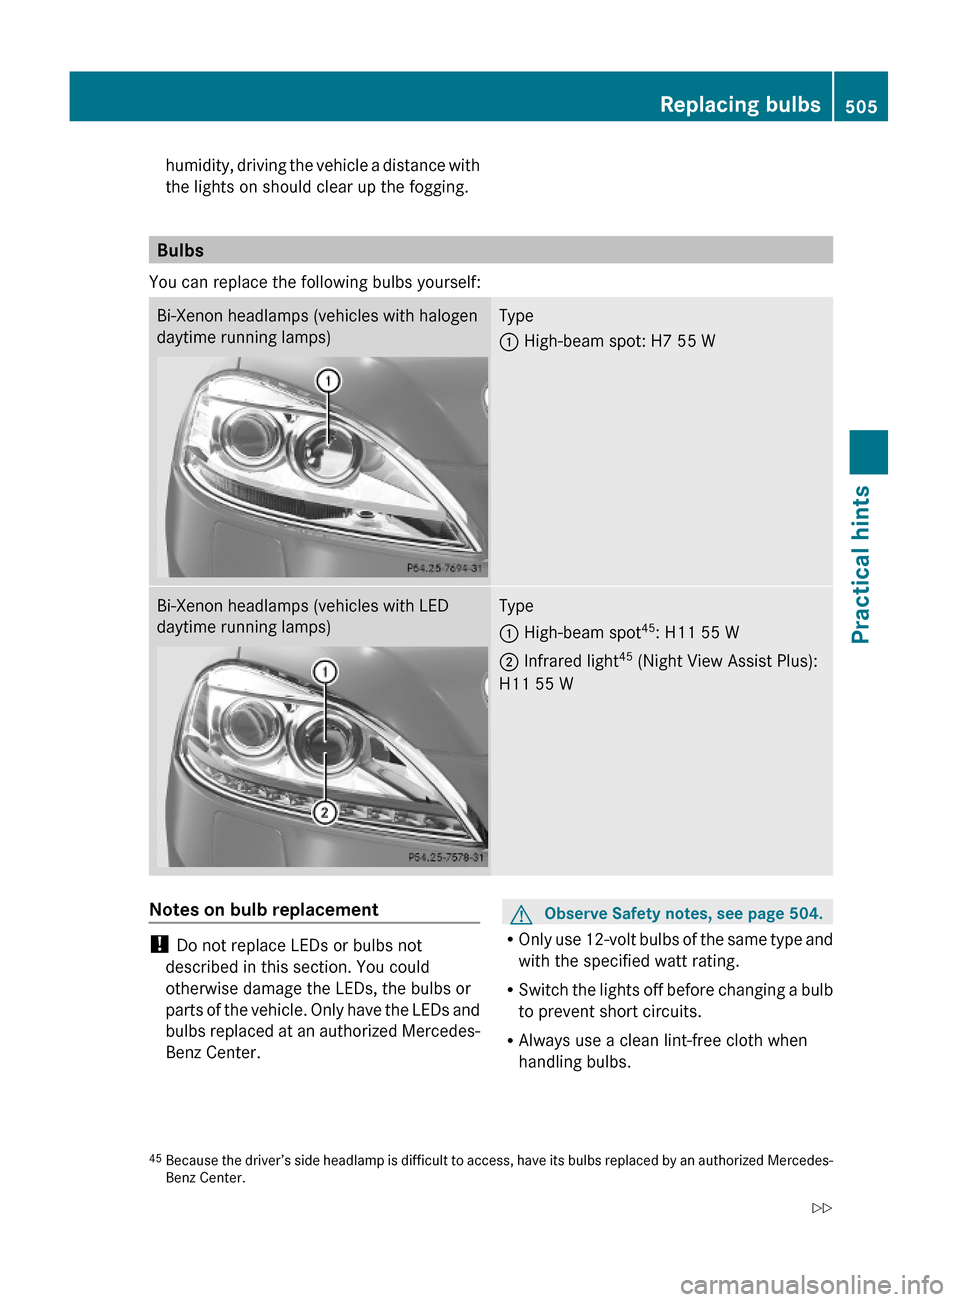
Bi-Xenon headlamps (vehicles with halogen
daytime running lamps)
Type
: High-beam spot: H7 55 W
Bi-Xenon headlamps (vehicles with LED
daytime running lamps)
Type
: High-beam spot45: H11 55 W
; Infrared light45 (Night View Assist Plus):
H11 55 W
Notes on bulb replacement
! Do not replace LEDs or bulbs not
described in this section. You could
otherwise damage the LEDs, the bulbs or
parts of the vehicle. Only have the LEDs and
bulbs replaced at an authorized Mercedes-
Benz Center.
GObserve Safety notes, see page 504.
ROnly use 12-volt bulbs of the same type and
with the specified watt rating.
RSwitch the lights off before changing a bulb
to prevent short circuits.
RAlways use a clean lint-free cloth when
handling bulbs.
45Because the driver’s side headlamp is difficult to access, have its bulbs replaced by an authorized Mercedes-Benz Center.
Replacing bulbs505Practical hints221_AKB; 6; 20, en-USd2ugruen,Version: 2.11.8.12009-09-24T13:28:17+02:00 - Seite 505Z
Page 508 of 548

RYour hands should be dry and free of oil and
grease.
RIf the newly installed bulb does not come
on, contact an authorized Mercedes-Benz
Center.
iMercedes-Benz recommends using
Longlife (LL) bulbs.
Replacing bulbs for front lamps
GWarning!
Do not remove the cover for the Bi-Xenon
headlamp. Because of high voltage in Xenon
lamps, it is dangerous to replace the bulb or
repair the lamp and its components. It is
recommended to have such work done by a
qualified technician.
Before you start to replace a bulb for a front
lamp, do the following:
XSwitch off the ignition.XTurn the exterior lamp switch to position
$.
XOpen the hood (Y page 404).
High-beam spot (vehicles with halogen
daytime running lamps)
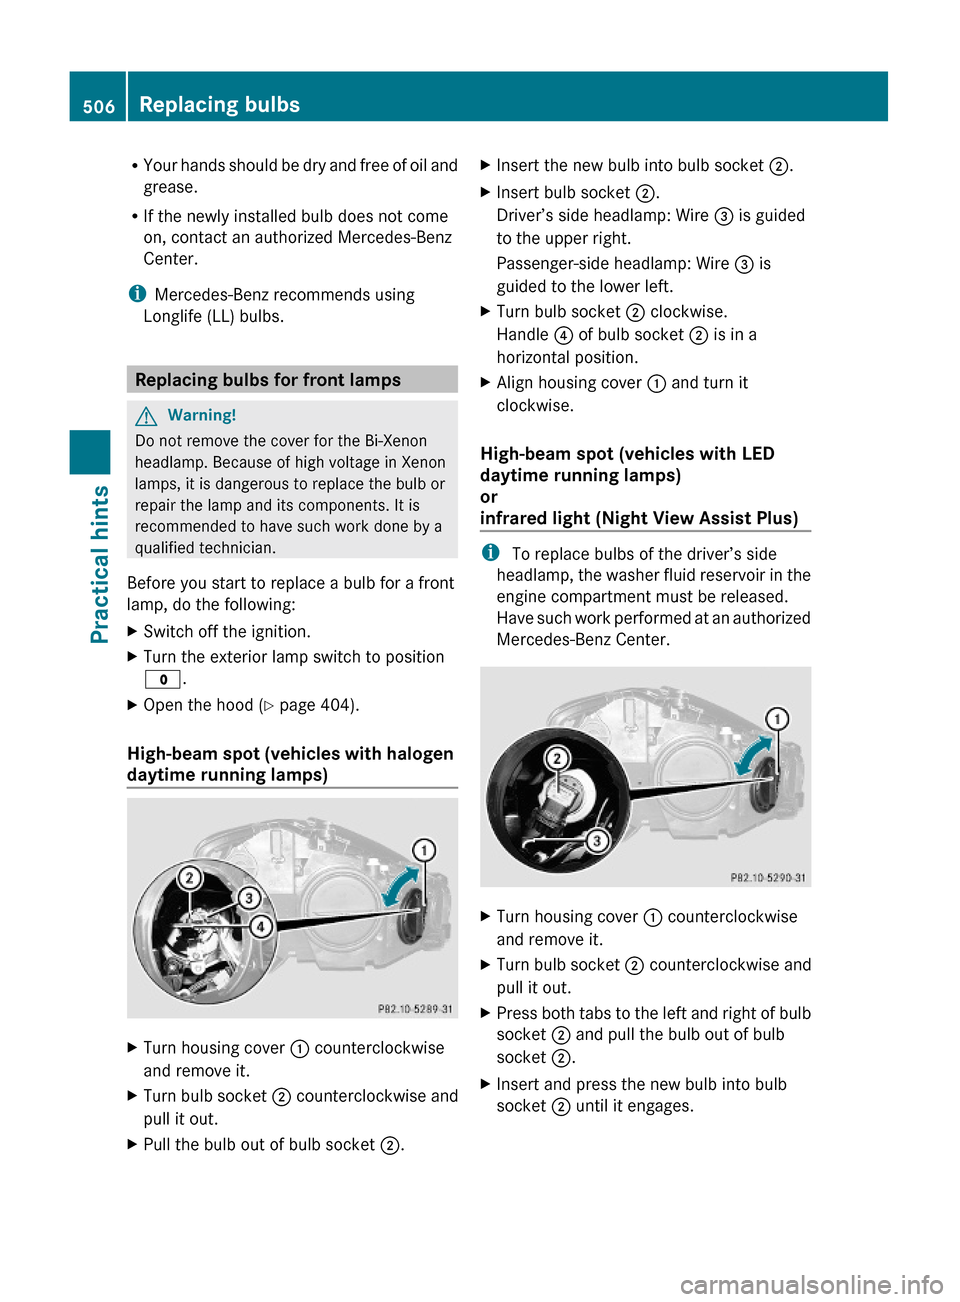
XTurn housing cover : counterclockwise
and remove it.
XTurn bulb socket ; counterclockwise and
pull it out.
XPull the bulb out of bulb socket ;.XInsert the new bulb into bulb socket ;.XInsert bulb socket ;.
Driver’s side headlamp: Wire = is guided
to the upper right.
Passenger-side headlamp: Wire = is
guided to the lower left.
XTurn bulb socket ; clockwise.
Handle ? of bulb socket ; is in a
horizontal position.
XAlign housing cover : and turn it
clockwise.
High-beam spot (vehicles with LED
daytime running lamps)
or
infrared light (Night View Assist Plus)
i To replace bulbs of the driver’s side
headlamp, the washer fluid reservoir in the
engine compartment must be released.
Have such work performed at an authorized
Mercedes-Benz Center.
XTurn housing cover : counterclockwise
and remove it.
XTurn bulb socket ; counterclockwise and
pull it out.
XPress both tabs to the left and right of bulb
socket ; and pull the bulb out of bulb
socket ;.
XInsert and press the new bulb into bulb
socket ; until it engages.
506Replacing bulbsPractical hints
221_AKB; 6; 20, en-USd2ugruen,Version: 2.11.8.12009-09-24T13:28:17+02:00 - Seite 506
Page 509 of 548

XInsert bulb socket ; into the guide on the
headlamp.
Wire = is guided to the lower right.
XTurn bulb socket ; clockwise.
Wire = is guided to the lower left.
XAlign housing cover : and turn it
clockwise.
Replacing bulbs for rear lamps
Tail lamp unit
The tail lamps are equipped with HiP bulbs
and LEDs. Have them replaced at an
authorized Mercedes-Benz Center.
Replacing wiper blades
Safety notes
GWarning!
For safety reasons, switch off the wipers and
remove the SmartKey from the starter switch
(vehicles with KEYLESS-GO: Make sure the
vehicle’s on-board electronics have status 0)
before replacing a wiper blade. Otherwise, the
wiper motor could suddenly turn on and cause
injury.
GWarning!
Wiper blades are components that are subject
to wear and tear. Replace the wiper blades
twice a year, preferably in the spring and fall.
Otherwise the windshield will not be wiped
properly. As a result, you may not be able to
observe surrounding traffic conditions and
could cause an accident.
! To avoid damage to the hood, the wiper
arms should only be folded forward when
in the vertical position.
! Never open the hood when a wiper arm is
folded forward.
Hold on to the wiper when folding a wiper
arm back. If released, the force of the
impact from the tensioning spring could
crack the windshield.
Do not allow a wiper arm to contact the
windshield glass without a wiper blade
inserted.
Mercedes-Benz recommends that you have
this work carried out at an authorized
Mercedes-Benz Center.
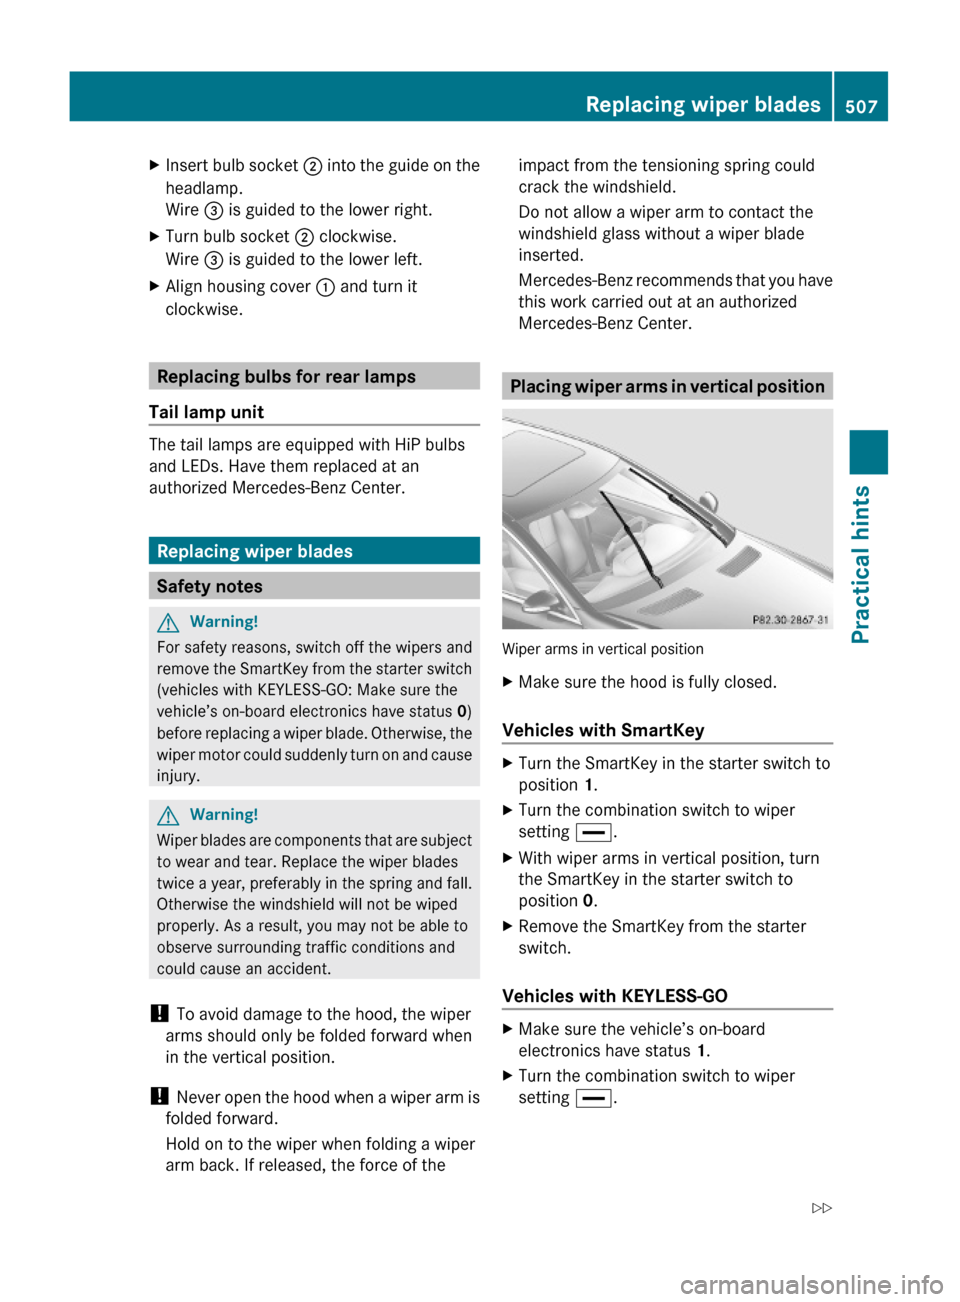
Placing wiper arms in vertical position
Wiper arms in vertical position
XMake sure the hood is fully closed.
Vehicles with SmartKey
XTurn the SmartKey in the starter switch to
position 1.
XTurn the combination switch to wiper
setting °.
XWith wiper arms in vertical position, turn
the SmartKey in the starter switch to
position 0.
XRemove the SmartKey from the starter
switch.
Vehicles with KEYLESS-GO
XMake sure the vehicle’s on-board
electronics have status 1.
XTurn the combination switch to wiper
setting °.
Replacing wiper blades507Practical hints221_AKB; 6; 20, en-USd2ugruen,Version: 2.11.8.12009-09-24T13:28:17+02:00 - Seite 507Z