2010 MERCEDES-BENZ S550 4MATIC activate navigation
[x] Cancel search: activate navigationPage 37 of 548

FunctionPagePress button W or X :to set the volumeto operate the RACETIMER 3APress button
?:to activate Voice Control
System
239
to accept a call156BInstrument cluster
illumination
326
CSwiveling COMAND display78DCOMAND display
illumination
78
ECOMAND display78FClock92GCD/DVD changer179HSD card slot180IRear window sunshade
switch
386
JHead restraint release
switch
291
KProgram mode selector
switch for automatic
transmission
322
LShortcut button for:CD/DVD/SD card181Radio166MBack button87NHazard warning flasher
switch
302
OSeat menu button216PShortcut button for:Telephone150Navigation101FunctionPageQCOMAND on/off button77RVolume control88SFavorite button94TTelephone keypad150UCOMAND controller793 AMG vehicles onlyControl systems35At a glance221_AKB; 6; 20, en-USd2ugruen,Version: 2.11.8.12009-09-24T13:28:17+02:00 - Seite 35Z
Page 92 of 548
R3-D sound does not work for mono-signal
sources, such as on analog AM radio or
in Weather Band.
R In the event of poor radio reception
quality, e.g. inside a tunnel, you should
switch off Logic 7 ®
, as a dynamic switch
from Stereo to Mono could occur,
resulting in temporary sound distortion.
R With some stereo recordings, the
resulting sound may deviate from
conventional stereo playback.
Switching the audio/video source off/
on
i When you load a CD or DVD, the audio or
video source is activated automatically.
Active audio source
XSwitching off: Select Audio Q Audio
OFF .
Playback is paused and the audio source is
switched off; Audio OFF appears in the
COMAND display.XSwitching on: Select Audio, then the
desired audio source.
or
XLoad a CD/DVD ( Y page 179) or an SD
card ( Y page 180).
or
XConnect a USB storage device
( Y page 80) or media interface device
( Y page 200) to COMAND.
Active video source
XSwitching off: Select Video Q Video
OFF .
The audio source is switched off; Video
OFF appears in the COMAND display.XSwitching on: Select Video, then the
desired video source.
or
XLoad a DVD ( Y page 179).SPLITVIEW
SPLITVIEW enables the driver and front
passenger to use separate COMAND
functions at the same time. Two different
displays appear in the COMAND screen. For
example, a Navigation display is only viewable
form the driver’s seat while a DVD Video
display is only viewable from the front
passenger’s seat.
COMAND is operated via SPLITVIEW from the
front passenger seat using the SPLITVIEW
remote control and the special wireless,
infrared headphone. You may also use a wired
headphone via the 3.5 mm socket in the front
passenger footwell.
For information about using the remote
control, see ( Y page 81).
For information about using the headphone,
see ( Y page 82).
Depending on the production date of your
vehicle, it may be equipped with SPLITVIEW.
At the time of this printing, the use of
SPLITVIEW is NOT allowed in the following US
states (AL, AZ, CO, IL, LA, MA, MD, NH, PA,
VA, VT, WA, WI, and WV) or Canadian
provinces (Manitoba, Newfoundland, New
Brunswick, and Prince Edward Island).
SPLITVIEW must NOT be operated in these
states or provinces. The driver is responsible
for observing ALL local statutory provisions.
If your vehicle is registered in a non-approved
state or province, then the feature will need
to be deactivated. Contact your authorized
Mercedes-Benz dealer to verify if SPLITVIEW
is allowed in your state or province.
Notes
R The audio volume of the wireless
headphone for the front passenger side
must be adjusted on the headphone
directly. The audio volume of a wired
headphone can be adjusted via the remote
90COMAND introductionControl systems
221_AKB; 6; 20, en-USd2ugruen,Version: 2.11.8.12009-09-24T13:28:17+02:00 - Seite 90
Page 94 of 548

RBluetooth Q Search for Bluetooth
Devices, Bluetooth activated. For
information on the Bluetooth® interface
see (Y page 151).
RUpload/Download Data Q Copy Data
to Storage Medium, Import Data from
Storage Medium (Y page 95)
RReset: Resetting the COMAND system to
factory settings
Display settings
Switching the display on or off
XSwitching off: Select Vehicle Q
Display OFF.
XSwitching back on: Rotate cVd or slide
ZVÆ, XVY or press W.
or
XPress button u.
Setting the display design
XSelect Vehicle Q System Q Display.XSelect Day Mode, Night Mode or
Automatic.
iIn the Automatic setting, COMAND sets
the display design automatically. The
setting depends on the information
retrieved from the vehicle's light sensor.
Time settings
The time of day is set automatically according
to the GPS signal and the selected time zone.
All time information always applies to the
local time at the current vehicle position.
Time information changes when entering a
different time zone.
iThe correct time zone, daylight savings
time/standard time and the time itself
must be set for the following navigation
system functions to operate correctly:
RRoute guidance on routes with time-
dependent traffic guidance
RCalculation of estimated arrival time
The settings are adopted for the analog
clock in the dashboard.
Change the settings in the following order:
1. Time zone
2. Daylight savings time/standard time
3. Time lag (only necessary in exceptional
cases)
Setting the time zone and switching
between daylight savings time and
standard time
XSetting time zone: Select Vehicle Q
System Q Time Q Time Zone.
The country list appears. The dot # in front
of a list entry indicates the current setting.
XSelect the country in which you are.
A time zone list may also be displayed,
depending on the selected country.
XSelect the desired time zone.
Subsequent operation depends on
Rwhether your navigation system has GPS
reception
Rwhich country you have set previously
You may either switch between Daylight
Savings Time (Summer) and Standard
Time.
92COMAND system settings Control systems
221_AKB; 6; 20, en-USd2ugruen,Version: 2.11.8.12009-09-24T13:28:17+02:00 - Seite 92
Page 96 of 548
If you select Yes, the second part begins.
Individualization is completed at the end of
the second part. You will see a message to
this effect. The data from the second part is
saved automatically.
Canceling during the first or second part
of individualization
XSelect Cancel.
A prompt appears asking whether you
really do want to cancel.
XSelect Yes or No.
If you select Yes, individualization will be
canceled. The data from the part at which
you exited is not saved.
If you select No, the part at which you
stopped begins again.
Deleting existing individualization data
XSelect Vehicle Q System Q Voice
Control Q Delete
Individualization.
A prompt appears asking whether you
really do want to delete.
XSelect Yes or No.
The individualization data will either be
deleted or not, depending on your
selection.
Setting the system language
XSelect Vehicle Q System Q
Language.
The language list appears. A dot #
indicates the current setting.
XChanging setting: Select the desired
language.
The language is set.
iFor some system languages, the
navigation announcements are made in
English (Y page 135).
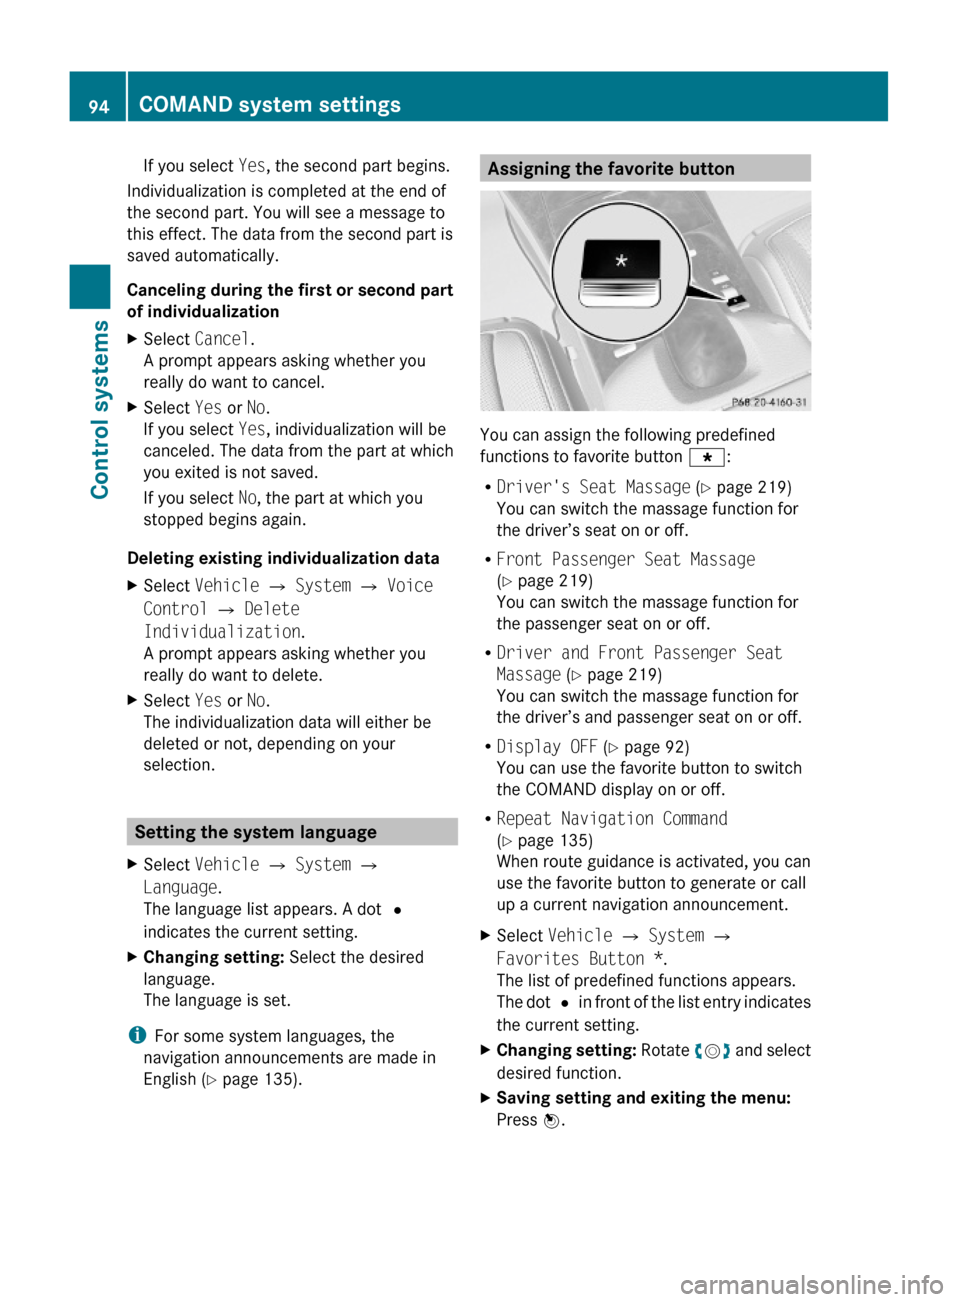
Assigning the favorite button
You can assign the following predefined
functions to favorite button g:
RDriver's Seat Massage (Y page 219)
You can switch the massage function for
the driver’s seat on or off.
RFront Passenger Seat Massage
(Y page 219)
You can switch the massage function for
the passenger seat on or off.
RDriver and Front Passenger Seat
Massage (Y page 219)
You can switch the massage function for
the driver’s and passenger seat on or off.
RDisplay OFF (Y page 92)
You can use the favorite button to switch
the COMAND display on or off.
RRepeat Navigation Command
(Y page 135)
When route guidance is activated, you can
use the favorite button to generate or call
up a current navigation announcement.
XSelect Vehicle Q System Q
Favorites Button *.
The list of predefined functions appears.
The dot # in front of the list entry indicates
the current setting.
XChanging setting: Rotate cVd and select
desired function.
XSaving setting and exiting the menu:
Press W.
94COMAND system settings Control systems
221_AKB; 6; 20, en-USd2ugruen,Version: 2.11.8.12009-09-24T13:28:17+02:00 - Seite 94
Page 102 of 548
journey is continued when you switch
COMAND back on and start driving.
Hard disk errors
COMAND has an integrated hard disk on
which the map software is stored.
If the message Navigation Unavailable.
Please refer to the operating
instructions. appears:
XSwitch the COMAND off.XSwitch the COMAND back on.
i
If the message appears again, contact an
authorized Mercedes-Benz Center.
Units of measurement
The units of measurement in navigation mode
are identical to those set in the instrument
cluster ( Y page 235). The units of
measurement can only be changed via the
instrument cluster control system.
Input restrictions
There is an input restriction for vehicles in
certain countries.
The restriction is active for vehicle speeds
above approximately 3 mph (5 km/h). The
restriction is deactivated as soon as the
speed falls below approximately 2 mph
(3 km/h).
Certain entries cannot be made when the
restriction is active.
This is indicated by the fact that certain menu
items cannot be selected, e.g. entering a
destination via map.
Navigation submenu overview
i The components and operating principles of COMAND can be found on ( Y page 76).
100COMAND navigation (introduction)Control systems
221_AKB; 6; 20, en-USd2ugruen,Version: 2.11.8.12009-09-24T13:28:17+02:00 - Seite 100
Page 106 of 548
RBird’s-eye View: Map display : is oriented
in the direction into which you are heading;
the orange tip of the symbol points to the
North.
R 3-D Map: Certain buildings in selected
cities are displayed in detail as a 3-D (three-
dimensional) model. The map displays
mountains and valleys three-
dimensionally. The 3-D map is country-
specific and is connected with the function
City (3D) ( Y page 105).XSelecting map orientation: Select Navi
Q Map Orientation .
The list of available map orientations
appears. The dot # indicates the currently
selected map orientation.XSelect North Up , Heading Up , Bird's-
eye View , or 3-D Map and press W.XExiting menu: Slide XV Y.
Setting POI symbols
You can set which points of interest (POIs)
should be displayed as symbols in the map.
POIs are parking facilities, hotels, restaurants
or movie theaters, for example.
i Depending on the map scale, POI symbols
may not be visible although their display is
activated. In addition, POI symbols may be
covered by other POIs or names displayed
on the map.
The following settings are possible:
R Standard symbols (factory setting)
R Personal symbols (you can select the
desired POIs)
R No symbols
XAdjusting: Select Navi Q POI Symbols
on Map .
The map display list appears. A dot #
indicates the current setting.XSelect Standard symbols , Personal
symbols or No symbols .
If you select Personal symbols , the list of
POIs appears.XSwitching POI symbol display on or
off: Select the desired POI.
The corresponding symbol displays are
switched on or off, depending on the
previous status. A checkmark indicates
which status is active. You can switch on
the symbol displays for more than one POI.
i The list shows all symbols that are
contained in the digital map across all
states (USA) and provinces (Canada). Not
all POIs in all states (USA) or in all provinces
(Canada) are available, however. Certain
POI symbols may not be displayed on the
map, even if the symbol display is switched
on. You can use this list as a map legend.
The map legend also contains, in addition
to the POI symbols, the names of the POI
categories.
XExiting menu: Slide XV Y or press back
button % in the center console
( Y page 87).
Selecting traffic symbols on the map
You can select what kind of traffic information
is displayed on the map ( Y page 139).
Selecting text information on the map
COMAND can display various text
information below the map:
R Time of arrival and distance to destination
R Current street
R Geo coordinates
R None
104COMAND navigation (introduction)Control systems
221_AKB; 6; 20, en-USd2ugruen,Version: 2.11.8.12009-09-24T13:28:17+02:00 - Seite 104
Page 122 of 548
RMap: Using the map to enter a destination
(Y page 122)
iIn this case, using the map for destination
entry is based on the city seen in the
address input menu.
RPOI: Entering a point of interest
(Y page 124)
iIn this case, entering a POI is based on the
city seen in the address input menu.
RSave: Saving a destination in the
destination memory (Y page 145)
RStart: Starting the route calculation
(Y page 120)
XContinuing or completing destination
entry: Select one of the menu items
mentioned above.
Starting the route calculation
iYou cannot start the route calculation
until all the necessary address data has
been entered.
XAfter entering the destination, select
Start.
The route calculation will start if route
guidance has not already been activated.
If route guidance has already been
activated, a prompt will appear asking
whether you want to end the current route
guidance.
XSelect Yes or No.
If you select Yes, COMAND will stop the
route guidance and start the route
calculation for the new destination.
If you select No, COMAND will continue
with the active route guidance.
The new destination is discarded.
During the route calculation, an arrow will
indicate the direction to the destination.
Below this, you will see the message The
route is being calculated....
Once the route has been calculated, route
guidance begins (Y page 129).
iRoute calculation requires time. The time
depends on factors such as the distance
from the destination.
COMAND calculates the route using the
digital map data. The calculated route may
differ from the actual road situation, e.g.
due to road construction or incomplete
map data. Please make sure that you
observe the notes about the digital map
(Y page 96).
iRoutes to destinations that do not have
road or ferry access to the current position.
This applies, for example, to routes from
the mainland to Hawaii.
Entering a destination from the
destination memory
XSelect Navi Q Destination Q From
Memory.
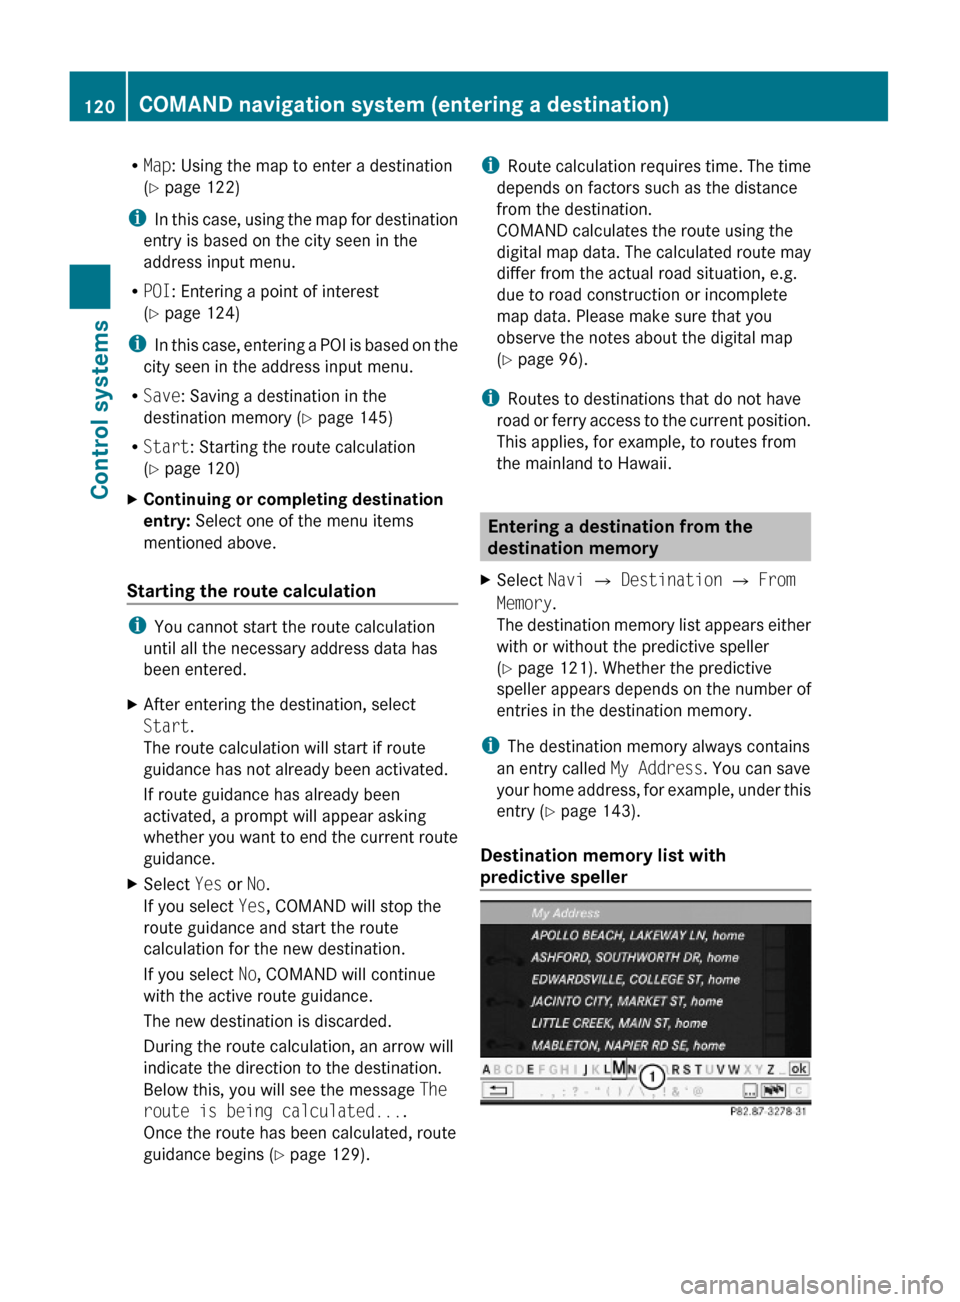
The destination memory list appears either
with or without the predictive speller
(Y page 121). Whether the predictive
speller appears depends on the number of
entries in the destination memory.
iThe destination memory always contains
an entry called My Address. You can save
your home address, for example, under this
entry (Y page 143).
Destination memory list with
predictive speller
120COMAND navigation system (entering a destination)Control systems
221_AKB; 6; 20, en-USd2ugruen,Version: 2.11.8.12009-09-24T13:28:17+02:00 - Seite 120
Page 145 of 548
XBack to list: Select Back.XDisplaying previous or next traffic
message: Select Previous or Next.
XDisplaying details for selected traffic
message: Select Details.
XSwitching to map view: Select Map.
COMAND navigation system
(destination memory)
My address
iThe destination memory always contains
an entry called My Address. You can save
your home address, for example, under this
entry.
Assigning your address for the first
time or changing your own address
Assigning and/or changing your own
address
XSelect Navi Q Destination Q From
Memory.
Depending on the number of entries in the
destination memory, you will see the
destination memory list with or without
predictive speller.
Example illustration: Destination memory listwithout predictive speller
In the destination memory list without
predictive speller, the My Address entry is
automatically highlighted.
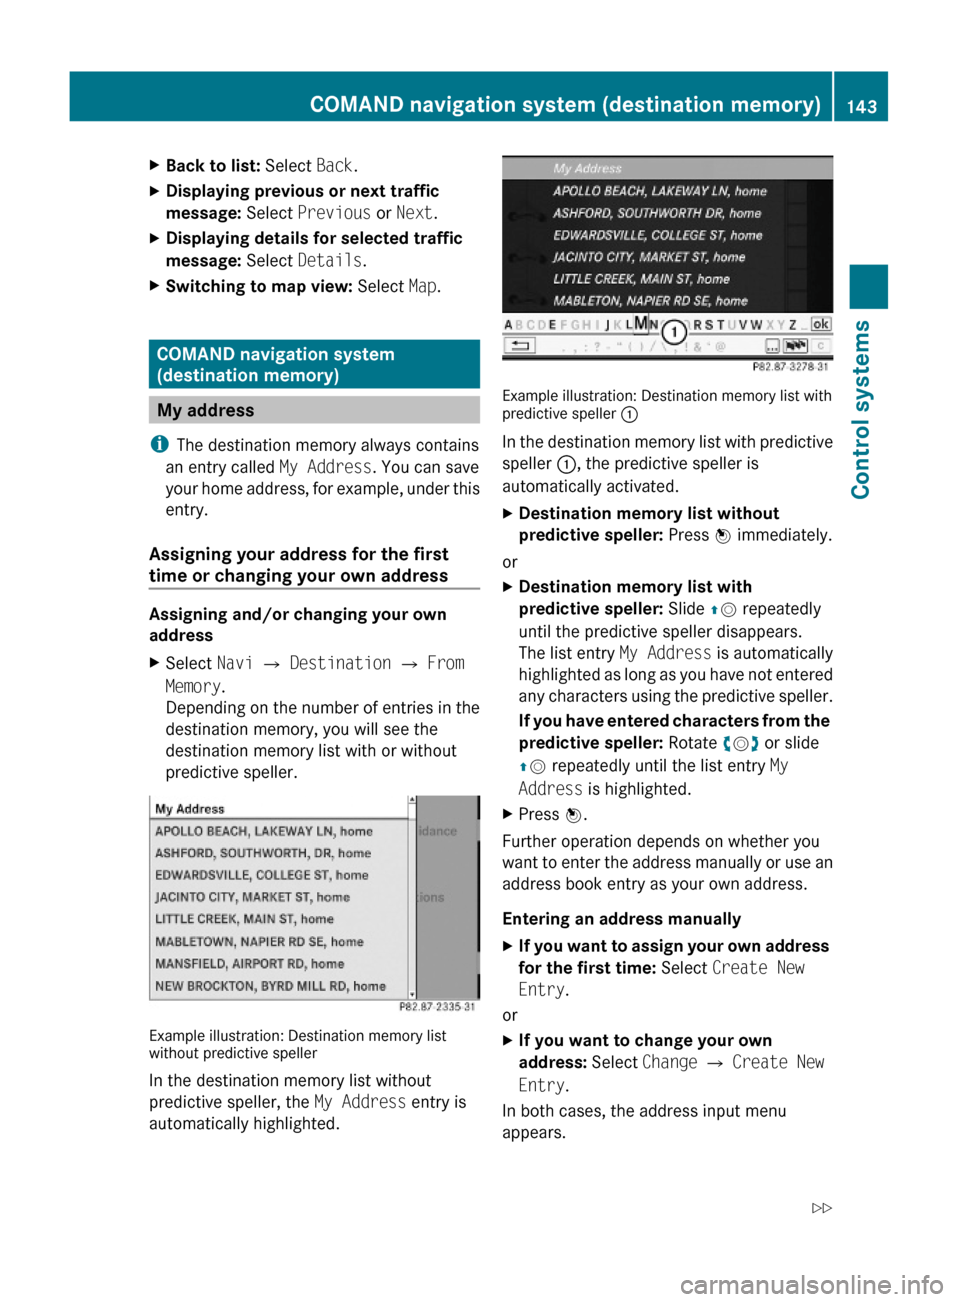
Example illustration: Destination memory list withpredictive speller :
In the destination memory list with predictive
speller :, the predictive speller is
automatically activated.
XDestination memory list without
predictive speller: Press W immediately.
or
XDestination memory list with
predictive speller: Slide ZV repeatedly
until the predictive speller disappears.
The list entry My Address is automatically
highlighted as long as you have not entered
any characters using the predictive speller.
If you have entered characters from the
predictive speller: Rotate cVd or slide
ZV repeatedly until the list entry My
Address is highlighted.
XPress W.
Further operation depends on whether you
want to enter the address manually or use an
address book entry as your own address.
Entering an address manually
XIf you want to assign your own address
for the first time: Select Create New
Entry.
or
XIf you want to change your own
address: Select Change Q Create New
Entry.
In both cases, the address input menu
appears.
COMAND navigation system (destination memory)143Control systems221_AKB; 6; 20, en-USd2ugruen,Version: 2.11.8.12009-09-24T13:28:17+02:00 - Seite 143Z