2010 MERCEDES-BENZ S550 4MATIC engine
[x] Cancel search: enginePage 235 of 548

XPress button a again if you would like
to change the current status.
After the function has been activated,
ATTENTION ASSIST indicator À appears
on the left-hand side of the multifunction
display.
For more information on ATTENTION ASSIST,
see (Y page 355).
Switching Blind Spot Assist on or off
XPress button = or ; to select the
DriveAssist menu.
XPress button : or 9 to select the
Blind Spot Assist function
XPress button a.XPress button a again if you would like
to change the current status.
Depending on the previous status, Blind
Spot Assist will be Enabled or Disabled
For more information on Blind Spot Assist,
see (Y page 359).
Switching Lane Keeping Assist on or off XPress button = or ; to select the
DriveAssist menu.
XPress button : or 9 to select the
Lane Keeping Assist function
XPress button a.XPress button a again if you would like
to change the current status.
After the function has been activated, the
Lane Keeping Assist indicator Ã
appears on the left-hand side of the
multifunction display.
For more information on Lane Keeping
Assistance, see (Y page 362).
Service menu
In the Service menu the following functions
are available:
RVehicle status message memory
(Y page 233)
RChecking tire inflation pressure
electronically with the Advanced TPMS
(Y page 414)
RCalling up the maintenance service
indicator display (Y page 439)
RChecking engine oil level (S 600 and
S 65 AMG) (Y page 406)
Vehicle status message memory
Use the vehicle status message memory
function to scan malfunction and warning
messages that may be stored in the system.
Such messages appear in the multifunction
Instrument cluster control system233Control systems221_AKB; 6; 20, en-USd2ugruen,Version: 2.11.8.12009-09-24T13:28:17+02:00 - Seite 233Z
Page 237 of 548
XPress button a again if you would like
to change the current status.
Depending on the previous status, the
Daytime Running Lamps will be switched
on (Enabled) or off (Disabled).
With Daytime Running Lamps mode
Enabled selected and the exterior lamp
switch at position $ or c, the low-
beam headlamps are switched on when the
engine is running.
In low ambient light conditions the following
lamps will come on additionally:
RParking lamps
RTail lamps
RLicense plate lamps
RSide marker lamps
For more information on the daytime running
lamp mode, see “Lighting” (Y page 299).
iMake sure the exterior lamp switch is set
to M or c when you switch off the
daytime running lamps while driving at
night.
Setting Adaptive Highbeam Assist
XPress button = or ; to select the
Settings menu.
XPress button : or 9 to select the
Adapt. High-beam Ass. .
XPress button a.XPress button a again if you would like
to change the current status.
Depending on the previous status, the
Adaptive Highbeam Assist will be
Enabled or Disabled.
For more information on the Adaptive
Highbeam Assist, see (Y page 301).
Showing or hiding additional
speedometer
You can have an additional digital
speedometer shown in the multifunction
display. Depending on the setting for the
speedometer display mode (Y page 235), the
speed is shown in the unit of kilometers/hour
(setting miles) or miles/hour (setting km).
XPress button = or ; to select the
Settings menu.
XPress button : or 9 to select the
Add. Speedometer function.
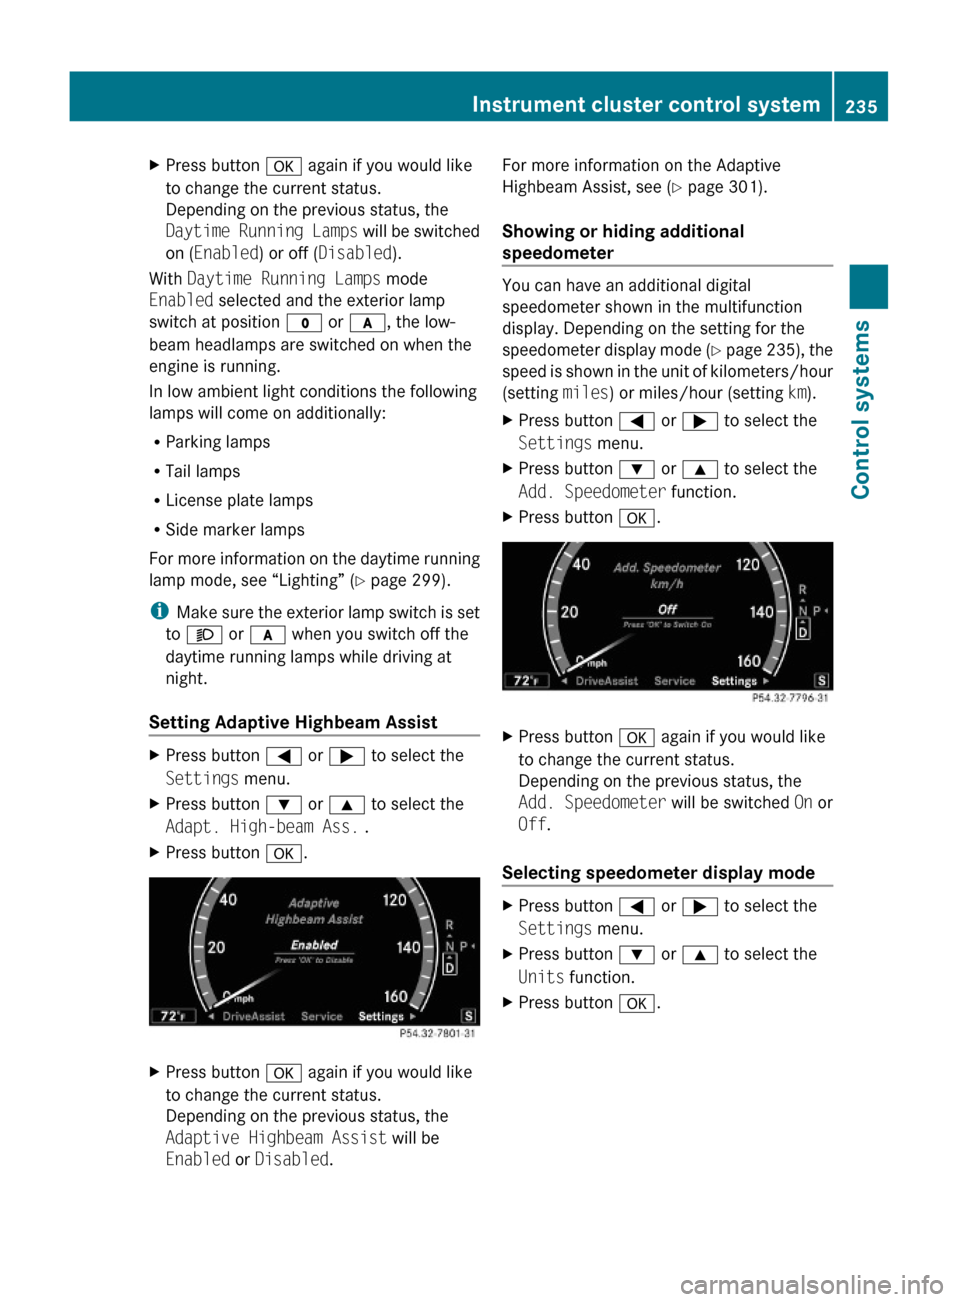
XPress button a.XPress button a again if you would like
to change the current status.
Depending on the previous status, the
Add. Speedometer will be switched On or
Off.
Selecting speedometer display mode
XPress button = or ; to select the
Settings menu.
XPress button : or 9 to select the
Units function.
XPress button a.Instrument cluster control system235Control systems221_AKB; 6; 20, en-USd2ugruen,Version: 2.11.8.12009-09-24T13:28:17+02:00 - Seite 235Z
Page 239 of 548
permitted. Do not tamper with, alter, or use
in any non-approved way.
Any unauthorized modification to this
device could void the user’s authority to
operate the equipment.
XPress button = or ; to select the
Settings menu.
XPress button : or 9 to select the
Radar Sensors function.
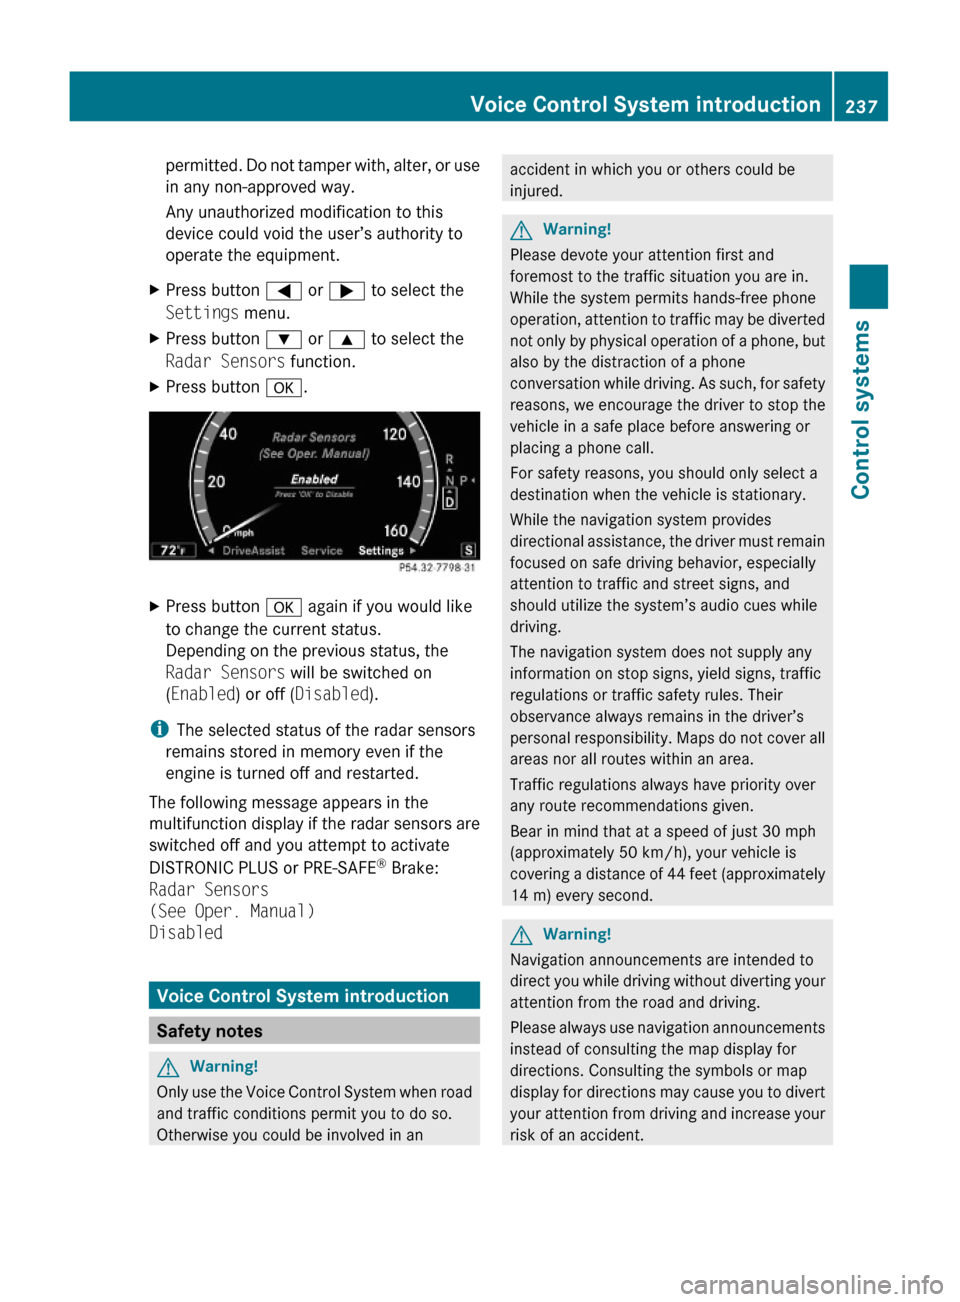
XPress button a.XPress button a again if you would like
to change the current status.
Depending on the previous status, the
Radar Sensors will be switched on
(Enabled) or off (Disabled).
iThe selected status of the radar sensors
remains stored in memory even if the
engine is turned off and restarted.
The following message appears in the
multifunction display if the radar sensors are
switched off and you attempt to activate
DISTRONIC PLUS or PRE-SAFE® Brake:
Radar Sensors
(See Oper. Manual)
Disabled
Voice Control System introduction
Safety notes
GWarning!
Only use the Voice Control System when road
and traffic conditions permit you to do so.
Otherwise you could be involved in an
accident in which you or others could be
injured.
GWarning!
Please devote your attention first and
foremost to the traffic situation you are in.
While the system permits hands-free phone
operation, attention to traffic may be diverted
not only by physical operation of a phone, but
also by the distraction of a phone
conversation while driving. As such, for safety
reasons, we encourage the driver to stop the
vehicle in a safe place before answering or
placing a phone call.
For safety reasons, you should only select a
destination when the vehicle is stationary.
While the navigation system provides
directional assistance, the driver must remain
focused on safe driving behavior, especially
attention to traffic and street signs, and
should utilize the system’s audio cues while
driving.
The navigation system does not supply any
information on stop signs, yield signs, traffic
regulations or traffic safety rules. Their
observance always remains in the driver’s
personal responsibility. Maps do not cover all
areas nor all routes within an area.
Traffic regulations always have priority over
any route recommendations given.
Bear in mind that at a speed of just 30 mph
(approximately 50 km/h), your vehicle is
covering a distance of 44 feet (approximately
14 m) every second.
GWarning!
Navigation announcements are intended to
direct you while driving without diverting your
attention from the road and driving.
Please always use navigation announcements
instead of consulting the map display for
directions. Consulting the symbols or map
display for directions may cause you to divert
your attention from driving and increase your
risk of an accident.
Voice Control System introduction237Control systems221_AKB; 6; 20, en-USd2ugruen,Version: 2.11.8.12009-09-24T13:28:17+02:00 - Seite 237Z
Page 278 of 548
iCanada only:
This device complies with RSS-210 of
Industry Canada. Operation is subject to
the following two conditions:
1. This device may not cause interference,
and
2. this device must accept any interference received, including
interference that may cause undesired
operation of the device.
Any unauthorized modification to this
device could void the user’s authority to
operate the equipment.
Important notes on using KEYLESS-GO
R You can also use the SmartKey with
KEYLESS-GO like a normal SmartKey
( Y page 274).
R You can combine KEYLESS-GO functions
with normal SmartKey functions (e.g.
unlocking with KEYLESS-GO and locking
with button &).
R Always carry the SmartKey with you.
R Never store the SmartKey together with
- electronic items such as a mobile phone
or another SmartKey
- metallic objects such as coins or metal
foil
Doing so could impair the function of the
KEYLESS-GO system.
R To lock or unlock the vehicle, the SmartKey
must be located outside the vehicle within
approximately 3 ft (1 m) of a door or the
trunk.
R When the vehicle has been parked for more
than 72 hours, the KEYLESS-GO function is
deactivated. Pull an outside door handle
and switch on the ignition once to activate
the KEYLESS-GO function.
R If the SmartKey is positioned farther away
from the vehicle, the system may no longer
recognize the SmartKey. The vehicle
cannot be locked or the engine started via
the KEYLESS-GO system.
R If the SmartKey is removed from the vehicle
(e.g. if a passenger exits the vehicle with
the SmartKey)
- when pressing the KEYLESS-GO start/
stop button or trying to lock the vehicle
with the outside door handle the
message Key Not Detected appears in
the multifunction display
- with the engine running, the red message
Key Not Detected appears in the
multifunction display while driving off
Find the SmartKey or change its present
location immediately (e.g. place it on the
front passenger seat or insert it in shirt
pocket).
R If you have started the engine with the
KEYLESS-GO start/stop button, you can
turn it off again by
- pressing the KEYLESS-GO start/stop
button
- inserting the SmartKey into the starter
switch when the vehicle is at a standstill
and the automatic transmission is in park
position P
R The vehicle could be inadvertently
unlocked if the SmartKey is within 3 ft (1 m)
of the vehicle and
- an outside door handle is splashed with
water
or
- you attempt to clean an outside door
handle
R Remember that the engine can be started
by anyone with a SmartKey that is left
inside the vehicle.
Possibility 1 (One SmartKey in the vehicle,
one SmartKey outside the vehicle):
If you leave the SmartKey behind when
exiting and locking the vehicle, no message
appears in the multifunction display.276Locking and unlockingControls in detail
221_AKB; 6; 20, en-USd2ugruen,Version: 2.11.8.12009-09-24T13:28:17+02:00 - Seite 276
Page 281 of 548
The doors are designed to unlock
automatically after an accident if the force of
the impact exceeds a preset threshold.
The vehicle locks automatically when the
ignition is switched on and the wheels are
turning at a vehicle speed of above 9 mph
(15 km/h). You could therefore lock yourself
out when the vehicle is pushed or towed or is
on a test stand.
Locking and unlocking from the inside
GObserve Safety notes, see page 56.
You can lock or unlock the vehicle from the
inside using the central locking or unlocking
switch. This can be useful, for example, if you
want to lock the vehicle before starting to
drive.
The central locking or unlocking switch does
not lock or unlock the fuel filler flap or the
interior storage compartments, such as the
glove box.
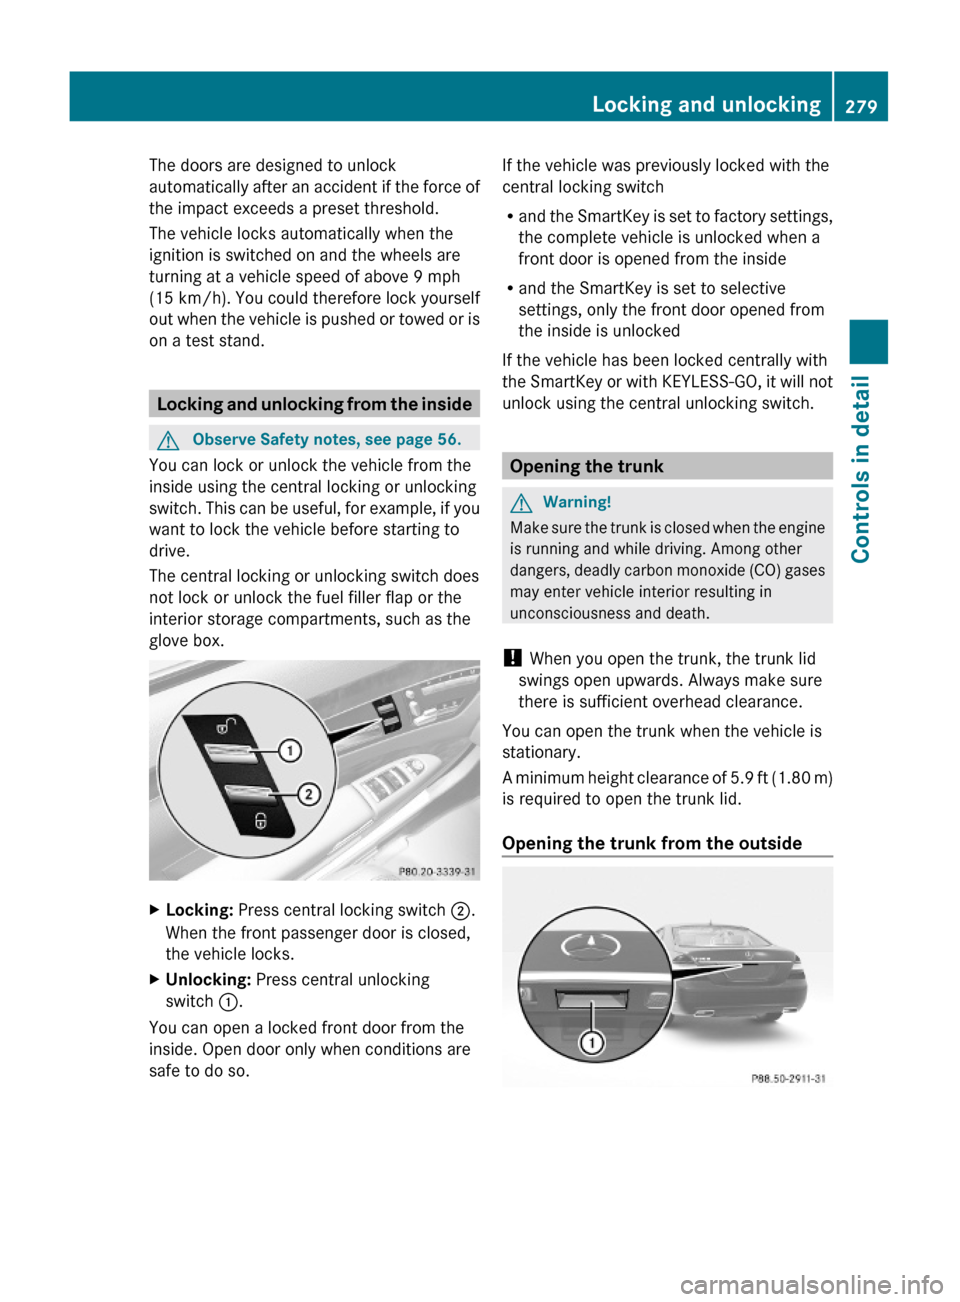
XLocking: Press central locking switch ;.
When the front passenger door is closed,
the vehicle locks.
XUnlocking: Press central unlocking
switch :.
You can open a locked front door from the
inside. Open door only when conditions are
safe to do so.
If the vehicle was previously locked with the
central locking switch
Rand the SmartKey is set to factory settings,
the complete vehicle is unlocked when a
front door is opened from the inside
Rand the SmartKey is set to selective
settings, only the front door opened from
the inside is unlocked
If the vehicle has been locked centrally with
the SmartKey or with KEYLESS-GO, it will not
unlock using the central unlocking switch.
Opening the trunk
GWarning!
Make sure the trunk is closed when the engine
is running and while driving. Among other
dangers, deadly carbon monoxide (CO) gases
may enter vehicle interior resulting in
unconsciousness and death.
! When you open the trunk, the trunk lid
swings open upwards. Always make sure
there is sufficient overhead clearance.
You can open the trunk when the vehicle is
stationary.
A minimum height clearance of 5.9 ft (1.80 m)
is required to open the trunk lid.
Opening the trunk from the outside
Locking and unlocking279Controls in detail221_AKB; 6; 20, en-USd2ugruen,Version: 2.11.8.12009-09-24T13:28:17+02:00 - Seite 279Z
Page 282 of 548
XPress and hold button F (Y page 274)
on the SmartKey until the trunk unlocks
and begins to open.
or
XPull on handle :.
In vehicles without KEYLESS-GO: The
vehicle must be unlocked.
If the trunk does not open, it is still locked
separately (Y page 283).
Vehicles with trunk opening/closing system:
XStopping the opening procedure: Press
button F on the SmartKey.
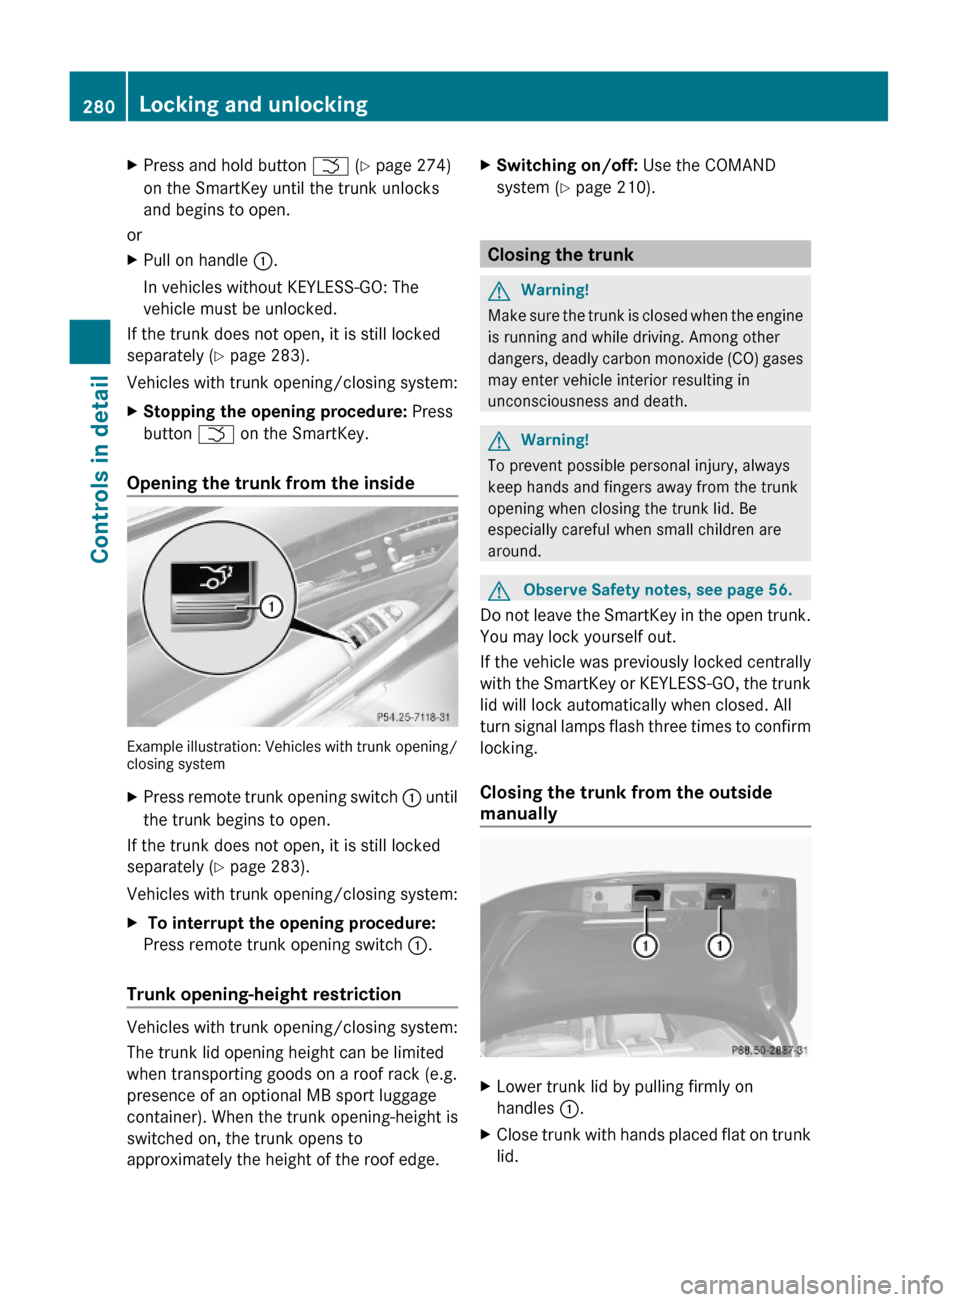
Opening the trunk from the inside
Example illustration: Vehicles with trunk opening/closing system
XPress remote trunk opening switch : until
the trunk begins to open.
If the trunk does not open, it is still locked
separately (Y page 283).
Vehicles with trunk opening/closing system:
X To interrupt the opening procedure:
Press remote trunk opening switch :.
Trunk opening-height restriction
Vehicles with trunk opening/closing system:
The trunk lid opening height can be limited
when transporting goods on a roof rack (e.g.
presence of an optional MB sport luggage
container). When the trunk opening-height is
switched on, the trunk opens to
approximately the height of the roof edge.
XSwitching on/off: Use the COMAND
system (Y page 210).
Closing the trunk
GWarning!
Make sure the trunk is closed when the engine
is running and while driving. Among other
dangers, deadly carbon monoxide (CO) gases
may enter vehicle interior resulting in
unconsciousness and death.
GWarning!
To prevent possible personal injury, always
keep hands and fingers away from the trunk
opening when closing the trunk lid. Be
especially careful when small children are
around.
GObserve Safety notes, see page 56.
Do not leave the SmartKey in the open trunk.
You may lock yourself out.
If the vehicle was previously locked centrally
with the SmartKey or KEYLESS-GO, the trunk
lid will lock automatically when closed. All
turn signal lamps flash three times to confirm
locking.
Closing the trunk from the outside
manually
XLower trunk lid by pulling firmly on
handles :.
XClose trunk with hands placed flat on trunk
lid.
280Locking and unlockingControls in detail
221_AKB; 6; 20, en-USd2ugruen,Version: 2.11.8.12009-09-24T13:28:17+02:00 - Seite 280
Page 286 of 548

GWarning!
Only drive with the doors closed. Otherwise,
one or more of the doors could open while the
vehicle is in motion, putting you and/or
others at risk.
GWarning!
Make sure the trunk is closed when the engine
is running and while driving. Among other
dangers, deadly carbon monoxide (CO) gases
may enter vehicle interior resulting in
unconsciousness and death.
XPower closing assist for doors: Press the
doors gently past the initial engage position
into the lock.
XPower closing assist for trunk lid: Press
the trunk lid gently into its lock.
Starter switch positions
SmartKey
GObserve Safety notes, see page 56.
Starter switch
gFor removing SmartKey1Power supply for some electrical
consumers, e.g. wipers
2Ignition (power supply for all electrical
consumers) and driving position
3Starting position
When you switch on the ignition, all lamps in
the instrument cluster come on. The high-
beam headlamp indicator lamp and turn
signal indicator lamps will only come on if
activated. If a lamp in the instrument cluster
fails to come on when the ignition is switched
on, have it checked and replaced if necessary.
If a lamp in the instrument cluster remains on
after starting the engine or comes on while
driving, refer to “Lamps in instrument cluster”
(Y page 489).
XAlways remove the SmartKey from the
starter switch when the engine is not in
operation.
This will help to prevent accelerated vehicle
battery discharge or a completely
discharged vehicle battery.
If the SmartKey cannot be turned in the
starter switch, the vehicle battery may not be
sufficiently charged.
XCheck the vehicle battery and charge it if
necessary (Y page 514).
or
XGet a jump start (Y page 514).
iIf the SmartKey does not belong to the
vehicle, the SmartKey can be turned in the
starter switch. However, the ignition does
not switch on and the engine does not start.
KEYLESS-GO
GObserve Safety notes, see page 56.
Vehicles equipped with the KEYLESS-GO
feature are supplied with a SmartKey with
integrated KEYLESS-GO function and a
removable KEYLESS-GO start/stop button.
The KEYLESS-GO start/stop button must be
inserted in the starter switch and the
SmartKey present in the vehicle.
Pressing the KEYLESS-GO start/stop button
without depressing the brake pedal
corresponds to the various starter switch
positions (Y page 284).
Pressing the KEYLESS-GO start/stop button
with the brake pedal firmly depressed will
start the engine (Y page 311).
The KEYLESS-GO start/stop button can be
pulled out of the starter switch easily. You can
284Starter switch positionsControls in detail
221_AKB; 6; 20, en-USd2ugruen,Version: 2.11.8.12009-09-24T13:28:17+02:00 - Seite 284
Page 287 of 548

then insert the SmartKey into the starter
switch.
iThe KEYLESS-GO start/stop button does
not need to be removed from the starter
switch when you leave the vehicle.
However, always take the SmartKey with
you when you leave the vehicle. As long as
the SmartKey is in the vehicle, the vehicle’s
electrical systems can be switched on or
the engine can be started using the
KEYLESS-GO start/stop button.
:KEYLESS-GO start/stop button;Starter switchXInsert the KEYLESS-GO start/stop button
into the starter switch (if not inserted
already).
iAllow for 2 seconds until the system has
detected the KEYLESS-GO start/stop
button.
XMake sure the automatic transmission is in
park position P.
XDo not depress the brake pedal.
KEYLESS-GO start/stop button
=USA only?Canada only
Position 0
Before you press the KEYLESS-GO start/stop
button, the vehicle’s on-board electronics
have status 0 (as with SmartKey removed).
Position 1
XPress the KEYLESS-GO start/stop button
once.
This supplies power for some electrical
consumers, e.g. wipers.
iWhen you now open the driver’s door, the
power supply is switched off.
Ignition (or position 2)
XPress the KEYLESS-GO start/stop button
twice.
This supplies power for all electrical
consumers.
When you switch on the ignition, all lamps
in the instrument cluster come on. The
high-beam headlamp indicator lamp and
turn signal indicator lamps will only come
on if activated. If a lamp in the instrument
cluster fails to come on when the ignition
is switched on, have it checked and
replaced if necessary. If a lamp in the
instrument cluster remains on after
starting the engine or comes on while
driving, refer to “Lamps in instrument
cluster” (Y page 489).
Starter switch positions285Controls in detail221_AKB; 6; 20, en-USd2ugruen,Version: 2.11.8.12009-09-24T13:28:17+02:00 - Seite 285Z