2010 MERCEDES-BENZ S CLASS reset
[x] Cancel search: resetPage 57 of 548
! When adjusting the seat backrests, make
sure there are no items behind the seats.
Otherwise, you could damage the seats
and/or the items.
For information on the seat belt adjustment
function as an integrated comfort feature of
the PRE-SAFE ®
system, see ( Y page 52).
NECK-PRO active front head
restraints
The NECK-PRO active front head restraints
are intended to offer the driver and front
passenger increased protection from
whiplash-type injuries. In the event of a rear-
end collision, the NECK-PRO active front head
restraints on the front seats are designed to
move forward in the direction of travel. They
thus provide the head with increased support
earlier on in the collision sequence. The
NECK-PRO active front head restraints will
move forward whether the seats are occupied
or not.
GWarning!
Do not attach any objects (e.g. hangers) to the
head restraint posts. Otherwise, the NECK-
PRO active front head restraints may not be
able to function properly or offer the intended
degree of protection they were designed for
in the event of a rear-end collision.
GWarning!
Only use seat or head restraint covers which
have been tested and approved by Mercedes-
Benz for your vehicle model.
Using other seat or head restraint covers may
interfere with or prevent the activation of the
NECK-PRO active front head restraints and/
or the deployment of the front side impact air
bags.
Contact an authorized Mercedes-Benz Center
for availability.
When the NECK-PRO active front head
restraints have been triggered in an accident,
the NECK-PRO active front head restraints
must be reset. Otherwise, the NECK-PRO
active front head restraints cannot offer any
additional protection in the event of another
rear-end collision.
For information on resetting the activated
NECK-PRO active front head restraints, see
“Resetting activated head restraints”
( Y page 501).
You cannot remove the NECK-PRO active
front head restraints.GWarning!
For your protection, drive only with properly
positioned head restraints.
Adjust the head restraint so that it is as close
to the head as possible and the center of the
head restraint supports the back of the head
at eye level. This will reduce the potential for
injury to the head and neck in the event of an
accident or similar situation.
For information on head restraint adjustment,
see “Head restraint height” ( Y page 287), or
see “Head restraint fore and aft adjustment”
( Y page 289).
Correct driver seat adjustment
GWarning!
In order to avoid possible loss of vehicle
control the following must be done before the
vehicle is put into motion:
R seat adjustment
R head restraint adjustment
R steering wheel adjustment
R rear view mirror adjustment
R fastening of seat belts
Occupant safety55Safety and security221_AKB; 6; 20, en-USd2ugruen,Version: 2.11.8.12009-09-24T13:28:17+02:00 - Seite 55Z
Page 71 of 548
! Avoid spinning of a drive wheel for an
extended period with the ESC switched off.
This may cause serious damage to the
drivetrain which is not covered by the
Mercedes-Benz Limited Warranty.
Switching on the ESCXSwitch on the ESC via the control system
( Y page 231).
PRE-SAFE ®
Brake
The PRE-SAFE ®
Brake is available in vehicles
equipped with DISTRONIC PLUS. The PRE-
SAFE ®
Brake can assist you in minimizing the
risk of a rear-end collision with a vehicle in
front of you. The PRE-SAFE ®
Brake may also
reduce the severity of an accident. At speeds
above approximately 20 mph (30 km/h) it will
issue a warning when your vehicle is
approaching the preceding vehicle very
quickly. An intermittent acoustic warning
sounds and the distance warning lamp 00BA
in the instrument cluster comes on.
When the driver and front passenger have
fastened their seat belts, the PRE-SAFE ®
Brake can also
R brake the vehicle within a speed range of
up to 112 mph (180 km/h) automatically
R activate preventative occupant safety
measures (PRE-SAFE ®
) ( Y page 54)
GWarning!
An intermittent warning sounds and the
distance warning lamp 00BA in the instrument
cluster is illuminated if the PRE-SAFE ®
Brake
calculates that the distance to the vehicle
ahead and your vehicle’s current speed
indicate that the PRE-SAFE ®
Brake will not be
capable of slowing the vehicle sufficiently to
maintain the preset following distance, which
creates a danger of a collision.
Immediately brake your vehicle to increase
the distance between your vehicle and the
vehicle driving in front of you. The warning
sound is intended as a final caution that you
have not interceded with your own braking
inputs to avoid a potentially dangerous
situation. Do not wait for the operation of the
warning signal to intercede with your own
braking, as that will result in potentially
dangerous emergency braking which will not
always result in an impact being avoided.
Tailgating increases the risk of an accident.GWarning!
The PRE-SAFE ®
Brake is a convenience
system designed to assist the driver during
vehicle operation. The responsibility for the
vehicle speed and the distance to the vehicle
ahead, including most importantly brake
operation to assure safe stopping distance,
always remains with the driver.
Always pay attention to traffic conditions
even while the PRE-SAFE ®
Brake is switched
on. Otherwise, you may not be able to
recognize dangerous situations until it is too
late and could cause an accident resulting in
personal or fatal injury to you or others.
i USA only:
This device has been approved by the FCC
as a “Vehicular Radar System”. The radar
sensor is intended for use in an automotive
radar system only. Removal, tampering, or
altering of the device will void any
warranties, and is not permitted by the
FCC. Do not tamper with, alter, or use in
any non-approved way.
Any unauthorized modification to this
device could void the user’s authority to
operate the equipment.
Driving safety systems69Safety and security221_AKB; 6; 20, en-USd2ugruen,Version: 2.11.8.12009-09-24T13:28:17+02:00 - Seite 69Z
Page 81 of 548

Telephone keypad XFlip up cover \000G.
With telephone keypad \000F you can
Renter and clear numbers and special
characters
Rreject, answer, connect and end calls
(Y page 148)
Rselect preset radio stations and enter the
frequency manually (Y page 168)
Rselect preset satellite radio stations and
enter the channel number (Y page 174)
Rselect a storage medium from the DVD
changer (Y page 183)
Rselect a track directly in CD mode, DVD
audio mode or MP3 mode (Y page 183), or
from a device connected to the media
interface (Y page 204)
Rselect a scene/chapter from a video DVD
(Y page 194)
Rselect a street in the navigation entry
(Y page 115)
COMAND controller
Use the COMAND controller to select menu
functions shown on the COMAND display.
Operating COMAND controller
You can operate the COMAND controller as
follows:
Rpress briefly or press and hold
Rrotate to the left or right
Rslide to the left, right, up, down or
diagonally
In this way, you can move through the menus,
select menu items or exit menus.
SymbolHow to use the COMAND
controller
\000
Page 94 of 548
RBluetooth \000T Search for Bluetooth
Devices, Bluetooth activated. For
information on the Bluetooth® interface
see (Y page 151).
RUpload/Download Data \000T Copy Data
to Storage Medium, Import Data from
Storage Medium (Y page 95)
RReset: Resetting the COMAND system to
factory settings
Display settings
Switching the display on or off
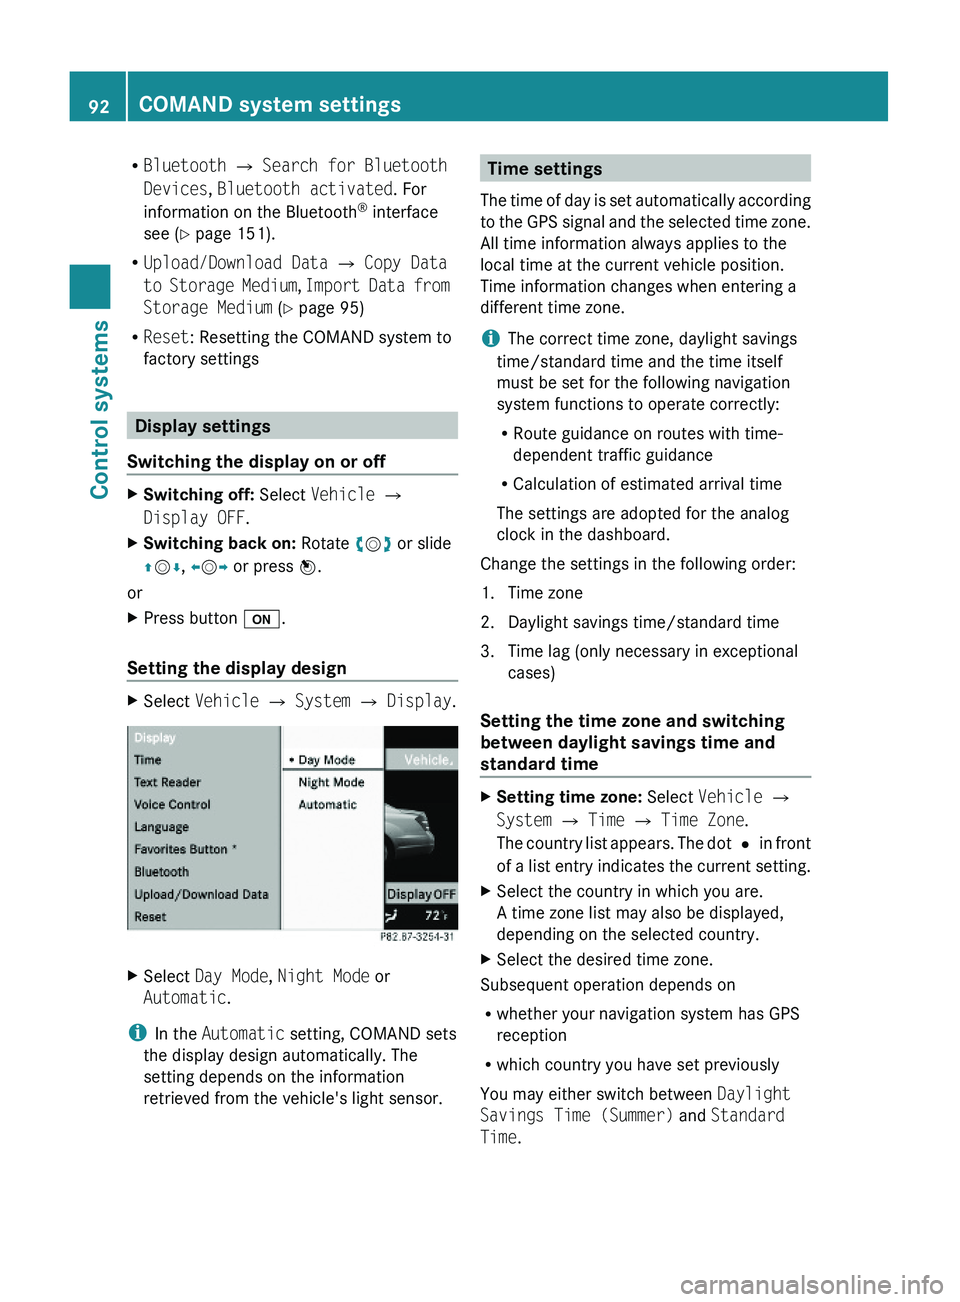
XSwitching off: Select Vehicle \000T
Display OFF.
XSwitching back on: Rotate \000
Page 97 of 548

Upload/Download of Data
This function lets you transfer COMAND data
to a memory card or a USB storage device and
vice versa.
The following COMAND data can be
transferred:
R Navigation destination memory and last
destination
R Address book entries
R Audio/Video presets memory
R System settings
i You can use this function, for example, to
save your COMAND data and transfer them
to another vehicle.XInsert an SD card into the SD card slot
( Y page 180) or connect a USB storage
device to the built-in USB socket in the
glove box (Y page 80). The USB jack of the
optional media interface is not intended for
this purpose.XSelect Vehicle 0054 System 0054 Upload/
Download Data .XDownload: Select Copy Data to
Storage Medium 0054 On the Memory
Card or On USB .XSelect Start Copying .XUpload: Select Import Data from
Storage Medium 0054 From Memory Card
or From USB .XSelect Start Data Import .XExiting menu without data transfer:
Select Back.
Reset
i You can reset COMAND back to its
factory settings.
Among other things, all personal data are
deleted, for example
R the address book entries
R the entries in the destination memory
R the list of last destinations of the
navigation systemXSelect Vehicle 0054 System 0054 Reset .
A prompt appears asking whether you
really want to reset.XSelect Yes or No.
If you select Yes another prompt will
appear asking whether you really want to
reset.XSelect Yes or No.
If you select Yes, COMAND will be reset
and restarted.
COMAND navigation (introduction)
Safety notes
GWarning!
For safety reasons, only enter a destination
when the vehicle is stationary. When the
vehicle is in motion, a passenger should enter
the destination. Study manual and select
route before driving.
Bear in mind that at a speed of just 30 mph
(approximately 50 km/h), your vehicle is
covering a distance of 44 feet (approximately
14 m) every second.
COMAND calculates the route to the
destination without taking account of the
following, for example:
R Traffic lights
R Stop and right-of-way signs
R Parking or stopping in prohibited areas
R Lane merging
R Other road and traffic rules and regulations
R Narrow bridges
COMAND navigation (introduction)95Control systems221_AKB; 6; 20, en-USd2ugruen,Version: 2.11.8.12009-09-24T13:28:17+02:00 - Seite 95Z
Page 124 of 548
Entering a destination from the list of
last destinations
XSelect Navi \000T Destination \000T From
Last Destinations.
The list of last destinations appears. The
most recent destination is at the top of the
list.
XSelect desired destination.XStarting route calculation: Select Start,
see also (Y page 120).
Entering a destination from the map
iDepending on the factory settings of the
vehicle, it may not be possible to enter a
destination while the vehicle exceeds a
preset speed. As soon as the vehicles
speed drops to below the preset speed, the
function is available again.
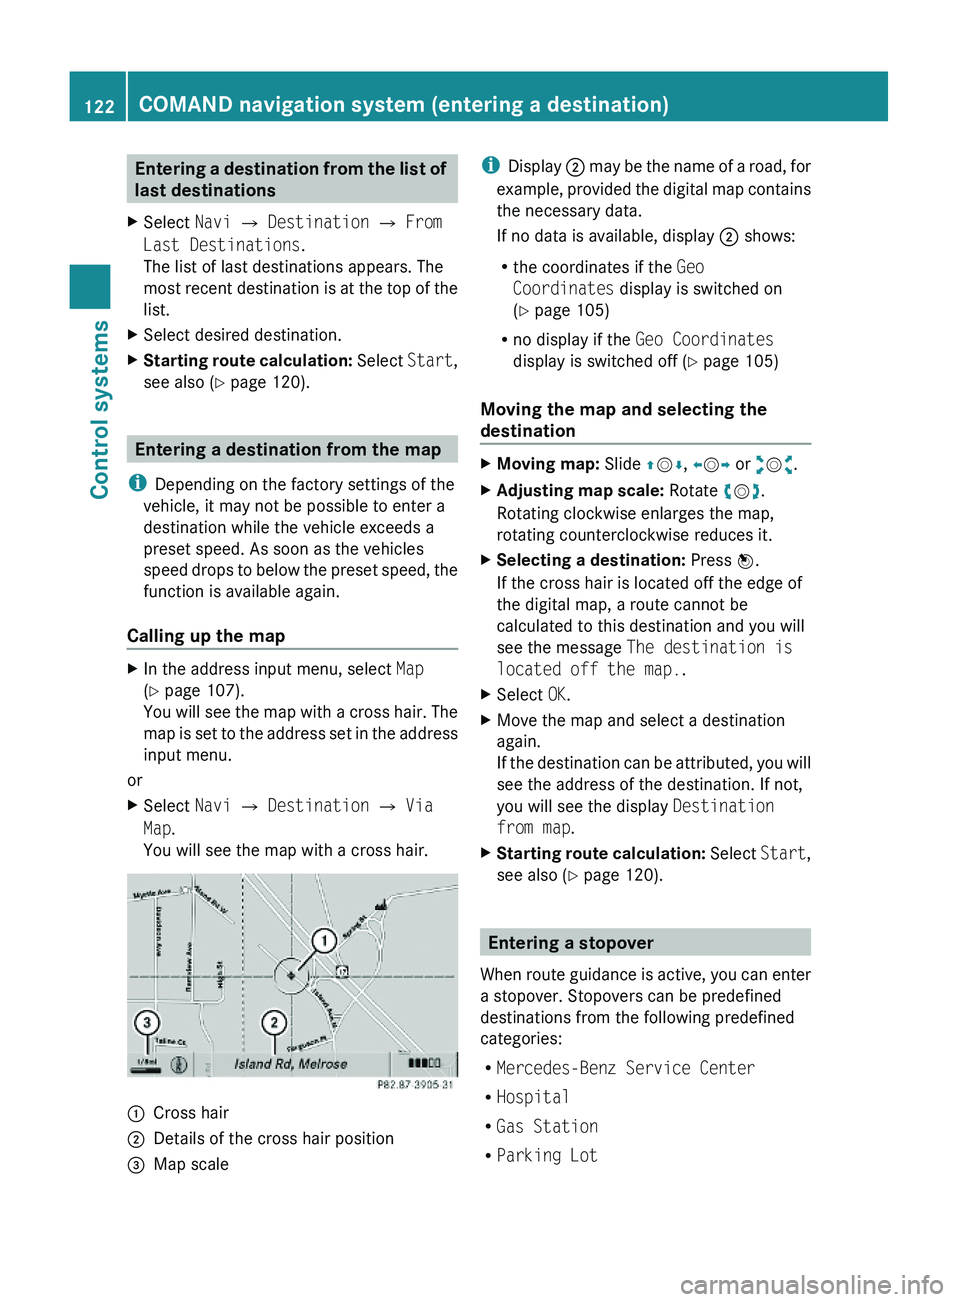
Calling up the map
XIn the address input menu, select Map
(Y page 107).
You will see the map with a cross hair. The
map is set to the address set in the address
input menu.
or
XSelect Navi \000T Destination \000T Via
Map.
You will see the map with a cross hair.
\000FCross hair\000GDetails of the cross hair position\000
Page 168 of 548
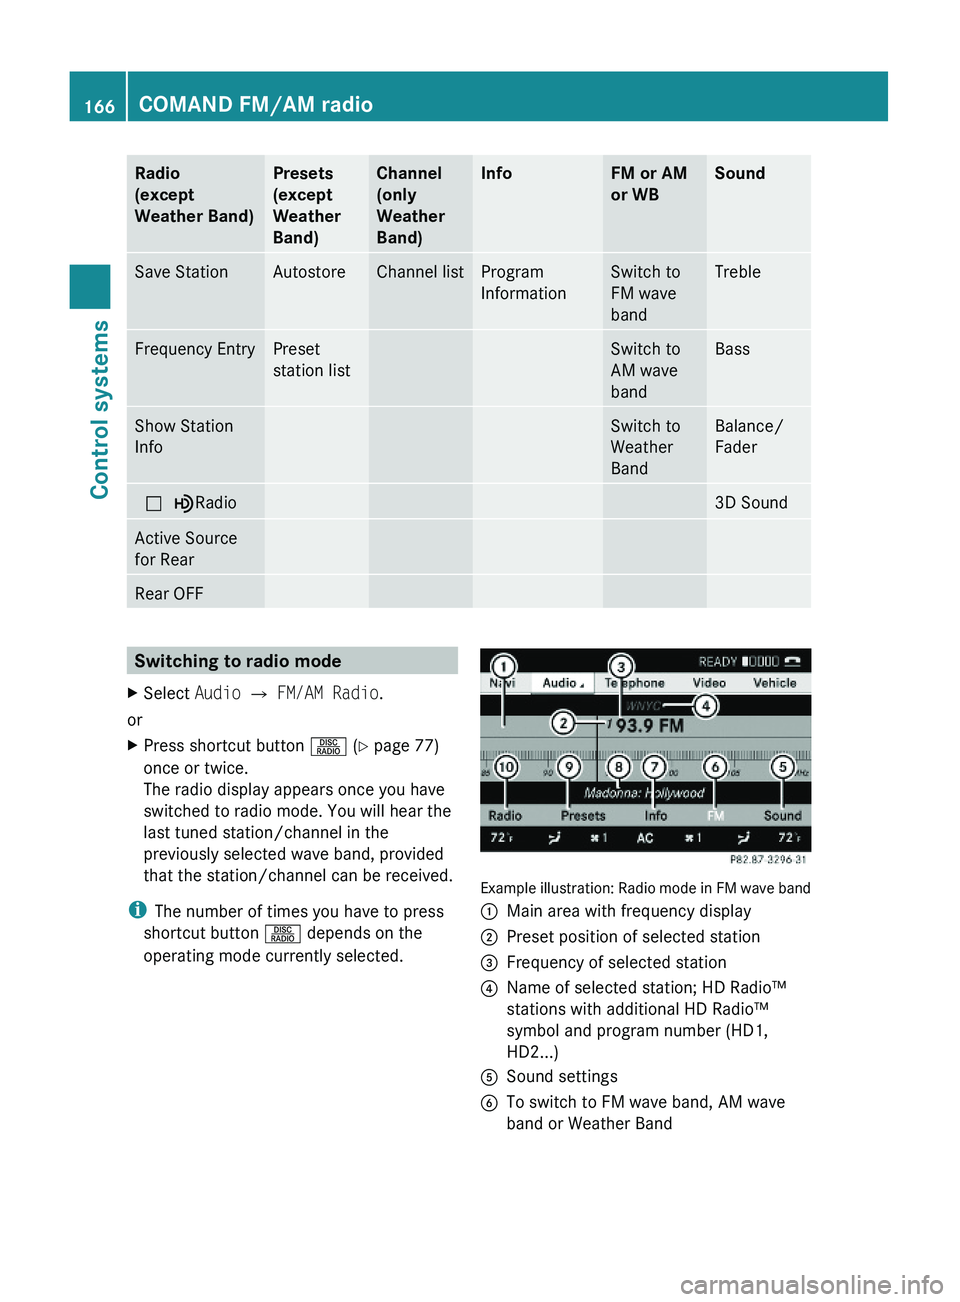
Radio
(except
Weather Band)
Presets
(except
Weather
Band)
Channel
(only
Weather
Band)
InfoFM or AM
or WB
SoundSave StationAutostoreChannel listProgram
Information
Switch to
FM wave
band
TrebleFrequency EntryPreset
station list
Switch to
AM wave
band
BassShow Station
Info
Switch to
Weather
Band
Balance/
Fader
\000?\000}Radio3D SoundActive Source
for Rear
Rear OFFSwitching to radio modeXSelect Audio \000T FM/AM Radio.
or
XPress shortcut button \000W (Y page 77)
once or twice.
The radio display appears once you have
switched to radio mode. You will hear the
last tuned station/channel in the
previously selected wave band, provided
that the station/channel can be received.
iThe number of times you have to press
shortcut button \000W depends on the
operating mode currently selected.
Example illustration: Radio mode in FM wave band
\000FMain area with frequency display\000GPreset position of selected station\000
Page 169 of 548
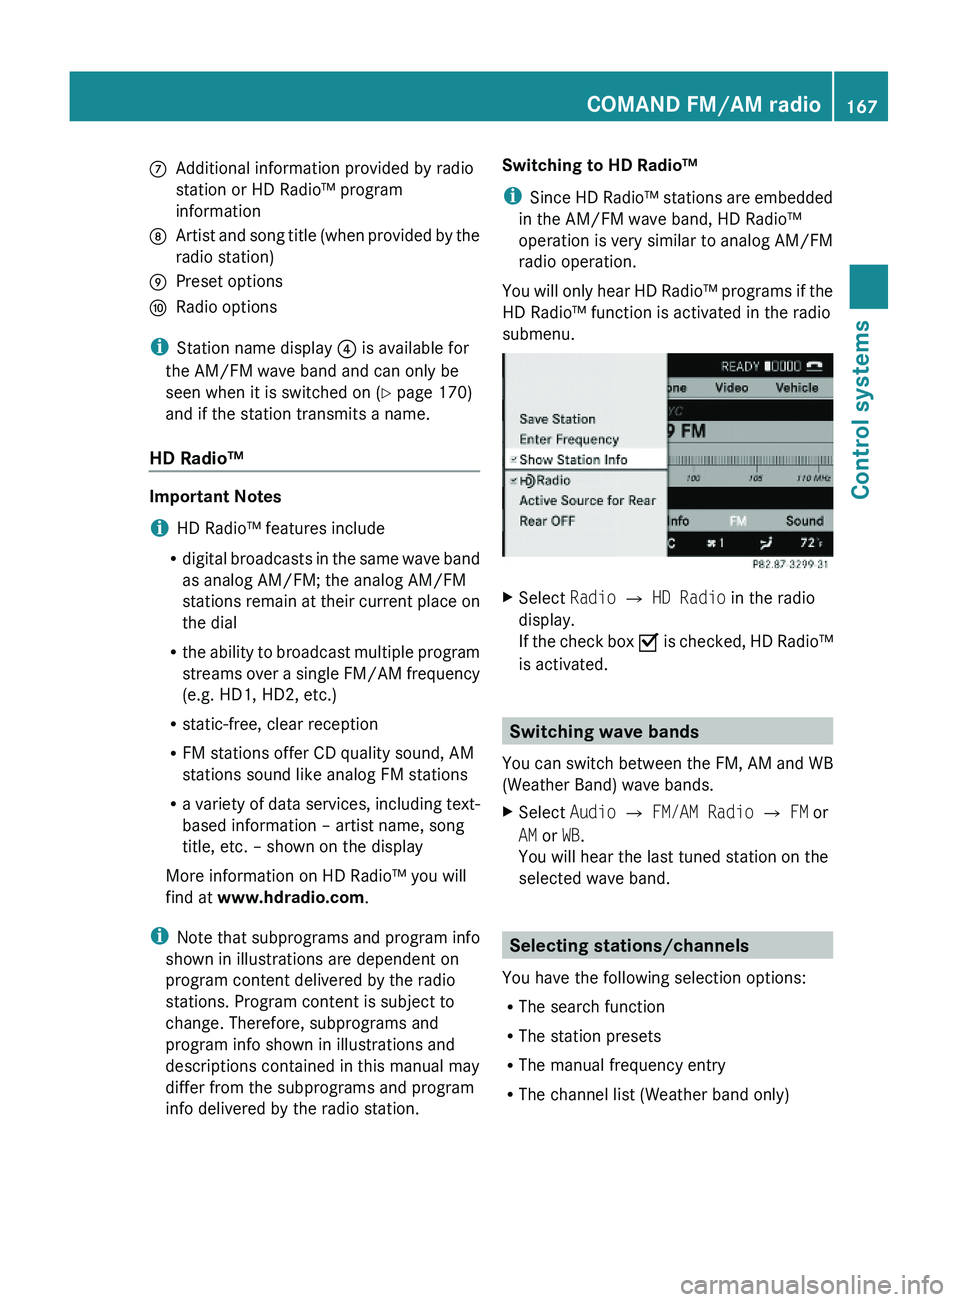
\000nAdditional information provided by radio
station or HD Radio™ program
information
\000oArtist and song title (when provided by the
radio station)
\000pPreset options\000qRadio options
iStation name display \000