2010 MERCEDES-BENZ S CLASS lock
[x] Cancel search: lockPage 497 of 548
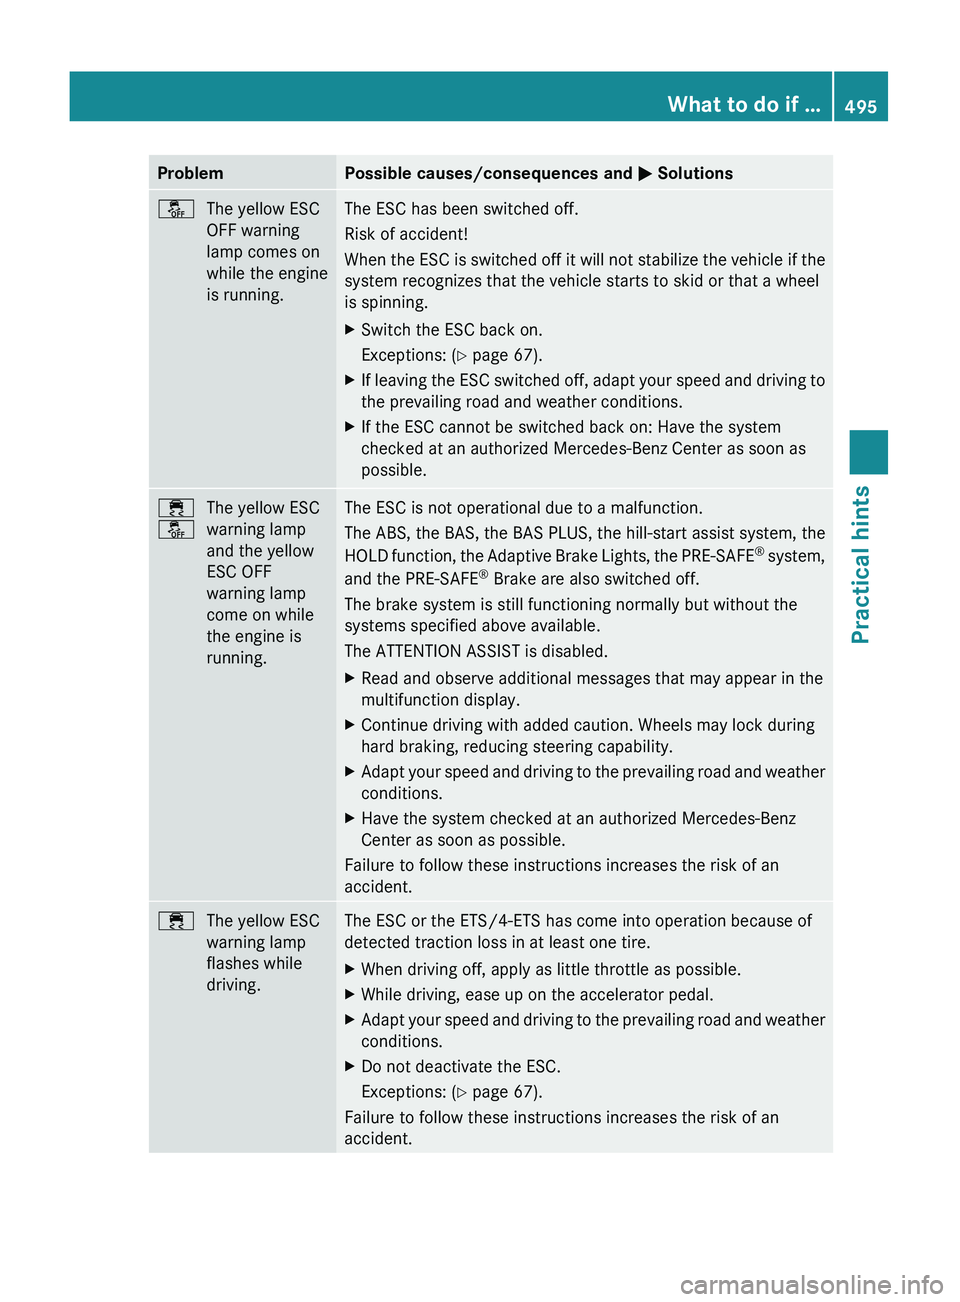
ProblemPossible causes/consequences and 0050 Solutions00C7The yellow ESC
OFF warning
lamp comes on
while the engine
is running.The ESC has been switched off.
Risk of accident!
When the ESC is switched off it will not stabilize the vehicle if the
system recognizes that the vehicle starts to skid or that a wheel
is spinning.XSwitch the ESC back on.
Exceptions: ( Y page 67).XIf leaving the ESC switched off, adapt your speed and driving to
the prevailing road and weather conditions.XIf the ESC cannot be switched back on: Have the system
checked at an authorized Mercedes-Benz Center as soon as
possible.00F2
00C7The yellow ESC
warning lamp
and the yellow
ESC OFF
warning lamp
come on while
the engine is
running.The ESC is not operational due to a malfunction.
The ABS, the BAS, the BAS PLUS, the hill-start assist system, the
HOLD function, the Adaptive Brake Lights, the PRE-SAFE ®
system,
and the PRE-SAFE ®
Brake are also switched off.
The brake system is still functioning normally but without the
systems specified above available.
The ATTENTION ASSIST is disabled.XRead and observe additional messages that may appear in the
multifunction display.XContinue driving with added caution. Wheels may lock during
hard braking, reducing steering capability.XAdapt your speed and driving to the prevailing road and weather
conditions.XHave the system checked at an authorized Mercedes-Benz
Center as soon as possible.
Failure to follow these instructions increases the risk of an
accident.
00F2The yellow ESC
warning lamp
flashes while
driving.The ESC or the ETS/4-ETS has come into operation because of
detected traction loss in at least one tire.XWhen driving off, apply as little throttle as possible.XWhile driving, ease up on the accelerator pedal.XAdapt your speed and driving to the prevailing road and weather
conditions.XDo not deactivate the ESC.
Exceptions: ( Y page 67).
Failure to follow these instructions increases the risk of an
accident.
What to do if …495Practical hints221_AKB; 6; 20, en-USd2ugruen,Version: 2.11.8.12009-09-24T13:28:17+02:00 - Seite 495Z
Page 501 of 548
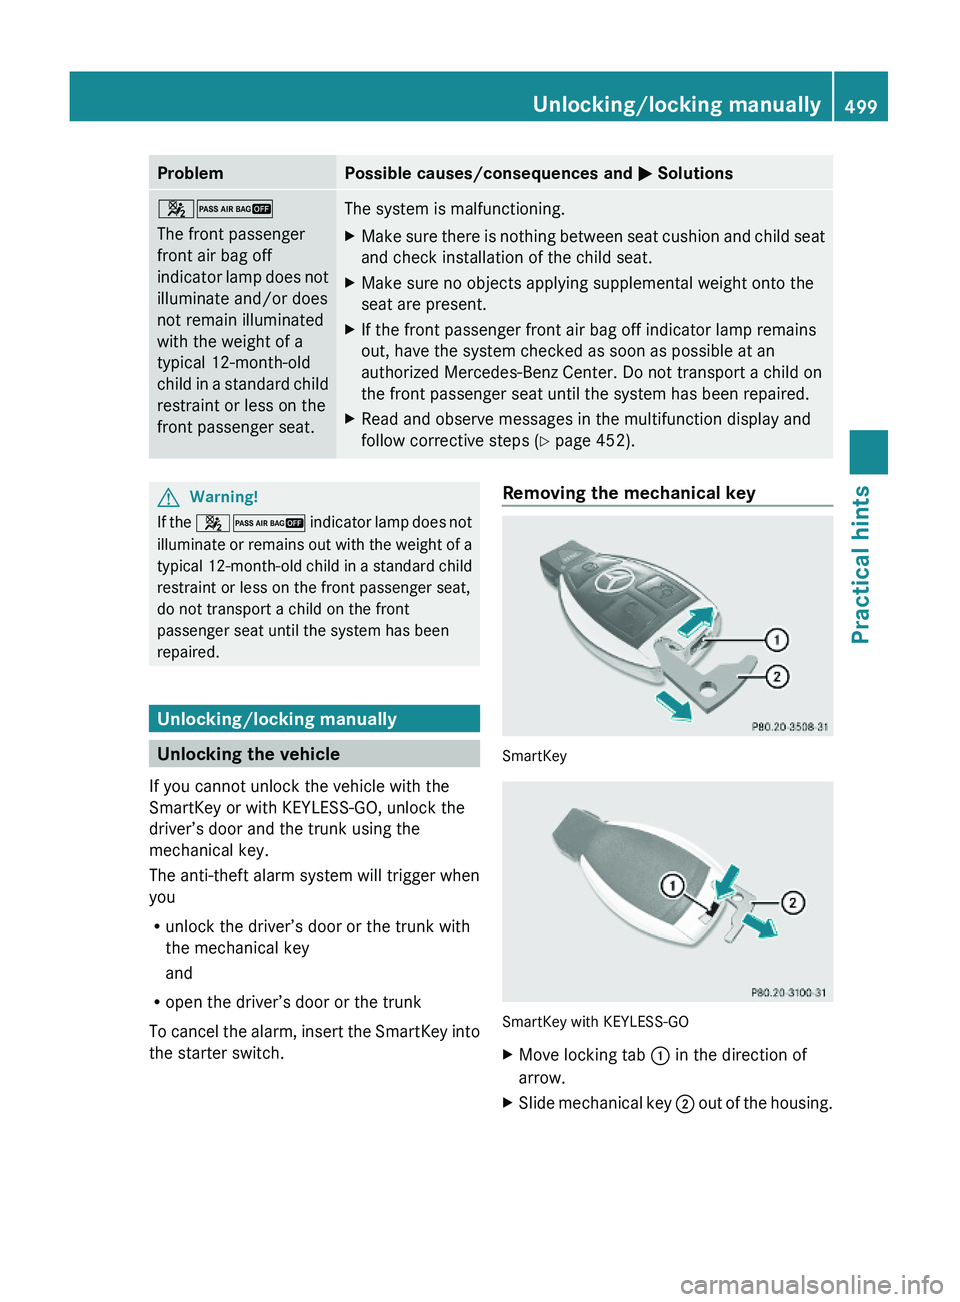
ProblemPossible causes/consequences and \000P Solutions\000\000}
The front passenger
front air bag off
indicator lamp does not
illuminate and/or does
not remain illuminated
with the weight of a
typical 12-month-old
child in a standard child
restraint or less on the
front passenger seat.
The system is malfunctioning.XMake sure there is nothing between seat cushion and child seat
and check installation of the child seat.
XMake sure no objects applying supplemental weight onto the
seat are present.
XIf the front passenger front air bag off indicator lamp remains
out, have the system checked as soon as possible at an
authorized Mercedes-Benz Center. Do not transport a child on
the front passenger seat until the system has been repaired.
XRead and observe messages in the multifunction display and
follow corrective steps (Y page 452).
GWarning!
If the \000\000} indicator lamp does not
illuminate or remains out with the weight of a
typical 12-month-old child in a standard child
restraint or less on the front passenger seat,
do not transport a child on the front
passenger seat until the system has been
repaired.
Unlocking/locking manually
Unlocking the vehicle
If you cannot unlock the vehicle with the
SmartKey or with KEYLESS-GO, unlock the
driver’s door and the trunk using the
mechanical key.
The anti-theft alarm system will trigger when
you
Runlock the driver’s door or the trunk with
the mechanical key
and
Ropen the driver’s door or the trunk
To cancel the alarm, insert the SmartKey into
the starter switch.
Removing the mechanical key
SmartKey
SmartKey with KEYLESS-GO
XMove locking tab \000F in the direction of
arrow.
XSlide mechanical key \000G out of the housing.Unlocking/locking manually499Practical hints221_AKB; 6; 20, en-USd2ugruen,Version: 2.11.8.12009-09-24T13:28:17+02:00 - Seite 499Z
Page 502 of 548
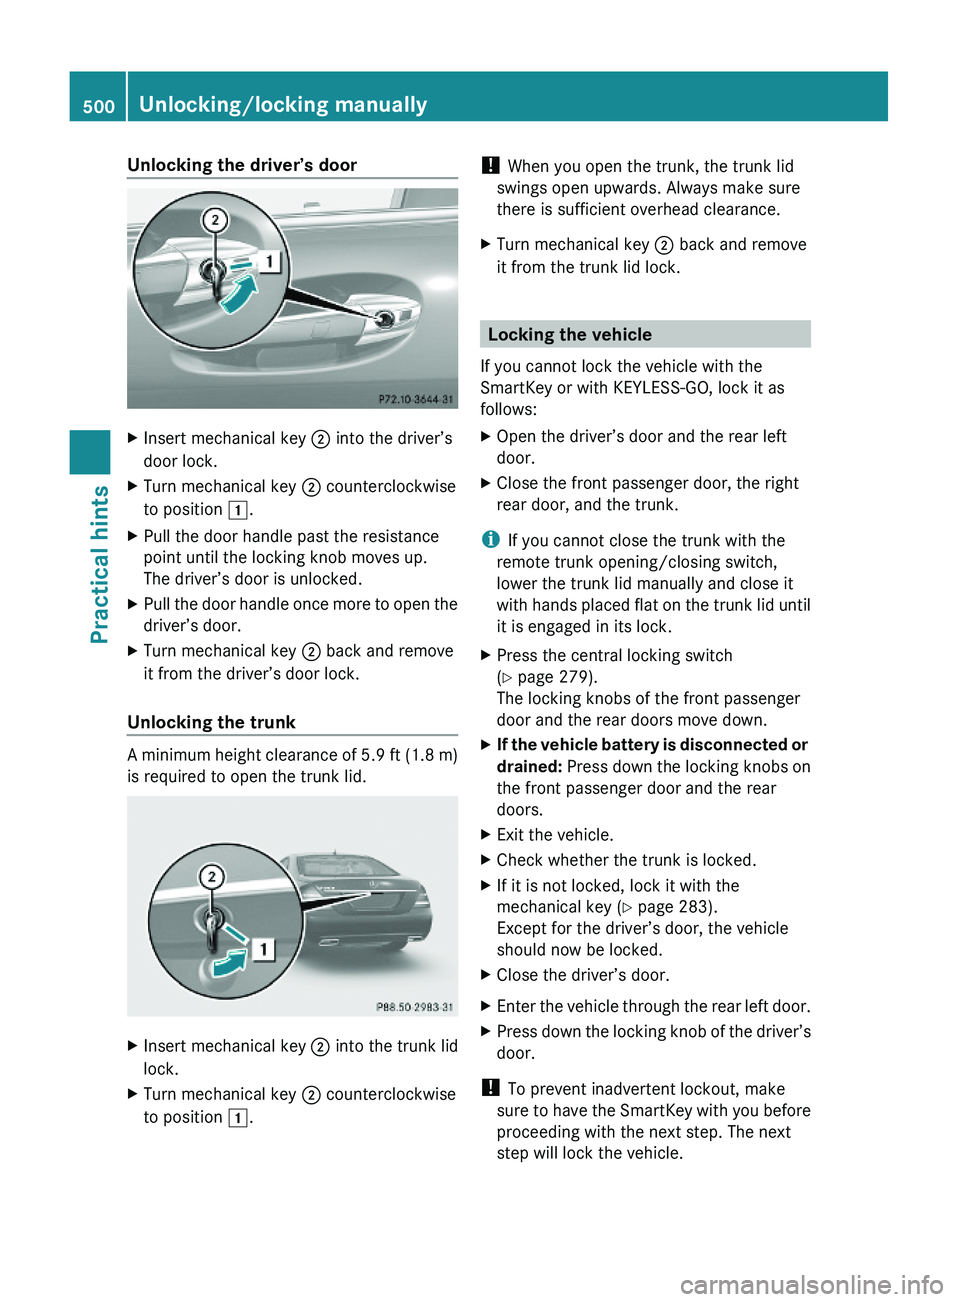
Unlocking the driver’s doorXInsert mechanical key \000G into the driver’s
door lock.
XTurn mechanical key \000G counterclockwise
to position \000J.
XPull the door handle past the resistance
point until the locking knob moves up.
The driver’s door is unlocked.
XPull the door handle once more to open the
driver’s door.
XTurn mechanical key \000G back and remove
it from the driver’s door lock.
Unlocking the trunk
A minimum height clearance of 5.9 ft (1.8 m)
is required to open the trunk lid.
XInsert mechanical key \000G into the trunk lid
lock.
XTurn mechanical key \000G counterclockwise
to position \000J.
! When you open the trunk, the trunk lid
swings open upwards. Always make sure
there is sufficient overhead clearance.
XTurn mechanical key \000G back and remove
it from the trunk lid lock.
Locking the vehicle
If you cannot lock the vehicle with the
SmartKey or with KEYLESS-GO, lock it as
follows:
XOpen the driver’s door and the rear left
door.
XClose the front passenger door, the right
rear door, and the trunk.
iIf you cannot close the trunk with the
remote trunk opening/closing switch,
lower the trunk lid manually and close it
with hands placed flat on the trunk lid until
it is engaged in its lock.
XPress the central locking switch
(Y page 279).
The locking knobs of the front passenger
door and the rear doors move down.
XIf the vehicle battery is disconnected or
drained: Press down the locking knobs on
the front passenger door and the rear
doors.
XExit the vehicle.XCheck whether the trunk is locked.XIf it is not locked, lock it with the
mechanical key (Y page 283).
Except for the driver’s door, the vehicle
should now be locked.
XClose the driver’s door.XEnter the vehicle through the rear left door.XPress down the locking knob of the driver’s
door.
! To prevent inadvertent lockout, make
sure to have the SmartKey with you before
proceeding with the next step. The next
step will lock the vehicle.
500Unlocking/locking manuallyPractical hints
221_AKB; 6; 20, en-USd2ugruen,Version: 2.11.8.12009-09-24T13:28:17+02:00 - Seite 500
Page 503 of 548
XExit the vehicle.XClose the rear left door.
The vehicle is locked.
iThis procedure does not arm the anti-
theft alarm system, nor does it lock the fuel
filler flap.
Resetting activated NECK-PRO active
front head restraints
If the NECK-PRO active front head restraints
have been triggered in a rear-end collision,
they must be reset.
You can tell that the NECK-PRO active front
head restraints have been triggered when
they have been moved forward and cannot be
adjusted.
GWarning!
For safety reasons, have the NECK-PRO active
front head restraints checked at an
authorized Mercedes-Benz Center after a
rear-end collision.
GWarning!
When pushing back the head restraint
cushion, make sure your fingers do not
become caught between the head restraint
cushion and the cover. Failing to do so may
lead to injury.
! Be careful not to damage upholstery.
iPressing the head restraint cushion back
requires high force. If you encounter
difficulties when pushing the head restraint
back, please have the procedure
performed at an authorized Mercedes-Benz
Center.
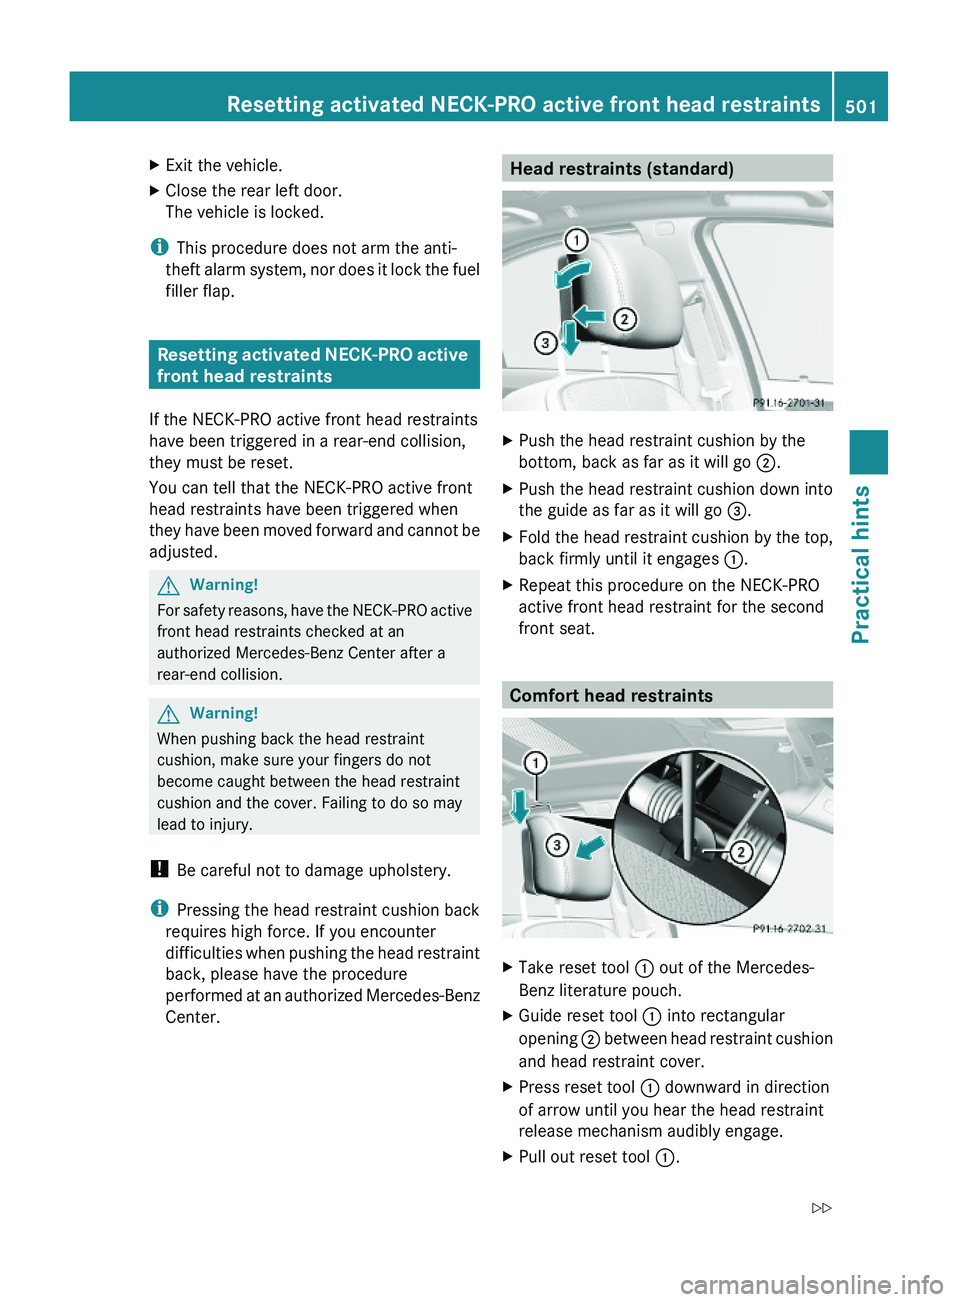
Head restraints (standard)XPush the head restraint cushion by the
bottom, back as far as it will go \000G.
XPush the head restraint cushion down into
the guide as far as it will go \000
Page 508 of 548
RYour hands should be dry and free of oil and
grease.
RIf the newly installed bulb does not come
on, contact an authorized Mercedes-Benz
Center.
iMercedes-Benz recommends using
Longlife (LL) bulbs.
Replacing bulbs for front lamps
GWarning!
Do not remove the cover for the Bi-Xenon
headlamp. Because of high voltage in Xenon
lamps, it is dangerous to replace the bulb or
repair the lamp and its components. It is
recommended to have such work done by a
qualified technician.
Before you start to replace a bulb for a front
lamp, do the following:
XSwitch off the ignition.XTurn the exterior lamp switch to position
\000'.
XOpen the hood (Y page 404).
High-beam spot (vehicles with halogen
daytime running lamps)
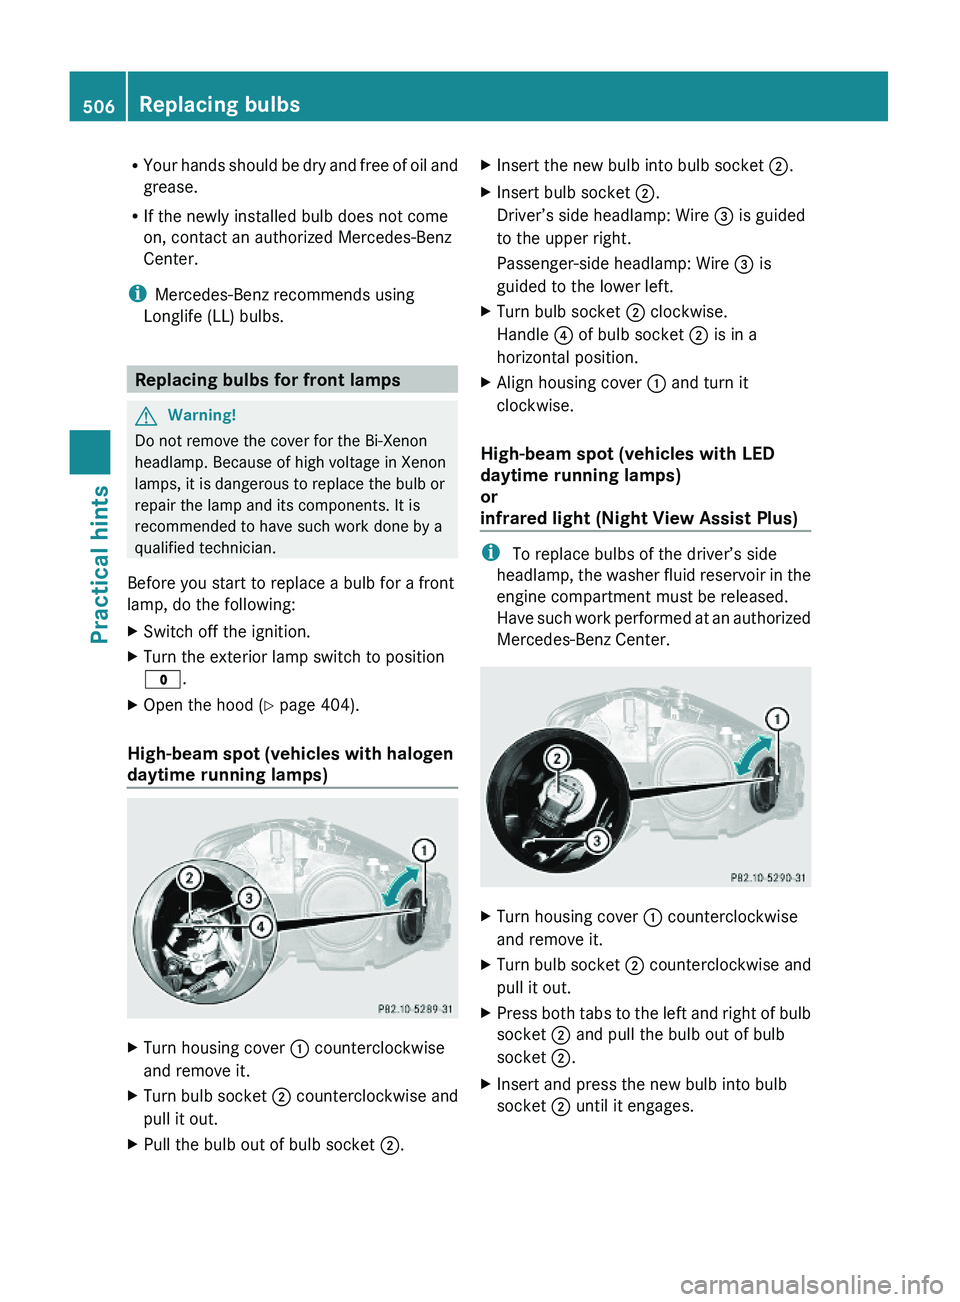
XTurn housing cover \000F counterclockwise
and remove it.
XTurn bulb socket \000G counterclockwise and
pull it out.
XPull the bulb out of bulb socket \000G.XInsert the new bulb into bulb socket \000G.XInsert bulb socket \000G.
Driver’s side headlamp: Wire \000
Page 510 of 548
XPress the KEYLESS-GO start/stop button
repeatedly until the windshield wipers
start.
XPress the KEYLESS-GO start/stop button
when the wiper arms are in a vertical
position.
Removing wiper blades
! Do not pull on the wiper blade inserts.
They could tear.
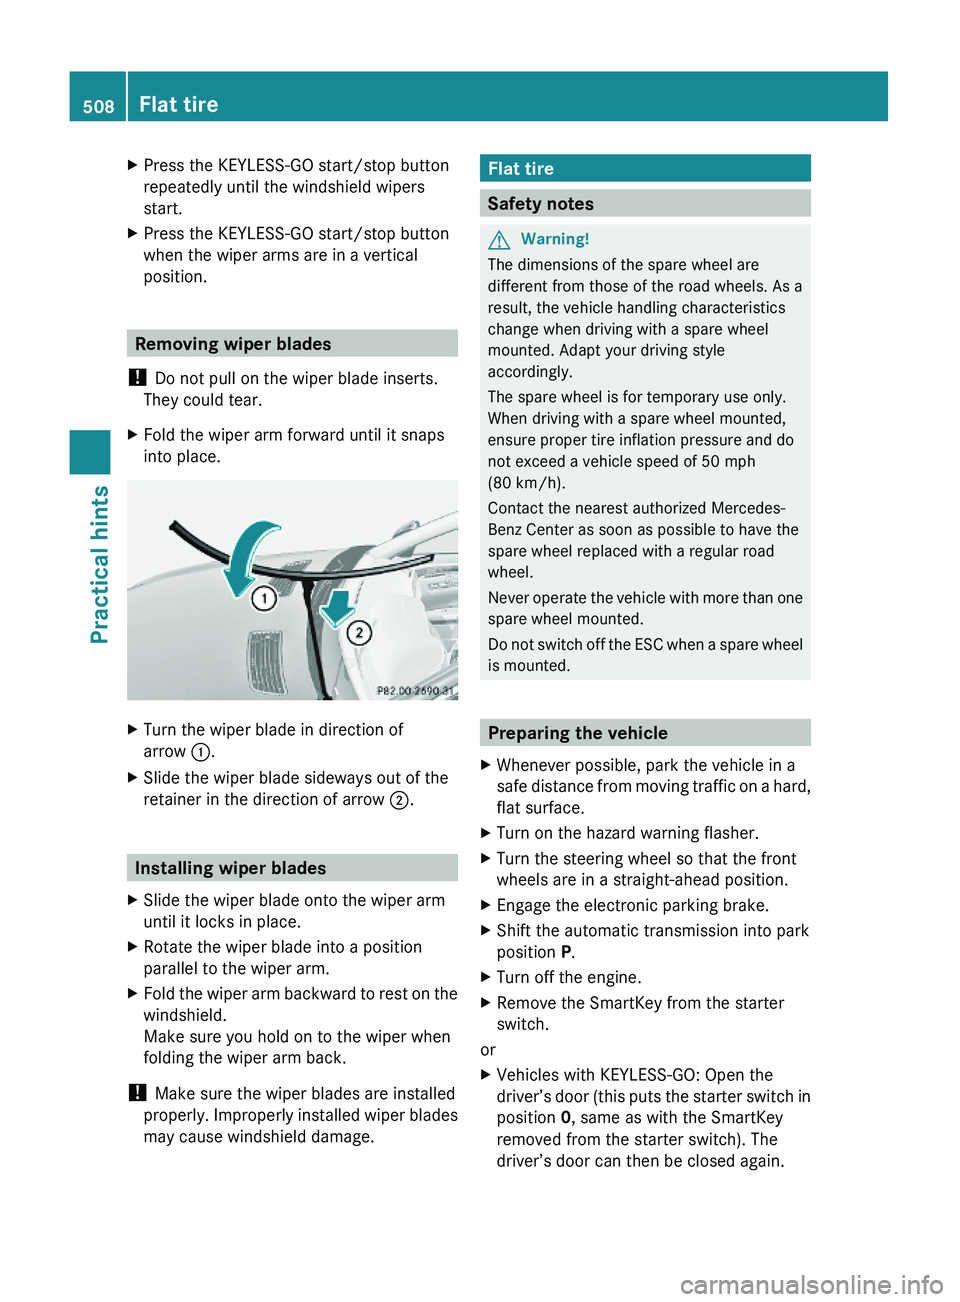
XFold the wiper arm forward until it snaps
into place.
XTurn the wiper blade in direction of
arrow \000F.
XSlide the wiper blade sideways out of the
retainer in the direction of arrow \000G.
Installing wiper blades
XSlide the wiper blade onto the wiper arm
until it locks in place.
XRotate the wiper blade into a position
parallel to the wiper arm.
XFold the wiper arm backward to rest on the
windshield.
Make sure you hold on to the wiper when
folding the wiper arm back.
! Make sure the wiper blades are installed
properly. Improperly installed wiper blades
may cause windshield damage.
Flat tire
Safety notes
GWarning!
The dimensions of the spare wheel are
different from those of the road wheels. As a
result, the vehicle handling characteristics
change when driving with a spare wheel
mounted. Adapt your driving style
accordingly.
The spare wheel is for temporary use only.
When driving with a spare wheel mounted,
ensure proper tire inflation pressure and do
not exceed a vehicle speed of 50 mph
(80 km/h).
Contact the nearest authorized Mercedes-
Benz Center as soon as possible to have the
spare wheel replaced with a regular road
wheel.
Never operate the vehicle with more than one
spare wheel mounted.
Do not switch off the ESC when a spare wheel
is mounted.
Preparing the vehicle
XWhenever possible, park the vehicle in a
safe distance from moving traffic on a hard,
flat surface.
XTurn on the hazard warning flasher.XTurn the steering wheel so that the front
wheels are in a straight-ahead position.
XEngage the electronic parking brake.XShift the automatic transmission into park
position P.
XTurn off the engine.XRemove the SmartKey from the starter
switch.
or
XVehicles with KEYLESS-GO: Open the
driver’s door (this puts the starter switch in
position 0, same as with the SmartKey
removed from the starter switch). The
driver’s door can then be closed again.
508Flat tirePractical hints
221_AKB; 6; 20, en-USd2ugruen,Version: 2.11.8.12009-09-24T13:28:17+02:00 - Seite 508
Page 511 of 548
Open doors only when conditions are safe
to do so.XVehicles with KEYLESS-GO: Remove the
KEYLESS-GO start/stop button from the
starter switch.XHave any passenger exit the vehicle at a
safe distance from the roadway. Open
doors only when conditions are safe to do
so.
Mounting the spare wheel
Introduction
XPrepare the vehicle as described
( Y page 508).XTake the following out of the vehicle:
R spare wheel
R jack
R vehicle tool kit
For information on where to find the
respective items, see “Where will I find ...?”
( Y page 450) and ( Y page 451).
i Vehicles without spare wheel are not
factory-equipped with the tools required for
a wheel change such as a jack or a wheel
wrench. Some tools required for a wheel
change are specific to your vehicle.
Contact an authorized Mercedes-Benz
Center to obtain the tools approved for
your vehicle. This section describes the
wheel change using the tools approved and
recommended for your vehicle.
Lifting the vehicle
GWarning!
When jacking up the vehicle, only use the jack
which has been specifically approved by
Mercedes-Benz for your vehicle.
The jack is designed exclusively for jacking up
the vehicle at the jack take-up brackets built
into both sides of the vehicle. Make sure the
jack arm is fully seated in the jack take-up
bracket. The jack must always be vertical
when in use, especially on inclines or
declines.
The jack is intended only for lifting the vehicle
briefly for wheel changes. It is not suited for
performing maintenance work under the
vehicle. To help avoid personal injury, use the
jack only to lift the vehicle during a wheel
change.
Never get beneath the vehicle while it is
supported by the jack. Keep hands and feet
away from the area under the lifted vehicle.
Always lower the vehicle onto sufficient
capacity jackstands before working under the
vehicle.
Always make sure the electronic parking
brake is engaged. In addition, block the
wheels with wheel chocks or other sizeable
objects before raising the vehicle with the
jack. Do not disengage the electronic parking
brake while the vehicle is raised.
Make sure that the ground on which the
vehicle is standing and where you place the
jack is solid, level and not slippery. If
necessary, use a large underlay. On slippery
surfaces, such as tiled floors, you should use
a non-slip underlay, for example a rubber mat.
Do not use wooden blocks or similar objects
to support the jack. Otherwise the jack may
not be able to achieve its load-bearing
capacity if it is not at its full height.
Never start the engine when the vehicle is
raised.
Also observe the notes on the jack.XPrevent the vehicle from rolling away by
blocking wheels with wheel chocks or other
sizeable objects.
When your vehicle is equipped with a wheel
chock, it is included with the vehicle tool kit
( Y page 450). For information on setting up
the collapsible wheel chock, see
( Y page 450).Flat tire509Practical hints221_AKB; 6; 20, en-USd2ugruen,Version: 2.11.8.12009-09-24T13:28:17+02:00 - Seite 509Z
Page 514 of 548
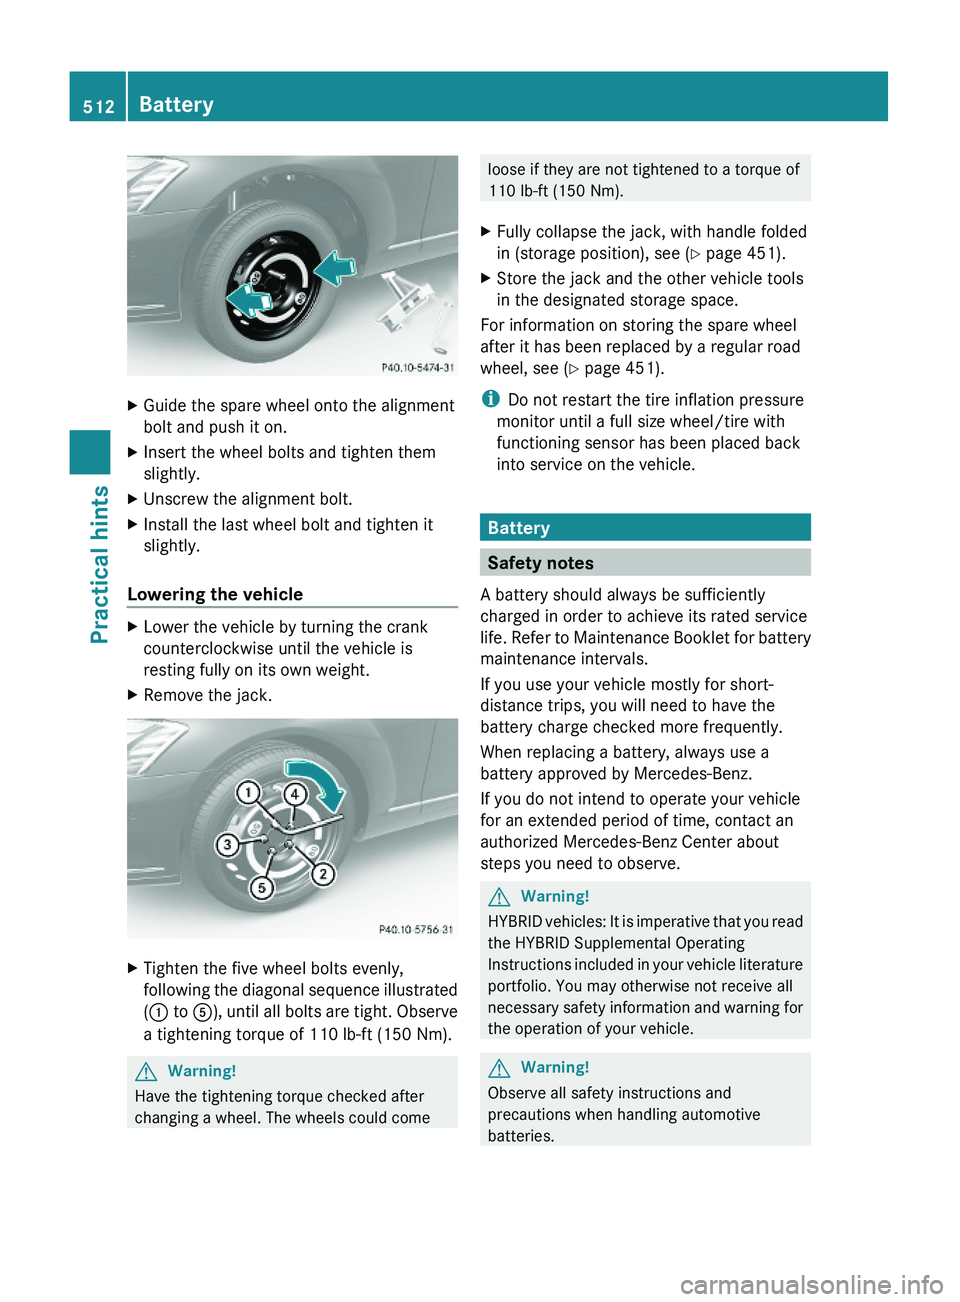
XGuide the spare wheel onto the alignment
bolt and push it on.
XInsert the wheel bolts and tighten them
slightly.
XUnscrew the alignment bolt.XInstall the last wheel bolt and tighten it
slightly.
Lowering the vehicle
XLower the vehicle by turning the crank
counterclockwise until the vehicle is
resting fully on its own weight.
XRemove the jack.XTighten the five wheel bolts evenly,
following the diagonal sequence illustrated
(\000F to \000