2010 MERCEDES-BENZ ML63AMG center console
[x] Cancel search: center consolePage 47 of 368

42 indicator lamp : will be
illuminated, except with the SmartKey
removed from the starter switch or with the
starter switch in position 0.
GWarning!
If the red SRS indicator lamp + in the
instrument cluster and the 42
indicator lamp are lit at the same time, there
is a malfunction in the OCS. The front
passenger front air bag will be deactivated in
this case. Have the system checked by
qualified technicians as soon as possible.
Contact an authorized Mercedes-Benz
Center.
Only have the seat repaired or replaced at an
authorized Mercedes-Benz Center.
In order to ensure proper operation of the air
bag system and OCS:
RDo not place more than 4.4 lb (2 kg) into
the parcel net on the back of the front
passenger seat. Otherwise, the OCS may
not be able to properly approximate the
occupant weight category.
RDo not place objects under and/or around
the front passenger seat.
RDo not hang anything from or attach any
items to the seats.
RDo not stuff objects such as books between
the front passenger seat and the center
console or front passenger door.
RDo not move the front passenger seat
backwards against stiff objects.
RSit with the seat belt properly fastened in a
position that is as upright as possible with
your back against the seat backrest.
RWhile seated, an occupant should not
position him/herself in such a way as to
cause the occupant’s weight to be lifted
from the seat bottom as this may result in
the OCS being unable to correctly
approximate the occupant’s weight
category.
RRead and observe all warnings in this
chapter.
OCS Self-test
After turning the SmartKey in the starter
switch to position 1 or 2 or pressing the
KEYLESS-GO start/stop button once or
twice, the 42 indicator lamp
illuminates. If an adult occupant is properly
sitting on the front passenger seat and the
system classifies the occupant as an adult,
the 42 indicator lamp will
illuminate and go out after approximately
6 seconds.
If the seat is not occupied and the system
classifies the front passenger seat as being
empty, the 42 indicator lamp
will illuminate and not go out.
GWarning!
If the 42 indicator lamp does not
illuminate, the system is not functioning. You
must contact an authorized Mercedes-Benz
Center before seating any child on the front
passenger seat.
For more information, see the “Practical
hints” section (Y page 305).
GWarning!
Never place anything between seat cushion
and child seat (e.g. pillow), since it reduces
the effectiveness of the OCS. The bottom and
back of the child seat must make full contact
with the passenger seat cushion and
backrest.
Occupant safety45Safety and security164_AKB; 7; 31, en-USd2ureepe,Version: 2.11.8.12009-09-11T12:07:36+02:00 - Seite 45Z
Page 88 of 368

XSwitch on the ignition.XSwitching on: Press respective seat
ventilation switch :.
Three blue indicator lamps ; in seat
ventilation switch : come on.
XPress seat ventilation switch : repeatedly
until the desired ventilation level is set.
XSwitching off: Press seat ventilation
switch : repeatedly until all indicator
lamps ; go out.
If there is insufficient voltage the seat
ventilating switches off automatically.
Seat heating
Front seat heating switches
The switches for the outboard rear seat
heating are located in the rear center console.
Rear seat heating switches
The red indicator lamps ; in front or rear
seat heating switch : come on to show
which heating level you have selected.
The seat heating switches from level 3 (high)
to level 2 after approximately 5 minutes.
The seat heating switches from level 2 to level
1 (low) after approximately 10 minutes.
After approximately 20 minutes in level 1, the
seat heating switches off automatically.
XSwitch on the ignition.XSwitching on: Press respective seat
heating switch :.
Three red indicator lamps ; in the
respective seat heating switch : come on.
XContinue pressing respective seat heating
switch : until desired seat heating level is
reached.
XSwitching off: Press respective seat
heating switch : repeatedly until all
indicator lamps ; go out.
If one or more of indicator lamps ; in
respective seat heating switch : are
flashing, there is insufficient voltage available
since too many electrical consumers are
turned on. The seat heating switches off
automatically.
The seat heating will switch back on again
automatically as soon as sufficient voltage is
available.
Multifunction steering wheel
Safety notes
GWarning!
Do not adjust the steering wheel while driving.
Adjusting the steering wheel while driving, or
driving without the steering wheel adjustment
feature locked could cause the driver to lose
control of the vehicle.
The electrical steering wheel adjustment
feature can be operated at any time.
Therefore, do not leave children unattended
in the vehicle, or with access to an unlocked
vehicle. A child’s unsupervised access to a
vehicle could result in an accident and/or
serious personal injury.
86Multifunction steering wheelControls in detail
164_AKB; 7; 31, en-USd2ureepe,Version: 2.11.8.12009-09-11T12:07:36+02:00 - Seite 86
Page 120 of 368

GWarning!
No messages will be displayed if either the
instrument cluster or the multifunction
display is inoperative.
As a result, you will not be able to see
information about your driving conditions,
such as
Rspeed
Routside temperature
Rwarning/indicator lamps
Rmalfunction/warning messages
Rfailure of any systems
Driving characteristics may be impaired.
If you must continue to drive, do so with added
caution. Contact an authorized Mercedes-
Benz Center as soon as possible.
GWarning!
HYBRID vehicles: It is imperative that you read
the HYBRID Supplemental Operating
Instructions included in your vehicle literature
portfolio. You may otherwise not recognize
potential danger.
:To dim instrument cluster illumination;Reset button =To brighten instrument cluster
illumination
For information on changing the instrument
cluster settings, e.g. the language, see
(Y page 130).
Activating the instrument cluster
The instrument cluster is activated when you
Ropen the driver’s door
Rswitch on the ignition
Rpress button :, ; or =
iOpening the driver’s door or pressing
button :, ; or = without switching on
the ignition activates the instrument
cluster illumination only for 30 seconds.
Adjusting the instrument cluster
illumination
XTo brighten illumination: Press and hold
button = until the desired level of
illumination is reached.
XTo dim illumination: Press and hold
button : until the desired level of
illumination is reached.
iThe instrument cluster illumination is
dimmed or brightened automatically to suit
ambient light conditions.
The instrument cluster illumination will also
be adjusted automatically when you switch
on the vehicle’s exterior lamps.
iWith the exterior lighting switched on, the
brightness of the switches in the center
console will also be adjusted when using
button : or =.
Resetting trip odometer
XMake sure you are viewing the standard
display (Y page 122) in the multifunction
display.
XPress and hold the reset button in the
instrument cluster (Y page 117) until the
trip odometer is reset.
118Instrument clusterControls in detail
164_AKB; 7; 31, en-USd2ureepe,Version: 2.11.8.12009-09-11T12:07:36+02:00 - Seite 118
Page 159 of 368

the vehicle lowers. When the temperature
rises, the vehicle raises.
The vehicle automatically regulates its ride
height based on the set vehicle height and the
current speed:
RAs your driving speed increases, the vehicle
is lowered by increments until it reaches
highspeed level.
RVehicles with ADS: If you are driving with
the ADS setting COMF or AUTO, the
vehicle is raised back to highway level as
your driving speed decreases.
RVehicles with ADS: You can select the
highspeed level via the ADS setting
SPORT. In ADS SPORT, the vehicle is
lowered directly to highspeed level as your
driving speed increases.
The vehicle begins adjusting to the set vehicle
level as soon as the doors or tailgate are
unlocked or opened or closed with the vehicle
unlocked.
In order to operate the vehicle level control
switch (Y page 157), however, the engine
must be running.
GWarning!
Make sure no one is near the wheel housing
or under the vehicle when you lower the
vehicle while it is standing still. Limbs could
become wedged into or under the vehicle.
For safety reasons, the vehicle can only be
lowered with all doors and the tailgate closed.
Lowering is interrupted if a door or the tailgate
is opened and will continue after the door is
closed again.
GWarning!
Please be aware that by raising the vehicle
level, the center of gravity also rises.
Therefore, always ensure that the vehicle
level is as low as possible. With higher ride
height the ESP® may activate earlier in certain
situations.
Adapt your speed and driving to possible
changed driving behavior of the vehicle after
changing the vehicle level. The ESP® cannot
prevent accidents, including those resulting
from excessive speed. The ESP® cannot
prevent the natural laws of physics from
acting on the vehicle.
! Keep in mind that in rough or uneven
terrain, adjusting the vehicle to a lower
level may cause the vehicle underbody to
come in contact with the ground and result
in damage to the vehicle underbody.
Always make sure the vehicle has sufficient
ground clearance before adjusting it to a
lower level.
! Before jacking up the vehicle with
equipment that lifts one or more of the
wheels completely off of the ground,
remove the SmartKey from the starter
switch.
For information on off-road driving, see “Off-
road driving” (Y page 248).
Basic settings (except ML 63 AMG)
The following vehicle chassis ride heights can
be selected using vehicle level control
switch : in the center console:
Driving systems157Controls in detail164_AKB; 7; 31, en-USd2ureepe,Version: 2.11.8.12009-09-11T12:07:36+02:00 - Seite 157Z
Page 160 of 368

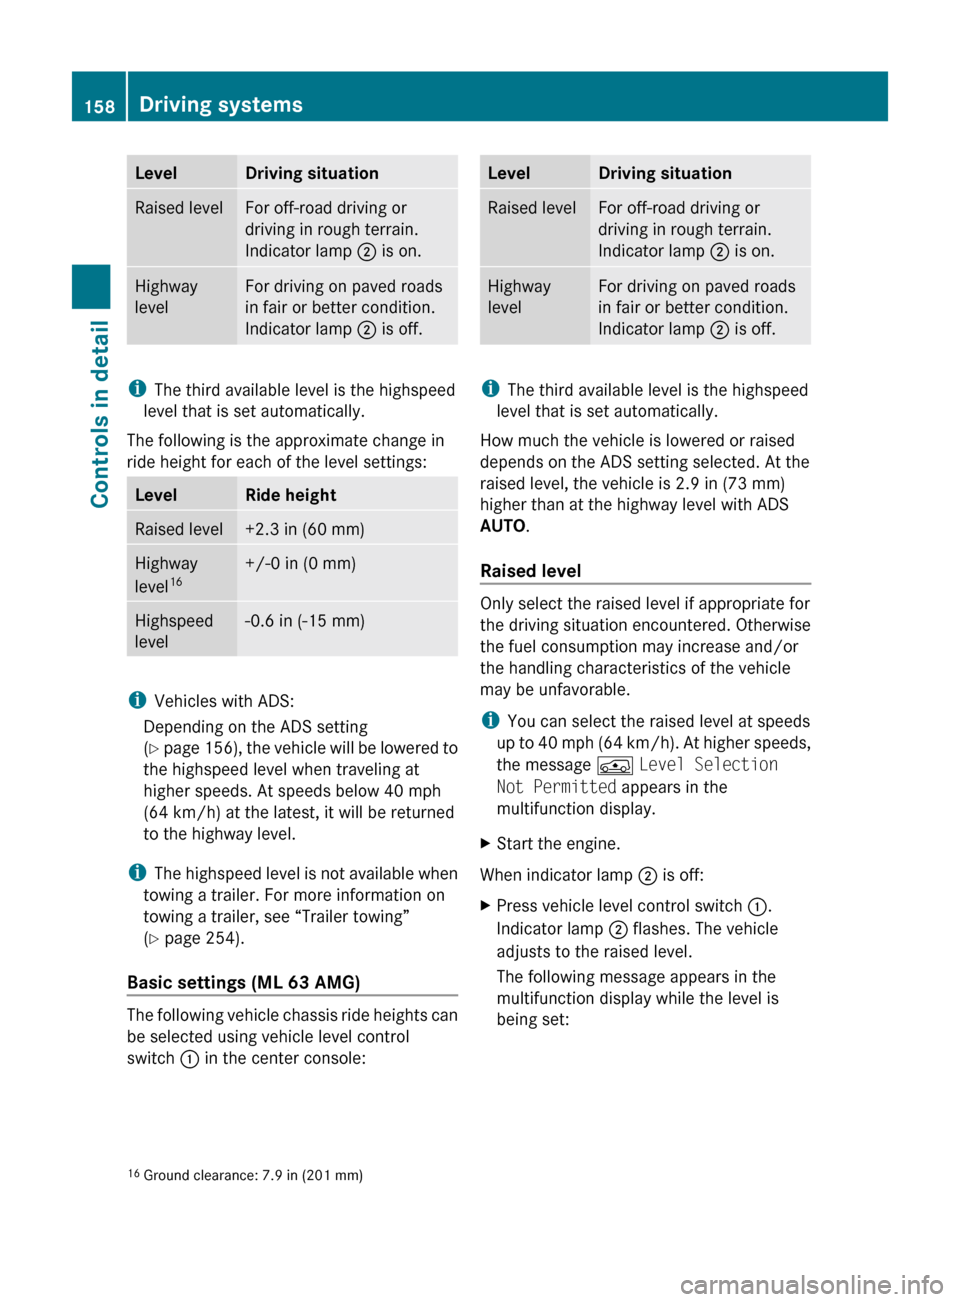
LevelDriving situationRaised levelFor off-road driving or
driving in rough terrain.
Indicator lamp ; is on.Highway
levelFor driving on paved roads
in fair or better condition.
Indicator lamp ; is off.
i
The third available level is the highspeed
level that is set automatically.
The following is the approximate change in
ride height for each of the level settings:
LevelRide heightRaised level+2.3 in (60 mm)Highway
level 16+/-0 in (0 mm)Highspeed
level-0.6 in (-15 mm)
i Vehicles with ADS:
Depending on the ADS setting
( Y page 156), the vehicle will be lowered to
the highspeed level when traveling at
higher speeds. At speeds below 40 mph
(64 km/h) at the latest, it will be returned
to the highway level.
i The highspeed level is not available when
towing a trailer. For more information on
towing a trailer, see “Trailer towing”
( Y page 254).
Basic settings (ML 63 AMG)
The following vehicle chassis ride heights can
be selected using vehicle level control
switch : in the center console:
LevelDriving situationRaised levelFor off-road driving or
driving in rough terrain.
Indicator lamp ; is on.Highway
levelFor driving on paved roads
in fair or better condition.
Indicator lamp ; is off.
i
The third available level is the highspeed
level that is set automatically.
How much the vehicle is lowered or raised
depends on the ADS setting selected. At the
raised level, the vehicle is 2.9 in (73 mm)
higher than at the highway level with ADS
AUTO .
Raised level
Only select the raised level if appropriate for
the driving situation encountered. Otherwise
the fuel consumption may increase and/or
the handling characteristics of the vehicle
may be unfavorable.
i You can select the raised level at speeds
up to 40 mph (64 km/h). At higher speeds,
the message Á Level Selection
Not Permitted appears in the
multifunction display.
XStart the engine.
When indicator lamp ; is off:
XPress vehicle level control switch :.
Indicator lamp ; flashes. The vehicle
adjusts to the raised level.
The following message appears in the
multifunction display while the level is
being set:16 Ground clearance: 7.9 in (201 mm)158Driving systemsControls in detail
164_AKB; 7; 31, en-USd2ureepe,Version: 2.11.8.12009-09-11T12:07:36+02:00 - Seite 158
Page 169 of 368

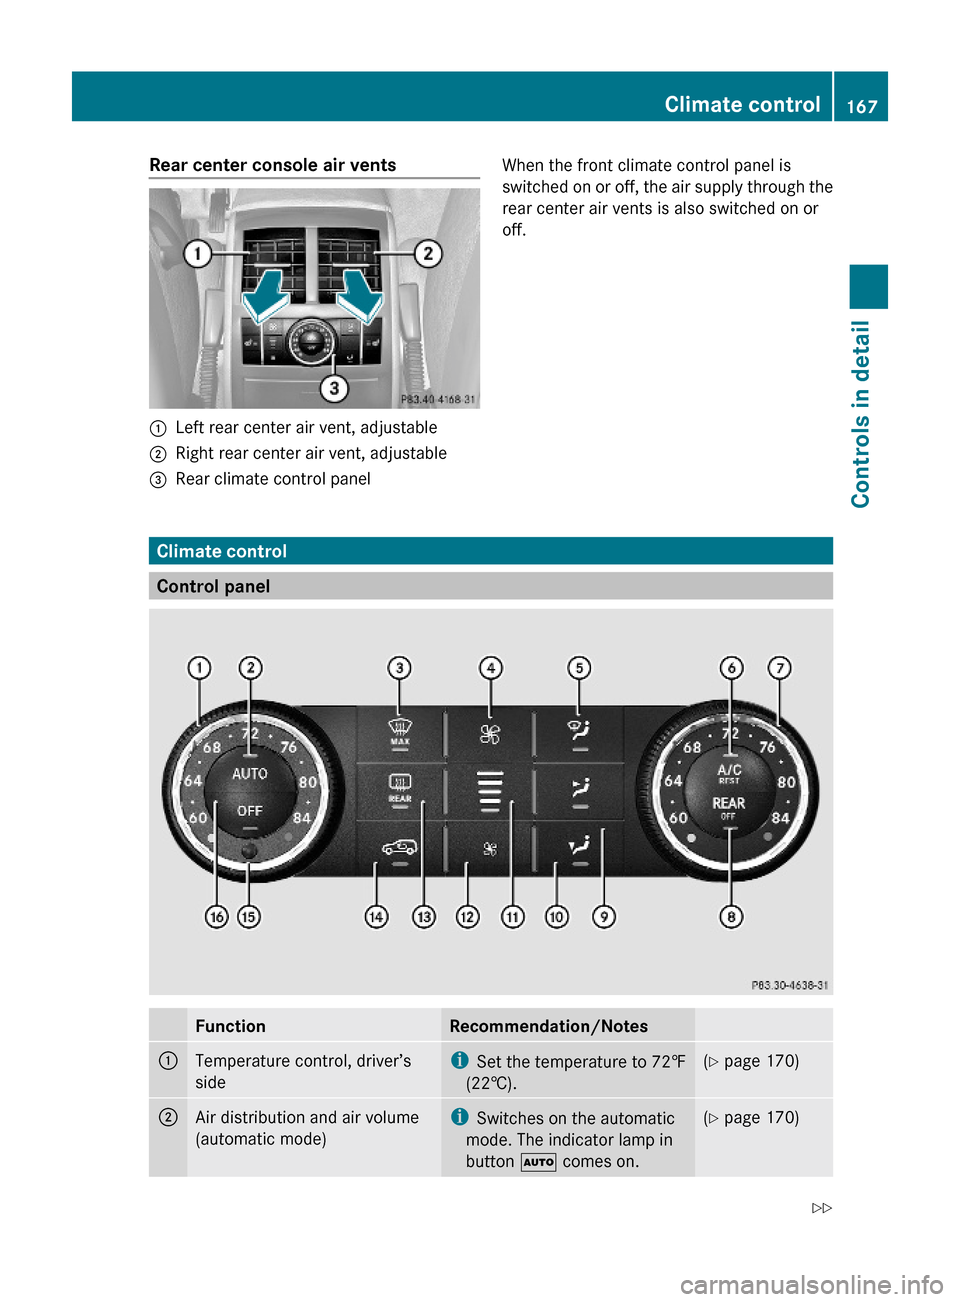
Rear center console air vents:Left rear center air vent, adjustable;Right rear center air vent, adjustable=Rear climate control panelWhen the front climate control panel is
switched on or off, the air supply through the
rear center air vents is also switched on or
off.
Climate control
Control panel
FunctionRecommendation/Notes:Temperature control, driver’s
side
iSet the temperature to 72‡
(22†).
(Y page 170);Air distribution and air volume
(automatic mode)
iSwitches on the automatic
mode. The indicator lamp in
button à comes on.
(Y page 170)Climate control167Controls in detail164_AKB; 7; 31, en-USd2ureepe,Version: 2.11.8.12009-09-11T12:07:36+02:00 - Seite 167Z
Page 195 of 368

storing objects in the vehicle. Put luggage or
cargo in the cargo compartment if possible.
Do not pile luggage or cargo higher than the
seat backrests.
If so equipped, always use the cargo net when
transporting cargo. The cargo net cannot
secure hard or heavy objects.
Parcel nets cannot secure hard or heavy
objects.
Keep compartment lids closed. This will help
to prevent stored objects from being thrown
about and injuring vehicle occupants during
Rbraking
Rvehicle maneuvers
Ran accident
Glove box
Depending on vehicle equipment, an AUX
socket or a media interface is located in the
glove box. For information on Audio AUX
mode or on media interface, see separate
COMAND system operating instructions.
XOpening: Pull glove box lid release :.XClosing: Push glove box lid ; upwards
until it engages.
You can lock the glove box, e.g. when the
vehicle is in the shop for service.
The glove box can only be locked or unlocked
with the mechanical key.
1Glove box unlocked2Glove box locked
Storage compartment in front center
console
XPress the front of the cover briefly.
The cover opens automatically.
Front armrest storage compartment
iThe Roadside Assistance button º
(Y page 201) and the Information button
Loading and storing193Controls in detail164_AKB; 7; 31, en-USd2ureepe,Version: 2.11.8.12009-09-11T12:07:36+02:00 - Seite 193Z
Page 196 of 368

E (Y page 202) are located in the
storage compartment.
XOpening storage compartment: Pull
button : and lift up armrest.
Coin holders = are located in front of storage
compartment ;.
Rear storage compartments
Depending on vehicle equipment, your
vehicle may not be equipped with three
storage compartments in the front of the rear
seats.
:Storage compartment;Storage compartment cover=Release button?Storage compartmentXBriefly press release button = on storage
compartment cover ;.
The storage compartment opens
automatically.
Useful features
Cup holders
GWarning!
In order to help prevent spilling liquids on
vehicle occupants and/or vehicle equipment,
only use containers that fit into the cup
holder. Use lids on open containers and do
not fill containers to a height where the
contents, especially hot liquids, could spill
during braking, vehicle maneuvers, or in an
accident. Liquids spilled on vehicle occupants
may cause serious personal injury. Liquids
spilled on vehicle equipment may cause
damage not covered by the Mercedes-Benz
Limited Warranty.
When not in use, keep the cup holder closed.
An open cup holder may cause injury to you
or others when contacted during braking,
vehicle maneuvers, or in an accident.
Keep in mind that objects placed in the cup
holder may come loose during braking,
vehicle maneuvers, or in an accident and be
thrown around in the vehicle interior. Objects
thrown around in the vehicle interior may
cause an accident and/or serious personal
injury.
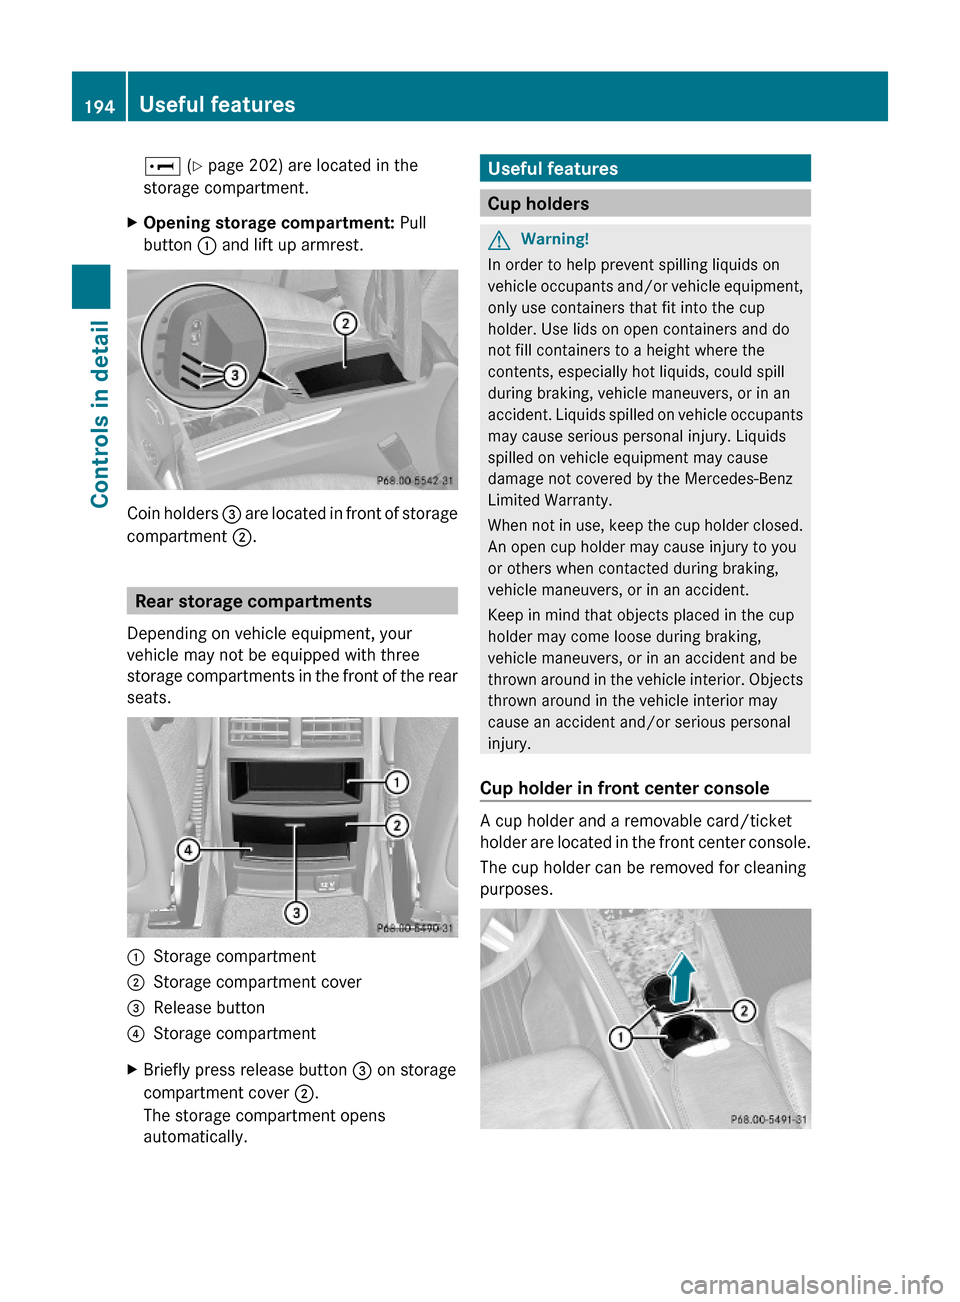
Cup holder in front center console
A cup holder and a removable card/ticket
holder are located in the front center console.
The cup holder can be removed for cleaning
purposes.
194Useful featuresControls in detail
164_AKB; 7; 31, en-USd2ureepe,Version: 2.11.8.12009-09-11T12:07:36+02:00 - Seite 194