Page 24 of 44

Using special additives not approved by
Mercedes-Benz may cause damage not
covered by the Mercedes-Benz Limited
Warranty.
For further information contact an
authorized Mercedes-Benz Center.
Notes on checking engine oil level
When checking the oil level the vehicle must
be parked on level ground and the vehicle
must have been stationary for at least
5 minutes with the combustion engine turned
off. Checking engine oil level
Before opening the hood do the following:
X Engage the parking brake.
X Shift the automatic transmission into park
position P.
X Switch off the ignition.
The READY indicator (Y page 16) in the
instrument cluster goes out.
X Remove the SmartKey from the starter
switch or remove the SmartKey with
KEYLESS-GO from the vehicle.
X Observe the safety notes on the danger of
electric shock in this manual.
X Open the hood, see Operator's Manual. X
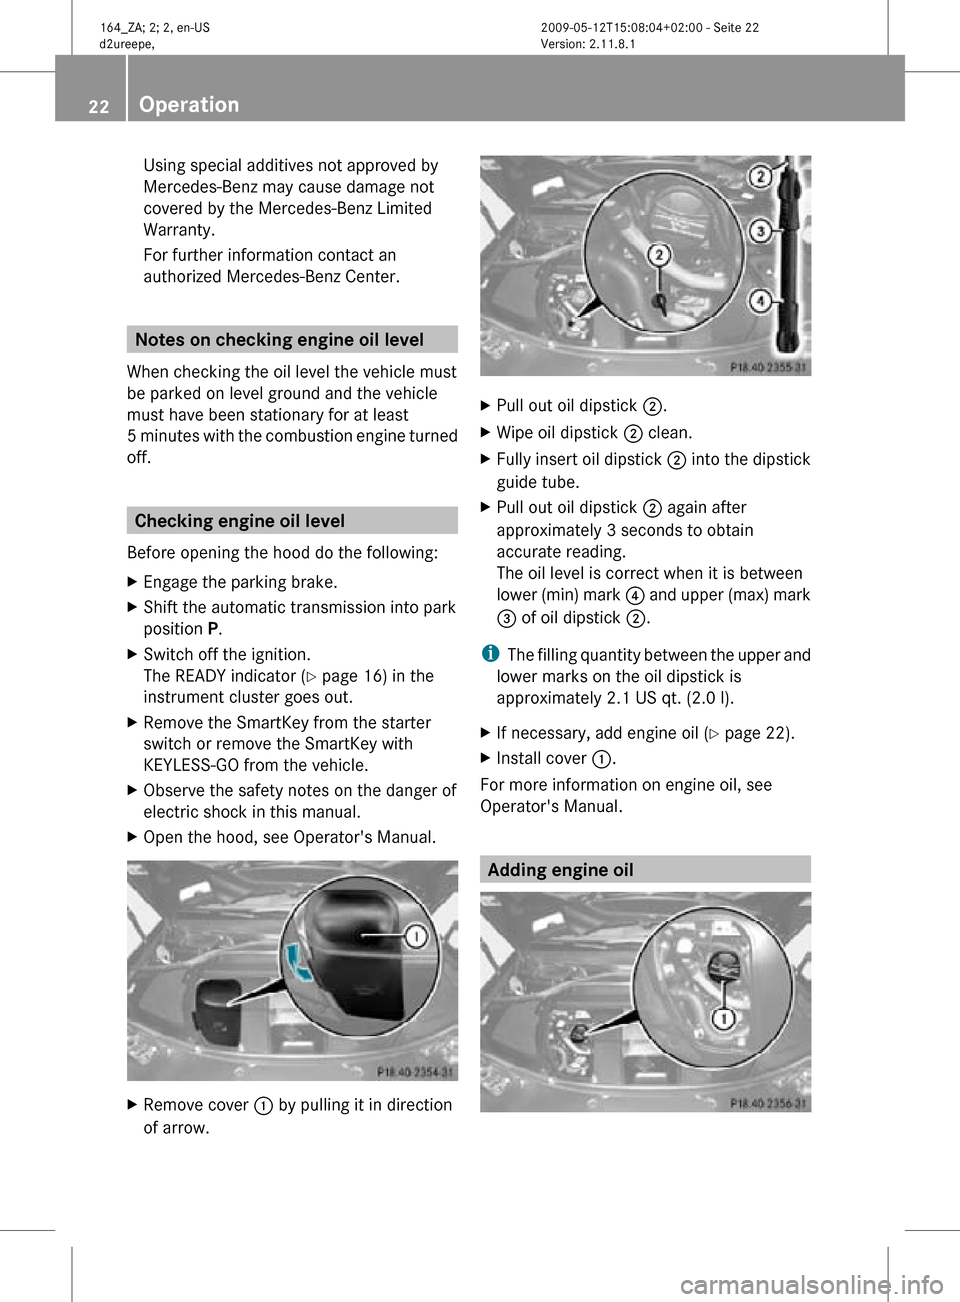
Remove cover : by pulling it in direction
of arrow. X
Pull out oil dipstick ;.
X Wipe oil dipstick ; clean.
X Fully insert oil dipstick ; into the dipstick
guide tube.
X Pull out oil dipstick ; again after
approximately 3 seconds to obtain
accurate reading.
The oil level is correct when it is between
lower (min) mark ? and upper (max) mark
= of oil dipstick ;.
i The filling quantity between the upper and
lower marks on the oil dipstick is
approximately 2.1 US qt. (2.0 l).
X If necessary, add engine oil ( Y page 22).
X Install cover :.
For more information on engine oil, see
Operator's Manual. Adding engine oil 22
Operation 164_ZA; 2; 2, en-US
d2ureepe,
Version: 2.11.8.1 2009-05-12T15:08:04+02:00 - Seite 22
Page 29 of 44

Display messages
Possible causes/consequences and
X Solutionsc Malfunctio
n Service
Required The high-voltage system is malfunctioning. In addition an
acoustic warning sounds.
X
Drive with added caution to the nearest authorized
Mercedes-Benz Center.
The combustion engine cannot be started again, if
R the automatic transmission is set to position neutral
position N or park position P
R the hood is opened
R the bolted cover in the trunk is removed 8 Gas Cap
Open A loss of pressure has been detected in the fuel system. The
fuel cap may not be closed properly or the fuel system may
be leaking.
X
Check the fuel cap.
X If it is not closed properly: Close the fuel cap.
X If it is closed properly: Have the fuel system checked by
an authorized Mercedes-Benz Center. D Power
Steering
Malfunctio
n
See
Operator's
Manual Power assistance for the steering system is not available. A
considerably
higher degree of effort is necessary to steer the
vehicle.
X Check whether you are capable to apply the higher degree
of effort necessary to safely steer the vehicle.
If you are able to steer the vehicle safely:
X Continue driving with added caution.
X Have the system checked at an authorized Mercedes-Benz
Center.
If, in any way, you feel that you are not able to steer the vehicle
safely:
X Stop the vehicle in a safe location as soon as it is safe to
do so.
X Apply the parking brake.
X Do not continue to drive.
X Contact an authorized Mercedes-Benz Center. Practical hints
27164_ZA; 2; 2, en-US
d2ureepe,
Version: 2.11.8.1 2009-05-12T15:08:04+02:00 - Seite 27 Z
Page 34 of 44

X
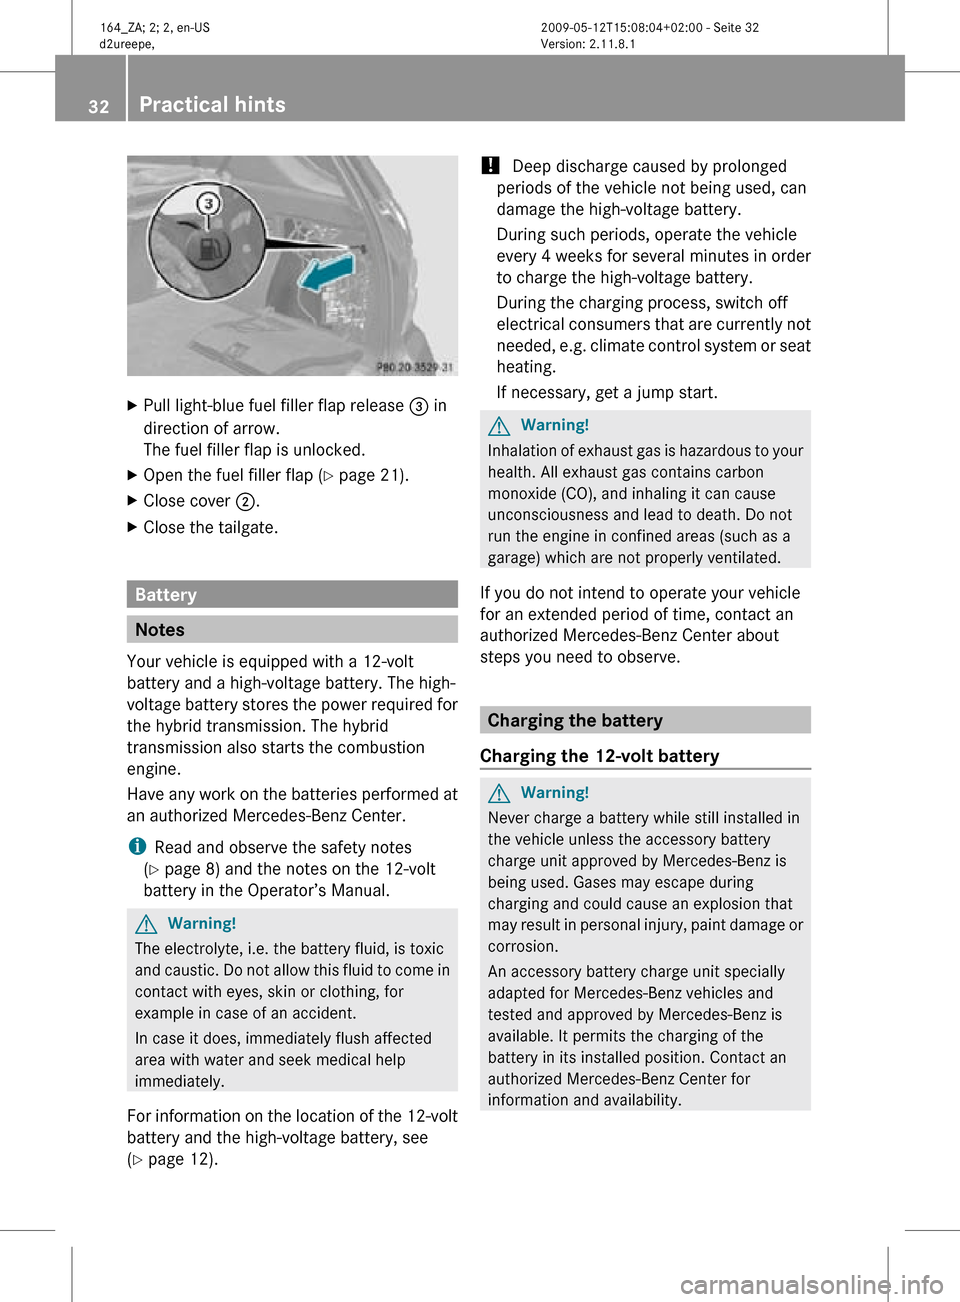
Pull light-blue fuel filler flap release = in
direction of arrow.
The fuel filler flap is unlocked.
X Open the fuel filler flap ( Y page 21).
X Close cover ;.
X Close the tailgate. Battery
Notes
Your vehicle is equipped with a 12-volt
battery and a high-voltage battery. The high-
voltage battery stores the power required for
the hybrid transmission. The hybrid
transmission also starts the combustion
engine.
Have any work on the batteries performed at
an authorized Mercedes-Benz Center.
i Read and observe the safety notes
(Y page 8) and the notes on the 12-volt
battery in the Operator’s Manual. G
Warning!
The electrolyte, i.e. the battery fluid, is toxic
and caustic. Do not allow this fluid to come in
contact with eyes, skin or clothing, for
example in case of an accident.
In case it does, immediately flush affected
area with water and seek medical help
immediately.
For information on the location of the 12-volt
battery and the high-voltage battery, see
(Y page 12). !
Deep discharge caused by prolonged
periods of the vehicle not being used, can
damage the high-voltage battery.
During such periods, operate the vehicle
every 4 weeks for several minutes in order
to charge the high-voltage battery.
During the charging process, switch off
electrical consumers that are currently not
needed, e.g. climate control system or seat
heating.
If necessary, get a jump start. G
Warning!
Inhalation of exhaust gas is hazardous to your
health. All exhaust gas contains carbon
monoxide (CO), and inhaling it can cause
unconsciousness and lead to death. Do not
run the engine in confined areas (such as a
garage) which are not properly ventilated.
If you do not intend to operate your vehicle
for an extended period of time, contact an
authorized Mercedes-Benz Center about
steps you need to observe. Charging the battery
Charging the 12-volt battery G
Warning!
Never charge a battery while still installed in
the vehicle unless the accessory battery
charge unit approved by Mercedes-Benz is
being used. Gases may escape during
charging and could cause an explosion that
may result in personal injury, paint damage or
corrosion.
An accessory battery charge unit specially
adapted for Mercedes-Benz vehicles and
tested and approved by Mercedes-Benz is
available. It permits the charging of the
battery in its installed position. Contact an
authorized Mercedes-Benz Center for
information and availability. 32
Practical hints 164_ZA; 2; 2, en-US
d2ureepe,
Version: 2.11.8.1 2009-05-12T15:08:04+02:00 - Seite 32
Page 36 of 44

Make sure the cable clamps do not touch
any other metal part while the other end is
still attached to a battery.
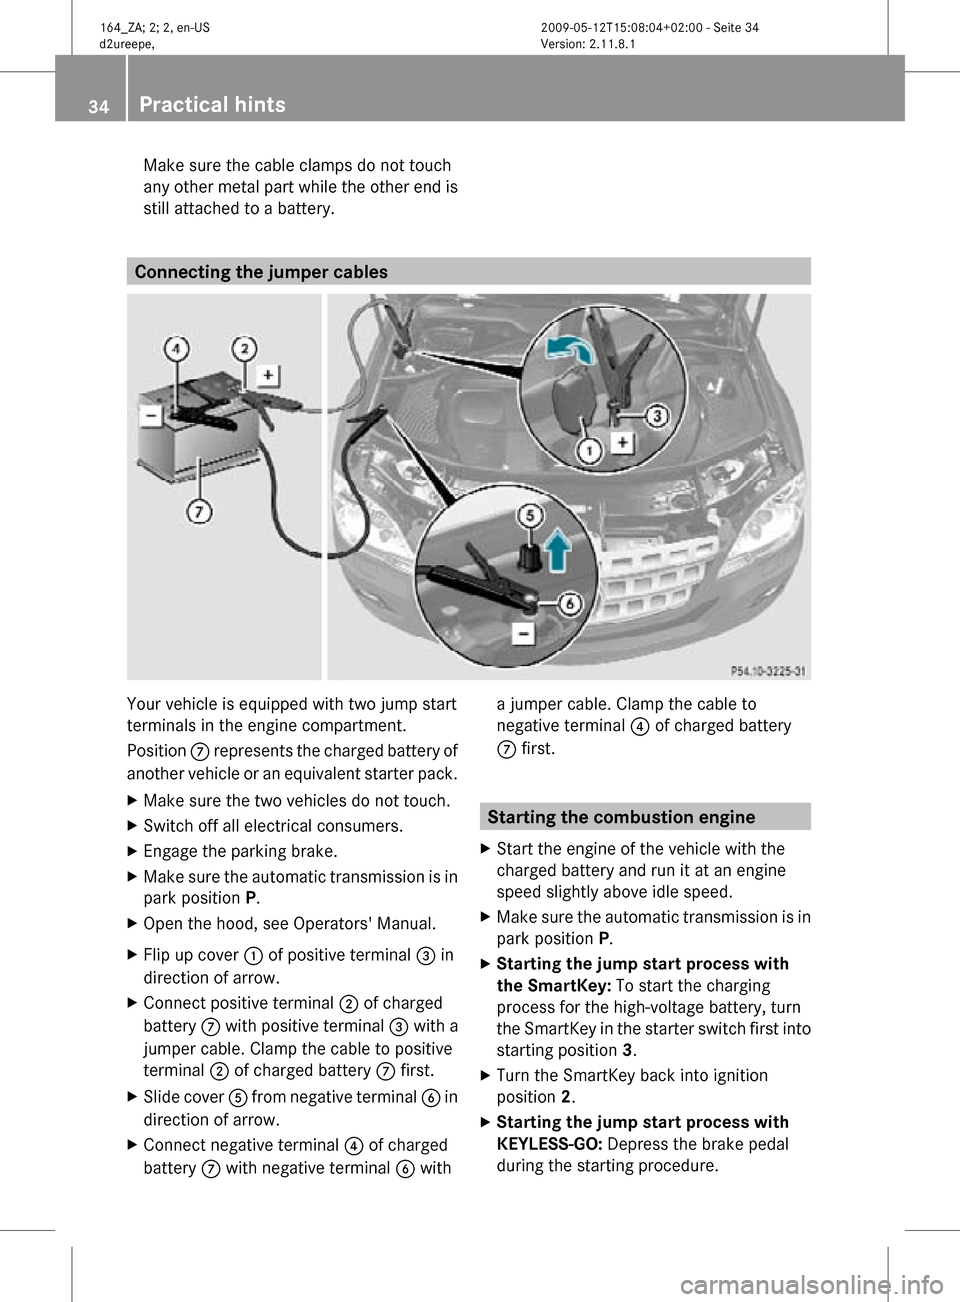
Connecting the jumper cables
Your vehicle is equipped with two jump start
terminals in the engine compartment.
Position
C represents the charged battery of
another vehicle or an equivalent starter pack.
X Make sure the two vehicles do not touch.
X Switch off all electrical consumers.
X Engage the parking brake.
X Make sure the automatic transmission is in
park position P.
X Open the hood, see Operators' Manual.
X Flip up cover : of positive terminal = in
direction of arrow.
X Connect positive terminal ; of charged
battery C with positive terminal = with a
jumper cable. Clamp the cable to positive
terminal ; of charged battery C first.
X Slide cover A from negative terminal B in
direction of arrow.
X Connect negative terminal ? of charged
battery C with negative terminal B with a jumper cable. Clamp the cable to
negative terminal ? of charged battery
C first. Starting the combustion engine
X Start the engine of the vehicle with the
charged battery and run it at an engine
speed slightly above idle speed.
X Make sure the automatic transmission is in
park position P.
X Starting the jump start process with
the SmartKey: To start the charging
process for the high-voltage battery, turn
the SmartKey in the starter switch first into
starting position 3.
X Turn the SmartKey back into ignition
position 2.
X Starting the jump start process with
KEYLESS-GO: Depress the brake pedal
during the starting procedure. 34
Practical hints 164_ZA; 2; 2, en-US
d2ureepe,
Version: 2.11.8.1 2009-05-12T15:08:04+02:00 - Seite 34