2010 MERCEDES-BENZ ML350 rear cargo
[x] Cancel search: rear cargoPage 92 of 368

iAt low ambient temperatures, the exterior
rear view mirrors will be heated
automatically.
Auto-dimming rear view mirrors
The exterior rear view mirror on the driver’s
side and the interior rear view mirror will
respond automatically to glare when the
ignition is switched on and incoming light
from headlamps falls on the sensor in the
interior rear view mirror.
The rear view mirrors will not react if the
automatic transmission is set to reverse gear
R or the interior lighting is switched on.
GWarning!
The auto-dimming function does not react if
incoming light is not aimed directly at sensors
in the interior rear view mirror.
The interior rear view mirror and the exterior
rear view mirror on the driver’s side do not
react, for example, when transporting cargo
which covers the rear window.
Light hitting the mirror(s) at certain angles
(incident light) could blind you. As a result,
you may not be able to observe traffic
conditions and could cause an accident.
Exterior rear view mirror parking
position
For more convenient parking, you can set the
passenger-side exterior rear view mirror so
that you can see the rear wheel and the road
curb.
Setting and storing the parking position
XSwitch on the ignition.XPress button =, to select the passenger-
side exterior rear view mirror.
XShift the automatic transmission into
reverse gear R.
The passenger-side exterior rear view
mirror moves to the preset parking
position.
XAdjust the passenger-side exterior rear
view mirror with adjustment button ; so
that you see the rear wheel and the road
curb.
The exterior rear view mirror parking
position is stored.
Calling up the parking position
XSwitch on the ignition.XPress button =, to select the passenger-
side exterior rear view mirror.
XShift the automatic transmission into
reverse gear R.
The passenger-side exterior rear view
mirror moves to the stored parking
position.
90MirrorsControls in detail
164_AKB; 7; 31, en-USd2ureepe,Version: 2.11.8.12009-09-11T12:07:36+02:00 - Seite 90
Page 188 of 368

closing the tilt/sliding sunroof with greater
force or without automatic reversal function.
If the movement of the tilt/sliding sunroof is
blocked during the closing procedure (e.g. by
ice or pollution), the tilt/sliding sunroof will
stop and open slightly.XImmediately after the tilt/sliding sunroof
has stopped and opened because it was
blocked, pull and hold the sunroof switch
in direction of arrow = until the tilt/sliding
sunroof is fully closed.
The tilt/sliding sunroof closes with greater
force.
If the tilt/sliding sunroof is blocked again and
opens slightly:
XImmediately after the tilt/sliding sunroof
was blocked and has opened, pull and hold
the sunroof switch in direction of arrow
= until the tilt/sliding sunroof is fully
closed.
The tilt/sliding sunroof closes without
automatic reversal function.GWarning!
Pulling and holding the sunroof switch to
close the tilt/sliding sunroof immediately
after it had been blocked two times will cause
the tilt/sliding sunroof to close without any
reversal function for as long as you hold the
sunroof switch.
Synchronizing
The tilt/sliding sunroof must be synchronized
R after the battery has been disconnected or
discharged
R after a malfunction
R if the tilt/sliding sunroof does not open
smoothly
! If the tilt/sliding sunroof cannot be closed
or synchronized, contact an authorized
Mercedes-Benz Center or call Roadside
Assistance.
XVehicles with SmartKey: Switch off the
ignition and remove the SmartKey from the
starter switch.XVehicles with KEYLESS-GO: Switch off the
ignition and open the driver’s door. This
puts the starter switch in position 0, same
as with the SmartKey removed from the
starter switch. The driver’s door then can
be closed again.XRemove the fuse for the tilt/sliding sunroof
from the fuse box ( Y page 342).XReinsert the fuse in the fuse box.XSwitch on the ignition.XPress and hold the sunroof switch in
direction of arrow : ( Y page 185) until the
tilt/sliding sunroof is fully raised at the
rear.XKeep holding the sunroof switch in
direction of arrow : for approximately
1 second.XCheck the express operation feature
( Y page 185).
If the tilt/sliding sunroof opens and closes
completely, the roof is synchronized.
Otherwise repeat the above steps.
Loading and storing
Loading instructions
GWarning!
Always fasten items being carried as securely
as possible. Use cargo tie-down rings and
fastening materials appropriate for the weight
and size of the load.
In an accident, during hard braking or sudden
maneuvers, loose items will be thrown around
inside the vehicle. This can cause injury to
vehicle occupants unless the items are
securely fastened in the vehicle.
To help avoid personal injury during a collision
or sudden maneuver, exercise care when
transporting cargo. Do not pile luggage or
cargo higher than the seat backrests.
186Loading and storingControls in detail
164_AKB; 7; 31, en-USd2ureepe,Version: 2.11.8.12009-09-11T12:07:36+02:00 - Seite 186
Page 189 of 368

The cargo compartment is the preferred place
to carry objects. Always use cargo tie-down
rings, and if so equipped, always use the cargo
net when transporting cargo.
Never drive a vehicle with the tailgate open.
Deadly carbon monoxide (CO) gases may
enter vehicle interior resulting in
unconsciousness and death.
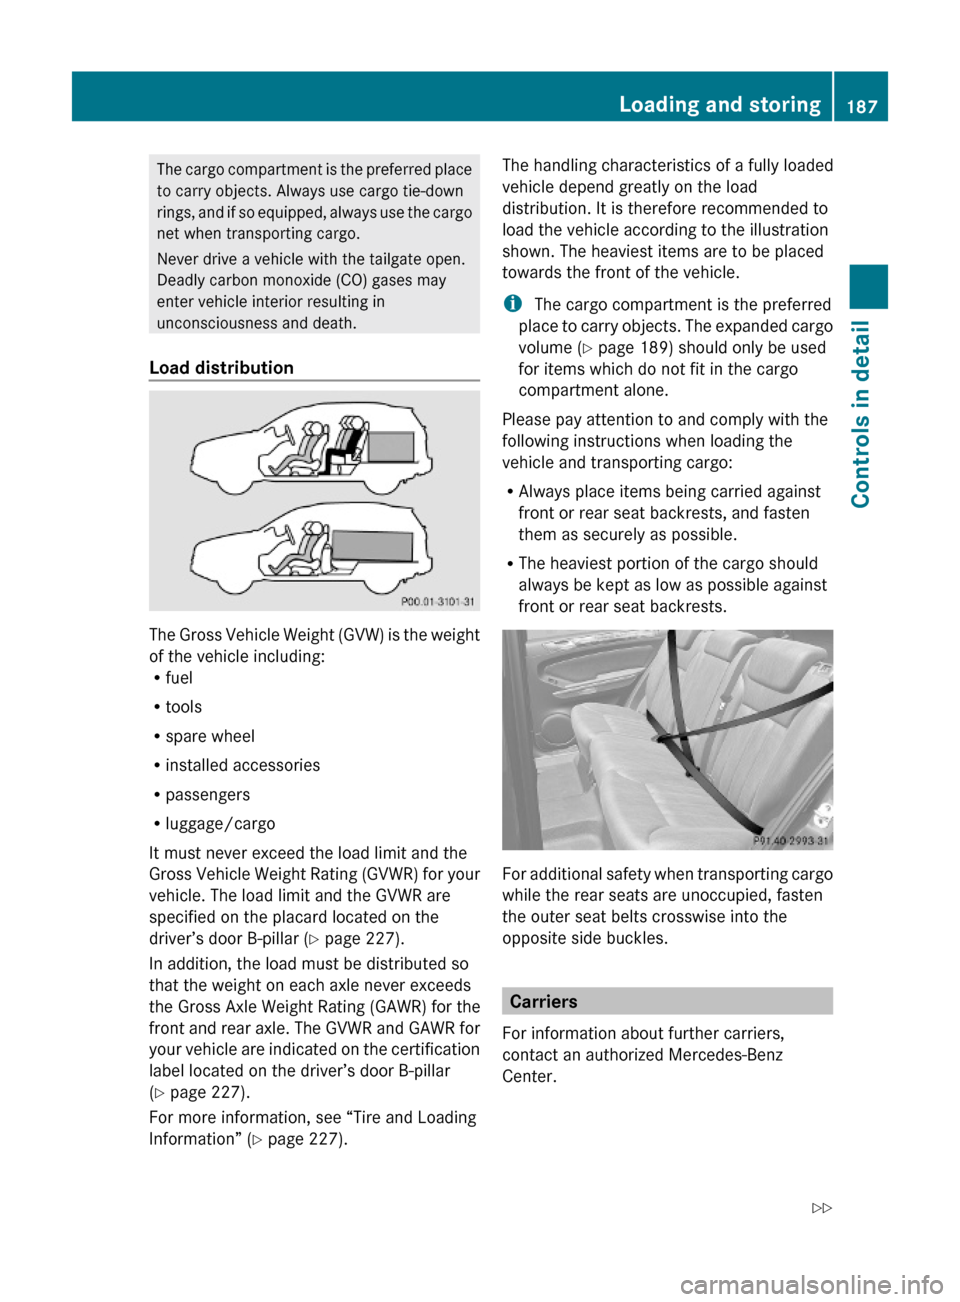
Load distribution
The Gross Vehicle Weight (GVW) is the weight
of the vehicle including:Rfuel
Rtools
Rspare wheel
Rinstalled accessories
Rpassengers
Rluggage/cargo
It must never exceed the load limit and the
Gross Vehicle Weight Rating (GVWR) for your
vehicle. The load limit and the GVWR are
specified on the placard located on the
driver’s door B-pillar (Y page 227).
In addition, the load must be distributed so
that the weight on each axle never exceeds
the Gross Axle Weight Rating (GAWR) for the
front and rear axle. The GVWR and GAWR for
your vehicle are indicated on the certification
label located on the driver’s door B-pillar
(Y page 227).
For more information, see “Tire and Loading
Information” (Y page 227).
The handling characteristics of a fully loaded
vehicle depend greatly on the load
distribution. It is therefore recommended to
load the vehicle according to the illustration
shown. The heaviest items are to be placed
towards the front of the vehicle.
i The cargo compartment is the preferred
place to carry objects. The expanded cargo
volume (Y page 189) should only be used
for items which do not fit in the cargo
compartment alone.
Please pay attention to and comply with the
following instructions when loading the
vehicle and transporting cargo:
RAlways place items being carried against
front or rear seat backrests, and fasten
them as securely as possible.
RThe heaviest portion of the cargo should
always be kept as low as possible against
front or rear seat backrests.
For additional safety when transporting cargo
while the rear seats are unoccupied, fasten
the outer seat belts crosswise into the
opposite side buckles.
Carriers
For information about further carriers,
contact an authorized Mercedes-Benz
Center.
Loading and storing187Controls in detail164_AKB; 7; 31, en-USd2ureepe,Version: 2.11.8.12009-09-11T12:07:36+02:00 - Seite 187Z
Page 190 of 368

GWarning!
Only use carriers when the basic carrier bars
have been completely mounted. The left and
right roof rails are only stabilized by means of
the basic carrier bars mounted.
Follow the manufacturer’s installation
instructions. Otherwise, an improperly
attached carrier or its load could become
detached from the vehicle.
Do not exceed the maximum roof load of
220 lb (100 kg).
Take into consideration that when the roof is
loaded, the handling characteristics are
different from those when operating the
vehicle without the roof loaded.
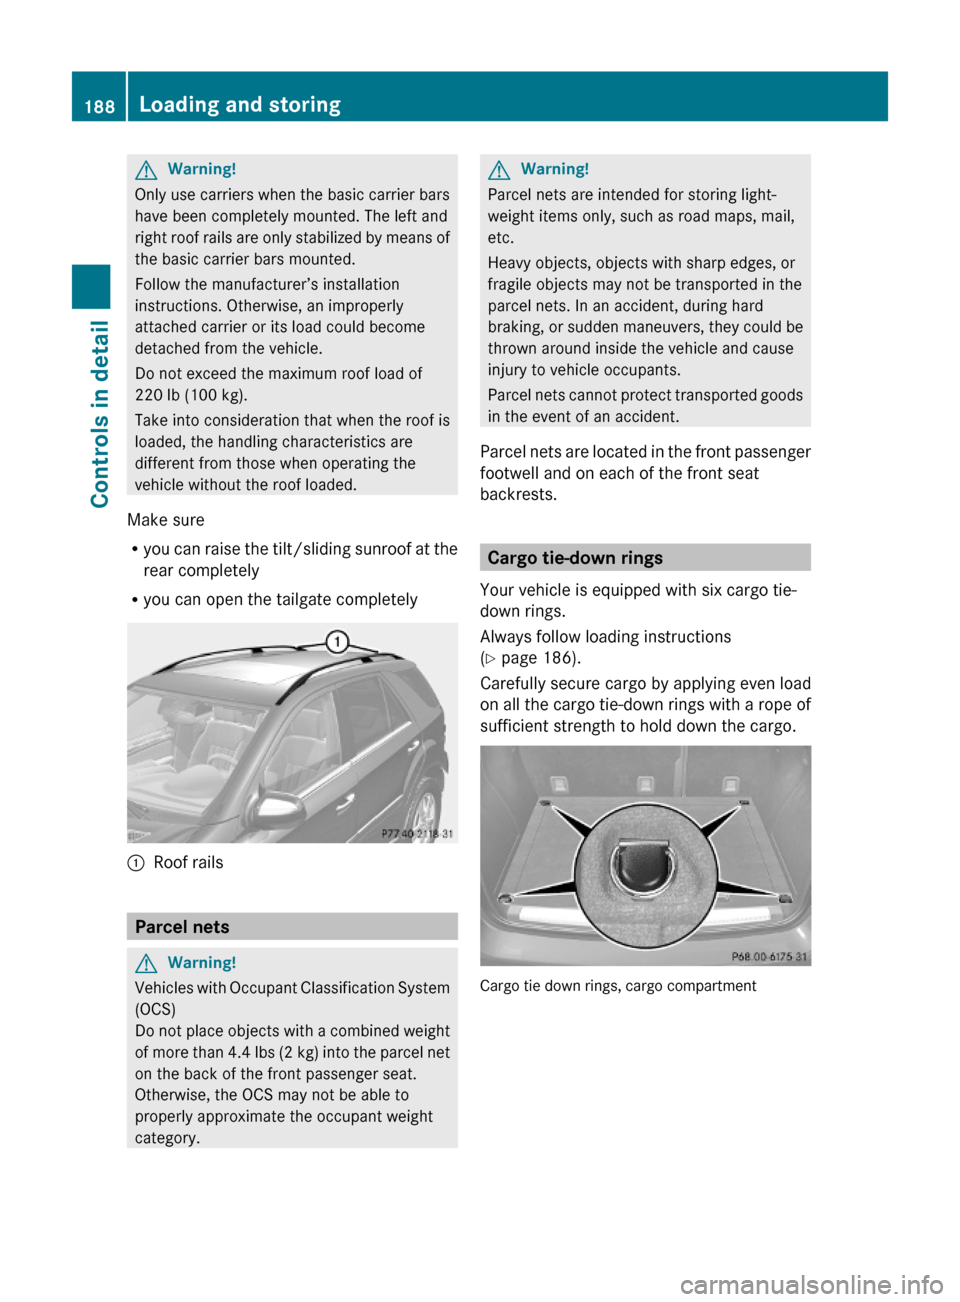
Make sure
Ryou can raise the tilt/sliding sunroof at the
rear completely
Ryou can open the tailgate completely
:Roof rails
Parcel nets
GWarning!
Vehicles with Occupant Classification System
(OCS)
Do not place objects with a combined weight
of more than 4.4 lbs (2 kg) into the parcel net
on the back of the front passenger seat.
Otherwise, the OCS may not be able to
properly approximate the occupant weight
category.
GWarning!
Parcel nets are intended for storing light-
weight items only, such as road maps, mail,
etc.
Heavy objects, objects with sharp edges, or
fragile objects may not be transported in the
parcel nets. In an accident, during hard
braking, or sudden maneuvers, they could be
thrown around inside the vehicle and cause
injury to vehicle occupants.
Parcel nets cannot protect transported goods
in the event of an accident.
Parcel nets are located in the front passenger
footwell and on each of the front seat
backrests.
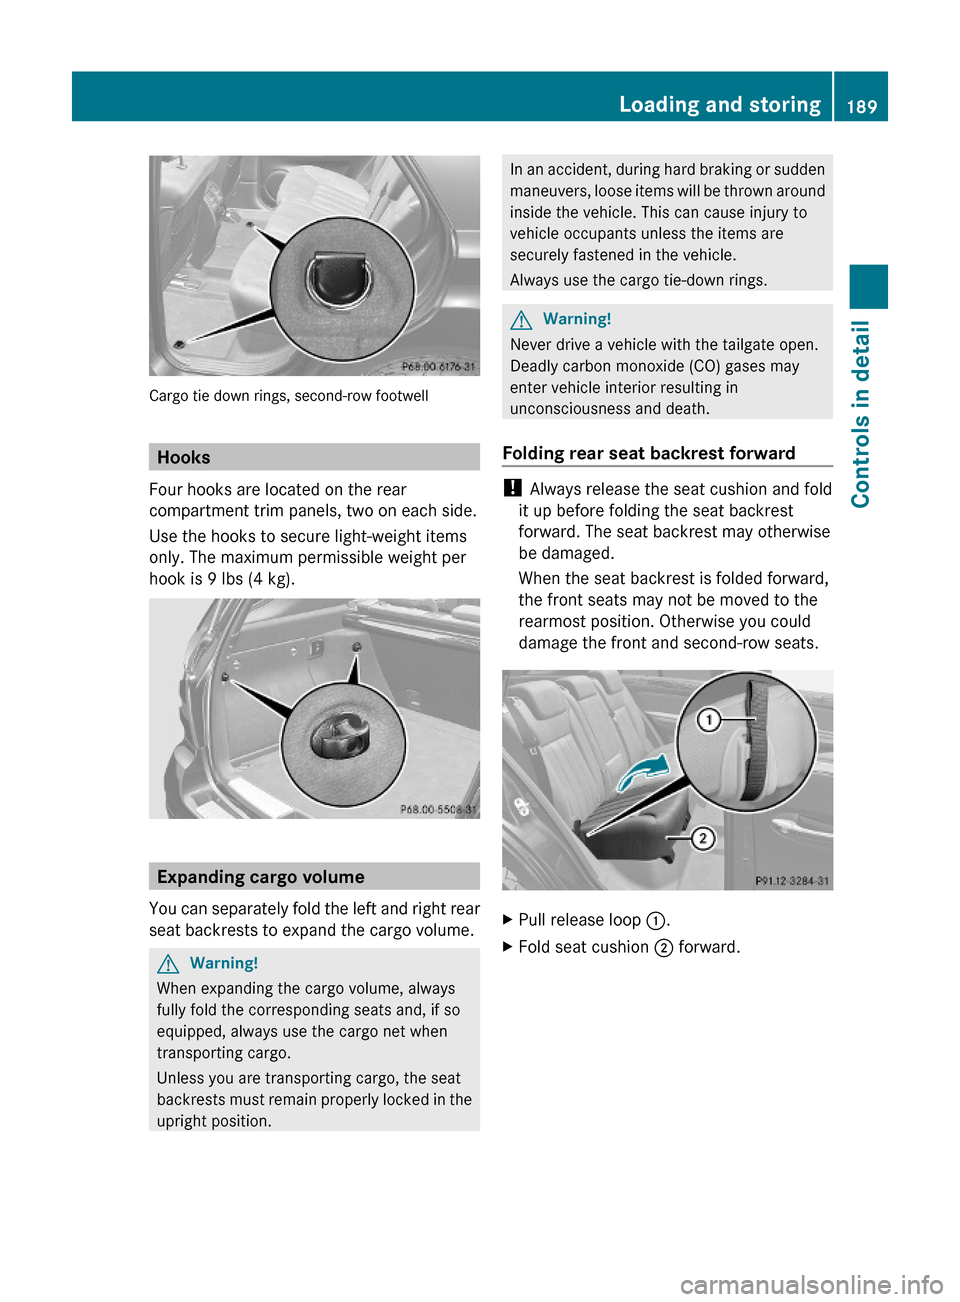
Cargo tie-down rings
Your vehicle is equipped with six cargo tie-
down rings.
Always follow loading instructions
(Y page 186).
Carefully secure cargo by applying even load
on all the cargo tie-down rings with a rope of
sufficient strength to hold down the cargo.
Cargo tie down rings, cargo compartment
188Loading and storingControls in detail
164_AKB; 7; 31, en-USd2ureepe,Version: 2.11.8.12009-09-11T12:07:36+02:00 - Seite 188
Page 191 of 368

Cargo tie down rings, second-row footwell
Hooks
Four hooks are located on the rear
compartment trim panels, two on each side.
Use the hooks to secure light-weight items
only. The maximum permissible weight per
hook is 9 lbs (4 kg).
Expanding cargo volume
You can separately fold the left and right rear
seat backrests to expand the cargo volume.
GWarning!
When expanding the cargo volume, always
fully fold the corresponding seats and, if so
equipped, always use the cargo net when
transporting cargo.
Unless you are transporting cargo, the seat
backrests must remain properly locked in the
upright position.
In an accident, during hard braking or sudden
maneuvers, loose items will be thrown around
inside the vehicle. This can cause injury to
vehicle occupants unless the items are
securely fastened in the vehicle.
Always use the cargo tie-down rings.
GWarning!
Never drive a vehicle with the tailgate open.
Deadly carbon monoxide (CO) gases may
enter vehicle interior resulting in
unconsciousness and death.
Folding rear seat backrest forward
! Always release the seat cushion and fold
it up before folding the seat backrest
forward. The seat backrest may otherwise
be damaged.
When the seat backrest is folded forward,
the front seats may not be moved to the
rearmost position. Otherwise you could
damage the front and second-row seats.
XPull release loop :.XFold seat cushion ; forward.Loading and storing189Controls in detail164_AKB; 7; 31, en-USd2ureepe,Version: 2.11.8.12009-09-11T12:07:36+02:00 - Seite 189Z
Page 192 of 368

XLower the rear seat head restraints
completely (Y page 84).
XPull release handle =.
A red indicator A will be visible and seat
backrest ? is released.
XFold seat backrest ? forward.
Returning rear seat backrest to original
position
! Make sure that the seat belt is not
pinched when folding rear seat backrest.
XFold seat backrest : rearward until it
engages.
Red indicator A should no longer be
visible.
XFold seat cushion ; rearward until it locks
into position.
XCheck for secure locking by pushing and
pulling on seat backrest :.
GWarning!
If a red indicator is visible with the seat
backrest up, then the seat backrest is not
properly locked into position.
Always lock seat backrest in its upright
position when the rear seats are occupied, or
the extended cargo compartment is not in
use. Check for secure locking by pushing and
pulling on the seat backrest.
XAdjust the rear seat head restraints, if
necessary (Y page 83).
Cargo compartment cover blind
The cargo compartment cover blind can be
installed behind the rear seats.
! With the cargo compartment cover blind
installed, do not pile luggage higher than
the lower edges of the rear side windows.
190Loading and storingControls in detail
164_AKB; 7; 31, en-USd2ureepe,Version: 2.11.8.12009-09-11T12:07:36+02:00 - Seite 190
Page 193 of 368

XRolling out: Pull cargo compartment cover
blind on handle : across the cargo
compartment.
XGuide cargo compartment cover blind into
mounts ; and release.
XRolling up: Disengage cargo compartment
cover blind and guide retraction by its
handle :.
Before removing or installing cargo
compartment cover blind behind the rear
seats, fold the left or right rear seat forward
(Y page 189). Afterwards, return the left or
right rear seat into its original position.
XRemoving: Roll up cargo compartment
cover blind.
XPush release button =.XPull cargo compartment cover blind ? to
the left.
XRemove cargo compartment cover blind.XInstalling: Make sure release button =
faces up and handle : is to the rear before
inserting the cargo compartment cover
blind.
XPlace left side of cargo compartment cover
blind in left mount.
XPosition right side of cargo compartment
cover blind over right mount.
XPress release button = and guide cargo
compartment cover blind into mount.
XMake sure cargo compartment cover blind
is securely fastened.Cargo netGWarning!
Make sure the cargo net is properly engaged
at top and bottom position and the tightening
belts are securely fastened.
Never use a damaged cargo net.
Always use cargo net when transporting
cargo. This helps to avoid personal injury from
smaller objects being thrown around in the
occupant compartment during a collision or
sudden maneuver.
The cargo net cannot prevent the movement
of large, heavier objects into the passenger
compartment in an accident. Such items must
be properly secured using the cargo tie-down
rings in the cargo compartment floor.
Passenger use of seats behind installed cargo
net is restricted because of the footwell being
taken up by the net.
Use of the cargo net is a particularly
important safety factor when the vehicle is
loaded higher than the top of the seat
backrests with smaller objects. For your
safety, always use the cargo net when
transporting cargo.
The cargo net can be installed behind the
B-pillar or the C-pillar.
RWith the cargo volume expanded
(Y page 189), use holders : behind
B-pillars and the cargo tie-down rings in the
second-row footwell (Y page 189).
RWithout the cargo volume expanded, use
holders ; behind C-pillars and the cargo
Loading and storing191Controls in detail164_AKB; 7; 31, en-USd2ureepe,Version: 2.11.8.12009-09-11T12:07:36+02:00 - Seite 191Z
Page 194 of 368

tie-down rings in the cargo compartment
(Y page 188).
XOpen the hook and loop fasteners on the
cargo net package.
XRoll out the cargo net.XUnfold the cargo net.XEngage the upper cargo net bar.
The cargo net bar must engage audibly.
Installing the cargo net
Cargo net installed behind the C-pillar
XHang cargo net bar ; on holder : as
indicated by the arrow.
XPush cargo net bar ; forward into
holder : in direction of arrow.
XEngage lower cargo net bar.
The cargo net bar must engage audibly.
Pulling the cargo net tight
Belt hook attached behind the rear seat backrests
XHook belt hook : into cargo tie-down
ring ; in direction of arrow.
XPull tightening belt = by the loose end in
direction of arrow until the cargo net is
pulled tight.
XAfter driving a short distance, make sure
the cargo net is still tight and, if necessary,
pull it tight again.
Loosening the cargo net
Belt hook attached behind the rear seat backrests
XLoosen the tightening belt by pulling
buckle : upward in direction of arrow.
XRemove belt hook ; from cargo tie-down
ring =.
Removing and storing the cargo net
XTake cargo net bar ; (Y page 192) out of
holder : (Y page 192).
XPress the red button on the upper and lower
cargo net bar.
XFold the cargo net.XRoll up the cargo net.XClose the hook and loop fasteners on the
cargo net package.
Front storage compartments
GWarning!
To help avoid personal injury during a collision
or sudden maneuver, exercise care when
192Loading and storingControls in detail
164_AKB; 7; 31, en-USd2ureepe,Version: 2.11.8.12009-09-11T12:07:36+02:00 - Seite 192