2010 MERCEDES-BENZ GLK350 4MATIC key
[x] Cancel search: keyPage 110 of 344
range indicator disappears from the
multifunction display.
The automatic transmission will shift from
the current gear range directly into drive
position D.
Shifting into optimal gear range
XPress and hold the gear selector lever to
the left in the D- direction.
The automatic transmission will select the
gear range suited for optimal acceleration
and deceleration automatically. This will
involve shifting down one or more gears.
Emergency operation (limp-home
mode)
If vehicle acceleration becomes less
responsive or sluggish or the automatic
transmission no longer shifts, the automatic
transmission is most likely operating in limp-
home (emergency operation) mode. In this
mode only second gear and reverse gear R
can be selected.
XStop the vehicle in a safe location.XShift the automatic transmission into park
position P.XTurn off the engine.XWait at least 10 seconds before restarting.XRestart the engine.XShift the automatic transmission into drive
position D (for second gear) or reverse gear
R .XHave the automatic transmission checked
at an authorized Mercedes-Benz Center as
soon as possible.
Transfer case
This section applies to vehicles equipped with
all-wheel drive (4MATIC) only. Both the front
and rear axles are powered at all times when
the vehicle is being operated.
! Only conduct operational or performance
tests on a two-axle dynamometer. If such
tests are necessary, contact an authorized
Mercedes-Benz Center. You could
otherwise seriously damage the brake
system or the transfer case which is not
covered by the Mercedes-Benz Limited
Warranty.
! Because the ESP ®
operates
automatically, the engine and ignition must
be shut off (SmartKey in starter switch
position 0 or 1) when
R the parking brake is being tested on a
brake test dynamometer
R towing the vehicle with the front or rear
axle raised (not permissible for vehicles
with 4MATIC)
Active braking action through the ESP ®
may otherwise seriously damage the brake
system which is not covered by the
Mercedes-Benz Limited Warranty.
Instrument cluster
Introduction
For a full view illustration of the instrument
cluster, see “Instrument cluster”
( Y page 28).
GWarning!
No messages will be displayed if either the
instrument cluster or the multifunction
display is inoperative.
As a result, you will not be able to see
information about your driving conditions,
such as
R speed
R outside temperature
R warning/indicator lamps
R malfunction/warning messages
R failure of any systems
Driving characteristics may be impaired.
108Instrument clusterControls in detail
X204_AKB; 3; 23, en-USd2ureepe,Version: 2.11.8.12009-07-16T19:16:58+02:00 - Seite 108
Page 116 of 344
orXPress and hold button % until the
standard display appears.
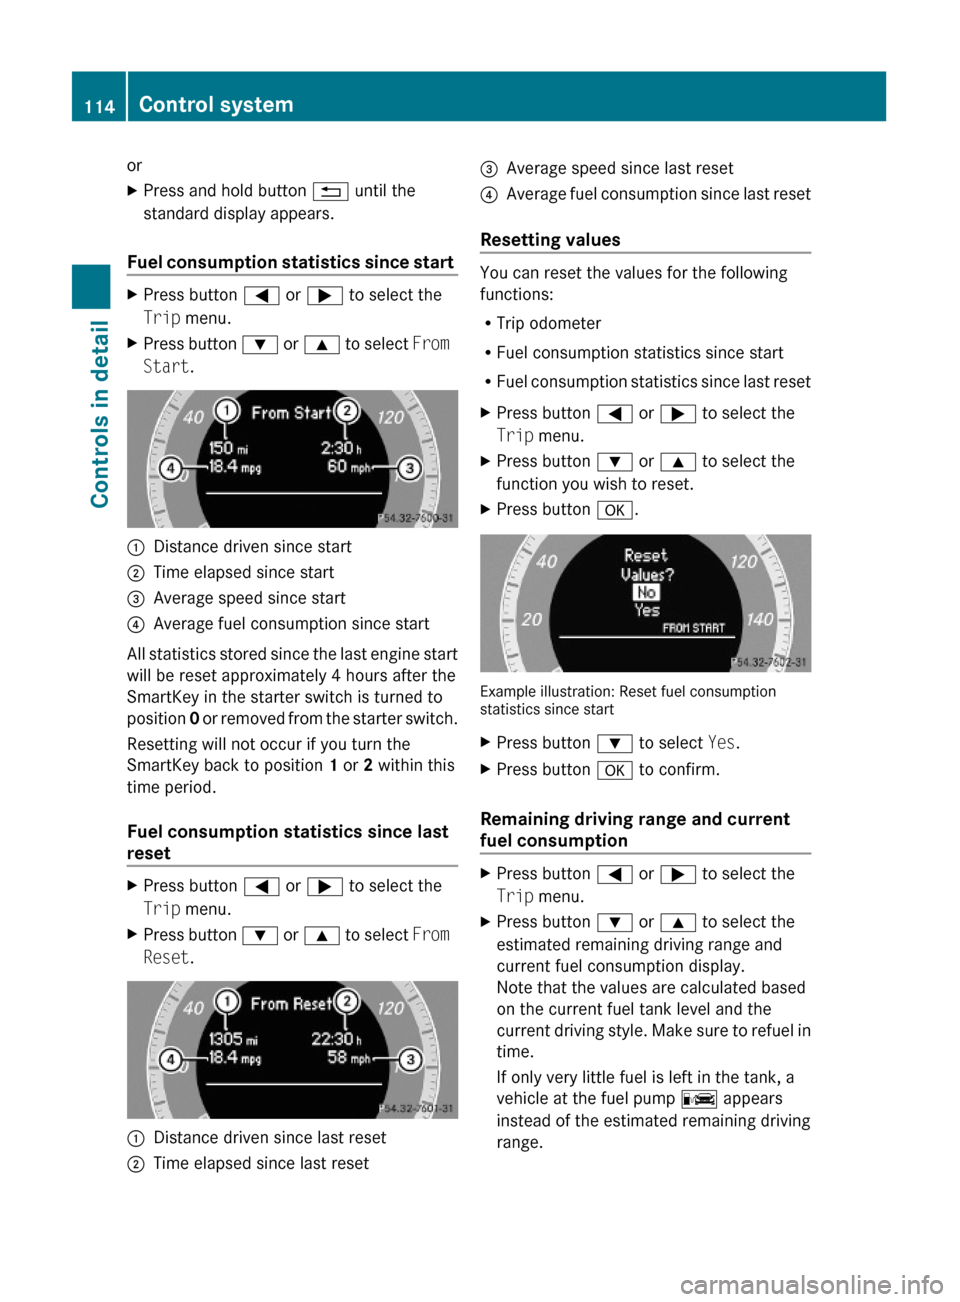
Fuel consumption statistics since start
XPress button = or ; to select the
Trip menu.
XPress button : or 9 to select From
Start.
:Distance driven since start;Time elapsed since start=Average speed since start?Average fuel consumption since start
All statistics stored since the last engine start
will be reset approximately 4 hours after the
SmartKey in the starter switch is turned to
position 0 or removed from the starter switch.
Resetting will not occur if you turn the
SmartKey back to position 1 or 2 within this
time period.
Fuel consumption statistics since last
reset
XPress button = or ; to select the
Trip menu.
XPress button : or 9 to select From
Reset.
:Distance driven since last reset;Time elapsed since last reset=Average speed since last reset?Average fuel consumption since last reset
Resetting values
You can reset the values for the following
functions:
RTrip odometer
RFuel consumption statistics since start
RFuel consumption statistics since last reset
XPress button = or ; to select the
Trip menu.
XPress button : or 9 to select the
function you wish to reset.
XPress button a.
Example illustration: Reset fuel consumptionstatistics since start
XPress button : to select Yes.XPress button a to confirm.
Remaining driving range and current
fuel consumption
XPress button = or ; to select the
Trip menu.
XPress button : or 9 to select the
estimated remaining driving range and
current fuel consumption display.
Note that the values are calculated based
on the current fuel tank level and the
current driving style. Make sure to refuel in
time.
If only very little fuel is left in the tank, a
vehicle at the fuel pump C appears
instead of the estimated remaining driving
range.
114Control systemControls in detail
X204_AKB; 3; 23, en-USd2ureepe,Version: 2.11.8.12009-07-16T19:16:58+02:00 - Seite 114
Page 121 of 344
operation of certain systems. They do not
replace the owner’s and/or driver’s
responsibility to maintain the vehicle’s
operating safety. Have all required
maintenance and safety checks performed on
the vehicle. Bring the vehicle to an authorized
Mercedes-Benz Center to address the
malfunction and warning messages.
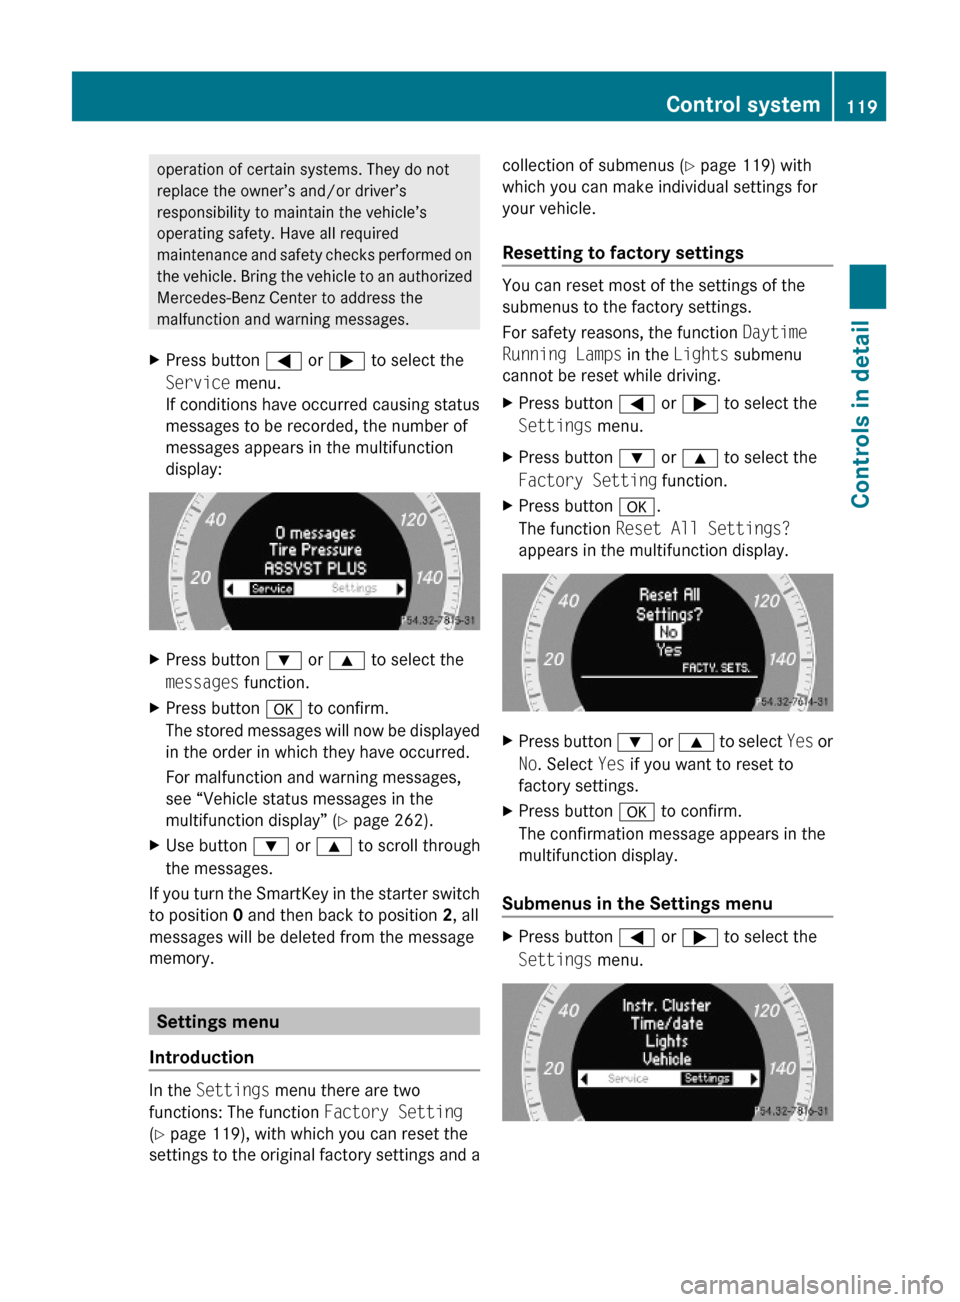
XPress button = or ; to select the
Service menu.
If conditions have occurred causing status
messages to be recorded, the number of
messages appears in the multifunction
display:
XPress button : or 9 to select the
messages function.
XPress button a to confirm.
The stored messages will now be displayed
in the order in which they have occurred.
For malfunction and warning messages,
see “Vehicle status messages in the
multifunction display” (Y page 262).
XUse button : or 9 to scroll through
the messages.
If you turn the SmartKey in the starter switch
to position 0 and then back to position 2, all
messages will be deleted from the message
memory.
Settings menu
Introduction
In the Settings menu there are two
functions: The function Factory Setting
(Y page 119), with which you can reset the
settings to the original factory settings and a
collection of submenus (Y page 119) with
which you can make individual settings for
your vehicle.
Resetting to factory settings
You can reset most of the settings of the
submenus to the factory settings.
For safety reasons, the function Daytime
Running Lamps in the Lights submenu
cannot be reset while driving.
XPress button = or ; to select the
Settings menu.
XPress button : or 9 to select the
Factory Setting function.
XPress button a.
The function Reset All Settings?
appears in the multifunction display.
XPress button : or 9 to select Yes or
No. Select Yes if you want to reset to
factory settings.
XPress button a to confirm.
The confirmation message appears in the
multifunction display.
Submenus in the Settings menu
XPress button = or ; to select the
Settings menu.
Control system119Controls in detailX204_AKB; 3; 23, en-USd2ureepe,Version: 2.11.8.12009-07-16T19:16:58+02:00 - Seite 119Z
Page 125 of 344
Rthe exterior lamps will come on during
darkness when the vehicle is unlocked with
the SmartKey.
The lamps will go out when the driver’s door
is opened.
If you do not open the driver’s door after
unlocking the vehicle with the SmartKey,
the lamps will go out automatically after
approximately 40 seconds.
Rthe exterior lamps will remain on for
15 seconds during darkness after exiting
the vehicle and closing all doors.
If, after turning off the engine, you do not
open or close a door, the lamps will
automatically go out after 60 seconds.
The following lamps will come on
RParking lamps
RTail lamps
RLicense plate lamps
RSide marker lamps
RFront fog lamps
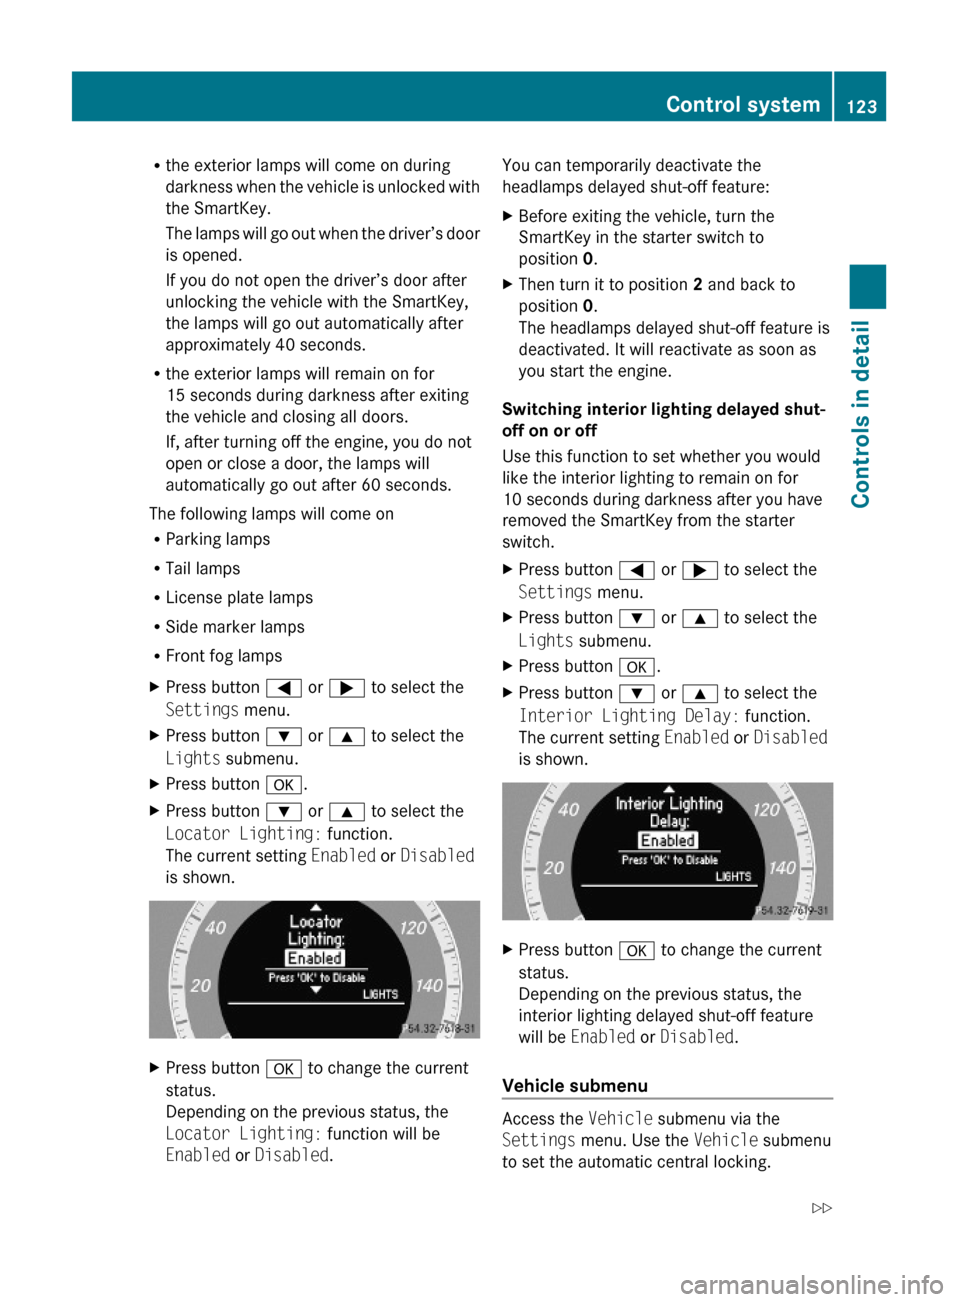
XPress button = or ; to select the
Settings menu.
XPress button : or 9 to select the
Lights submenu.
XPress button a.XPress button : or 9 to select the
Locator Lighting: function.
The current setting Enabled or Disabled
is shown.
XPress button a to change the current
status.
Depending on the previous status, the
Locator Lighting: function will be
Enabled or Disabled.
You can temporarily deactivate the
headlamps delayed shut-off feature:
XBefore exiting the vehicle, turn the
SmartKey in the starter switch to
position 0.
XThen turn it to position 2 and back to
position 0.
The headlamps delayed shut-off feature is
deactivated. It will reactivate as soon as
you start the engine.
Switching interior lighting delayed shut-
off on or off
Use this function to set whether you would
like the interior lighting to remain on for
10 seconds during darkness after you have
removed the SmartKey from the starter
switch.
XPress button = or ; to select the
Settings menu.
XPress button : or 9 to select the
Lights submenu.
XPress button a.XPress button : or 9 to select the
Interior Lighting Delay: function.
The current setting Enabled or Disabled
is shown.
XPress button a to change the current
status.
Depending on the previous status, the
interior lighting delayed shut-off feature
will be Enabled or Disabled.
Vehicle submenu
Access the Vehicle submenu via the
Settings menu. Use the Vehicle submenu
to set the automatic central locking.
Control system123Controls in detailX204_AKB; 3; 23, en-USd2ureepe,Version: 2.11.8.12009-07-16T19:16:58+02:00 - Seite 123Z
Page 128 of 344
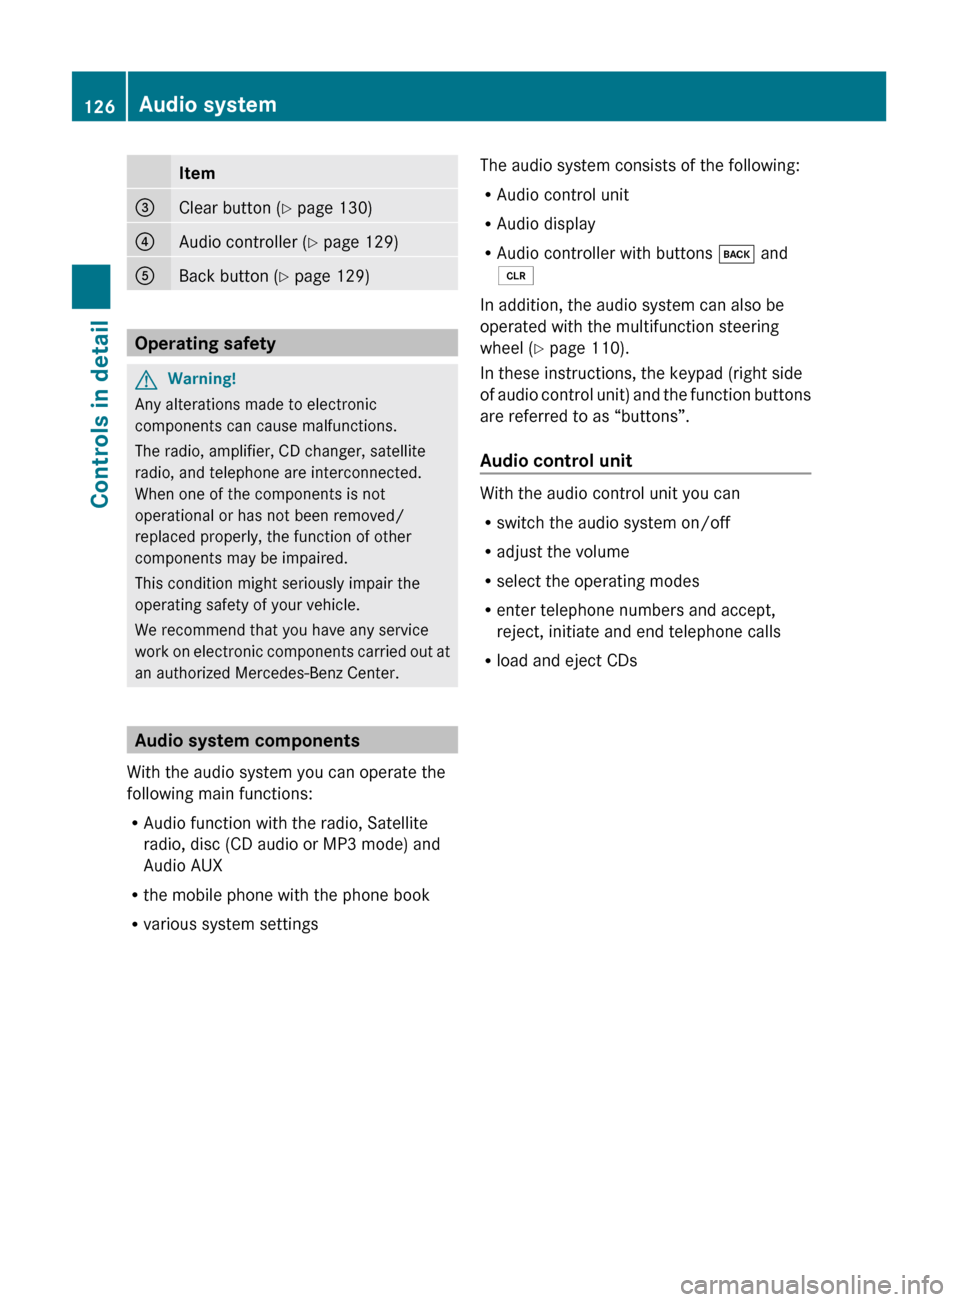
Item=Clear button (Y page 130)?Audio controller ( Y page 129)ABack button ( Y page 129)
Operating safety
GWarning!
Any alterations made to electronic
components can cause malfunctions.
The radio, amplifier, CD changer, satellite
radio, and telephone are interconnected.
When one of the components is not
operational or has not been removed/
replaced properly, the function of other
components may be impaired.
This condition might seriously impair the
operating safety of your vehicle.
We recommend that you have any service
work on electronic components carried out at
an authorized Mercedes-Benz Center.
Audio system components
With the audio system you can operate the
following main functions:
R Audio function with the radio, Satellite
radio, disc (CD audio or MP3 mode) and
Audio AUX
R the mobile phone with the phone book
R various system settings
The audio system consists of the following:
R Audio control unit
R Audio display
R Audio controller with buttons k and
2
In addition, the audio system can also be
operated with the multifunction steering
wheel ( Y page 110).
In these instructions, the keypad (right side
of audio control unit) and the function buttons
are referred to as “buttons”.
Audio control unit
With the audio control unit you can
R switch the audio system on/off
R adjust the volume
R select the operating modes
R enter telephone numbers and accept,
reject, initiate and end telephone calls
R load and eject CDs
126Audio systemControls in detail
X204_AKB; 3; 23, en-USd2ureepe,Version: 2.11.8.12009-07-16T19:16:58+02:00 - Seite 126
Page 129 of 344
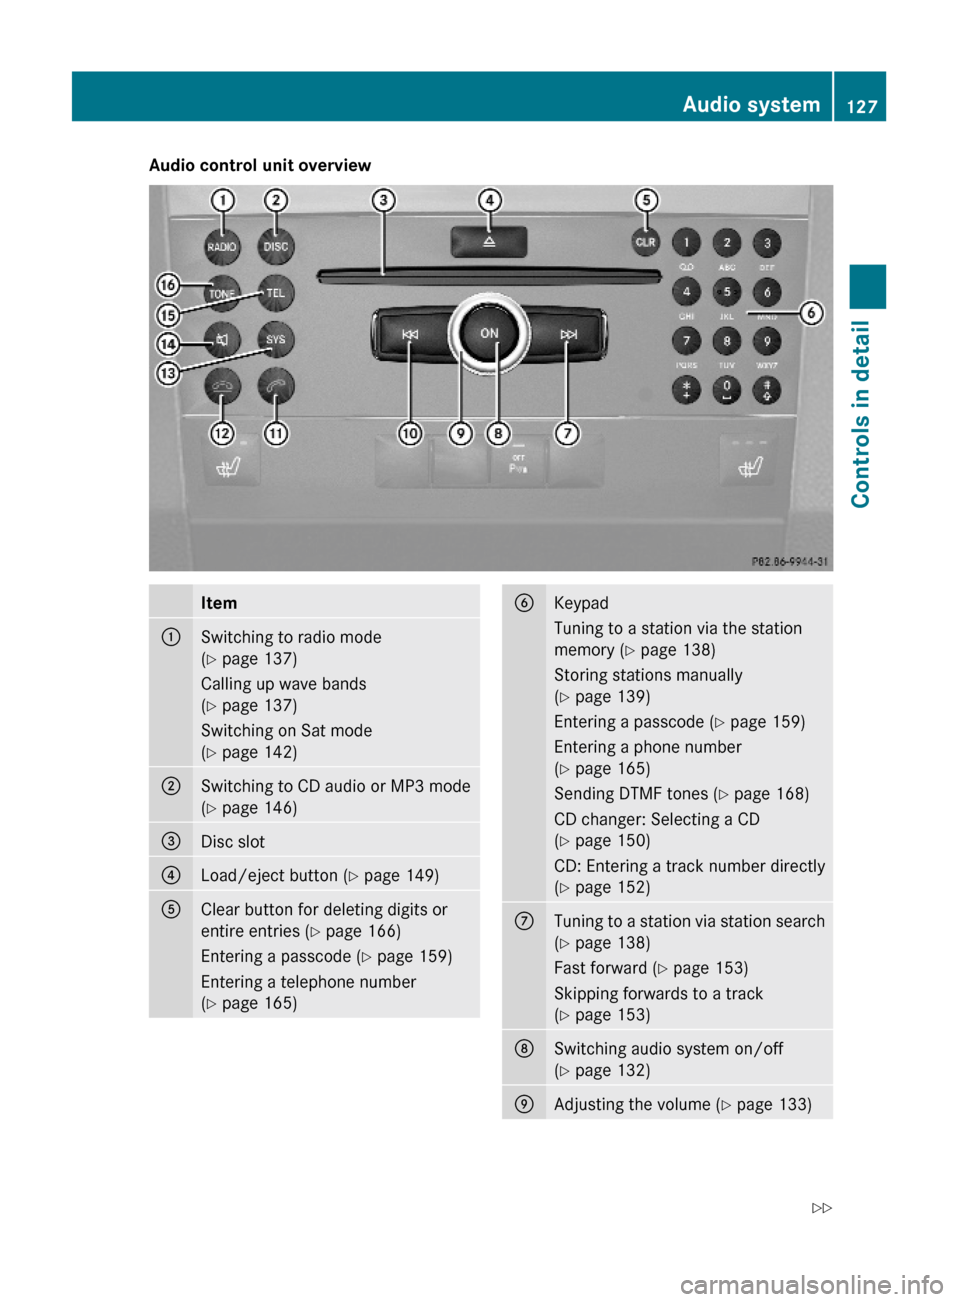
Audio control unit overviewItem:Switching to radio mode
(Y page 137)
Calling up wave bands
(Y page 137)
Switching on Sat mode
(Y page 142)
;Switching to CD audio or MP3 mode
(Y page 146)
=Disc slot?Load/eject button (Y page 149)AClear button for deleting digits or
entire entries (Y page 166)
Entering a passcode (Y page 159)
Entering a telephone number
(Y page 165)
BKeypad
Tuning to a station via the station
memory (Y page 138)
Storing stations manually
(Y page 139)
Entering a passcode (Y page 159)
Entering a phone number
(Y page 165)
Sending DTMF tones (Y page 168)
CD changer: Selecting a CD
(Y page 150)
CD: Entering a track number directly
(Y page 152)
CTuning to a station via station search
(Y page 138)
Fast forward (Y page 153)
Skipping forwards to a track
(Y page 153)
DSwitching audio system on/off
(Y page 132)
EAdjusting the volume (Y page 133)Audio system127Controls in detailX204_AKB; 3; 23, en-USd2ureepe,Version: 2.11.8.12009-07-16T19:16:58+02:00 - Seite 127Z
Page 134 of 344
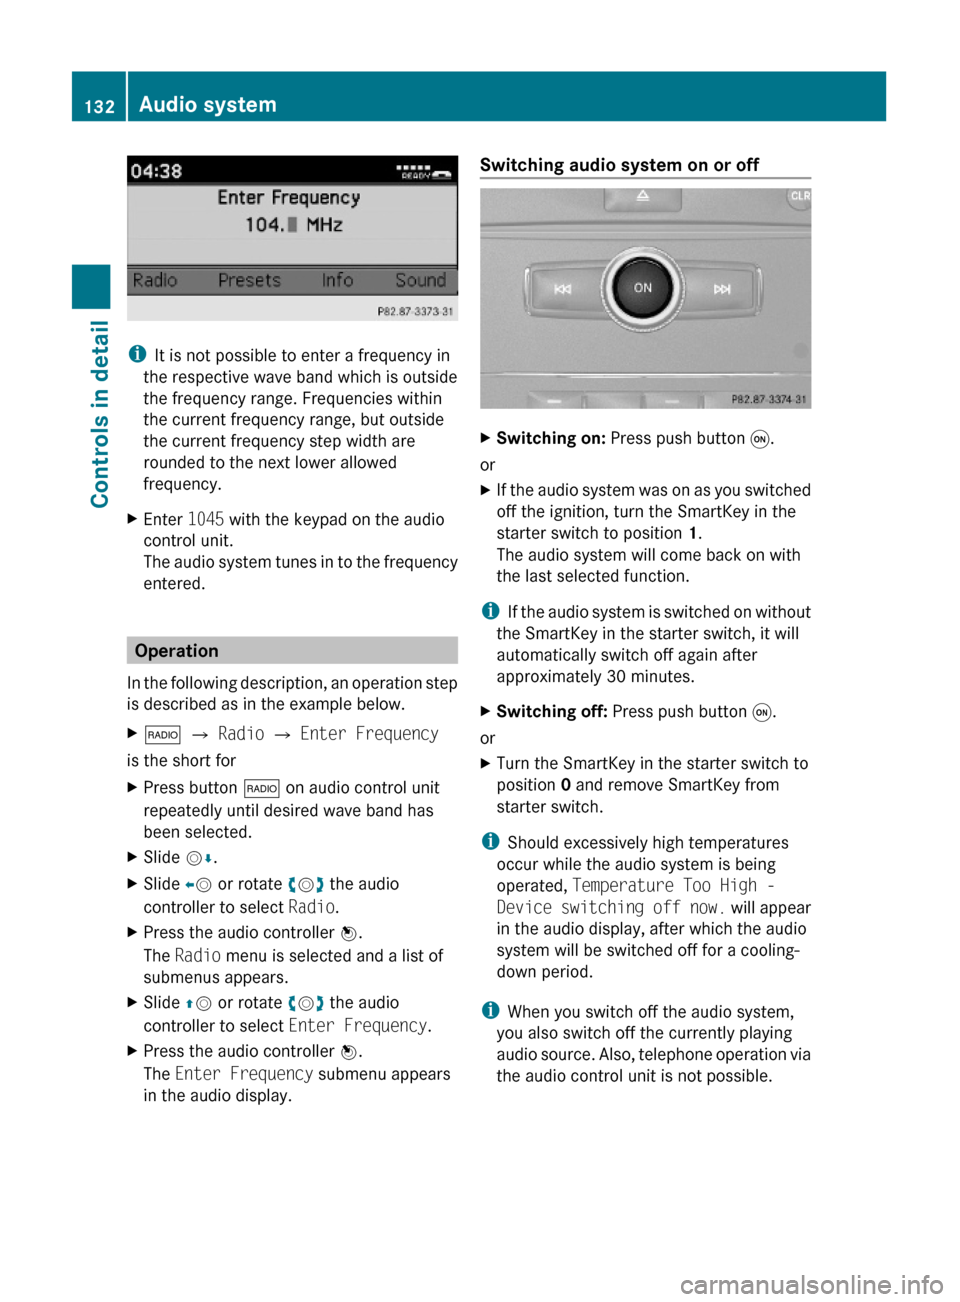
iIt is not possible to enter a frequency in
the respective wave band which is outside
the frequency range. Frequencies within
the current frequency range, but outside
the current frequency step width are
rounded to the next lower allowed
frequency.
XEnter 1045 with the keypad on the audio
control unit.
The audio system tunes in to the frequency
entered.
Operation
In the following description, an operation step
is described as in the example below.
X$ Q Radio Q Enter Frequency
is the short for
XPress button $ on audio control unit
repeatedly until desired wave band has
been selected.
XSlide VÆ.XSlide XV or rotate cVd the audio
controller to select Radio.
XPress the audio controller W.
The Radio menu is selected and a list of
submenus appears.
XSlide ZV or rotate cVd the audio
controller to select Enter Frequency.
XPress the audio controller W.
The Enter Frequency submenu appears
in the audio display.
Switching audio system on or off XSwitching on: Press push button q.
or
XIf the audio system was on as you switched
off the ignition, turn the SmartKey in the
starter switch to position 1.
The audio system will come back on with
the last selected function.
iIf the audio system is switched on without
the SmartKey in the starter switch, it will
automatically switch off again after
approximately 30 minutes.
XSwitching off: Press push button q.
or
XTurn the SmartKey in the starter switch to
position 0 and remove SmartKey from
starter switch.
iShould excessively high temperatures
occur while the audio system is being
operated, Temperature Too High -
Device switching off now. will appear
in the audio display, after which the audio
system will be switched off for a cooling-
down period.
iWhen you switch off the audio system,
you also switch off the currently playing
audio source. Also, telephone operation via
the audio control unit is not possible.
132Audio systemControls in detail
X204_AKB; 3; 23, en-USd2ureepe,Version: 2.11.8.12009-07-16T19:16:58+02:00 - Seite 132
Page 140 of 344
The wave band currently selected appears
in the main area of the audio display. The
last selected station in the selected wave
band is heard.
Selecting a station/channel
The following functions are available:
R Station search function
R Channel list (Weather Band/satellite radio)
R Station memory (except Weather Band)
R Manual frequency entry (except Weather
Band/satellite radio)
For using satellite radio see ( Y page 140).
The station search proceeds in the following
frequency increments:
R 200 kHz in FM range
R 10 kHz in AM range
Tuning to a station/channel via station/
channel search function
i The search function searches for the next
receivable station in the FM or AM wave
band. In Weather Band (WB) the search
function switches to the next channel in the
channel list. For tuning to a station/
channel you can also use the buttons on
the multifunction steering wheel, see
Audio menu ( Y page 115).
XPress button $ on audio control unit
repeatedly until the FM/AM/WB wave
band is selected.XSlide XV Y or rotate cV d when the main
area in the basic menu is active.
Depending on the direction in which the
controller is being slid or rotated, thesystem searches upward or downward and
stops at the next station/channel.
or
XPress button E or F on audio control
unit.
Depending on the pressed button, the
system searches downward or upward and
stops at the next station/channel.
Selecting a station using station memory
i This function is not available for Weather
Band.
XPress button $ on audio control unit
repeatedly until desired wave band has
been selected.XSelect Presets .
or
XPress W when the main area is selected.
The memory menu appears. The dot # in
front of a memory position indicates that
the currently selected station is saved
there.XSelect a station in the memory menu by
rotating cV d or sliding ZV Æ and press
W .
or
XPress desired station button k to
x , with the keypad in audio control unit
briefly.
Tuning to a station by entering the
frequency manually
i This function is not available for Weather
Band/satellite radio.
X$ Q Radio Q Enter Frequency
The menu for manual frequency entry
appears.138Audio systemControls in detail
X204_AKB; 3; 23, en-USd2ureepe,Version: 2.11.8.12009-07-16T19:16:58+02:00 - Seite 138