2010 MERCEDES-BENZ GL550 ignition
[x] Cancel search: ignitionPage 126 of 380
menu, see the “Controls in detail” section
(Y page 131).
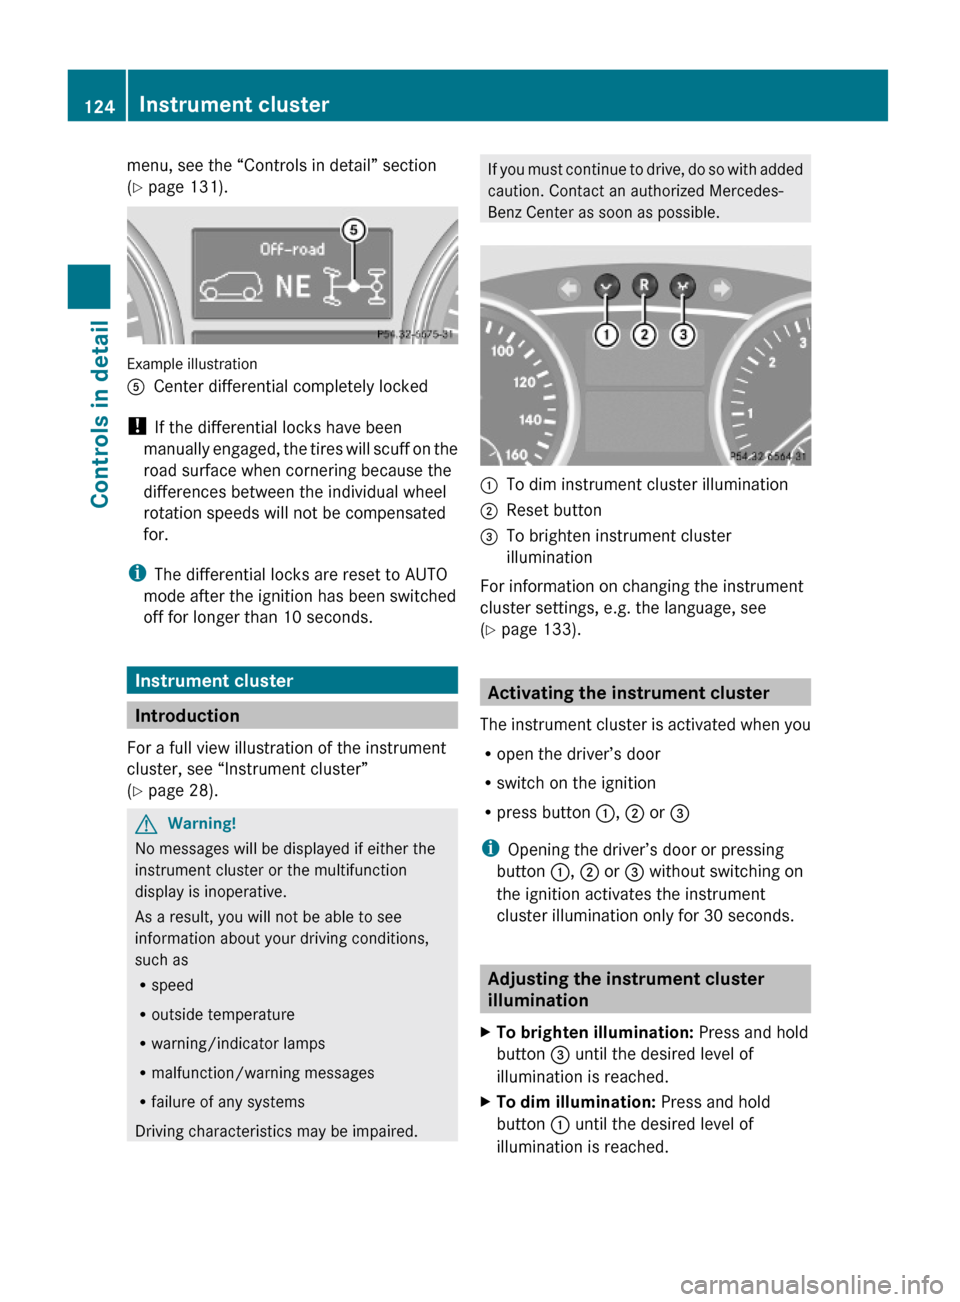
Example illustration
ACenter differential completely locked
! If the differential locks have been
manually engaged, the tires will scuff on the
road surface when cornering because the
differences between the individual wheel
rotation speeds will not be compensated
for.
iThe differential locks are reset to AUTO
mode after the ignition has been switched
off for longer than 10 seconds.
Instrument cluster
Introduction
For a full view illustration of the instrument
cluster, see “Instrument cluster”
(Y page 28).
GWarning!
No messages will be displayed if either the
instrument cluster or the multifunction
display is inoperative.
As a result, you will not be able to see
information about your driving conditions,
such as
Rspeed
Routside temperature
Rwarning/indicator lamps
Rmalfunction/warning messages
Rfailure of any systems
Driving characteristics may be impaired.
If you must continue to drive, do so with added
caution. Contact an authorized Mercedes-
Benz Center as soon as possible.
:To dim instrument cluster illumination;Reset button =To brighten instrument cluster
illumination
For information on changing the instrument
cluster settings, e.g. the language, see
(Y page 133).
Activating the instrument cluster
The instrument cluster is activated when you
Ropen the driver’s door
Rswitch on the ignition
Rpress button :, ; or =
iOpening the driver’s door or pressing
button :, ; or = without switching on
the ignition activates the instrument
cluster illumination only for 30 seconds.
Adjusting the instrument cluster
illumination
XTo brighten illumination: Press and hold
button = until the desired level of
illumination is reached.
XTo dim illumination: Press and hold
button : until the desired level of
illumination is reached.
124Instrument clusterControls in detail
X164_AKB; 5; 31, en-USd2ureepe,Version: 2.11.8.12009-09-11T12:30:16+02:00 - Seite 124
Page 134 of 380

XPress button & or *.
The stored messages will now be displayed
in the order in which they have occurred.
For malfunction and warning messages,
see “Vehicle status messages in the
multifunction display” (Y page 287).
iAfter you have scrolled through all
recorded status messages, the first
recorded message appears again.
Should the vehicle’s system record any
conditions while driving, the number of
messages will reappear in the multifunction
display when the SmartKey in the starter
switch is turned to position 0 or removed
from the starter switch. With KEYLESS-GO,
the number of messages will reappear when
you turn off the engine by pressing the
KEYLESS-GO start/stop button and open the
driver’s door.
Except for high-priority messages, the vehicle
status message memory will be cleared when
you switch off the ignition.
Settings menu
Introduction
In the Settings menu there are two
functions: The function To reset, press
reset button for 3 seconds, with which
you can reset all the settings to the original
factory settings and a collection of submenus
with which you can make individual settings
for your vehicle.
The following settings and submenus are
available in the Settings menu:
RResetting to factory settings
(Y page 132)
RSubmenus in the Settings menu
(Y page 133)
RInstrument cluster submenu
(Y page 133)
RTime/Date submenu (Y page 135)
RLighting submenu (Y page 136)
RVehicle submenu (Y page 138)
RComfort submenu (Y page 139)
Resetting to factory settings
You can reset the settings of all submenus to
the factory settings.
For safety reasons, the function Lamp
Circuit Headlamp in the Lighting
submenu cannot be reset while driving.
The following message appears in the
multifunction display:
Settings
Cannot be
completely reset
to factory settings
when engine is running.
XPress button V or U repeatedly until
the Settings menu appears in the
multifunction display.
XPress the reset button in the instrument
cluster (Y page 124) for approximately
3 seconds.
The request to press the reset button once
more to confirm appears in the
multifunction display.
XPress the reset button once more.
The settings you have changed will not be
reset unless you confirm the action by
pressing the reset button a second time. After
132Control systemControls in detail
X164_AKB; 5; 31, en-USd2ureepe,Version: 2.11.8.12009-09-11T12:30:16+02:00 - Seite 132
Page 142 of 380
XMove the selection marker with button
W or X to the Comfort submenu.
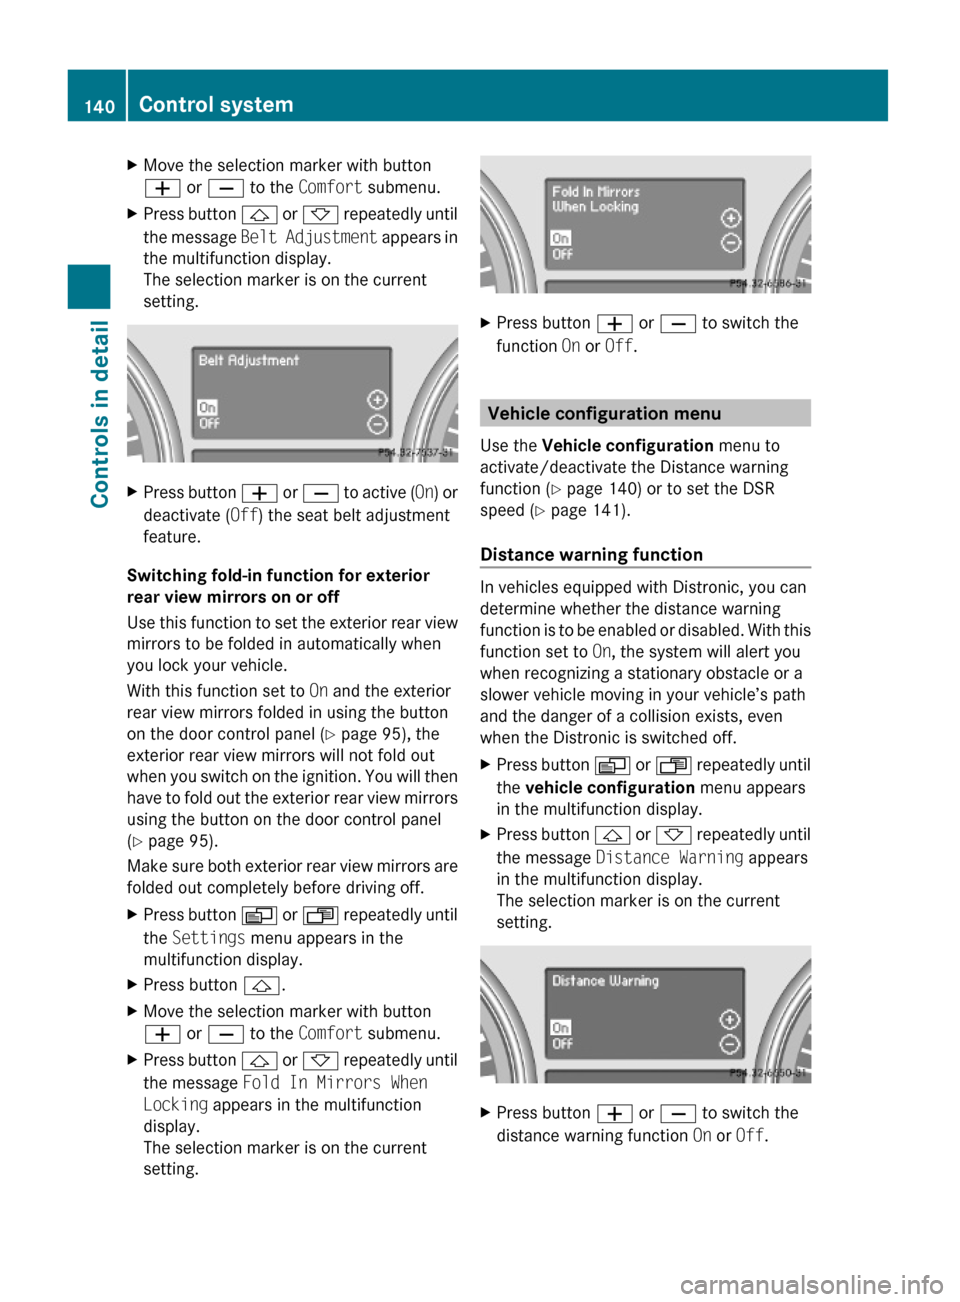
XPress button & or * repeatedly until
the message Belt Adjustment appears in
the multifunction display.
The selection marker is on the current
setting.
XPress button W or X to active (On) or
deactivate (Off) the seat belt adjustment
feature.
Switching fold-in function for exterior
rear view mirrors on or off
Use this function to set the exterior rear view
mirrors to be folded in automatically when
you lock your vehicle.
With this function set to On and the exterior
rear view mirrors folded in using the button
on the door control panel (Y page 95), the
exterior rear view mirrors will not fold out
when you switch on the ignition. You will then
have to fold out the exterior rear view mirrors
using the button on the door control panel
(Y page 95).
Make sure both exterior rear view mirrors are
folded out completely before driving off.
XPress button V or U repeatedly until
the Settings menu appears in the
multifunction display.
XPress button &.XMove the selection marker with button
W or X to the Comfort submenu.
XPress button & or * repeatedly until
the message Fold In Mirrors When
Locking appears in the multifunction
display.
The selection marker is on the current
setting.
XPress button W or X to switch the
function On or Off.
Vehicle configuration menu
Use the Vehicle configuration menu to
activate/deactivate the Distance warning
function (Y page 140) or to set the DSR
speed (Y page 141).
Distance warning function
In vehicles equipped with Distronic, you can
determine whether the distance warning
function is to be enabled or disabled. With this
function set to On, the system will alert you
when recognizing a stationary obstacle or a
slower vehicle moving in your vehicle’s path
and the danger of a collision exists, even
when the Distronic is switched off.
XPress button V or U repeatedly until
the vehicle configuration menu appears
in the multifunction display.
XPress button & or * repeatedly until
the message Distance Warning appears
in the multifunction display.
The selection marker is on the current
setting.
XPress button W or X to switch the
distance warning function On or Off.
140Control systemControls in detail
X164_AKB; 5; 31, en-USd2ureepe,Version: 2.11.8.12009-09-11T12:30:16+02:00 - Seite 140
Page 168 of 380
iThe message can be cleared by pressing
the V, U, & or * button on
the multifunction steering wheel.
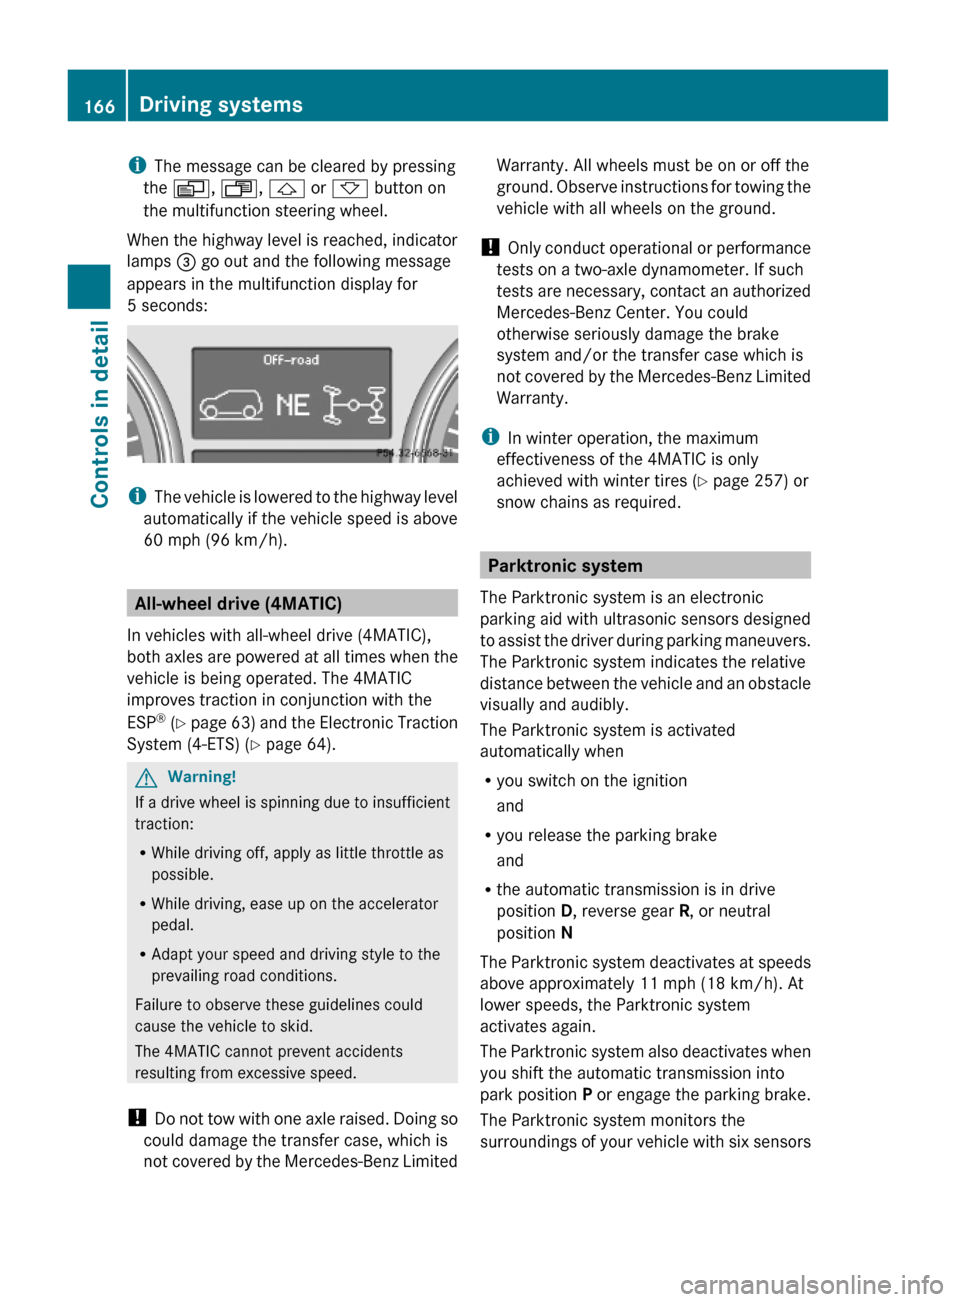
When the highway level is reached, indicator
lamps = go out and the following message
appears in the multifunction display for
5 seconds:
iThe vehicle is lowered to the highway level
automatically if the vehicle speed is above
60 mph (96 km/h).
All-wheel drive (4MATIC)
In vehicles with all-wheel drive (4MATIC),
both axles are powered at all times when the
vehicle is being operated. The 4MATIC
improves traction in conjunction with the
ESP® (Y page 63) and the Electronic Traction
System (4-ETS) (Y page 64).
GWarning!
If a drive wheel is spinning due to insufficient
traction:
RWhile driving off, apply as little throttle as
possible.
RWhile driving, ease up on the accelerator
pedal.
RAdapt your speed and driving style to the
prevailing road conditions.
Failure to observe these guidelines could
cause the vehicle to skid.
The 4MATIC cannot prevent accidents
resulting from excessive speed.
! Do not tow with one axle raised. Doing so
could damage the transfer case, which is
not covered by the Mercedes-Benz Limited
Warranty. All wheels must be on or off the
ground. Observe instructions for towing the
vehicle with all wheels on the ground.
! Only conduct operational or performance
tests on a two-axle dynamometer. If such
tests are necessary, contact an authorized
Mercedes-Benz Center. You could
otherwise seriously damage the brake
system and/or the transfer case which is
not covered by the Mercedes-Benz Limited
Warranty.
iIn winter operation, the maximum
effectiveness of the 4MATIC is only
achieved with winter tires (Y page 257) or
snow chains as required.
Parktronic system
The Parktronic system is an electronic
parking aid with ultrasonic sensors designed
to assist the driver during parking maneuvers.
The Parktronic system indicates the relative
distance between the vehicle and an obstacle
visually and audibly.
The Parktronic system is activated
automatically when
Ryou switch on the ignition
and
Ryou release the parking brake
and
Rthe automatic transmission is in drive
position D, reverse gear R, or neutral
position N
The Parktronic system deactivates at speeds
above approximately 11 mph (18 km/h). At
lower speeds, the Parktronic system
activates again.
The Parktronic system also deactivates when
you shift the automatic transmission into
park position P or engage the parking brake.
The Parktronic system monitors the
surroundings of your vehicle with six sensors
166Driving systemsControls in detail
X164_AKB; 5; 31, en-USd2ureepe,Version: 2.11.8.12009-09-11T12:30:16+02:00 - Seite 166
Page 170 of 380
signal. If the obstacle is closer than the
minimum distance, the actual distance may
no longer be indicated by the Parktronic
system.
Warning indicators
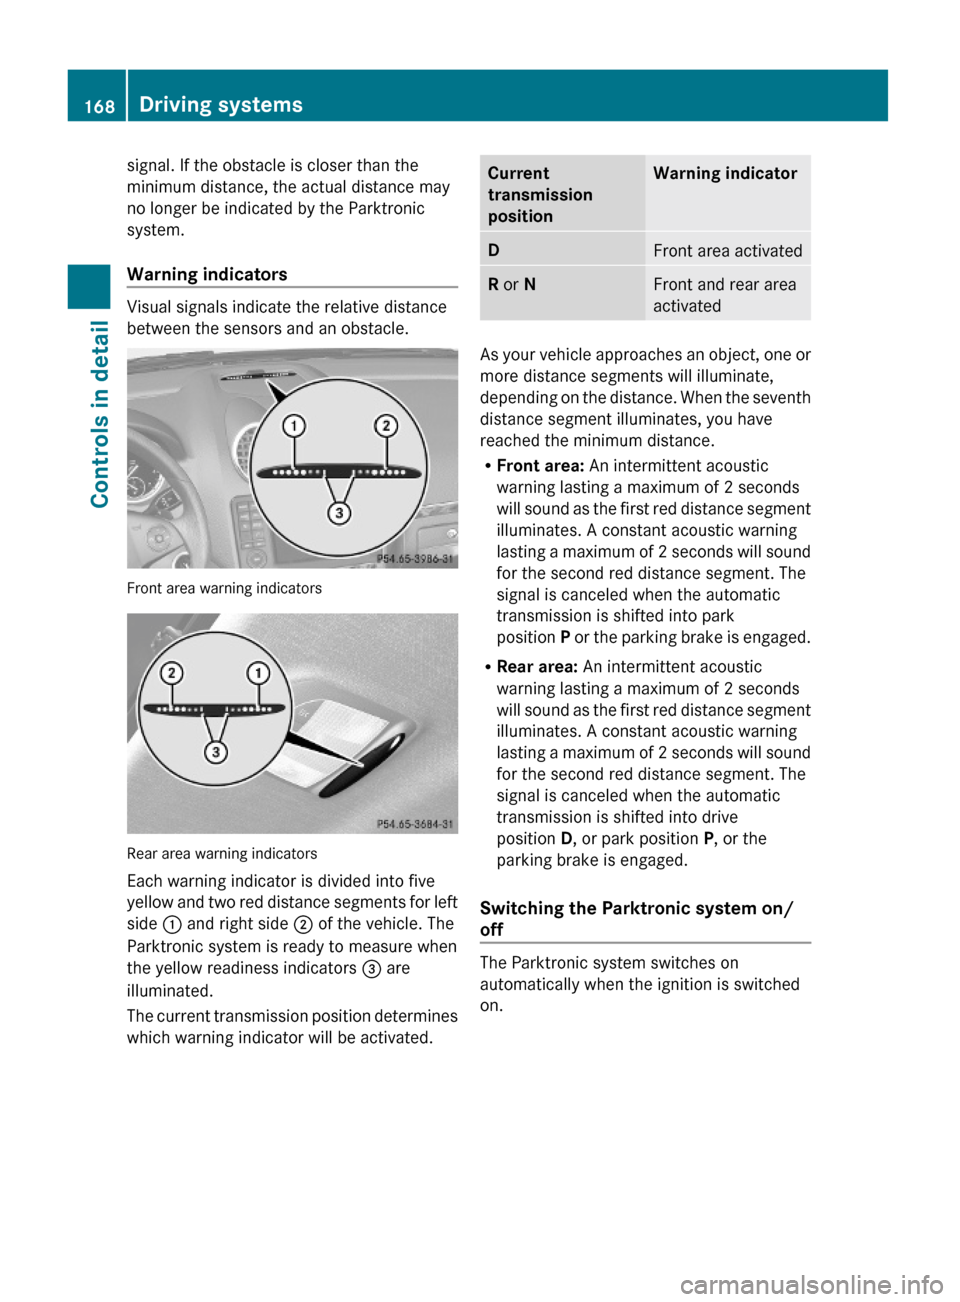
Visual signals indicate the relative distance
between the sensors and an obstacle.
Front area warning indicators
Rear area warning indicators
Each warning indicator is divided into five
yellow and two red distance segments for left
side : and right side ; of the vehicle. The
Parktronic system is ready to measure when
the yellow readiness indicators = are
illuminated.
The current transmission position determines
which warning indicator will be activated.
Current
transmission
position
Warning indicatorDFront area activatedR or NFront and rear area
activated
As your vehicle approaches an object, one or
more distance segments will illuminate,
depending on the distance. When the seventh
distance segment illuminates, you have
reached the minimum distance.
RFront area: An intermittent acoustic
warning lasting a maximum of 2 seconds
will sound as the first red distance segment
illuminates. A constant acoustic warning
lasting a maximum of 2 seconds will sound
for the second red distance segment. The
signal is canceled when the automatic
transmission is shifted into park
position P or the parking brake is engaged.
RRear area: An intermittent acoustic
warning lasting a maximum of 2 seconds
will sound as the first red distance segment
illuminates. A constant acoustic warning
lasting a maximum of 2 seconds will sound
for the second red distance segment. The
signal is canceled when the automatic
transmission is shifted into drive
position D, or park position P, or the
parking brake is engaged.
Switching the Parktronic system on/
off
The Parktronic system switches on
automatically when the ignition is switched
on.
168Driving systemsControls in detail
X164_AKB; 5; 31, en-USd2ureepe,Version: 2.11.8.12009-09-11T12:30:16+02:00 - Seite 168
Page 171 of 380

Vehicle without enhanced off-road package
Vehicle with enhanced off-road package
XSwitching off: Press Parktronic
switch :.
Indicator lamp ; comes on.
XSwitching on: Press Parktronic switch :
again.
Trailer towing
The rear Parktronic sensors will be
deactivated when you have established the
electrical connection between your vehicle
and the trailer you are about to tow.
! The distance between the sensors in the
bumpers and an obstacle is referred to as
the minimum range of the Parktronic. A
trailer hitch will reduce the distance to an
obstacle. Keep this in mind to avoid any
damage.
Parktronic system malfunction
There is a malfunction in the Parktronic
system, if only the red distance segments
illuminate and an acoustic warning sounds.
The Parktronic system will switch off
automatically after 20 seconds and indicator
lamp ; in Parktronic switch : comes on.
XHave the Parktronic system checked at an
authorized Mercedes-Benz Center as soon
as possible.
If only the red distance segments illuminate
and no acoustic warning sounds, the
Parktronic system sensors are dirty (e.g. dirt,
ice, snow and slush). Another cause could be
interference from other radio or ultrasonic
signals (e.g. truck air brakes, car wash, or
jackhammers). The Parktronic system will
switch off automatically after 20 seconds and
indicator lamp ; in Parktronic switch :
comes on.
XSwitch off the ignition.XClean the Parktronic system sensors
(Y page 278).
XSwitch on the ignition.
or
XCheck the Parktronic system operation at
another location to rule out interference
from outside radio or ultrasonic signals.
Rear view camera
The rear view camera is an optical parking aid.
The area behind the vehicle appears in the
COMAND system display as a mirror image,
like in the rear view mirror.
In addition, the rear view camera contains
guidelines to help you with driving in reverse.
GWarning!
Make sure no persons or animals are in or
near the area in which you are parking/
maneuvering. Otherwise, they could be
injured.
Driving systems169Controls in detailX164_AKB; 5; 31, en-USd2ureepe,Version: 2.11.8.12009-09-11T12:30:16+02:00 - Seite 169Z
Page 172 of 380
GWarning!
The rear view camera is only an aid and may
display obstacles
Rfrom a distorted perspective
Rinaccurately
Rmay not display obstacles at all
The rear view camera does not relieve you of
the responsibility to be cautious. Take care
and pay careful attention. The rear view
camera may not show objects which are
Rvery close to the rear bumper
Runder the rear bumper
Rabove the tailgate handle
You are responsible for safety at all times and
must continue to pay attention to the
immediate surroundings when parking and
maneuvering. This includes the area behind,
in front of, and beside the vehicle. Otherwise
you could endanger yourself and/or others.
GWarning!
The rear view camera either will not function
or will not function to its full capability if
Rthe tailgate is open
Rit is raining very hard, snowing or foggy
Rit is night or you are parking/maneuvering
your vehicle in an area where it is very dark
Rthe camera is exposed to a very bright white
light
Rthe immediate surroundings are
illuminated with fluorescent light (the
display may flicker)
Rthere is a sudden change in temperature,
e.g. if you drive into a heated garage from
the cold (lens condensation)
Rthe camera lens is dirty or covered
Rthe rear of your vehicle is damaged
In this case, have the position and setting
of the camera checked by a qualified
specialist workshop. Mercedes-Benz
recommends that you contact a Mercedes-
Benz Center for this purpose.
Do not use the rear view camera in these
situations. Otherwise you could injure
yourself or others and/or damage property
including your vehicle while parking/
maneuvering.
GWarning!
Use of rear view camera can be dangerous if
you are color-blind or have impaired color
vision.
Only use rear view camera if you can see and
distinguish all colored guidelines shown by
rear view camera on the COMAND system
display.
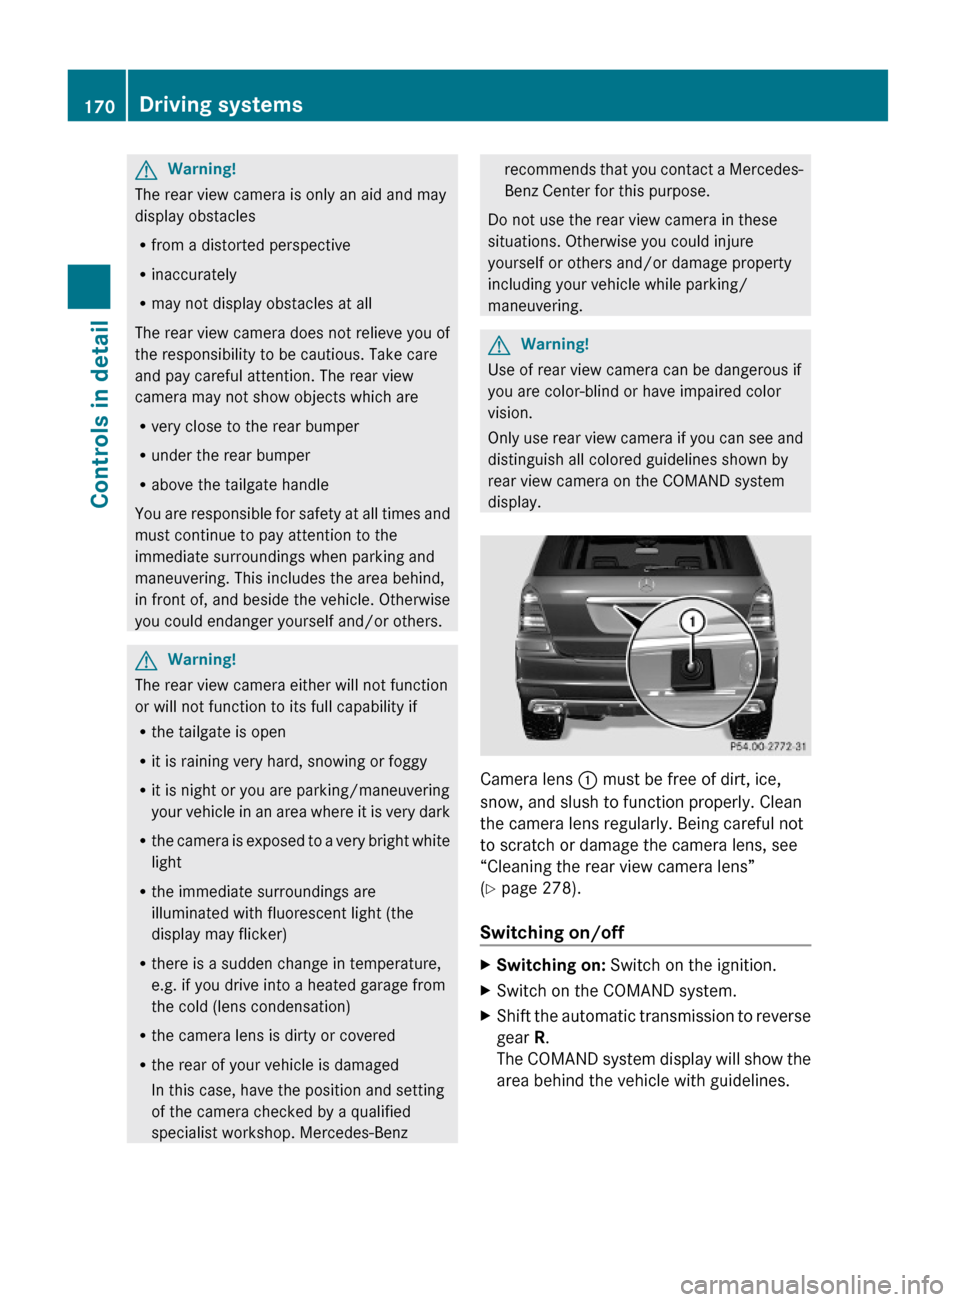
Camera lens : must be free of dirt, ice,
snow, and slush to function properly. Clean
the camera lens regularly. Being careful not
to scratch or damage the camera lens, see
“Cleaning the rear view camera lens”
(Y page 278).
Switching on/off
XSwitching on: Switch on the ignition.XSwitch on the COMAND system.XShift the automatic transmission to reverse
gear R.
The COMAND system display will show the
area behind the vehicle with guidelines.
170Driving systemsControls in detail
X164_AKB; 5; 31, en-USd2ureepe,Version: 2.11.8.12009-09-11T12:30:16+02:00 - Seite 170
Page 182 of 380
Air recirculation mode
Switch to air recirculation mode to prevent
unpleasant odors from entering the vehicle
from the outside (e. g. before driving through
a tunnel). This setting cuts off the intake of
outside air and recirculates the air in the
passenger compartment.GWarning!
Fogged windows impair visibility,
endangering you and others. If the windows
begin to fog on the inside, switching off the
air recirculation mode immediately should
clear interior window fogging. If interior
window fogging persists, make sure the air
conditioning is activated, or press button
¦ .
XActivating: Press button d.
The indicator lamp in the button comes on.
i The air recirculation mode is activated
automatically at high outside
temperatures.
The indicator lamp in button d is not lit
when the air recirculation mode is switched
on automatically.
A quantity of outside air is added after
approximately 30 minutes.
If you have turned off the air conditioning
or the outside temperature is below 41‡
(5†), the air recirculation mode will not
switch on automatically.
XDeactivating: Press button d.
The indicator lamp in the button goes out.i The manually selected air recirculation
mode is deactivated automatically:
R after 5 minutes if the outside
temperature is below approximately
41‡ (5†)
R after 5 minutes if the air conditioning and
air-drying are turned off
R after 30 minutes if the outside
temperature is above approximately
41‡ (5†)
Residual heat and ventilation
With the engine switched off, it is possible to
continue to heat or ventilate the interior for
up to 30 minutes. This feature makes use of
the residual heat produced by the engine.
i How long the system will provide heating
depends on the coolant temperature and
the battery voltage.
Regardless of the temperature and air
volume set on the climate control panel, an
interior temperature is aimed at by 72‡
(22† ) and the blower runs on low speed to
protect the vehicle battery.
XActivating: Switch off the ignition.XPress button Á.
The indicator lamp in the button comes on.XDeactivating: Press button Á again.
The indicator lamp in the button goes out.
The residual heat is deactivated automatically
R when the ignition is switched on
R after approximately 30 minutes
R if the battery voltage drops
R if the coolant temperature is too low
180Climate controlControls in detail
X164_AKB; 5; 31, en-USd2ureepe,Version: 2.11.8.12009-09-11T12:30:16+02:00 - Seite 180