2010 MERCEDES-BENZ GL550 towing
[x] Cancel search: towingPage 125 of 380
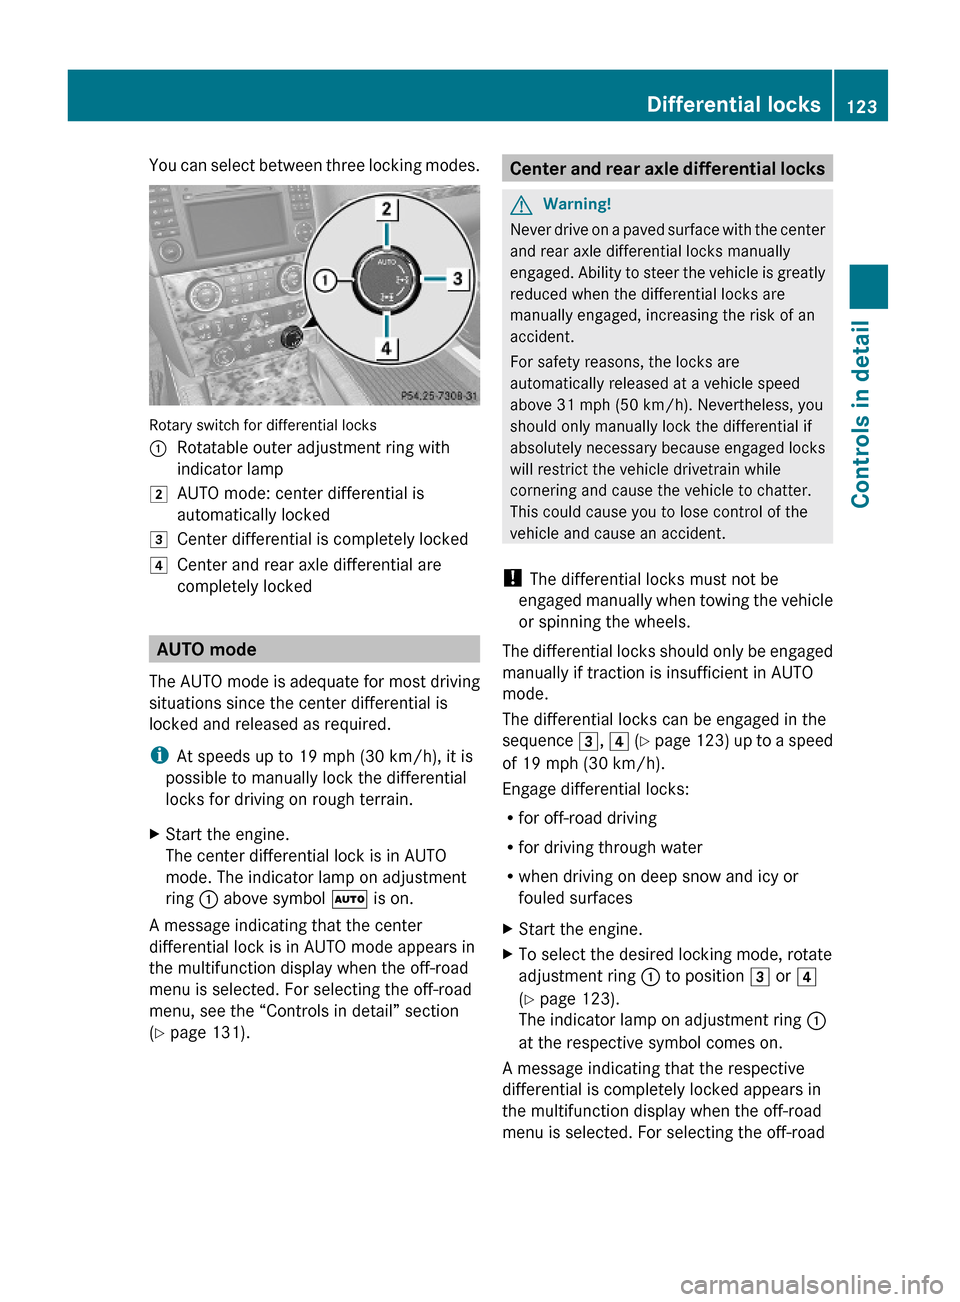
You can select between three locking modes.
Rotary switch for differential locks
:Rotatable outer adjustment ring with
indicator lamp
2AUTO mode: center differential is
automatically locked
3Center differential is completely locked4Center and rear axle differential are
completely locked
AUTO mode
The AUTO mode is adequate for most driving
situations since the center differential is
locked and released as required.
iAt speeds up to 19 mph (30 km/h), it is
possible to manually lock the differential
locks for driving on rough terrain.
XStart the engine.
The center differential lock is in AUTO
mode. The indicator lamp on adjustment
ring : above symbol à is on.
A message indicating that the center
differential lock is in AUTO mode appears in
the multifunction display when the off-road
menu is selected. For selecting the off-road
menu, see the “Controls in detail” section
(Y page 131).
Center and rear axle differential locksGWarning!
Never drive on a paved surface with the center
and rear axle differential locks manually
engaged. Ability to steer the vehicle is greatly
reduced when the differential locks are
manually engaged, increasing the risk of an
accident.
For safety reasons, the locks are
automatically released at a vehicle speed
above 31 mph (50 km/h). Nevertheless, you
should only manually lock the differential if
absolutely necessary because engaged locks
will restrict the vehicle drivetrain while
cornering and cause the vehicle to chatter.
This could cause you to lose control of the
vehicle and cause an accident.
! The differential locks must not be
engaged manually when towing the vehicle
or spinning the wheels.
The differential locks should only be engaged
manually if traction is insufficient in AUTO
mode.
The differential locks can be engaged in the
sequence 3, 4 (Y page 123) up to a speed
of 19 mph (30 km/h).
Engage differential locks:
Rfor off-road driving
Rfor driving through water
Rwhen driving on deep snow and icy or
fouled surfaces
XStart the engine.XTo select the desired locking mode, rotate
adjustment ring : to position 3 or 4
(Y page 123).
The indicator lamp on adjustment ring :
at the respective symbol comes on.
A message indicating that the respective
differential is completely locked appears in
the multifunction display when the off-road
menu is selected. For selecting the off-road
Differential locks123Controls in detailX164_AKB; 5; 31, en-USd2ureepe,Version: 2.11.8.12009-09-11T12:30:16+02:00 - Seite 123Z
Page 160 of 380
Increase set speed:XBriefly lift the cruise control lever up to the
resistance point in direction of arrow :.
XRelease the cruise control lever.
The vehicle speed increases in increments
of 1 mph (Canada: 1 km/h).
Reduce set speed:
XBriefly press the cruise control lever down
to the resistance point in direction of
arrow ;.
XRelease the cruise control lever.
The vehicle speed decreases in increments
of 1 mph (Canada: 1 km/h).
Each time the set speed is changed, DSR
will appear in the multifunction display and
the changed set speed is shown.
The set speed is canceled when the DSR is
switched off. If the DSR is switched on again,
the DSR will use the programmed default
speed (Y page 141).
Adjustment in 5 mph (Canada: 10 km/h)
increments
iThe set value is increased or decreased in
5 mph (Canada: 10 km/h) increments each
time you lift or depress the cruise control
lever past the resistance point.
Increase set speed:
XBriefly lift the cruise control lever up past
the resistance point in direction of
arrow :.
XRelease the cruise control lever.
The vehicle speed increases in increments
of 5 mph (Canada: 10 km/h).
Reduce set speed:
XBriefly press the cruise control lever down
past the resistance point in direction of
arrow ;.
XRelease the cruise control lever.
The vehicle speed decreases in increments
of 5 mph (Canada: 10 km/h).
Each time the set speed is changed, DSR
will appear in the multifunction display and
the changed set speed is shown.
The new speed is set and the vehicle will
accelerate or decelerate. Keep in mind that
it may take a brief moment until the vehicle
has reached the new set speed.
The set speed is canceled when the DSR is
switched off. If the DSR is switched on again,
the DSR will use the programmed default
speed (Y page 141).
Off-road driving program (Vehicles
without enhanced off-road package)
The off-road driving program is designed to
assist the driver when driving off-road in
terrain and crossing water. The off-road
driving program adjusts the engine power and
shifting of the automatic transmission to be
more suitable for the off-road use of the
vehicle. In addition, the ABS, ESP®, and 4-ETS
designed for off-road use are automatically
activated.
In the following situations you should switch
to the off-road driving program:
Rduring off-road driving
Rwhen crossing water (Y page 266)
Rwhen towing up or down on steep gradients
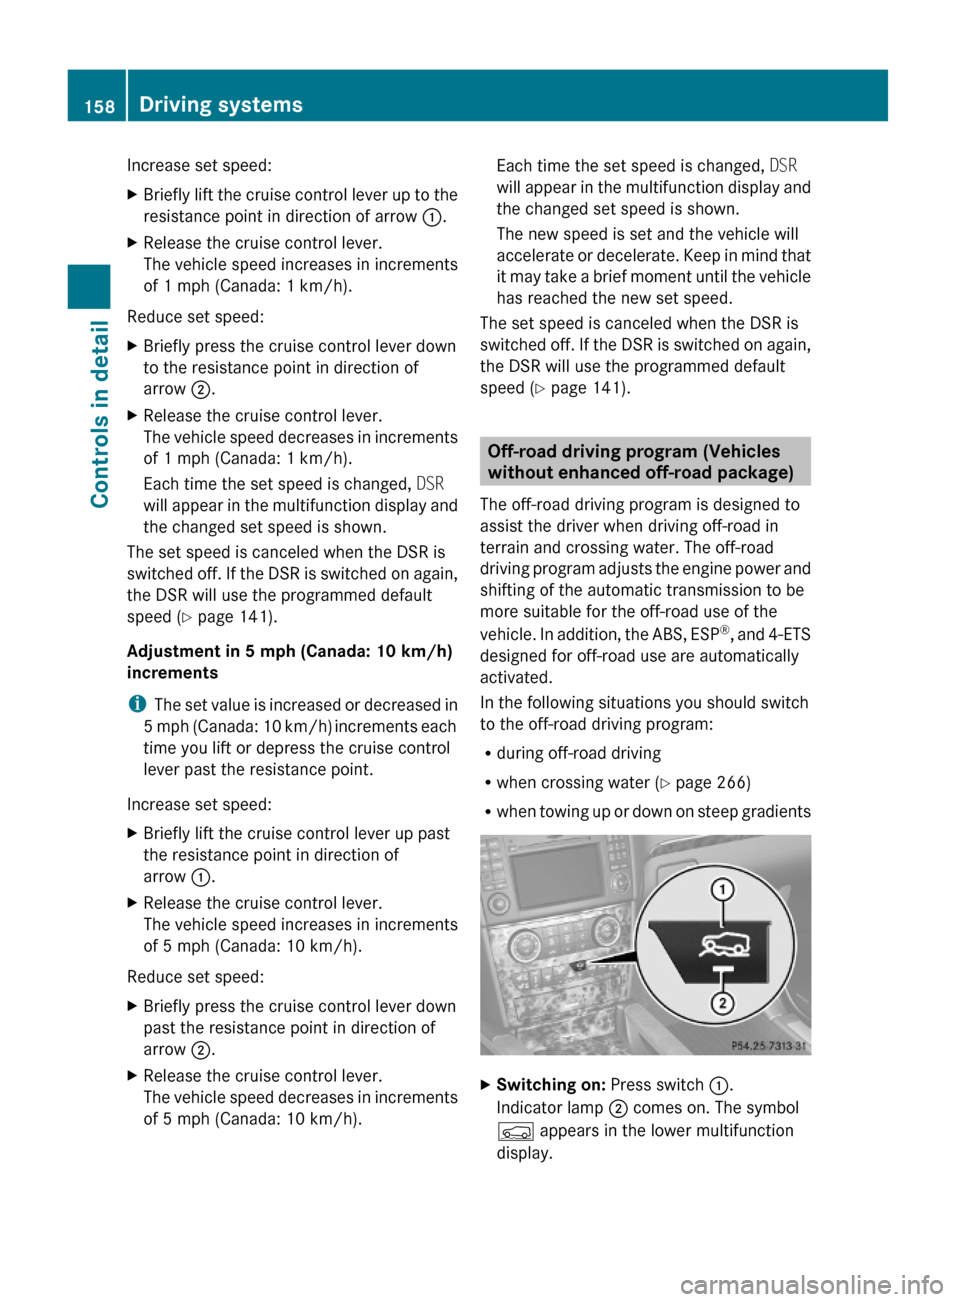
XSwitching on: Press switch :.
Indicator lamp ; comes on. The symbol
Ç appears in the lower multifunction
display.
158Driving systemsControls in detail
X164_AKB; 5; 31, en-USd2ureepe,Version: 2.11.8.12009-09-11T12:30:16+02:00 - Seite 158
Page 163 of 380

Basic settings
The following vehicle chassis ride heights can
be selected using vehicle level control
switch : in the center console:
LevelDriving situationRaised levelFor off-road driving or
driving in rough terrain.
Indicator lamp ; is on.
Highway
level
For driving on paved roads
in fair or better condition.
Indicator lamp ; is off.
iThe third available level is the highspeed
level that is set automatically.
The following is the approximate change in
ride height for each of the level settings:
LevelRide heightRaised level+2.3 in (60 mm)Highway
level13+/-0 in (0 mm)Highspeed
level
-0.6 in (-15 mm)
iVehicles with ADS:
Depending on the ADS setting
(Y page 159), the vehicle will be lowered to
the highspeed level when traveling at
higher speeds. At speeds below 40 mph
(64 km/h) at the latest, it will be returned
to the highway level.
iThe highspeed level is not available when
towing a trailer. For more information on
towing a trailer, see “Trailer towing”
(Y page 269).
Raised level
Only select the raised level if appropriate for
the driving situation encountered. Otherwise
the fuel consumption may increase and/or
the handling characteristics of the vehicle
may be unfavorable.
iYou can select the raised level at speeds
up to 40 mph (64 km/h). At higher speeds,
the message Á Level Selection
Not Permitted appears in the
multifunction display.
XStart the engine.
When indicator lamp ; is off:
XPress vehicle level control switch :.
Indicator lamp ; flashes. The vehicle
adjusts to the raised level.
The following message appears in the
multifunction display while the level is
being set:
iThe message can be cleared by pressing
the V, U, & or * button on
the multifunction steering wheel.
When the raised level is reached, indicator
lamp ; comes on continuously and the
following message appears in the
multifunction display for 5 seconds:
Highway level
! Keep in mind that on rough or uneven
roads, adjusting the vehicle to a lower level
may cause the vehicle underbody to come
in contact with the road and result in
13Ground clearance: 8.5 in (217 mm)Driving systems161Controls in detailX164_AKB; 5; 31, en-USd2ureepe,Version: 2.11.8.12009-09-11T12:30:16+02:00 - Seite 161Z
Page 165 of 380
LevelRide heightOff-road
level 3+3.5 in (90 mm)Off-road
level 2+2.3 in (60 mm)Off-road
level 1+1.2 in (30 mm)Highway
level 13+/-0 in (0 mm)Highspeed
level-0.6 in (-15 mm)
i Vehicles with ADS:
Depending on the ADS setting
( Y page 159), the vehicle will be lowered to
the highspeed level when traveling at
higher speeds. At speeds below 40 mph
(64 km/h) at the latest, it will be returned
to the highway level.
i The highspeed level is not available when
towing a trailer. For more information on
towing a trailer, see “Trailer towing”
( Y page 269).
You can only select the off-road levels below
a certain speed. At higher speeds, the
message Level Selection Not
Permitted appears in the multifunction
display.
You can select
R Off-road level 1: selectable below 60 mph
(96 km/h)
R Off-road level 2: selectable below 40 mph
(64 km/h)
R Off-road level 3: selectable below 12 mph
(20 km/h)
Off-road levelsGWarning!
Vehicle off-road level 3 is not intended for use
on paved roads. This vehicle level is intended
for clearing impracticable situations at low
speed exclusively. The vehicle has a very high
center of gravity in off-road level 3. This
increases the overturning hazard.
R Select off-road level 3 exclusively for
clearing impracticable situations at low
speed.
R Adapt your driving style to the modified
conditions.
R Do not exceed a speed of 12 mph
(20 km/h).
R Avoid extreme, quick steering movements.
R Keep in mind the vehicle’s driving
characteristics are modified.
You should therefore drive in off-road level 3
with particular caution as it could otherwise
lead to an accident and/or serious injury to
you or others.
If you are driving too fast while using off-road
level 3, you will see the following message in
the multifunction display:
Reduce speed to under 12 MPH
( 20 km/h )
In addition, an acoustic signal sounds.
i This message cannot be deactivated.
For more information, see “Display
messages” ( Y page 302).
Only use off-road levels when necessary.
Otherwise the fuel consumption may
increase and/or the handling characteristics
of the vehicle may be unfavorable.
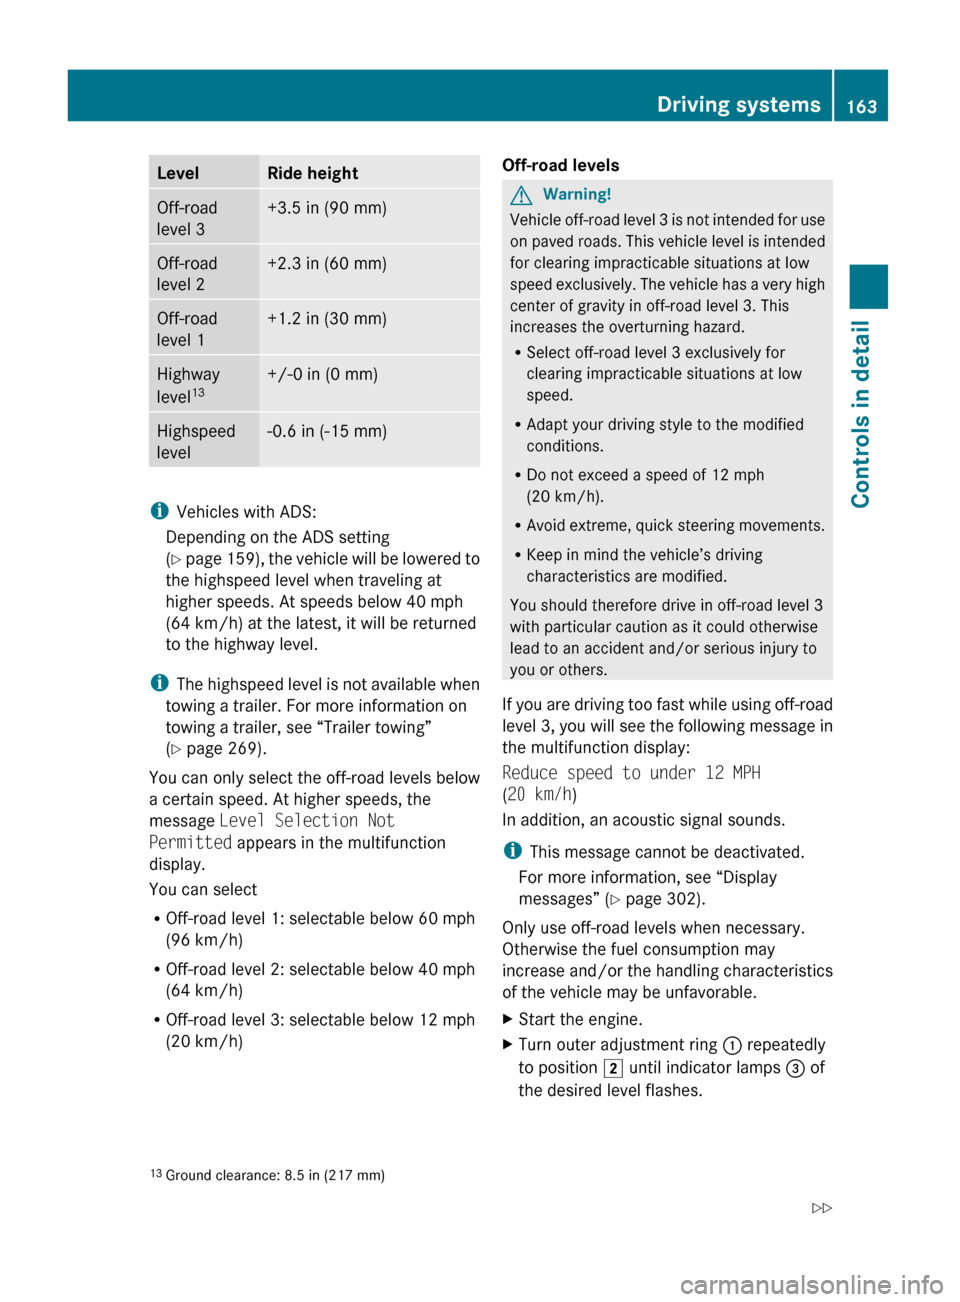
XStart the engine.XTurn outer adjustment ring : repeatedly
to position 2 until indicator lamps = of
the desired level flashes.13 Ground clearance: 8.5 in (217 mm)Driving systems163Controls in detailX164_AKB; 5; 31, en-USd2ureepe,Version: 2.11.8.12009-09-11T12:30:16+02:00 - Seite 163Z
Page 168 of 380
iThe message can be cleared by pressing
the V, U, & or * button on
the multifunction steering wheel.
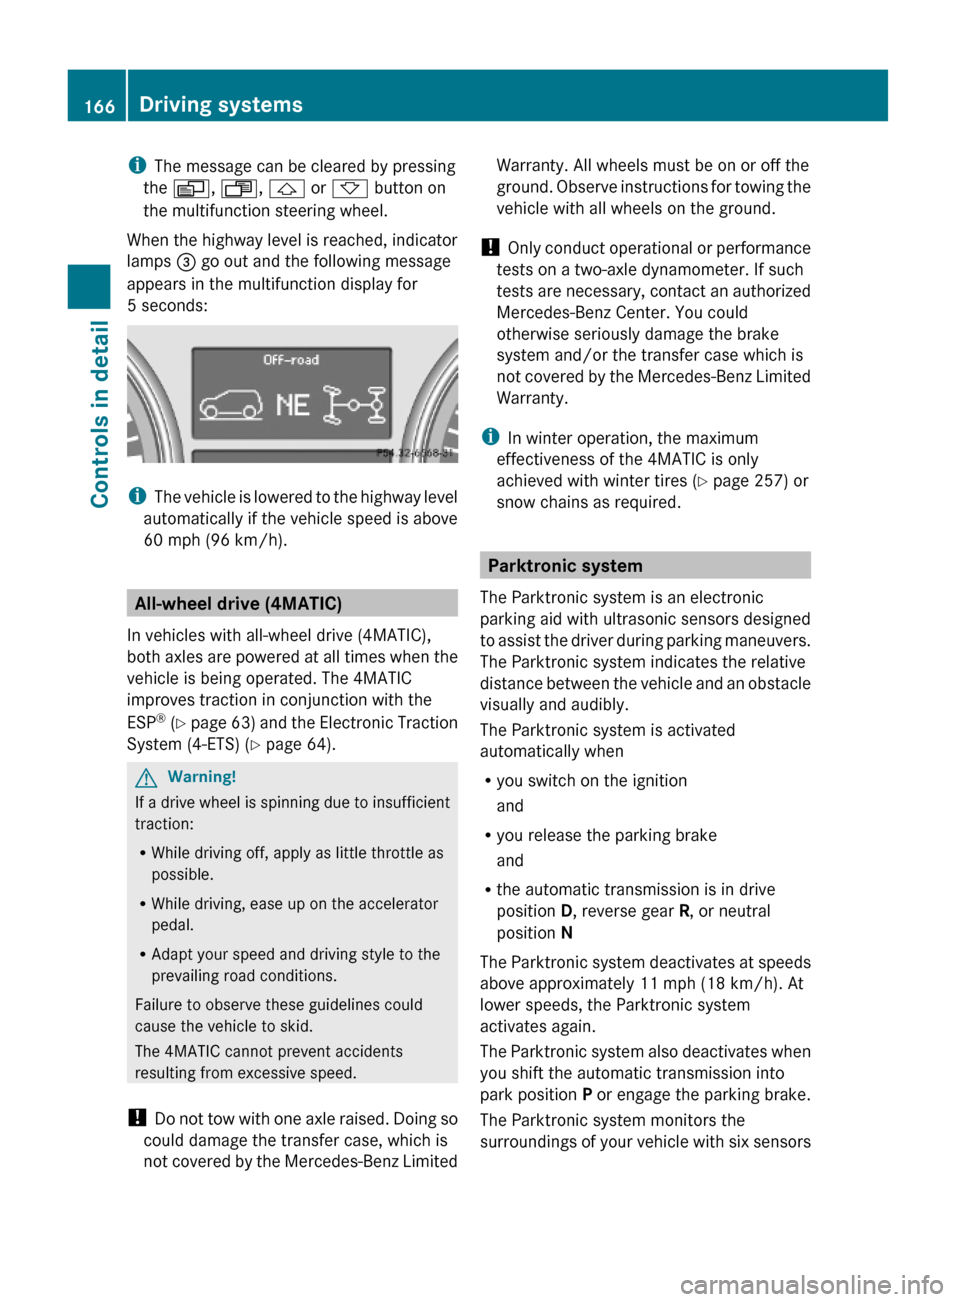
When the highway level is reached, indicator
lamps = go out and the following message
appears in the multifunction display for
5 seconds:
iThe vehicle is lowered to the highway level
automatically if the vehicle speed is above
60 mph (96 km/h).
All-wheel drive (4MATIC)
In vehicles with all-wheel drive (4MATIC),
both axles are powered at all times when the
vehicle is being operated. The 4MATIC
improves traction in conjunction with the
ESP® (Y page 63) and the Electronic Traction
System (4-ETS) (Y page 64).
GWarning!
If a drive wheel is spinning due to insufficient
traction:
RWhile driving off, apply as little throttle as
possible.
RWhile driving, ease up on the accelerator
pedal.
RAdapt your speed and driving style to the
prevailing road conditions.
Failure to observe these guidelines could
cause the vehicle to skid.
The 4MATIC cannot prevent accidents
resulting from excessive speed.
! Do not tow with one axle raised. Doing so
could damage the transfer case, which is
not covered by the Mercedes-Benz Limited
Warranty. All wheels must be on or off the
ground. Observe instructions for towing the
vehicle with all wheels on the ground.
! Only conduct operational or performance
tests on a two-axle dynamometer. If such
tests are necessary, contact an authorized
Mercedes-Benz Center. You could
otherwise seriously damage the brake
system and/or the transfer case which is
not covered by the Mercedes-Benz Limited
Warranty.
iIn winter operation, the maximum
effectiveness of the 4MATIC is only
achieved with winter tires (Y page 257) or
snow chains as required.
Parktronic system
The Parktronic system is an electronic
parking aid with ultrasonic sensors designed
to assist the driver during parking maneuvers.
The Parktronic system indicates the relative
distance between the vehicle and an obstacle
visually and audibly.
The Parktronic system is activated
automatically when
Ryou switch on the ignition
and
Ryou release the parking brake
and
Rthe automatic transmission is in drive
position D, reverse gear R, or neutral
position N
The Parktronic system deactivates at speeds
above approximately 11 mph (18 km/h). At
lower speeds, the Parktronic system
activates again.
The Parktronic system also deactivates when
you shift the automatic transmission into
park position P or engage the parking brake.
The Parktronic system monitors the
surroundings of your vehicle with six sensors
166Driving systemsControls in detail
X164_AKB; 5; 31, en-USd2ureepe,Version: 2.11.8.12009-09-11T12:30:16+02:00 - Seite 166
Page 171 of 380

Vehicle without enhanced off-road package
Vehicle with enhanced off-road package
XSwitching off: Press Parktronic
switch :.
Indicator lamp ; comes on.
XSwitching on: Press Parktronic switch :
again.
Trailer towing
The rear Parktronic sensors will be
deactivated when you have established the
electrical connection between your vehicle
and the trailer you are about to tow.
! The distance between the sensors in the
bumpers and an obstacle is referred to as
the minimum range of the Parktronic. A
trailer hitch will reduce the distance to an
obstacle. Keep this in mind to avoid any
damage.
Parktronic system malfunction
There is a malfunction in the Parktronic
system, if only the red distance segments
illuminate and an acoustic warning sounds.
The Parktronic system will switch off
automatically after 20 seconds and indicator
lamp ; in Parktronic switch : comes on.
XHave the Parktronic system checked at an
authorized Mercedes-Benz Center as soon
as possible.
If only the red distance segments illuminate
and no acoustic warning sounds, the
Parktronic system sensors are dirty (e.g. dirt,
ice, snow and slush). Another cause could be
interference from other radio or ultrasonic
signals (e.g. truck air brakes, car wash, or
jackhammers). The Parktronic system will
switch off automatically after 20 seconds and
indicator lamp ; in Parktronic switch :
comes on.
XSwitch off the ignition.XClean the Parktronic system sensors
(Y page 278).
XSwitch on the ignition.
or
XCheck the Parktronic system operation at
another location to rule out interference
from outside radio or ultrasonic signals.
Rear view camera
The rear view camera is an optical parking aid.
The area behind the vehicle appears in the
COMAND system display as a mirror image,
like in the rear view mirror.
In addition, the rear view camera contains
guidelines to help you with driving in reverse.
GWarning!
Make sure no persons or animals are in or
near the area in which you are parking/
maneuvering. Otherwise, they could be
injured.
Driving systems169Controls in detailX164_AKB; 5; 31, en-USd2ureepe,Version: 2.11.8.12009-09-11T12:30:16+02:00 - Seite 169Z
Page 219 of 380
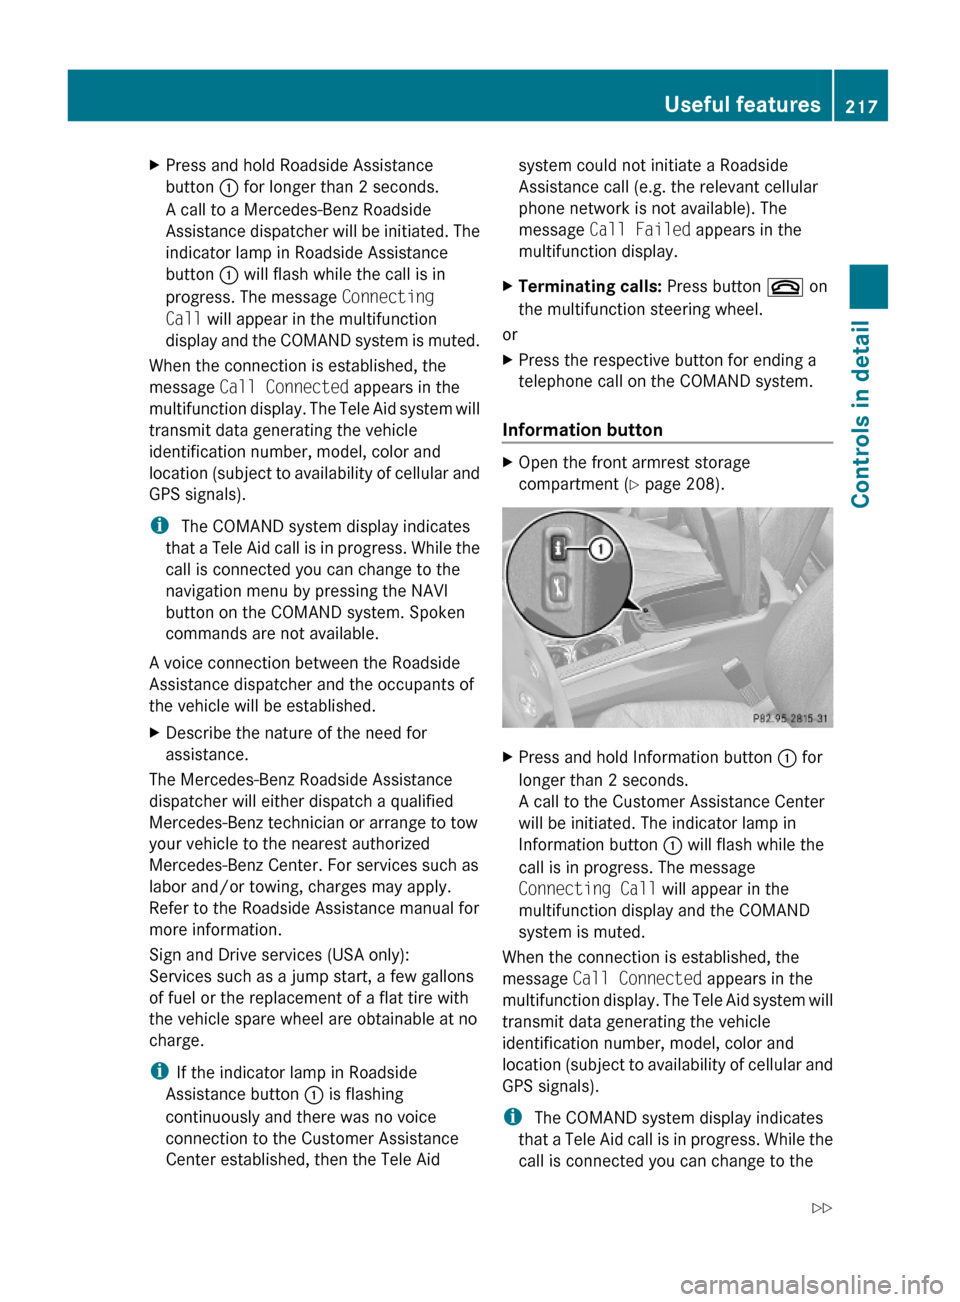
XPress and hold Roadside Assistance
button : for longer than 2 seconds.
A call to a Mercedes-Benz Roadside
Assistance dispatcher will be initiated. The
indicator lamp in Roadside Assistance
button : will flash while the call is in
progress. The message Connecting
Call will appear in the multifunction
display and the COMAND system is muted.
When the connection is established, the
message Call Connected appears in the
multifunction display. The Tele Aid system will
transmit data generating the vehicle
identification number, model, color and
location (subject to availability of cellular and
GPS signals).
i The COMAND system display indicates
that a Tele Aid call is in progress. While the
call is connected you can change to the
navigation menu by pressing the NAVI
button on the COMAND system. Spoken
commands are not available.
A voice connection between the Roadside
Assistance dispatcher and the occupants of
the vehicle will be established.
XDescribe the nature of the need for
assistance.
The Mercedes-Benz Roadside Assistance
dispatcher will either dispatch a qualified
Mercedes-Benz technician or arrange to tow
your vehicle to the nearest authorized
Mercedes-Benz Center. For services such as
labor and/or towing, charges may apply.
Refer to the Roadside Assistance manual for
more information.
Sign and Drive services (USA only):
Services such as a jump start, a few gallons
of fuel or the replacement of a flat tire with
the vehicle spare wheel are obtainable at no
charge.
iIf the indicator lamp in Roadside
Assistance button : is flashing
continuously and there was no voice
connection to the Customer Assistance
Center established, then the Tele Aid
system could not initiate a Roadside
Assistance call (e.g. the relevant cellular
phone network is not available). The
message Call Failed appears in the
multifunction display.
XTerminating calls: Press button ~ on
the multifunction steering wheel.
or
XPress the respective button for ending a
telephone call on the COMAND system.
Information button
XOpen the front armrest storage
compartment (Y page 208).
XPress and hold Information button : for
longer than 2 seconds.
A call to the Customer Assistance Center
will be initiated. The indicator lamp in
Information button : will flash while the
call is in progress. The message
Connecting Call will appear in the
multifunction display and the COMAND
system is muted.
When the connection is established, the
message Call Connected appears in the
multifunction display. The Tele Aid system will
transmit data generating the vehicle
identification number, model, color and
location (subject to availability of cellular and
GPS signals).
i The COMAND system display indicates
that a Tele Aid call is in progress. While the
call is connected you can change to the
Useful features217Controls in detailX164_AKB; 5; 31, en-USd2ureepe,Version: 2.11.8.12009-09-11T12:30:16+02:00 - Seite 217Z
Page 238 of 380
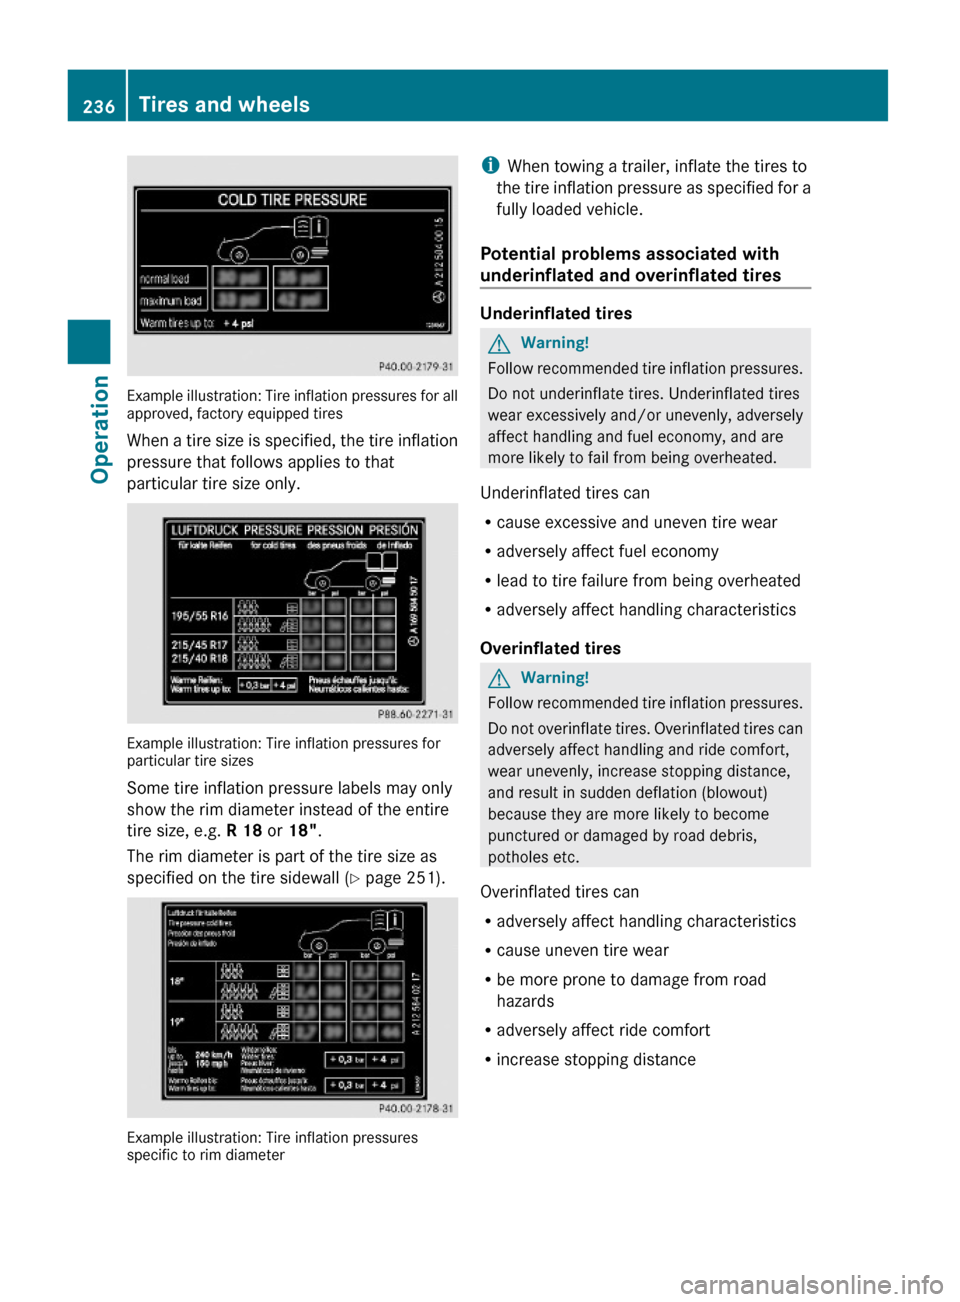
Example illustration: Tire inflation pressures for allapproved, factory equipped tires
When a tire size is specified, the tire inflation
pressure that follows applies to that
particular tire size only.
Example illustration: Tire inflation pressures forparticular tire sizes
Some tire inflation pressure labels may only
show the rim diameter instead of the entire
tire size, e.g. R 18 or 18".
The rim diameter is part of the tire size as
specified on the tire sidewall (Y page 251).
Example illustration: Tire inflation pressuresspecific to rim diameter
iWhen towing a trailer, inflate the tires to
the tire inflation pressure as specified for a
fully loaded vehicle.
Potential problems associated with
underinflated and overinflated tires
Underinflated tires
GWarning!
Follow recommended tire inflation pressures.
Do not underinflate tires. Underinflated tires
wear excessively and/or unevenly, adversely
affect handling and fuel economy, and are
more likely to fail from being overheated.
Underinflated tires can
Rcause excessive and uneven tire wear
Radversely affect fuel economy
Rlead to tire failure from being overheated
Radversely affect handling characteristics
Overinflated tires
GWarning!
Follow recommended tire inflation pressures.
Do not overinflate tires. Overinflated tires can
adversely affect handling and ride comfort,
wear unevenly, increase stopping distance,
and result in sudden deflation (blowout)
because they are more likely to become
punctured or damaged by road debris,
potholes etc.
Overinflated tires can
Radversely affect handling characteristics
Rcause uneven tire wear
Rbe more prone to damage from road
hazards
Radversely affect ride comfort
Rincrease stopping distance
236Tires and wheelsOperation
X164_AKB; 5; 31, en-USd2ureepe,Version: 2.11.8.12009-09-11T12:30:16+02:00 - Seite 236