2010 MERCEDES-BENZ GL450 light
[x] Cancel search: lightPage 135 of 380
approximately 5 seconds, the Settings
menu reappears in the multifunction display.
Submenus in the Settings menu
XPress button V or U repeatedly until
the Settings menu appears in the
multifunction display.
XPress button &.
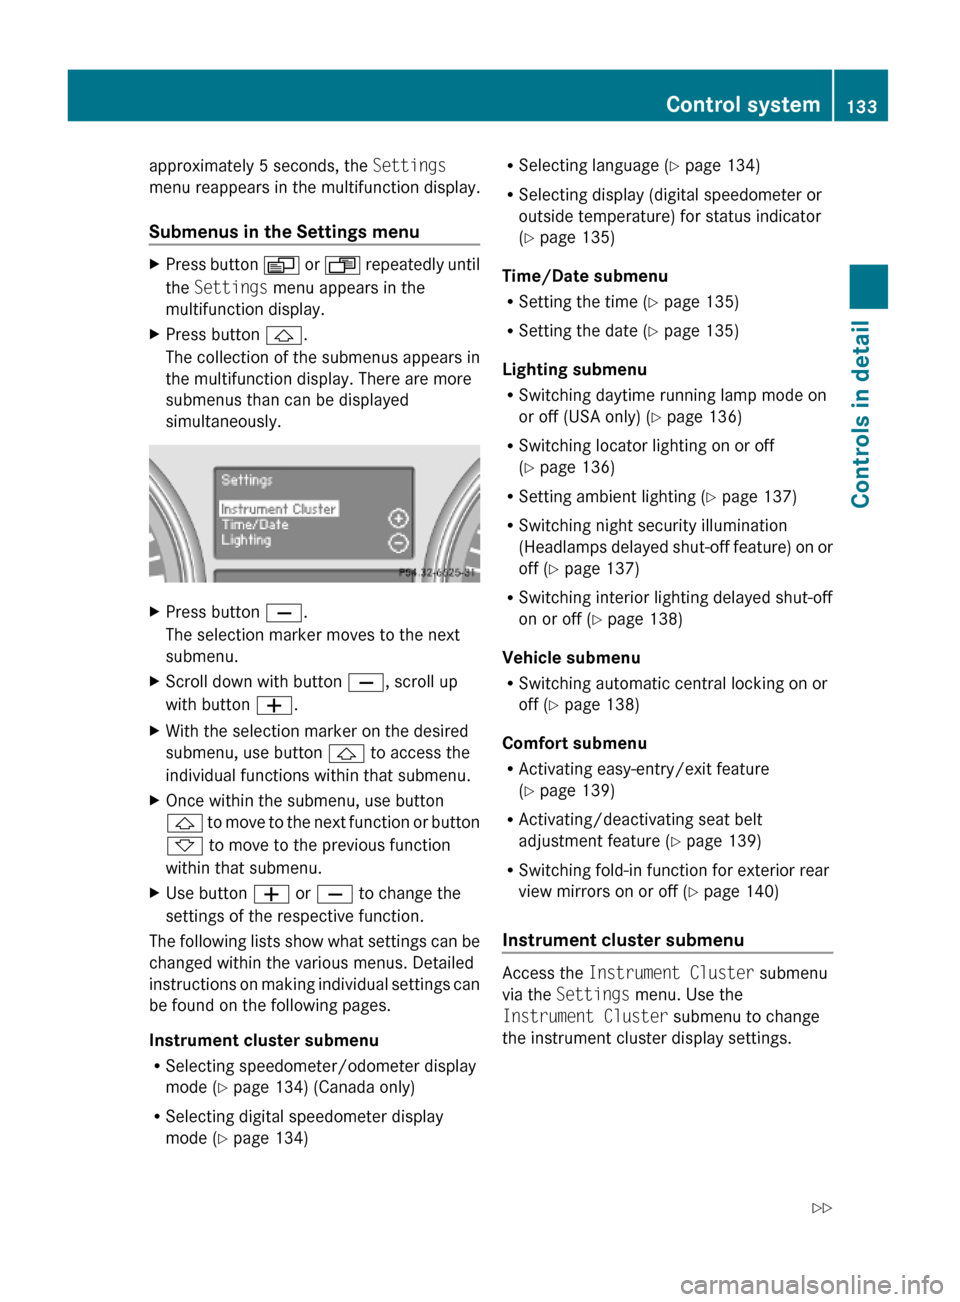
The collection of the submenus appears in
the multifunction display. There are more
submenus than can be displayed
simultaneously.
XPress button X.
The selection marker moves to the next
submenu.
XScroll down with button X, scroll up
with button W.
XWith the selection marker on the desired
submenu, use button & to access the
individual functions within that submenu.
XOnce within the submenu, use button
& to move to the next function or button
* to move to the previous function
within that submenu.
XUse button W or X to change the
settings of the respective function.
The following lists show what settings can be
changed within the various menus. Detailed
instructions on making individual settings can
be found on the following pages.
Instrument cluster submenu
RSelecting speedometer/odometer display
mode (Y page 134) (Canada only)
RSelecting digital speedometer display
mode (Y page 134)
RSelecting language (Y page 134)
RSelecting display (digital speedometer or
outside temperature) for status indicator
(Y page 135)
Time/Date submenu
RSetting the time (Y page 135)
RSetting the date (Y page 135)
Lighting submenu
RSwitching daytime running lamp mode on
or off (USA only) (Y page 136)
RSwitching locator lighting on or off
(Y page 136)
RSetting ambient lighting (Y page 137)
RSwitching night security illumination
(Headlamps delayed shut-off feature) on or
off (Y page 137)
RSwitching interior lighting delayed shut-off
on or off (Y page 138)
Vehicle submenu
RSwitching automatic central locking on or
off (Y page 138)
Comfort submenu
RActivating easy-entry/exit feature
(Y page 139)
RActivating/deactivating seat belt
adjustment feature (Y page 139)
RSwitching fold-in function for exterior rear
view mirrors on or off (Y page 140)
Instrument cluster submenu
Access the Instrument Cluster submenu
via the Settings menu. Use the
Instrument Cluster submenu to change
the instrument cluster display settings.
Control system133Controls in detailX164_AKB; 5; 31, en-USd2ureepe,Version: 2.11.8.12009-09-11T12:30:16+02:00 - Seite 133Z
Page 138 of 380
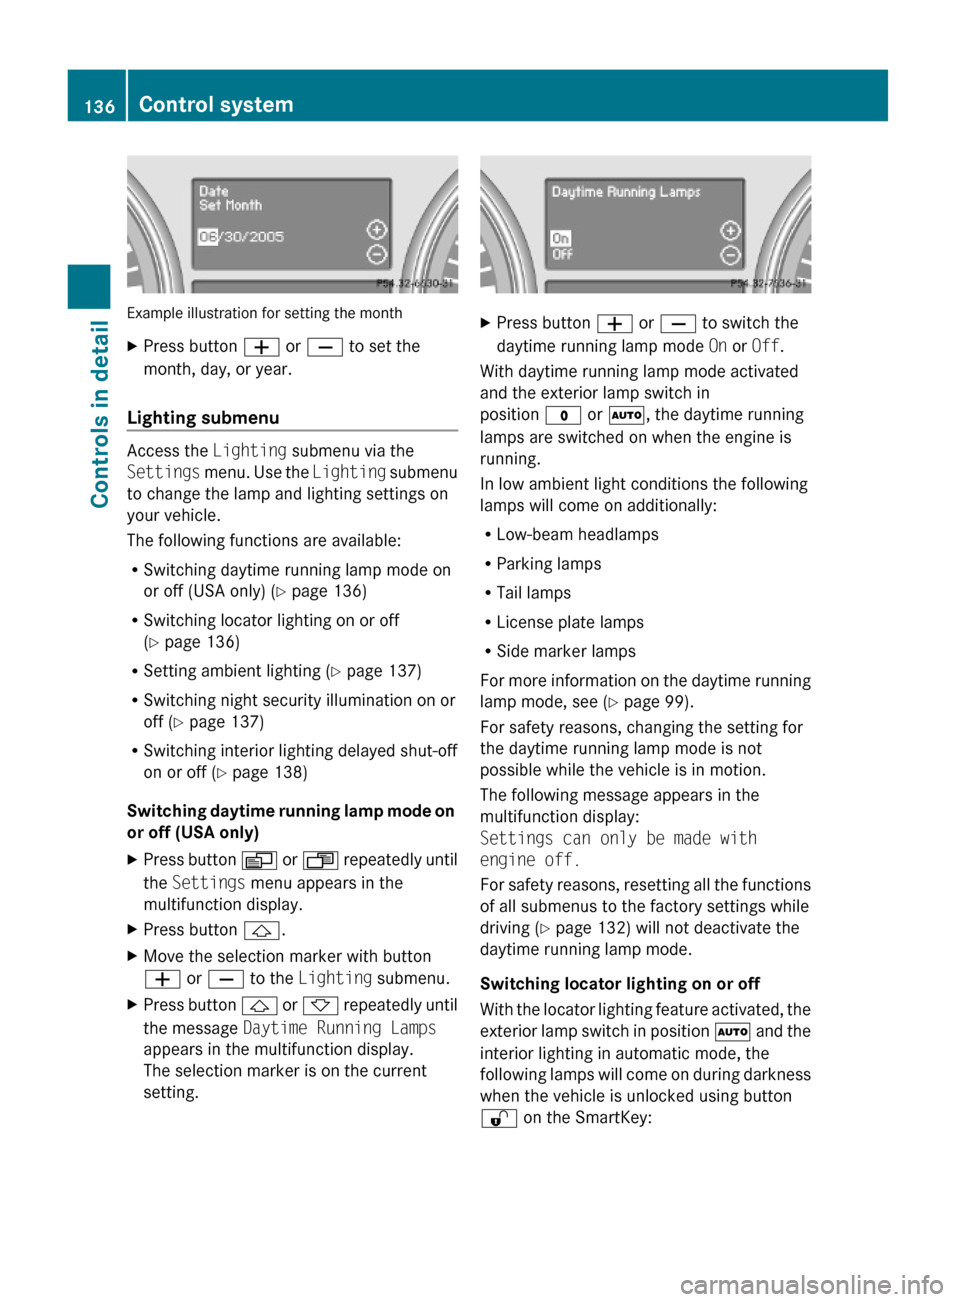
Example illustration for setting the month
XPress button W or X to set the
month, day, or year.
Lighting submenu
Access the Lighting submenu via the
Settings menu. Use the Lighting submenu
to change the lamp and lighting settings on
your vehicle.
The following functions are available:
RSwitching daytime running lamp mode on
or off (USA only) (Y page 136)
RSwitching locator lighting on or off
(Y page 136)
RSetting ambient lighting (Y page 137)
RSwitching night security illumination on or
off (Y page 137)
RSwitching interior lighting delayed shut-off
on or off (Y page 138)
Switching daytime running lamp mode on
or off (USA only)
XPress button V or U repeatedly until
the Settings menu appears in the
multifunction display.
XPress button &.XMove the selection marker with button
W or X to the Lighting submenu.
XPress button & or * repeatedly until
the message Daytime Running Lamps
appears in the multifunction display.
The selection marker is on the current
setting.
XPress button W or X to switch the
daytime running lamp mode On or Off.
With daytime running lamp mode activated
and the exterior lamp switch in
position $ or Ã, the daytime running
lamps are switched on when the engine is
running.
In low ambient light conditions the following
lamps will come on additionally:
RLow-beam headlamps
RParking lamps
RTail lamps
RLicense plate lamps
RSide marker lamps
For more information on the daytime running
lamp mode, see (Y page 99).
For safety reasons, changing the setting for
the daytime running lamp mode is not
possible while the vehicle is in motion.
The following message appears in the
multifunction display:
Settings can only be made with
engine off.
For safety reasons, resetting all the functions
of all submenus to the factory settings while
driving (Y page 132) will not deactivate the
daytime running lamp mode.
Switching locator lighting on or off
With the locator lighting feature activated, the
exterior lamp switch in position à and the
interior lighting in automatic mode, the
following lamps will come on during darkness
when the vehicle is unlocked using button
% on the SmartKey:
136Control systemControls in detail
X164_AKB; 5; 31, en-USd2ureepe,Version: 2.11.8.12009-09-11T12:30:16+02:00 - Seite 136
Page 139 of 380
RParking lamps
RTail lamps
RLicense plate lamps
RSide marker lamps
RFront fog lamps
The locator lighting goes out when the driver’s
door is opened.
If you do not open the driver’s door after
unlocking the vehicle with the SmartKey, the
lamps will go out automatically after
approximately 40 seconds.
XPress button V or U repeatedly until
the Settings menu appears in the
multifunction display.
XPress button &.XMove the selection marker with button
W or X to the Lighting submenu.
XPress button & or * repeatedly until
the message Surround Lighting
Function appears in the multifunction
display.
The selection marker is on the current
setting.
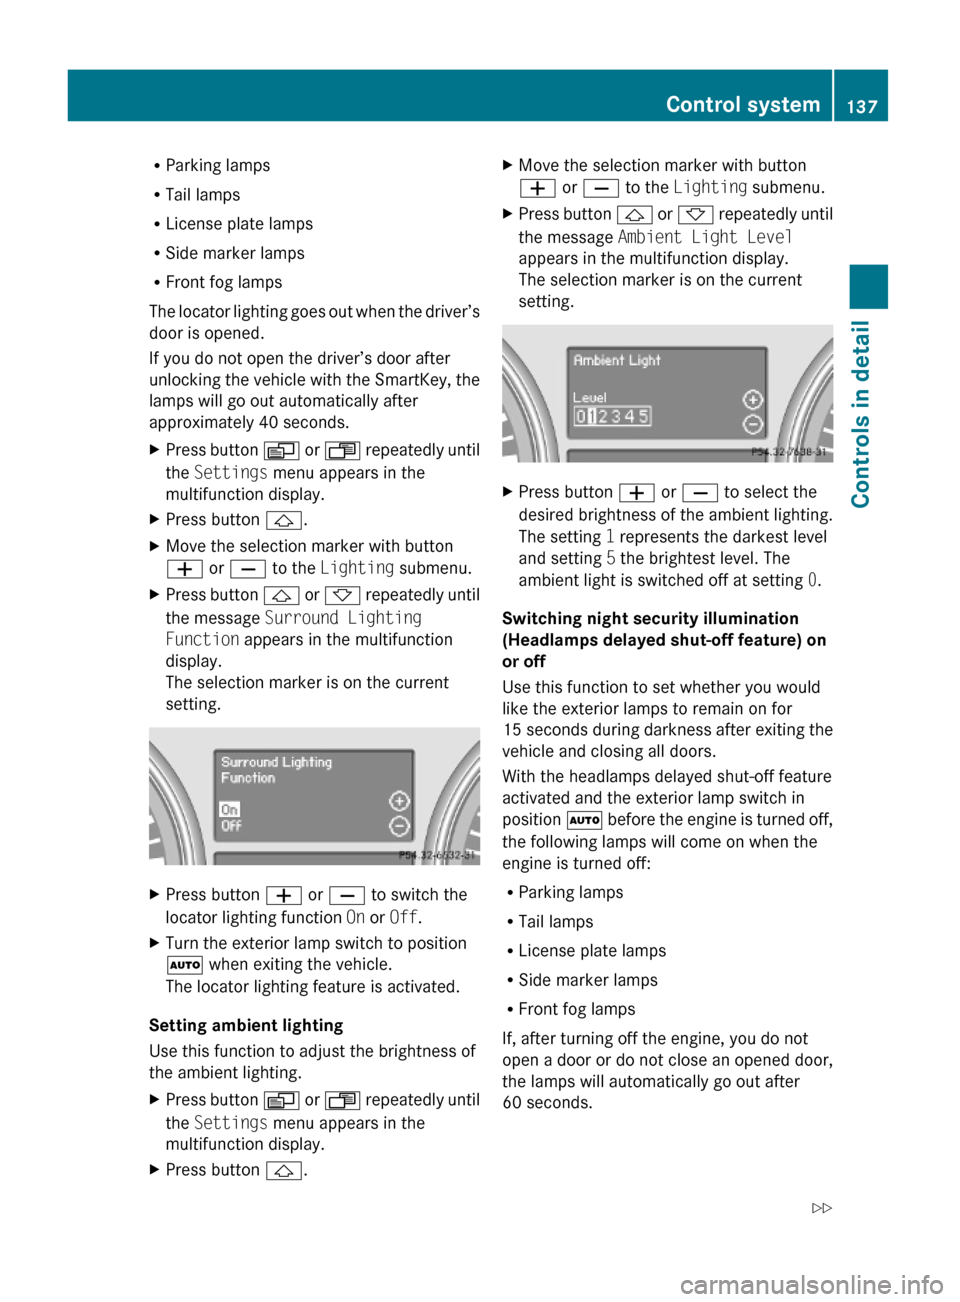
XPress button W or X to switch the
locator lighting function On or Off.
XTurn the exterior lamp switch to position
à when exiting the vehicle.
The locator lighting feature is activated.
Setting ambient lighting
Use this function to adjust the brightness of
the ambient lighting.
XPress button V or U repeatedly until
the Settings menu appears in the
multifunction display.
XPress button &.XMove the selection marker with button
W or X to the Lighting submenu.
XPress button & or * repeatedly until
the message Ambient Light Level
appears in the multifunction display.
The selection marker is on the current
setting.
XPress button W or X to select the
desired brightness of the ambient lighting.
The setting 1 represents the darkest level
and setting 5 the brightest level. The
ambient light is switched off at setting 0.
Switching night security illumination
(Headlamps delayed shut-off feature) on
or off
Use this function to set whether you would
like the exterior lamps to remain on for
15 seconds during darkness after exiting the
vehicle and closing all doors.
With the headlamps delayed shut-off feature
activated and the exterior lamp switch in
position à before the engine is turned off,
the following lamps will come on when the
engine is turned off:
RParking lamps
RTail lamps
RLicense plate lamps
RSide marker lamps
RFront fog lamps
If, after turning off the engine, you do not
open a door or do not close an opened door,
the lamps will automatically go out after
60 seconds.
Control system137Controls in detailX164_AKB; 5; 31, en-USd2ureepe,Version: 2.11.8.12009-09-11T12:30:16+02:00 - Seite 137Z
Page 140 of 380

XPress button V or U repeatedly until
the Settings menu appears in the
multifunction display.
XPress button &.XMove the selection marker with button
W or X to the Lighting submenu.
XPress button & or * repeatedly until
the message Headlamp Delayed Shut-
off appears in the multifunction display.
The selection marker is on the current
setting.
XPress button W or X to switch the
headlamps delayed shut-off feature On or
Off.
XTurn the exterior lamp switch to position
à before turning off the engine.
The headlamps delayed shut-off feature is
activated.
You can temporarily deactivate the
headlamps delayed shut-off feature:
XBefore exiting the vehicle, turn the
SmartKey in the starter switch to position
0.
XThen turn it to position 2 and back to
position 0.
The headlamps delayed shut-off feature is
deactivated. It will reactivate as soon as
you start the engine.
Switching interior lighting delayed shut-
off on or off
Use this function to set whether you would
like the interior lighting to remain on for
10 seconds during darkness after you have
removed the SmartKey from the starter
switch.
XPress button V or U repeatedly until
the Settings menu appears in the
multifunction display.
XPress button &.XMove the selection marker with button
W or X to the Lighting submenu.
XPress button & or * repeatedly until
the message Interior Lighting
Delayed Shut-off appears in the
multifunction display.
The selection marker is on the current
setting.
XPress button W or X to switch the
interior lighting delayed shut-off feature
On or Off.
Vehicle submenu
Access the Vehicle submenu via the
Settings menu. Use the Vehicle submenu
to set the automatic central locking.
Switching automatic central locking on or
off
Use this function to switch the automatic
central locking on or off. With the automatic
central locking activated, the vehicle is
locked centrally at a vehicle speed of
approximately 9 mph (15 km/h).
XPress button V or U repeatedly until
the Settings menu appears in the
multifunction display.
XPress button &.138Control systemControls in detail
X164_AKB; 5; 31, en-USd2ureepe,Version: 2.11.8.12009-09-11T12:30:16+02:00 - Seite 138
Page 158 of 380
The DSR is an aid for driving downhill. The
DSR regulates your vehicle’s speed when
driving downhill to the value set in the control
system (Y page 141). The steeper the
downhill gradient is, the greater the brake
application. On flat road surfaces, the DSR
brakes only slightly or not at all.
GWarning!
The Downhill Speed Regulation (DSR) is a
convenience system designed to assist the
driver during vehicle operation. The system
must be set to be appropriate for the
topographical and weather conditions
encountered which can change quickly. The
driver is and must remain at all times
responsible for the vehicle speed and for safe
brake operation.
Depending on the programmed speed, actual
vehicle speed and gradient, switching on the
DSR while driving can cause the vehicle to
slow down rapidly and you may hear a sound
which is caused by the activation of the
vehicle’s brake system through the DSR.
Sudden and unexpected deceleration can
result in loss of vehicle control, causing an
accident and/or serious personal injury to
you and others. Do not switch on the DSR in
a circumstance where rapid deceleration
could result in a loss of vehicle control.
The DSR regulates the vehicle’s speed in
automatic transmission positions D, or R.
iIn addition, make use of the engine’s
braking effect by shifting the automatic
transmission into a lower gear.
You can drive slower or faster than the set
speed at any time by braking the vehicle or
depressing the accelerator pedal.
iWhenever the DSR is switched on, the
DSR will use the programmed default
speed to regulate the vehicle’s speed. The
default speed programmed at the factory is
4 mph (Canada: 6 km/h). The default speed
can be reprogrammed using the control
system (Y page 141). The next time the
DSR is switched on, the DSR will use the
newly programmed default speed to
regulate the vehicle’s speed.
Once the DSR is switched on, you can
adjust the set speed using the cruise
control lever (Y page 145). Keep in mind
that adjusting the set speed using the
cruise control lever with the DSR switched
on will not change the programmed default
speed. If the DSR is switched off and then
switched on again, the DSR will use the
programmed default speed.
Depending on the road surface and level of
downhill grade, the DSR may not be able to
maintain the set speed. To maintain the set
speed, apply the brakes if necessary.
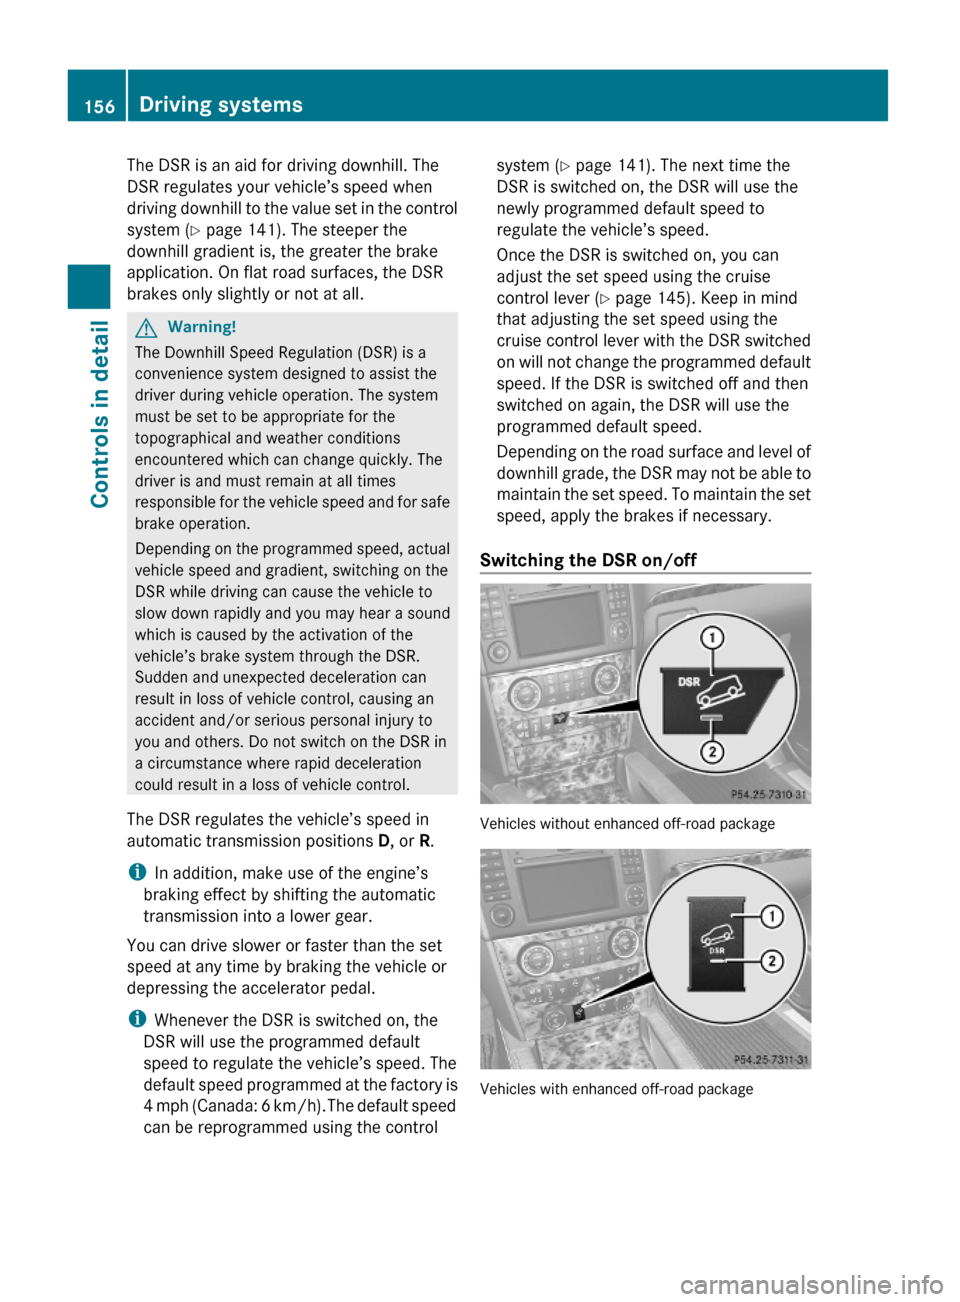
Switching the DSR on/off
Vehicles without enhanced off-road package
Vehicles with enhanced off-road package
156Driving systemsControls in detail
X164_AKB; 5; 31, en-USd2ureepe,Version: 2.11.8.12009-09-11T12:30:16+02:00 - Seite 156
Page 172 of 380
GWarning!
The rear view camera is only an aid and may
display obstacles
Rfrom a distorted perspective
Rinaccurately
Rmay not display obstacles at all
The rear view camera does not relieve you of
the responsibility to be cautious. Take care
and pay careful attention. The rear view
camera may not show objects which are
Rvery close to the rear bumper
Runder the rear bumper
Rabove the tailgate handle
You are responsible for safety at all times and
must continue to pay attention to the
immediate surroundings when parking and
maneuvering. This includes the area behind,
in front of, and beside the vehicle. Otherwise
you could endanger yourself and/or others.
GWarning!
The rear view camera either will not function
or will not function to its full capability if
Rthe tailgate is open
Rit is raining very hard, snowing or foggy
Rit is night or you are parking/maneuvering
your vehicle in an area where it is very dark
Rthe camera is exposed to a very bright white
light
Rthe immediate surroundings are
illuminated with fluorescent light (the
display may flicker)
Rthere is a sudden change in temperature,
e.g. if you drive into a heated garage from
the cold (lens condensation)
Rthe camera lens is dirty or covered
Rthe rear of your vehicle is damaged
In this case, have the position and setting
of the camera checked by a qualified
specialist workshop. Mercedes-Benz
recommends that you contact a Mercedes-
Benz Center for this purpose.
Do not use the rear view camera in these
situations. Otherwise you could injure
yourself or others and/or damage property
including your vehicle while parking/
maneuvering.
GWarning!
Use of rear view camera can be dangerous if
you are color-blind or have impaired color
vision.
Only use rear view camera if you can see and
distinguish all colored guidelines shown by
rear view camera on the COMAND system
display.
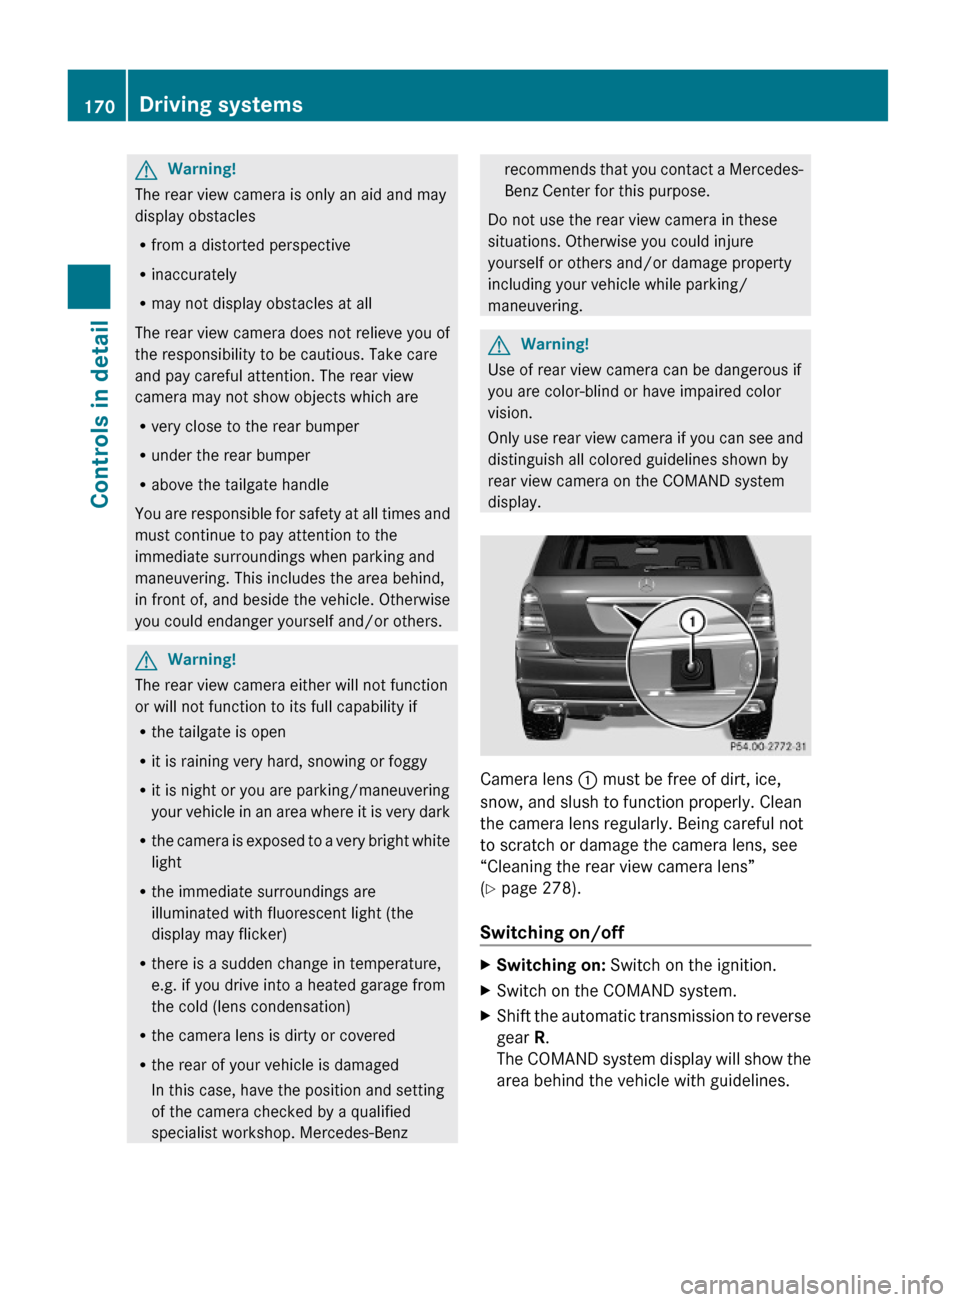
Camera lens : must be free of dirt, ice,
snow, and slush to function properly. Clean
the camera lens regularly. Being careful not
to scratch or damage the camera lens, see
“Cleaning the rear view camera lens”
(Y page 278).
Switching on/off
XSwitching on: Switch on the ignition.XSwitch on the COMAND system.XShift the automatic transmission to reverse
gear R.
The COMAND system display will show the
area behind the vehicle with guidelines.
170Driving systemsControls in detail
X164_AKB; 5; 31, en-USd2ureepe,Version: 2.11.8.12009-09-11T12:30:16+02:00 - Seite 170
Page 180 of 380
The air conditioning uses the refrigerant
R134a. This refrigerant is free of CFCs which
are harmful to the ozone layer.
! If the air conditioning cannot be activated
again, this indicates that the air
conditioning is losing refrigerant. The
compressor has turned off.
Have the air conditioning checked at the
nearest authorized Mercedes-Benz Center.
Automatic mode
When operating the climate control system in
automatic mode, the interior air temperature,
air volume and air distribution are adjusted
automatically.
In automatic mode, cooling with
dehumidification is switched on. This function
can be switched off if necessary.
GWarning!
If you switch off the air conditioning, the
vehicle will not be cooled when weather
conditions are warm. The windows can fog up
more quickly. Window fogging may impair
visibility and endanger you and others.
XSet the desired temperature
( Y page 178).XActivating: Press button Ã.
The indicator lamp in the button comes on.
The air volume and air distribution are
adjusted automatically.
i The settings for the passenger side are
also used for the rear passenger
compartment.
XDeactivating: Press button I or K .
The indicator lamp in button à goes out.
The automatic operation of air volume
switches off. The selected blower speed isshown in air volume display G
( Y page 175).
or
XPress air distribution button ¯, P , or
O .
The indicator lamp in button à goes out.
The automatic operation of air distribution
switches off.
Setting the temperature
You can adjust the air temperature on each
side of the passenger compartment. You
should raise or lower the temperature setting
in small increments, preferably starting at
72‡ (22†).
XIncreasing/decreasing: Turn
temperature control : and/or C
( Y page 175) slightly clockwise or
counterclockwise.
Adjusting air distribution
The air distribution can be adjusted manually.
The symbols on the buttons represent the
following functions:
SymbolFunction¯Directs air to the windshield and
side air ventsPDirects air through the center
and side air ventsODirects air to the footwells and
side air ventsXPress the desired air distribution button
¯ , P , or O .
The indicator lamp in button à goes out.
The automatic mode is switched off. Air
distribution is controlled according to the
desired button.178Climate controlControls in detail
X164_AKB; 5; 31, en-USd2ureepe,Version: 2.11.8.12009-09-11T12:30:16+02:00 - Seite 178
Page 181 of 380
Adjusting air volumeXDecreasing/increasing: Press button
I or K .
The automatic mode is switched off. The
selected blower speed is shown in air
volume display G (Y page 175).
When using the Voice Control System, the
blower speed reduces automatically. When
the Voice Control System is not used
anymore, the blower speed increases to the
previously selected level.
Front defroster
You can use this setting to defrost the
windshield, for example if it is iced up.
You can also defog the windshield and the
side windows.
i Keep this setting selected only until the
windshield or the side windows are clear
again.
Activating
XPress button ¦.
The indicator lamp in the button comes on.
The climate control switches to the
following functions automatically:
R most efficient blower speed and heating
power, depending on outside
temperature
R air flows onto the windshield and the
front door windows (side air vents must
be open)
R the air conditioning compressor
switches on at outside temperatures
above approximately 41‡ (5†) for air-
drying
Adjustments
You can adjust the air volume and the
temperature when the front defroster is
switched on. The air flow will remain on the
windshield and front door windows.
XPress button I to decrease or button
K to increase air volume to the desired
level.
The air volume decreases/increases to the
next lower/higher blower speed and
heating switches to the temperature that
was set before the front defroster was
switched on.
The indicator lamp in button ¦ goes out.
The indicator lamp in button Á comes
on.
or
XTurn temperature control : and/or C
( Y page 175) slightly in any direction.
Heating switches to the temperature that
was set before the front defroster was
switched on.
The indicator lamp in button ¦ goes out.
The indicator lamp in button Á comes
on.
i The air conditioning compressor remains
on even if the indicator lamp in button
¦ goes out. This helps to prevent the
windshield from fogging.
Deactivating
XPress button ¦ again.
The indicator lamp in the button goes out.
Defrosting is turned off.
The previous settings are once again in
effect. The air conditioning compressor
remains switched on.
i To deactivate, you can also press button
^ or à .
Windshield fogged on the outside
XSwitch the windshield wipers on
( Y page 103).XPress air distribution button P or O .Climate control179Controls in detailX164_AKB; 5; 31, en-USd2ureepe,Version: 2.11.8.12009-09-11T12:30:16+02:00 - Seite 179Z