2010 MERCEDES-BENZ GL450 brake switch
[x] Cancel search: brake switchPage 159 of 380
GWarning!
If the accelerator pedal is depressed while the
Downhill Speed Regulation (DSR) is activated,
the vehicle can drive faster than the
programmed set speed. You should therefore
drive downhill with particular caution as it
could otherwise lead to an accident and/or
serious injury to you or others. Keep in mind
that as soon as you remove your foot from the
accelerator pedal with the DSR switched on,
the DSR will start regulating the vehicle’s
speed including use of brakes if required.
Depending on the programmed set speed,
actual vehicle speed and gradient, the DSR
can cause the vehicle to slow down rapidly.
Sudden and unexpected deceleration can
result in loss of vehicle control, causing an
accident and/or serious personal injury to
you and others.
Switching on the DSR
The DSR can only be switched on if the vehicle
speed is below 20 mph (Canada: 30 km/h).
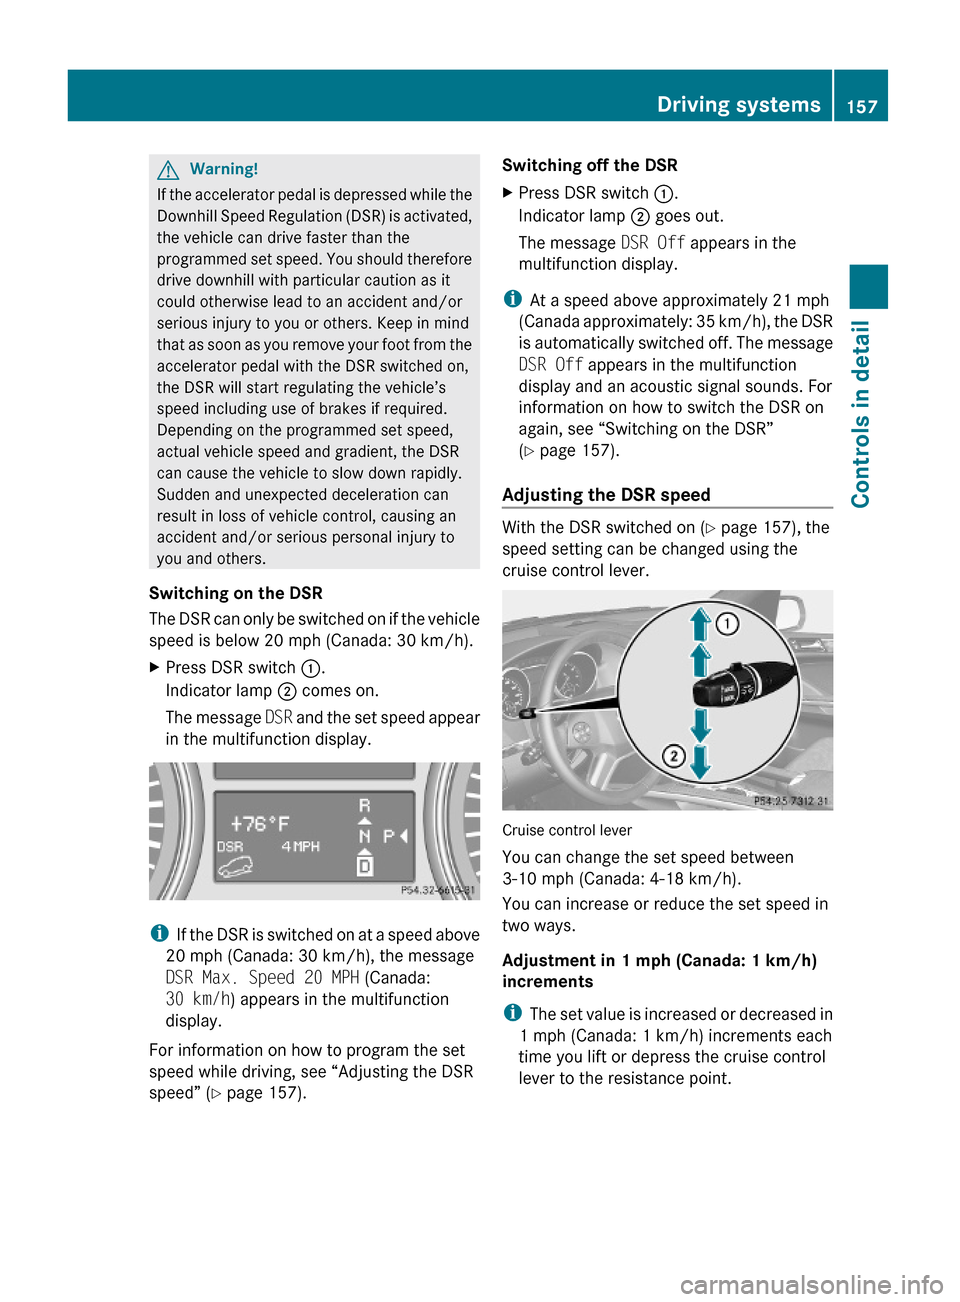
XPress DSR switch :.
Indicator lamp ; comes on.
The message DSR and the set speed appear
in the multifunction display.
iIf the DSR is switched on at a speed above
20 mph (Canada: 30 km/h), the message
DSR Max. Speed 20 MPH (Canada:
30 km/h) appears in the multifunction
display.
For information on how to program the set
speed while driving, see “Adjusting the DSR
speed” (Y page 157).
Switching off the DSRXPress DSR switch :.
Indicator lamp ; goes out.
The message DSR Off appears in the
multifunction display.
iAt a speed above approximately 21 mph
(Canada approximately: 35 km/h), the DSR
is automatically switched off. The message
DSR Off appears in the multifunction
display and an acoustic signal sounds. For
information on how to switch the DSR on
again, see “Switching on the DSR”
(Y page 157).
Adjusting the DSR speed
With the DSR switched on (Y page 157), the
speed setting can be changed using the
cruise control lever.
Cruise control lever
You can change the set speed between
3-10 mph (Canada: 4-18 km/h).
You can increase or reduce the set speed in
two ways.
Adjustment in 1 mph (Canada: 1 km/h)
increments
iThe set value is increased or decreased in
1 mph (Canada: 1 km/h) increments each
time you lift or depress the cruise control
lever to the resistance point.
Driving systems157Controls in detailX164_AKB; 5; 31, en-USd2ureepe,Version: 2.11.8.12009-09-11T12:30:16+02:00 - Seite 157Z
Page 168 of 380
iThe message can be cleared by pressing
the V, U, & or * button on
the multifunction steering wheel.
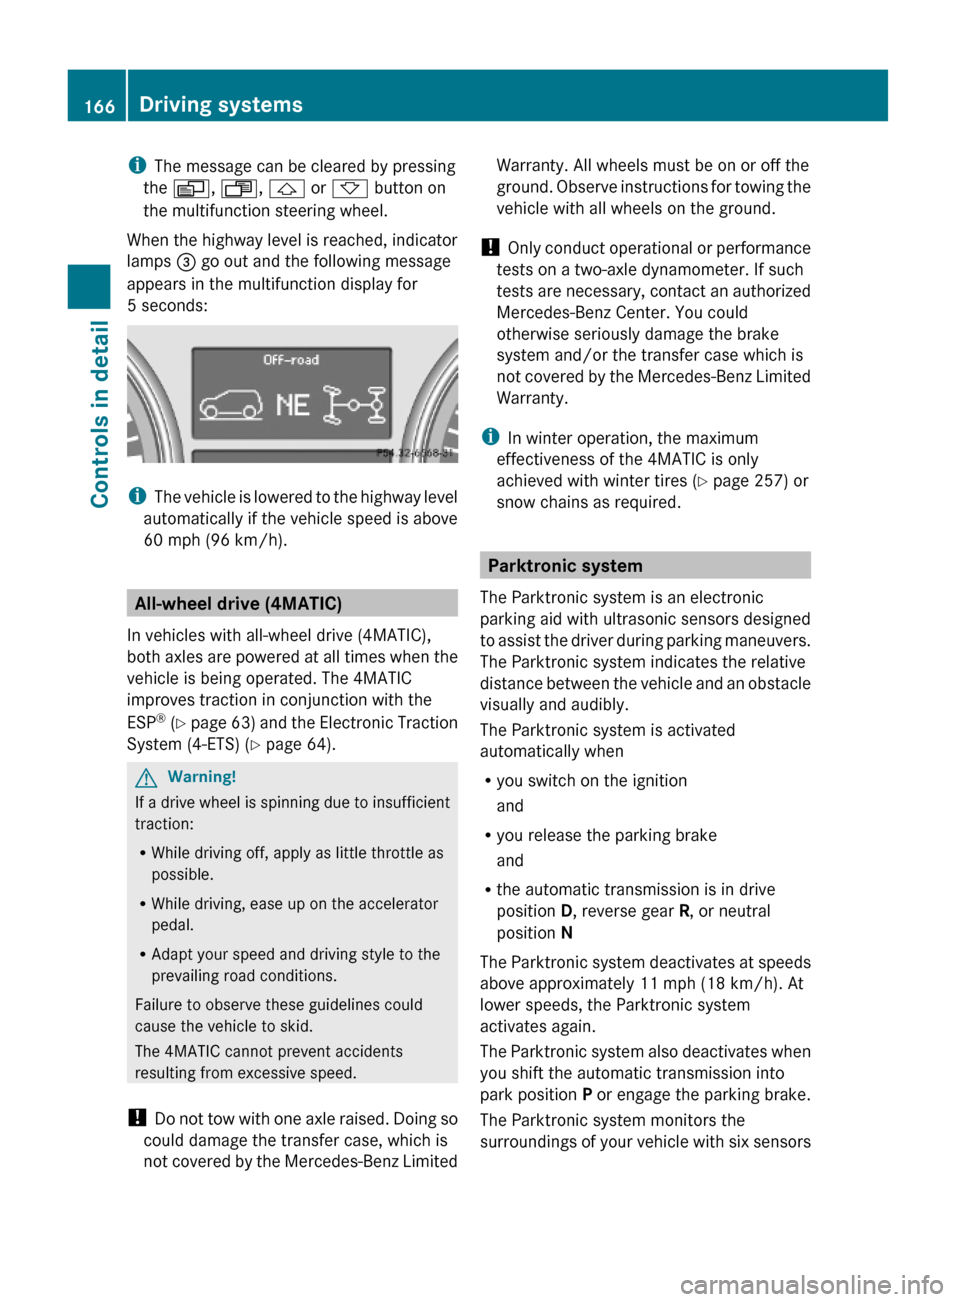
When the highway level is reached, indicator
lamps = go out and the following message
appears in the multifunction display for
5 seconds:
iThe vehicle is lowered to the highway level
automatically if the vehicle speed is above
60 mph (96 km/h).
All-wheel drive (4MATIC)
In vehicles with all-wheel drive (4MATIC),
both axles are powered at all times when the
vehicle is being operated. The 4MATIC
improves traction in conjunction with the
ESP® (Y page 63) and the Electronic Traction
System (4-ETS) (Y page 64).
GWarning!
If a drive wheel is spinning due to insufficient
traction:
RWhile driving off, apply as little throttle as
possible.
RWhile driving, ease up on the accelerator
pedal.
RAdapt your speed and driving style to the
prevailing road conditions.
Failure to observe these guidelines could
cause the vehicle to skid.
The 4MATIC cannot prevent accidents
resulting from excessive speed.
! Do not tow with one axle raised. Doing so
could damage the transfer case, which is
not covered by the Mercedes-Benz Limited
Warranty. All wheels must be on or off the
ground. Observe instructions for towing the
vehicle with all wheels on the ground.
! Only conduct operational or performance
tests on a two-axle dynamometer. If such
tests are necessary, contact an authorized
Mercedes-Benz Center. You could
otherwise seriously damage the brake
system and/or the transfer case which is
not covered by the Mercedes-Benz Limited
Warranty.
iIn winter operation, the maximum
effectiveness of the 4MATIC is only
achieved with winter tires (Y page 257) or
snow chains as required.
Parktronic system
The Parktronic system is an electronic
parking aid with ultrasonic sensors designed
to assist the driver during parking maneuvers.
The Parktronic system indicates the relative
distance between the vehicle and an obstacle
visually and audibly.
The Parktronic system is activated
automatically when
Ryou switch on the ignition
and
Ryou release the parking brake
and
Rthe automatic transmission is in drive
position D, reverse gear R, or neutral
position N
The Parktronic system deactivates at speeds
above approximately 11 mph (18 km/h). At
lower speeds, the Parktronic system
activates again.
The Parktronic system also deactivates when
you shift the automatic transmission into
park position P or engage the parking brake.
The Parktronic system monitors the
surroundings of your vehicle with six sensors
166Driving systemsControls in detail
X164_AKB; 5; 31, en-USd2ureepe,Version: 2.11.8.12009-09-11T12:30:16+02:00 - Seite 166
Page 170 of 380
signal. If the obstacle is closer than the
minimum distance, the actual distance may
no longer be indicated by the Parktronic
system.
Warning indicators
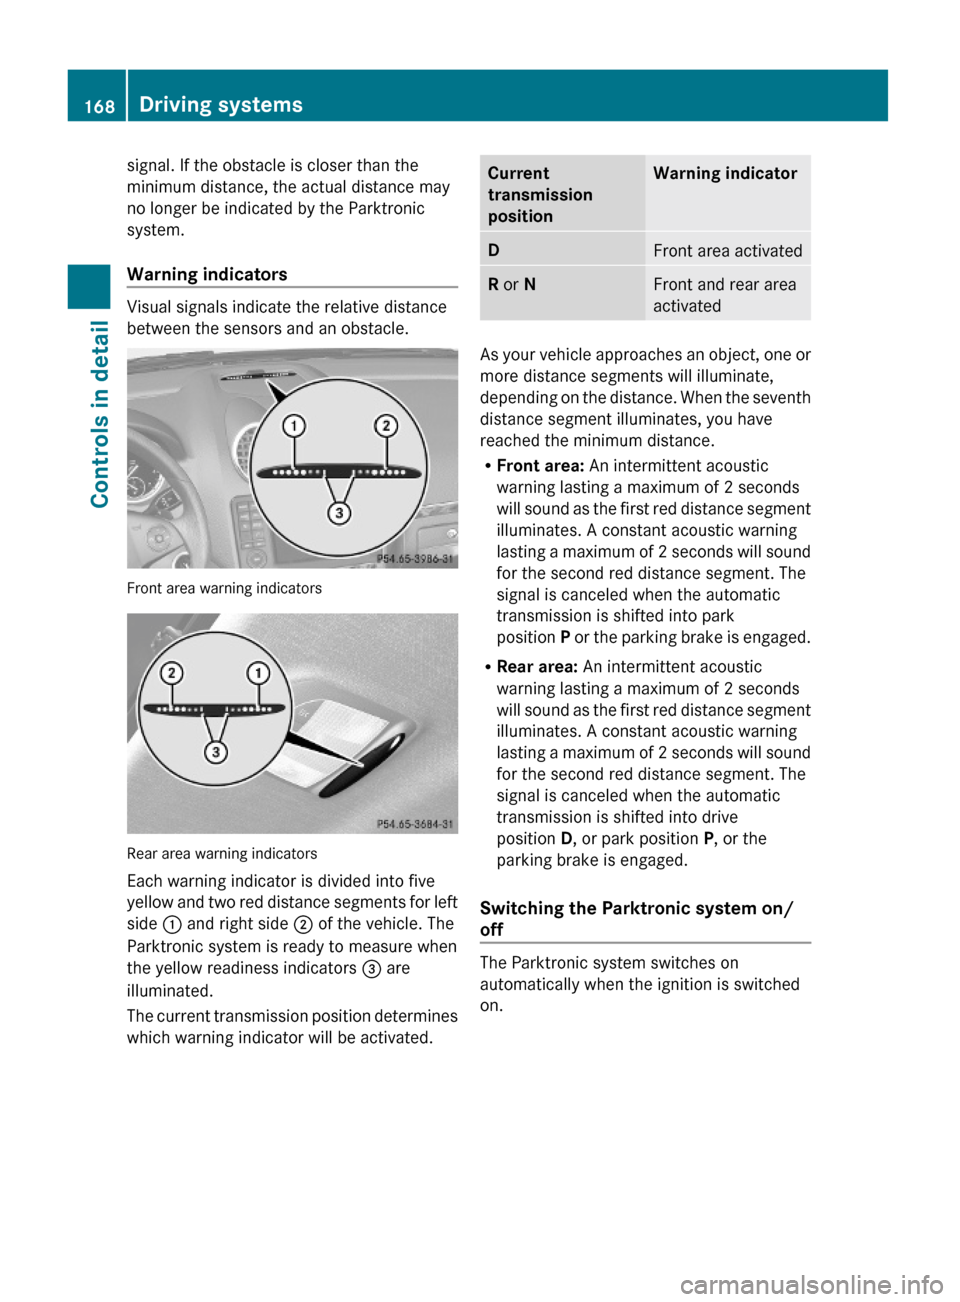
Visual signals indicate the relative distance
between the sensors and an obstacle.
Front area warning indicators
Rear area warning indicators
Each warning indicator is divided into five
yellow and two red distance segments for left
side : and right side ; of the vehicle. The
Parktronic system is ready to measure when
the yellow readiness indicators = are
illuminated.
The current transmission position determines
which warning indicator will be activated.
Current
transmission
position
Warning indicatorDFront area activatedR or NFront and rear area
activated
As your vehicle approaches an object, one or
more distance segments will illuminate,
depending on the distance. When the seventh
distance segment illuminates, you have
reached the minimum distance.
RFront area: An intermittent acoustic
warning lasting a maximum of 2 seconds
will sound as the first red distance segment
illuminates. A constant acoustic warning
lasting a maximum of 2 seconds will sound
for the second red distance segment. The
signal is canceled when the automatic
transmission is shifted into park
position P or the parking brake is engaged.
RRear area: An intermittent acoustic
warning lasting a maximum of 2 seconds
will sound as the first red distance segment
illuminates. A constant acoustic warning
lasting a maximum of 2 seconds will sound
for the second red distance segment. The
signal is canceled when the automatic
transmission is shifted into drive
position D, or park position P, or the
parking brake is engaged.
Switching the Parktronic system on/
off
The Parktronic system switches on
automatically when the ignition is switched
on.
168Driving systemsControls in detail
X164_AKB; 5; 31, en-USd2ureepe,Version: 2.11.8.12009-09-11T12:30:16+02:00 - Seite 168
Page 171 of 380

Vehicle without enhanced off-road package
Vehicle with enhanced off-road package
XSwitching off: Press Parktronic
switch :.
Indicator lamp ; comes on.
XSwitching on: Press Parktronic switch :
again.
Trailer towing
The rear Parktronic sensors will be
deactivated when you have established the
electrical connection between your vehicle
and the trailer you are about to tow.
! The distance between the sensors in the
bumpers and an obstacle is referred to as
the minimum range of the Parktronic. A
trailer hitch will reduce the distance to an
obstacle. Keep this in mind to avoid any
damage.
Parktronic system malfunction
There is a malfunction in the Parktronic
system, if only the red distance segments
illuminate and an acoustic warning sounds.
The Parktronic system will switch off
automatically after 20 seconds and indicator
lamp ; in Parktronic switch : comes on.
XHave the Parktronic system checked at an
authorized Mercedes-Benz Center as soon
as possible.
If only the red distance segments illuminate
and no acoustic warning sounds, the
Parktronic system sensors are dirty (e.g. dirt,
ice, snow and slush). Another cause could be
interference from other radio or ultrasonic
signals (e.g. truck air brakes, car wash, or
jackhammers). The Parktronic system will
switch off automatically after 20 seconds and
indicator lamp ; in Parktronic switch :
comes on.
XSwitch off the ignition.XClean the Parktronic system sensors
(Y page 278).
XSwitch on the ignition.
or
XCheck the Parktronic system operation at
another location to rule out interference
from outside radio or ultrasonic signals.
Rear view camera
The rear view camera is an optical parking aid.
The area behind the vehicle appears in the
COMAND system display as a mirror image,
like in the rear view mirror.
In addition, the rear view camera contains
guidelines to help you with driving in reverse.
GWarning!
Make sure no persons or animals are in or
near the area in which you are parking/
maneuvering. Otherwise, they could be
injured.
Driving systems169Controls in detailX164_AKB; 5; 31, en-USd2ureepe,Version: 2.11.8.12009-09-11T12:30:16+02:00 - Seite 169Z
Page 230 of 380

iLeaving the engine running and the fuel
filler cap open can cause the yellow fuel
tank reserve warning lamp to flash and the
malfunction indicator lamp ! (USA
only) or ; (Canada only) to illuminate.
For more information, see also “Practical
hints” ( Y page 320).XRemove the SmartKey from the starter
switch.
KEYLESS-GO: Open the driver’s door. This
puts the starter switch in position 0, same
as with the SmartKey removed from the
starter switch. The driver’s door then can
be closed again.XOpening: Press fuel filler flap : at the
point indicated by the arrow.XTurn fuel filler cap ; counterclockwise.XTake off fuel filler cap ;.
!
The fuel filler cap is tethered to the fuel
filler neck. Do not drop the cap. It could
damage the vehicle paint finish.
XSet fuel filler cap ; on fuel filler flap :.XFully insert filler nozzle unit and refuel.XOnly fill your tank until the filler nozzle unit
cuts out – do not top off or overfill .XClosing: Turn fuel filler cap ; clockwise
until it audibly engages.
i Close the fuel filler flap before locking the
vehicle. Otherwise the flap locking pin will
prevent closing the fuel filler flap.
XClose fuel filler flap :.
Low outside temperatures (diesel
engine)
! Do not fill the tank with gasoline. Do not
blend diesel fuel with gasoline or kerosene.
The fuel system and engine will otherwise
be damaged, which is not covered by the
Mercedes-Benz Limited Warranty.
To prevent malfunctions, diesel fuel with
improved cold flow characteristics is offered
in the winter months. Check with your fuel
retailer.
Check regularly and before a long trip
For information on quantities and
requirements of operating agents, see “Fuels,
coolants, lubricants, etc.” ( Y page 368).
Check the following:
R Engine oil level ( Y page 230)
R Tire inflation pressure ( Y page 237)
R Coolant level ( Y page 231)
R Vehicle lighting ( Y page 328)
R Washer system and headlamp cleaning
system ( Y page 232)
R Brake fluid ( Y page 233)
Engine compartment
Hood
GWarning!
Do not pull the release lever while the vehicle
is in motion. Otherwise the hood could be
forced open by passing air flow.
This could cause the hood to come loose and
injure you and/or others.
Opening
GWarning!
Do not open the hood when the engine is
overheated. You could be seriously injured.
Observe the coolant temperature display to
determine whether the engine may be
overheated. If you see flames or smoke
coming from the engine compartment, move
away from the vehicle. Wait until the engine
has cooled. If necessary, call the fire
department.
228Engine compartmentOperation
X164_AKB; 5; 31, en-USd2ureepe,Version: 2.11.8.12009-09-11T12:30:16+02:00 - Seite 228
Page 240 of 380
Each tire, including the spare, should be
checked at least once a month when cold.
Inflate the tires to the recommended tire
inflation pressure as specified on
R the Tire and Loading Information placard on
the driver’s door B-pillar
or
R the tire inflation pressure label located on
the inside of the fuel filler flap
i The recommended tire inflation pressures
for your vehicle can be found on
R the Tire and Loading Information placard
located on the driver’s door B-pillar
( Y page 242)
R the tire inflation pressure label on the
inside of the fuel filler flap
The tire inflation pressures are not listed in
the Operator’s Manual.GWarning!
The tire pressure loss warning system does
not provide a warning for wrongly selected tire
inflation pressures. Always adjust tire
inflation pressure according to the Tire and
Loading Information placard on the driver’s
door B-pillar or on the tire inflation pressure
label located on the inside of the fuel filler flap.
The tire pressure loss warning system does
not replace regular checks of the tire inflation
pressures since a gradual pressure loss in
more than one tire cannot be detected by the
tire pressure loss warning system.
The tire pressure loss warning system is not
able to issue a warning due to a sudden
dramatic loss of tire inflation pressure (e.g.
tire blowout caused by a foreign object). In
this case bring the vehicle to a halt by carefully
applying the brakes and avoiding abrupt
steering maneuvers.
Restarting the tire pressure loss warning
system
The tire pressure loss warning system must
be restarted in the following situations:
R after you have changed the tire inflation
pressure
R after you have replaced the wheels or tires
R after you have installed new wheels or tiresXUsing the Tire and Loading Information
placard on the driver’s door B-pillar or, if
available, the tire inflation pressure label on
the inside of the fuel filler flap, make sure
the tire inflation pressure of all four tires is
correct.GWarning!
The tire pressure loss warning system can
only warn you in a reliable manner if you have
set the correct tire inflation pressures for
each tire.
If an incorrect tire inflation pressure was set,
the system will monitor the pressure
according to the incorrect value.
XSwitch on the ignition.XMake sure the standard display appears in
the multifunction display ( Y page 128).XPress button * or & on the
multifunction steering wheel repeatedly
until the following message appears in the
multifunction display:
Run Flat Indicator
Active
Menu: R-ButtonXPress the reset button ( Y page 124).
The following message will appear in the
multifunction display:
Restart
Run Flat Indicator?XIf you wish to confirm: Press button
W .
The following message will appear in the
multifunction display:
Run Flat Indicator
Restarted238Tires and wheelsOperation
X164_AKB; 5; 31, en-USd2ureepe,Version: 2.11.8.12009-09-11T12:30:16+02:00 - Seite 238
Page 243 of 380
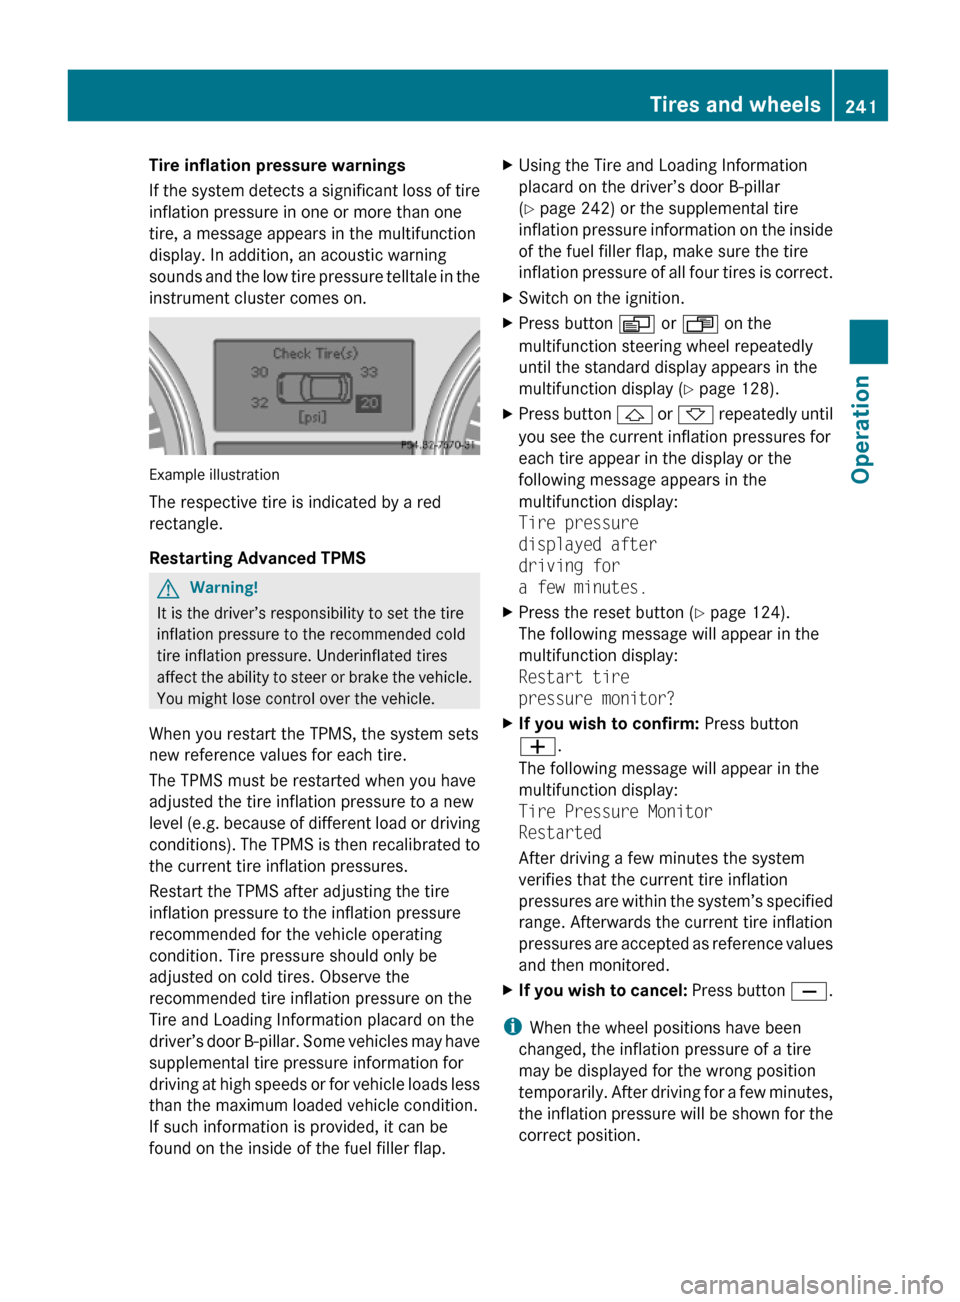
Tire inflation pressure warnings
If the system detects a significant loss of tire
inflation pressure in one or more than one
tire, a message appears in the multifunction
display. In addition, an acoustic warning
sounds and the low tire pressure telltale in the
instrument cluster comes on.
Example illustration
The respective tire is indicated by a red
rectangle.
Restarting Advanced TPMS
GWarning!
It is the driver’s responsibility to set the tire
inflation pressure to the recommended cold
tire inflation pressure. Underinflated tires
affect the ability to steer or brake the vehicle.
You might lose control over the vehicle.
When you restart the TPMS, the system sets
new reference values for each tire.
The TPMS must be restarted when you have
adjusted the tire inflation pressure to a new
level (e.g. because of different load or driving
conditions). The TPMS is then recalibrated to
the current tire inflation pressures.
Restart the TPMS after adjusting the tire
inflation pressure to the inflation pressure
recommended for the vehicle operating
condition. Tire pressure should only be
adjusted on cold tires. Observe the
recommended tire inflation pressure on the
Tire and Loading Information placard on the
driver’s door B-pillar. Some vehicles may have
supplemental tire pressure information for
driving at high speeds or for vehicle loads less
than the maximum loaded vehicle condition.
If such information is provided, it can be
found on the inside of the fuel filler flap.
XUsing the Tire and Loading Information
placard on the driver’s door B-pillar
(Y page 242) or the supplemental tire
inflation pressure information on the inside
of the fuel filler flap, make sure the tire
inflation pressure of all four tires is correct.
XSwitch on the ignition.XPress button V or U on the
multifunction steering wheel repeatedly
until the standard display appears in the
multifunction display (Y page 128).
XPress button & or * repeatedly until
you see the current inflation pressures for
each tire appear in the display or the
following message appears in the
multifunction display:
Tire pressure
displayed after
driving for
a few minutes.
XPress the reset button (Y page 124).
The following message will appear in the
multifunction display:
Restart tire
pressure monitor?
XIf you wish to confirm: Press button
W.
The following message will appear in the
multifunction display:
Tire Pressure Monitor
Restarted
After driving a few minutes the system
verifies that the current tire inflation
pressures are within the system’s specified
range. Afterwards the current tire inflation
pressures are accepted as reference values
and then monitored.
XIf you wish to cancel: Press button X.
iWhen the wheel positions have been
changed, the inflation pressure of a tire
may be displayed for the wrong position
temporarily. After driving for a few minutes,
the inflation pressure will be shown for the
correct position.
Tires and wheels241OperationX164_AKB; 5; 31, en-USd2ureepe,Version: 2.11.8.12009-09-11T12:30:16+02:00 - Seite 241Z
Page 263 of 380
Have the brake system inspected
immediately. Contact an authorized
Mercedes-Benz Center.
All checks and service work on the brake
system should be carried out by qualified
technicians only. Contact an authorized
Mercedes-Benz Center.
Only install brake pads and use brake fluid
recommended by Mercedes-Benz.GWarning!
If other than recommended brake pads are
installed, or other than recommended brake
fluid is used, the braking properties of the
vehicle can be degraded to an extent that safe
braking is substantially impaired. This could
result in an accident.
! Only conduct operational or performance
tests on a two-axle dynamometer. If such
tests are necessary, contact an authorized
Mercedes-Benz Center. You could
otherwise seriously damage the brake
system or the transfer case which is not
covered by the Mercedes-Benz Limited
Warranty.
! Because the ESP ®
operates
automatically, the engine and ignition must
be shut off (SmartKey in starter switch
position 0 or 1 or KEYLESS-GO start/stop
button in position 0 or 1) when the parking
brake is being tested on a brake test
dynamometer. Such testing should be no
longer than 10 seconds.
Active braking action through the ESP ®
may otherwise seriously damage the brake
system which is not covered by the
Mercedes-Benz Limited Warranty.
If your brake system is only subjected to
moderate loads, you should occasionally test
the effectiveness of the brakes by applying
above-normal braking pressure at higher
speeds. This will also enhance the grip of the
brake pads.
GWarning!
Make sure not to endanger any other road
users when carrying out these braking
maneuvers.
Refer to the description of the Brake Assist
System (BAS) ( Y page 63).
Parking brake
When driving on wet roads or dirt covered
surfaces, road salt and/or dirt can get into
the parking brake.
To prevent corrosion and a reduction in the
braking power of the parking brake, observe
the following:
XFrom time to time, lightly engage the
parking brake before driving off.XDrive a distance of approximately 110 yds
(100 m) at a maximum speed of 12 mph
(20 km/h).GWarning!
While performing this procedure please
assure that the vehicle is stopped before
applying the parking brake. Otherwise the
rear wheels could lock up. You could lose
control of the vehicle and cause an accident.
In addition, the vehicle’s brake lights do not
light up when the parking brake is engaged.
Make sure not to endanger any other road
users when you engage the parking brake.
Driving off
Warm up the engine smoothly. Do not place
full load on the engine until the operating
temperature has been reached.
! When driving off on a slippery surface, do
not allow a drive wheel to spin for an
extended period with the ESP ®
switched
off. Doing so may cause serious damage to
the drivetrain which is not covered by the
Mercedes-Benz Limited Warranty.
Driving instructions261OperationX164_AKB; 5; 31, en-USd2ureepe,Version: 2.11.8.12009-09-11T12:30:16+02:00 - Seite 261Z