2010 MERCEDES-BENZ GL fuel
[x] Cancel search: fuelPage 127 of 380
iThe instrument cluster illumination is
dimmed or brightened automatically to suit
ambient light conditions.
The instrument cluster illumination will also
be adjusted automatically when you switch
on the vehicle’s exterior lamps.
iWith the exterior lighting switched on, the
brightness of the switches in the center
console will also be adjusted when using
button : or =.
Resetting trip odometer
XMake sure you are viewing the standard
display (Y page 128) in the multifunction
display.
XPress and hold the reset button in the
instrument cluster (Y page 124) until the
trip odometer is reset.
Tachometer
The red marking on the tachometer
(Y page 29) denotes excessive engine speed.
! Avoid driving at excessive engine speeds,
as it may result in serious engine damage
that is not covered by the Mercedes-Benz
Limited Warranty.
To help protect the engine, the fuel supply is
interrupted if the engine is operated within
the red marking.
Control system
Introduction
The control system is activated as soon as the
starter switch is in position 1 (Y page 80).
The control system enables you to call up
information about your vehicle and to change
vehicle settings.
For example, you can use the control system
to find out when your vehicle is next due for
maintenance service, to set the language for
messages in the instrument cluster display,
and much more.
GWarning!
A driver’s attention to the road and traffic
conditions must always be his/her primary
focus when driving.
For your safety and the safety of others,
selecting features through the multifunction
steering wheel should only be done by the
driver when traffic and road conditions permit
it to be done safely.
Bear in mind that at a speed of just 30 mph
(approximately 50 km/h), your vehicle is
covering a distance of 44 feet (approximately
14 m) every second.
The control system relays information to the
multifunction display.
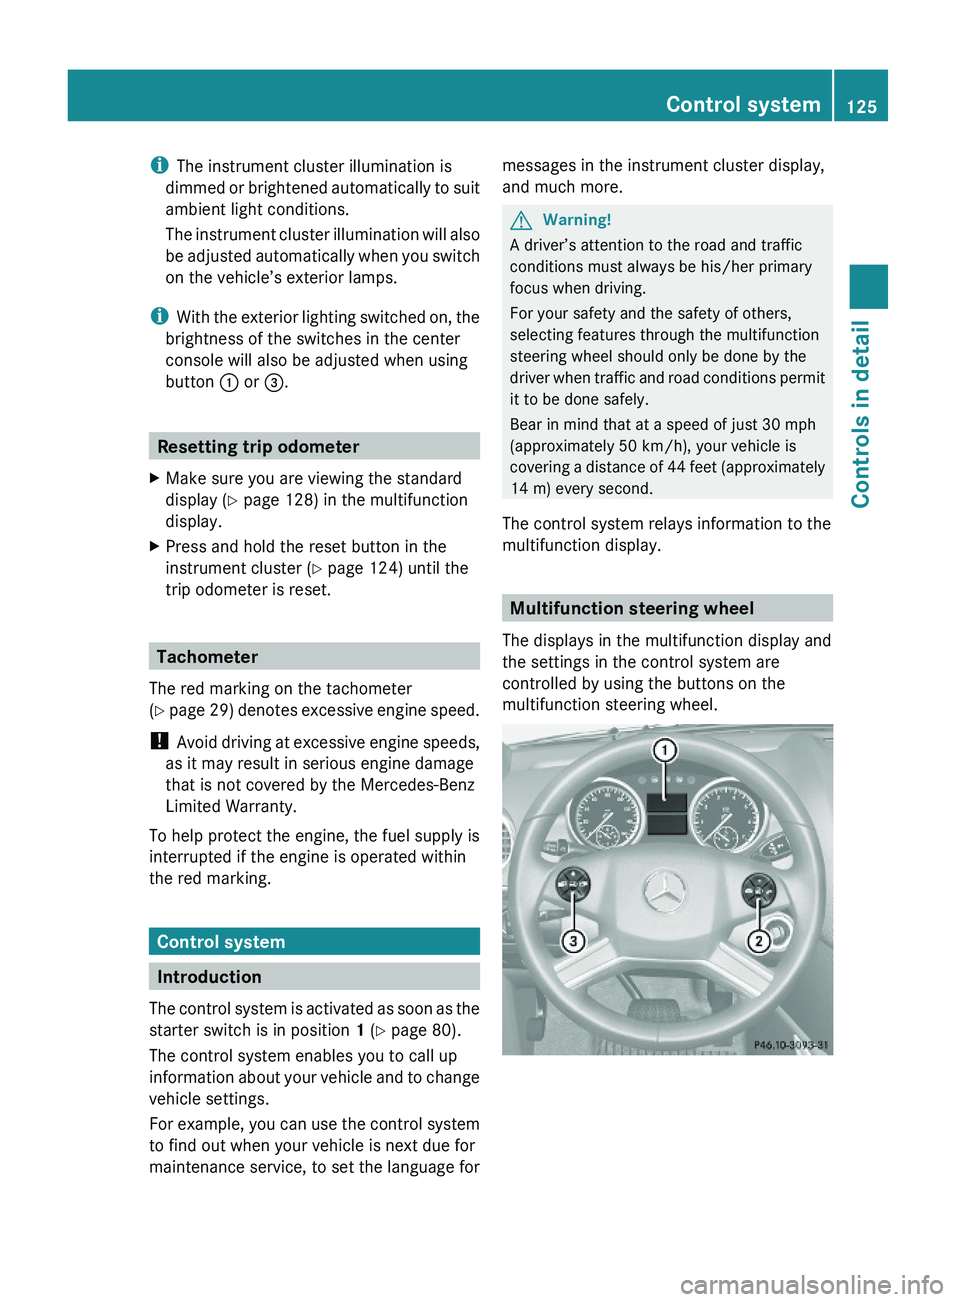
Multifunction steering wheel
The displays in the multifunction display and
the settings in the control system are
controlled by using the buttons on the
multifunction steering wheel.
Control system125Controls in detailX164_AKB; 5; 31, en-USd2ureepe,Version: 2.11.8.12009-09-11T12:30:16+02:00 - Seite 125Z
Page 143 of 380
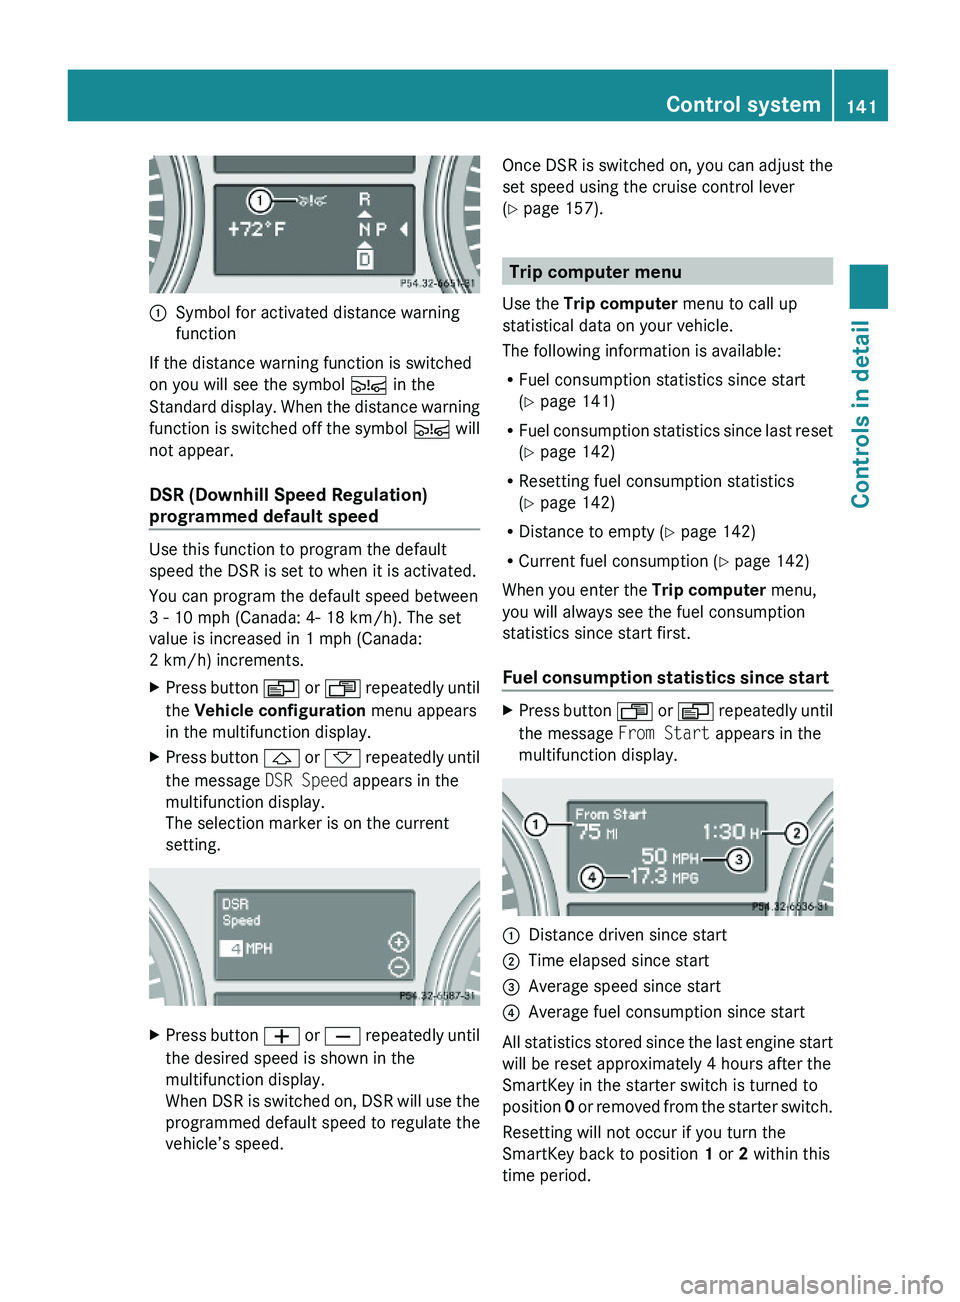
:Symbol for activated distance warning
function
If the distance warning function is switched
on you will see the symbol Ä in the
Standard display. When the distance warning
function is switched off the symbol Ä will
not appear.
DSR (Downhill Speed Regulation)
programmed default speed
Use this function to program the default
speed the DSR is set to when it is activated.
You can program the default speed between
3 - 10 mph (Canada: 4- 18 km/h). The set
value is increased in 1 mph (Canada:
2 km/h) increments.
XPress button V or U repeatedly until
the Vehicle configuration menu appears
in the multifunction display.
XPress button & or * repeatedly until
the message DSR Speed appears in the
multifunction display.
The selection marker is on the current
setting.
XPress button W or X repeatedly until
the desired speed is shown in the
multifunction display.
When DSR is switched on, DSR will use the
programmed default speed to regulate the
vehicle’s speed.
Once DSR is switched on, you can adjust the
set speed using the cruise control lever
(Y page 157).
Trip computer menu
Use the Trip computer menu to call up
statistical data on your vehicle.
The following information is available:
RFuel consumption statistics since start
(Y page 141)
RFuel consumption statistics since last reset
(Y page 142)
RResetting fuel consumption statistics
(Y page 142)
RDistance to empty (Y page 142)
RCurrent fuel consumption (Y page 142)
When you enter the Trip computer menu,
you will always see the fuel consumption
statistics since start first.
Fuel consumption statistics since start
XPress button U or V repeatedly until
the message From Start appears in the
multifunction display.
:Distance driven since start;Time elapsed since start=Average speed since start?Average fuel consumption since start
All statistics stored since the last engine start
will be reset approximately 4 hours after the
SmartKey in the starter switch is turned to
position 0 or removed from the starter switch.
Resetting will not occur if you turn the
SmartKey back to position 1 or 2 within this
time period.
Control system141Controls in detailX164_AKB; 5; 31, en-USd2ureepe,Version: 2.11.8.12009-09-11T12:30:16+02:00 - Seite 141Z
Page 144 of 380
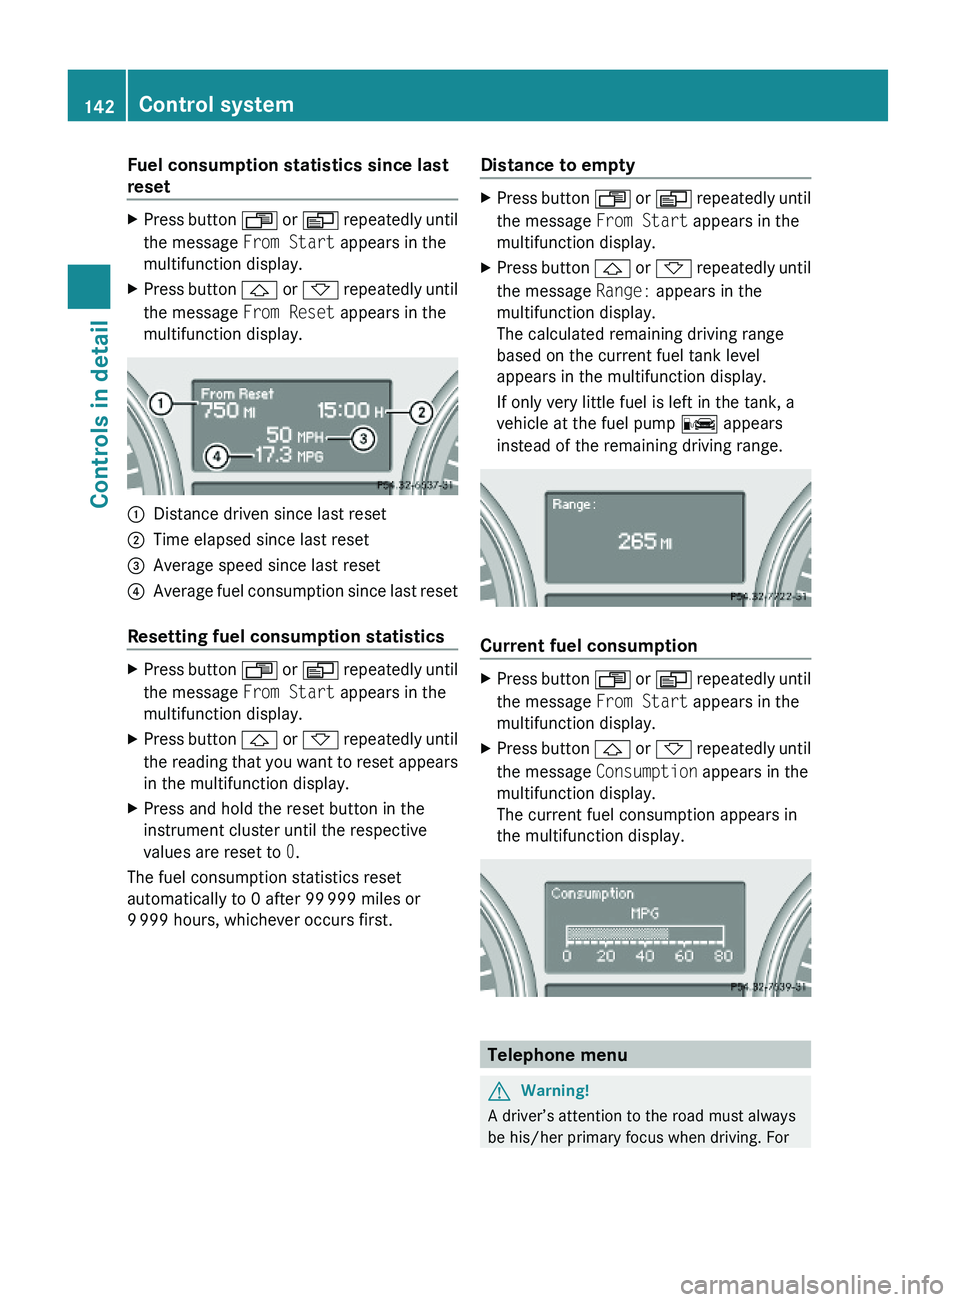
Fuel consumption statistics since last
reset
XPress button U or V repeatedly until
the message From Start appears in the
multifunction display.
XPress button & or * repeatedly until
the message From Reset appears in the
multifunction display.
:Distance driven since last reset;Time elapsed since last reset=Average speed since last reset?Average fuel consumption since last reset
Resetting fuel consumption statistics
XPress button U or V repeatedly until
the message From Start appears in the
multifunction display.
XPress button & or * repeatedly until
the reading that you want to reset appears
in the multifunction display.
XPress and hold the reset button in the
instrument cluster until the respective
values are reset to 0.
The fuel consumption statistics reset
automatically to 0 after 99 999 miles or
9 999 hours, whichever occurs first.
Distance to emptyXPress button U or V repeatedly until
the message From Start appears in the
multifunction display.
XPress button & or * repeatedly until
the message Range: appears in the
multifunction display.
The calculated remaining driving range
based on the current fuel tank level
appears in the multifunction display.
If only very little fuel is left in the tank, a
vehicle at the fuel pump C appears
instead of the remaining driving range.
Current fuel consumption
XPress button U or V repeatedly until
the message From Start appears in the
multifunction display.
XPress button & or * repeatedly until
the message Consumption appears in the
multifunction display.
The current fuel consumption appears in
the multifunction display.
Telephone menu
GWarning!
A driver’s attention to the road must always
be his/her primary focus when driving. For
142Control systemControls in detail
X164_AKB; 5; 31, en-USd2ureepe,Version: 2.11.8.12009-09-11T12:30:16+02:00 - Seite 142
Page 161 of 380
XSwitching off: Press switch : again.
Indicator lamp ; goes out. The symbol
Ç disappears.
Air suspension program
The system lets you select the chassis and
suspension setup. The chassis and
suspension setup adjusts the damping
behavior and the ride height for your vehicle.
The system consists of two components. The
Adaptive Damping System (ADS)
(Y page 159) and the vehicle level control
(Y page 159).
Adaptive Damping System (ADS)
The Adaptive Damping System (ADS) is
controlled electronically and operates
continuously. It adjusts the damping
characteristics to the current operating and
driving conditions. The damping is adjusted
individually for each wheel. Driving safety and
tire comfort are increased.
The fine tuning of the damping is dependent
on:
Ryour driving style
Rroad surface conditions
Ryour personal settings
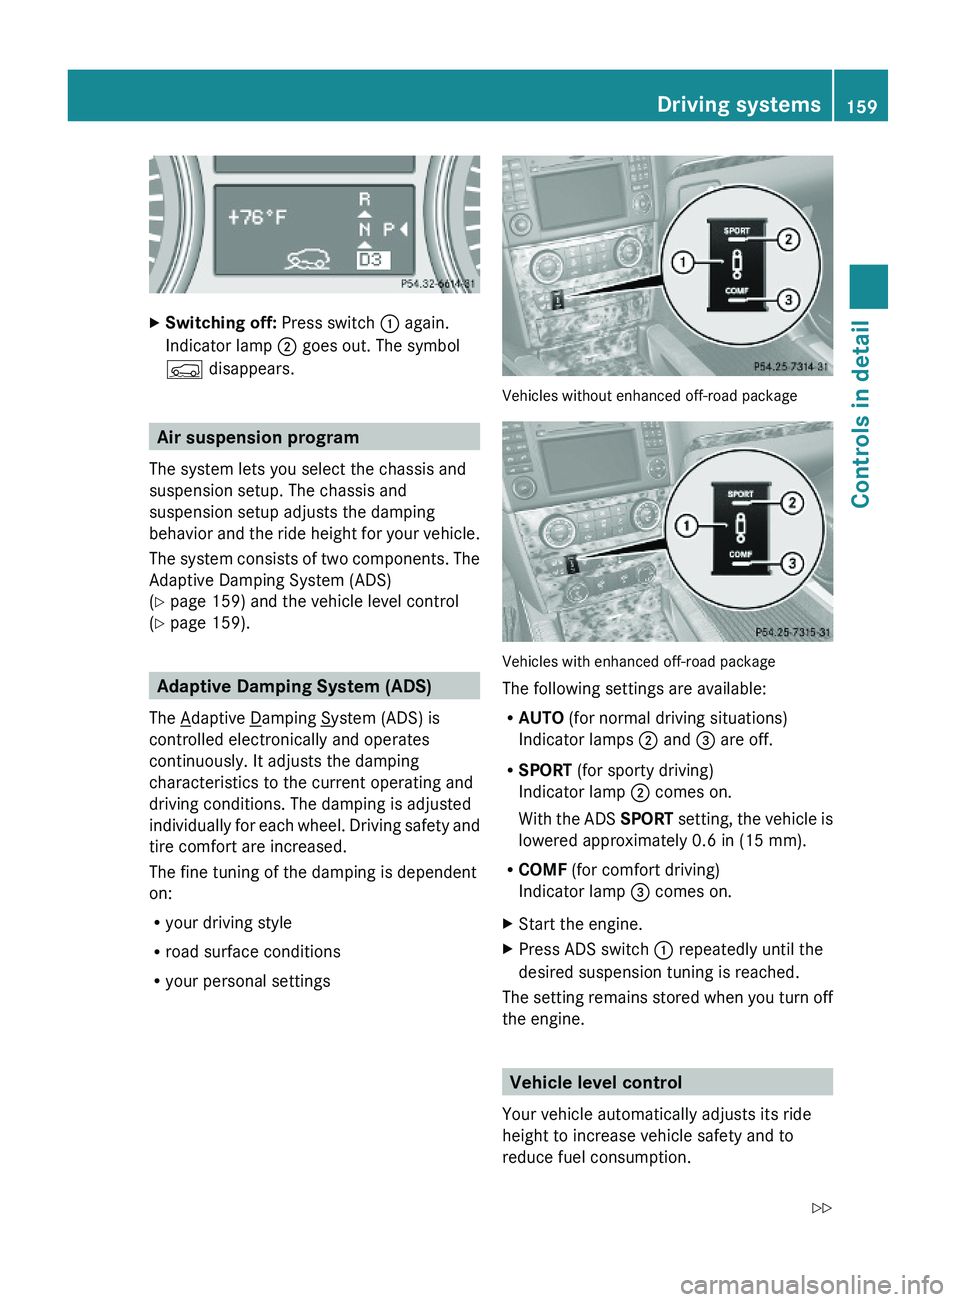
Vehicles without enhanced off-road package
Vehicles with enhanced off-road package
The following settings are available:
RAUTO (for normal driving situations)
Indicator lamps ; and = are off.
RSPORT (for sporty driving)
Indicator lamp ; comes on.
With the ADS SPORT setting, the vehicle is
lowered approximately 0.6 in (15 mm).
RCOMF (for comfort driving)
Indicator lamp = comes on.
XStart the engine.XPress ADS switch : repeatedly until the
desired suspension tuning is reached.
The setting remains stored when you turn off
the engine.
Vehicle level control
Your vehicle automatically adjusts its ride
height to increase vehicle safety and to
reduce fuel consumption.
Driving systems159Controls in detailX164_AKB; 5; 31, en-USd2ureepe,Version: 2.11.8.12009-09-11T12:30:16+02:00 - Seite 159Z
Page 163 of 380
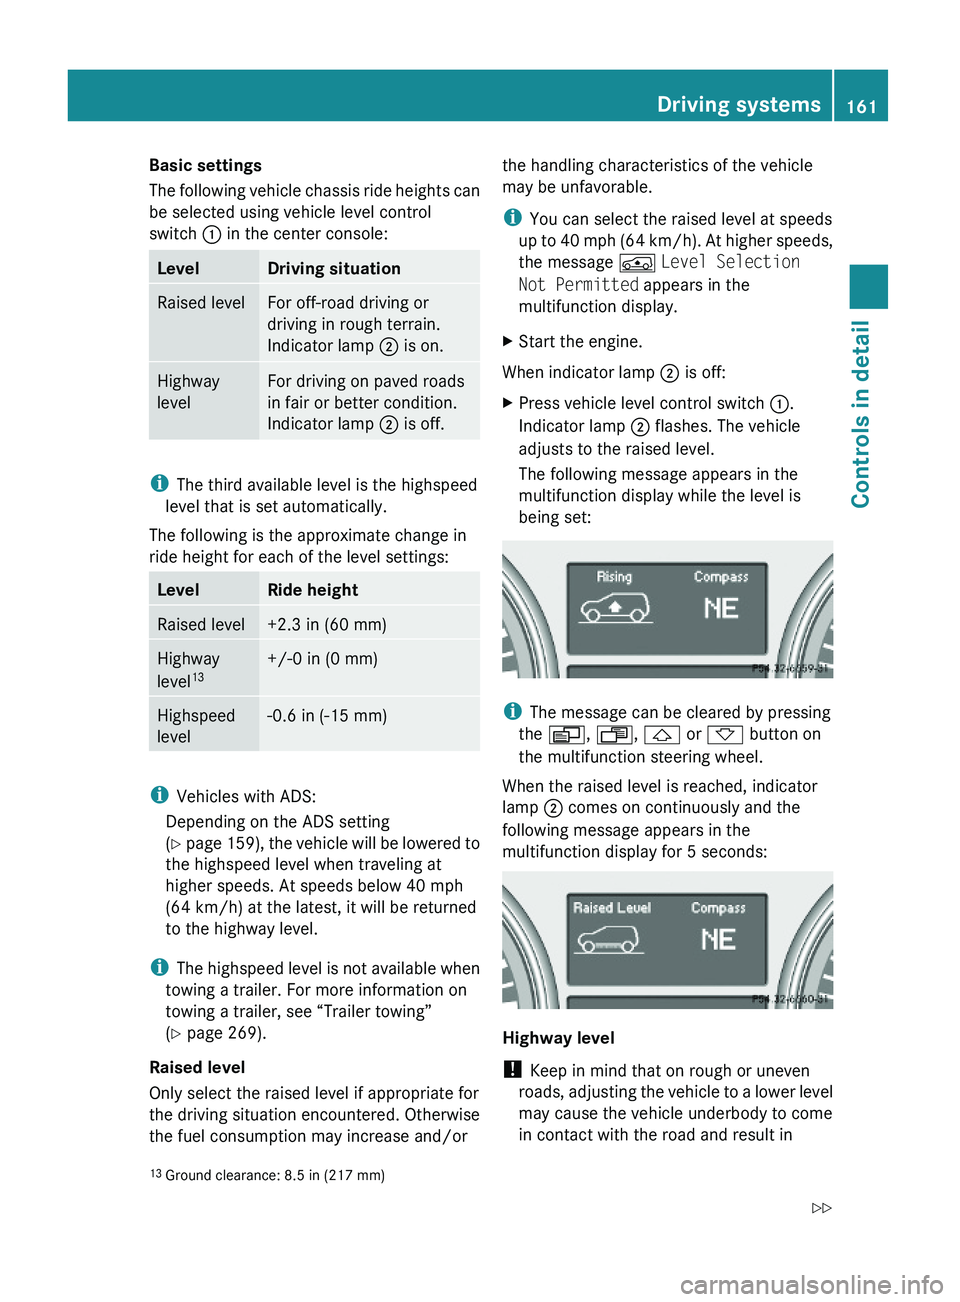
Basic settings
The following vehicle chassis ride heights can
be selected using vehicle level control
switch : in the center console:
LevelDriving situationRaised levelFor off-road driving or
driving in rough terrain.
Indicator lamp ; is on.
Highway
level
For driving on paved roads
in fair or better condition.
Indicator lamp ; is off.
iThe third available level is the highspeed
level that is set automatically.
The following is the approximate change in
ride height for each of the level settings:
LevelRide heightRaised level+2.3 in (60 mm)Highway
level13+/-0 in (0 mm)Highspeed
level
-0.6 in (-15 mm)
iVehicles with ADS:
Depending on the ADS setting
(Y page 159), the vehicle will be lowered to
the highspeed level when traveling at
higher speeds. At speeds below 40 mph
(64 km/h) at the latest, it will be returned
to the highway level.
iThe highspeed level is not available when
towing a trailer. For more information on
towing a trailer, see “Trailer towing”
(Y page 269).
Raised level
Only select the raised level if appropriate for
the driving situation encountered. Otherwise
the fuel consumption may increase and/or
the handling characteristics of the vehicle
may be unfavorable.
iYou can select the raised level at speeds
up to 40 mph (64 km/h). At higher speeds,
the message Á Level Selection
Not Permitted appears in the
multifunction display.
XStart the engine.
When indicator lamp ; is off:
XPress vehicle level control switch :.
Indicator lamp ; flashes. The vehicle
adjusts to the raised level.
The following message appears in the
multifunction display while the level is
being set:
iThe message can be cleared by pressing
the V, U, & or * button on
the multifunction steering wheel.
When the raised level is reached, indicator
lamp ; comes on continuously and the
following message appears in the
multifunction display for 5 seconds:
Highway level
! Keep in mind that on rough or uneven
roads, adjusting the vehicle to a lower level
may cause the vehicle underbody to come
in contact with the road and result in
13Ground clearance: 8.5 in (217 mm)Driving systems161Controls in detailX164_AKB; 5; 31, en-USd2ureepe,Version: 2.11.8.12009-09-11T12:30:16+02:00 - Seite 161Z
Page 165 of 380
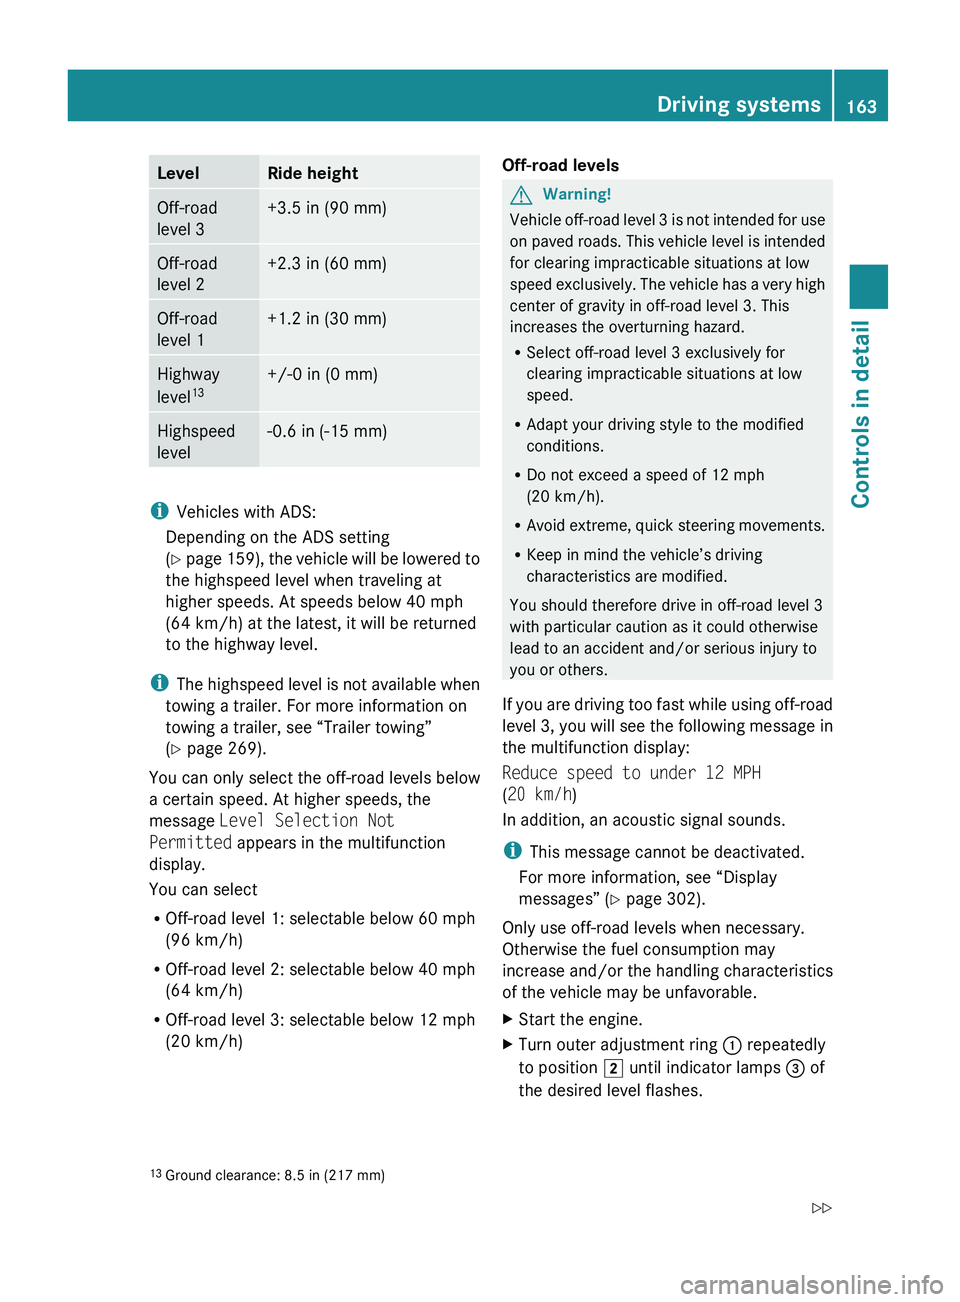
LevelRide heightOff-road
level 3+3.5 in (90 mm)Off-road
level 2+2.3 in (60 mm)Off-road
level 1+1.2 in (30 mm)Highway
level 13+/-0 in (0 mm)Highspeed
level-0.6 in (-15 mm)
i Vehicles with ADS:
Depending on the ADS setting
( Y page 159), the vehicle will be lowered to
the highspeed level when traveling at
higher speeds. At speeds below 40 mph
(64 km/h) at the latest, it will be returned
to the highway level.
i The highspeed level is not available when
towing a trailer. For more information on
towing a trailer, see “Trailer towing”
( Y page 269).
You can only select the off-road levels below
a certain speed. At higher speeds, the
message Level Selection Not
Permitted appears in the multifunction
display.
You can select
R Off-road level 1: selectable below 60 mph
(96 km/h)
R Off-road level 2: selectable below 40 mph
(64 km/h)
R Off-road level 3: selectable below 12 mph
(20 km/h)
Off-road levelsGWarning!
Vehicle off-road level 3 is not intended for use
on paved roads. This vehicle level is intended
for clearing impracticable situations at low
speed exclusively. The vehicle has a very high
center of gravity in off-road level 3. This
increases the overturning hazard.
R Select off-road level 3 exclusively for
clearing impracticable situations at low
speed.
R Adapt your driving style to the modified
conditions.
R Do not exceed a speed of 12 mph
(20 km/h).
R Avoid extreme, quick steering movements.
R Keep in mind the vehicle’s driving
characteristics are modified.
You should therefore drive in off-road level 3
with particular caution as it could otherwise
lead to an accident and/or serious injury to
you or others.
If you are driving too fast while using off-road
level 3, you will see the following message in
the multifunction display:
Reduce speed to under 12 MPH
( 20 km/h )
In addition, an acoustic signal sounds.
i This message cannot be deactivated.
For more information, see “Display
messages” ( Y page 302).
Only use off-road levels when necessary.
Otherwise the fuel consumption may
increase and/or the handling characteristics
of the vehicle may be unfavorable.
XStart the engine.XTurn outer adjustment ring : repeatedly
to position 2 until indicator lamps = of
the desired level flashes.13 Ground clearance: 8.5 in (217 mm)Driving systems163Controls in detailX164_AKB; 5; 31, en-USd2ureepe,Version: 2.11.8.12009-09-11T12:30:16+02:00 - Seite 163Z
Page 197 of 380
The cargo compartment is the preferred place
to carry objects. Always use cargo tie-down
rings, and if so equipped, always use the cargo
net when transporting cargo.
Never drive a vehicle with the tailgate open.
Deadly carbon monoxide (CO) gases may
enter vehicle interior resulting in
unconsciousness and death.
Load distribution
The Gross Vehicle Weight (GVW) is the weight
of the vehicle including:Rfuel
Rtools
Rspare wheel
Rinstalled accessories
Rpassengers
Rluggage/cargo
It must never exceed the load limit and the
Gross Vehicle Weight Rating (GVWR) for your
vehicle. The load limit and the GVWR are
specified on the placard located on the
driver’s door B-pillar (Y page 242).
In addition, the load must be distributed so
that the weight on each axle never exceeds
the Gross Axle Weight Rating (GAWR) for the
front and rear axle. The GVWR and GAWR for
your vehicle are indicated on the certification
label located on the driver’s door B-pillar
(Y page 242).
For more information, see “Tire and Loading
Information” (Y page 242).
The handling characteristics of a fully loaded
vehicle depend greatly on the load
distribution. It is therefore recommended to
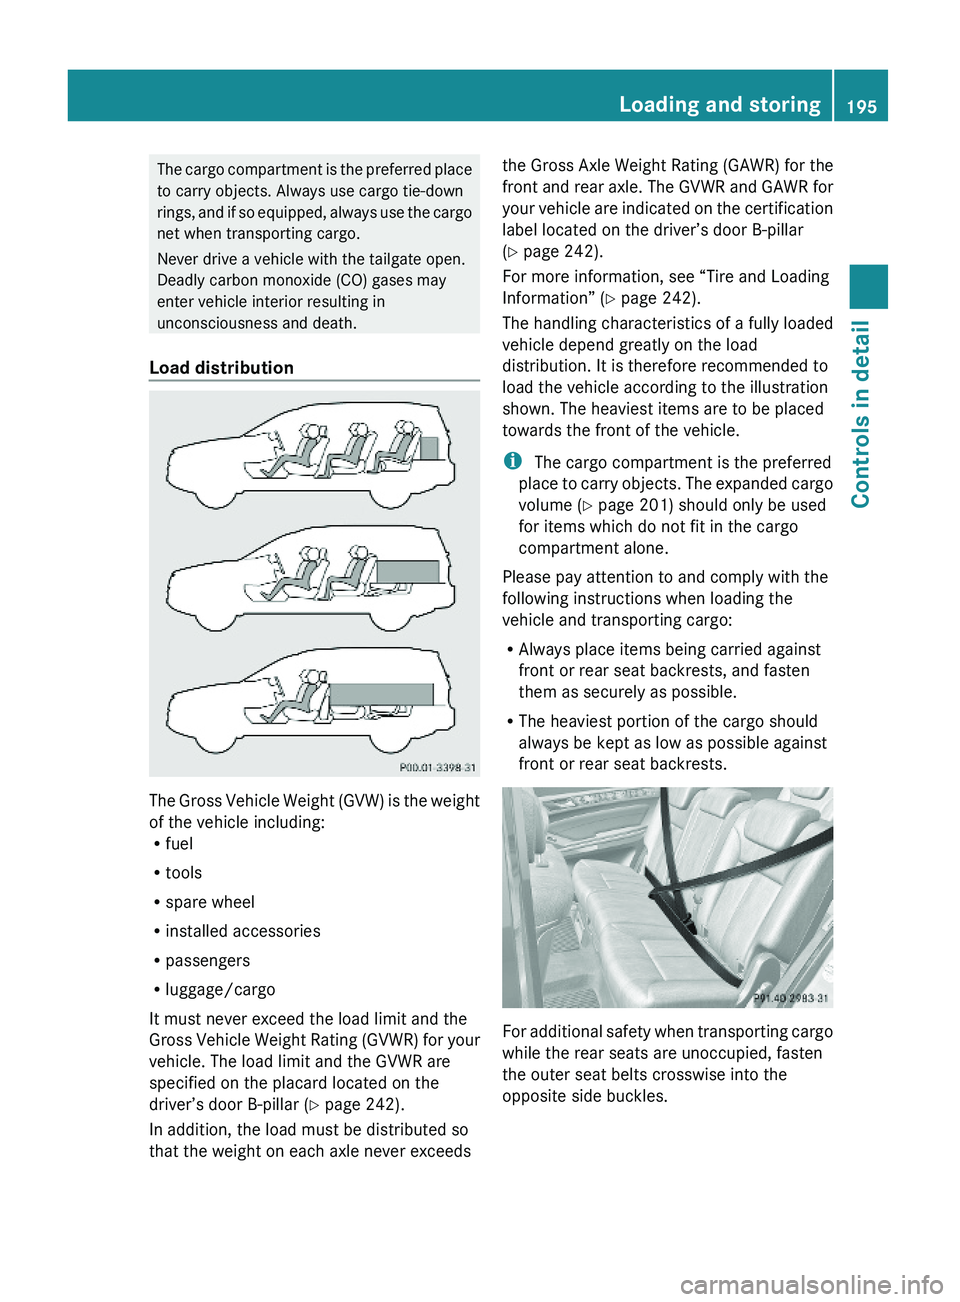
load the vehicle according to the illustration
shown. The heaviest items are to be placed
towards the front of the vehicle.
i The cargo compartment is the preferred
place to carry objects. The expanded cargo
volume (Y page 201) should only be used
for items which do not fit in the cargo
compartment alone.
Please pay attention to and comply with the
following instructions when loading the
vehicle and transporting cargo:
RAlways place items being carried against
front or rear seat backrests, and fasten
them as securely as possible.
RThe heaviest portion of the cargo should
always be kept as low as possible against
front or rear seat backrests.
For additional safety when transporting cargo
while the rear seats are unoccupied, fasten
the outer seat belts crosswise into the
opposite side buckles.
Loading and storing195Controls in detailX164_AKB; 5; 31, en-USd2ureepe,Version: 2.11.8.12009-09-11T12:30:16+02:00 - Seite 195Z
Page 219 of 380
XPress and hold Roadside Assistance
button : for longer than 2 seconds.
A call to a Mercedes-Benz Roadside
Assistance dispatcher will be initiated. The
indicator lamp in Roadside Assistance
button : will flash while the call is in
progress. The message Connecting
Call will appear in the multifunction
display and the COMAND system is muted.
When the connection is established, the
message Call Connected appears in the
multifunction display. The Tele Aid system will
transmit data generating the vehicle
identification number, model, color and
location (subject to availability of cellular and
GPS signals).
i The COMAND system display indicates
that a Tele Aid call is in progress. While the
call is connected you can change to the
navigation menu by pressing the NAVI
button on the COMAND system. Spoken
commands are not available.
A voice connection between the Roadside
Assistance dispatcher and the occupants of
the vehicle will be established.
XDescribe the nature of the need for
assistance.
The Mercedes-Benz Roadside Assistance
dispatcher will either dispatch a qualified
Mercedes-Benz technician or arrange to tow
your vehicle to the nearest authorized
Mercedes-Benz Center. For services such as
labor and/or towing, charges may apply.
Refer to the Roadside Assistance manual for
more information.
Sign and Drive services (USA only):
Services such as a jump start, a few gallons
of fuel or the replacement of a flat tire with
the vehicle spare wheel are obtainable at no
charge.
iIf the indicator lamp in Roadside
Assistance button : is flashing
continuously and there was no voice
connection to the Customer Assistance
Center established, then the Tele Aid
system could not initiate a Roadside
Assistance call (e.g. the relevant cellular
phone network is not available). The
message Call Failed appears in the
multifunction display.
XTerminating calls: Press button ~ on
the multifunction steering wheel.
or
XPress the respective button for ending a
telephone call on the COMAND system.
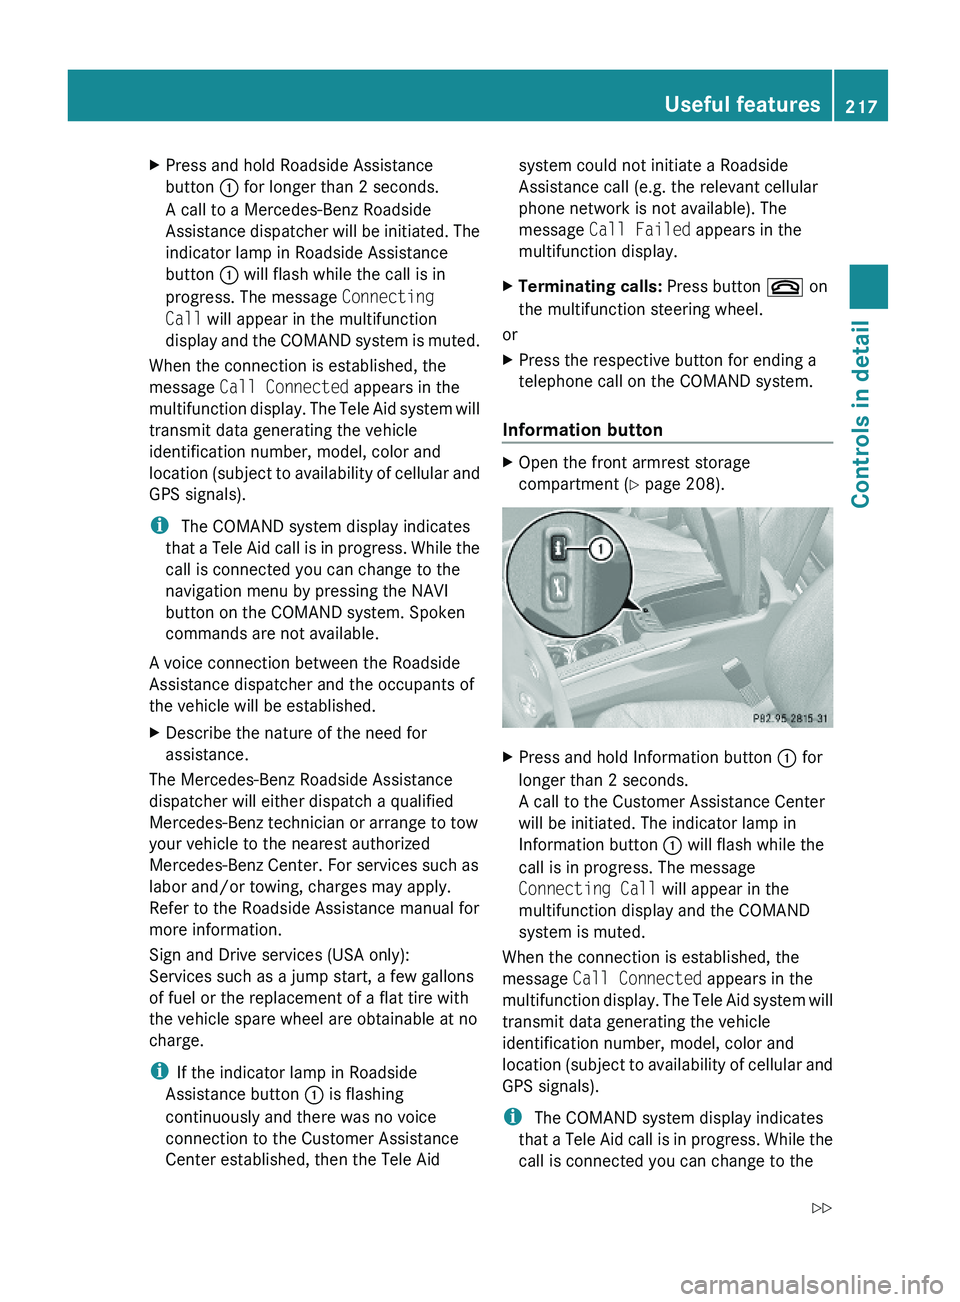
Information button
XOpen the front armrest storage
compartment (Y page 208).
XPress and hold Information button : for
longer than 2 seconds.
A call to the Customer Assistance Center
will be initiated. The indicator lamp in
Information button : will flash while the
call is in progress. The message
Connecting Call will appear in the
multifunction display and the COMAND
system is muted.
When the connection is established, the
message Call Connected appears in the
multifunction display. The Tele Aid system will
transmit data generating the vehicle
identification number, model, color and
location (subject to availability of cellular and
GPS signals).
i The COMAND system display indicates
that a Tele Aid call is in progress. While the
call is connected you can change to the
Useful features217Controls in detailX164_AKB; 5; 31, en-USd2ureepe,Version: 2.11.8.12009-09-11T12:30:16+02:00 - Seite 217Z