2010 MERCEDES-BENZ GL ECO mode
[x] Cancel search: ECO modePage 67 of 380
GWarning!
Switch on the ESP® immediately if the
aforementioned circumstances do not apply
anymore. Otherwise the ESP® will not
stabilize the vehicle when it is starting to skid
or a wheel is spinning.
When you switch off the ESP®,
Rthe ESP® does not stabilize the vehicle
Rthe engine output is not limited, which
allows the drive wheels to spin and thus cut
into surfaces for better grip
Rthe 4-ETS will still apply the brakes to a
spinning wheel
Rthe ESP® continues to operate when you
are braking
Rthe cruise control or the Distronic system
cannot be activated
Rthe cruise control or the Distronic system
switch off if activated
iWhen the ESP® is switched off and one or
more drive wheels are spinning, the ESP®
warning lamp d in the instrument
cluster flashes. However, the ESP® will
then not stabilize the vehicle.
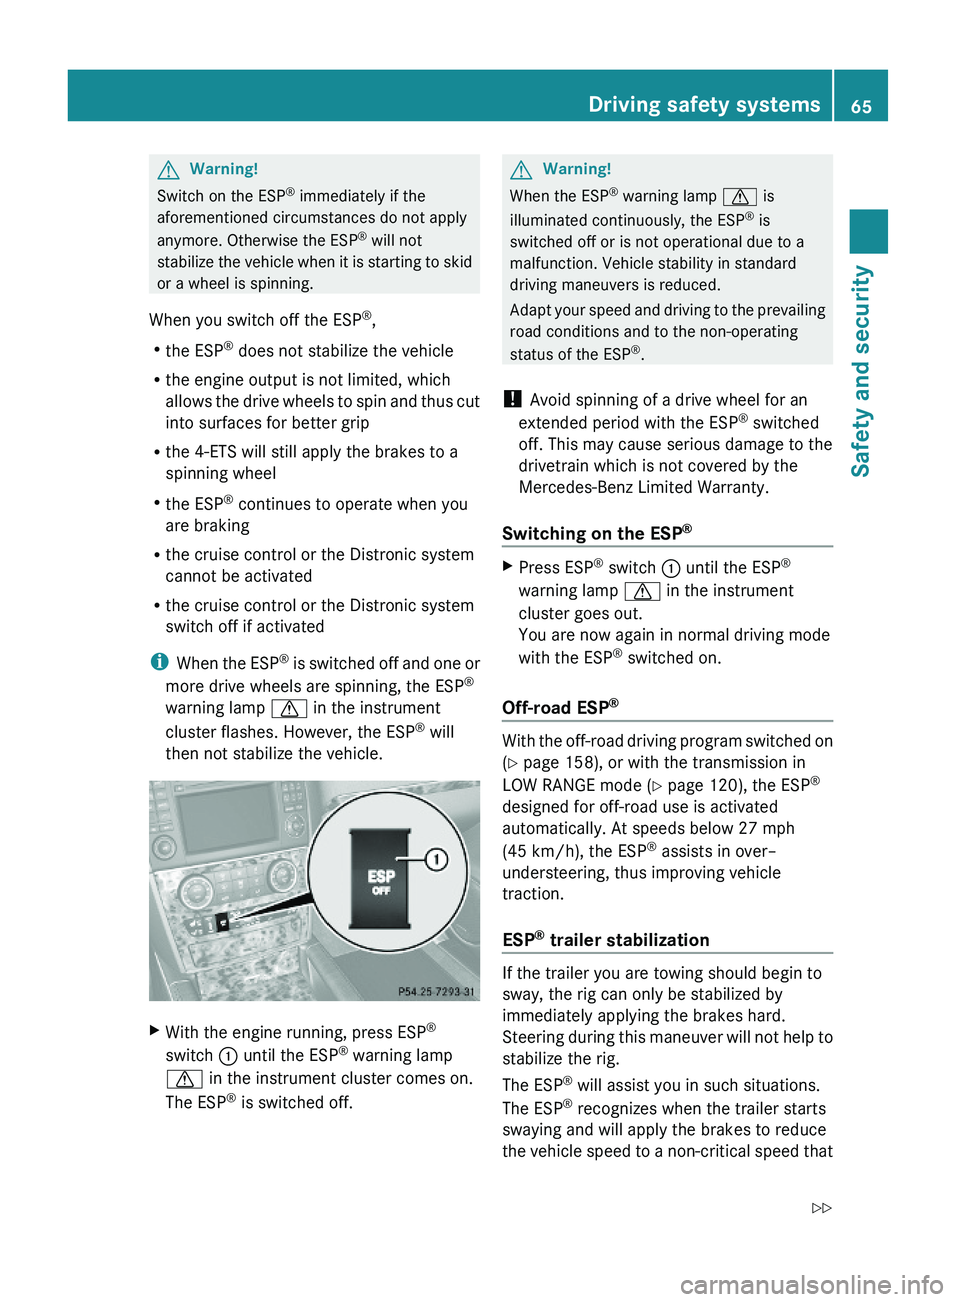
XWith the engine running, press ESP®
switch : until the ESP® warning lamp
d in the instrument cluster comes on.
The ESP® is switched off.
GWarning!
When the ESP® warning lamp d is
illuminated continuously, the ESP® is
switched off or is not operational due to a
malfunction. Vehicle stability in standard
driving maneuvers is reduced.
Adapt your speed and driving to the prevailing
road conditions and to the non-operating
status of the ESP®.
! Avoid spinning of a drive wheel for an
extended period with the ESP® switched
off. This may cause serious damage to the
drivetrain which is not covered by the
Mercedes-Benz Limited Warranty.
Switching on the ESP®
XPress ESP® switch : until the ESP®
warning lamp d in the instrument
cluster goes out.
You are now again in normal driving mode
with the ESP® switched on.
Off-road ESP®
With the off-road driving program switched on
(Y page 158), or with the transmission in
LOW RANGE mode (Y page 120), the ESP®
designed for off-road use is activated
automatically. At speeds below 27 mph
(45 km/h), the ESP® assists in over–
understeering, thus improving vehicle
traction.
ESP® trailer stabilization
If the trailer you are towing should begin to
sway, the rig can only be stabilized by
immediately applying the brakes hard.
Steering during this maneuver will not help to
stabilize the rig.
The ESP® will assist you in such situations.
The ESP® recognizes when the trailer starts
swaying and will apply the brakes to reduce
the vehicle speed to a non-critical speed that
Driving safety systems65Safety and securityX164_AKB; 5; 31, en-USd2ureepe,Version: 2.11.8.12009-09-11T12:30:16+02:00 - Seite 65Z
Page 99 of 380
Storing positions into memory
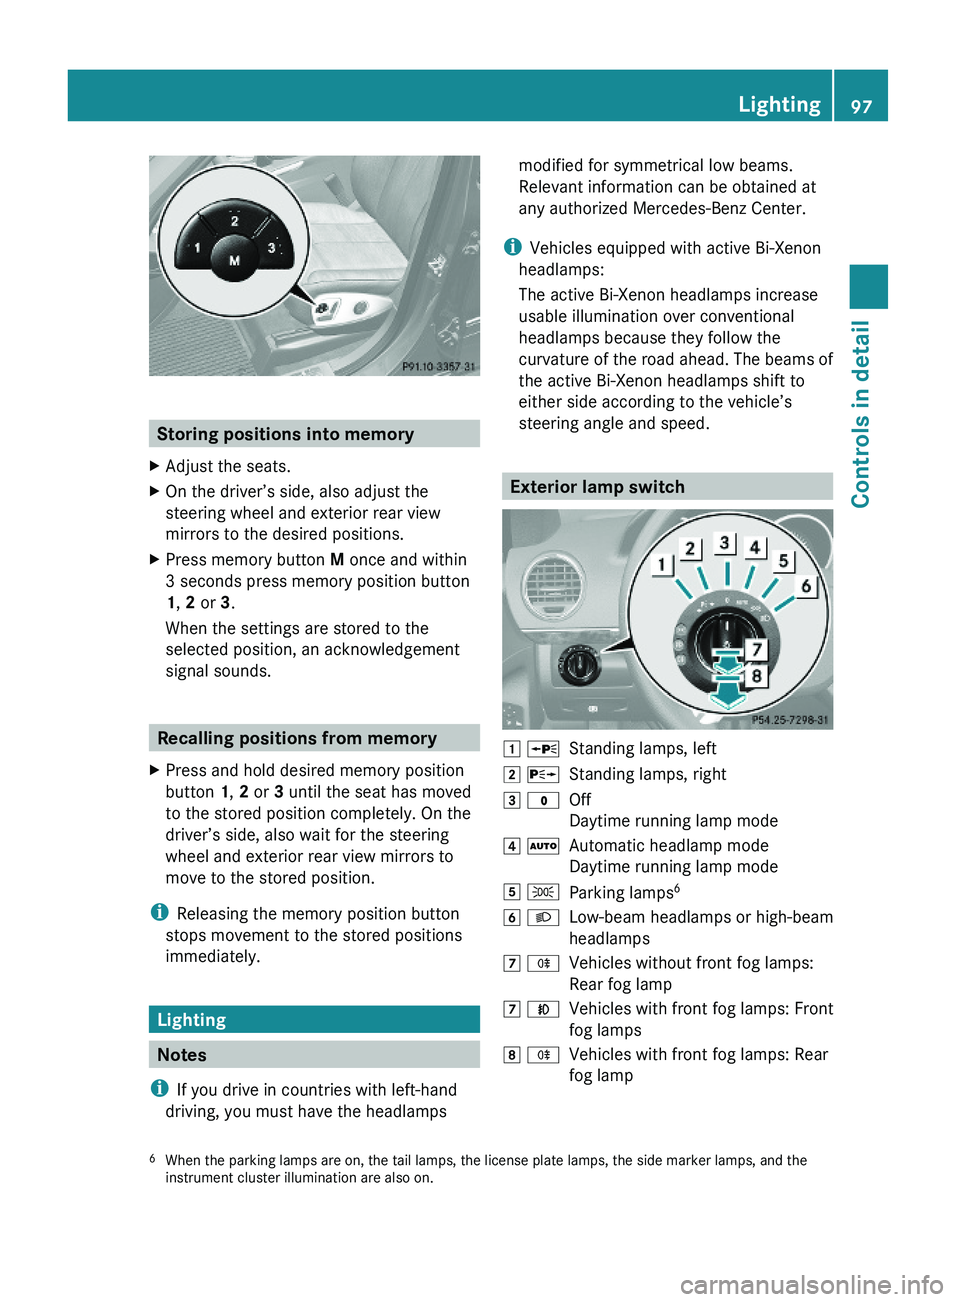
XAdjust the seats.XOn the driver’s side, also adjust the
steering wheel and exterior rear view
mirrors to the desired positions.
XPress memory button M once and within
3 seconds press memory position button
1, 2 or 3.
When the settings are stored to the
selected position, an acknowledgement
signal sounds.
Recalling positions from memory
XPress and hold desired memory position
button 1, 2 or 3 until the seat has moved
to the stored position completely. On the
driver’s side, also wait for the steering
wheel and exterior rear view mirrors to
move to the stored position.
iReleasing the memory position button
stops movement to the stored positions
immediately.
Lighting
Notes
iIf you drive in countries with left-hand
driving, you must have the headlamps
modified for symmetrical low beams.
Relevant information can be obtained at
any authorized Mercedes-Benz Center.
iVehicles equipped with active Bi-Xenon
headlamps:
The active Bi-Xenon headlamps increase
usable illumination over conventional
headlamps because they follow the
curvature of the road ahead. The beams of
the active Bi-Xenon headlamps shift to
either side according to the vehicle’s
steering angle and speed.
Exterior lamp switch
1 WStanding lamps, left2 XStanding lamps, right3 $Off
Daytime running lamp mode
4 ÃAutomatic headlamp mode
Daytime running lamp mode
5 TParking lamps66 LLow-beam headlamps or high-beam
headlamps
7 RVehicles without front fog lamps:
Rear fog lamp
7 NVehicles with front fog lamps: Front
fog lamps
8 RVehicles with front fog lamps: Rear
fog lamp6When the parking lamps are on, the tail lamps, the license plate lamps, the side marker lamps, and theinstrument cluster illumination are also on.
Lighting97Controls in detailX164_AKB; 5; 31, en-USd2ureepe,Version: 2.11.8.12009-09-11T12:30:16+02:00 - Seite 97Z
Page 102 of 380
Vehicles with front fog lampsXSwitching on front fog lamps: Pull out the
exterior lamp switch to first stop.
The green indicator lamp N in the
exterior lamp switch comes on.
XSwitching on rear fog lamp: Pull out the
exterior lamp switch to second stop.
The rear fog lamp, the front fog lamps, the
green and the yellow indicator lamp R
in the exterior lamp switch come on.
XSwitching off front fog lamps/rear fog
lamp: Push in the exterior lamp switch to
its stop.
Vehicles without front fog lamps
XSwitching on rear fog lamp: Pull out the
exterior lamp switch to its stop.
The rear fog lamp and the yellow indicator
lamp R in the exterior lamp switch
come on.
XSwitching off rear fog lamp: Push in the
exterior lamp switch to its stop.
Locator lighting and night security
illumination
Locator lighting and night security
illumination are described in the “Control
system” section, see “Switching locator
lighting on or off” (Y page 136) and
“Switching night security illumination
(Headlamps delayed shut-off feature) on or
off” (Y page 137).
Combination switch
Turn signals
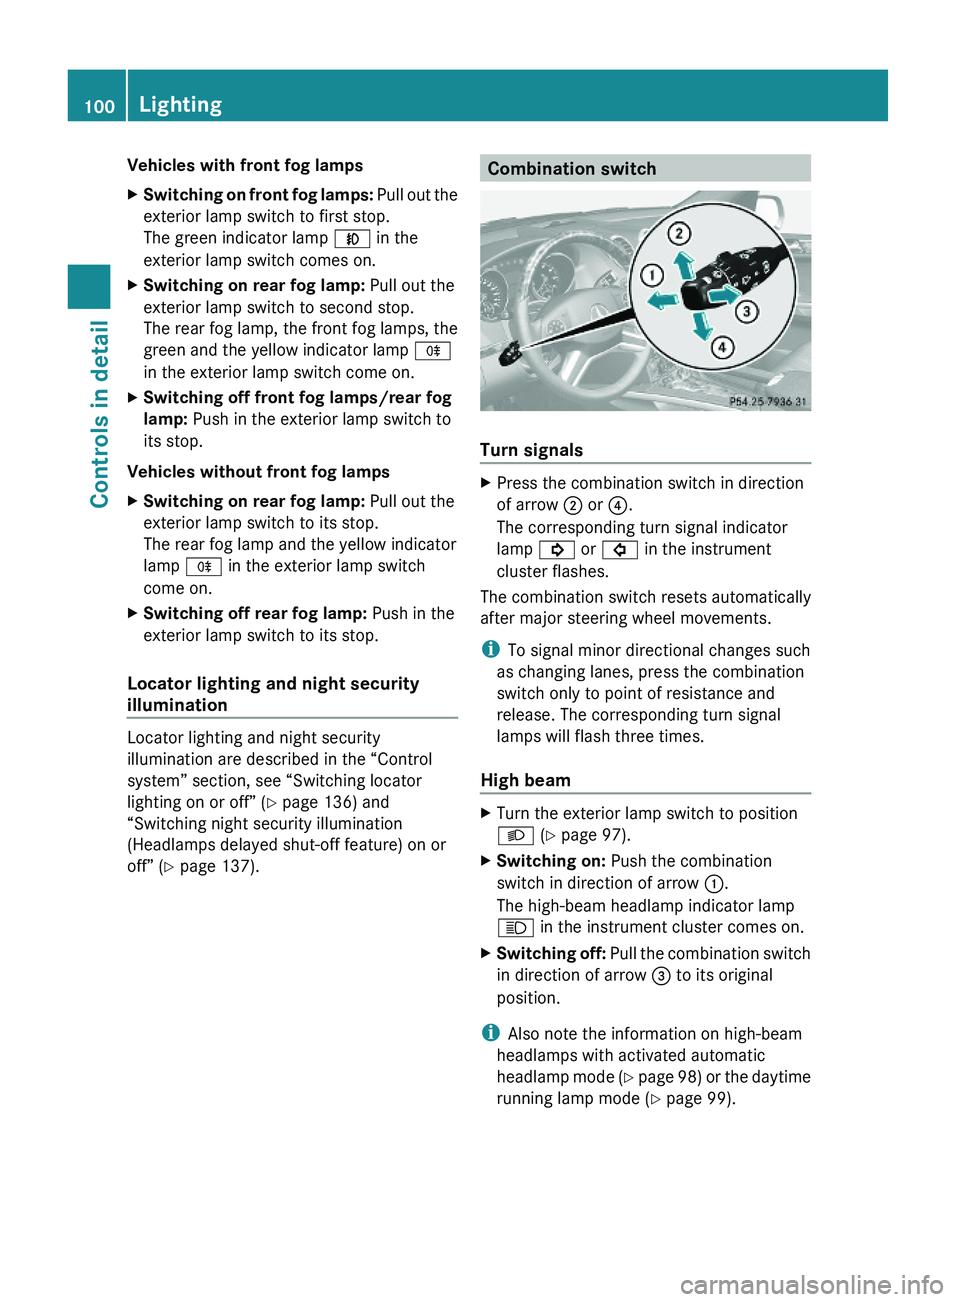
XPress the combination switch in direction
of arrow ; or ?.
The corresponding turn signal indicator
lamp ! or # in the instrument
cluster flashes.
The combination switch resets automatically
after major steering wheel movements.
iTo signal minor directional changes such
as changing lanes, press the combination
switch only to point of resistance and
release. The corresponding turn signal
lamps will flash three times.
High beam
XTurn the exterior lamp switch to position
L (Y page 97).
XSwitching on: Push the combination
switch in direction of arrow :.
The high-beam headlamp indicator lamp
K in the instrument cluster comes on.
XSwitching off: Pull the combination switch
in direction of arrow = to its original
position.
iAlso note the information on high-beam
headlamps with activated automatic
headlamp mode (Y page 98) or the daytime
running lamp mode (Y page 99).
100LightingControls in detail
X164_AKB; 5; 31, en-USd2ureepe,Version: 2.11.8.12009-09-11T12:30:16+02:00 - Seite 100
Page 107 of 380
For information on filling up the washer
reservoir, see “Washer system and headlamp
cleaning system” ( Y page 232).
Problems with wipers
! If anything blocks the wipers (leaves,
snow, etc.), switch them off immediately.
For safety reasons, do the following before
attempting to remove any blockage:
R Stop the vehicle in a safe location.
R Remove the SmartKey from the starter
switch.
or
R Turn off the engine by pressing the
KEYLESS-GO start/stop button and
open the driver’s door (with the driver’s
door open, starter switch is in position
0 , same as with SmartKey removed from
starter switch).
R Engage the parking brake.
R Remove blockage.
R Turn the wipers on again.
If the windshield wipers fail to function at
all with the combination switch in position
Ä or Å ,
R set the combination switch to the next
higher wiper speed
R have the windshield wipers checked at
the nearest authorized Mercedes-Benz
Center
Power windows
Opening and closing
The door windows and the hinged quarter
windows are opened and closed electrically.
The switches for all door windows and the
hinged quarter windows are located on the
driver’s door control panel. The switches for
the respective door windows are located on
the front passenger door and the rear doors.
The hinged quarter windows can be operated
from the driver’s seat only.
i Operating the rear door windows from
the rear is not possible when you activate
the override switch ( Y page 60).GObserve Safety notes, see page 55.GWarning!
When opening or closing the windows, make
sure there is no danger of anyone being
harmed by the opening/closing procedure.
The door windows are equipped with the
express operation and automatic reversal
function. If in express operation mode a door
window encounters an obstruction that
blocks its path, the automatic reversal
function will stop the door window and open
it slightly.
The door windows operate differently when
the switch is pulled and held. See the “Closing
when a door window is blocked” section in
this chapter for details.
The closing of a door window can be
immediately halted by releasing the switch or,
if the switch was pulled past the resistance
point and released, by either pressing or
pulling the respective switch.
The closing of the hinged quarter windows can
be immediately halted by pressing or pulling
the switch.
If a window encounters an obstruction that
blocks its path in a circumstance where you
are closing the windows by pressing and
holding button & on the SmartKey or by
pressing and holding the lock button (vehicles
with KEYLESS-GO) on an outside door handle,
the automatic reversal function will not
operate.
Activate the override switch when children
are riding in the back seats of the vehicle. The
children may otherwise injure themselves,
e.g. by becoming trapped in the window
opening.
Power windows105Controls in detailX164_AKB; 5; 31, en-USd2ureepe,Version: 2.11.8.12009-09-11T12:30:16+02:00 - Seite 105Z
Page 121 of 380
iYou cannot shift with the steering wheel
gearshift control when the automatic
transmission is in park position P, neutral
position N, or reverse gear R.
Limiting gear range GWarning!
On slippery road surfaces, never downshift in
order to obtain braking action. This could
result in drive wheel slip and reduced vehicle
control. Your vehicle’s ABS will not prevent
this type of loss of control.
XBriefly pull left gearshift control :.
The automatic transmission will shift into
the next lower gear as permitted by the
shift program. This action simultaneously
limits the gear range of the automatic
transmission.
i To avoid overrevving the engine when
downshifting, the automatic transmission
will not shift into a lower gear if the engine’s
maximum speed would be exceeded.
Extending gear range
XBriefly pull right gearshift control ;.
The automatic transmission will shift into
the next higher gear as permitted by the
shift program. This action simultaneously
extends the gear range of the automatic
transmission.
i If you press on the accelerator pedal
when the engine has reached the
revolution limit of the current gear range,
the automatic transmission will upshift
beyond any gear range limit selected.
Canceling gear range limit
XPull and hold right gearshift control ; until
the gear range indicator disappears from
the multifunction display.
The automatic transmission will shift from
the current gear range directly into drive
position D.Shifting into optimal gear range XPull and hold left gearshift control :.
The automatic transmission will select the
gear range suited for optimal acceleration
and deceleration automatically. This will
involve shifting down one or more gears.
Emergency operation (limp-home
mode)
If vehicle acceleration becomes less
responsive or sluggish or the automatic
transmission no longer shifts, the automatic
transmission is most likely operating in limp-
home (emergency operation) mode. In this
mode only second gear and reverse gear R
can be selected.
XStop the vehicle in a safe location.XShift the automatic transmission into park
position P.XTurn off the engine.XWait at least 10 seconds before restarting.XRestart the engine.XShift the automatic transmission into drive
position D (for second gear) or reverse gear
R .XHave the automatic transmission checked
at an authorized Mercedes-Benz Center as
soon as possible.
Transfer case
The vehicle is equipped with all-wheel drive
(4MATIC). Both the front and rear axles are
powered at all times when the vehicle is being
operated.
! Only conduct operational or performance
tests on a two-axle dynamometer. If such
tests are necessary, contact an authorized
Mercedes-Benz Center. You could
otherwise seriously damage the brake
system or the transfer case which is not
Transfer case119Controls in detailX164_AKB; 5; 31, en-USd2ureepe,Version: 2.11.8.12009-09-11T12:30:16+02:00 - Seite 119Z
Page 122 of 380
covered by the Mercedes-Benz Limited
Warranty.
! Because the ESP ®
operates
automatically, the engine and ignition must
be shut off (SmartKey in starter switch
position 0 or 1 or KEYLESS-GO start/stop
button in position 0 or 1) when the parking
brake is being tested on a brake test
dynamometer. Such testing should be no
longer than 10 seconds.
Active braking action through the ESP ®
may otherwise seriously damage the brake
system which is not covered by the
Mercedes-Benz Limited Warranty.
LOW RANGE mode
The LOW RANGE mode is available on
vehicles with enhanced off-road package.
In the following situations you should switch
to the LOW RANGE mode:
R during off-road driving
R before driving through water
R when towing up or down on steep gradients
With LOW RANGE selected, the engine’s
power delivery and the shifting behavior of
the automatic transmission are adjusted.
Furthermore, the ABS, the ESP ®
, and the
4-ETS functions especially adapted to off-
road travel are activated.
For more information on off-road driving, see
“Off-road driving” ( Y page 262).
For information on driving safety systems
during LOW RANGE mode, see “Driving safety
systems” ( Y page 61).
Gear ranges
There are two possible settings.
HIGH
RANGERoad position for all normal
driving situations.
(LOW RANGE mode off)LOW
RANGEOff-road position for
traveling on rough terrain.
(LOW RANGE mode on)
Also use the off-road
position when driving on-
road on steep gradients,
especially when towing a
trailer.
LOW RANGE acts by raising
the engine’s gear ratio. The
vehicle travels at roughly
third the speed compared to
when in HIGH RANGE
position, leading to an
increase in the engine’s
drive power.GWarning!
Always wait until the procedure of shifting
from HIGH RANGE to LOW RANGE – and from
LOW RANGE to HIGH RANGE – has been
entirely completed. During this procedure do
not turn off the engine or shift the automatic
transmission into another gear.
If you do not wait until the shifting procedure
has been entirely completed then it might not
be correctly performed. The transfer case
might be in neutral, thus interrupting the
transfer of power between the engine and the
drive axle.
The vehicle is then freely movable, even if a
gear has been selected, and could
unintentionally be set into motion –
particularly on up – or downhill grades. This
could lead to an accident and cause injury to
yourself and others.
Please observe related messages appearing
in the multifunction display.
120Transfer caseControls in detail
X164_AKB; 5; 31, en-USd2ureepe,Version: 2.11.8.12009-09-11T12:30:16+02:00 - Seite 120
Page 126 of 380
menu, see the “Controls in detail” section
(Y page 131).
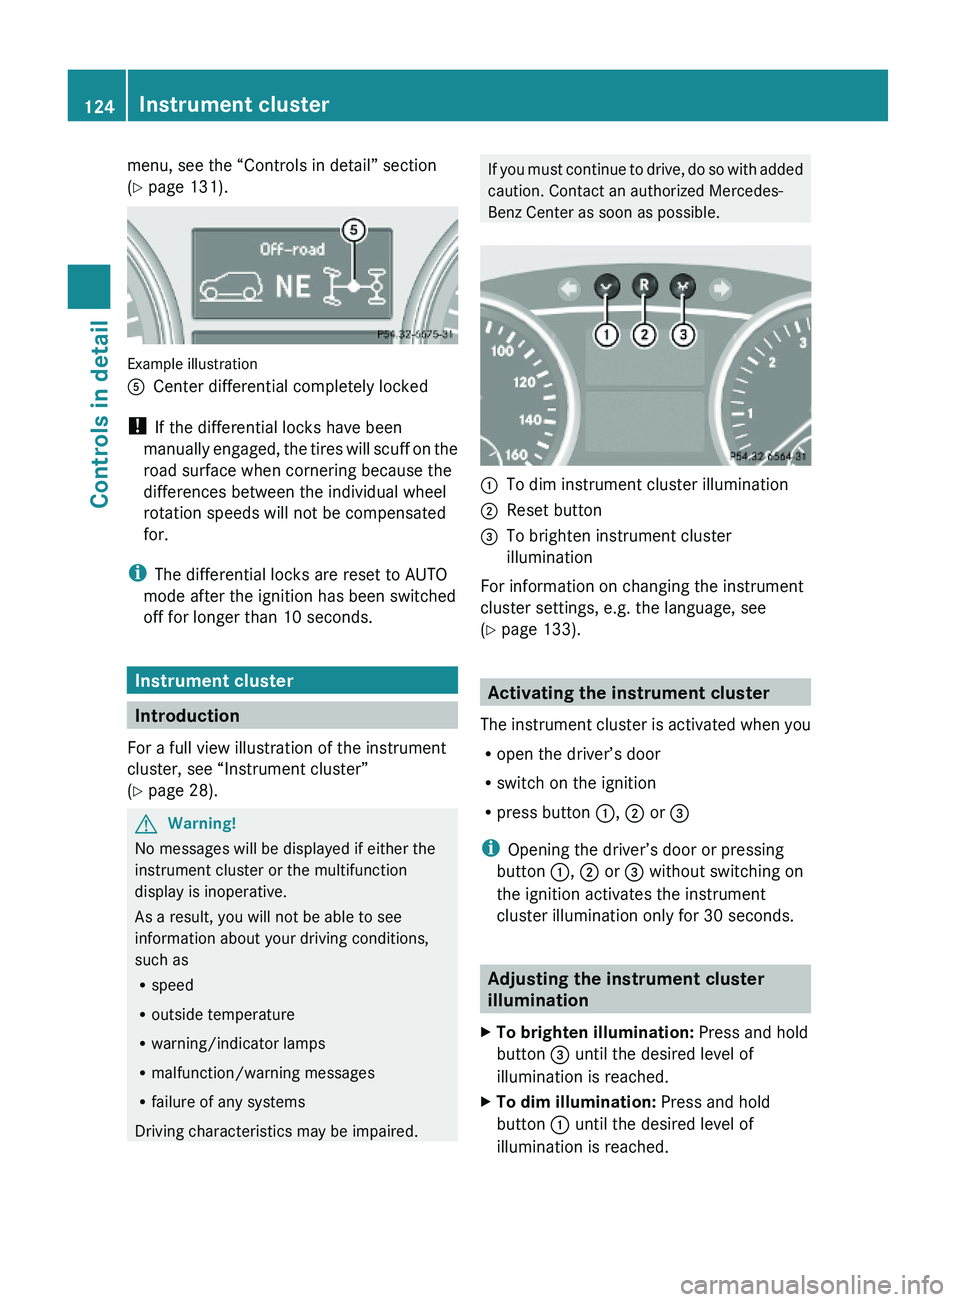
Example illustration
ACenter differential completely locked
! If the differential locks have been
manually engaged, the tires will scuff on the
road surface when cornering because the
differences between the individual wheel
rotation speeds will not be compensated
for.
iThe differential locks are reset to AUTO
mode after the ignition has been switched
off for longer than 10 seconds.
Instrument cluster
Introduction
For a full view illustration of the instrument
cluster, see “Instrument cluster”
(Y page 28).
GWarning!
No messages will be displayed if either the
instrument cluster or the multifunction
display is inoperative.
As a result, you will not be able to see
information about your driving conditions,
such as
Rspeed
Routside temperature
Rwarning/indicator lamps
Rmalfunction/warning messages
Rfailure of any systems
Driving characteristics may be impaired.
If you must continue to drive, do so with added
caution. Contact an authorized Mercedes-
Benz Center as soon as possible.
:To dim instrument cluster illumination;Reset button =To brighten instrument cluster
illumination
For information on changing the instrument
cluster settings, e.g. the language, see
(Y page 133).
Activating the instrument cluster
The instrument cluster is activated when you
Ropen the driver’s door
Rswitch on the ignition
Rpress button :, ; or =
iOpening the driver’s door or pressing
button :, ; or = without switching on
the ignition activates the instrument
cluster illumination only for 30 seconds.
Adjusting the instrument cluster
illumination
XTo brighten illumination: Press and hold
button = until the desired level of
illumination is reached.
XTo dim illumination: Press and hold
button : until the desired level of
illumination is reached.
124Instrument clusterControls in detail
X164_AKB; 5; 31, en-USd2ureepe,Version: 2.11.8.12009-09-11T12:30:16+02:00 - Seite 124
Page 135 of 380
approximately 5 seconds, the Settings
menu reappears in the multifunction display.
Submenus in the Settings menu
XPress button V or U repeatedly until
the Settings menu appears in the
multifunction display.
XPress button &.
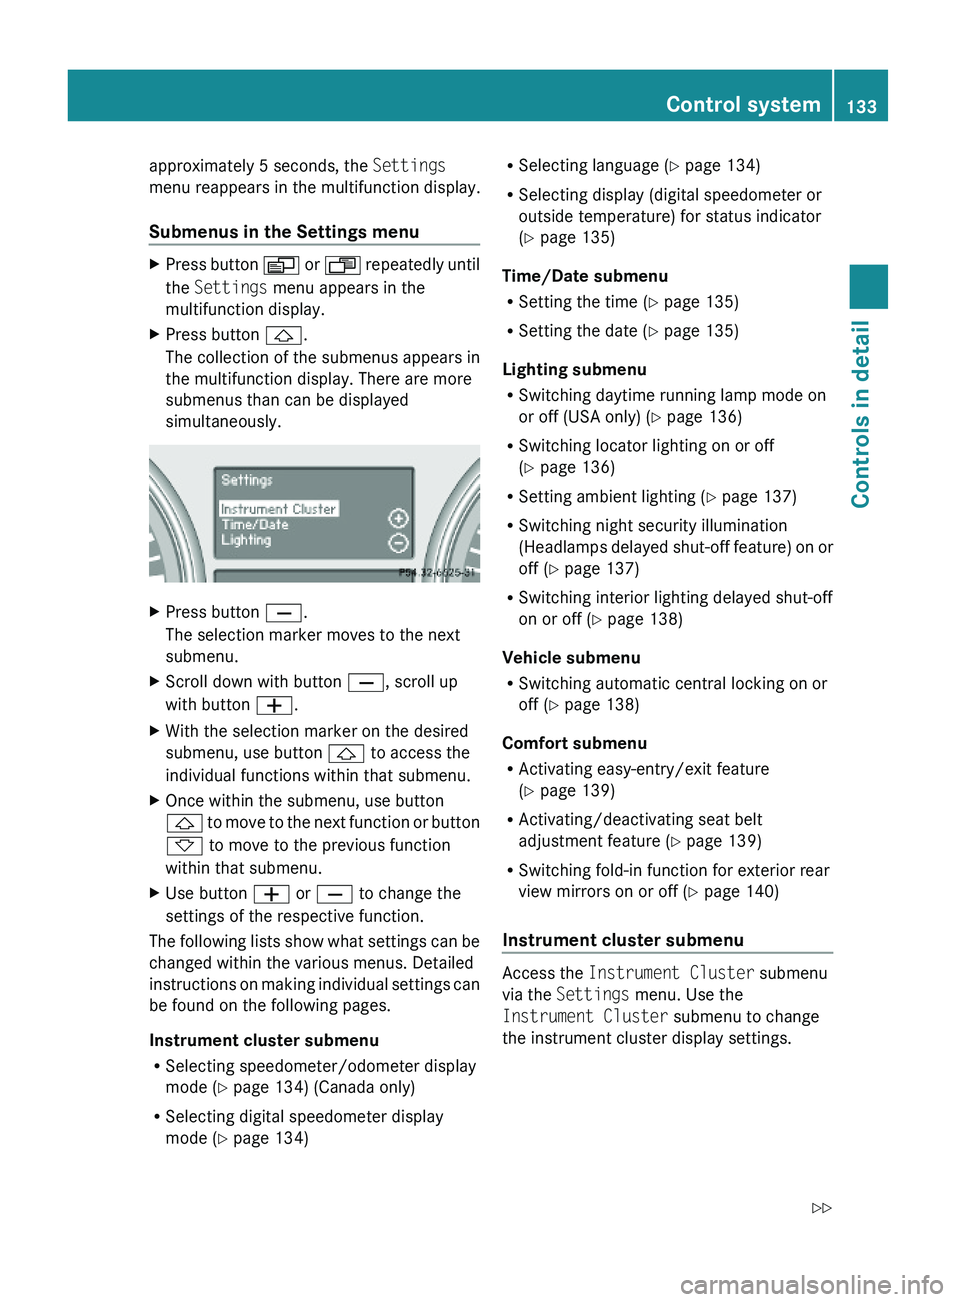
The collection of the submenus appears in
the multifunction display. There are more
submenus than can be displayed
simultaneously.
XPress button X.
The selection marker moves to the next
submenu.
XScroll down with button X, scroll up
with button W.
XWith the selection marker on the desired
submenu, use button & to access the
individual functions within that submenu.
XOnce within the submenu, use button
& to move to the next function or button
* to move to the previous function
within that submenu.
XUse button W or X to change the
settings of the respective function.
The following lists show what settings can be
changed within the various menus. Detailed
instructions on making individual settings can
be found on the following pages.
Instrument cluster submenu
RSelecting speedometer/odometer display
mode (Y page 134) (Canada only)
RSelecting digital speedometer display
mode (Y page 134)
RSelecting language (Y page 134)
RSelecting display (digital speedometer or
outside temperature) for status indicator
(Y page 135)
Time/Date submenu
RSetting the time (Y page 135)
RSetting the date (Y page 135)
Lighting submenu
RSwitching daytime running lamp mode on
or off (USA only) (Y page 136)
RSwitching locator lighting on or off
(Y page 136)
RSetting ambient lighting (Y page 137)
RSwitching night security illumination
(Headlamps delayed shut-off feature) on or
off (Y page 137)
RSwitching interior lighting delayed shut-off
on or off (Y page 138)
Vehicle submenu
RSwitching automatic central locking on or
off (Y page 138)
Comfort submenu
RActivating easy-entry/exit feature
(Y page 139)
RActivating/deactivating seat belt
adjustment feature (Y page 139)
RSwitching fold-in function for exterior rear
view mirrors on or off (Y page 140)
Instrument cluster submenu
Access the Instrument Cluster submenu
via the Settings menu. Use the
Instrument Cluster submenu to change
the instrument cluster display settings.
Control system133Controls in detailX164_AKB; 5; 31, en-USd2ureepe,Version: 2.11.8.12009-09-11T12:30:16+02:00 - Seite 133Z