Page 105 of 224

XTo switch predictive speller to upper or
lower case characters: Select & or
( .XTo switch predictive speller character
set: Select k.
Every time this is selected it switches the
character set.XTo change the predictive speller
language: Select !.XPress 9 or : until the desired
language is highlighted and then press 9.XTo move the cursor in the data field:
Select Y or Z.
Deleting an Entry
XTo delete individual characters: Select
õ and briefly press 9.
or
XPress the 2 button.
The character to the left of the cursor is
deleted.XTo delete an entire entry: Select õ
and press 9 until the entire entry has been
deleted.
or
XPress the 2 button and hold it until the
entire entry is deleted.
Cancelling an Entry
XSelect á.
If one of the data fields contains data, a
prompt will appear asking whether you wish
to store the entry.
XSelect Yes or No.
The entry will either be stored or not,
depending on your selection.
Saving an Entry
XSelect d.
A corresponding message is displayed.Deleting an Entry
The deletion rules vary according to the entry
selected:
R Phone book entry selected:
The entry is deleted in the COMAND phone
book and the address book if the address
book entry only contains phone numbers.
R Entire address book entry selected:
The entry is deleted in the COMAND phone
book and additionally also in the address
book if the address book entry only
contains phone numbers.
R Subentry of an address book entry
selected:
The subentry is deleted in the COMAND
phone book and in the address book.XTo delete: Select entry ( Y page 101).XSelect Options £Delete .
You will be prompted to confirm that you
really want to delete the entry.XSelect Yes or No.
Yes option: The entry is deleted according
to the above rules.
Adding a Phone Number to a Phone
Book Entry
XSelect the address book entry.XSelect Options £Add Phone No. .XSelect a number category, e.g. Home.XSelect a phone category, e.g. Mobile
Phone .XSelect Save.
If five numbers are saved for the entry in the
selected number category, a prompt will
appear asking whether you wish to overwrite
one of the existing numbers.
COMAND Phone Book103TelephoneZ
Page 106 of 224

XSelect Yes or No.
If you select Yes, a selection list will appear
containing the five existing numbers.XSelect the number to be overwritten.
The input menu with the data field for
entering the new telephone number
appears.XTo enter digits: Select the required digits
in sequence from the predictive speller or
use the number keypad.XTo move the cursor in the data field:
Select Y or Z.XTo delete individual digits: Select õ
and briefly press the 9 button.
or
XPress the 2.
The digit to the left of the cursor is deleted.XTo delete an entire entry: Select õ
and press 9 until the entire entry has been
deleted.
or
XPress and hold down the 2 button until
the entire entry is deleted.XTo save entry: Select d.
Call Lists
COMAND displays calls received (including
missed calls) and made during phone mode
in their own lists.
i The particular menu item can only be
selected if calls have already been received
or made from COMAND.
The display of missed calls in the COMAND
display is not possible with all mobile
phones.
i The instrument cluster control system
displays a list of the last dialed calls.
i For many operating functions you can
also use the buttons on the multifunction
steering wheel, e.g. the =, ; ,
9 , : , 9 , 6 or ~ buttons, for
selecting a menu, scrolling through lists or
initiating or ending a call ( Y page 23).
Calling up the List
XIn the phone main menu select Call
Lists .
A menu appears.XSelect Calls Received or Calls
Dialed .
The appropriate list appears.
or
XWhen the basic telephone menu is
displayed, press the 6 button on
COMAND or on the multi-function steering
wheel.
A list of the last dialed calls appears.
List of incoming calls
1List of calls received2Date/time of the highlighted entry3List entry options menuXTo select a list entry: Press 9
or : .XTo close list: Select Back.
or
XPress the k button.104Call ListsTelephone
Page 107 of 224

Displaying Details on a List Entry
COMAND can also fully display an
abbreviated list entry.XSelect the list entry.XSelect Options £Details .
The details screen appears.XBack to the list: Press ; or = until
the list is highlighted.
or
XPress the k button.
Saving Unsaved List Entry
Unsaved list entries are displayed with the
phone number.
Saved list entries are displayed with the
name. They are either saved in the address
book or in the COMAND phone book.
Saving in the Address Book as a New
Entry
XSelect the list entry.XSelect Options £Save £New Entry .
i
Save has no function if the selected list
entry is already stored in the address book.
XSelect a number category, e.g. Home.XSelect a telephone category, e.g. Mobile
Phone .Number categoryDisplay (phone
and address book)Not classified°Home@Work\Phone categoryDisplay (phone
and address book)Not classified°Mobile¢Phone categoryDisplay (phone
and address book)Car^PagerïXSelect Save.
An input menu with data fields will appear.
The data field for the phone number is
completed automatically. The data field for
the last name is also completed if the entry
to be saved contains a name.1Cursor2Data field3Speller4Data field for phone number is completed
automatically5Phone category6Number categoryXTo switch data fields: Press 9 until the
last name is highlighted.XThen press 9.
or
XSelect [ or ] and press 9.
The selected data field is highlighted.XTo enter data into a field: Select all the
characters one after the other in the speller
3 .
i
The speller offers the characters that
correspond to the selected data field.
Call Lists105TelephoneZ
Page 108 of 224

XTo switch predictive speller to upper or
lower case characters: Select ( or
& .XTo switch predictive speller character
set: Select k.
Every time this is selected it switches the
character set (digits, lower case letters).XTo change the predictive speller
language: Select !.XPress 9 or : until the desired
language is highlighted and then press 9.XTo move the cursor in the data field:
Select Y or Z.XTo delete individual characters: Select
õ and briefly press 9.
or
XPress the 2 button.
The character to the left of the cursor is
deleted.XTo delete an entire entry: Select õ
and press 9 until the entire entry has been
deleted.
or
XPress the 2 button and hold it until the
entry is deleted.XTo save entry: Select d.
A corresponding message is displayed.XTo cancel entry: Select Back.
If one of the data fields contains data, a
prompt will appear asking whether you wish
to save the entry.
XSelect Yes or No.
The entry will either be stored or not,
depending on your selection.
Adding a Phone Number from the Call
List to an Existing Address Book Entry
XSelect the list entry.XSelect Options £Save £Add Phone
No.
i Save has no function if the selected list
entry is already stored.
XSelect a number category, e.g. Home.XSelect a phone category, e.g. Mobile
Phone .XSelect Save.
The search menu for address book entries
appears.XSearch for the desired entry.
i Please see the “Searching for an Address
Book Entry” section ( Y page 111) for a
detailed description on searching for an
address book entry.
XPress 9 after completing the search.
If there are fewer than five numbers saved
for the required entry in the selected
number category, COMAND saves the
data.
If five numbers are saved for the entry you
are searching for, a prompt will appear
asking whether you wish to overwrite one
of the existing numbers.XSelect Yes or No.
If you select Yes, a selection list with the
five existing numbers is displayed.XSelect the number to be overwritten.
COMAND overwrites the selected number
with the new data.
Deleting Call Lists
i The saved call lists are retained in
COMAND even if you use the COMAND
with another mobile phone. For this reason
you should delete any call lists before
handing over or selling the vehicle.
XSelect Call Lists £Delete Call
Lists from the basic telephone menu.
A query appears asking if all call lists are to
be deleted.XSelect Yes or No.
The call lists will either be deleted or not,
depending on your selection.106Call ListsTelephone
Page 109 of 224

Making Calls
Incoming Call
Rejecting or Accepting Calls
Incoming calls are indicated by a dialog
window.
XTo reject: Select Reject.
or
XPress the ~ button on the COMAND
control panel or on the multifunction
steering wheel.XTo accept: Select Accept.
or
XPress the 6 button on the COMAND
control panel or on the multifunction
steering wheel.
After accepting the call, you will conduct the
conversation over the hands-free system. The
call volume can be adjusted ( Y page 32).
Please see the “Functions during a Single
Call” section for other functions
( Y page 108).
i You can also accept a call as described
above when COMAND is showing a display
of a different main application. The display
switches to the telephone display after you
accept the call. After the call is finished,
you see the display of the previous main
application again.
Initiating an Outgoing Call
Entering a Phone Number via the
COMAND Control UnitXOpen the phone main menu ( Y page 100).XEnter all the digits on the numeric keypad
one after the other.XTo delete individual digits: Press briefly
the CLR button on the COMAND control
unit.XTo delete an entire phone number: Press
and hold the CLR button until the number
is deleted.XTo place a call: Press the 6 button on
the COMAND control panel or on the
multifunction steering wheel.
Entering a Phone Number via Phone
Main Menu
XOpen the phone main menu ( Y page 100).XTo enter digits: Select all the digits one
after the other in the speller.XTo delete individual digits: Select õ
and briefly press the 9 button.
or
XPress the 2 button.XTo delete an entire phone number:
Select õ and press 9 until the phone
number has been deleted.
or
XPress and hold down the 2 button until
the entire entry is deleted.XTo connect a call: Select ° at the bottom
right-hand side of the speller.
or
XPress the 6 button on the COMAND
control panel or on the multifunction
steering wheel.Making Calls107TelephoneZ
Page 110 of 224
.XSelect ° at the bottom right-hand side of
the speller.
or
XPress the 6 button on the COMAND
control unit when the phone main menu is
displayed.
Th")
Redialing XOpen the phone main menu (Y page 100).XSelect ° at the bottom right-hand side of
the speller.
or
XPress the 6 button on the COMAND
control unit when the phone main menu is
displayed.
The dialed calls list appears. The call dialed
last will be at the top of the list.XTo select a call: Press 9 or :XTo initiate call: Press 9.
Initiating a Call to a Call List Entry or
COMAND Phone Book Entry
XOpen the call list and select an entry .
or
XOpen the COMAND phone book and select
an entry ( Y page 101).XTo initiate call: Press 9.
Functions During a Single Call
Phone mode with a single call
1Other party2Symbol for active phone connection3Switches the hands-free microphone off
or on4Sends DTMF tones (not possible with all
mobile phones)5Device name of the connected mobile
phone6Terminates call
Switching Hands-Free Microphone On
or Off
XOpen the phone main menu ( Y page 100).XTo switch off: Select Mic Off .
If the microphone is switched off, the >
icon appears in the main area.XTo switch on: Select Mic On.
The > symbol disappears.
DTMF Tone Transmission
i
This function is not possible with all
mobile phones.
Answering machines or other devices can be
controlled by DTMF tones, e.g. for remote
query functions.
XTo send individual characters: During a
call select the required characters using
the ; or = button.
or
XPress the corresponding button on the
COMAND control unit keypad.
Every character selected will be
transmitted immediately.XTransmitting phone book entry as a
sequence of characters: Select Name.XSelect the desired phone book entry.
The entry is transmitted immediately as a
sequence of characters.XTo switch back to the call display: Select
Back .108Making CallsTelephone
Page 111 of 224
.XTo terminate call: Select 4.
or
XPress the ~ button on the COMAND
control panel or on the multifunction
steering wheel.")
Ending an Active Call XIf necessary, open the phone main menu
( Y page 100).XTo terminate call: Select 4.
or
XPress the ~ button on the COMAND
control panel or on the multifunction
steering wheel.
Call Waiting
i The call waiting function must be
supported and activated by the phone
provider.
If you are conducting a single call and you
receive another, the second call number is
entered into the received calls list and a signal
tone will sound.
Address Book
GWarning!
Please devote your attention first and
foremost to the traffic situation you are in.
Before your journey, please familiarize
yourself with the address book functions.
Only use the COMAND when road and traffic
conditions permit you to do so. Otherwise you
could be involved in an accident in which you
or others could be injured.
General Information
The entries of the address book can be used
for making phone calls and navigation
destination entries.
i You should delete your personal data
before selling your vehicle, using the Reset
function ( Y page 45).
Opening the Address Book
From Another Main FunctionXSelect Phone£Phone £Address Book .
i
If the address book was last open in the
telephone function, you only need to select
Phone .
Within the Phone Function
XSelect Phone£Address Book .
The address book main display appears.
Address book with address book entry ¥ and
navigable data ¤
i An address book entry may contain up to
five phone numbers and both a private and
business address.
Submenu Overview for Address Book
Address BookSearchDownloading
contacts (from
mobile phone, from
memory card or
business cards)
Deleting contactsSearching for an
address book entryNewDeleteCreating a new
address book entryDeleting an address
book entryAddress Book109TelephoneZ
Page 112 of 224

Selecting Entry in the Address BookXPress ; or = if the display/selection
window is active.
Creating a New Address Book Entry
i You can create address data directly in
the address book. If you save phone
numbers in the COMAND phone book,
these are saved in the address book. When
you save a navigation destination,
COMAND creates an address book entry
containing the complete address data that
support navigation.
XOpen the address book ( Y page 109) and
select New.
The input menu containing data fields and
the speller appears.
Input menu with data fields
1Selected data field with cursor2Speller
Switching Data Field
XPress 9 repeatedly until the predictive
speller is hidden.XThen press 9 or : and press 9.
or
XSelect [ or ] in the speller.
The input menu indicates the selected data
field.Entering Data into a FieldXSelect all the characters one after the other
in the predictive speller 2.
i
The predictive speller provides the
characters corresponding to the selected
data field.
XTo switch predictive speller to upper or
lower case characters: Select ( or
& .XTo switch predictive speller character
set: Select k.
Every time this is selected it switches the
character set.XTo change the predictive speller
language: Select !.XPress 9 or : until the desired
language is highlighted and then press 9.XTo move the cursor in the data field:
Select Y or Z.
Deleting
XTo delete an individual character: Select
õ and briefly press 9.
or
XPress the 2 button.
The character to the left of the cursor is
deleted.XTo delete an entire entry: Select õ
and press 9 until the entire entry has been
deleted.
or
XPress the 2 button and hold it until the
entire entry is deleted.
Canceling an Entry
XSelect á.
If one of the data fields contains new data,
a prompt will appear asking whether you
wish to store the entry.XSelect Yes or No.
The entry will either be stored or not,
depending on your selection.110Address BookTelephone
 1
1 2
2 3
3 4
4 5
5 6
6 7
7 8
8 9
9 10
10 11
11 12
12 13
13 14
14 15
15 16
16 17
17 18
18 19
19 20
20 21
21 22
22 23
23 24
24 25
25 26
26 27
27 28
28 29
29 30
30 31
31 32
32 33
33 34
34 35
35 36
36 37
37 38
38 39
39 40
40 41
41 42
42 43
43 44
44 45
45 46
46 47
47 48
48 49
49 50
50 51
51 52
52 53
53 54
54 55
55 56
56 57
57 58
58 59
59 60
60 61
61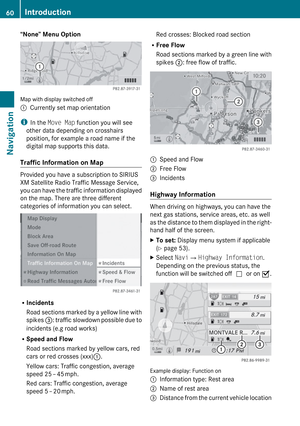 62
62 63
63 64
64 65
65 66
66 67
67 68
68 69
69 70
70 71
71 72
72 73
73 74
74 75
75 76
76 77
77 78
78 79
79 80
80 81
81 82
82 83
83 84
84 85
85 86
86 87
87 88
88 89
89 90
90 91
91 92
92 93
93 94
94 95
95 96
96 97
97 98
98 99
99 100
100 101
101 102
102 103
103 104
104 105
105 106
106 107
107 108
108 109
109 110
110 111
111 112
112 113
113 114
114 115
115 116
116 117
117 118
118 119
119 120
120 121
121 122
122 123
123 124
124 125
125 126
126 127
127 128
128 129
129 130
130 131
131 132
132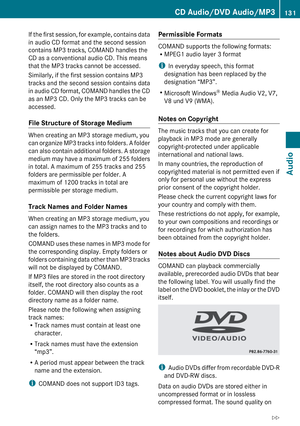 133
133 134
134 135
135 136
136 137
137 138
138 139
139 140
140 141
141 142
142 143
143 144
144 145
145 146
146 147
147 148
148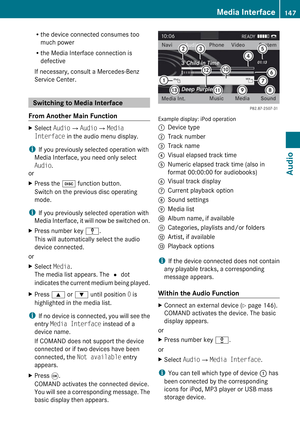 149
149 150
150 151
151 152
152 153
153 154
154 155
155 156
156 157
157 158
158 159
159 160
160 161
161 162
162 163
163 164
164 165
165 166
166 167
167 168
168 169
169 170
170 171
171 172
172 173
173 174
174 175
175 176
176 177
177 178
178 179
179 180
180 181
181 182
182 183
183 184
184 185
185 186
186 187
187 188
188 189
189 190
190 191
191 192
192 193
193 194
194 195
195 196
196 197
197 198
198 199
199 200
200 201
201 202
202 203
203 204
204 205
205 206
206 207
207 208
208 209
209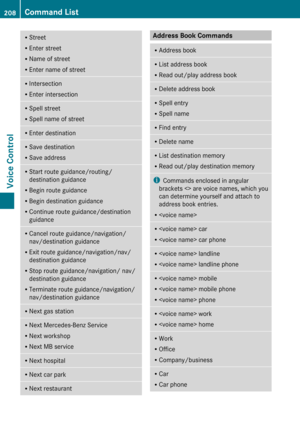 210
210 211
211 212
212 213
213 214
214 215
215 216
216 217
217 218
218 219
219 220
220 221
221 222
222 223
223