2010 MERCEDES-BENZ G550 warning light
[x] Cancel search: warning lightPage 80 of 272

Hazard warning flasher
The hazard warning flasher can be switched
on at all times, even with the SmartKey
removed from the starter switch.
The hazard warning flasher comes on
automatically when an air bag deploys.
XSwitching on: Press hazard warning
flasher switch :.
All turn signal lamps are flashing.
iWith the hazard warning flasher activated
and the combination switch set for either
left or right turn, only the respective left or
right turn signals will operate when the
ignition is switched on.
XSwitching off: Press hazard warning
flasher switch : again.
iIf the hazard warning flasher has been
activated automatically, press hazard
warning flasher switch : to switch it off.
Headlamp cleaning system
XSwitch on the ignition.XPress headlamp cleaning button :.
The headlamps are cleaned with a high-
pressure water jet.
The headlamps will be cleaned automatically
when you have
Rswitched on the headlamps
and
Rthe windshield wipers have wiped the
windshield with washer fluid fifteen times
For information on filling up the washer
reservoir, see “Washer system and headlamp
cleaning system” (Y page 157).
Corner-illuminating front fog lamps
The corner-illuminating front fog lamps
improve illumination of the area in the
direction into which you are turning.
The corner-illuminating front fog lamps will
only operate
Rin low ambient lighting conditions
Rat vehicle speeds below 25 mph
(40 km/h)
Rwith the front fog lamps switched off
Rwhen the engine is running
Switching on
XTurn the exterior lamp switch to position
L or Ã.
or
XActivate the daytime running lamp mode
(Y page 76).
XSwitch on the left or right turn signal,
depending on whether you are turning left
or right.
The respective front fog lamp comes on. If
you have switched on the turn signal for
one side but turn the steering wheel in the
other direction, the corner-illuminating
78LightingControls in detail
463_AKB; 3; 35, en-USd2ureepe,Version: 2.11.8.12009-07-16T20:59:56+02:00 - Seite 78
Page 83 of 272

Cargo compartment lamps
The switch for the cargo compartment lamps
and the rear interior lamp is located in the
overhead control panel.
The cargo compartment lamps are located
above the rear window.
XSwitching cargo compartment
lamps ; on/off: Press switch :.
iWhen opening the tailgate, cargo
compartment lamps ; come on
automatically. Switching off cargo
compartment lamps ; using switch : in
the overhead control panel then is not
possible.
You can switch off cargo compartment
lamps ; if the tailgate should remain open
for a longer period of time, see “Switching
cargo compartment lamps off and on with
the tailgate open” (Y page 81).
Switching cargo compartment lamps
off and on with the tailgate open
GWarning!
To prevent possible personal injury, always
keep hands and fingers away from the cargo
compartment opening when closing the
tailgate. Be especially careful when small
children are around.
GWarning!
Make sure the tailgate is closed when the
engine is running and while driving. Among
other dangers, deadly carbon monoxide (CO)
gases may enter vehicle interior resulting in
unconsciousness and death.
! To prevent the vehicle battery from being
discharged, switch off the cargo
compartment lamps if the tailgate should
remain open for a longer period of time.
XSwitching off: Open the tailgate
(Y page 63).
XPress door lock : down in direction of
arrow until it engages.
! Do not close the tailgate if the lock is
engaged in down position. The lock could
otherwise be damaged.
When locking the tailgate, it is important
that the door lock be in the same original
position as shown in the illustration.
To return door lock : to its original
position, press lock cylinder ;.
Lighting81Controls in detail463_AKB; 3; 35, en-USd2ureepe,Version: 2.11.8.12009-07-16T20:59:56+02:00 - Seite 81Z
Page 90 of 272

XAllow the engine and coolant to cool off.XCheck the coolant level and add coolant if
necessary (Y page 156).
In case of accident
If the vehicle is leaking fuel:
XDo not start the engine under any
circumstances.
XExit the vehicle at a safe distance from the
roadway.
XNotify local fire and/or police authorities.
If the extent of the damage cannot be
determined:
XContact an authorized Mercedes-Benz
Center or call Roadside Assistance.
If no damage on major assemblies, fuel
system, and engine mount can be
determined:
XStart the engine in the usual manner.
Parking
GWarning!
Do not park this vehicle in areas where
combustible materials such as grass, hay or
leaves can come into contact with the hot
exhaust system. These materials could be
ignited and cause a vehicle fire.
Vehicle movement can cause serious
personal injury or damage to the vehicle or
the vehicle drivetrain. Therefore, always do
the following before turning off the engine and
leaving the vehicle:
RKeep right foot on the brake pedal.
REngage the parking brake.
RShift the automatic transmission into park
position P.
RSlowly release the brake pedal.
RWhen parked on an incline, always turn the
front wheels towards the road curb.
RTurn the SmartKey in the starter switch to
position 0 and remove the SmartKey from
the starter switch.
RTake the SmartKey with you and lock the
vehicle when leaving.
Parking brake
GWarning!
Engaging the parking brake while the vehicle
is in motion can cause the rear wheels to lock
up. You could lose control of the vehicle and
cause an accident. In addition, the vehicle’s
brake lights do not light up when the parking
brake is engaged.
GWarning!
When leaving the vehicle, always remove the
SmartKey from the starter switch, take it with
you, and lock the vehicle. Do not leave
children unattended in the vehicle, or with
access to an unlocked vehicle. Children could
release the parking brake and/or shift the
automatic transmission out of park position
P, either of which could result in an accident
and/or serious personal injury.
XReleasing: Pull up slightly on parking brake
lever : and press release button ;.
XPush parking brake lever : down to its
original position.
When the ignition is switched on or the
engine is running, the brake warning lamp
88Driving and parkingControls in detail
463_AKB; 3; 35, en-USd2ureepe,Version: 2.11.8.12009-07-16T20:59:56+02:00 - Seite 88
Page 100 of 272

GWarning!
Always remember to disengage the
differential locks when returning to drive on
paved roads, see “A few words about
differentials and differential locks”.
Instrument cluster
Introduction
For a full view illustration of the instrument
cluster, see “Instrument cluster”
(Y page 26).
GWarning!
No messages will be displayed if either the
instrument cluster or the multifunction
display is inoperative.
As a result, you will not be able to see
information about your driving conditions,
such as
Rspeed
Routside temperature
Rwarning/indicator lamps
Rmalfunction/warning messages
Rfailure of any systems
Driving characteristics may be impaired.
If you must continue to drive, do so with added
caution. Contact an authorized Mercedes-
Benz Center as soon as possible.
:Reset button For information on changing the instrument
cluster settings, e.g. the language, see
(Y page 107).
Activating the instrument cluster
The instrument cluster is activated when you
Ropen the driver’s door
Rswitch on the ignition
Rpress reset button :
Rswitch on the exterior lamps
Adjusting the instrument cluster
illumination
Use reset button : to adjust the illumination
brightness for the instrument cluster and the
switches on the center console.
XTo brighten illumination: Turn reset
button : clockwise until the desired level
of illumination is reached.
XTo dim illumination: Turn reset
button : counterclockwise until the
desired level of illumination is reached.
iThe instrument cluster illumination is
dimmed or brightened automatically to suit
ambient light conditions.
The instrument cluster illumination will also
be adjusted automatically when you switch
on the vehicle’s exterior lamps.
Coolant temperature gauge
The coolant temperature gauge is located on
the left side in the instrument cluster
(Y page 26).
GWarning!
Driving when your engine is overheated can
cause some fluids which may have leaked into
the engine compartment to catch fire. You
could be seriously burned.
98Instrument clusterControls in detail
463_AKB; 3; 35, en-USd2ureepe,Version: 2.11.8.12009-07-16T20:59:56+02:00 - Seite 98
Page 108 of 272

XPress button & or *.
The stored messages will now be displayed
in the order in which they have occurred.
For malfunction and warning messages,
see “Vehicle status messages in the
multifunction display” (Y page 203).
iAfter you have scrolled through all
recorded status messages, the first
recorded message appears again.
Should the vehicle’s system record any
conditions while driving, the number of
messages will reappear in the multifunction
display when the SmartKey in the starter
switch is turned to position 0 or removed
from the starter switch.
Except for high-priority messages, the vehicle
status message memory will be cleared when
you switch off the ignition.
Settings menu
Introduction
In the Settings menu there are two
functions: The function To reset: Press
reset button for 3 secs., with which you
can reset all the settings to the original
factory settings and a collection of submenus
with which you can make individual settings
for your vehicle.
The following settings and submenus are
available in the Settings menu:
RResetting to factory settings
(Y page 106)
RSubmenus in the Settings menu
(Y page 107)
RInstrument cluster submenu
(Y page 107)
RLighting submenu (Y page 109)
RVehicle submenu (Y page 111)
RConvenience submenu (Y page 111)
Resetting to factory settings
You can reset the settings of all submenus to
the factory settings.
For safety reasons, the function Headlamp
Mode in the Lighting submenu cannot be
reset while driving.
The following message appears in the
multifunction display: Cannot be
completely reset to factory
settings while driving.
XPress button V or U repeatedly until
the Settings menu appears in the
multifunction display.
XPress the reset button in the instrument
cluster (Y page 98) for approximately
3 seconds.
The request to press the reset button once
more to confirm appears in the
multifunction display.
XPress the reset button once more.
The settings you have changed will not be
reset unless you confirm the action by
pressing the reset button a second time. After
106Control systemControls in detail
463_AKB; 3; 35, en-USd2ureepe,Version: 2.11.8.12009-07-16T20:59:56+02:00 - Seite 106
Page 122 of 272
Rear Parking Assist system
malfunction
If no distance segments illuminate and no
acoustic warning sounds, there is a
malfunction in the Rear Parking Assist
system.
XHave the Rear Parking Assist system
checked at an authorized Mercedes-Benz
Center as soon as possible.
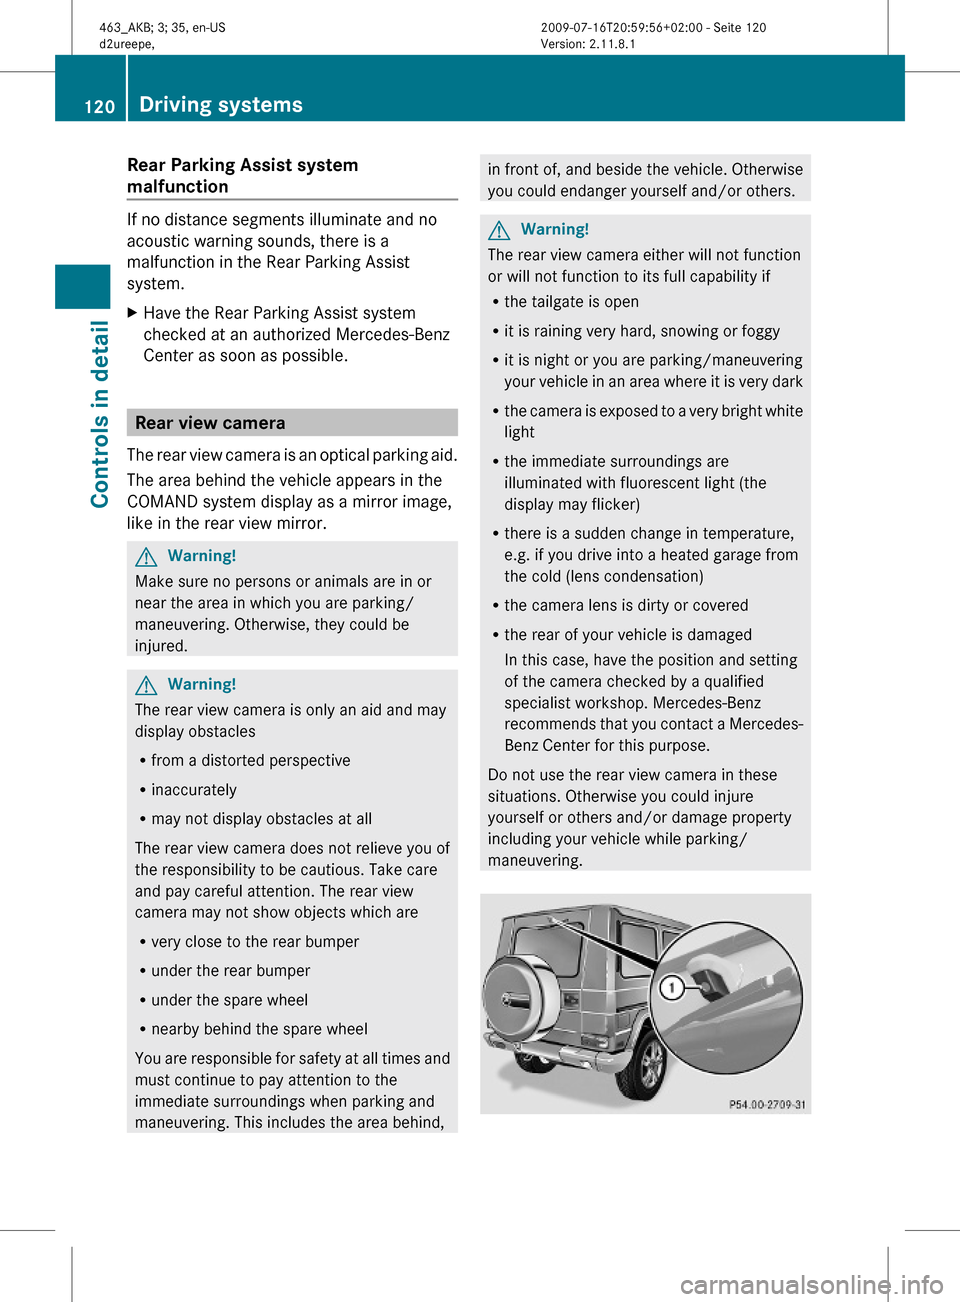
Rear view camera
The rear view camera is an optical parking aid.
The area behind the vehicle appears in the
COMAND system display as a mirror image,
like in the rear view mirror.
GWarning!
Make sure no persons or animals are in or
near the area in which you are parking/
maneuvering. Otherwise, they could be
injured.
GWarning!
The rear view camera is only an aid and may
display obstacles
Rfrom a distorted perspective
Rinaccurately
Rmay not display obstacles at all
The rear view camera does not relieve you of
the responsibility to be cautious. Take care
and pay careful attention. The rear view
camera may not show objects which are
Rvery close to the rear bumper
Runder the rear bumper
Runder the spare wheel
Rnearby behind the spare wheel
You are responsible for safety at all times and
must continue to pay attention to the
immediate surroundings when parking and
maneuvering. This includes the area behind,
in front of, and beside the vehicle. Otherwise
you could endanger yourself and/or others.
GWarning!
The rear view camera either will not function
or will not function to its full capability if
Rthe tailgate is open
Rit is raining very hard, snowing or foggy
Rit is night or you are parking/maneuvering
your vehicle in an area where it is very dark
Rthe camera is exposed to a very bright white
light
Rthe immediate surroundings are
illuminated with fluorescent light (the
display may flicker)
Rthere is a sudden change in temperature,
e.g. if you drive into a heated garage from
the cold (lens condensation)
Rthe camera lens is dirty or covered
Rthe rear of your vehicle is damaged
In this case, have the position and setting
of the camera checked by a qualified
specialist workshop. Mercedes-Benz
recommends that you contact a Mercedes-
Benz Center for this purpose.
Do not use the rear view camera in these
situations. Otherwise you could injure
yourself or others and/or damage property
including your vehicle while parking/
maneuvering.
120Driving systemsControls in detail
463_AKB; 3; 35, en-USd2ureepe,Version: 2.11.8.12009-07-16T20:59:56+02:00 - Seite 120
Page 126 of 272

In automatic mode, cooling with
dehumidification is switched on. This function
can be switched off if necessary.
GWarning!
If you deactivate the air conditioning, the
vehicle will not be cooled when weather
conditions are warm. The windows can fog up
more quickly. Window fogging may impair
visibility and endanger you and others.
XSet the desired temperature
(Y page 124).
XActivating: Press button Ã.
The indicator lamp in the button comes on.
The air volume and air distribution are
adjusted automatically.
XDeactivating: Press button à again.
The indicator lamp in the button goes out.
Automatic control of air volume and air
distribution are switched off.
Setting temperature
You can adjust the air temperature on each
side of the passenger compartment. You
should raise or lower the temperature setting
in small increments, preferably starting at
72‡ (22†).
XIncreasing/decreasing: Turn
temperature control ; and/or =
(Y page 121) slightly clockwise or
counterclockwise.
iIf you turn the temperature control fully
clockwise or counterclockwise for one side
of the vehicle, you are increasing or
decreasing the temperature for the other
side of the vehicle as well.
Adjusting air vents
GWarning!
When operating the climate control, the air
that enters the passenger compartment
through the air vents can be very hot or very
cold (depending on the set temperature). This
may cause burns or frostbite to unprotected
skin in the immediate area of the air vents.
Always keep sufficient distance between
unprotected parts of the body and the air
vents. If necessary, use the air distribution
adjustment to direct the air to air vents in the
vehicle interior that are not in the immediate
area of unprotected skin.
For best possible performance of the climate
control:
XKeep the air intake grille in front of the
windshield free of snow, leaves, sticks, and
any other debris.
XAlways keep all air vents and grilles in the
passenger compartment free from
obstruction.
iFor draft-free ventilation, move the
adjustable center and side air vents to the
middle position.
Center air vents
:Left center air vent, adjustable;Right center air vent, adjustable=Thumbwheel for air volume control for
adjustable right center air vent
?Thumbwheel for air volume control for
adjustable left center air vent
XOpening/closing: Turn thumbwheels =
and ? in the required direction.
124Climate control systemControls in detail
463_AKB; 3; 35, en-USd2ureepe,Version: 2.11.8.12009-07-16T20:59:56+02:00 - Seite 124
Page 132 of 272

for items which do not fit in the cargo
compartment alone.
Please pay attention to and comply with the
following instructions when loading the
vehicle and transporting cargo:
RAlways pad off sharp edges.
RAlways place items being carried against
front or rear seat backrests, and fasten
them as securely as possible.
RThe heaviest portion of the cargo should
always be kept as low as possible against
front or rear seat backrests.
For additional safety when transporting cargo
while the rear seats are unoccupied, fasten
the outer seat belts crosswise into the
opposite side buckles :.
Roof rack
This vehicle is not intended to carry items on
its roof. Thus roof rails and any roof-mounted
devices must not be used.
GWarning!
Do not load items on the roof. It may cause
instability during some maneuvers which
could result in an accident.
Parcel netGWarning!
Parcel nets are intended for storing light-
weight items only, such as road maps, mail,
etc.
Heavy objects, objects with sharp edges, or
fragile objects may not be transported in the
parcel nets. In an accident, during hard
braking, or sudden maneuvers, they could be
thrown around inside the vehicle and cause
injury to vehicle occupants.
Parcel nets cannot protect transported goods
in the event of an accident.
A parcel net is located in the front passenger
footwell.
Cargo tie-down rings
Your vehicle is equipped with four cargo tie-
down rings.
Always follow loading instructions
(Y page 129).
Carefully secure cargo by applying even load
on all the cargo tie-down rings with a rope of
sufficient strength to hold down the cargo.
Expanding cargo volume
To expand the cargo volume, you can fold the
left and right rear seat backrests and the rear
seat bench forward.
130Loading and storingControls in detail
463_AKB; 3; 35, en-USd2ureepe,Version: 2.11.8.12009-07-16T20:59:56+02:00 - Seite 130