2010 MERCEDES-BENZ E550 Esp
[x] Cancel search: EspPage 176 of 372

iThe infrared headlamps only come on
above a speed of approximately 6 mph
(10 km/h). Therefore, when you are at a
standstill, you do not have a complete view
and cannot check the function of the Night
View Assist Plus.
Pedestrian detection
The Night View Assist Plus detects
pedestrians by means of specific
characteristics, e.g. a human silhouette.
Pedestrian detection is activated when
Rthe Night View Assist Plus is switched on
Rthe vehicle speed is above approximately
6 mph (10 km/h)
Rdriving in darkness, e.g. on highways
without road lighting
:Night View Assist Plus image;Detected pedestrian=Frame?Symbol for active pedestrian detection
When pedestrian detection is active,
symbol ? appears in the Night View Assist
Plus image. Once a pedestrian is detected,
that pedestrian is highlighted by frame =.
When you have been made aware of a
pedestrian, assess the situation by looking
through the windshield. The actual distance
between your vehicle and objects or
pedestrians cannot be assessed properly via
a screen display.
Other objects apart from pedestrians may
also be highlighted.
GWarning!
The pedestrian detection may be impaired or
unavailable when
Rpedestrians are obstructed fully or in part
by other objects such as parking vehicles
Rthe silhouette in the Night View Assist Plus
image is displayed incomplete or
interrupted, e.g. by significant light
reflection
Ra pedestrian’s silhouette is not rich enough
in contrast compared to the background
Rpedestrians are not in erected position but,
for example, sit, crouch down, or lie
iAnimals cannot be detected.
Dirty or fogged-up windshield
The Night View Assist Plus image is
diminished when the windshield in front of the
camera is
Rdirty
Rfogged up on the outside
Rfogged up on the inside
GWarning!
Please do not forget that your primary
responsibility is to drive the vehicle. A driver’s
attention to the road must always be his/her
primary focus when driving. For your safety
and the safety of others, stop before trying to
remove window fogging or cleaning the
windshield in front of the Night View Assist
Plus camera.
Bear in mind that at a speed of just 30 mph
(approximately 50 km/h), your vehicle is
covering a distance of 44 feet
(approximately 14 m) every second.
XRemoving condensation: Check settings
of the climate control and change them, if
necessary (Y page 181).
XSwing the camera cover downward
(Y page 263).
174Driving systemsControls in detail
212_AKB; 2; 41, en-USd2ureepe,Version: 2.11.8.12009-07-17T09:14:21+02:00 - Seite 174
Page 177 of 372
XCleaning inside of windshield: Use a soft,
non-scratching cloth ( Y page 263).
Blind Spot Assist
The Blind Spot Assist uses radar sensors to
monitor the area on both sides of your
vehicle. It will assist you when you change
lanes driving at speeds of above 20 mph
(30 km/h). A red warning lamp will come on
in the exterior rear view mirror as soon as
another vehicle is detected. If you then
activate the corresponding turn signals to
change lanes, the red warning lamp flashes
and warning sounds (collision warning). The
Blind Spot Assist operates using sensors in
the rear bumper.
GWarning!
The Blind Spot Assist is only a driving aid and
may not detect all vehicles.
The Blind Spot Assist may not be able to
detect narrow vehicles such as motorcycles
or bicycles, or it may not detect them until it
is too late.
The monitoring function may be impaired if
your sensors are dirty, subject to heavy spray,
or if visibility is poor due to e.g. snow, rain, or
fog. This can result in vehicles not being
detected or being detected too late.
The Blind Spot Assist cannot detect road,
traffic and weather conditions.
It is the driver’s responsibility at all times to
be attentive to road, weather and traffic
conditions and to provide the steering,
braking and other driving inputs necessary to
retain control of the vehicle. Failure to do so
could result in recognizing dangers too late,
possibly resulting in an accident and serious
injury to yourself and others.
In order for the Blind Spot Assist to function,
the radar sensors must be switched on and
operational.
When traveling in Canada in a vehicle not
registered in Canada, you must switch off the
radar sensor system ( Y page 144). Canadian
law does not permit the use of the radar
sensor system for vehicles from outside of
Canada. When you switch off the radar sensor
system, the following functions are
deactivated:
R Blind Spot Assist
R BAS PLUS ( Y page 63)
R PRE-SAFE ®
Brake ( Y page 69)
R DISTRONIC PLUS ( Y page 149)
i USA only:
This device has been approved by the FCC
as a “Vehicular Radar System”. The radar
sensor is intended for use in an automotive
radar system only. Removal, tampering, or
altering of the device will void any
warranties, and is not permitted by the
FCC. Do not tamper with, alter, or use in
any non-approved way.
Any unauthorized modification to this
device could void the user’s authority to
operate the equipment.
i Canada only:
This device complies with RSS-210 of
Industry Canada. Operation is subject to
the following two conditions:
1. This device may not cause interference,
and
2. this device must accept any interference received, including
interference that may cause undesired
operation of the device.
Removal, tampering, or altering of the
device will void any warranties, and is not
permitted. Do not tamper with, alter, or use
in any non-approved way.
Any unauthorized modification to this
device could void the user’s authority to
operate the equipment.
Sensor monitoring range
The Blind Spot Assist is able to monitor a
range up to 10 ft (3 m) to the rear and both
sides of the vehicle.
Driving systems175Controls in detail212_AKB; 2; 41, en-USd2ureepe,Version: 2.11.8.12009-07-17T09:14:21+02:00 - Seite 175Z
Page 178 of 372

GWarning!
The Blind Spot Assist monitors certain areas
in the immediate vicinity of your vehicle.
Vehicles approaching and passing at speeds
that exceed the speed of your vehicle
significantly will not be detected. There will be
no warning display and no audible warning.
When driving in a very wide lane, the sensors
may not be able to cover the entire width of
the neighboring lane. Vehicles driving on the
outside of the neighboring lane may not be
detected.
It is the driver’s responsibility at all times to
be attentive to road, weather and traffic
conditions and to provide the steering,
braking and other driving inputs necessary to
retain control of the vehicle. Failure to do so
could result in recognizing dangers too late,
possibly resulting in an accident and serious
injury to yourself and others.
When driving in a very narrow lane, the
sensors may detect and display vehicles in the
second lane over. This will be the case if there
are vehicles driving on the inside edge of their
lane.
The system may issue causeless warnings in
the area of guardrails or similar structural
boundaries.
The two Blind Spot Assist sensors are built
into the rear bumper. Make sure that the area
of the bumper around the sensors is free of
dirt, ice and snow. The radar sensors must not
be obstructed, for example, by bicycle
carriers or overhanging luggage.
! In the event of a significant impact or
damage affecting the bumpers, have the
radar sensors checked by a qualified
specialist workshop such as a Mercedes-
Benz Center. Failure to do this can result in
Blind Spot Assist not functioning correctly.
Indicator and warning lamps
Exterior rear view mirror, driver’s side
XMake sure that the radar sensors
(Y page 144) and Blind Spot Assist
(Y page 138) are switched on.
XSwitch on the ignition.
Red warning lamps : in the exterior rear
view mirrors come on.
XStart the engine.
Yellow indicator lamps : in the exterior
rear view mirrors come on up to a speed of
20 mph (30 km/h).
Above a speed of 20 mph (30 km/h), yellow
indicator lamps : go out and the Blind Spot
Assist is active. If the Blind Spot Assist
detects a vehicle in its range, red warning
lamp : on the corresponding side of the
vehicle comes on. The warning is issued each
time a vehicle enters the area monitored by
the Blind Spot Assist from behind or from the
side. When you pass another vehicle, the
warning is issued only when the speed
differential is less than 7 mph (12 km/h).
176Driving systemsControls in detail
212_AKB; 2; 41, en-USd2ureepe,Version: 2.11.8.12009-07-17T09:14:21+02:00 - Seite 176
Page 179 of 372

When you shift the automatic transmission in
reverse gear R, yellow indicator lamps : in
the exterior rear view mirrors goes out after
approximately 3 seconds. The Blind Spot
Assist is then not active.
The brightness of indicator lamps/warning
lamps : is controlled automatically
depending on the brightness of the ambient
light.
GWarning!
The Blind Spot Assist is not active at speeds
below approximately 20 mph (30 km/h). The
yellow indicator lamps in the exterior rear
view mirrors are illuminated. You will not be
alerted to the presence of vehicles in the
monitored area at these speeds.
It is the driver’s responsibility at all times to
be attentive to road, weather and traffic
conditions and to provide the steering,
braking and other driving inputs necessary to
retain control of the vehicle. Failure to do so
could result in recognizing dangers too late,
possibly resulting in an accident and serious
injury to yourself and others.
Collision warning
If a vehicle is detected in the Blind Spot Assist
range and you activate the turn signal, a two-
tone warning will sound once. Red warning
lamp : on the corresponding side of the
vehicle will flash.
GWarning!
Do not change lanes or make turns, while red
warning lamp : is flashing. Doing so could
result in an accident and serious injury to
yourself and others.
XRemain on the lane that you are currently
on until traffic conditions permit to change.
If the turn signal remains on, red warning
lamp : will flash to indicate that vehicles
have been detected. No further audible
warnings will sound.
Lane Keeping Assist
The Lane Keeping Assist supports you at a
vehicle speed of above 40 mph when you
have set the display unit to miles in the
Display Unit Speed-/Odometer: menu in
the control system (Y page 141). When you
have set the display unit to km, the system
supports you at a vehicle speed of above
60 km/h. When the Lane Keeping Assist
detects lane markings, the system is
designed to alert you in case you leave your
lane unintentionally. A warning is usually
issued when a front wheel is on the lane
marking. An interval vibration in the steering
wheel that lasts for up to 1.5 seconds will
then alert you.
The Lane Keeping Assist monitors the area in
front of your vehicle via camera :.
The system can distinguish various
conditions in order to alert you early enough
and to avoid unnecessary warnings when
crossing lane markings.
The warning is issued sooner when
Rcutting a curve on the outside of the turn
Rdriving on very wide lanes such as highway
lanes
Rthe system recognizes dividing lines
because crossing them is often crucial due
to soft shoulders or guardrails behind for
example
The warning is issued later however when
Rdriving on narrow lanes
Rcutting a curve on the inside of the turn
Driving systems177Controls in detail212_AKB; 2; 41, en-USd2ureepe,Version: 2.11.8.12009-07-17T09:14:21+02:00 - Seite 177Z
Page 180 of 372
The system does not issue a warning when
Rsteering, braking, or accelerating in a
clearly active manner, e.g. when changing
lanes, passing, exiting a highway
Rcutting a narrow curve
Rmaking a very sharp turn
Ra driving safety system such as the ABS,
the BAS, or the ESC has been activated
When setting the turn signal in either
direction, the warning will be suppressed. The
system will issue a warning if a turn signal has
been on for an extended period of time.
GWarning!
The Lane Keeping Assist does not keep the
vehicle in the lane. The Lane Keeping Assist
is only an aid to the driver and may not always
recognize lane markings properly or fail to
recognize them at all.
The system may be impaired or unavailable
when
Rvisibility is poor, e.g. due to snow, rain, fog,
or heavy spray
Roncoming traffic, sun glare or reflection
from other vehicles
Rthe camera area of the windshield is dirty,
foggy, or otherwise obstructed
Rlane markings are not present
Rlane markings are worn, dark, or covered
e.g. by snow or dirt
Rthe distance to the preceding vehicle is too
short
Rwhen lane markings are ambiguous, for
example in road work sections
Rlane markings change rapidly, e.g. on
highway exits or turn-off lanes
Rlanes are narrow and winding
The Lane Keeping Assist cannot take road and
traffic conditions into account. It is the
driver’s responsibility at all times to be
attentive to road, weather and traffic
conditions and to provide the steering,
braking and other driving inputs necessary to
retain control of the vehicle. Failure to do so
could result in recognizing dangers too late,
possibly resulting in an accident and serious
injury to yourself and others.
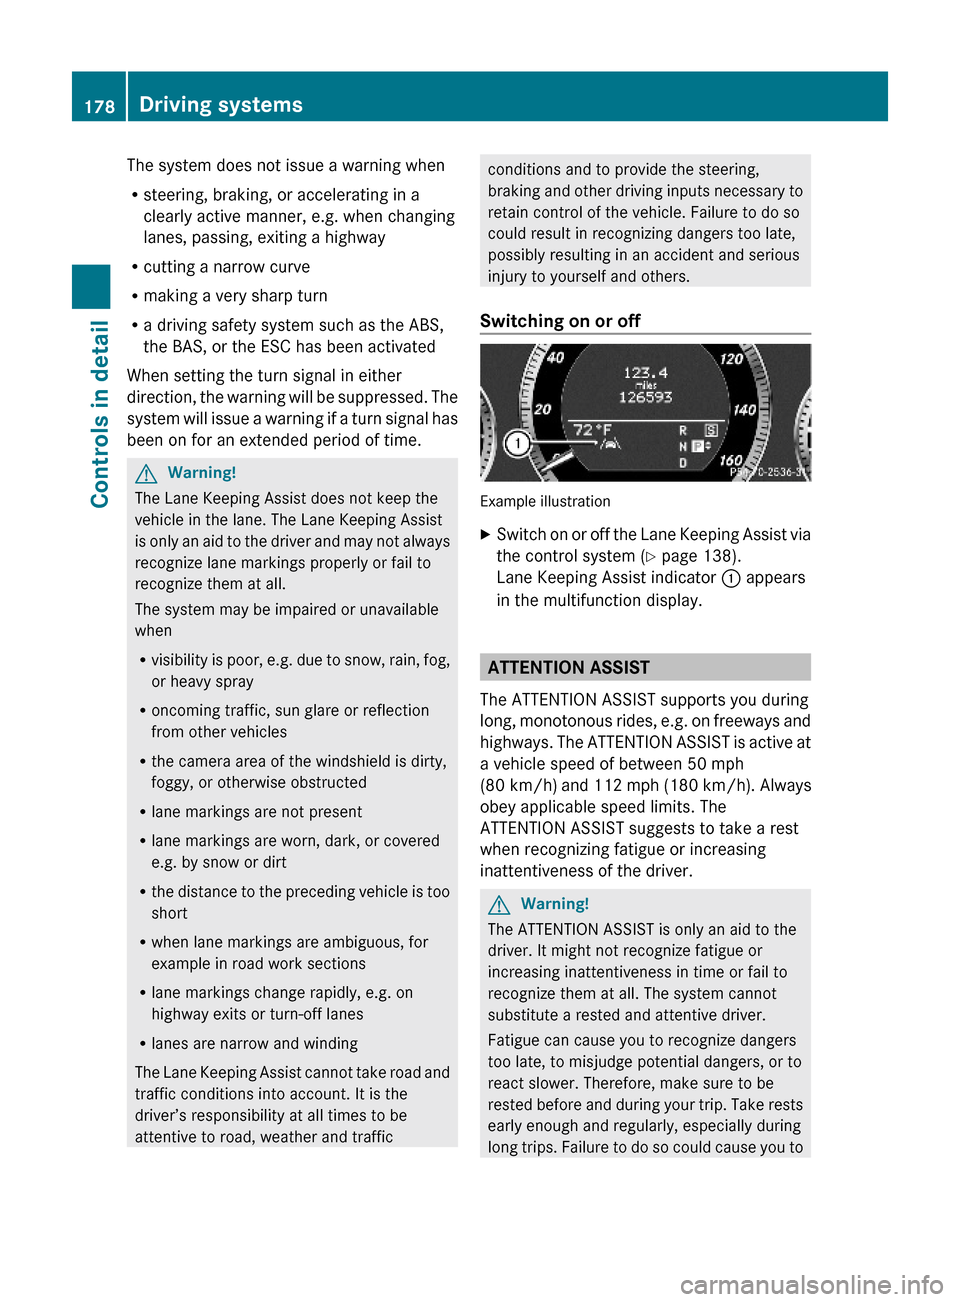
Switching on or off
Example illustration
XSwitch on or off the Lane Keeping Assist via
the control system (Y page 138).
Lane Keeping Assist indicator : appears
in the multifunction display.
ATTENTION ASSIST
The ATTENTION ASSIST supports you during
long, monotonous rides, e.g. on freeways and
highways. The ATTENTION ASSIST is active at
a vehicle speed of between 50 mph
(80 km/h) and 112 mph (180 km/h). Always
obey applicable speed limits. The
ATTENTION ASSIST suggests to take a rest
when recognizing fatigue or increasing
inattentiveness of the driver.
GWarning!
The ATTENTION ASSIST is only an aid to the
driver. It might not recognize fatigue or
increasing inattentiveness in time or fail to
recognize them at all. The system cannot
substitute a rested and attentive driver.
Fatigue can cause you to recognize dangers
too late, to misjudge potential dangers, or to
react slower. Therefore, make sure to be
rested before and during your trip. Take rests
early enough and regularly, especially during
long trips. Failure to do so could cause you to
178Driving systemsControls in detail
212_AKB; 2; 41, en-USd2ureepe,Version: 2.11.8.12009-07-17T09:14:21+02:00 - Seite 178
Page 191 of 372
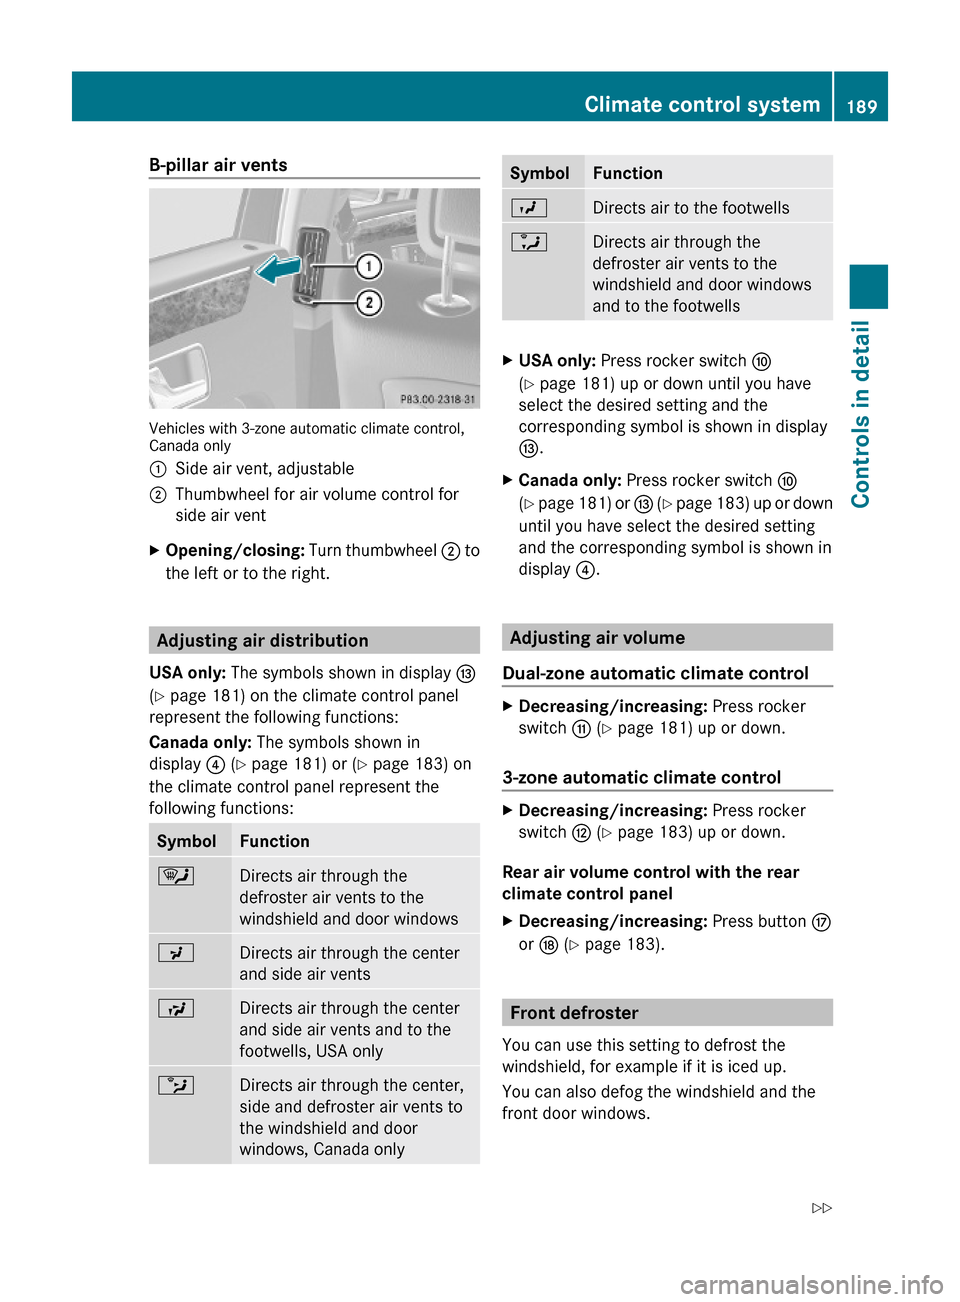
B-pillar air vents
Vehicles with 3-zone automatic climate control,Canada only
:Side air vent, adjustable;Thumbwheel for air volume control for
side air vent
XOpening/closing: Turn thumbwheel ; to
the left or to the right.
Adjusting air distribution
USA only: The symbols shown in display I
(Y page 181) on the climate control panel
represent the following functions:
Canada only: The symbols shown in
display ? (Y page 181) or (Y page 183) on
the climate control panel represent the
following functions:
SymbolFunction¯Directs air through the
defroster air vents to the
windshield and door windows
PDirects air through the center
and side air vents
SDirects air through the center
and side air vents and to the
footwells, USA only
bDirects air through the center,
side and defroster air vents to
the windshield and door
windows, Canada only
SymbolFunctionODirects air to the footwellsaDirects air through the
defroster air vents to the
windshield and door windows
and to the footwells
XUSA only: Press rocker switch F
(Y page 181) up or down until you have
select the desired setting and the
corresponding symbol is shown in display
I.
XCanada only: Press rocker switch F
(Y page 181) or I (Y page 183) up or down
until you have select the desired setting
and the corresponding symbol is shown in
display ?.
Adjusting air volume
Dual-zone automatic climate control
XDecreasing/increasing: Press rocker
switch G (Y page 181) up or down.
3-zone automatic climate control
XDecreasing/increasing: Press rocker
switch H (Y page 183) up or down.
Rear air volume control with the rear
climate control panel
XDecreasing/increasing: Press button M
or N (Y page 183).
Front defroster
You can use this setting to defrost the
windshield, for example if it is iced up.
You can also defog the windshield and the
front door windows.
Climate control system189Controls in detail212_AKB; 2; 41, en-USd2ureepe,Version: 2.11.8.12009-07-17T09:14:21+02:00 - Seite 189Z
Page 199 of 372
if the tilt/sliding panel does not open
smoothly.
! Do not attempt to open the tilt/sliding
panel before the tilt/sliding panel is
properly synchronized. The tilt/sliding
panel could otherwise lock-up in the open
position.
If the tilt/sliding panel cannot be closed or
synchronized, contact an authorized
Mercedes-Benz Center or call Roadside
Assistance.
XSwitch on the ignition.XPull the roof panel switch repeatedly in
direction of arrow = to the resistance
point until the tilt/sliding panel is closed
completely.
XPull and hold the roof panel switch in
direction of arrow = for 1 more second.
XPull the roof panel switch repeatedly in
direction of arrow = to the resistance
point until the roller sunblinds are closed
completely.
XPull and hold the roof panel switch in
direction of arrow = for 1 more second.
XCheck whether the tilt/sliding panel and
the roller sunblinds can be opened
completely (Y page 195).
Loading and storing
Loading instructions
GWarning!
Always fasten items being carried as securely
as possible. Use cargo tie-down rings and
fastening materials appropriate for the weight
and size of the load.
In an accident, during hard braking or sudden
maneuvers, loose items will be thrown around
inside the vehicle. This can cause injury to
vehicle occupants unless the items are
securely fastened in the vehicle.
To help avoid personal injury during a collision
or sudden maneuver, exercise care when
transporting cargo. Do not pile luggage or
cargo higher than the seat backrests.
The trunk is the preferred place to carry
objects.
Never drive a vehicle with the trunk open.
Deadly carbon monoxide (CO) gases may
enter vehicle interior resulting in
unconsciousness and death.
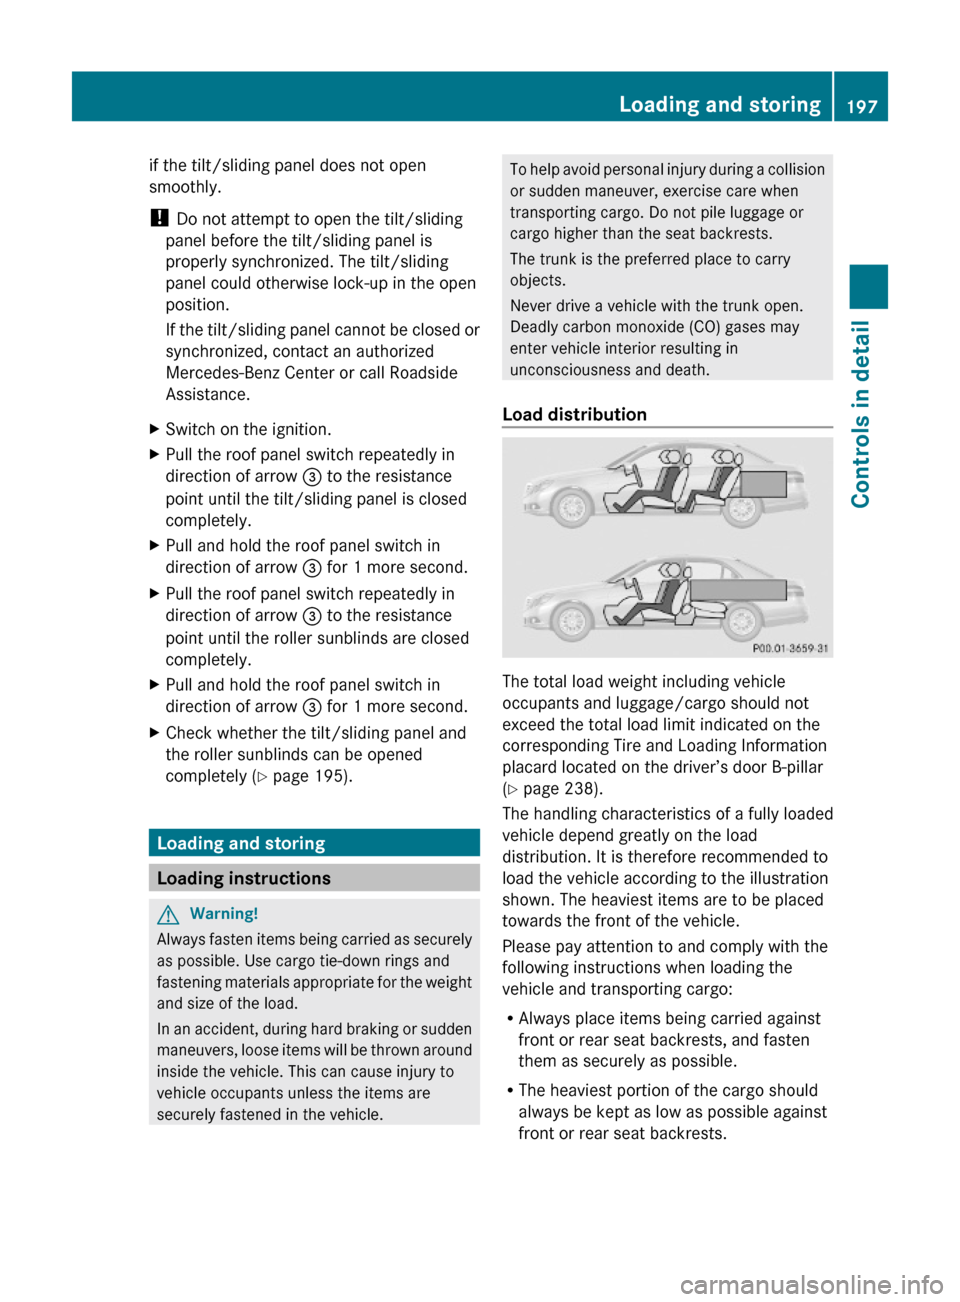
Load distribution
The total load weight including vehicle
occupants and luggage/cargo should not
exceed the total load limit indicated on the
corresponding Tire and Loading Information
placard located on the driver’s door B-pillar
(Y page 238).
The handling characteristics of a fully loaded
vehicle depend greatly on the load
distribution. It is therefore recommended to
load the vehicle according to the illustration
shown. The heaviest items are to be placed
towards the front of the vehicle.
Please pay attention to and comply with the
following instructions when loading the
vehicle and transporting cargo:
RAlways place items being carried against
front or rear seat backrests, and fasten
them as securely as possible.
RThe heaviest portion of the cargo should
always be kept as low as possible against
front or rear seat backrests.
Loading and storing197Controls in detail212_AKB; 2; 41, en-USd2ureepe,Version: 2.11.8.12009-07-17T09:14:21+02:00 - Seite 197Z
Page 205 of 372
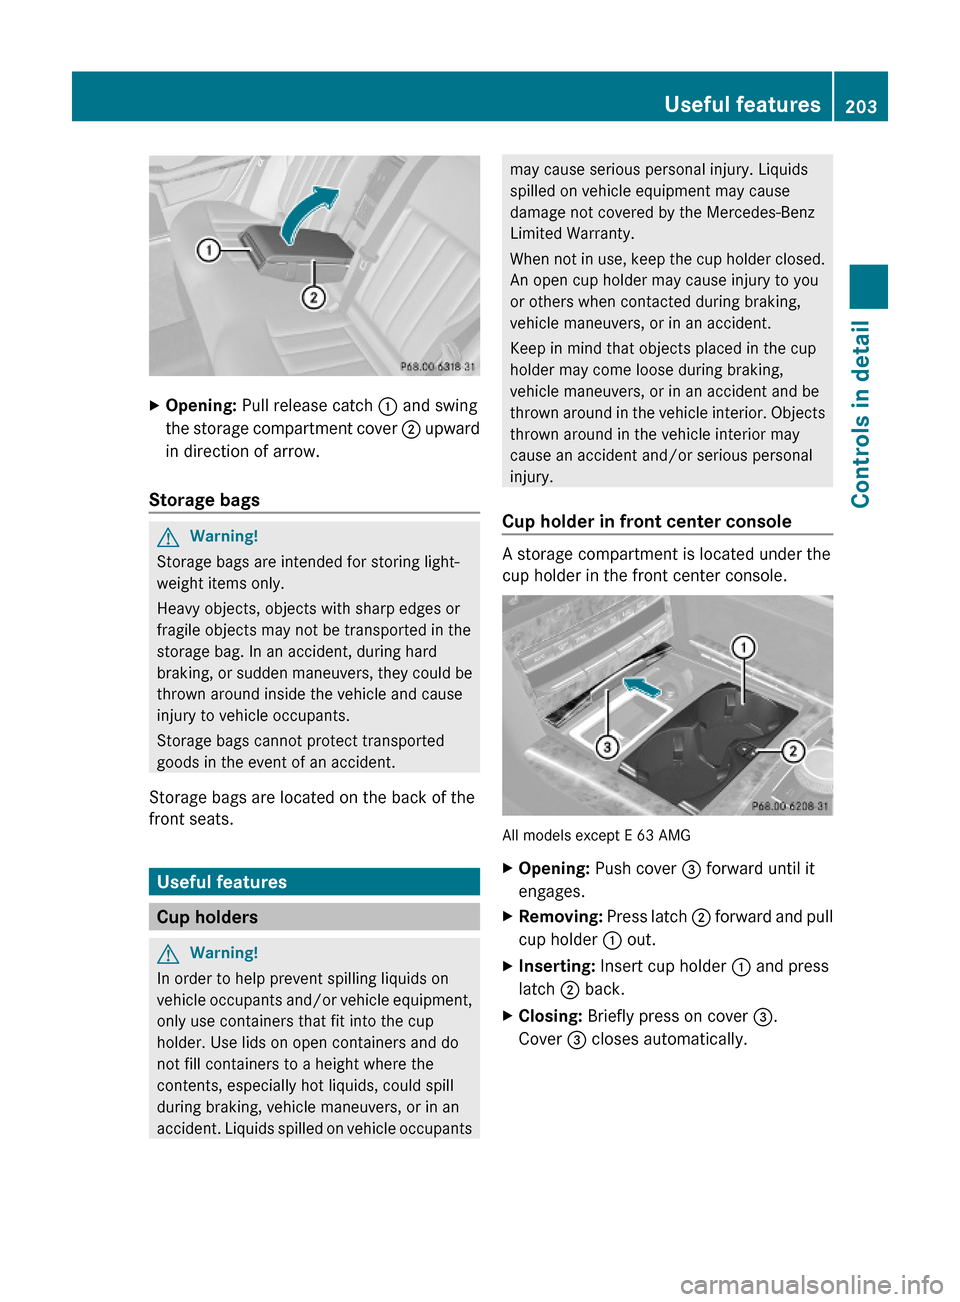
XOpening: Pull release catch : and swing
the storage compartment cover ; upward
in direction of arrow.
Storage bags
GWarning!
Storage bags are intended for storing light-
weight items only.
Heavy objects, objects with sharp edges or
fragile objects may not be transported in the
storage bag. In an accident, during hard
braking, or sudden maneuvers, they could be
thrown around inside the vehicle and cause
injury to vehicle occupants.
Storage bags cannot protect transported
goods in the event of an accident.
Storage bags are located on the back of the
front seats.
Useful features
Cup holders
GWarning!
In order to help prevent spilling liquids on
vehicle occupants and/or vehicle equipment,
only use containers that fit into the cup
holder. Use lids on open containers and do
not fill containers to a height where the
contents, especially hot liquids, could spill
during braking, vehicle maneuvers, or in an
accident. Liquids spilled on vehicle occupants
may cause serious personal injury. Liquids
spilled on vehicle equipment may cause
damage not covered by the Mercedes-Benz
Limited Warranty.
When not in use, keep the cup holder closed.
An open cup holder may cause injury to you
or others when contacted during braking,
vehicle maneuvers, or in an accident.
Keep in mind that objects placed in the cup
holder may come loose during braking,
vehicle maneuvers, or in an accident and be
thrown around in the vehicle interior. Objects
thrown around in the vehicle interior may
cause an accident and/or serious personal
injury.
Cup holder in front center console
A storage compartment is located under the
cup holder in the front center console.
All models except E 63 AMG
XOpening: Push cover = forward until it
engages.
XRemoving: Press latch ; forward and pull
cup holder : out.
XInserting: Insert cup holder : and press
latch ; back.
XClosing: Briefly press on cover =.
Cover = closes automatically.
Useful features203Controls in detail212_AKB; 2; 41, en-USd2ureepe,Version: 2.11.8.12009-07-17T09:14:21+02:00 - Seite 203Z