2010 MERCEDES-BENZ E550 door lock
[x] Cancel search: door lockPage 224 of 372

The fuel filler flap is located on the right-hand
side of the vehicle towards the rear.
XTurn off the engine.
iLeaving the engine running and the fuel
filler cap open can cause the yellow engine
malfunction indicator lamp ; to
illuminate.
For more information, see also “Practical
hints” (Y page 310).
XRemove the SmartKey from the starter
switch.
KEYLESS-GO: Open the driver’s door. This
puts the starter switch in position 0, same
as with the SmartKey removed from the
starter switch. The driver’s door then can
be closed again.
XOpening: Press fuel filler flap : at the
point indicated by the arrow.
XTurn fuel filler cap ; counterclockwise.XTake off fuel filler cap ;.
! The fuel filler cap is tethered to the fuel
filler neck. Do not drop the cap. It could
damage the vehicle paint finish.
XPlace fuel filler cap ; in direction of arrow
into holder =.
XFully insert filler nozzle unit and refuel.XOnly fill your tank until the filler nozzle unit
cuts out – do not top off or overfill.
XClosing: Turn fuel filler cap ; clockwise
until it audibly engages.
iClose the fuel filler flap before locking the
vehicle. Otherwise the flap locking pin will
prevent closing the fuel filler flap.
XClose fuel filler flap :.
Low outside temperatures (diesel
engine)
! Do not fill the tank with gasoline. Do not
blend diesel fuel with gasoline or kerosene.
The fuel system and engine will otherwise
be damaged, which is not covered by the
Mercedes-Benz Limited Warranty.
To prevent malfunctions, diesel fuel with
improved cold flow characteristics is offered
in the winter months. Check with your fuel
retailer.
Check regularly and before a long trip
For information on quantities and
requirements of operating agents, see “Fuels,
coolants, lubricants, etc.” (Y page 359).
Check the following:
REngine oil level (Y page 224)
RTire inflation pressure (Y page 231)
RCoolant level (Y page 226)
RVehicle lighting (Y page 318)
RWasher system and headlamp cleaning
system (Y page 227)
RBrake fluid (Y page 227)
222At the gas stationOperation
212_AKB; 2; 41, en-USd2ureepe,Version: 2.11.8.12009-07-17T09:14:21+02:00 - Seite 222
Page 262 of 372

engine damage and/or other vehicle
damage not covered by the Mercedes-Benz
Limited Warranty.
Vehicle care
Cleaning and care of the vehicle
Notes
Regular and proper care will help to maintain
the value of your vehicle.
GWarning!
Many cleaning products can be hazardous.
Some are poisonous, others are flammable.
Always follow the instructions on the
particular container. Always open your
vehicle’s doors or windows when cleaning the
inside.
Never use fluids or solvents that are not
designed for cleaning your vehicle.
Always lock away cleaning products and keep
them out of reach of children.
! When cleaning the vehicle, do not use
scouring agents. Never apply strong force
and only use a soft, wet cloth or sponge.
Otherwise you may scratch or damage the
surface to be cleaned.
While in operation, even while parked, your
vehicle is subjected to varying external
influences which, if gone unchecked, can
attack the paintwork as well as the vehicle
underbody and cause lasting damage.
Such damage is caused not only by extreme
and varying climatic conditions, but also by:
R Air pollution
R Road salt
R Tar
R Gravel and stone chipping
To avoid paint damage, you should
immediately remove:
R Grease and oil
R Fuel
R Coolant
R Brake fluid
R Bird droppings
R Insects
R Tree resins etc.
Frequent washing reduces and/or eliminates
the aggressiveness and potency of the above
adverse influences.
More frequent washings are necessary to
deal with unfavorable conditions:
R near the ocean
R in industrial areas (smoke, exhaust
emissions)
R during winter operation
You should check your vehicle from time to
time for stone chipping or other damage. Any
damage should be repaired as soon as
possible to prevent corrosion.
In doing so, do not neglect the underbody of
the vehicle. A prerequisite for a thorough
check is a washing of the underbody followed
by a thorough inspection. Damaged areas
need to be re-undercoated.
Your vehicle has been treated at the factory
with a wax-base rustproofing in the body
cavities which will last for the lifetime of the
vehicle. Post-production treatment is neither
necessary nor recommended by Mercedes-
Benz because of the possibility of
incompatibility between materials used in the
production process and others applied later.
We have selected vehicle-care products and
compiled recommendations which are
specially matched to our vehicles and which
always reflect the latest technology. You can
obtain Mercedes-Benz approved vehicle-care
products at an authorized Mercedes-Benz
Center.260Vehicle careOperation
212_AKB; 2; 41, en-USd2ureepe,Version: 2.11.8.12009-07-17T09:14:21+02:00 - Seite 260
Page 263 of 372

Scratches, corrosive deposits, corrosion or
damage due to negligent or incorrect care
cannot always be removed or repaired with
the vehicle-care products recommended
here. In such cases it is best to seek aid at an
authorized Mercedes-Benz Center.
The following topics deal with the cleaning
and care of your vehicle and give important
“how-to” information as well as references to
Mercedes-Benz approved vehicle-care
products.
Power washer
! Follow the instructions provided by the
power washer manufacturer on
maintaining a distance between the vehicle
and the nozzle of the power washer.
Never use a round nozzle to power-wash
tires. The intense jet of water can result in
damage to the tire.
Always replace a damaged tire.
Always keep the jet of water moving across
the surface. Do not aim directly at electrical
parts, electrical connectors, seals, or other
rubber parts.
i Vehicles with KEYLESS-GO:
If a door handle is hit by a strong jet of
water, and a SmartKey is within
approximately 3 ft (1 m) of the vehicle, it
could be inadvertently locked or unlocked.
Tar stains
Quickly remove tar stains before they dry and
become more difficult to remove. A tar
remover is recommended.
Paintwork, painted body components
! Affixing stickers, magnets, adhesive tape
or similar materials to painted body
components may damage the paintwork.
Mercedes-Benz approved Paint Care should
be applied when water drops on the paint
surface do not “bead up”. This should
normally be done every 3 to 5 months,
depending on the climate and washing
detergent used.
Mercedes-Benz approved Paint Cleaner
should be applied if the paint surface shows
signs of embedded dirt (i.e. loss of gloss).
Do not apply any of these products or wax if
your vehicle is parked in the sun or if the hood
is still hot.XUse the appropriate MB-Touch-Up Stick for
quick and provisional repairs of minor paint
damage (i.e. chips from stones, vehicle
doors, etc.).
Engine cleaning
Prior to cleaning the engine compartment,
make sure to protect electrical components
and connectors from contact with water and
cleaning agents.
Corrosion protection, such as MB
Anticorrosion Wax should be applied to the
engine compartment after every engine
cleaning. Before applying, all control linkage
bushings and joints should be lubricated. The
poly-V-belt and all pulleys should be
protected from any wax.
Vehicle washing
In the winter, thoroughly remove all traces of
road salt as soon as possible.
When washing the vehicle underbody, do not
forget to clean the inner sides of the wheels.
i Vehicles with KEYLESS-GO:
If a door handle is hit by a strong jet of
water, and a SmartKey is within
approximately 3 ft (1 m) of the vehicle, it
could be inadvertently locked or unlocked.
Hand-wash
XDo not use hot water or wash your vehicle
in direct sunlight.XOnly use a soft, wet cloth or sponge to
clean the vehicle.Vehicle care261Operation212_AKB; 2; 41, en-USd2ureepe,Version: 2.11.8.12009-07-17T09:14:21+02:00 - Seite 261Z
Page 295 of 372

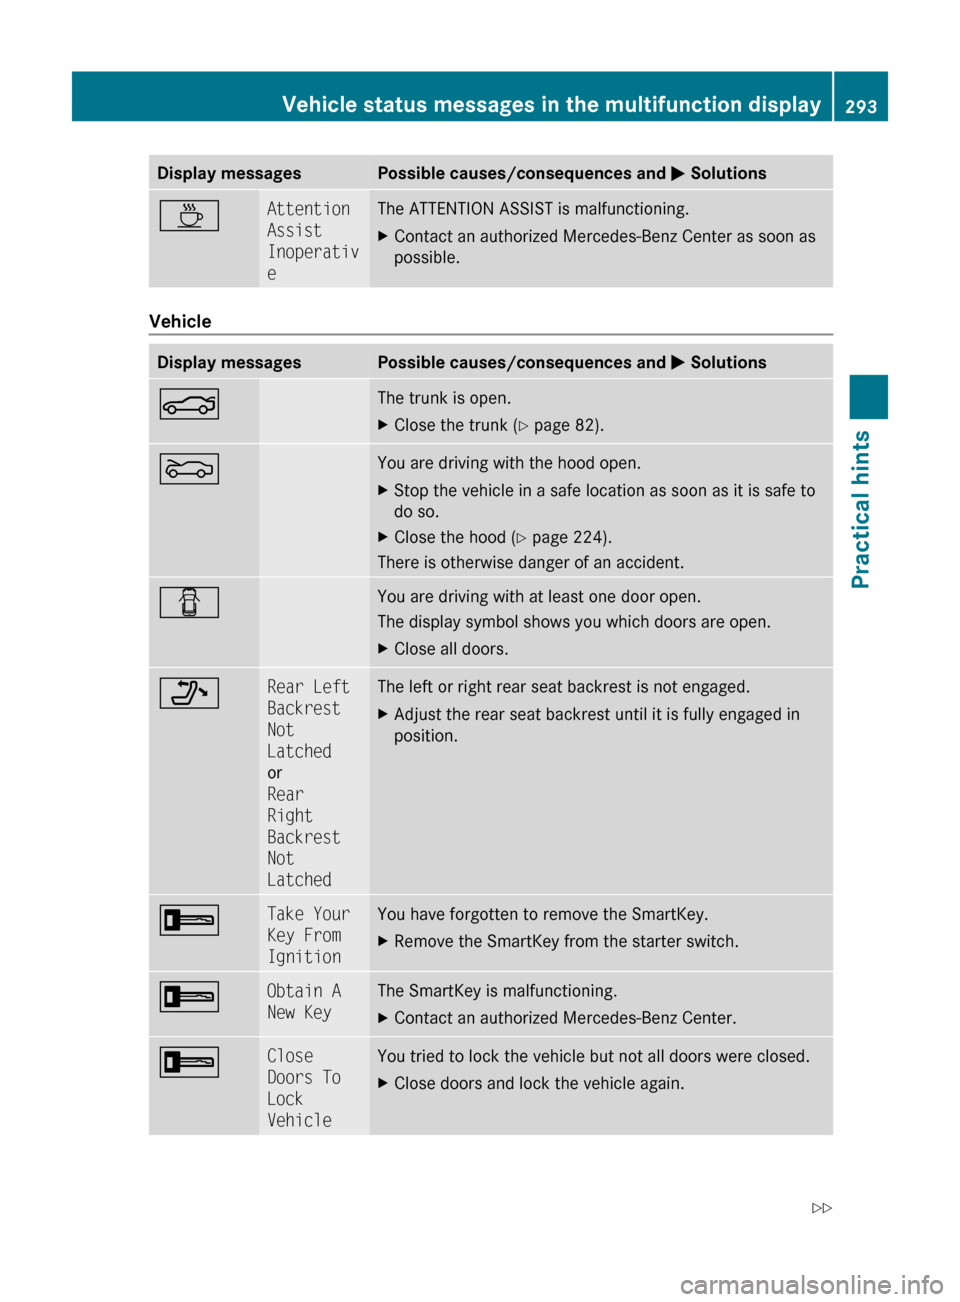
Display messagesPossible causes/consequences and M SolutionsÀAttention
Assist
Inoperativ
eThe ATTENTION ASSIST is malfunctioning.XContact an authorized Mercedes-Benz Center as soon as
possible.
Vehicle
Display messagesPossible causes/consequences and M SolutionsNThe trunk is open.XClose the trunk ( Y page 82).MYou are driving with the hood open.XStop the vehicle in a safe location as soon as it is safe to
do so.XClose the hood ( Y page 224).
There is otherwise danger of an accident.
CYou are driving with at least one door open.
The display symbol shows you which doors are open.XClose all doors._Rear Left
Backrest
Not
Latched
or
Rear
Right
Backrest
Not
LatchedThe left or right rear seat backrest is not engaged.XAdjust the rear seat backrest until it is fully engaged in
position.+Take Your
Key From
IgnitionYou have forgotten to remove the SmartKey.XRemove the SmartKey from the starter switch.+Obtain A
New KeyThe SmartKey is malfunctioning.XContact an authorized Mercedes-Benz Center.+Close
Doors To
Lock
VehicleYou tried to lock the vehicle but not all doors were closed.XClose doors and lock the vehicle again.Vehicle status messages in the multifunction display293Practical hints212_AKB; 2; 41, en-USd2ureepe,Version: 2.11.8.12009-07-17T09:14:21+02:00 - Seite 293Z
Page 316 of 372

ProblemPossible causes/consequences and M SolutionsUSA only:
45
The front passenger
front air bag off
indicator lamp
illuminates and
remains illuminated
with the weight of a
typical adult or
someone larger than a
small individual on the
front passenger seat.The system is malfunctioning.XHave the system checked as soon as possible at an authorized
Mercedes-Benz Center.XRead and observe messages in the multifunction display and
follow corrective steps ( Y page 272).GWarning!
If the 45 indicator lamp illuminates
and remains illuminated with the weight of a
typical adult or someone larger than a small
individual on the front passenger seat, do not
have any passenger use the front passenger
seat until the system has been repaired.ProblemPossible causes/consequences and M SolutionsUSA only:
45
The front passenger
front air bag off
indicator lamp does not
illuminate and/or does
not remain illuminated
with the weight of a
typical 12-month-old
child in a standard child
restraint or less on the
front passenger seat.The system is malfunctioning.XMake sure there is nothing between seat cushion and child seat
and check installation of the child seat.XMake sure no objects applying supplemental weight onto the
seat are present.XIf the front passenger front air bag off indicator lamp remains
out, have the system checked as soon as possible at an
authorized Mercedes-Benz Center. Do not transport a child on
the front passenger seat until the system has been repaired.XRead and observe messages in the multifunction display and
follow corrective steps ( Y page 272).GWarning!
If the 45 indicator lamp does not
illuminate or remains out with the weight of a
typical 12-month-old child in a standard child
restraint or less on the front passenger seat,
do not transport a child on the front
passenger seat until the system has been
repaired.
Unlocking/locking manually
Unlocking the vehicle
If you cannot unlock the vehicle with the
SmartKey or with KEYLESS-GO, unlock the
driver’s door and the trunk using the
mechanical key.
314Unlocking/locking manuallyPractical hints
212_AKB; 2; 41, en-USd2ureepe,Version: 2.11.8.12009-07-17T09:14:21+02:00 - Seite 314
Page 317 of 372

The anti-theft alarm system will trigger when
you
Runlock the driver’s door or the trunk with
the mechanical key
and
Ropen the driver’s door or the trunk
To cancel the alarm, insert the SmartKey into
the starter switch.
Removing the mechanical key
XMove locking tab : in the direction of
arrow.
XSlide mechanical key ; out of the housing.
Unlocking the driver’s door
XInsert mechanical key ; into the driver’s
door lock.
XTurn mechanical key ; counterclockwise
to position 1.
XPull the door handle to open the driver’s
door.
XTurn mechanical key ; back and remove
it from the driver’s door lock.
Unlocking the trunk
A minimum height clearance of 5.78 ft
(1.76 m) is required to open the trunk lid.
XInsert mechanical key ; into the trunk lid
lock.
XTurn mechanical key ; counterclockwise
to position 1.
! When you open the trunk, the trunk lid
swings open upwards. Always make sure
there is sufficient overhead clearance.
XTurn mechanical key ; back and remove
it from the trunk lid lock.
Locking the vehicle
If you cannot lock the vehicle with the
SmartKey or with KEYLESS-GO, lock it as
follows:
XOpen the driver’s door.XClose the front passenger door, the rear
doors, and the trunk.
XPress the central locking switch
(Y page 81).
The locking knobs of the front passenger
door and the rear doors move down.
XIf the vehicle battery is disconnected or
drained: Press down the locking knobs on
Unlocking/locking manually315Practical hints212_AKB; 2; 41, en-USd2ureepe,Version: 2.11.8.12009-07-17T09:14:21+02:00 - Seite 315Z
Page 318 of 372

the front passenger door and the rear
doors.
XExit the vehicle.XClose the driver’s door.XRemove mechanical key ; from the
SmartKey (Y page 315).
XInsert mechanical key ; into the driver’s
door lock.
XTurn mechanical key ; clockwise to
position 1.
The vehicle is locked.
XTurn mechanical key ; back and remove
it from the driver’s door lock.
XCheck whether the doors and the trunk are
locked.
XIf necessary, lock the trunk with the
mechanical key (Y page 85).
iThis procedure does not arm the anti-
theft alarm system, nor does it lock the fuel
filler flap.
Fuel filler flap
GWarning!
Avoid contact with the vehicle walls as they
may contain sharp edges. Otherwise, you
could injure yourself while releasing the fuel
filler flap.
In case the central locking system does not
release the fuel filler flap, you can open it
manually.
The fuel filler flap release is located on the
passenger side in the trunk behind the cover.
XOpen the trunk (Y page 81).XPush the parcel net down.XOpen the cover (Y page 268).XRemove fuel filler flap release ; from
holder :.
XPull fuel filler flap release ; in direction of
the arrow.
XOpen the fuel filler flap (Y page 220).XClose the cover.XClose the trunk.
Resetting activated NECK-PRO active
front head restraints
If the NECK-PRO active front head restraints
have been triggered in a rear-end collision,
they must be reset.
You can tell that the NECK-PRO active front
head restraints have been triggered when
they have been moved forward and cannot be
adjusted.
GWarning!
For safety reasons, have the NECK-PRO active
front head restraints checked at an
authorized Mercedes-Benz Center after a
rear-end collision.
316Resetting activated NECK-PRO active front head restraintsPractical hints
212_AKB; 2; 41, en-USd2ureepe,Version: 2.11.8.12009-07-17T09:14:21+02:00 - Seite 316
Page 327 of 372

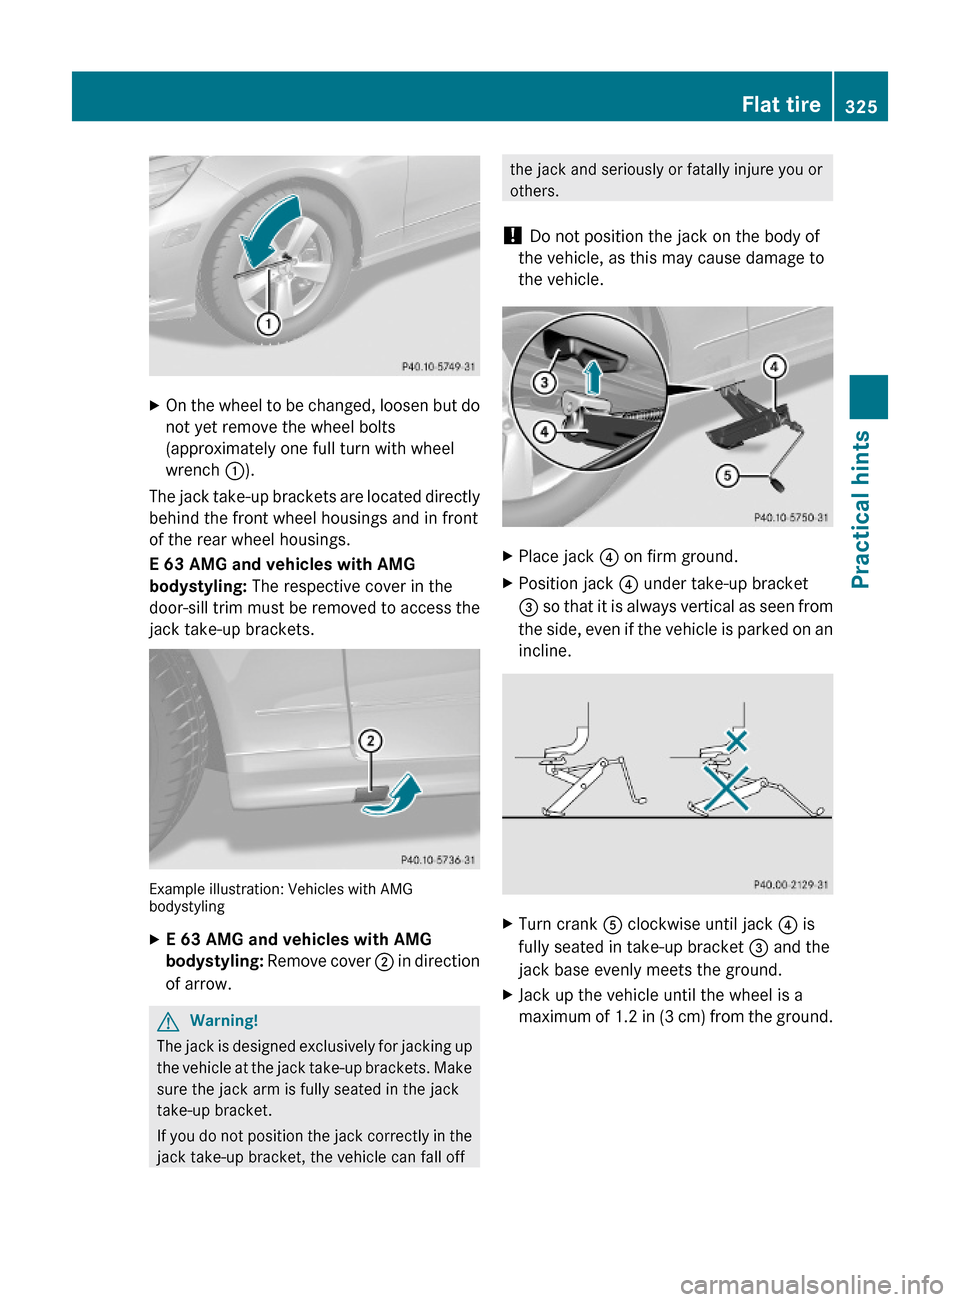
XOn the wheel to be changed, loosen but do
not yet remove the wheel bolts
(approximately one full turn with wheel
wrench :).
The jack take-up brackets are located directly
behind the front wheel housings and in front
of the rear wheel housings.
E 63 AMG and vehicles with AMG
bodystyling: The respective cover in the
door-sill trim must be removed to access the
jack take-up brackets.
Example illustration: Vehicles with AMGbodystyling
XE 63 AMG and vehicles with AMG
bodystyling: Remove cover ; in direction
of arrow.
GWarning!
The jack is designed exclusively for jacking up
the vehicle at the jack take-up brackets. Make
sure the jack arm is fully seated in the jack
take-up bracket.
If you do not position the jack correctly in the
jack take-up bracket, the vehicle can fall off
the jack and seriously or fatally injure you or
others.
! Do not position the jack on the body of
the vehicle, as this may cause damage to
the vehicle.
XPlace jack ? on firm ground.XPosition jack ? under take-up bracket
= so that it is always vertical as seen from
the side, even if the vehicle is parked on an
incline.
XTurn crank A clockwise until jack ? is
fully seated in take-up bracket = and the
jack base evenly meets the ground.
XJack up the vehicle until the wheel is a
maximum of 1.2 in (3 cm) from the ground.
Flat tire325Practical hints212_AKB; 2; 41, en-USd2ureepe,Version: 2.11.8.12009-07-17T09:14:21+02:00 - Seite 325Z