2010 MERCEDES-BENZ E550 air condition
[x] Cancel search: air conditionPage 103 of 372
GWarning!
The Adaptive Highbeam Assist is only an aid
intended to support you while driving. The
driver is and remains responsible for proper
vehicle lighting in accordance with the
prevailing light, sight and traffic conditions.
The system may be impaired or unavailable
when
R visibility is poor, e.g. due to snow, rain, fog,
or heavy spray
R the optical sensor area of the windshield is
dirty, fogged up, or covered by a sticker for
example
The system cannot recognize the following
road users:
R Road users without a lighting system of
their own, e.g. pedestrians
R Road users with dim lighting of their own,
e.g. cyclists
R Road users whose lighting is obstructed,
e.g. road users behind a guardrail
R In some seldom cases, even road users with
a lighting system of their own may be
recognized too late or not at all.
The automatic high-beam headlamps will then
not be deactivated or it will be activated in
spite of preceding or oncoming road users.
This could endanger you and/or others and
cause an accident. Always pay close attention
to the traffic situation and switch off the high
beam manually if necessary.
XActivating: Enable the Adaptive
Highbeam Assist via the control system
( Y page 142).XTurn the exterior lamp switch to position
c .XPress the combination switch in direction
of arrow :.
The Adaptive Highbeam Assist
indicator _ in the multifunction display
comes on when switching on the low-beam
headlamps.When driving faster than approximately
34 mph (55 km/h) and no other road users
are recognized, the high-beam headlamps
are switched on automatically. The high-
beam headlamp indicator lamp K in the
instrument cluster comes on additionally.
When driving slower than approximately
28 mph (45 km/h), other road users are
recognized, or the road is illuminated
sufficiently, the high-beam headlamps are
switched off automatically. The indicator
lamp K in the instrument cluster goes
out. The Adaptive Highbeam Assist
indicator _ in the multifunction display
remains on.
Adaptive control of the headlamp leveling
takes place at a speed of approximately
25 mph (40 km/h).XDeactivating: Pull the combination switch
back to its initial position.
The Adaptive Highbeam Assist
indicator _ in the multifunction display
goes out.
High-beam flasher
XSwitching on: Pull the combination switch
briefly in direction of arrow =.
Hazard warning flasher
The hazard warning flasher can be switched
on at all times, even with the SmartKey
removed from the starter switch.
The hazard warning flasher comes on
automatically when an air bag deploys.
Lighting101Controls in detail212_AKB; 2; 41, en-USd2ureepe,Version: 2.11.8.12009-07-17T09:14:21+02:00 - Seite 101Z
Page 127 of 372

Instrument cluster
Introduction
For a full view illustration of the instrument
cluster, see “Instrument cluster”
(Y page 28).
GWarning!
No messages will be displayed if either the
instrument cluster or the multifunction
display is inoperative.
As a result, you will not be able to see
information about your driving conditions,
such as
Rspeed
Routside temperature
Rwarning/indicator lamps
Rmalfunction/warning messages
Rfailure of any systems
Driving characteristics may be impaired.
If you must continue to drive, do so with added
caution. Contact an authorized Mercedes-
Benz Center as soon as possible.
The language setting for the multifunction
display can be changed via COMAND, see
separate operating instructions.
Activating the instrument cluster
The instrument cluster is activated when you
Ropen the driver’s door
Rswitch on the ignition
Rswitch on the exterior lamps
Adjusting the instrument cluster
illumination
XTo brighten illumination: Turn
dimmer : clockwise.
XTo dim illumination: Turn dimmer :
counterclockwise.
iThe instrument cluster illumination is
dimmed or brightened automatically to suit
ambient light conditions.
Coolant temperature gauge
The coolant temperature gauge is located on
the right side in the instrument cluster
(Y page 28).
GWarning!
Driving when your engine is overheated can
cause some fluids which may have leaked into
the engine compartment to catch fire. You
could be seriously burned.
Steam from an overheated engine can cause
serious burns which can occur just by opening
the engine hood. Stay away from the engine
if you see or hear steam coming from it.
Stop the vehicle in a safe location away from
other traffic. Turn off the engine, get out of the
vehicle and do not stand near the vehicle until
the engine has cooled down.
During severe operating conditions, e.g. stop-
and-go traffic, the coolant temperature may
rise close to 248‡ (120†), i.e close to the
red zone of the temperature gauge.
Instrument cluster125Controls in detail212_AKB; 2; 41, en-USd2ureepe,Version: 2.11.8.12009-07-17T09:14:21+02:00 - Seite 125Z
Page 148 of 372
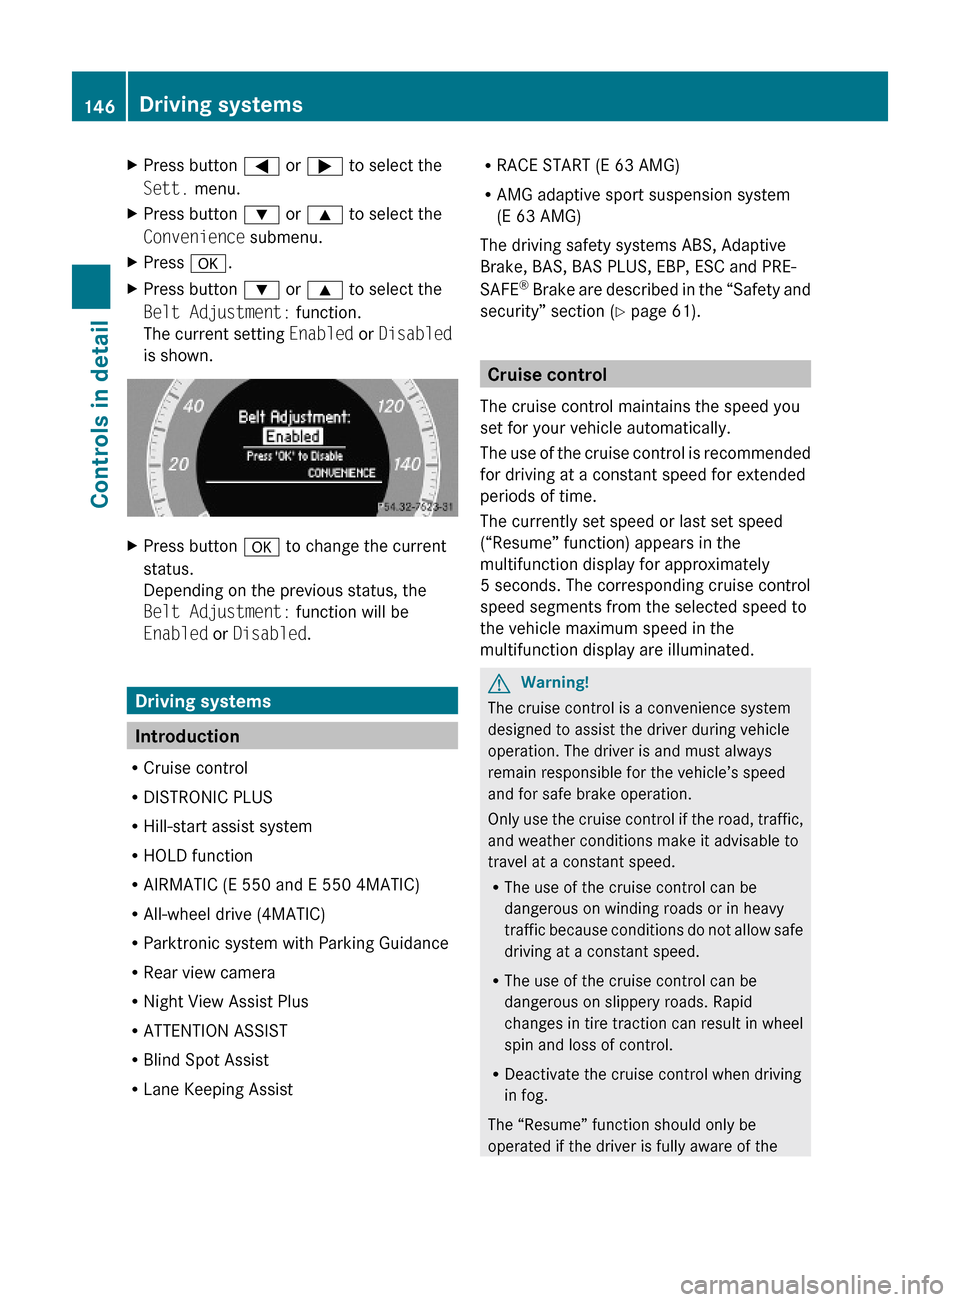
XPress button = or ; to select the
Sett. menu.
XPress button : or 9 to select the
Convenience submenu.
XPress a.XPress button : or 9 to select the
Belt Adjustment: function.
The current setting Enabled or Disabled
is shown.
XPress button a to change the current
status.
Depending on the previous status, the
Belt Adjustment: function will be
Enabled or Disabled.
Driving systems
Introduction
RCruise control
RDISTRONIC PLUS
RHill-start assist system
RHOLD function
RAIRMATIC (E 550 and E 550 4MATIC)
RAll-wheel drive (4MATIC)
RParktronic system with Parking Guidance
RRear view camera
RNight View Assist Plus
RATTENTION ASSIST
RBlind Spot Assist
RLane Keeping Assist
RRACE START (E 63 AMG)
RAMG adaptive sport suspension system
(E 63 AMG)
The driving safety systems ABS, Adaptive
Brake, BAS, BAS PLUS, EBP, ESC and PRE-
SAFE® Brake are described in the “Safety and
security” section (Y page 61).
Cruise control
The cruise control maintains the speed you
set for your vehicle automatically.
The use of the cruise control is recommended
for driving at a constant speed for extended
periods of time.
The currently set speed or last set speed
(“Resume” function) appears in the
multifunction display for approximately
5 seconds. The corresponding cruise control
speed segments from the selected speed to
the vehicle maximum speed in the
multifunction display are illuminated.
GWarning!
The cruise control is a convenience system
designed to assist the driver during vehicle
operation. The driver is and must always
remain responsible for the vehicle’s speed
and for safe brake operation.
Only use the cruise control if the road, traffic,
and weather conditions make it advisable to
travel at a constant speed.
RThe use of the cruise control can be
dangerous on winding roads or in heavy
traffic because conditions do not allow safe
driving at a constant speed.
RThe use of the cruise control can be
dangerous on slippery roads. Rapid
changes in tire traction can result in wheel
spin and loss of control.
RDeactivate the cruise control when driving
in fog.
The “Resume” function should only be
operated if the driver is fully aware of the
146Driving systemsControls in detail
212_AKB; 2; 41, en-USd2ureepe,Version: 2.11.8.12009-07-17T09:14:21+02:00 - Seite 146
Page 152 of 372

The DISTRONIC PLUS does not function in
adverse sight and distance conditions. Do not
use the DISTRONIC PLUS during conditions of
fog, heavy rain, snow or sleet.GWarning!
The DISTRONIC PLUS cannot take weather
conditions into account. Switch off the
DISTRONIC PLUS or do not switch it on if:
R roads are slippery or covered with snow or
ice. The wheels could lose traction while
braking or accelerating, and the vehicle
could skid.
R the DISTRONIC PLUS system sensor covers
are dirty or visibility is diminished due to
snow, rain or fog, for example. The distance
control system functionality could be
impaired.
Always pay attention to surrounding traffic
conditions even while the DISTRONIC PLUS is
switched on. Otherwise, you may not be able
to recognize dangerous situations until it is
too late. This could cause an accident in which
you and/or others could be injured.
GWarning!
The “Resume” function should only be
operated if the driver is fully aware of the
previously set speed and wishes to resume
this particular preset speed.
GWarning!
Close attention to road and traffic conditions
is imperative at all times, regardless of
whether or not the DISTRONIC PLUS is
activated.
Use of the DISTRONIC PLUS can be
dangerous on winding roads or in heavy traffic
because conditions do not allow safe driving
at a constant speed.
The DISTRONIC PLUS will not react to
stationary objects in the roadway (e.g. a
stopped vehicle in a traffic jam or a disabled
vehicle). The DISTRONIC PLUS will also not
respond to oncoming vehicles.
Switch off the DISTRONIC PLUS:
R when changing from the left to the right
lane if vehicles are moving more slowly in
the left lane
R when entering a turn lane or highway off
ramp
R in complex driving situations, such as in
highway construction zones
In these situations, the DISTRONIC PLUS will
continue to maintain the set speed unless
deactivated.
The DISTRONIC PLUS is designed and
intended only to maintain a set speed and
keep a set distance from moving objects in
front of it.
The DISTRONIC PLUS functions in a speed
range of 0 to 120 mph
(Canada: 0 to 200 km/h) if a preceding
vehicle is detected. If no preceding vehicle is
detected the DISTRONIC PLUS functions in a
speed range of 20 to 120 mph
(Canada: 30 to 200 km/h).
Always obey applicable speed limits.
Do not use the DISTRONIC PLUS if you are
driving on a road with steep uphill or downhill
slopes.
When traveling in Canada in a vehicle not
registered in Canada, you must switch off the
radar sensor system ( Y page 144). Canadian
law does not permit the use of the radar
sensor system for vehicles from outside of
Canada. When you switch off the radar sensor
system, the following functions are
deactivated:
R DISTRONIC PLUS
R BAS PLUS ( Y page 63)
R PRE-SAFE ®
Brake ( Y page 69)
R Blind Spot Assist ( Y page 175)
i Due to its radar-emitting nature
DISTRONIC PLUS may have an appearance
similar to a radar detector to law
enforcement officials. You may want to150Driving systemsControls in detail
212_AKB; 2; 41, en-USd2ureepe,Version: 2.11.8.12009-07-17T09:14:21+02:00 - Seite 150
Page 164 of 372

Activating HOLD XMake sure the activation conditions are
met.
XDepress the brake pedal.XContinue to depress the brake pedal with
increased pedal pressure until the message
HOLD appears in the multifunction display.
The HOLD function is activated. You can
now release the brake pedal.
Example illustration, HOLD function activated
iIf the HOLD function is not activated when
depressing the brake pedal, wait briefly and
repeat the above steps.
GWarning!
The vehicle’s brakes are applied when the
HOLD function is activated. Therefore,
deactivate the HOLD function, for example,
when the vehicle is pulled through an
automatic car wash or being towed.
Deactivating HOLD
The HOLD function is switched off when
Ryou depress the accelerator pedal with the
automatic transmission in drive position D
or reverse gear R
Ryou shift the automatic transmission into
park position P
Ryou depress the brake pedal fully again
until the message HOLD in the multifunction
display disappears
Ryou activate the DISTRONIC PLUS
GWarning!
The braking effect of the HOLD function is
canceled and the vehicle can start to roll if
Rthe HOLD function is deactivated by
depressing the accelerator pedal or the
brake pedal
Rthe HOLD function or the power supply is
malfunctioning, e.g. due to battery failure
Rthe electrical components in the engine
compartment or the fuses have been
manipulated
Rthe battery is disconnected
GWarning!
Never get out of the vehicle while the HOLD
function is activated!
The HOLD function must never be operated
or deactivated by passengers or from outside
the vehicle.
The HOLD function does not replace the
parking brake. It must not be used to secure
the vehicle when parking.
Deactivate the HOLD function when leaving
or parking the vehicle. Use the parking brake
to secure the vehicle.
When the HOLD function is activated, the
automatic transmission shifts into park
position P automatically when
Ropening the driver’s door and releasing the
seat belt
Rturning off the engine
Ropening the hood
Ra system malfunction occurs
Rthe on-board voltage is insufficient
The HOLD function is deactivated.
AIRMATIC (E 550 and E 550 4MATIC)
Introduction
The AIRMATIC lets you select the chassis and
suspension setup. The chassis and
162Driving systemsControls in detail
212_AKB; 2; 41, en-USd2ureepe,Version: 2.11.8.12009-07-17T09:14:21+02:00 - Seite 162
Page 165 of 372

suspension setup adjusts the damping
behavior and the ride height for your vehicle.
The AIRMATIC consists of two components.
The electronically controlled damping system
(Y page 163) and the vehicle level control
(Y page 163).
Damping system
The damping system is controlled
electronically and operates continuously. It
adjusts the damping characteristics to the
current operating and driving conditions. The
damping is adjusted individually for each
wheel. Driving safety and tire comfort are
increased.
The fine tuning of the damping is dependent
on
Ryour driving style
Rroad surface conditions
Ryour personal settings
The selected setting remains stored in
memory even if the SmartKey is removed
from the starter switch.
XStart the engine.
Sporty damping adjustment
The firmer suspension tuning in Sport driving
mode provides enhanced road contact.
Select this mode for example, on winding
highways.
XPress damping system switch :.
Indicator lamp ; comes on. The Sport
driving mode with a firmer suspension
tuning is selected. The message
AIRMATIC SPORT appears in the
multifunction display.
Comfort damping adjustment
Vehicle handling in Comfort driving mode is
softer. Select this mode when you prefer a
more comfortable driving style on straight
freeways.
XPress damping system switch :.
Indicator lamp = comes on. The Comfort
driving mode is selected. The message
AIRMATIC COMFORT appears in the
multifunction display.
Vehicle level control
Your vehicle automatically adjusts its ride
height.
The all-around vehicle level control provides
best possible suspension and constant
ground clearance. The vehicle lowers at high
speed automatically in order to increase
driving safety and to reduce fuel
consumption.
The following vehicle levels are available:
Rnormal
Rraised; the vehicle is raised by
approximately 1.0 in (25 mm) compared to
normal level
Rlowered; the vehicle is lowered by
approximately 0.4 in (10 mm) compared to
normal level
You can choose between normal or raised
level.
The vehicle chassis ride height is reduced
automatically
Rat a speed exceeding approximately
93 mph (150 km/h)
Rwith the Sport driving mode (Y page 163)
set
With decreasing speed, the ride height is
again raised to the normal level.
Driving systems163Controls in detail212_AKB; 2; 41, en-USd2ureepe,Version: 2.11.8.12009-07-17T09:14:21+02:00 - Seite 163Z
Page 166 of 372

iThese height adjustments are so small
that you may not notice any change.
Adjusting vehicle level manually
GWarning!
To help avoid personal injury, keep hands and
feet away from wheel housing area, and stay
away from under the vehicle when lowering
the vehicle chassis.
Select the normal level for driving on normal
roads. Select the raised level for driving on
rough roads or with snow chains. Select the
raised level only when required by current
driving conditions. Otherwise, the handling
may be impaired and the fuel consumption
may increase.
The selected vehicle level setting remains
stored in memory even if the SmartKey is
removed from the starter switch.
Selecting raised level
XStart the engine.
When indicator lamp ; is off:
XBriefly press vehicle level control
switch :.
Indicator lamp ; comes on. The vehicle
adjusts from normal level to raised level.
The message: Vehicle Rising appears in
the multifunction display when adjusting
from normal level to raised level. The
message disappears when the vehicle is
raised. Indicator lamp ; is then lit.
When the vehicle is in raised level, pressing
vehicle level control switch : will return
the vehicle to normal level.
The vehicle is lowered to the normal level
automatically when
Rthe vehicle speed is above 75 mph
(120 km/h)
Rthe vehicle speed stays between 50 mph
(80 km/h) and 75 mph (120 km/h) for
approximately 3 minutes.
Indicator lamp ; in
vehicle level control switch : goes out.
If you do not drive in this speed range, the
selected vehicle level setting remains stored
in memory even if the SmartKey is removed
from the starter switch.
Selecting normal level
XStart the engine.
When indicator lamp ; is on:
XBriefly press vehicle level control
switch :.
Indicator lamp ; goes out. The vehicle
adjusts from raised level to normal level.
AMG adaptive sport suspension
system (E 63 AMG)
Rear-axle level control
The rear-axle level control adjusts the vehicle
level for the rear axle. The rear-axle level
control is beneficial because it keeps the
vehicle level at the rear axle constant,
independent of the load. Your vehicle adjusts
its ride height automatically to increase
vehicle safety and to reduce fuel
consumption.
Damping system
The damping system is controlled
electronically and operates continuously. It
adjusts the damping characteristics to the
current operating and driving conditions. The
164Driving systemsControls in detail
212_AKB; 2; 41, en-USd2ureepe,Version: 2.11.8.12009-07-17T09:14:21+02:00 - Seite 164
Page 175 of 372
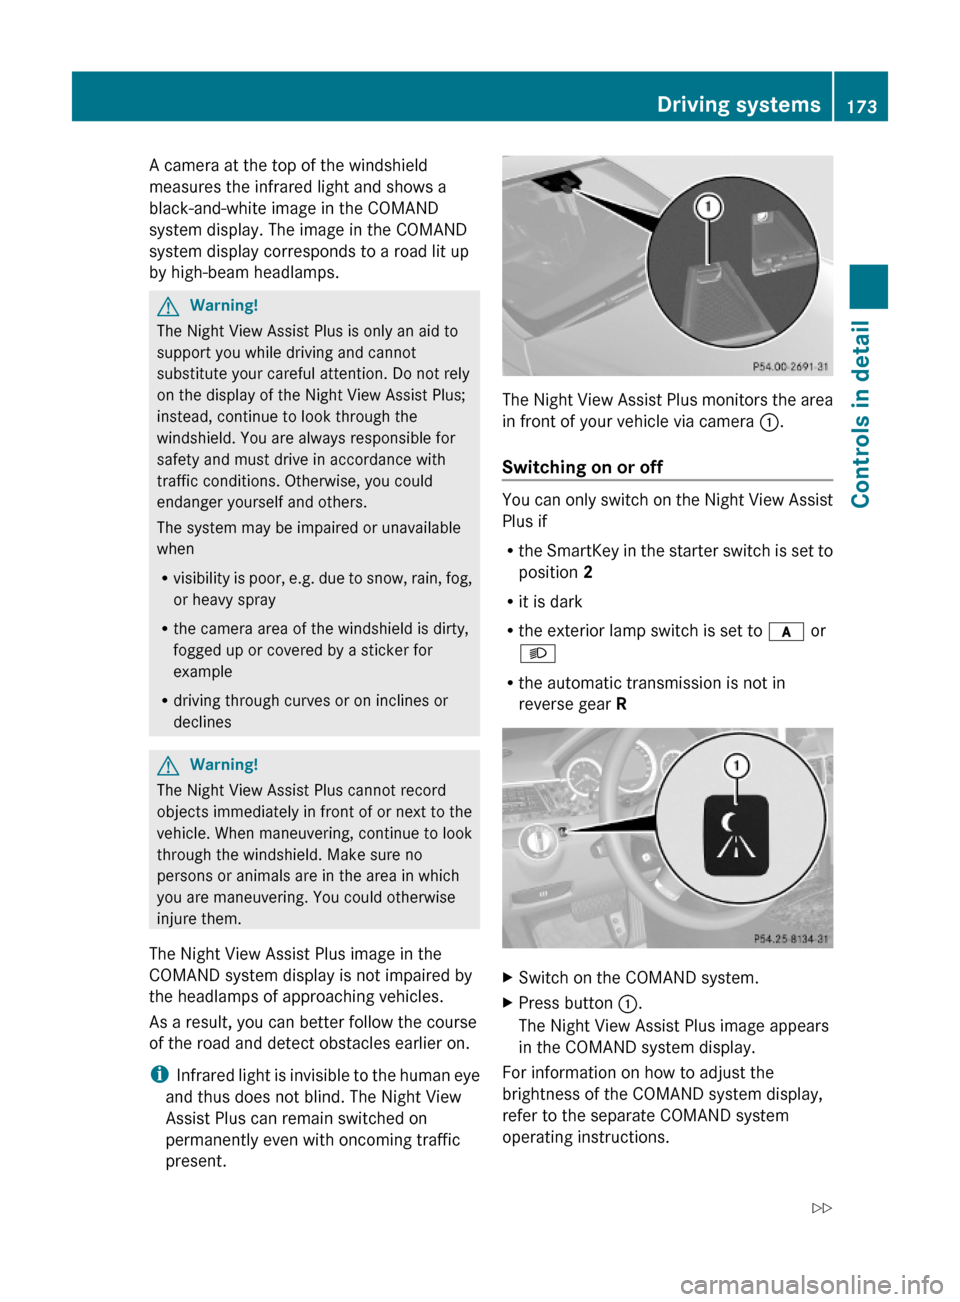
A camera at the top of the windshield
measures the infrared light and shows a
black-and-white image in the COMAND
system display. The image in the COMAND
system display corresponds to a road lit up
by high-beam headlamps.
GWarning!
The Night View Assist Plus is only an aid to
support you while driving and cannot
substitute your careful attention. Do not rely
on the display of the Night View Assist Plus;
instead, continue to look through the
windshield. You are always responsible for
safety and must drive in accordance with
traffic conditions. Otherwise, you could
endanger yourself and others.
The system may be impaired or unavailable
when
Rvisibility is poor, e.g. due to snow, rain, fog,
or heavy spray
Rthe camera area of the windshield is dirty,
fogged up or covered by a sticker for
example
Rdriving through curves or on inclines or
declines
GWarning!
The Night View Assist Plus cannot record
objects immediately in front of or next to the
vehicle. When maneuvering, continue to look
through the windshield. Make sure no
persons or animals are in the area in which
you are maneuvering. You could otherwise
injure them.
The Night View Assist Plus image in the
COMAND system display is not impaired by
the headlamps of approaching vehicles.
As a result, you can better follow the course
of the road and detect obstacles earlier on.
iInfrared light is invisible to the human eye
and thus does not blind. The Night View
Assist Plus can remain switched on
permanently even with oncoming traffic
present.
The Night View Assist Plus monitors the area
in front of your vehicle via camera :.
Switching on or off
You can only switch on the Night View Assist
Plus if
Rthe SmartKey in the starter switch is set to
position 2
Rit is dark
Rthe exterior lamp switch is set to c or
L
Rthe automatic transmission is not in
reverse gear R
XSwitch on the COMAND system.XPress button :.
The Night View Assist Plus image appears
in the COMAND system display.
For information on how to adjust the
brightness of the COMAND system display,
refer to the separate COMAND system
operating instructions.
Driving systems173Controls in detail212_AKB; 2; 41, en-USd2ureepe,Version: 2.11.8.12009-07-17T09:14:21+02:00 - Seite 173Z