2010 MERCEDES-BENZ E350 back mirror
[x] Cancel search: back mirrorPage 7 of 372

ATTENTION ASSIST ........................... 178
Messages in the multifunction
display ........................................... 292
Switching on or off ......................... 138
Audio menu ........................................ 134
Auto-dimming rear view mirrors ........ 95
Automatic central locking .......... 80, 144
Automatic climate control see Climate control system
Automatic headlamp mode ................ 98
Automatic interior lighting control .. 103
Automatic locking when driving ...... 144
Automatic shift program .................. 120
Automatic transmission ................... 114
Automatic shift program ................120
Gear range indicator ......................120
Gear ranges ................................... 120
Gear selector lever ........................115
Hill-start assist system ..................160
Kickdown ....................................... 119
Kickdown (manual shift program) ..124
Manual shift program ..................... 122
One-touch gearshifting ..................121
Program mode indicator ................121
Program mode selector dial
(E 63 AMG) ............................ 121, 123
Program mode selector switch
(automatic shift program) ..............120
Shifting procedure .........................118
Steering wheel gearshift control ....122
Transmission position indicator .....118
Transmission positions ..................118
AUX socket ........................................ 201
Axle oils .............................................. 360
B
BabySmart™
Air bag deactivation system .............46
Self-test ........................................... 47
Backrest
see Seats
Backup lamps
Messages in the multifunction
display ........................................... 300
Bar (air pressure unit) ....................... 250
BAS (Brake Assist System) ................. 63
BAS PLUS (Brake Assist System
PLUS) .................................................... 63
Batteries, SmartKey
Checking condition ..........................79
Replacing ....................................... 317
Battery, Vehicle ................................. 336
Charging ........................................ 337
Jump starting ................................. 338
Messages in the multifunction
display ................................... 284, 297
Bead (tire) .......................................... 250
Beverage holders see Cup holders
Bleeding the fuel system (diesel
engine) ............................................... 333
Blind Spot Assist ............................... 175
Messages in the multifunction
display ........................................... 281
Switching on or off ......................... 138
BlueTEC
AdBlue ®
tank ................................. 333
Brake Assist System
see BAS
Brake Assist System PLUS
see BAS PLUS
Brake fluid
Checking level ............................... 227
Messages in the multifunction
display ........................................... 289
Brake lamps
Cleaning lenses ............................. 262
Brake pads
Messages in the multifunction
display ........................................... 287
Brakes ................................................ 254
Ceramic brake system ...................256
High-performance brake system ....256
Parking brake ................................ 113
Warning lamp ................................. 305
Break-in period .................................. 220
Bug cover (Radiator) ......................... 224
Bulbs see Replacing bulbs Index5212_AKB; 2; 41, en-USd2ureepe,Version: 2.11.8.12009-07-17T09:14:21+02:00 - Seite 5
Page 14 of 372

SRS .......................................... 36, 308
Turn signals ..................................... 29
Lane Keeping Assist .......................... 177
Messages in the multifunction
display ........................................... 283
Switching on or off ......................... 138
LATCH-type child seat anchors (ISOFIX)
see Children in the vehicle
License plate lamps
Messages in the multifunction
display ........................................... 301
Light alloy wheels, cleaning ............. 265
Lighter see Cigarette lighter
Lighting ................................................ 97
Daytime running lamp mode ............98
Exterior ............................................ 97
Interior ........................................... 103
Limp-home mode .............................. 124
Load index (tires) ...................... 246, 250
Loading see Vehicle loading
Locator lighting ................................. 142
Locking the vehicle
KEYLESS-GO .................................... 77
Manually ........................................ 315
SmartKey ......................................... 76
Loss of
Key .................................................. 79
Service and Warranty Information
booklet .......................................... 346
Low-beam headlamps ......................... 98
Exterior lamp switch ........................97
Indicator lamp .................................. 30
Replacing bulbs ............................. 319
Switching on .................................... 98
Lubricants .......................................... 359
Lumbar support ................................... 89
M
Maintenance ........................................ 21
Maintenance System
Service indicator display ................259
Service indicator message .............258
Service term exceeded ..................259
Manual headlamp mode (Low-
beam headlamps) ................................ 98
Manual shift program ....................... 122
Maximum engine speed see Vehicle specification
Maximum loaded vehicle weight ..... 250
Maximum load rating (tires) ............. 250
Maximum permissible tire
inflation pressure .............................. 251
Mechanical key see Key, Mechanical
Media interface ................................. 201
Memory function ................................. 96
Menus see Control system menus
Minispare wheel
see Spare wheel
Mirrors .................................................. 94
Auto-dimming rear view mirrors ....... 95
Exterior rear view mirror parking
position ............................................ 95
Exterior rear view mirrors ................95
Interior rear view mirror ...................94
Memory function .............................. 96
Vanity mirror .................................. 205
MOExtended system ......................... 329
MOExtended tires ..................... 329, 353
MON (Motor Octane Number) .......... 363
Motor Octane Number see MON
Multifunction display ........................ 128
Symbol messages ..........................287
Text messages ............................... 274
Vehicle status messages ...............272
Multifunction display messages
ABS ....................................... 288, 289
Active headlamps .......................... 299
Advanced TPMS ............................. 285
Air bags ......................................... 276
Air filter .......................................... 299
AIRMATIC ...................................... 292
Alternator .............................. 284, 297
ATTENTION ASSIST ........................292
Automatic
transmission .......................... 283, 284
Backrests ....................................... 293
Battery ................................... 284, 297
Blind Spot Assist ............................ 281
Brake fluid ..................................... 28912Index212_AKB; 2; 41, en-USd2ureepe,Version: 2.11.8.12009-07-17T09:14:21+02:00 - Seite 12
Page 57 of 372

Rsteering wheel adjustment
Rrear view mirror adjustment
Rfastening of seat belts
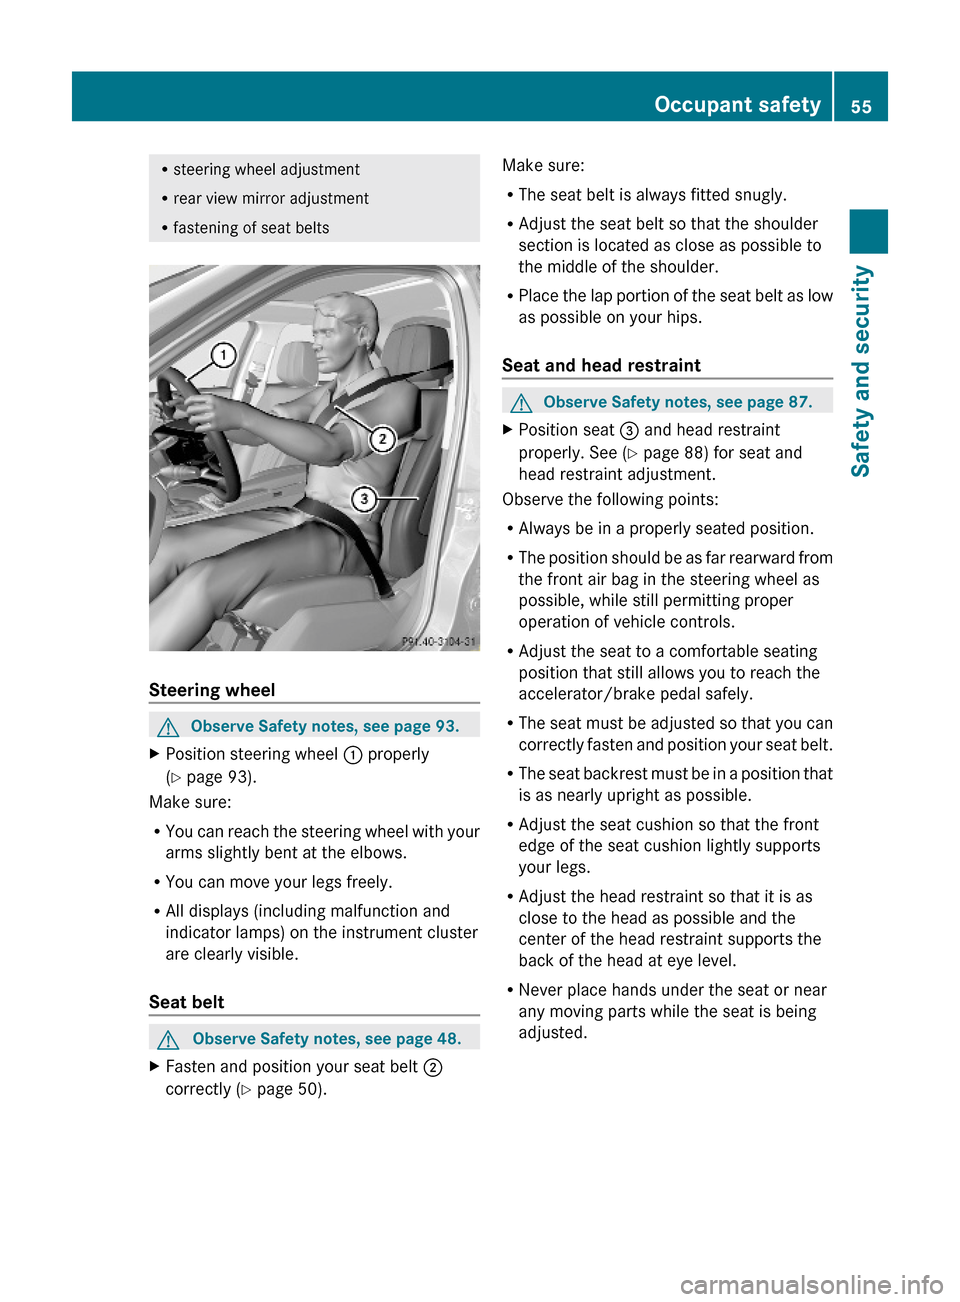
Steering wheel
GObserve Safety notes, see page 93.XPosition steering wheel : properly
(Y page 93).
Make sure:
RYou can reach the steering wheel with your
arms slightly bent at the elbows.
RYou can move your legs freely.
RAll displays (including malfunction and
indicator lamps) on the instrument cluster
are clearly visible.
Seat belt
GObserve Safety notes, see page 48.XFasten and position your seat belt ;
correctly (Y page 50).
Make sure:
RThe seat belt is always fitted snugly.
RAdjust the seat belt so that the shoulder
section is located as close as possible to
the middle of the shoulder.
RPlace the lap portion of the seat belt as low
as possible on your hips.
Seat and head restraint
GObserve Safety notes, see page 87.XPosition seat = and head restraint
properly. See (Y page 88) for seat and
head restraint adjustment.
Observe the following points:
RAlways be in a properly seated position.
RThe position should be as far rearward from
the front air bag in the steering wheel as
possible, while still permitting proper
operation of vehicle controls.
RAdjust the seat to a comfortable seating
position that still allows you to reach the
accelerator/brake pedal safely.
RThe seat must be adjusted so that you can
correctly fasten and position your seat belt.
RThe seat backrest must be in a position that
is as nearly upright as possible.
RAdjust the seat cushion so that the front
edge of the seat cushion lightly supports
your legs.
RAdjust the head restraint so that it is as
close to the head as possible and the
center of the head restraint supports the
back of the head at eye level.
RNever place hands under the seat or near
any moving parts while the seat is being
adjusted.
Occupant safety55Safety and security212_AKB; 2; 41, en-USd2ureepe,Version: 2.11.8.12009-07-17T09:14:21+02:00 - Seite 55Z
Page 89 of 372

Position 0
Before you press the KEYLESS-GO start/stop
button, the vehicle’s on-board electronics
have status 0 (as with SmartKey removed).
Position 1
XPress the KEYLESS-GO start/stop button
once.
This supplies power for some electrical
consumers, e.g. wipers.
i When you now open the driver’s door, the
power supply is switched off.
Ignition (or position 2)
XPress the KEYLESS-GO start/stop button
twice.
This supplies power for all electrical
consumers.
When you switch on the ignition, all lamps
in the instrument cluster come on. The low-
beam headlamp indicator lamp, high-beam
headlamp indicator lamp, turn signal
indicator lamps, and the indicator lamps for
the fog lamps will only come on if activated.
If a lamp in the instrument cluster fails to
come on when the ignition is switched on,
have it checked and replaced if necessary.
If a lamp in the instrument cluster remains
on after starting the engine or comes on
while driving, refer to “Lamps in instrument
cluster” ( Y page 304).
i
When you now press the KEYLESS-GO
start/stop button once and the driver’s
door is open, the power supply is switched
off.
Seats
Safety notes
GWarning!
In order to avoid possible loss of vehicle
control the following must be done before the
vehicle is put into motion:
R seat adjustment
R head restraint adjustment
R steering wheel adjustment
R rear view mirror adjustment
R fastening of seat belts
GWarning!
Do not adjust the driver’s seat while driving.
Adjusting the seat while driving could cause
the driver to lose control of the vehicle.
Never ride in a moving vehicle with the seat
backrest in an excessively reclined position as
this can be dangerous. You could slide under
the seat belt in a collision. If you slide under
it, the seat belt would apply force at the
abdomen or neck. That could cause serious
or fatal injuries. The seat backrest and seat
belts provide the best restraint when the
wearer is in a position that is as upright as
possible and seat belts are properly
positioned on the body.
GWarning!
Your seat must be adjusted so that you can
correctly fasten your seat belt.
Observe the following points:
R Adjust the seat backrest until your arms are
slightly angled when holding the steering
wheel.
R Adjust the seat to a comfortable seating
position that still allows you to reach the
accelerator/brake pedal safely. The
position should be as far back as possible
with the driver still able to operate the
controls properly.
Seats87Controls in detail212_AKB; 2; 41, en-USd2ureepe,Version: 2.11.8.12009-07-17T09:14:21+02:00 - Seite 87Z
Page 90 of 372

RAdjust the head restraint so that it is as
close to the head as possible. The center of
the head restraint must support the back of
the head at eye level.
RNever place hands under the seat or near
any moving parts while a seat is being
adjusted.
Failure to do so could result in an accident
and/or serious personal injury.
GWarning!
The power seats can be operated at any time.
Therefore, do not leave children unattended
in the vehicle, or with access to an unlocked
vehicle. A child’s unsupervised access to a
vehicle could result in an accident and/or
serious personal injury.
GWarning!
According to accident statistics, children are
safer when properly restrained in the rear
seating positions than in the front seating
position. Thus, we strongly recommend that
children be placed in the rear seats whenever
possible. Regardless of seating position,
children 12 years old and under must be
seated and properly secured in an
appropriately sized infant restraint, toddler
restraint, or booster seat recommended for
the size and weight of the child. For additional
information, see “Children in the vehicle”.
A child’s risk of serious or fatal injuries is
significantly increased if the child restraints
are not properly secured in the vehicle and/
or the child is not properly secured in the child
restraint.
GWarning!
For your protection, drive only with properly
positioned head restraints.
Adjust the head restraint so that it is as close
to the head as possible and the center of the
head restraint supports the back of the head
at eye level. This will reduce the potential for
injury to the head and neck in the event of an
accident or similar situation.
Do not drive the vehicle without the seat head
restraints. Head restraints are intended to
help reduce injuries during an accident.
Seat adjustment
! When moving the seats, make sure there
are no items in the footwell or behind the
seats. Otherwise, you could damage the
seats and/or the items.
Power seats
iThe memory function (Y page 96) lets
you store the settings for the seat position
together with the settings for the steering
wheel and the exterior rear view mirrors.
iVehicles with split rear seat bench:
If you fold down one or both sections of the
rear seat backrest, the respective front
seat is moved forward slightly, if necessary,
to prevent contact with the rear seat
backrest.
XSeat fore and aft adjustment: Press the
switch forward or backward in direction of
arrow ?.
XSeat backrest tilt: Press the switch
forward or backward in direction of arrow
A.
XSeat height: Press the switch up or down
in direction of arrow =.
88SeatsControls in detail
212_AKB; 2; 41, en-USd2ureepe,Version: 2.11.8.12009-07-17T09:14:21+02:00 - Seite 88
Page 97 of 372

Exterior rear view mirrorsGWarning!
Exercise care when using the passenger-side
exterior rear view mirror. The mirror surface
is convex (outwardly curved surface for a
wider field of view). Objects in mirror are
closer than they appear. Check your interior
rear view mirror and glance over your
shoulder before changing lanes.
iYou can store the settings for the exterior
rear view mirror position with the memory
function (Y page 96).
XSwitch on the ignition.XPress button : for the driver’s side
exterior rear view mirror or button ; for
the passenger-side exterior rear view
mirror.
The indicator lamp in the respective button
comes on.
If you do not make adjustments to the
selected exterior rear view mirror within
15 seconds, the indicator lamp goes out.
You will then have to select the desired
exterior rear view mirror again before
adjustments can be made. Adjustments
can only be made with the indicator lamp
for the respective exterior rear view mirror
button illuminated.
XPress adjustment button = up, down, left
or right according to the desired setting.
! If an exterior rear view mirror was forcibly
hit from the front, manually snap it back
into place.
iAt low ambient temperatures, the exterior
rear view mirrors will be heated
automatically.
Auto-dimming rear view mirrors
The exterior rear view mirror on the driver’s
side and the interior rear view mirror will
respond automatically to glare when the
ignition is switched on and incoming light
from headlamps falls on the sensor in the
interior rear view mirror.
The rear view mirrors will not react if the
automatic transmission is set to reverse gear
R or the interior lighting is switched on.
GWarning!
The auto dimming function does not react if
incoming light is not aimed directly at sensors
in the interior rear view mirror.
The interior rear view mirror and the exterior
rear view mirror on the driver’s side do not
react, for example, if the rear window
sunshade is in raised position.
Light hitting the mirror(s) at certain angles
(incident light) could blind you. As a result,
you may not be able to observe traffic
conditions and could cause an accident.
Exterior rear view mirror parking
position
To assist during parking maneuvers, you can
set the passenger-side exterior rear view
mirror so that you can see the rear wheel and
the road curb.
Setting and storing the parking position
Mirrors95Controls in detail212_AKB; 2; 41, en-USd2ureepe,Version: 2.11.8.12009-07-17T09:14:21+02:00 - Seite 95Z
Page 173 of 372

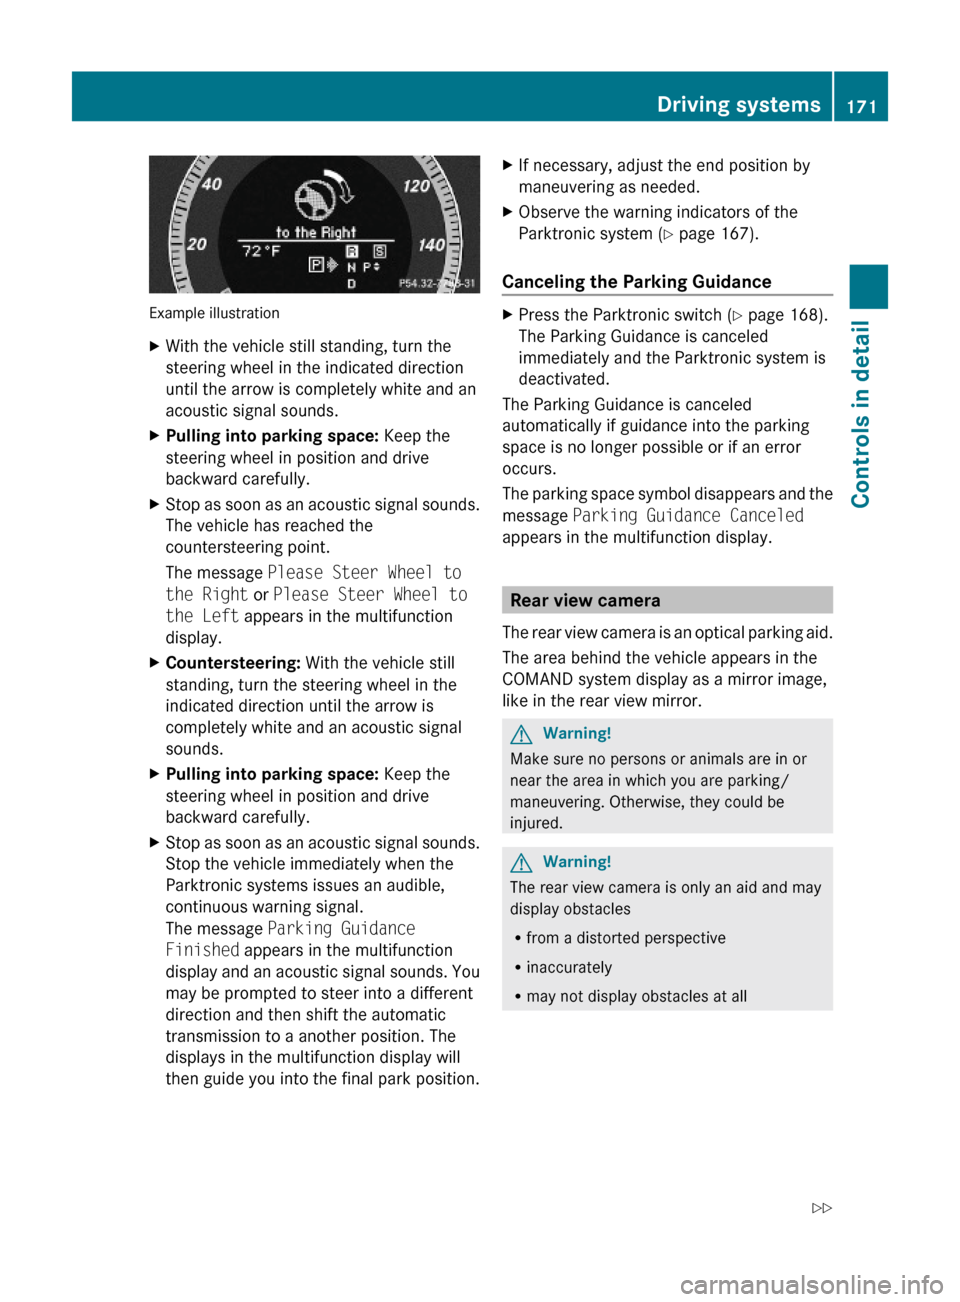
Example illustration
XWith the vehicle still standing, turn the
steering wheel in the indicated direction
until the arrow is completely white and an
acoustic signal sounds.
XPulling into parking space: Keep the
steering wheel in position and drive
backward carefully.
XStop as soon as an acoustic signal sounds.
The vehicle has reached the
countersteering point.
The message Please Steer Wheel to
the Right or Please Steer Wheel to
the Left appears in the multifunction
display.
XCountersteering: With the vehicle still
standing, turn the steering wheel in the
indicated direction until the arrow is
completely white and an acoustic signal
sounds.
XPulling into parking space: Keep the
steering wheel in position and drive
backward carefully.
XStop as soon as an acoustic signal sounds.
Stop the vehicle immediately when the
Parktronic systems issues an audible,
continuous warning signal.
The message Parking Guidance
Finished appears in the multifunction
display and an acoustic signal sounds. You
may be prompted to steer into a different
direction and then shift the automatic
transmission to a another position. The
displays in the multifunction display will
then guide you into the final park position.
XIf necessary, adjust the end position by
maneuvering as needed.
XObserve the warning indicators of the
Parktronic system (Y page 167).
Canceling the Parking Guidance
XPress the Parktronic switch (Y page 168).
The Parking Guidance is canceled
immediately and the Parktronic system is
deactivated.
The Parking Guidance is canceled
automatically if guidance into the parking
space is no longer possible or if an error
occurs.
The parking space symbol disappears and the
message Parking Guidance Canceled
appears in the multifunction display.
Rear view camera
The rear view camera is an optical parking aid.
The area behind the vehicle appears in the
COMAND system display as a mirror image,
like in the rear view mirror.
GWarning!
Make sure no persons or animals are in or
near the area in which you are parking/
maneuvering. Otherwise, they could be
injured.
GWarning!
The rear view camera is only an aid and may
display obstacles
Rfrom a distorted perspective
Rinaccurately
Rmay not display obstacles at all
Driving systems171Controls in detail212_AKB; 2; 41, en-USd2ureepe,Version: 2.11.8.12009-07-17T09:14:21+02:00 - Seite 171Z
Page 206 of 372

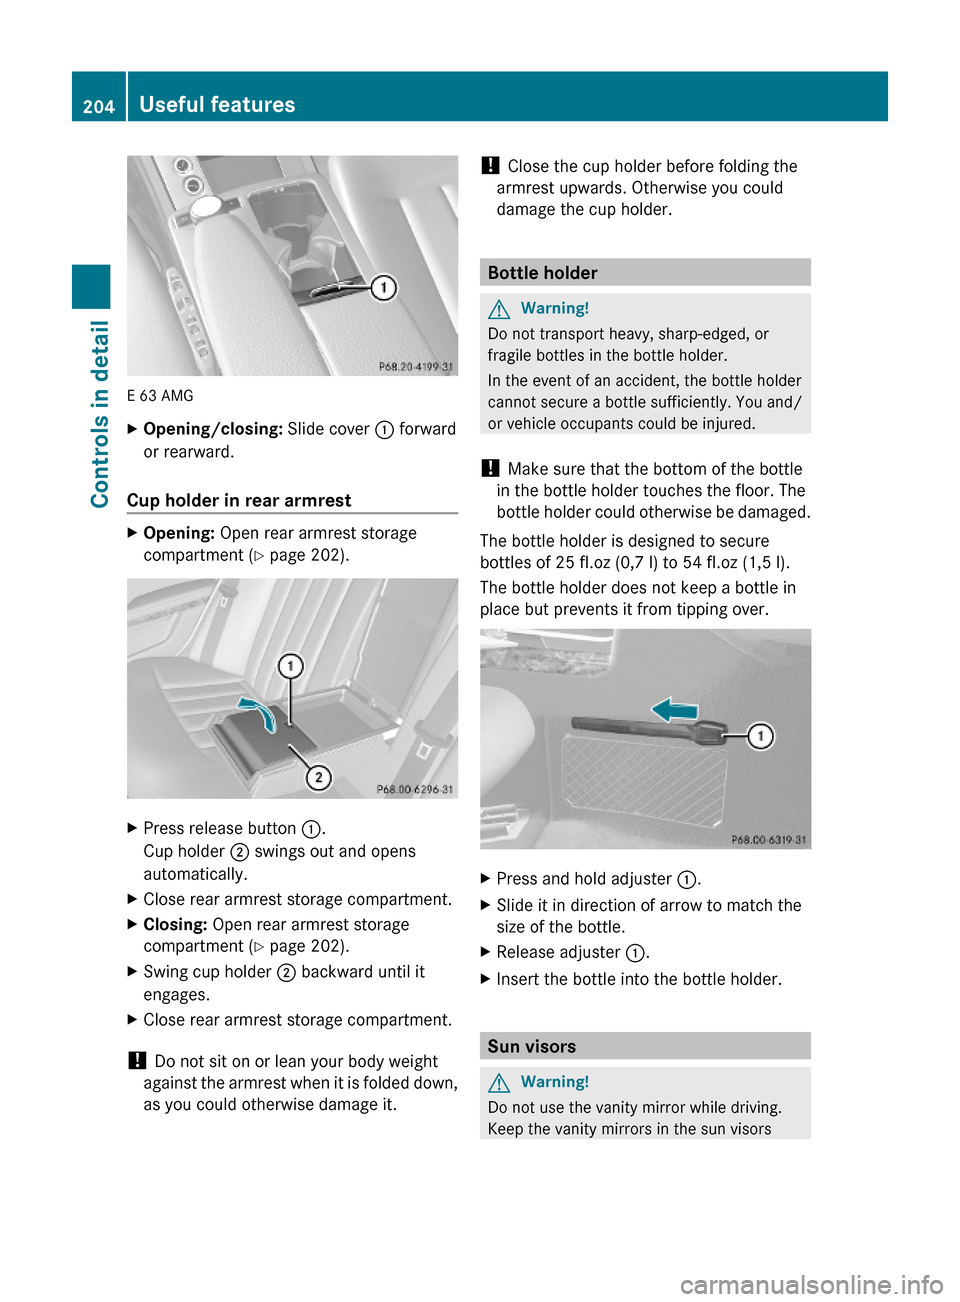
E 63 AMG
XOpening/closing: Slide cover : forward
or rearward.
Cup holder in rear armrest
XOpening: Open rear armrest storage
compartment (Y page 202).
XPress release button :.
Cup holder ; swings out and opens
automatically.
XClose rear armrest storage compartment.XClosing: Open rear armrest storage
compartment (Y page 202).
XSwing cup holder ; backward until it
engages.
XClose rear armrest storage compartment.
! Do not sit on or lean your body weight
against the armrest when it is folded down,
as you could otherwise damage it.
! Close the cup holder before folding the
armrest upwards. Otherwise you could
damage the cup holder.
Bottle holder
GWarning!
Do not transport heavy, sharp-edged, or
fragile bottles in the bottle holder.
In the event of an accident, the bottle holder
cannot secure a bottle sufficiently. You and/
or vehicle occupants could be injured.
! Make sure that the bottom of the bottle
in the bottle holder touches the floor. The
bottle holder could otherwise be damaged.
The bottle holder is designed to secure
bottles of 25 fl.oz (0,7 l) to 54 fl.oz (1,5 l).
The bottle holder does not keep a bottle in
place but prevents it from tipping over.
XPress and hold adjuster :.XSlide it in direction of arrow to match the
size of the bottle.
XRelease adjuster :.XInsert the bottle into the bottle holder.
Sun visors
GWarning!
Do not use the vanity mirror while driving.
Keep the vanity mirrors in the sun visors
204Useful featuresControls in detail
212_AKB; 2; 41, en-USd2ureepe,Version: 2.11.8.12009-07-17T09:14:21+02:00 - Seite 204