2010 MERCEDES-BENZ E350 ECU
[x] Cancel search: ECUPage 164 of 372

Activating HOLD XMake sure the activation conditions are
met.
XDepress the brake pedal.XContinue to depress the brake pedal with
increased pedal pressure until the message
HOLD appears in the multifunction display.
The HOLD function is activated. You can
now release the brake pedal.
Example illustration, HOLD function activated
iIf the HOLD function is not activated when
depressing the brake pedal, wait briefly and
repeat the above steps.
GWarning!
The vehicle’s brakes are applied when the
HOLD function is activated. Therefore,
deactivate the HOLD function, for example,
when the vehicle is pulled through an
automatic car wash or being towed.
Deactivating HOLD
The HOLD function is switched off when
Ryou depress the accelerator pedal with the
automatic transmission in drive position D
or reverse gear R
Ryou shift the automatic transmission into
park position P
Ryou depress the brake pedal fully again
until the message HOLD in the multifunction
display disappears
Ryou activate the DISTRONIC PLUS
GWarning!
The braking effect of the HOLD function is
canceled and the vehicle can start to roll if
Rthe HOLD function is deactivated by
depressing the accelerator pedal or the
brake pedal
Rthe HOLD function or the power supply is
malfunctioning, e.g. due to battery failure
Rthe electrical components in the engine
compartment or the fuses have been
manipulated
Rthe battery is disconnected
GWarning!
Never get out of the vehicle while the HOLD
function is activated!
The HOLD function must never be operated
or deactivated by passengers or from outside
the vehicle.
The HOLD function does not replace the
parking brake. It must not be used to secure
the vehicle when parking.
Deactivate the HOLD function when leaving
or parking the vehicle. Use the parking brake
to secure the vehicle.
When the HOLD function is activated, the
automatic transmission shifts into park
position P automatically when
Ropening the driver’s door and releasing the
seat belt
Rturning off the engine
Ropening the hood
Ra system malfunction occurs
Rthe on-board voltage is insufficient
The HOLD function is deactivated.
AIRMATIC (E 550 and E 550 4MATIC)
Introduction
The AIRMATIC lets you select the chassis and
suspension setup. The chassis and
162Driving systemsControls in detail
212_AKB; 2; 41, en-USd2ureepe,Version: 2.11.8.12009-07-17T09:14:21+02:00 - Seite 162
Page 199 of 372
if the tilt/sliding panel does not open
smoothly.
! Do not attempt to open the tilt/sliding
panel before the tilt/sliding panel is
properly synchronized. The tilt/sliding
panel could otherwise lock-up in the open
position.
If the tilt/sliding panel cannot be closed or
synchronized, contact an authorized
Mercedes-Benz Center or call Roadside
Assistance.
XSwitch on the ignition.XPull the roof panel switch repeatedly in
direction of arrow = to the resistance
point until the tilt/sliding panel is closed
completely.
XPull and hold the roof panel switch in
direction of arrow = for 1 more second.
XPull the roof panel switch repeatedly in
direction of arrow = to the resistance
point until the roller sunblinds are closed
completely.
XPull and hold the roof panel switch in
direction of arrow = for 1 more second.
XCheck whether the tilt/sliding panel and
the roller sunblinds can be opened
completely (Y page 195).
Loading and storing
Loading instructions
GWarning!
Always fasten items being carried as securely
as possible. Use cargo tie-down rings and
fastening materials appropriate for the weight
and size of the load.
In an accident, during hard braking or sudden
maneuvers, loose items will be thrown around
inside the vehicle. This can cause injury to
vehicle occupants unless the items are
securely fastened in the vehicle.
To help avoid personal injury during a collision
or sudden maneuver, exercise care when
transporting cargo. Do not pile luggage or
cargo higher than the seat backrests.
The trunk is the preferred place to carry
objects.
Never drive a vehicle with the trunk open.
Deadly carbon monoxide (CO) gases may
enter vehicle interior resulting in
unconsciousness and death.
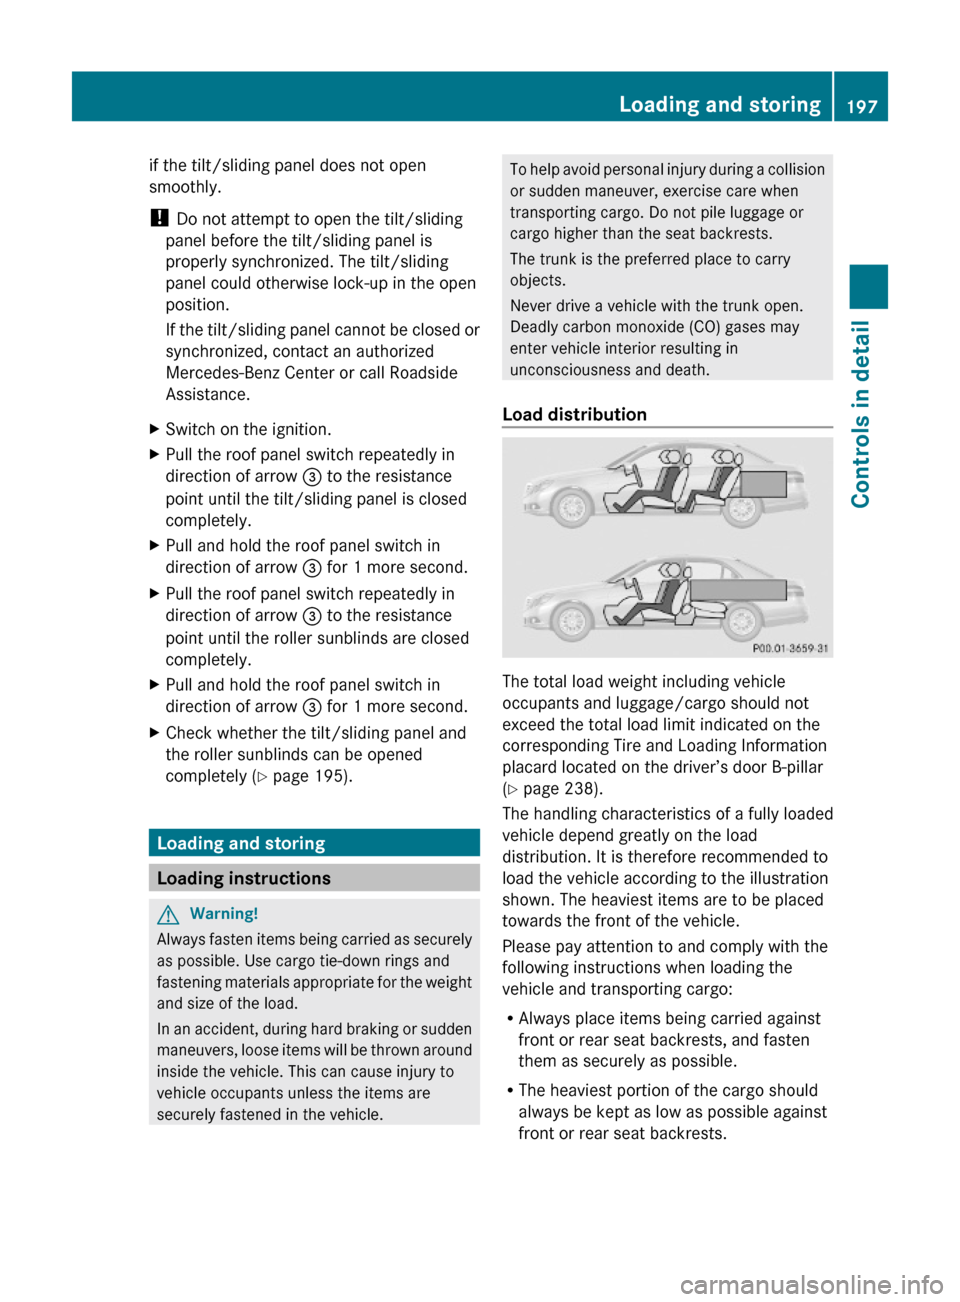
Load distribution
The total load weight including vehicle
occupants and luggage/cargo should not
exceed the total load limit indicated on the
corresponding Tire and Loading Information
placard located on the driver’s door B-pillar
(Y page 238).
The handling characteristics of a fully loaded
vehicle depend greatly on the load
distribution. It is therefore recommended to
load the vehicle according to the illustration
shown. The heaviest items are to be placed
towards the front of the vehicle.
Please pay attention to and comply with the
following instructions when loading the
vehicle and transporting cargo:
RAlways place items being carried against
front or rear seat backrests, and fasten
them as securely as possible.
RThe heaviest portion of the cargo should
always be kept as low as possible against
front or rear seat backrests.
Loading and storing197Controls in detail212_AKB; 2; 41, en-USd2ureepe,Version: 2.11.8.12009-07-17T09:14:21+02:00 - Seite 197Z
Page 200 of 372
Roof rack
For information about further roof rack
equipment, contact an authorized Mercedes-
Benz Center.
GWarning!
Only use roof racks approved by Mercedes-
Benz for your vehicle model to avoid damage
to the vehicle.
Follow the manufacturer’s installation
instructions. Otherwise, an improperly
attached roof rack system or its load could
become detached from the vehicle.
Do not exceed the maximum roof load of
220 lb (100 kg).
Take into consideration that when the roof
rack is loaded, the handling characteristics
are different from those when operating the
vehicle without the roof rack loaded.
Make sure
Ryou can raise the power tilt/sliding sunroof
or the panorama roof with tilt/sliding panel
completely
Ryou can open the trunk completely
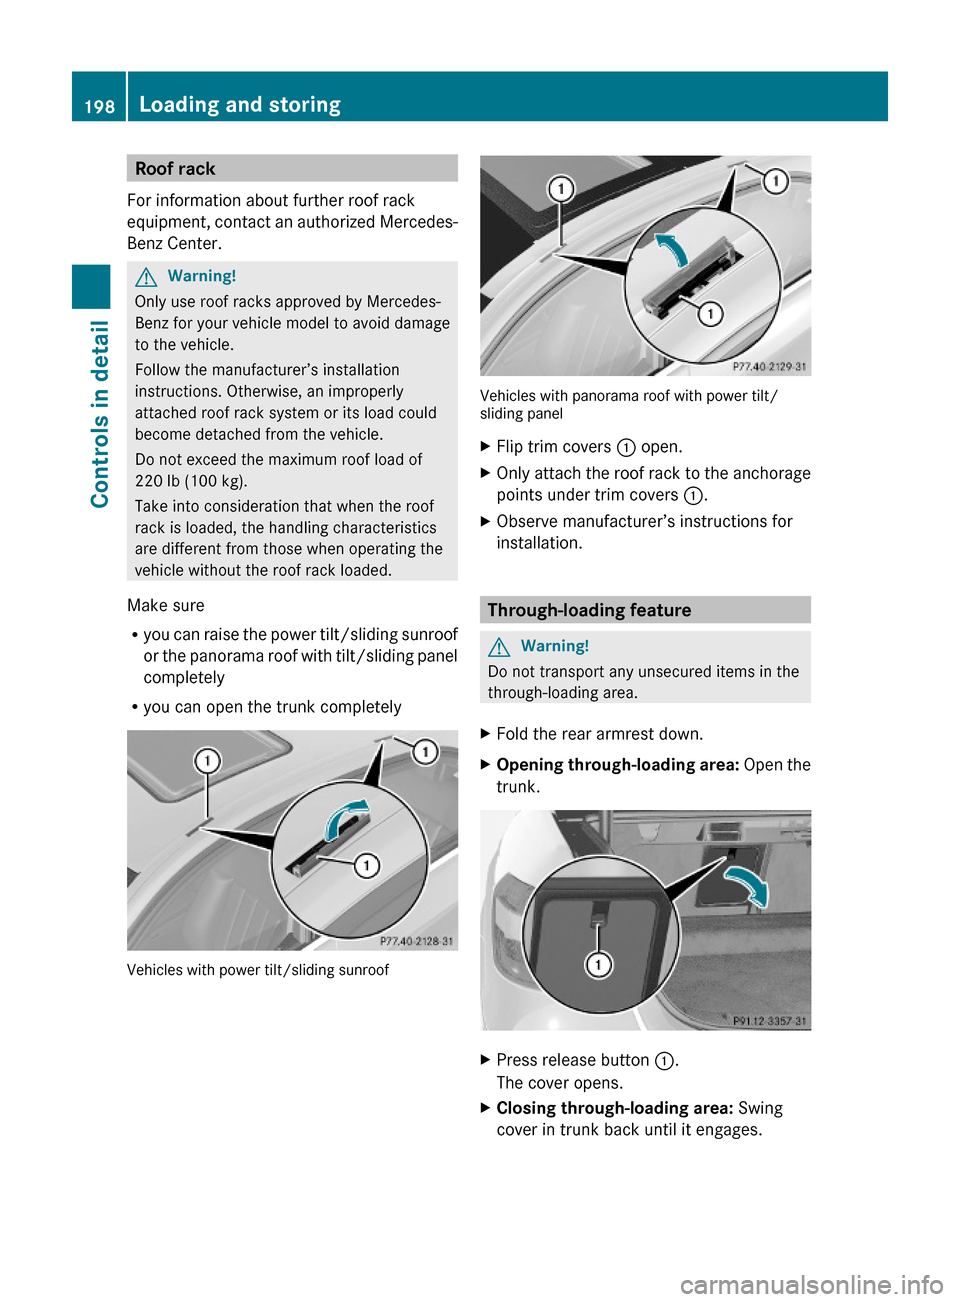
Vehicles with power tilt/sliding sunroof
Vehicles with panorama roof with power tilt/sliding panel
XFlip trim covers : open.XOnly attach the roof rack to the anchorage
points under trim covers :.
XObserve manufacturer’s instructions for
installation.
Through-loading feature
GWarning!
Do not transport any unsecured items in the
through-loading area.
XFold the rear armrest down.XOpening through-loading area: Open the
trunk.
XPress release button :.
The cover opens.
XClosing through-loading area: Swing
cover in trunk back until it engages.
198Loading and storingControls in detail
212_AKB; 2; 41, en-USd2ureepe,Version: 2.11.8.12009-07-17T09:14:21+02:00 - Seite 198
Page 201 of 372
Parcel netsGWarning!
Parcel nets are intended for storing light-
weight items only, such as road maps, mail,
etc.
Heavy objects, objects with sharp edges, or
fragile objects may not be transported in the
parcel nets. In an accident, during hard
braking, or sudden maneuvers, they could be
thrown around inside the vehicle and cause
injury to vehicle occupants.
Parcel nets cannot protect transported goods
in the event of an accident.
Parcel nets are located:
Rin the front passenger footwell
Rbehind the rear armrest
Rat each side of the left and right trunk side
walls
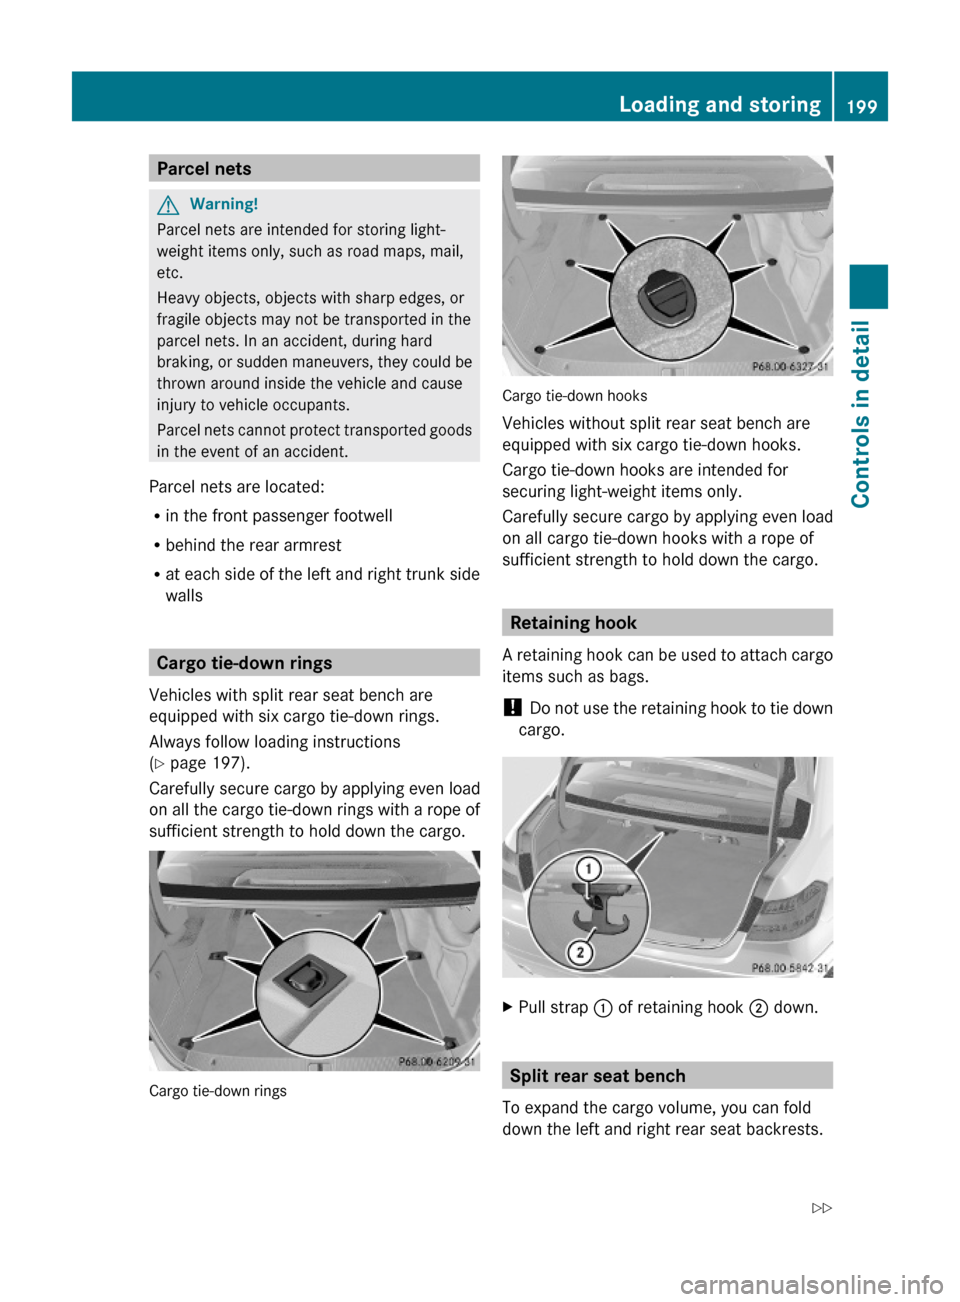
Cargo tie-down rings
Vehicles with split rear seat bench are
equipped with six cargo tie-down rings.
Always follow loading instructions
(Y page 197).
Carefully secure cargo by applying even load
on all the cargo tie-down rings with a rope of
sufficient strength to hold down the cargo.
Cargo tie-down rings
Cargo tie-down hooks
Vehicles without split rear seat bench are
equipped with six cargo tie-down hooks.
Cargo tie-down hooks are intended for
securing light-weight items only.
Carefully secure cargo by applying even load
on all cargo tie-down hooks with a rope of
sufficient strength to hold down the cargo.
Retaining hook
A retaining hook can be used to attach cargo
items such as bags.
! Do not use the retaining hook to tie down
cargo.
XPull strap : of retaining hook ; down.
Split rear seat bench
To expand the cargo volume, you can fold
down the left and right rear seat backrests.
Loading and storing199Controls in detail212_AKB; 2; 41, en-USd2ureepe,Version: 2.11.8.12009-07-17T09:14:21+02:00 - Seite 199Z
Page 202 of 372
The two sections can be folded down
separately.
GWarning!
When expanding the cargo volume, always
fold the seat backrests fully forward.
Unless you are transporting cargo, the seat
backrests must remain properly locked in the
upright position.
In an accident, during hard braking or sudden
maneuvers, loose items will be thrown around
inside the vehicle. This can cause injury to
vehicle occupants unless the items are
securely fastened in the vehicle.
Always use the cargo tie-down rings.
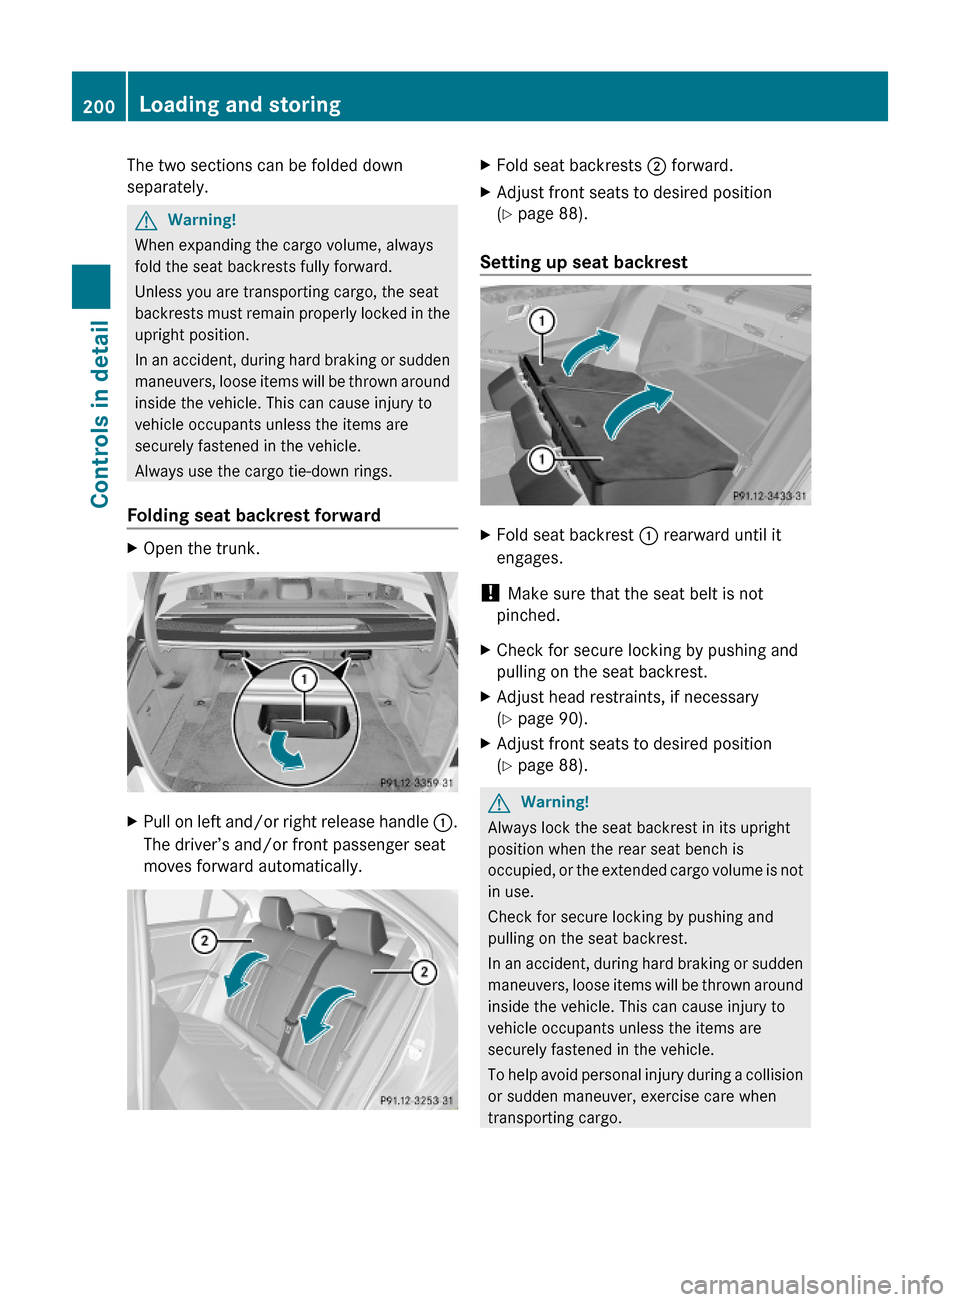
Folding seat backrest forward
XOpen the trunk.XPull on left and/or right release handle :.
The driver’s and/or front passenger seat
moves forward automatically.
XFold seat backrests ; forward.XAdjust front seats to desired position
(Y page 88).
Setting up seat backrest
XFold seat backrest : rearward until it
engages.
! Make sure that the seat belt is not
pinched.
XCheck for secure locking by pushing and
pulling on the seat backrest.
XAdjust head restraints, if necessary
(Y page 90).
XAdjust front seats to desired position
(Y page 88).
GWarning!
Always lock the seat backrest in its upright
position when the rear seat bench is
occupied, or the extended cargo volume is not
in use.
Check for secure locking by pushing and
pulling on the seat backrest.
In an accident, during hard braking or sudden
maneuvers, loose items will be thrown around
inside the vehicle. This can cause injury to
vehicle occupants unless the items are
securely fastened in the vehicle.
To help avoid personal injury during a collision
or sudden maneuver, exercise care when
transporting cargo.
200Loading and storingControls in detail
212_AKB; 2; 41, en-USd2ureepe,Version: 2.11.8.12009-07-17T09:14:21+02:00 - Seite 200
Page 206 of 372
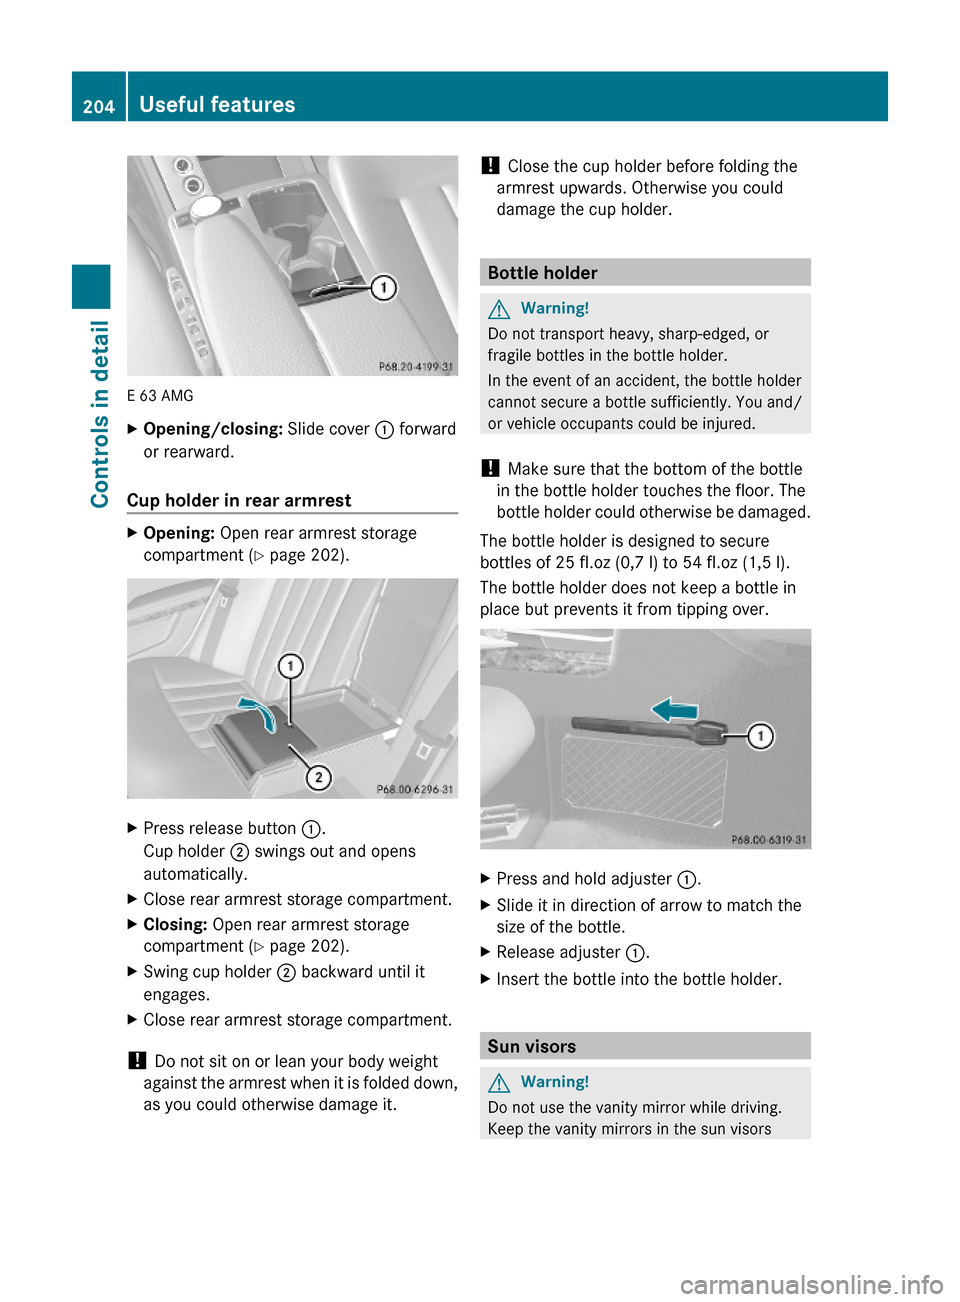
E 63 AMG
XOpening/closing: Slide cover : forward
or rearward.
Cup holder in rear armrest
XOpening: Open rear armrest storage
compartment (Y page 202).
XPress release button :.
Cup holder ; swings out and opens
automatically.
XClose rear armrest storage compartment.XClosing: Open rear armrest storage
compartment (Y page 202).
XSwing cup holder ; backward until it
engages.
XClose rear armrest storage compartment.
! Do not sit on or lean your body weight
against the armrest when it is folded down,
as you could otherwise damage it.
! Close the cup holder before folding the
armrest upwards. Otherwise you could
damage the cup holder.
Bottle holder
GWarning!
Do not transport heavy, sharp-edged, or
fragile bottles in the bottle holder.
In the event of an accident, the bottle holder
cannot secure a bottle sufficiently. You and/
or vehicle occupants could be injured.
! Make sure that the bottom of the bottle
in the bottle holder touches the floor. The
bottle holder could otherwise be damaged.
The bottle holder is designed to secure
bottles of 25 fl.oz (0,7 l) to 54 fl.oz (1,5 l).
The bottle holder does not keep a bottle in
place but prevents it from tipping over.
XPress and hold adjuster :.XSlide it in direction of arrow to match the
size of the bottle.
XRelease adjuster :.XInsert the bottle into the bottle holder.
Sun visors
GWarning!
Do not use the vanity mirror while driving.
Keep the vanity mirrors in the sun visors
204Useful featuresControls in detail
212_AKB; 2; 41, en-USd2ureepe,Version: 2.11.8.12009-07-17T09:14:21+02:00 - Seite 204
Page 219 of 372
XPress button = approximately 3 seconds.
The currently selected zone appears in
compass display ;.
XSelecting zone: Press button = until the
desired zone is selected.
Do not press the button again until the
direction is indicated.
XCompass calibration: Make sure you are
in an area where you can drive a full circle
with your vehicle without disturbing traffic
in order to calibrate the compass.
In order to calibrate the compass properly,
mind the following:
RCalibrate the compass in open terrain.
Nearby buildings, bridges, power lines and
large antenna masts, for example, could
impair compass calibration.
RSwitch off electrical consumers (e.g.
climate control, windshield wipers, or rear
window defroster).
RClose all doors and the trunk.
XStart the engine.XPress button = approximately 6 seconds
until symbol C appears in compass
display ;.
XDrive a full circle at a vehicle speed of
between 3 mph (5 km/h) and 6 mph
(10 km/h).
When calibration was successful, the
current direction appears in compass
display ;.
Floormat (driver’s side only)
GWarning!
Whenever you are using a floormat, make sure
there is enough clearance and that the
floormat is securely fastened.
The floormat should always be securely
fastened using the fastening equipment.
Before driving off, check that the floormat is
securely in place and adjust it if necessary. A
loose floormat could slip and hinder proper
functioning of the pedals.
Do not place several floormats on top of each
other as this may impair pedal movement.
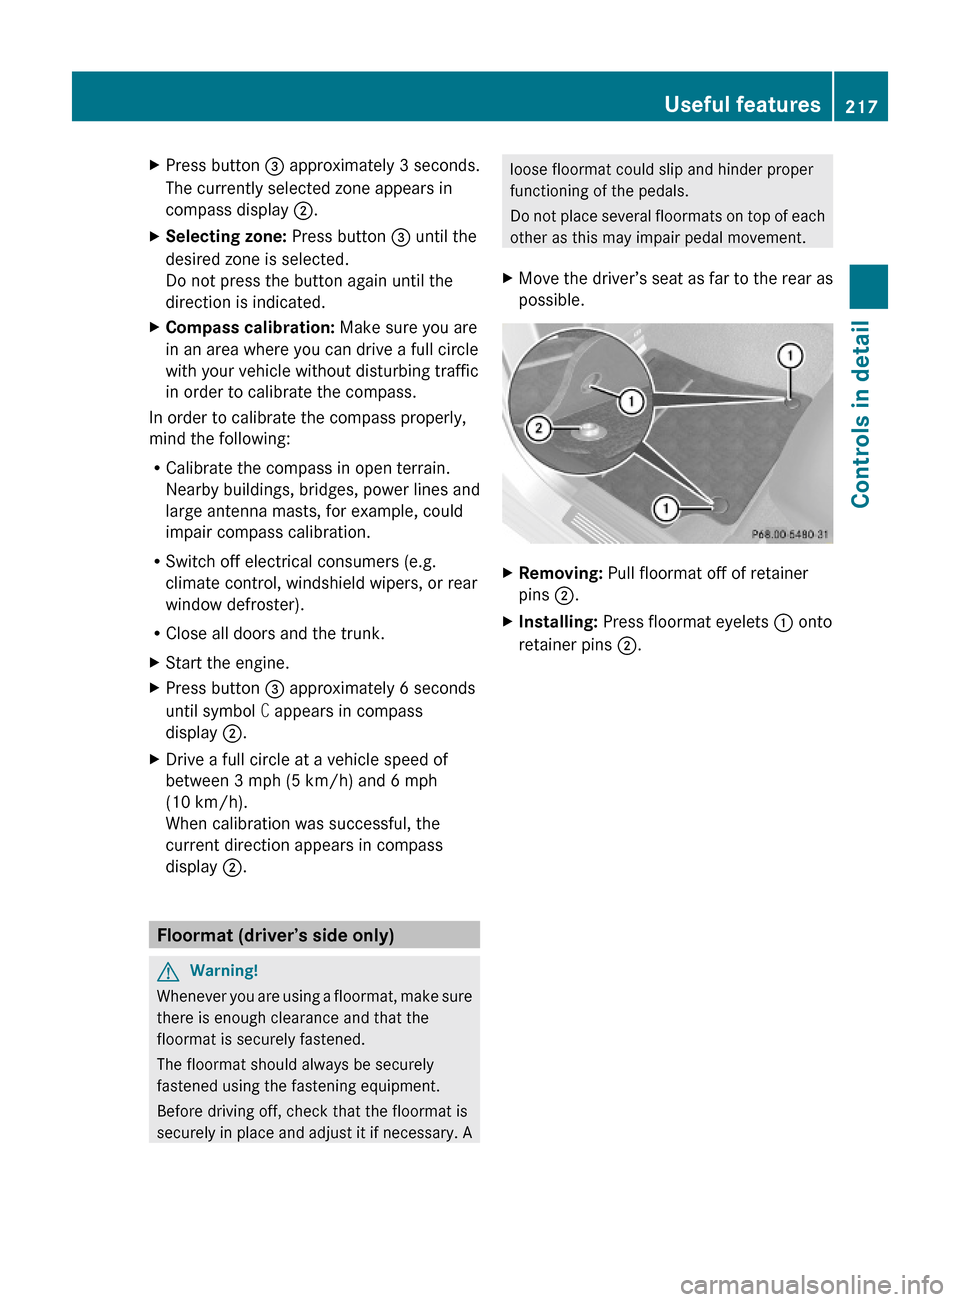
XMove the driver’s seat as far to the rear as
possible.
XRemoving: Pull floormat off of retainer
pins ;.
XInstalling: Press floormat eyelets : onto
retainer pins ;.
Useful features217Controls in detail212_AKB; 2; 41, en-USd2ureepe,Version: 2.11.8.12009-07-17T09:14:21+02:00 - Seite 217Z
Page 226 of 372

XPush handle ; under the hood upwards.XPull up on the hood and then release it.
The hood will be held open at shoulder
height by gas-filled struts automatically.
Closing
GWarning!
When closing the hood, use extreme caution
not to catch hands or fingers. Be careful that
you do not close the hood on anyone.
Make sure the hood is securely engaged
before driving off. Do not continue driving if
the hood can no longer engage after an
accident, for example. The hood could
otherwise come loose while the vehicle is in
motion and injure you and/or others.
XLet the hood drop from a height of
approximately 8 in (20 cm).
XCheck to make sure the hood is fully
closed.
If you can raise the hood at a point above
the headlamps, then it is not properly
closed. Open it again and let it drop with
somewhat greater force.
Radiator
iVehicles with diesel engine:
Do not cover the radiator, for example with
a winter front or bug cover. Otherwise the
readings of the on-board diagnostic system
may be inaccurate. Some of theses
readings are required by law and must be
accurate at all times.
Engine oil
The amount of oil your engine consumes will
depend on a number of factors, including
driving style. Increased oil consumption can
occur when the vehicle is new or the vehicle
is driven frequently at higher engine speeds.
Engine oil consumption checks should only
be made after the vehicle break-in period.
! Do not use any special lubricant additives,
as these may damage the drive assemblies.
Using special additives not approved by
Mercedes-Benz may cause damage not
covered by the Mercedes-Benz Limited
Warranty.
For further information contact an
authorized Mercedes-Benz Center.
Notes on checking engine oil level
When checking the oil level
Rthe vehicle must be parked on level ground
Rwith the engine at operating temperature,
the vehicle must have been stationary for
at least 5 minutes with the engine turned
off
Rwith the engine not at operating
temperature, the vehicle must have been
stationary for at least 30 minutes with the
engine turned off
Checking engine oil level
XOpen the hood (Y page 223).224Engine compartmentOperation
212_AKB; 2; 41, en-USd2ureepe,Version: 2.11.8.12009-07-17T09:14:21+02:00 - Seite 224