2010 MERCEDES-BENZ E350 Service BH
[x] Cancel search: Service BHPage 131 of 372

Menus and submenusFunction:Trip menu (Y page 129);AMG12 menu (Y page 131)=Navi menu (Y page 134)?Audio menu (Y page 134)ATel menu (Y page 135)BAssistance menu (Y page 137)CService menu (Y page 138)DSettings menu (Y page 139)
Trip menu
In the Trip menu, you can show an additional
display for the speedometer and call up or
reset your vehicle’s statistical data.
The following information is available:
RStandard display (Y page 129)
RFuel consumption statistics since start
(Y page 130)
RFuel consumption statistics since last reset
(Y page 130)
RResetting values (Y page 130)
RRemaining driving range and current fuel
consumption (Y page 131)
RDigital Speedometer (Y page 131)
Standard display
In the standard display, the trip
odometer : and the main odometer ;
appear in the multifunction display.
12AMG vehicles only.Control system129Controls in detail212_AKB; 2; 41, en-USd2ureepe,Version: 2.11.8.12009-07-17T09:14:21+02:00 - Seite 129Z
Page 136 of 372
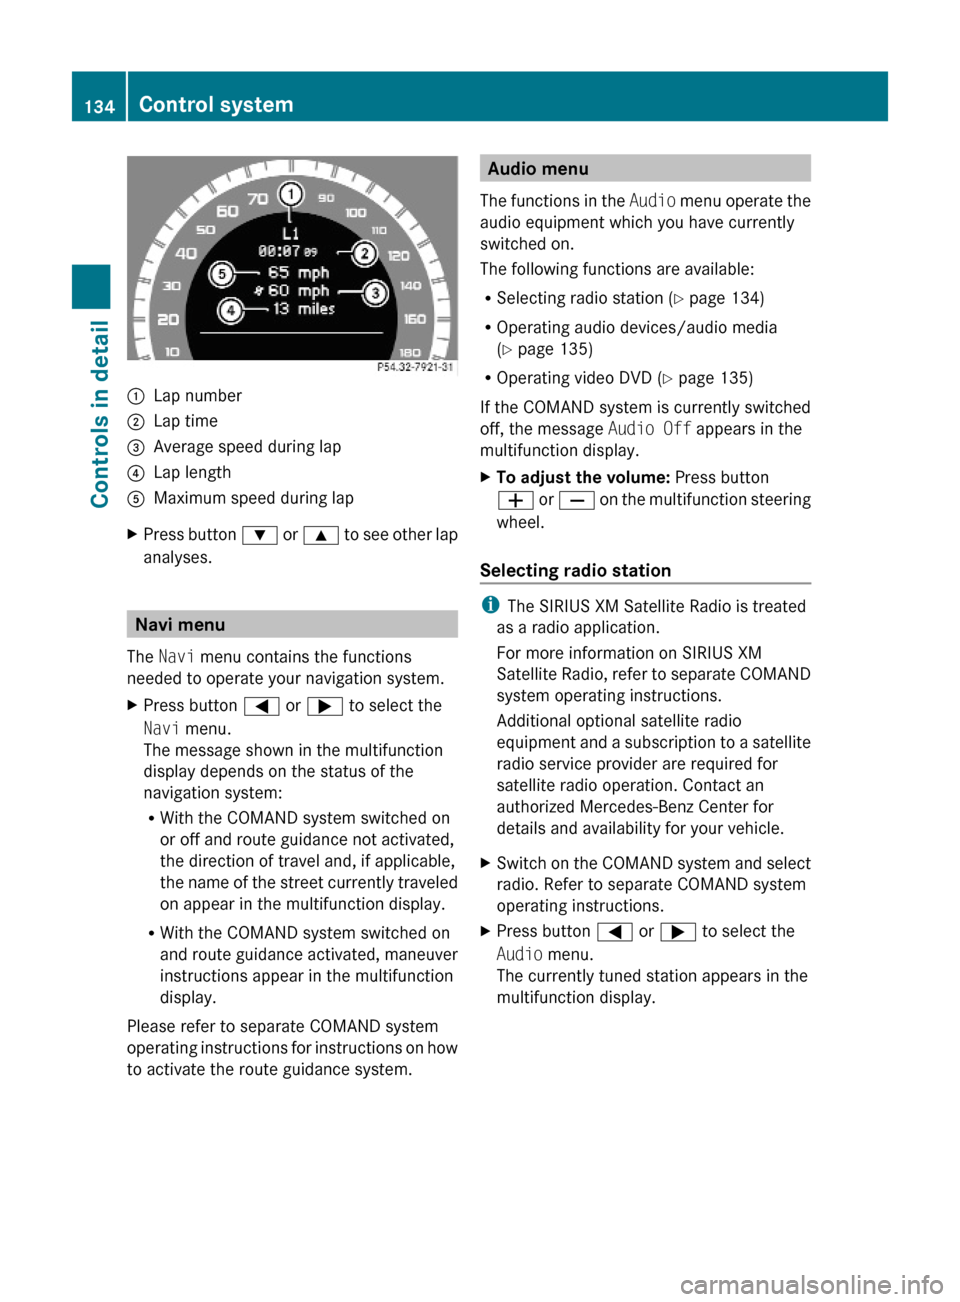
:Lap number;Lap time=Average speed during lap?Lap lengthAMaximum speed during lapXPress button : or 9 to see other lap
analyses.
Navi menu
The Navi menu contains the functions
needed to operate your navigation system.
XPress button = or ; to select the
Navi menu.
The message shown in the multifunction
display depends on the status of the
navigation system:
RWith the COMAND system switched on
or off and route guidance not activated,
the direction of travel and, if applicable,
the name of the street currently traveled
on appear in the multifunction display.
RWith the COMAND system switched on
and route guidance activated, maneuver
instructions appear in the multifunction
display.
Please refer to separate COMAND system
operating instructions for instructions on how
to activate the route guidance system.
Audio menu
The functions in the Audio menu operate the
audio equipment which you have currently
switched on.
The following functions are available:
RSelecting radio station (Y page 134)
ROperating audio devices/audio media
(Y page 135)
ROperating video DVD (Y page 135)
If the COMAND system is currently switched
off, the message Audio Off appears in the
multifunction display.
XTo adjust the volume: Press button
W or X on the multifunction steering
wheel.
Selecting radio station
iThe SIRIUS XM Satellite Radio is treated
as a radio application.
For more information on SIRIUS XM
Satellite Radio, refer to separate COMAND
system operating instructions.
Additional optional satellite radio
equipment and a subscription to a satellite
radio service provider are required for
satellite radio operation. Contact an
authorized Mercedes-Benz Center for
details and availability for your vehicle.
XSwitch on the COMAND system and select
radio. Refer to separate COMAND system
operating instructions.
XPress button = or ; to select the
Audio menu.
The currently tuned station appears in the
multifunction display.
134Control systemControls in detail
212_AKB; 2; 41, en-USd2ureepe,Version: 2.11.8.12009-07-17T09:14:21+02:00 - Seite 134
Page 138 of 372
Some jurisdictions prohibit the driver from
using a mobile phone while driving a vehicle.
Bear in mind that at a speed of just 30 mph
(approximately 50 km/h), your vehicle is
covering a distance of 44 feet (approximately
14 m) every second.
You can connect your telephone to the
COMAND system via Bluetooth®, see
separate COMAND system operating
instructions.
XSwitch on the COMAND system.
Refer to separate COMAND system
operating instructions.
XPress button = or ; to select the
Tel menu.
One of the following messages will appear
in the multifunction display:
RNo Service: No network is available.
RReady for Bluetooth Telephony...:
The telephone has not been connected
to the COMAND system via Bluetooth®
yet.
XConnect the telephone to the
COMAND system via Bluetooth®.
RPhone READY or name of the network
provider (if available): The telephone has
found a network and is ready for use. You
can operate it using the control system.
Answering a call
When your telephone is ready to receive calls,
you can answer a call at any time. In the
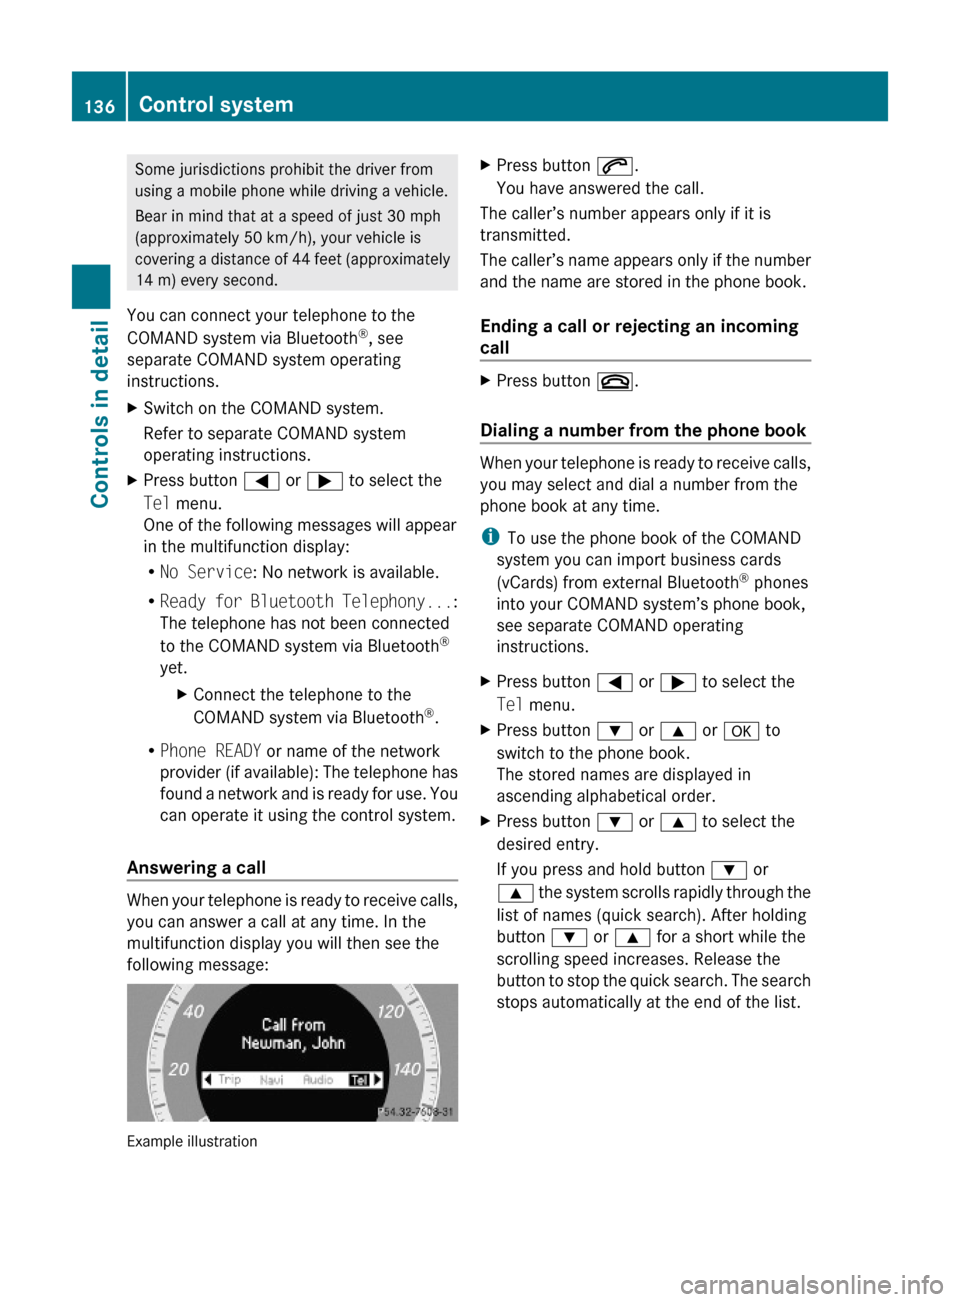
multifunction display you will then see the
following message:
Example illustration
XPress button 6.
You have answered the call.
The caller’s number appears only if it is
transmitted.
The caller’s name appears only if the number
and the name are stored in the phone book.
Ending a call or rejecting an incoming
call
XPress button ~.
Dialing a number from the phone book
When your telephone is ready to receive calls,
you may select and dial a number from the
phone book at any time.
iTo use the phone book of the COMAND
system you can import business cards
(vCards) from external Bluetooth® phones
into your COMAND system’s phone book,
see separate COMAND operating
instructions.
XPress button = or ; to select the
Tel menu.
XPress button : or 9 or a to
switch to the phone book.
The stored names are displayed in
ascending alphabetical order.
XPress button : or 9 to select the
desired entry.
If you press and hold button : or
9 the system scrolls rapidly through the
list of names (quick search). After holding
button : or 9 for a short while the
scrolling speed increases. Release the
button to stop the quick search. The search
stops automatically at the end of the list.
136Control systemControls in detail
212_AKB; 2; 41, en-USd2ureepe,Version: 2.11.8.12009-07-17T09:14:21+02:00 - Seite 136
Page 140 of 372
XPress button a again if you would like
to change the current status.
After the function has been activated, the
PRE-SAFE® Brake indicator Ä appears
in the lower part of the multifunction
display. When the HOLD function is
switched on, the PRE-SAFE® Brake
indicator Ä will not appear.
For more information on PRE-SAFE® Brake,
see (Y page 69).
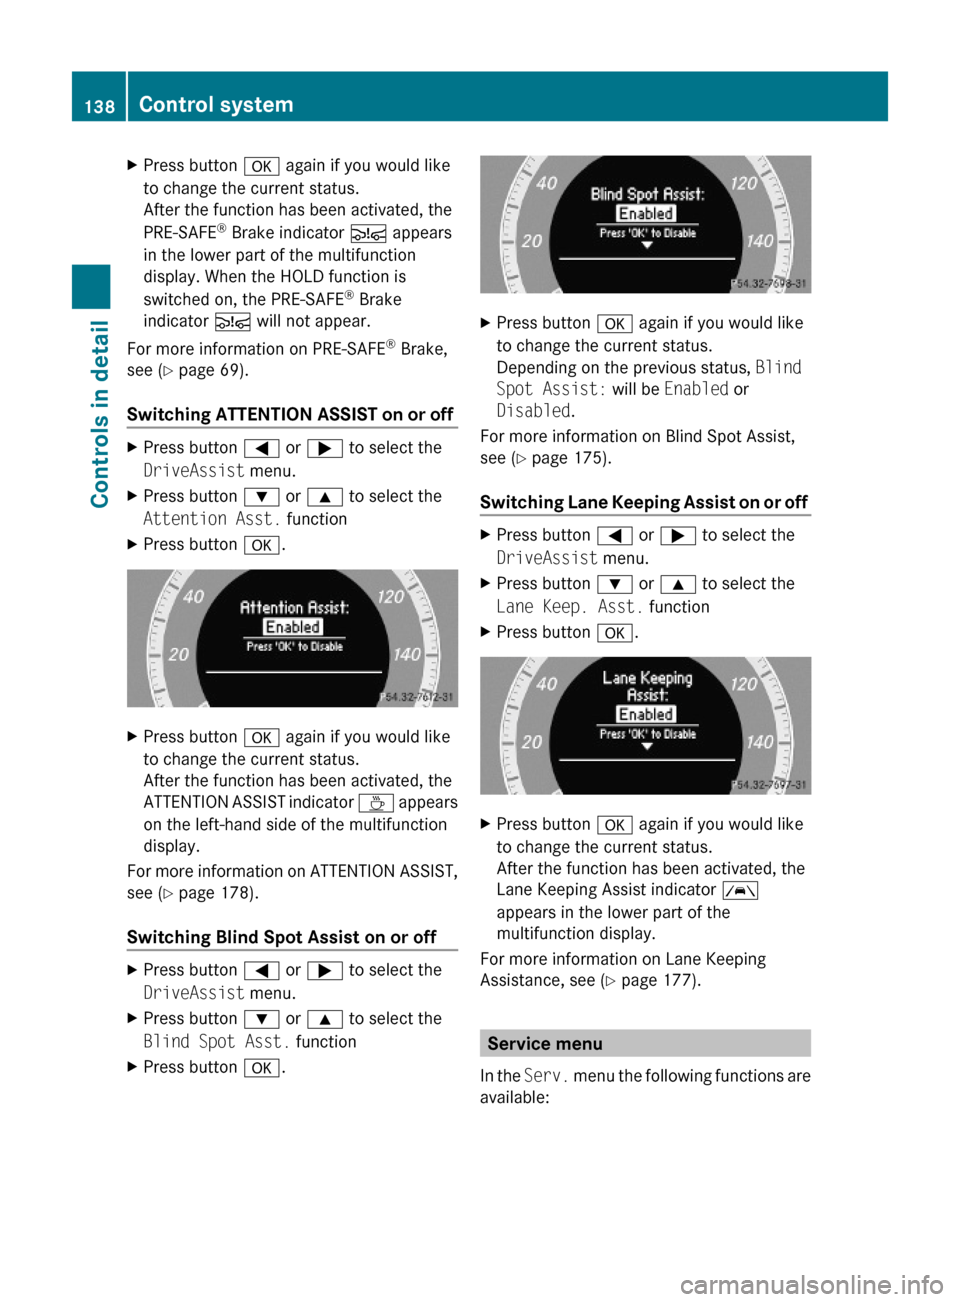
Switching ATTENTION ASSIST on or off
XPress button = or ; to select the
DriveAssist menu.
XPress button : or 9 to select the
Attention Asst. function
XPress button a.XPress button a again if you would like
to change the current status.
After the function has been activated, the
ATTENTION ASSIST indicator À appears
on the left-hand side of the multifunction
display.
For more information on ATTENTION ASSIST,
see (Y page 178).
Switching Blind Spot Assist on or off
XPress button = or ; to select the
DriveAssist menu.
XPress button : or 9 to select the
Blind Spot Asst. function
XPress button a.XPress button a again if you would like
to change the current status.
Depending on the previous status, Blind
Spot Assist: will be Enabled or
Disabled.
For more information on Blind Spot Assist,
see (Y page 175).
Switching Lane Keeping Assist on or off
XPress button = or ; to select the
DriveAssist menu.
XPress button : or 9 to select the
Lane Keep. Asst. function
XPress button a.XPress button a again if you would like
to change the current status.
After the function has been activated, the
Lane Keeping Assist indicator Ã
appears in the lower part of the
multifunction display.
For more information on Lane Keeping
Assistance, see (Y page 177).
Service menu
In the Serv. menu the following functions are
available:
138Control systemControls in detail
212_AKB; 2; 41, en-USd2ureepe,Version: 2.11.8.12009-07-17T09:14:21+02:00 - Seite 138
Page 141 of 372

RVehicle status message memory
(Y page 139)
RRestarting the tire pressure loss warning
system (Canada only) (Y page 233)
RChecking tire inflation pressure
electronically with the Advanced TPMS
(Y page 233)
RCalling up the maintenance service
indicator display (Y page 259)
Vehicle status message memory
Use the vehicle status message memory
function to scan malfunction and warning
messages that may be stored in the system.
Such messages appear in the multifunction
display and are based on conditions or
system status the vehicle’s system has
recorded.
GWarning!
Malfunction and warning messages are only
indicated for certain systems and are
intentionally not very detailed. The
malfunction and warning messages are
simply a reminder with respect to the
operation of certain systems. They do not
replace the owner’s and/or driver’s
responsibility to maintain the vehicle’s
operating safety. Have all required
maintenance and safety checks performed on
the vehicle. Bring the vehicle to an authorized
Mercedes-Benz Center to address the
malfunction and warning messages.
XPress button = or ; to select the
Serv. menu.
If conditions have occurred causing status
messages to be recorded, the number of
messages appears in the multifunction
display:
XPress button : or 9 to select the
messages function.
XPress button a to confirm.
The stored messages will now be displayed
in the order in which they have occurred.
For malfunction and warning messages,
see “Vehicle status messages in the
multifunction display” (Y page 272).
XUse button : or 9 to scroll through
the messages.
If you turn the SmartKey in the starter switch
to position 0 and then back to position 2, all
messages will be deleted from the message
memory.
Settings menu
Introduction
In the Sett. menu there are two functions:
The function Factory Setting
(Y page 139), with which you can reset the
settings to the original factory settings and a
collection of submenus (Y page 140) with
which you can make individual settings for
your vehicle.
Resetting to factory settings
You can reset most of the settings of the
submenus to the factory settings.
For safety reasons, the function Daytime
Running Lamps in the Lights submenu
cannot be reset while driving.
XPress button = or ; to select the
Sett. menu.
Control system139Controls in detail212_AKB; 2; 41, en-USd2ureepe,Version: 2.11.8.12009-07-17T09:14:21+02:00 - Seite 139Z
Page 203 of 372
iTo prevent unauthorized persons from
access to the trunk, always lock the seat
backrests in its upright position.
Front storage compartments
GWarning!
To help avoid personal injury during a collision
or sudden maneuver, exercise care when
storing objects in the vehicle. Put luggage or
cargo in the trunk if possible.
Do not pile luggage or cargo higher than the
seat backrests.
Keep compartment lids closed. This will help
to prevent stored objects from being thrown
about and injuring vehicle occupants during
Rbraking
Rvehicle maneuvers
Ran accident
Glove box
Depending on vehicle equipment, an AUX
socket or a media interface is located in the
glove box. For information on Audio AUX
mode or on media interface, see separate
COMAND system operating instructions.
The glove box can be ventilated
(Y page 188).
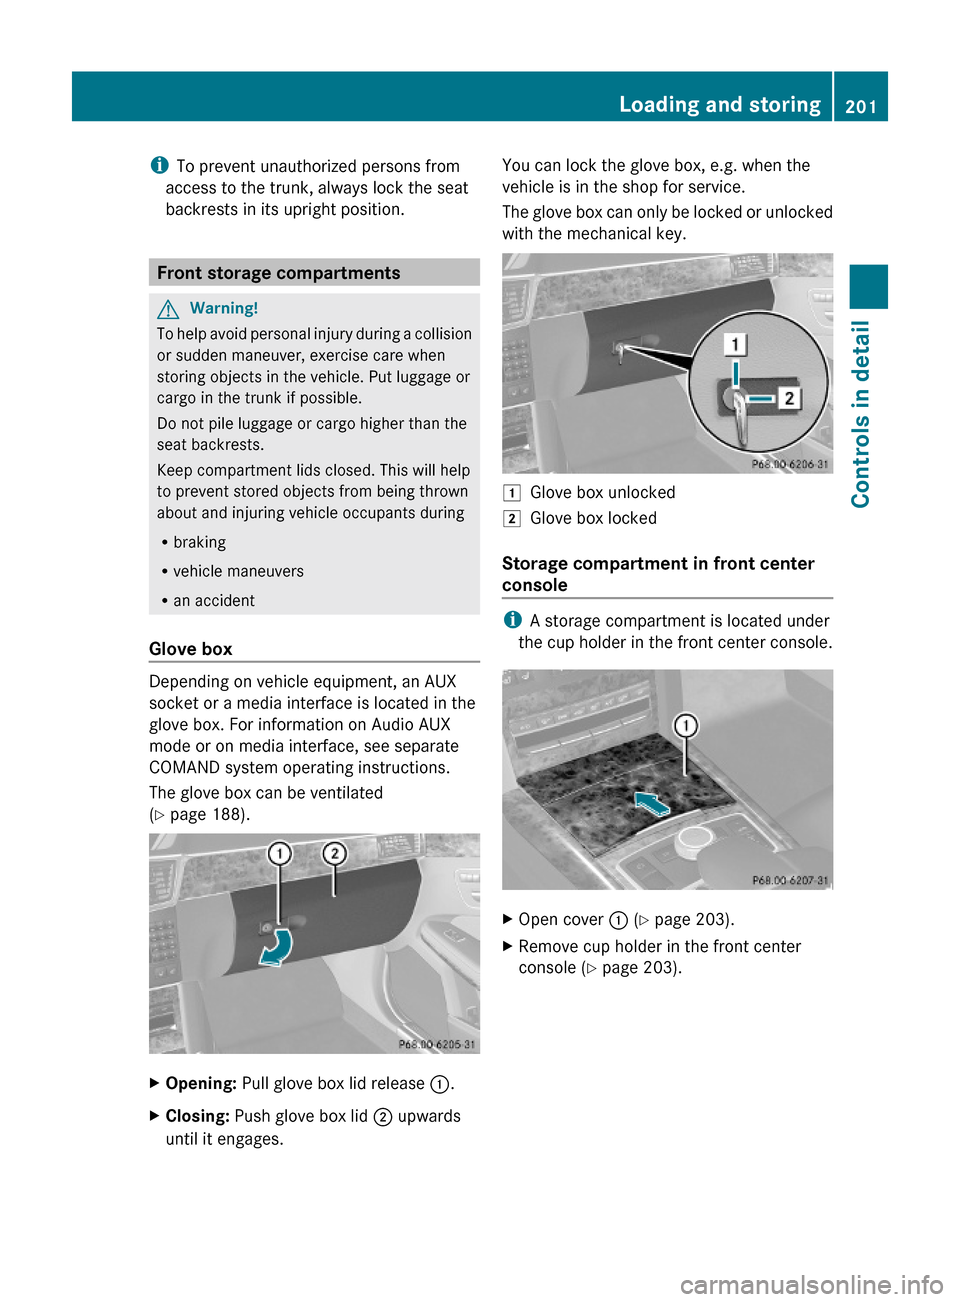
XOpening: Pull glove box lid release :.XClosing: Push glove box lid ; upwards
until it engages.
You can lock the glove box, e.g. when the
vehicle is in the shop for service.
The glove box can only be locked or unlocked
with the mechanical key.
1Glove box unlocked2Glove box locked
Storage compartment in front center
console
iA storage compartment is located under
the cup holder in the front center console.
XOpen cover : (Y page 203).XRemove cup holder in the front center
console (Y page 203).
Loading and storing201Controls in detail212_AKB; 2; 41, en-USd2ureepe,Version: 2.11.8.12009-07-17T09:14:21+02:00 - Seite 201Z
Page 209 of 372
Power outlets
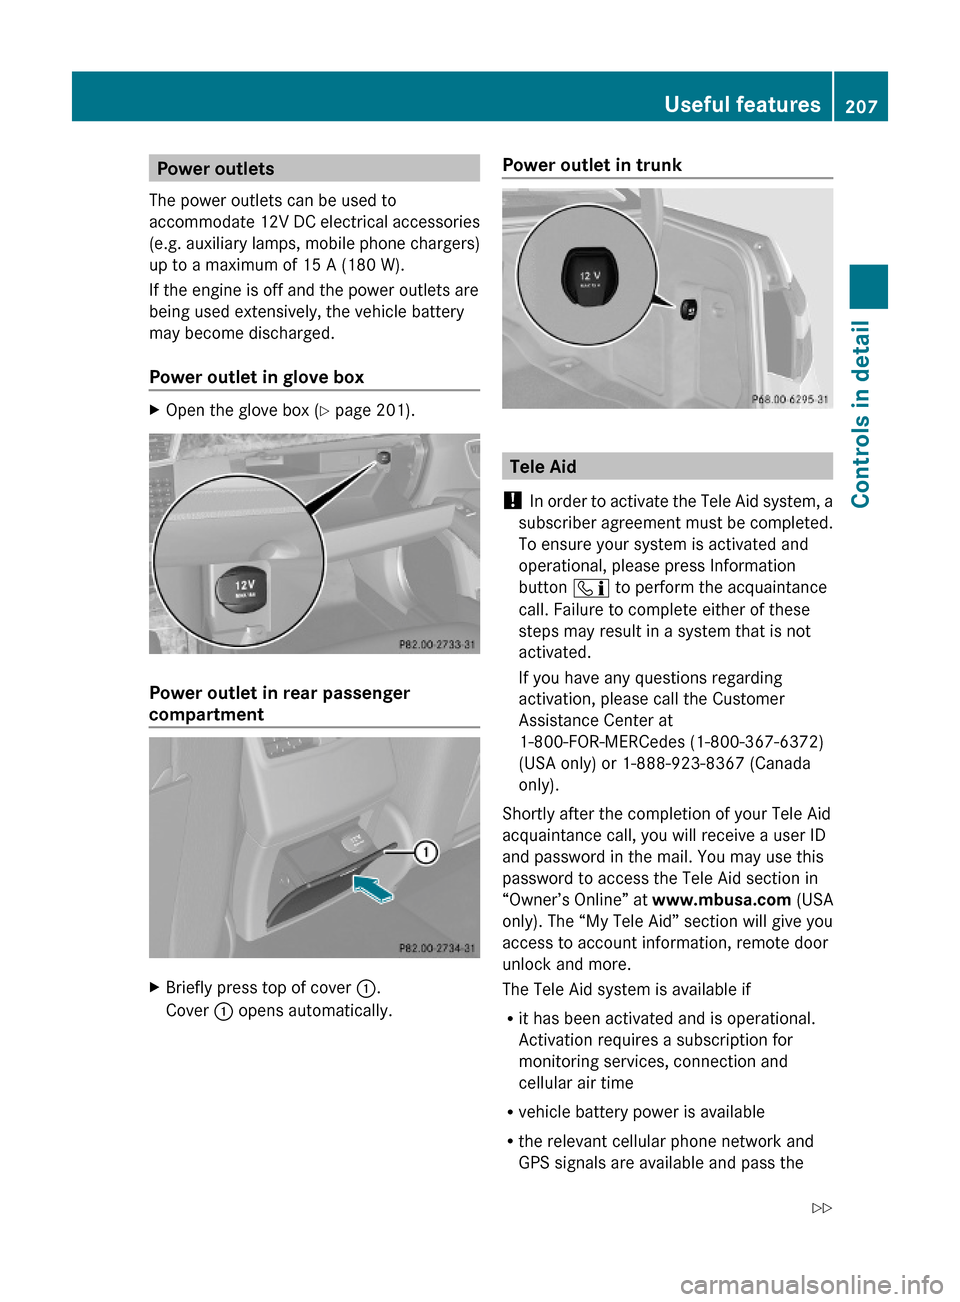
The power outlets can be used to
accommodate 12V DC electrical accessories
(e.g. auxiliary lamps, mobile phone chargers)
up to a maximum of 15 A (180 W).
If the engine is off and the power outlets are
being used extensively, the vehicle battery
may become discharged.
Power outlet in glove box
XOpen the glove box (Y page 201).
Power outlet in rear passenger
compartment
XBriefly press top of cover :.
Cover : opens automatically.
Power outlet in trunk
Tele Aid
! In order to activate the Tele Aid system, a
subscriber agreement must be completed.
To ensure your system is activated and
operational, please press Information
button ï to perform the acquaintance
call. Failure to complete either of these
steps may result in a system that is not
activated.
If you have any questions regarding
activation, please call the Customer
Assistance Center at
1-800-FOR-MERCedes (1-800-367-6372)
(USA only) or 1-888-923-8367 (Canada
only).
Shortly after the completion of your Tele Aid
acquaintance call, you will receive a user ID
and password in the mail. You may use this
password to access the Tele Aid section in
“Owner’s Online” at www.mbusa.com (USA
only). The “My Tele Aid” section will give you
access to account information, remote door
unlock and more.
The Tele Aid system is available if
Rit has been activated and is operational.
Activation requires a subscription for
monitoring services, connection and
cellular air time
Rvehicle battery power is available
Rthe relevant cellular phone network and
GPS signals are available and pass the
Useful features207Controls in detail212_AKB; 2; 41, en-USd2ureepe,Version: 2.11.8.12009-07-17T09:14:21+02:00 - Seite 207Z
Page 211 of 372
An emergency call can also be initiated
manually (Y page 209).
Once the emergency call is in progress, the
indicator lamp in the SOS button will begin to
flash. The message Connecting Call
appears in the multifunction display and the
COMAND system is muted. When the
connection is established, the message
Call Connected appears in the
multifunction display.
All information relevant to the emergency,
such as the location of the vehicle
(determined by the GPS satellite location
system), vehicle model, identification number
and color are generated.
A voice connection between the Customer
Assistance Center and the occupants of the
vehicle will be established automatically soon
after the emergency call has been initiated.
The Customer Assistance Center will attempt
to determine the nature of the emergency
more precisely, provided they can speak to
an occupant of the vehicle.
iIf no vehicle occupant responds, an
ambulance will be sent to the vehicle
immediately.
GWarning!
If the indicator lamp in the SOS button is
flashing continuously and there was no voice
connection to the Customer Assistance
Center established, then the Tele Aid system
could not initiate an emergency call (e.g. the
relevant cellular phone network is not
available).
The message Call Failed appears in the
multifunction display for approximately
10 seconds.
Should this occur, assistance must be
summoned by other means.
iThe “911” emergency call system is a
public service. Using it without due cause
is a criminal offense.
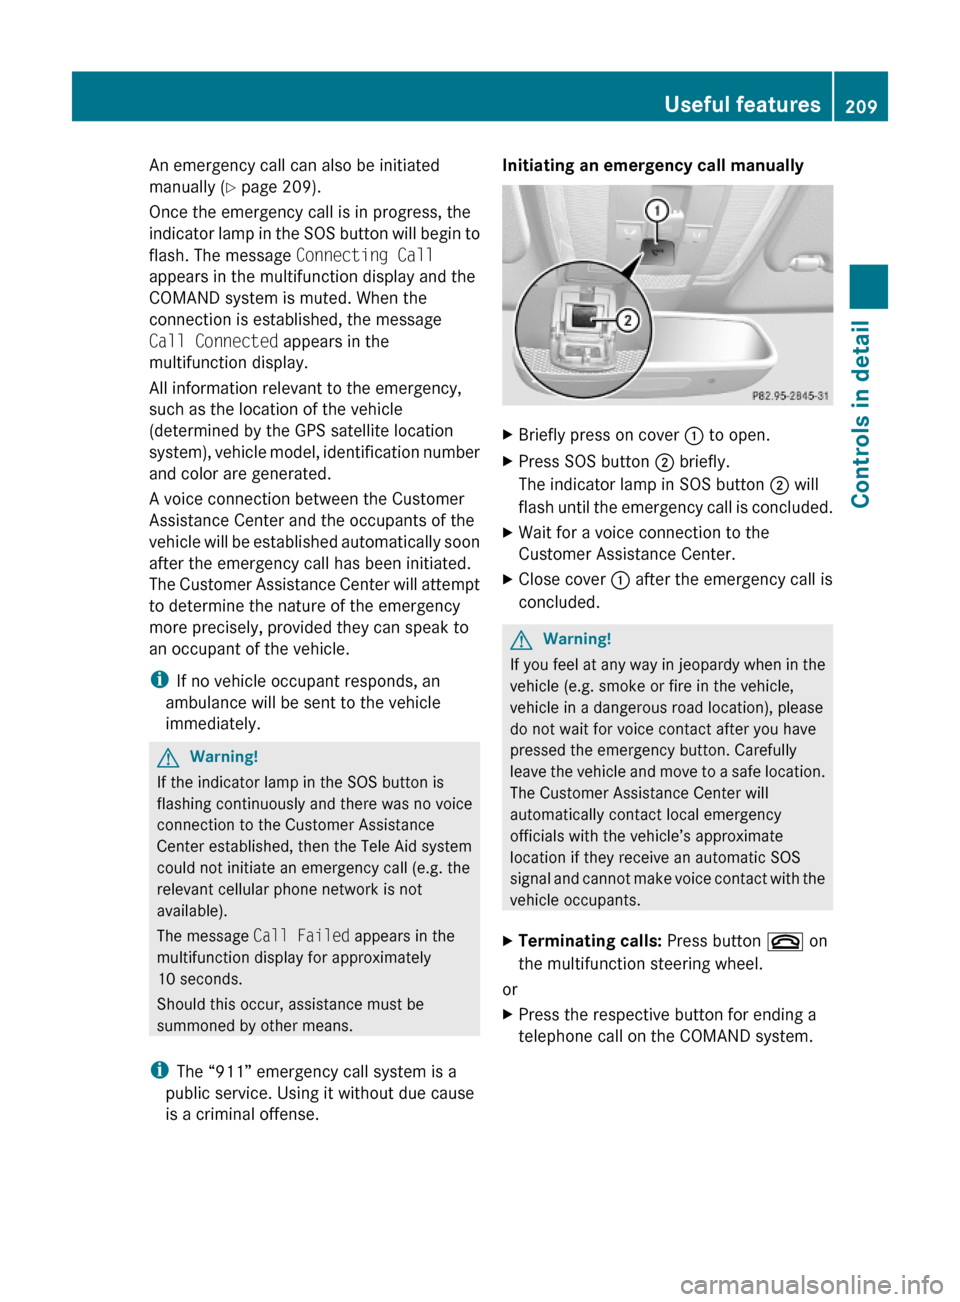
Initiating an emergency call manually XBriefly press on cover : to open.XPress SOS button ; briefly.
The indicator lamp in SOS button ; will
flash until the emergency call is concluded.
XWait for a voice connection to the
Customer Assistance Center.
XClose cover : after the emergency call is
concluded.
GWarning!
If you feel at any way in jeopardy when in the
vehicle (e.g. smoke or fire in the vehicle,
vehicle in a dangerous road location), please
do not wait for voice contact after you have
pressed the emergency button. Carefully
leave the vehicle and move to a safe location.
The Customer Assistance Center will
automatically contact local emergency
officials with the vehicle’s approximate
location if they receive an automatic SOS
signal and cannot make voice contact with the
vehicle occupants.
XTerminating calls: Press button ~ on
the multifunction steering wheel.
or
XPress the respective button for ending a
telephone call on the COMAND system.
Useful features209Controls in detail212_AKB; 2; 41, en-USd2ureepe,Version: 2.11.8.12009-07-17T09:14:21+02:00 - Seite 209Z