2010 MERCEDES-BENZ CLS63AMG wheel
[x] Cancel search: wheelPage 126 of 308
X
Move the selection marker with button
W or X to the Vehicle submenu.
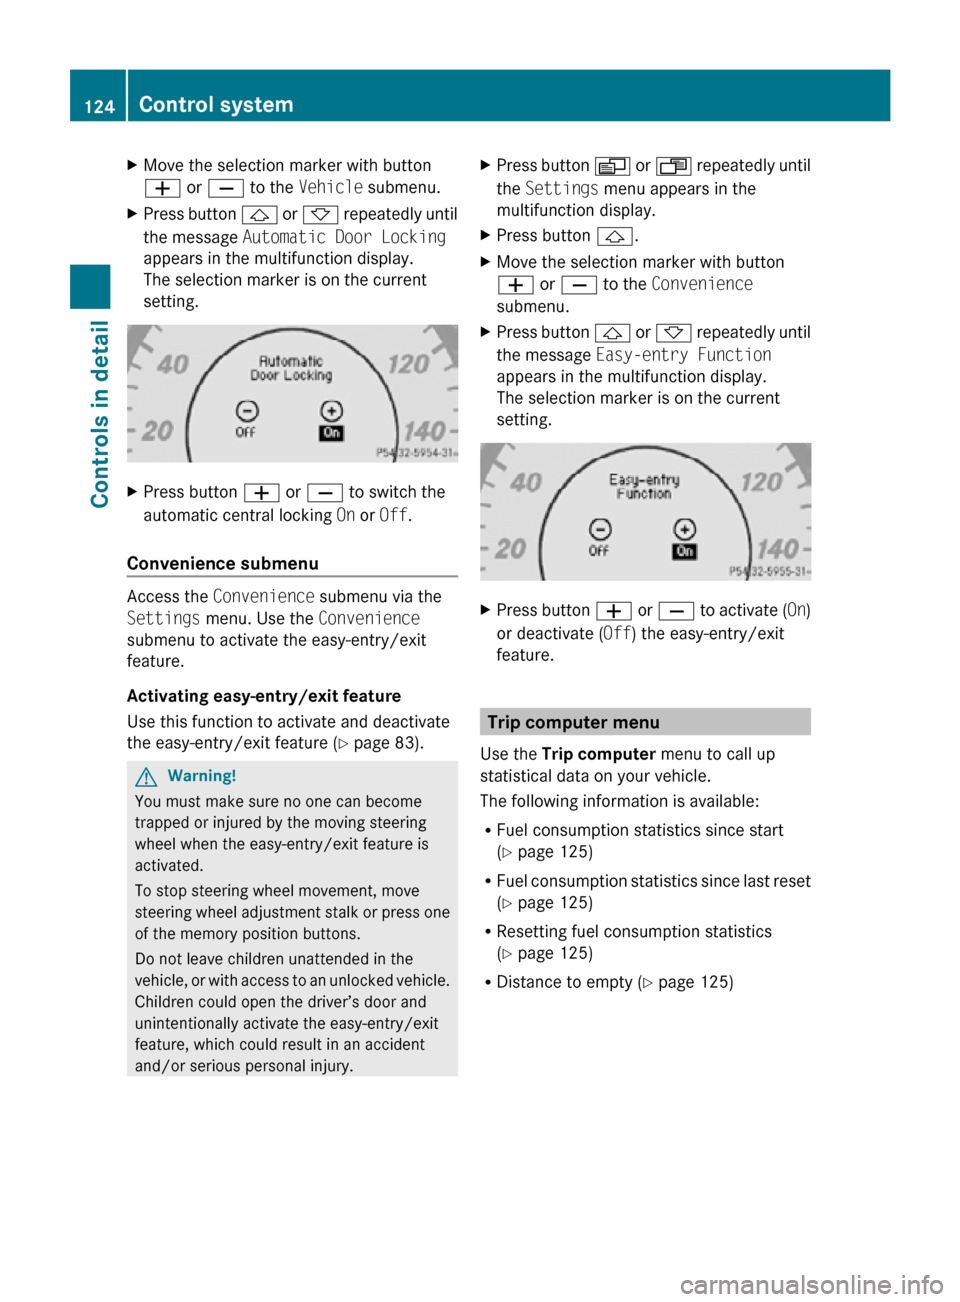
X Press button & or * repeatedly until
the message Automatic Door Locking
appears in the multifunction display.
The selection marker is on the current
setting. X
Press button W or X to switch the
automatic central locking On or Off.
Convenience submenu Access the
Convenience submenu via the
Settings menu. Use the Convenience
submenu to activate the easy-entry/exit
feature.
Activating easy-entry/exit feature
Use this function to activate and deactivate
the easy-entry/exit feature (Y page 83). G
Warning!
You must make sure no one can become
trapped or injured by the moving steering
wheel when the easy-entry/exit feature is
activated.
To stop steering wheel movement, move
steering wheel adjustment stalk or press one
of the memory position buttons.
Do not leave children unattended in the
vehicle, or with access to an unlocked vehicle.
Children could open the driver’s door and
unintentionally activate the easy-entry/exit
feature, which could result in an accident
and/or serious personal injury. X
Press button V or U repeatedly until
the Settings menu appears in the
multifunction display.
X Press button &.
X Move the selection marker with button
W or X to the Convenience
submenu.
X Press button & or * repeatedly until
the message Easy-entry Function
appears in the multifunction display.
The selection marker is on the current
setting. X
Press button W or X to activate ( On)
or deactivate (Off) the easy-entry/exit
feature. Trip computer menu
Use the Trip computer menu to call up
statistical data on your vehicle.
The following information is available:
R Fuel consumption statistics since start
(Y page 125)
R Fuel consumption statistics since last reset
(Y page 125)
R Resetting fuel consumption statistics
(Y page 125)
R Distance to empty ( Y page 125)124
Control systemControls in detail
219_AKB; 4; 54, en-US
d2ureepe,
Version: 2.11.8.1 2009-05-11T16:21:02+02:00 - Seite 124
Page 129 of 308
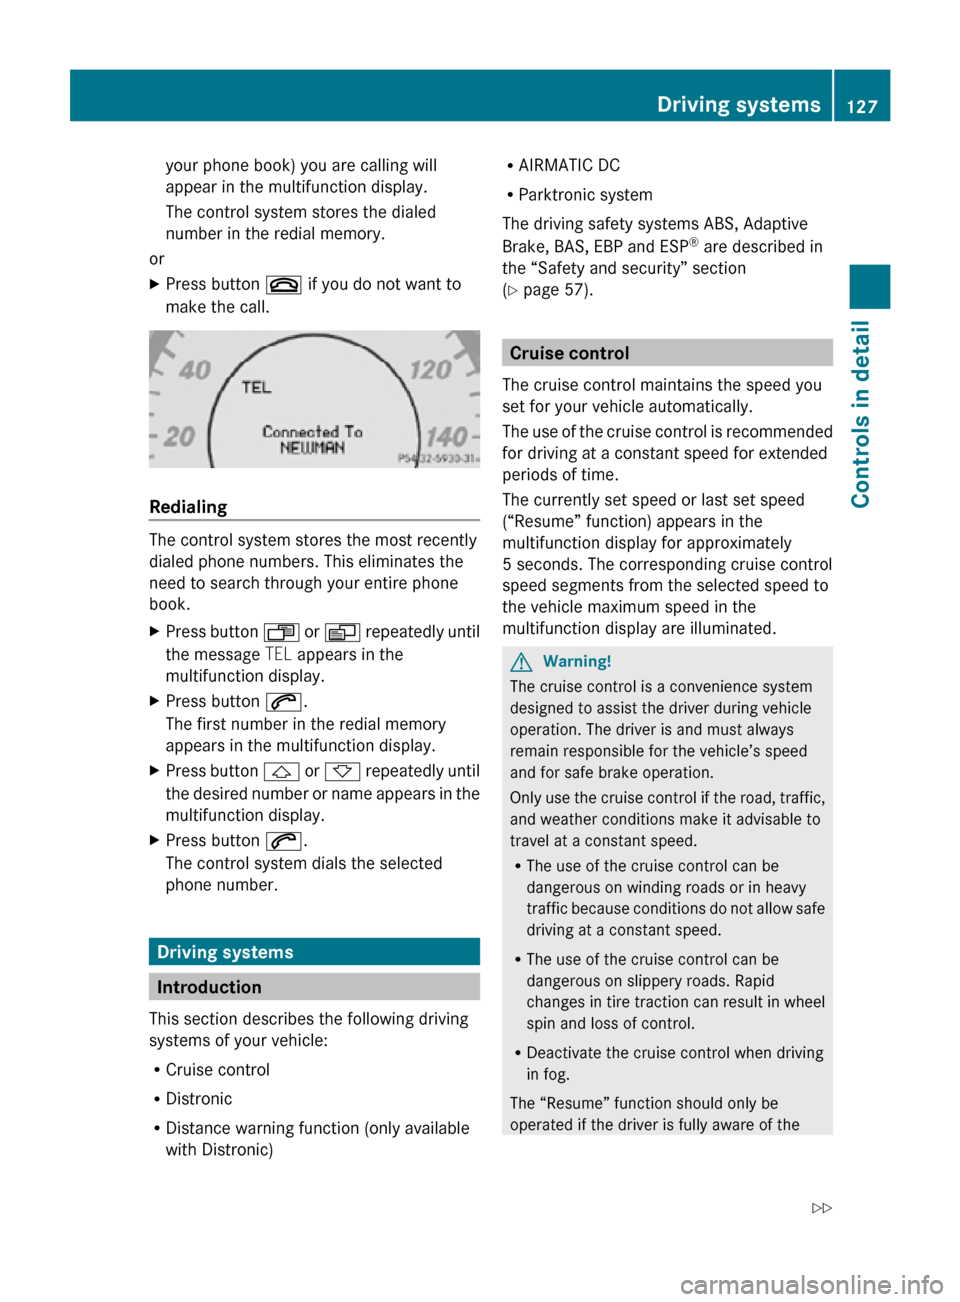
your phone book) you are calling will
appear in the multifunction display.
The control system stores the dialed
number in the redial memory.
or
X Press button ~ if you do not want to
make the call. Redialing
The control system stores the most recently
dialed phone numbers. This eliminates the
need to search through your entire phone
book.
X
Press button U or V repeatedly until
the message TEL appears in the
multifunction display.
X Press button 6.
The first number in the redial memory
appears in the multifunction display.
X Press button & or * repeatedly until
the desired number or name appears in the
multifunction display.
X Press button 6.
The control system dials the selected
phone number. Driving systems
Introduction
This section describes the following driving
systems of your vehicle:
R Cruise control
R Distronic
R Distance warning function (only available
with Distronic) R
AIRMATIC DC
R Parktronic system
The driving safety systems ABS, Adaptive
Brake, BAS, EBP and ESP ®
are described in
the “Safety and security” section
(Y page 57). Cruise control
The cruise control maintains the speed you
set for your vehicle automatically.
The use of the cruise control is recommended
for driving at a constant speed for extended
periods of time.
The currently set speed or last set speed
(“Resume” function) appears in the
multifunction display for approximately
5 seconds. The corresponding cruise control
speed segments from the selected speed to
the vehicle maximum speed in the
multifunction display are illuminated. G
Warning!
The cruise control is a convenience system
designed to assist the driver during vehicle
operation. The driver is and must always
remain responsible for the vehicle’s speed
and for safe brake operation.
Only use the cruise control if the road, traffic,
and weather conditions make it advisable to
travel at a constant speed.
R The use of the cruise control can be
dangerous on winding roads or in heavy
traffic because conditions do not allow safe
driving at a constant speed.
R The use of the cruise control can be
dangerous on slippery roads. Rapid
changes in tire traction can result in wheel
spin and loss of control.
R Deactivate the cruise control when driving
in fog.
The “Resume” function should only be
operated if the driver is fully aware of the Driving systems
127Controls in detail
219_AKB; 4; 54, en-US
d2ureepe, Version: 2.11.8.1 2009-05-11T16:21:02+02:00 - Seite 127 Z
Page 132 of 308
G
Warning!
The Distronic is a convenience system. Its
speed adjustment reduction capability is
intended to make cruise control more
effective
and usable when traffic speeds vary.
It is not however, intended to, nor does it,
replace the need for extreme care.
The responsibility for the vehicle’s speed,
distance to the preceding vehicle and, most
importantly, brake operation to ensure a safe
stopping distance, always remains with the
driver.
The Distronic cannot take street and traffic
conditions into account. Complex driving
situations are not always fully recognized by
the Distronic. This could result in wrong or
missing distance warnings. G
Warning!
The Distronic adaptive cruise control is not a
substitute for active driving involvement. It
does
not react to pedestrians or on stationary
objects, nor does it recognize or predict the
lane curvature or the movement of preceding
vehicles.
The Distronic can only apply 20% of the
maximum braking power of the vehicle.
It is the driver’s responsibility at all times to
be attentive to the road, weather and traffic
conditions. Additionally, the driver must
provide the steering, braking and other driving
inputs necessary to remain in control of the
vehicle.
High-frequency sources such as toll stations,
speed measuring systems etc. can cause the
Distronic system to malfunction. G
Warning!
The Distronic cannot take road and traffic
conditions into account. Only use the
Distronic if the road, weather and traffic
conditions make it advisable to travel at a
constant speed. G
Warning!
Use of the Distronic can be dangerous on
slippery roads. Rapid changes in tire traction
can result in wheel spin and loss of control.
The Distronic does not function in adverse
sight
and distance conditions. Do not use the
Distronic during conditions of fog, heavy rain,
snow or sleet. G
Warning!
The Distronic cannot take weather conditions
into account. Switch off the Distronic or do
not switch it on if:
R roads
are slippery or covered with snow or
ice. The wheels could lose traction while
braking or accelerating, and the vehicle
could skid.
R the Distronic system sensor cover is dirty
or visibility is diminished due to snow, rain
or fog, for example. The distance control
system functionality could be impaired.
Always pay attention to surrounding traffic
conditions even while the Distronic is
switched on. Otherwise, you may not be able
to recognize dangerous situations until it is
too late. This could cause an accident in which
you and/or others could be injured. G
Warning!
The “Resume” function should only be
operated if the driver is fully aware of the
previously set speed and wishes to resume
this particular preset speed. G
Warning!
Close attention to road and traffic conditions
is imperative at all times, regardless of
whether or not the Distronic is activated.
Use of the Distronic can be dangerous on
winding roads or in heavy traffic because
conditions do not allow safe driving at a
constant speed.
The Distronic will not react to stationary
objects
in the roadway (e.g. a stopped vehicle
in a traffic jam or a disabled vehicle). The 130
Driving systems
Controls in detail
219_AKB; 4; 54, en-US
d2ureepe,
Version: 2.11.8.1 2009-05-11T16:21:02+02:00 - Seite 130
Page 137 of 308
R
the ESP ®
has switched off due to a
malfunction
R you shift the automatic transmission into
neutral position N while driving
The cruise control speed segments in the
multifunction display goes out and an
acoustic warning will sound. Observe
additional messages in the multifunction
display that may appear. G
Warning!
Distronic switches off and releases the brakes
when the vehicle decelerates below the
minimum speed of 20 mph (30 km/h) by
operation of the system. At that time the
driver must apply the brakes in order to
reduce vehicle speed further or bring it to a
stop.
Depressing the accelerator pedal does not
deactivate the Distronic. After a brief
acceleration (e.g. for passing), the Distronic
will resume the last set speed.
Setting the following distance in
Distronic You can set the specified following distance
for Distronic by varying the time setting
between 1.0 and 2.0 seconds. Using this time
setting and the current speed of your vehicle,
Distronic calculates and sets the required
following distance to the preceding vehicle.
The set distance will be shown in the
multifunction display.
G
Warning!
It is up to the driver to exercise discretion to
select the appropriate setting given road
conditions, traffic, driver’s preferred driving
style and applicable laws and driving
recommendations for safe following distance. X
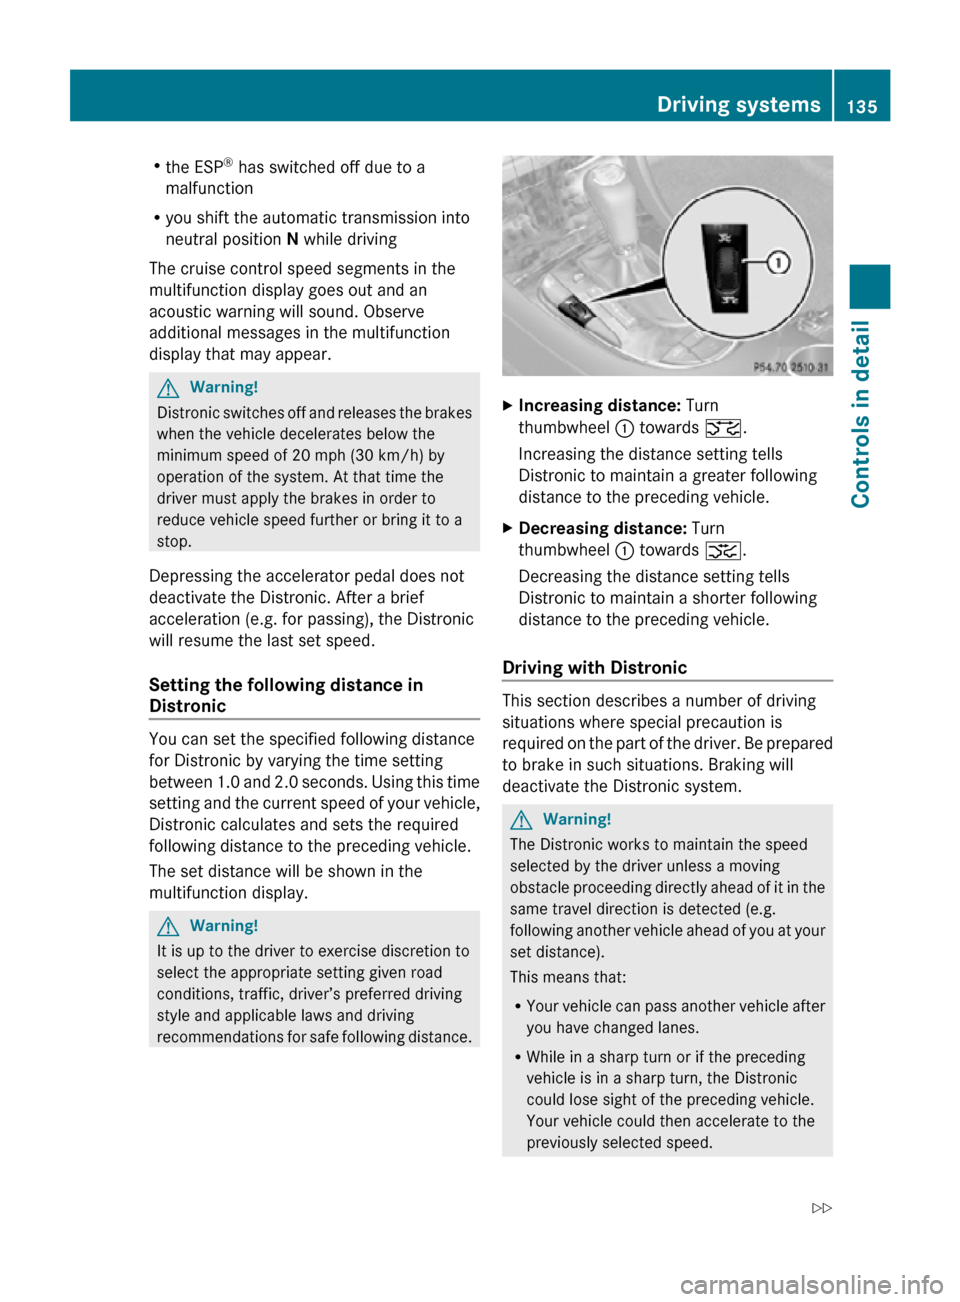
Increasing distance: Turn
thumbwheel : towards ª.
Increasing the distance setting tells
Distronic to maintain a greater following
distance to the preceding vehicle.
X Decreasing distance: Turn
thumbwheel : towards ¥.
Decreasing the distance setting tells
Distronic to maintain a shorter following
distance to the preceding vehicle.
Driving with Distronic This section describes a number of driving
situations where special precaution is
required on the part of the driver. Be prepared
to brake in such situations. Braking will
deactivate the Distronic system.
G
Warning!
The Distronic works to maintain the speed
selected by the driver unless a moving
obstacle proceeding directly ahead of it in the
same travel direction is detected (e.g.
following another vehicle ahead of you at your
set distance).
This means that:
R Your vehicle can pass another vehicle after
you have changed lanes.
R While in a sharp turn or if the preceding
vehicle is in a sharp turn, the Distronic
could lose sight of the preceding vehicle.
Your vehicle could then accelerate to the
previously selected speed. Driving systems
135Controls in detail
219_AKB; 4; 54, en-US
d2ureepe, Version: 2.11.8.1 2009-05-11T16:21:02+02:00 - Seite 135 Z
Page 140 of 308
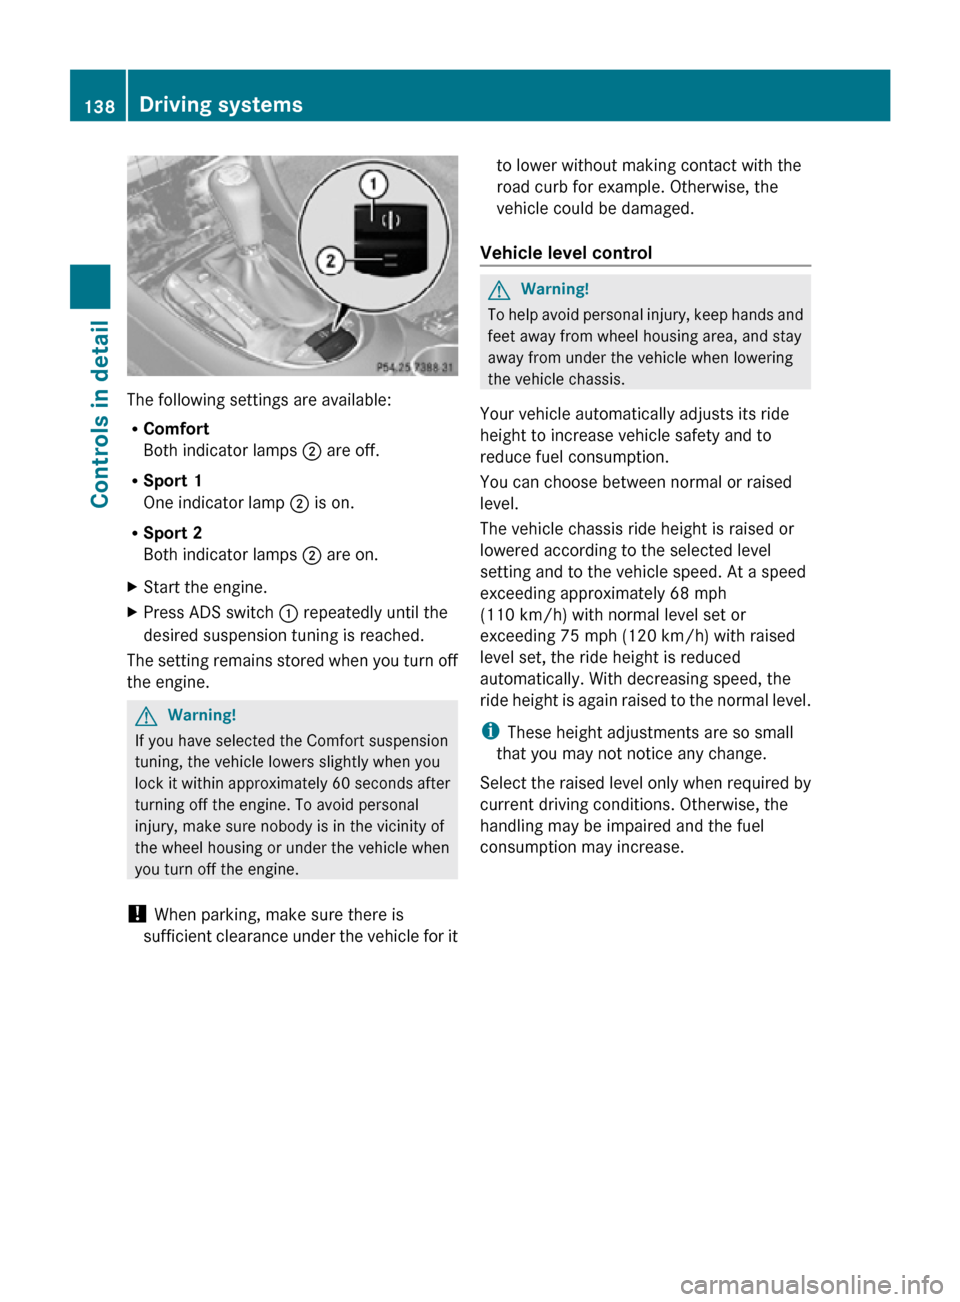
The following settings are available:
R
Comfort
Both indicator lamps ; are off.
R Sport 1
One indicator lamp ; is on.
R Sport 2
Both indicator lamps ; are on.
X Start the engine.
X Press ADS switch : repeatedly until the
desired suspension tuning is reached.
The setting remains stored when you turn off
the engine. G
Warning!
If you have selected the Comfort suspension
tuning, the vehicle lowers slightly when you
lock it within approximately 60 seconds after
turning off the engine. To avoid personal
injury, make sure nobody is in the vicinity of
the wheel housing or under the vehicle when
you turn off the engine.
! When parking, make sure there is
sufficient clearance under the vehicle for it to lower without making contact with the
road curb for example. Otherwise, the
vehicle could be damaged.
Vehicle level control G
Warning!
To help avoid personal injury, keep hands and
feet away from wheel housing area, and stay
away from under the vehicle when lowering
the vehicle chassis.
Your vehicle automatically adjusts its ride
height to increase vehicle safety and to
reduce fuel consumption.
You can choose between normal or raised
level.
The vehicle chassis ride height is raised or
lowered according to the selected level
setting and to the vehicle speed. At a speed
exceeding approximately 68 mph
(110 km/h) with normal level set or
exceeding 75 mph (120 km/h) with raised
level set, the ride height is reduced
automatically. With decreasing speed, the
ride height is again raised to the normal level.
i These height adjustments are so small
that you may not notice any change.
Select the raised level only when required by
current driving conditions. Otherwise, the
handling may be impaired and the fuel
consumption may increase. 138
Driving systemsControls in detail
219_AKB; 4; 54, en-US
d2ureepe,
Version: 2.11.8.1 2009-05-11T16:21:02+02:00 - Seite 138
Page 150 of 308
X
Keep the air intake grille in front of the
windshield free of snow, leaves, sticks, and
any other debris.
X Always keep all air vents and grilles in the
passenger compartment free from
obstruction.
i For draft-free ventilation, move the
adjustable center and side air vents to the
middle position.
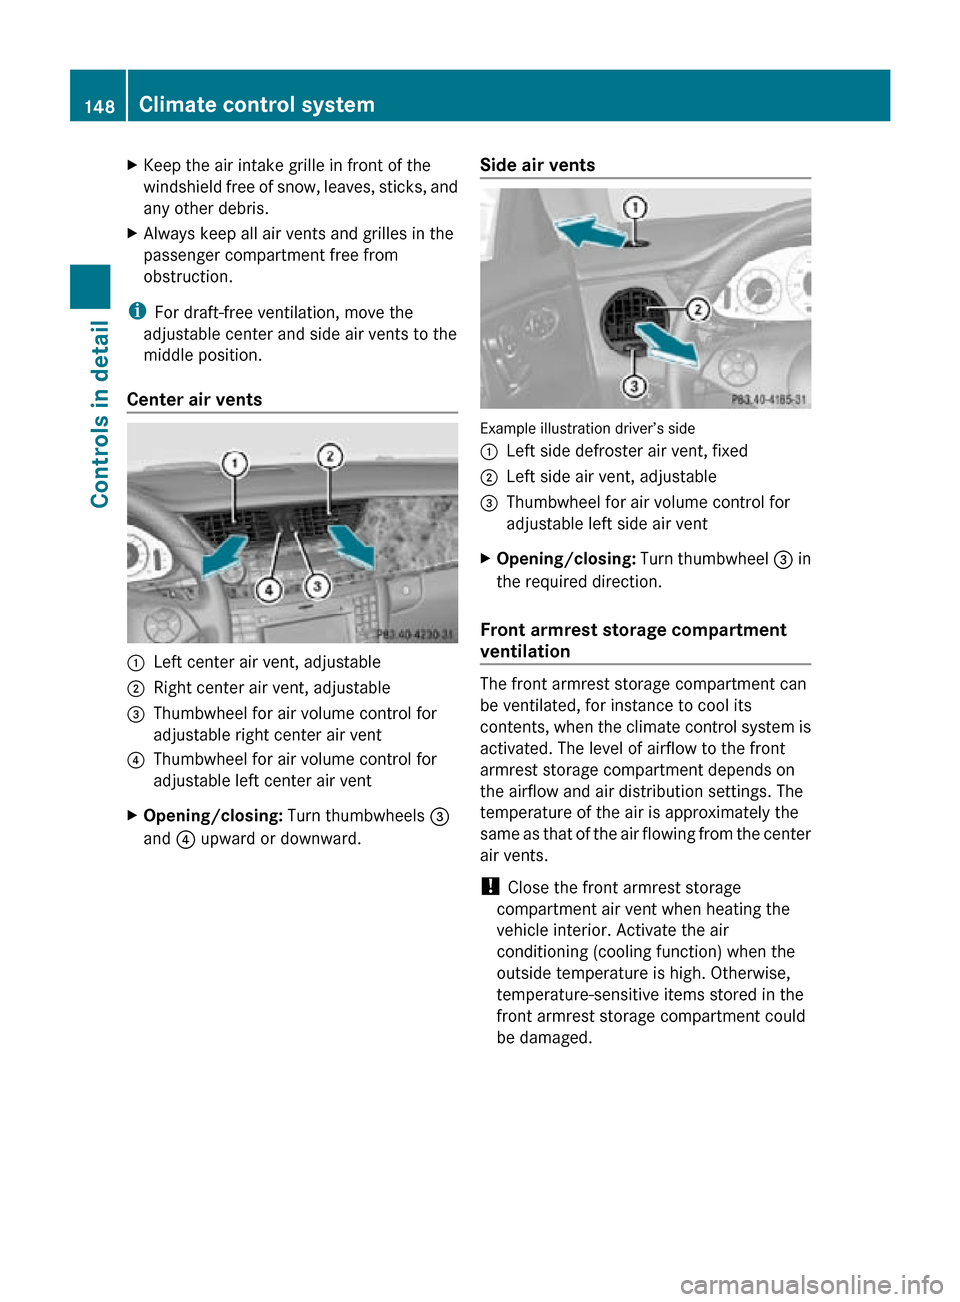
Center air vents :
Left center air vent, adjustable
; Right center air vent, adjustable
= Thumbwheel for air volume control for
adjustable right center air vent
? Thumbwheel for air volume control for
adjustable left center air vent
X Opening/closing: Turn thumbwheels =
and ? upward or downward. Side air vents Example illustration driver’s side
:
Left side defroster air vent, fixed
; Left side air vent, adjustable
= Thumbwheel for air volume control for
adjustable left side air vent
X Opening/closing: Turn thumbwheel = in
the required direction.
Front armrest storage compartment
ventilation The front armrest storage compartment can
be ventilated, for instance to cool its
contents, when the climate control system is
activated. The level of airflow to the front
armrest storage compartment depends on
the airflow and air distribution settings. The
temperature of the air is approximately the
same as that of the air flowing from the center
air vents.
!
Close the front armrest storage
compartment air vent when heating the
vehicle interior. Activate the air
conditioning (cooling function) when the
outside temperature is high. Otherwise,
temperature-sensitive items stored in the
front armrest storage compartment could
be damaged. 148
Climate control systemControls in detail
219_AKB; 4; 54, en-US
d2ureepe,
Version: 2.11.8.1 2009-05-11T16:21:02+02:00 - Seite 148
Page 151 of 308
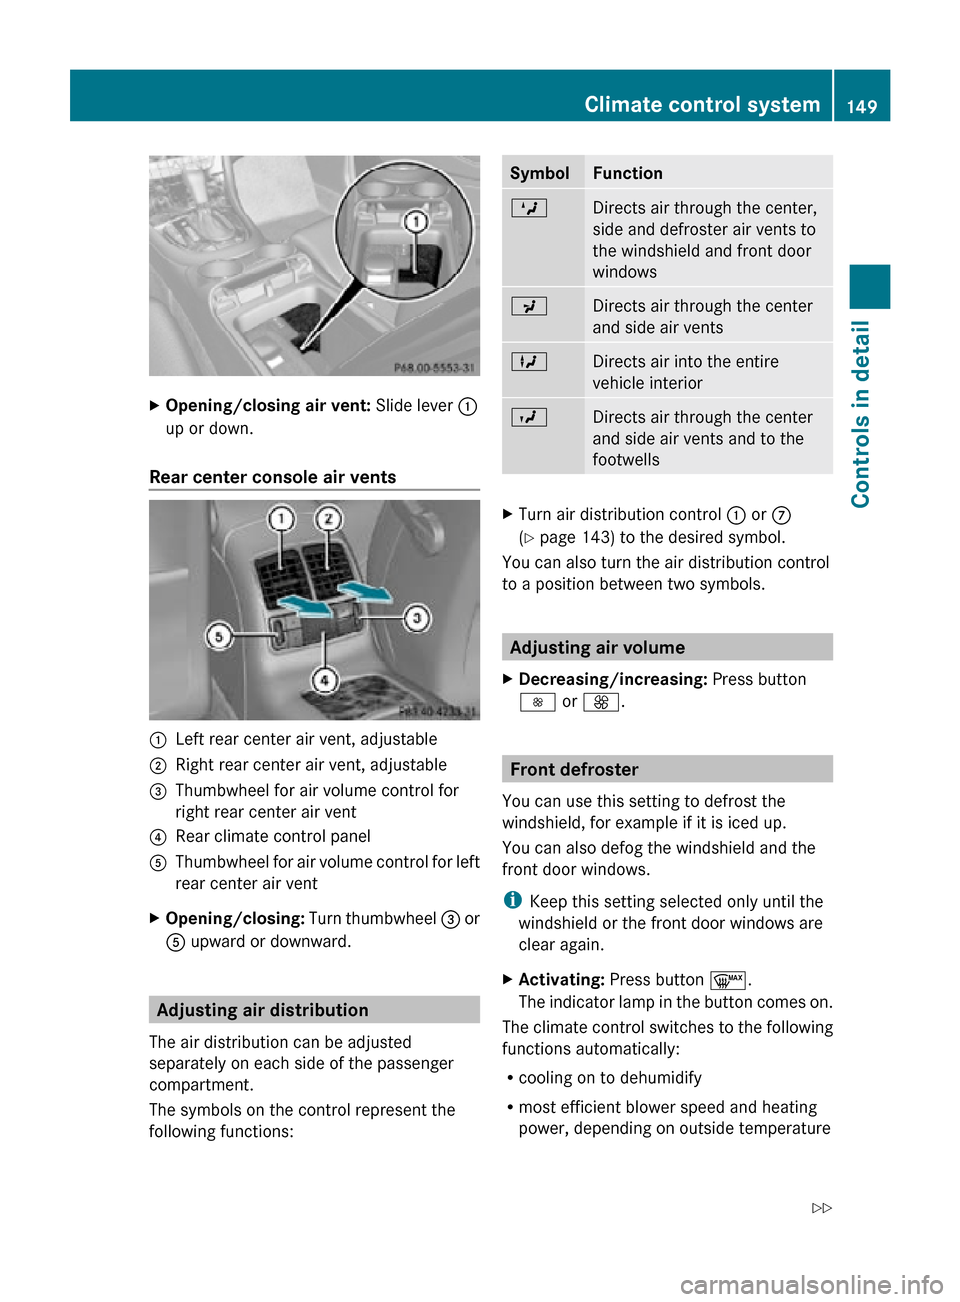
X
Opening/closing air vent: Slide lever :
up or down.
Rear center console air vents :
Left rear center air vent, adjustable
; Right rear center air vent, adjustable
= Thumbwheel for air volume control for
right rear center air vent
? Rear climate control panel
A Thumbwheel for air volume control for left
rear center air vent
X Opening/closing: Turn thumbwheel = or
A upward or downward. Adjusting air distribution
The air distribution can be adjusted
separately on each side of the passenger
compartment.
The symbols on the control represent the
following functions: Symbol Function
M
Directs air through the center,
side and defroster air vents to
the windshield and front door
windows
P
Directs air through the center
and side air vents
L
Directs air into the entire
vehicle interior
O
Directs air through the center
and side air vents and to the
footwells
X
Turn air distribution control : or C
(Y page 143) to the desired symbol.
You can also turn the air distribution control
to a position between two symbols. Adjusting air volume
X Decreasing/increasing: Press button
I or K. Front defroster
You can use this setting to defrost the
windshield, for example if it is iced up.
You can also defog the windshield and the
front door windows.
i Keep this setting selected only until the
windshield or the front door windows are
clear again.
X Activating: Press button ¬.
The indicator lamp in the button comes on.
The climate control switches to the following
functions automatically:
R cooling on to dehumidify
R most efficient blower speed and heating
power, depending on outside temperature Climate control system
149Controls in detail
219_AKB; 4; 54, en-US
d2ureepe, Version: 2.11.8.1 2009-05-11T16:21:02+02:00 - Seite 149 Z
Page 166 of 308
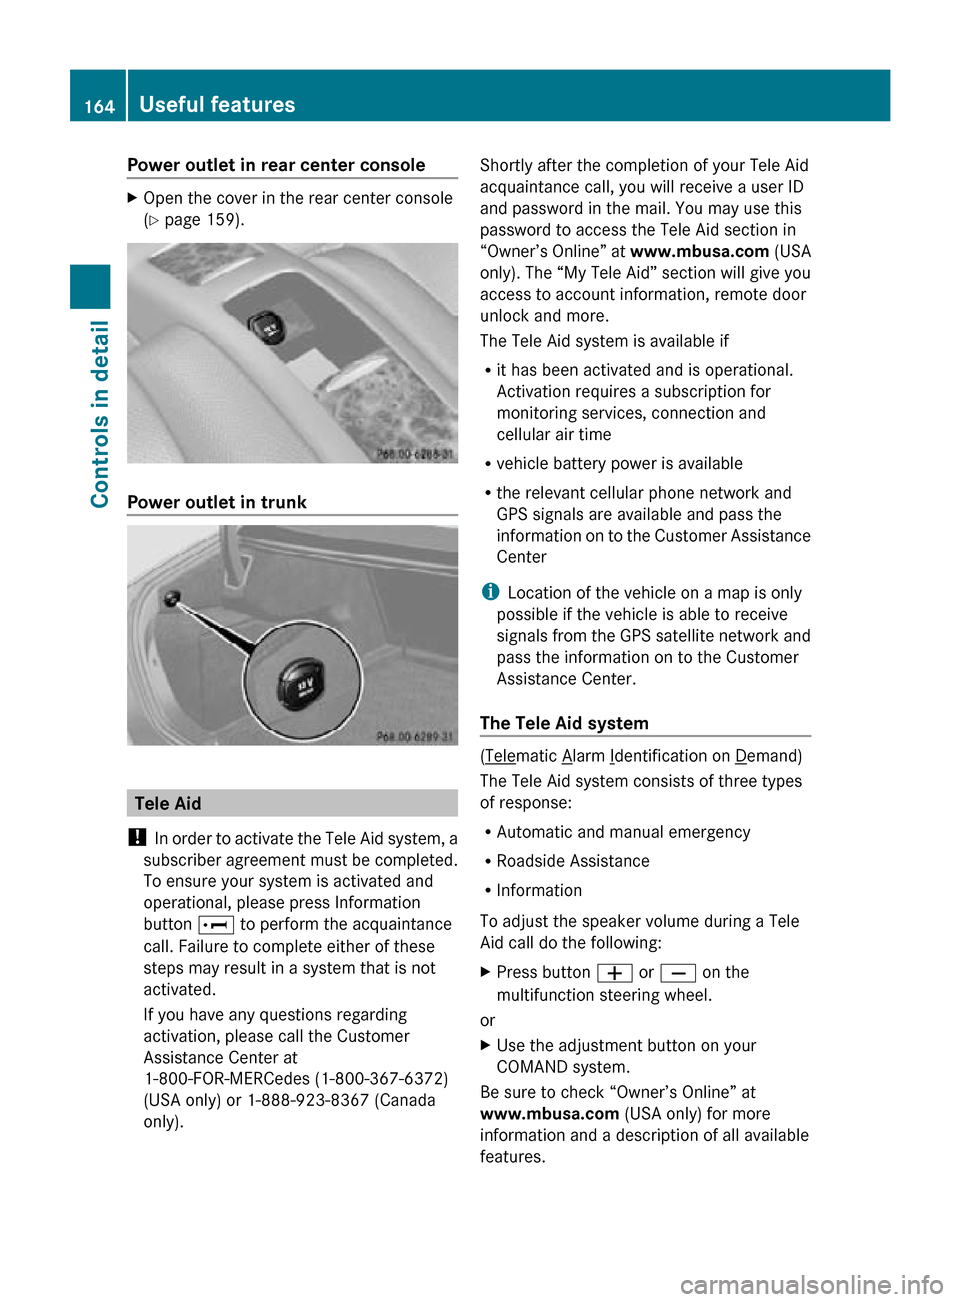
Power outlet in rear center console
X
Open the cover in the rear center console
(Y page 159). Power outlet in trunk
Tele Aid
! In order to activate the Tele Aid system, a
subscriber agreement must be completed.
To ensure your system is activated and
operational, please press Information
button E to perform the acquaintance
call. Failure to complete either of these
steps may result in a system that is not
activated.
If you have any questions regarding
activation, please call the Customer
Assistance Center at
1-800-FOR-MERCedes (1-800-367-6372)
(USA only) or 1-888-923-8367 (Canada
only). Shortly after the completion of your Tele Aid
acquaintance call, you will receive a user ID
and password in the mail. You may use this
password to access the Tele Aid section in
“Owner’s Online” at
www.mbusa.com (USA
only). The “My Tele Aid” section will give you
access to account information, remote door
unlock and more.
The Tele Aid system is available if
R it has been activated and is operational.
Activation requires a subscription for
monitoring services, connection and
cellular air time
R vehicle battery power is available
R the relevant cellular phone network and
GPS signals are available and pass the
information on to the Customer Assistance
Center
i Location of the vehicle on a map is only
possible if the vehicle is able to receive
signals from the GPS satellite network and
pass the information on to the Customer
Assistance Center.
The Tele Aid system ( Telematic Alarm Identification on Demand)
The Tele Aid system consists of three types
of response:
R Automatic and manual emergency
R Roadside Assistance
R Information
To adjust the speaker volume during a Tele
Aid call do the following:
X Press button W or X on the
multifunction steering wheel.
or
X Use the adjustment button on your
COMAND system.
Be sure to check “Owner’s Online” at
www.mbusa.com (USA only) for more
information and a description of all available
features. 164
Useful featuresControls in detail
219_AKB; 4; 54, en-US
d2ureepe,
Version: 2.11.8.1 2009-05-11T16:21:02+02:00 - Seite 164