2010 MERCEDES-BENZ CLS63AMG weight
[x] Cancel search: weightPage 56 of 308
Children can be killed or seriously injured by
an inflating air bag. Note the following
important information when circumstances
require you to place a child in the front
passenger seat:
R
Your vehicle is equipped with air bag
technology
designed to deactivate the front
passenger front air bag in your vehicle
when the system senses the weight of a
typical 12-month-old child or less along
with the weight of a standard appropriate
child restraint on the front passenger seat.
R A child in a rear-facing child restraint on the
front passenger seat will be seriously
injured or even killed if the front passenger
front air bag inflates in a collision which
could occur under some circumstances,
even with the air bag technology installed
in your vehicle. The only means to
completely eliminate this risk is to never
place a child in a rear-facing child restraint
in the front seat. We therefore strongly
recommend that you always place a child
in a rear-facing child restraint in a backseat.
R If you must install a rear-facing child
restraint on the front passenger seat
because circumstances require you to do
so, make sure the 04
indicator lamp is illuminated, indicating
that the front passenger front air bag is
deactivated. Should the 04
indicator lamp not illuminate or go out while
the restraint is installed, please check
installation. Periodically check the
04 indicator lamp while
driving to make sure the 04
indicator lamp is illuminated. If the
04 indicator lamp goes out or
remains out, do not transport a child on the
front passenger seat until the system has
been repaired.
A child in a rear-facing child restraint on the
front passenger seat will be seriously injured or even killed if the front passenger
front air bag inflates.
R If you have to place a child in a forward-
facing
child restraint on the front passenger
seat, move the seat as far back as possible,
use the proper child restraint
recommended for the age, size and weight
of the child, and secure child restraint with
the vehicle’s seat belt according to the child
seat manufacturer’s instructions. For
children larger than the typical 12-month-
old child, the front passenger front air bag
may or may not be activated. G
Warning!
Infants and small children should never share
a seat belt with another occupant. During an
accident,
they could be crushed between the
occupant and seat belt.
A child’s risk of serious or fatal injuries is
significantly increased if the child restraints
are not properly secured in the vehicle and/
or the child is not properly secured in the child
restraint.
Children too big for a toddler restraint must
ride in seats using regular seat belts. Position
shoulder belt across chest and shoulder, not
face or neck. A booster seat may be
necessary to achieve proper seat belt
positioning for children over 41 lb (18 kg) until
they reach a height where a lap/shoulder belt
fits properly without a booster.
When the child restraint is not in use, remove
it from the vehicle or secure it with the seat
belt to prevent the child restraint from
becoming a projectile in the event of an
accident.
Installation of infant and child restraint
systems G
Observe Safety notes, see page 52.
This vehicle is equipped with tether
anchorages for a top tether strap at each of
the rear seating positions. 54
Occupant safety
Safety and security
219_AKB; 4; 54, en-US
d2ureepe,
Version: 2.11.8.1 2009-05-11T16:21:02+02:00 - Seite 54
Page 80 of 308
Observe the following points:
R
Adjust the seat backrest until your arms are
slightly angled when holding the steering
wheel.
R Adjust the seat to a comfortable seating
position that still allows you to reach the
accelerator/brake pedal safely. The
position should be as far back as possible
with the driver still able to operate the
controls properly.
R Adjust the head restraint so that it is as
close to the head as possible. The center of
the head restraint must support the back of
the head at eye level.
R Never place hands under the seat or near
any moving parts while a seat is being
adjusted.
Failure to do so could result in an accident
and/or serious personal injury. G
Warning!
The power seats can be operated at any time.
Therefore, do not leave children unattended
in the vehicle, or with access to an unlocked
vehicle. A child’s unsupervised access to a
vehicle could result in an accident and/or
serious personal injury. G
Warning!
According to accident statistics, children are
safer when properly restrained in the rear
seating positions than in the front seating
position. Thus, we strongly recommend that
children be placed in the rear seats whenever
possible. Regardless of seating position,
children 12 years old and under must be
seated and properly secured in an
appropriately sized infant restraint, toddler
restraint, or booster seat recommended for
the size and weight of the child. For additional
information, see “Children in the vehicle”.
A child’s risk of serious or fatal injuries is
significantly increased if the child restraints
are not properly secured in the vehicle and/ or the child is not properly secured in the child
restraint.
G
Warning!
For your protection, drive only with properly
positioned head restraints.
Adjust the head restraint so that it is as close
to the head as possible and the center of the
head restraint supports the back of the head
at eye level. This will reduce the potential for
injury to the head and neck in the event of an
accident or similar situation.
Do not drive the vehicle without the seat head
restraints. Head restraints are intended to
help reduce injuries during an accident. Seat adjustment
! When moving the seats, make sure there
are no items in the footwell or behind the
seats. Otherwise, you could damage the
seats and/or the items.
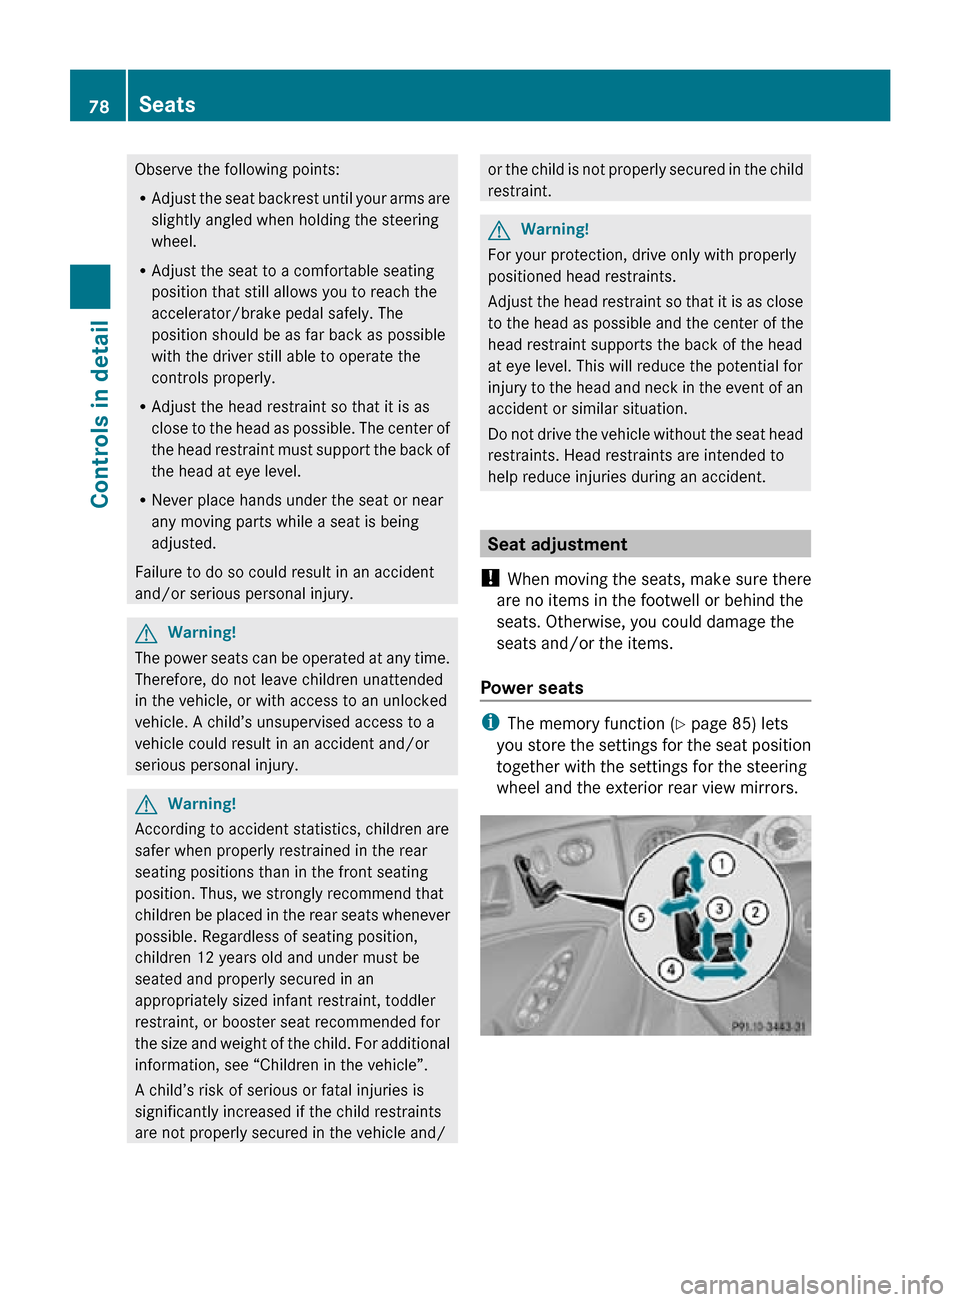
Power seats i
The memory function (Y page 85) lets
you store the settings for the seat position
together with the settings for the steering
wheel and the exterior rear view mirrors. 78
SeatsControls in detail
219_AKB; 4; 54, en-US
d2ureepe,
Version: 2.11.8.1 2009-05-11T16:21:02+02:00 - Seite 78
Page 156 of 308
in direction of arrow
= until the tilt/sliding
sunroof is fully closed.
The tilt/sliding sunroof closes with greater
force.
If the tilt/sliding sunroof is blocked again and
opens slightly:
X Immediately after the tilt/sliding sunroof
was
blocked and has opened, pull and hold
the sunroof switch in direction of arrow
= until the tilt/sliding sunroof is fully
closed.
The tilt/sliding sunroof closes without
automatic reversal function. G
Warning!
Pulling and holding the sunroof switch to
close the tilt/sliding sunroof immediately
after
it had been blocked two times will cause
the tilt/sliding sunroof to close without any
reversal function for as long as you hold the
sunroof switch. Synchronizing
The
tilt/sliding sunroof must be synchronized
R after the battery has been disconnected or
discharged
R after a malfunction
R if the tilt/sliding sunroof does not open
smoothly
! If the tilt/sliding sunroof cannot be closed
or synchronized, contact an authorized
Mercedes-Benz Center or call Roadside
Assistance.
X Vehicles with SmartKey: Switch off the
ignition
and remove the SmartKey from the
starter switch.
X Vehicles with KEYLESS-GO: Switch off the
ignition and open the driver’s door. This
puts the starter switch in position 0, same
as with the SmartKey removed from the starter switch. The driver’s door then can
be closed again.
X Remove the fuse for the tilt/sliding sunroof
from the fuse box (Y page 284).
X Reinsert the fuse in the fuse box.
X Switch on the ignition.
X Press and hold the sunroof switch in
direction
of arrow : (Y page 152) until the
tilt/sliding sunroof is fully raised at the
rear.
X Keep holding the sunroof switch in
direction of arrow : for approximately
1 second.
X Check the express operation feature
(Y page 153).
If
the tilt/sliding sunroof opens and closes
completely, the roof is synchronized.
Otherwise repeat the above steps. Loading and storing
Loading instructions
G
Warning!
Always fasten items being carried as securely
as possible using cargo tie-down hooks and
fastening
materials appropriate for the weight
and size of the load.
In an accident, during hard braking or sudden
maneuvers, loose items will be thrown around
inside the vehicle. This can cause injury to
vehicle occupants unless the items are
securely fastened in the vehicle.
To help avoid personal injury during a collision
or sudden maneuver, exercise care when
transporting cargo. Do not pile luggage or
cargo higher than the seat backrests.
The trunk is the preferred place to carry
objects. Always use cargo tie-down hooks
when transporting cargo. Do not place
anything on the rear-window shelf.
Never drive a vehicle with the trunk open.
Deadly carbon monoxide (CO) gases may 154
Loading and storing
Controls in detail
219_AKB; 4; 54, en-US
d2ureepe,
Version: 2.11.8.1 2009-05-11T16:21:02+02:00 - Seite 154
Page 157 of 308
enter vehicle interior resulting in
unconsciousness and death.
Load distribution The total load weight including vehicle
occupants and luggage/cargo should not
exceed the total load limit indicated on the
corresponding Tire and Loading Information
placard located on the driver’s door B-pillar
(Y page 194).
The handling characteristics of a fully loaded
vehicle depends greatly on the load
distribution. It is therefore recommended to
load the vehicle accordingly with the heaviest
items being placed towards the front of the
vehicle.
Please pay attention to and comply with the
following instructions when loading the
vehicle and transporting cargo:
R
Always place items being carried against
front or rear seat backrests, and fasten
them as securely as possible.
R The heaviest portion of the cargo should
always be kept as low as possible against
front or rear seat backrests. Roof rack
For information about further roof rack
equipment, contact an authorized Mercedes-
Benz Center. G
Warning!
Only use roof racks approved by Mercedes-
Benz for your vehicle model to avoid damage
to the vehicle.
Follow the manufacturer’s installation
instructions. Otherwise, an improperly
attached roof rack system or its load could
become detached from the vehicle.
Do not exceed the maximum roof load of
220 lb (100 kg).
Take into consideration that when the roof
rack is loaded, the handling characteristics are different from those when operating the
vehicle without the roof rack loaded.
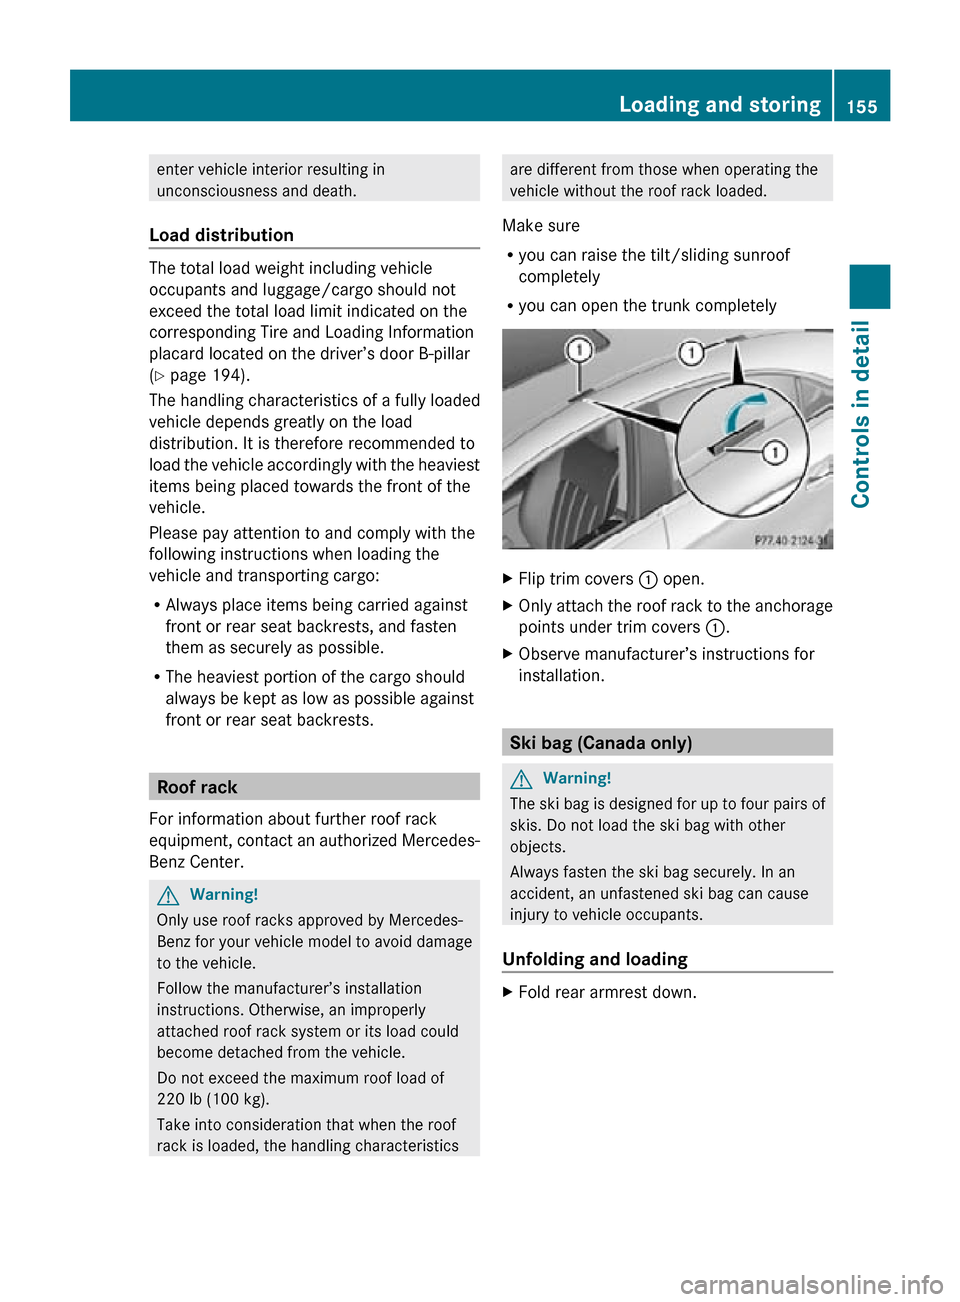
Make sure
R you can raise the tilt/sliding sunroof
completely
R you can open the trunk completely X
Flip trim covers : open.
X Only attach the roof rack to the anchorage
points under trim covers :.
X Observe manufacturer’s instructions for
installation. Ski bag (Canada only)
G
Warning!
The ski bag is designed for up to four pairs of
skis. Do not load the ski bag with other
objects.
Always fasten the ski bag securely. In an
accident, an unfastened ski bag can cause
injury to vehicle occupants.
Unfolding and loading X
Fold rear armrest down. Loading and storing
155Controls in detail
219_AKB; 4; 54, en-US
d2ureepe, Version: 2.11.8.1 2009-05-11T16:21:02+02:00 - Seite 155 Z
Page 159 of 308
X
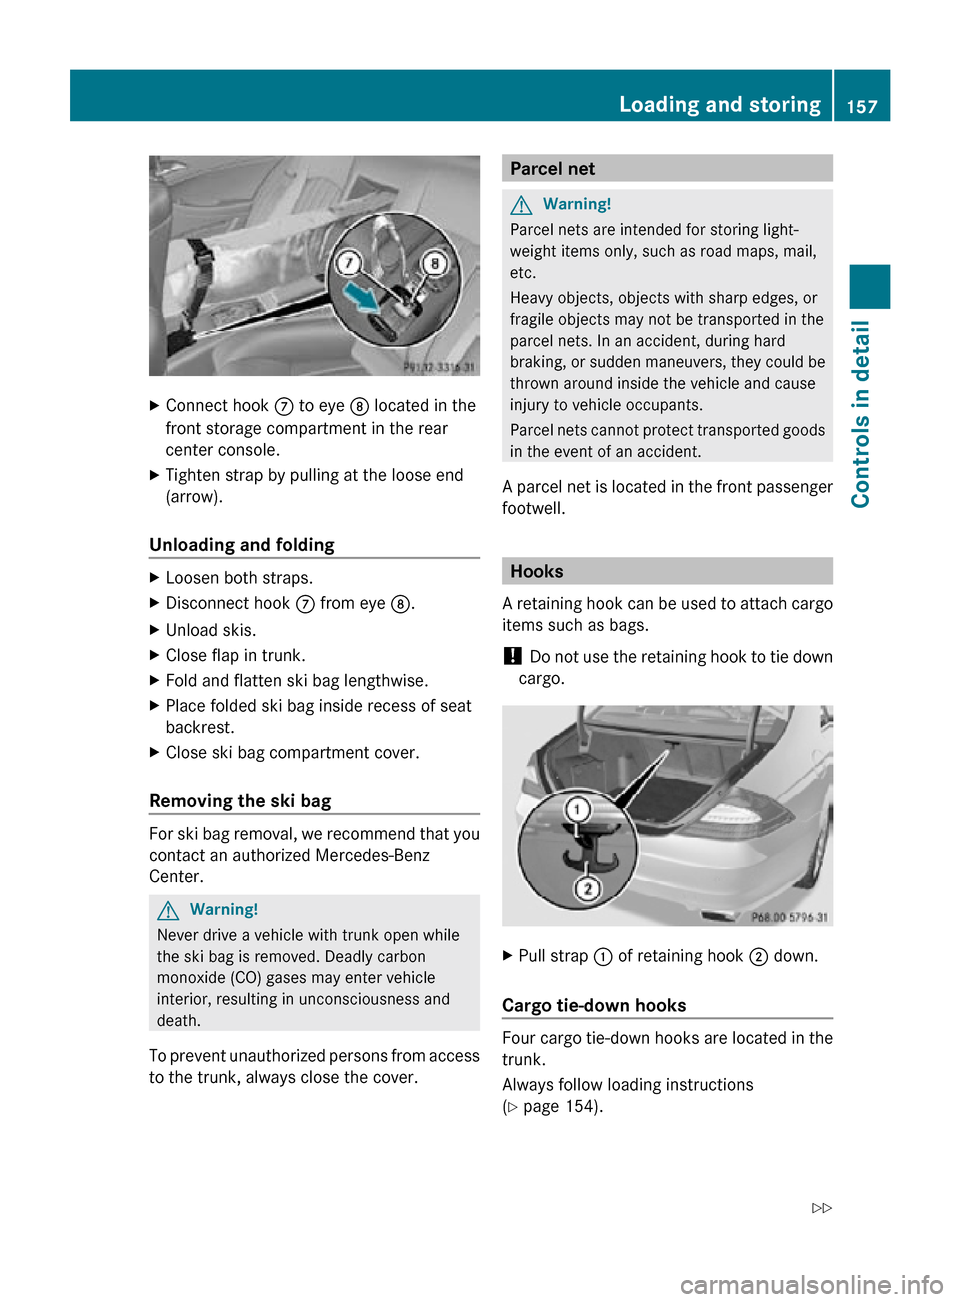
Connect hook C to eye D located in the
front storage compartment in the rear
center console.
X Tighten strap by pulling at the loose end
(arrow).
Unloading and folding X
Loosen both straps.
X Disconnect hook C from eye D.
X Unload skis.
X Close flap in trunk.
X Fold and flatten ski bag lengthwise.
X Place folded ski bag inside recess of seat
backrest.
X Close ski bag compartment cover.
Removing the ski bag For ski bag removal, we recommend that you
contact an authorized Mercedes-Benz
Center.
G
Warning!
Never drive a vehicle with trunk open while
the ski bag is removed. Deadly carbon
monoxide (CO) gases may enter vehicle
interior, resulting in unconsciousness and
death.
To prevent unauthorized persons from access
to the trunk, always close the cover. Parcel net
G
Warning!
Parcel nets are intended for storing light-
weight items only, such as road maps, mail,
etc.
Heavy objects, objects with sharp edges, or
fragile objects may not be transported in the
parcel nets. In an accident, during hard
braking, or sudden maneuvers, they could be
thrown around inside the vehicle and cause
injury to vehicle occupants.
Parcel nets cannot protect transported goods
in the event of an accident.
A parcel net is located in the front passenger
footwell. Hooks
A retaining hook can be used to attach cargo
items such as bags.
! Do not use the retaining hook to tie down
cargo. X
Pull strap : of retaining hook ; down.
Cargo tie-down hooks Four cargo tie-down hooks are located in the
trunk.
Always follow loading instructions
(Y page 154). Loading and storing
157Controls in detail
219_AKB; 4; 54, en-US
d2ureepe, Version: 2.11.8.1 2009-05-11T16:21:02+02:00 - Seite 157 Z
Page 161 of 308
i
The Roadside Assistance button º
(Y page 164) and the Information button
E (Y page 167) are located in the
storage compartment.
The front armrest storage compartment can
be ventilated ( Y page 148).
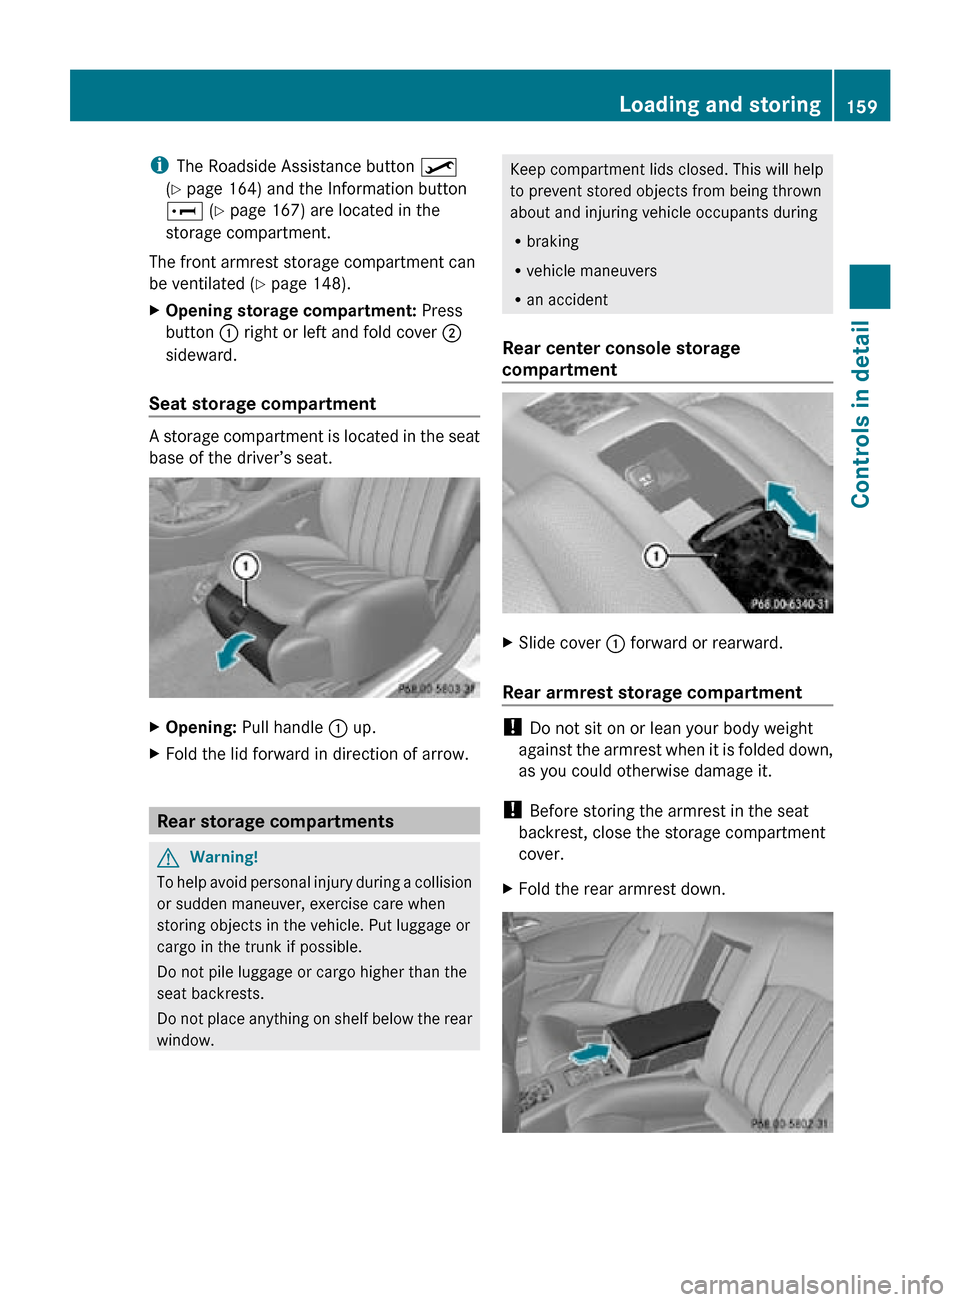
X Opening storage compartment: Press
button : right or left and fold cover ;
sideward.
Seat storage compartment A storage compartment is located in the seat
base of the driver’s seat.
X
Opening: Pull handle : up.
X Fold the lid forward in direction of arrow. Rear storage compartments
G
Warning!
To help avoid personal injury during a collision
or sudden maneuver, exercise care when
storing objects in the vehicle. Put luggage or
cargo in the trunk if possible.
Do not pile luggage or cargo higher than the
seat backrests.
Do not place anything on shelf below the rear
window. Keep compartment lids closed. This will help
to prevent stored objects from being thrown
about and injuring vehicle occupants during
R
braking
R vehicle maneuvers
R an accident
Rear center console storage
compartment X
Slide cover : forward or rearward.
Rear armrest storage compartment !
Do not sit on or lean your body weight
against the armrest when it is folded down,
as you could otherwise damage it.
! Before storing the armrest in the seat
backrest, close the storage compartment
cover.
X Fold the rear armrest down. Loading and storing
159Controls in detail
219_AKB; 4; 54, en-US
d2ureepe, Version: 2.11.8.1 2009-05-11T16:21:02+02:00 - Seite 159 Z
Page 162 of 308

X
Opening: Press the handle upwards and
fold the rear armrest lid up.
Storage bags G
Warning!
Do not place objects with a combined weight
of more than 4.4 lb (2 kg) into the storage bag.
Otherwise, the Occupant Classification
System (OCS) may not be able to properly
approximate the occupant weight category.
The storage bag is intended for storing light-
weight items only.
Heavy objects, objects with sharp edges or
fragile objects may not be transported in the
storage bag. In an accident, during hard
braking, or sudden maneuvers, they could be
thrown around inside the vehicle and cause
injury to vehicle occupants.
The storage bag cannot protect transported
goods in the event of an accident.
Storage bags are located on the back of the
front seats. Useful features
Cup holders
G
Warning!
In order to help prevent spilling liquids on
vehicle occupants and/or vehicle equipment,
only use containers that fit into the cup
holder. Use lids on open containers and do
not fill containers to a height where the
contents, especially hot liquids, could spill
during braking, vehicle maneuvers, or in an
accident. Liquids spilled on vehicle occupants
may cause serious personal injury. Liquids
spilled on vehicle equipment may cause
damage not covered by the Mercedes-Benz
Limited Warranty.
The cup holder must be extended when in use
with bottles. When not in use, keep the cup holder closed.
An open cup holder may cause injury to you
or others when contacted during braking,
vehicle maneuvers, or in an accident.
Keep in mind that objects placed in the cup
holder may come loose during braking,
vehicle maneuvers, or in an accident and be
thrown around in the vehicle interior. Objects
thrown around in the vehicle interior may
cause an accident and/or serious personal
injury.
Cup holder in front center console The cup holder can be removed for cleaning
purposes.
X
Extending: Briefly press mark on cup
holder.
The cup holder automatically extends
upward.
X Removing: Extend cup holder.
X Press mark on cup holder and remove cup
holder by pulling it upward.
X Reinstalling: Insert cup holder into
opening.
X Retracting: Press mark on cup holder and
push cup holder in until it engages.
! Make sure that the cup holder is correctly
positioned in the guide while you are
reinstalling it. Otherwise the cup holder can
be damaged.
X Press mark on cup holder and press cup
holder downward until it engages. 160
Useful featuresControls in detail
219_AKB; 4; 54, en-US
d2ureepe,
Version: 2.11.8.1 2009-05-11T16:21:02+02:00 - Seite 160
Page 163 of 308
Cup holder in rear center console
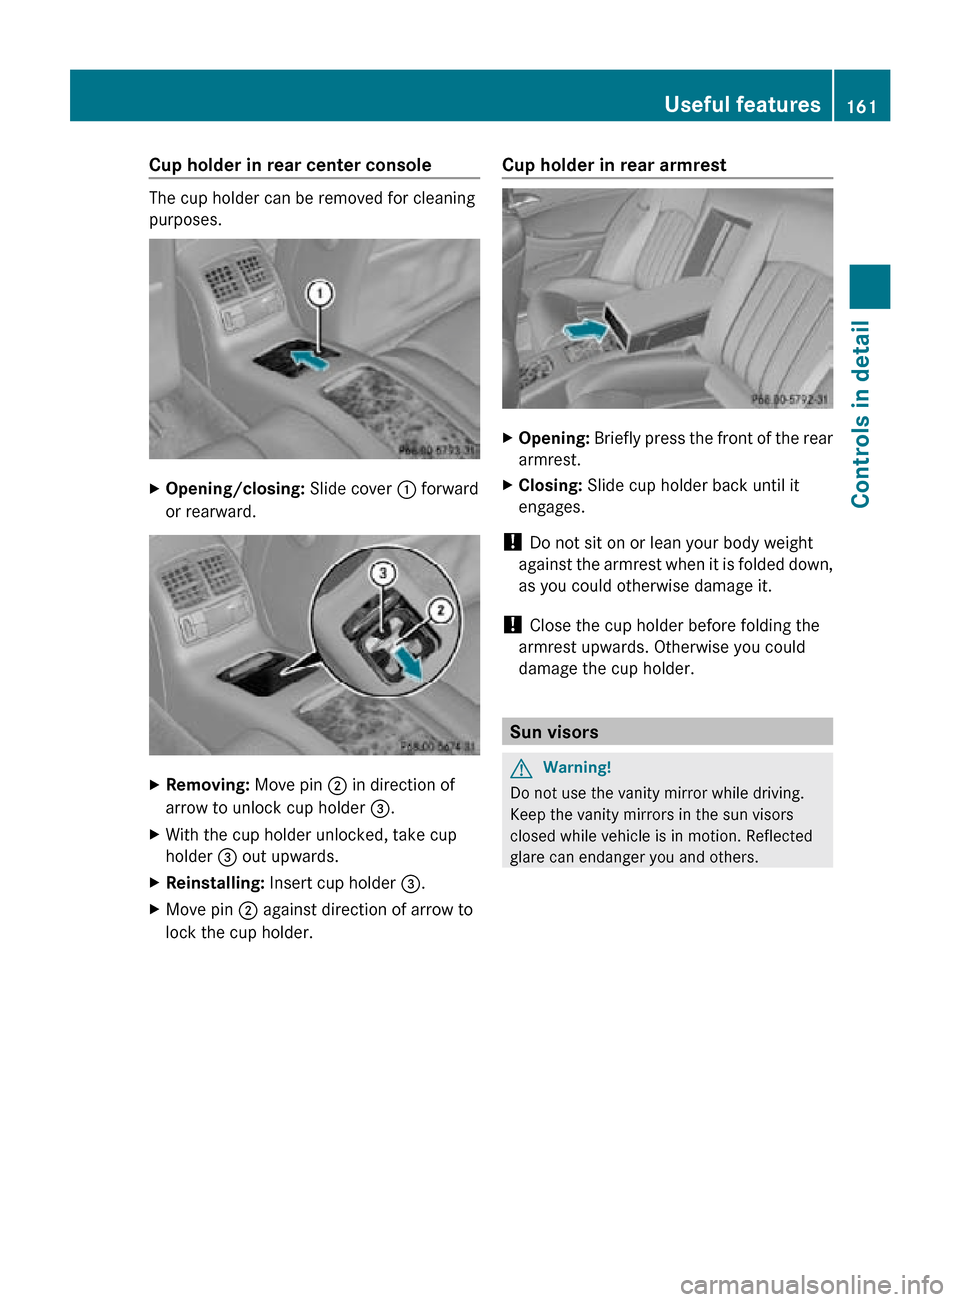
The cup holder can be removed for cleaning
purposes.
X
Opening/closing: Slide cover : forward
or rearward. X
Removing: Move pin ; in direction of
arrow to unlock cup holder =.
X With the cup holder unlocked, take cup
holder = out upwards.
X Reinstalling: Insert cup holder =.
X Move pin ; against direction of arrow to
lock the cup holder. Cup holder in rear armrest X
Opening: Briefly press the front of the rear
armrest.
X Closing: Slide cup holder back until it
engages.
! Do not sit on or lean your body weight
against the armrest when it is folded down,
as you could otherwise damage it.
! Close the cup holder before folding the
armrest upwards. Otherwise you could
damage the cup holder. Sun visors
G
Warning!
Do not use the vanity mirror while driving.
Keep the vanity mirrors in the sun visors
closed while vehicle is in motion. Reflected
glare can endanger you and others. Useful features
161Controls in detail
219_AKB; 4; 54, en-US
d2ureepe, Version: 2.11.8.1 2009-05-11T16:21:02+02:00 - Seite 161 Z