2010 MERCEDES-BENZ CLS63AMG height
[x] Cancel search: heightPage 81 of 308
X
Seat fore and aft adjustment: Press the
switch forward or backward in direction of
arrow ?.
i When moving the seat fore or aft, the head
restraints may readjust automatically.
X Seat backrest tilt: Press the switch
forward or backward in direction of arrow
A.
X Seat height: Press the switch up or down
in direction of arrow =.
X Seat cushion tilt: Press the switch up or
down in direction of arrow ; until your
upper legs are lightly supported.
X Head restraint height: Press the switch
up or down in direction of arrow :.
Head restraint fore and aft adjustment X
While seated, reach behind you with both
hands and find upper edge of the head
restraint.
X Push or pull on the upper edge of the head
restraint cushion to the desired position.
Comfort head restraint G
Warning!
When folding back the side cushions, never
reach between the side cushion and the
mounting post. You could otherwise be
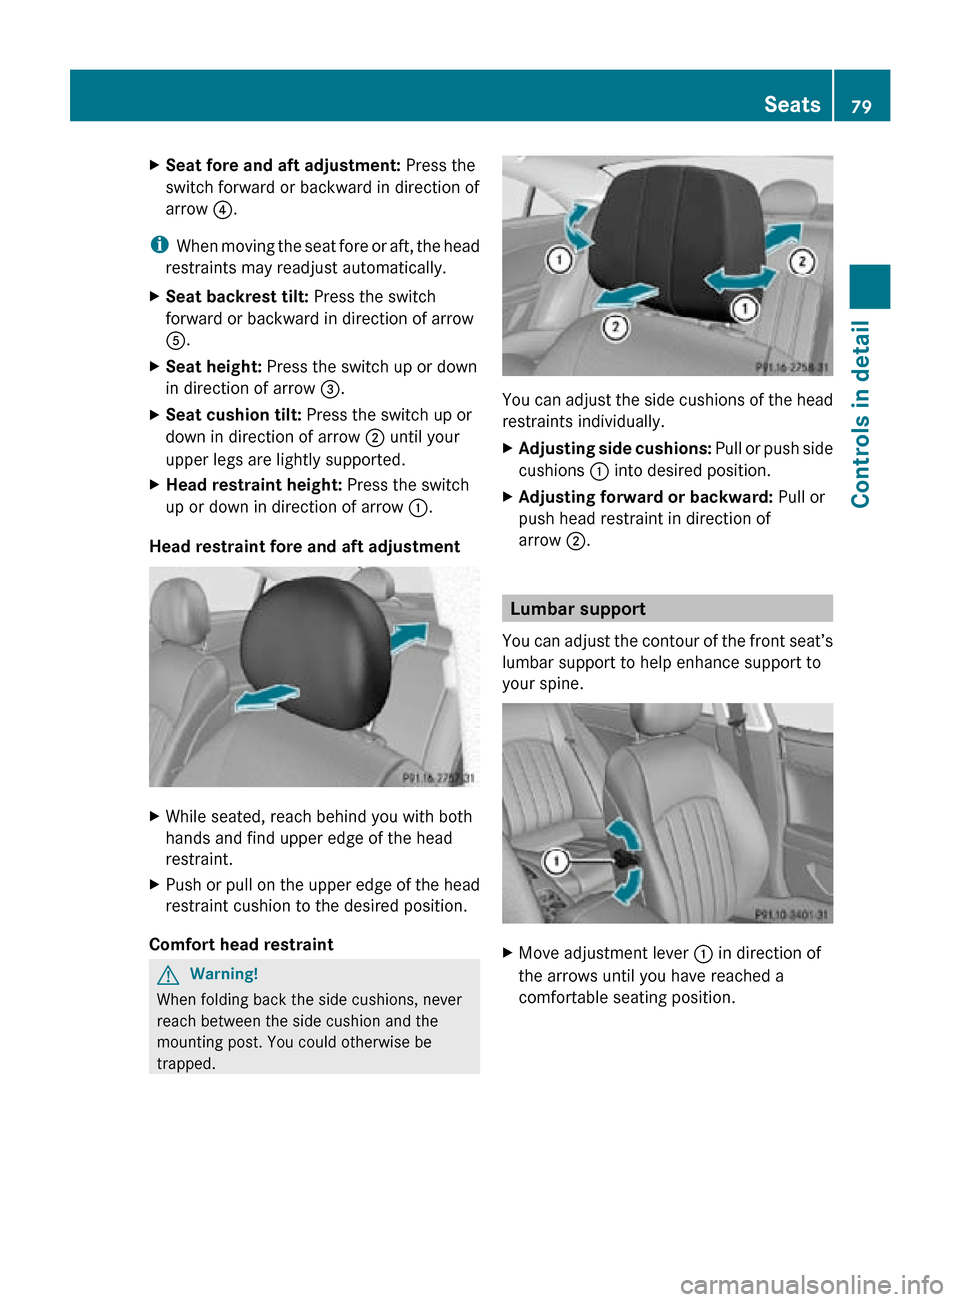
trapped. You can adjust the side cushions of the head
restraints individually.
X
Adjusting side cushions: Pull or push side
cushions : into desired position.
X Adjusting forward or backward: Pull or
push head restraint in direction of
arrow ;. Lumbar support
You can adjust the contour of the front seat’s
lumbar support to help enhance support to
your spine. X
Move adjustment lever : in direction of
the arrows until you have reached a
comfortable seating position. Seats
79Controls in detail
219_AKB; 4; 54, en-US
d2ureepe, Version: 2.11.8.1 2009-05-11T16:21:02+02:00 - Seite 79 Z
Page 139 of 308
Because of their narrow profile, the vehicles
traveling near the outer edges of the lane
have not yet been detected by the Distronic.
There will be insufficient distance to the
preceding vehicles.
Distance warning function
When the Distronic is deactivated, this
function will continue to warn you when
recognizing a stationary obstacle or a slower
vehicle moving in your vehicle’s path and the
danger of a collision exists:
R
The distance warning lamp · in the
instrument cluster comes on.
R An intermittent warning will sound if
necessary.
If these warnings are issued, you must apply
the brakes to maintain a safe distance and
avoid a collision with the preceding vehicle.
When depressing the brake pedal, the
warning sound ceases. The warning sound
will also cease when the distance to the
preceding vehicle is sufficient again without
applying the brakes. In this case, the distance
warning lamp · will also go out. G
Warning!
If the distance warning lamp · in the
instrument cluster comes on while driving
and/or an intermittent warning sounds,
immediate attention on the part of the driver
is required. As required by the traffic
situation, apply the brakes and navigate
around a possible obstacle. However, do not
drive by relying on the distance warning
function, as this will result in an emergency
braking application. This will not always
enable you to avoid a collision, especially
when traveling on varying road surface
conditions and with varying driver reaction.
Complex driving situations are not always
fully recognized by the distance warning
function. This could result in wrong or missing
distance warnings. X
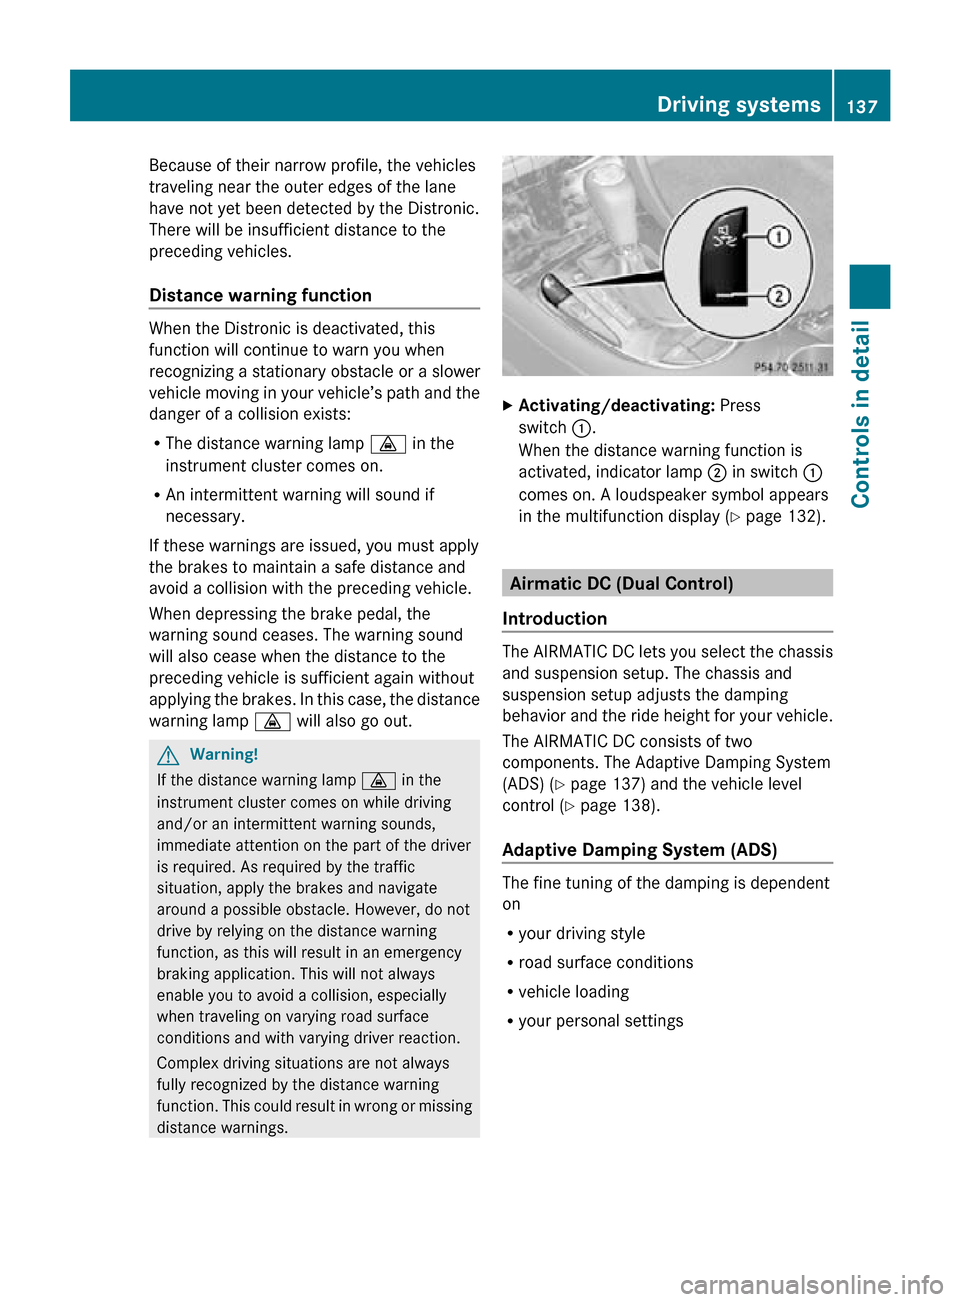
Activating/deactivating: Press
switch :.
When the distance warning function is
activated, indicator lamp ; in switch :
comes on. A loudspeaker symbol appears
in the multifunction display ( Y page 132). Airmatic DC (Dual Control)
Introduction The AIRMATIC DC lets you select the chassis
and suspension setup. The chassis and
suspension setup adjusts the damping
behavior and the ride height for your vehicle.
The AIRMATIC DC consists of two
components. The Adaptive Damping System
(ADS) (
Y page 137) and the vehicle level
control ( Y page 138).
Adaptive Damping System (ADS) The fine tuning of the damping is dependent
on
R
your driving style
R road surface conditions
R vehicle loading
R your personal settings Driving systems
137Controls in detail
219_AKB; 4; 54, en-US
d2ureepe, Version: 2.11.8.1 2009-05-11T16:21:02+02:00 - Seite 137 Z
Page 140 of 308
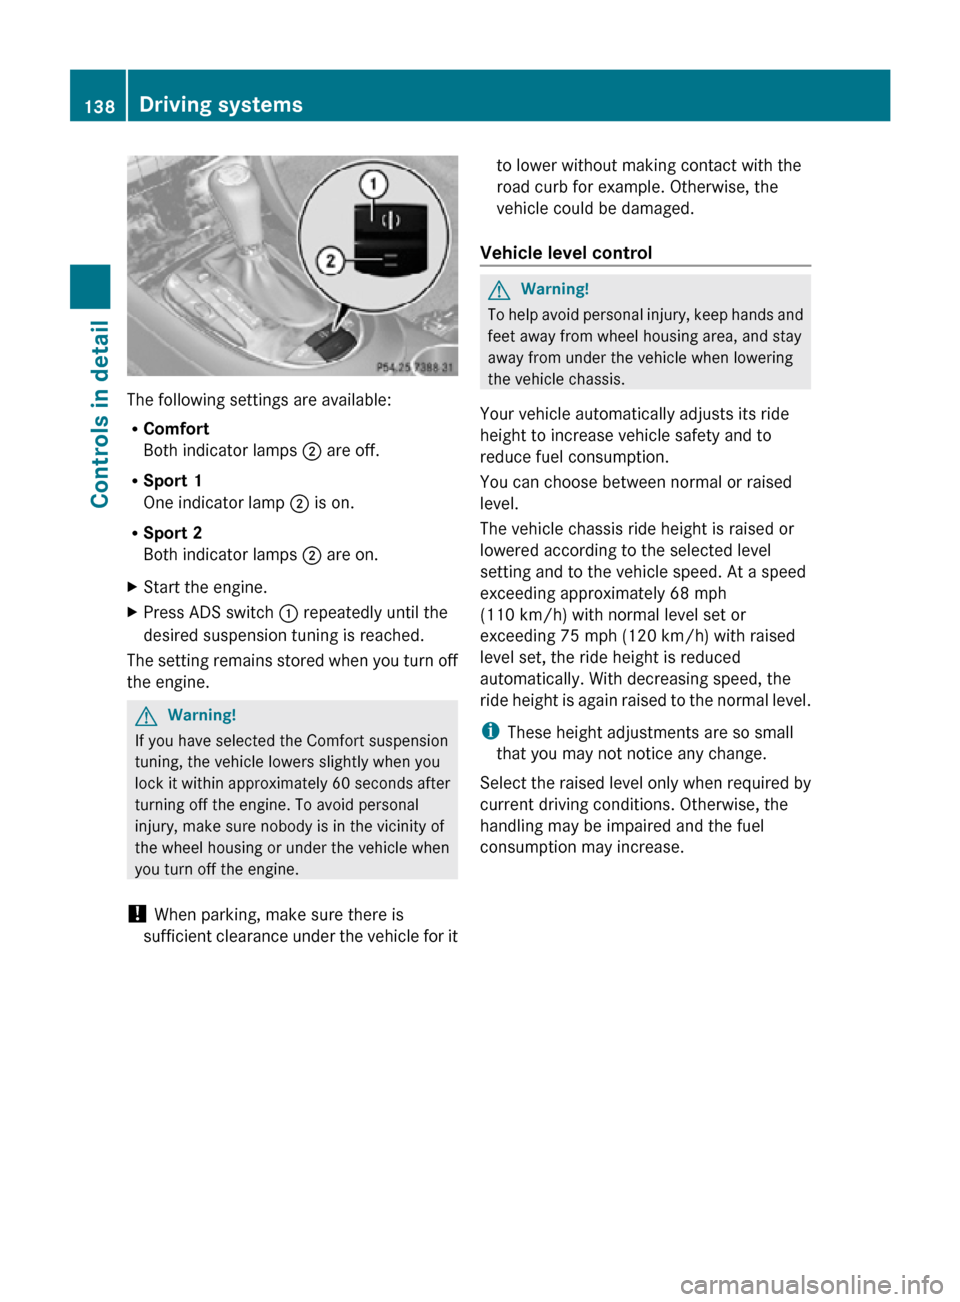
The following settings are available:
R
Comfort
Both indicator lamps ; are off.
R Sport 1
One indicator lamp ; is on.
R Sport 2
Both indicator lamps ; are on.
X Start the engine.
X Press ADS switch : repeatedly until the
desired suspension tuning is reached.
The setting remains stored when you turn off
the engine. G
Warning!
If you have selected the Comfort suspension
tuning, the vehicle lowers slightly when you
lock it within approximately 60 seconds after
turning off the engine. To avoid personal
injury, make sure nobody is in the vicinity of
the wheel housing or under the vehicle when
you turn off the engine.
! When parking, make sure there is
sufficient clearance under the vehicle for it to lower without making contact with the
road curb for example. Otherwise, the
vehicle could be damaged.
Vehicle level control G
Warning!
To help avoid personal injury, keep hands and
feet away from wheel housing area, and stay
away from under the vehicle when lowering
the vehicle chassis.
Your vehicle automatically adjusts its ride
height to increase vehicle safety and to
reduce fuel consumption.
You can choose between normal or raised
level.
The vehicle chassis ride height is raised or
lowered according to the selected level
setting and to the vehicle speed. At a speed
exceeding approximately 68 mph
(110 km/h) with normal level set or
exceeding 75 mph (120 km/h) with raised
level set, the ride height is reduced
automatically. With decreasing speed, the
ride height is again raised to the normal level.
i These height adjustments are so small
that you may not notice any change.
Select the raised level only when required by
current driving conditions. Otherwise, the
handling may be impaired and the fuel
consumption may increase. 138
Driving systemsControls in detail
219_AKB; 4; 54, en-US
d2ureepe,
Version: 2.11.8.1 2009-05-11T16:21:02+02:00 - Seite 138
Page 141 of 308
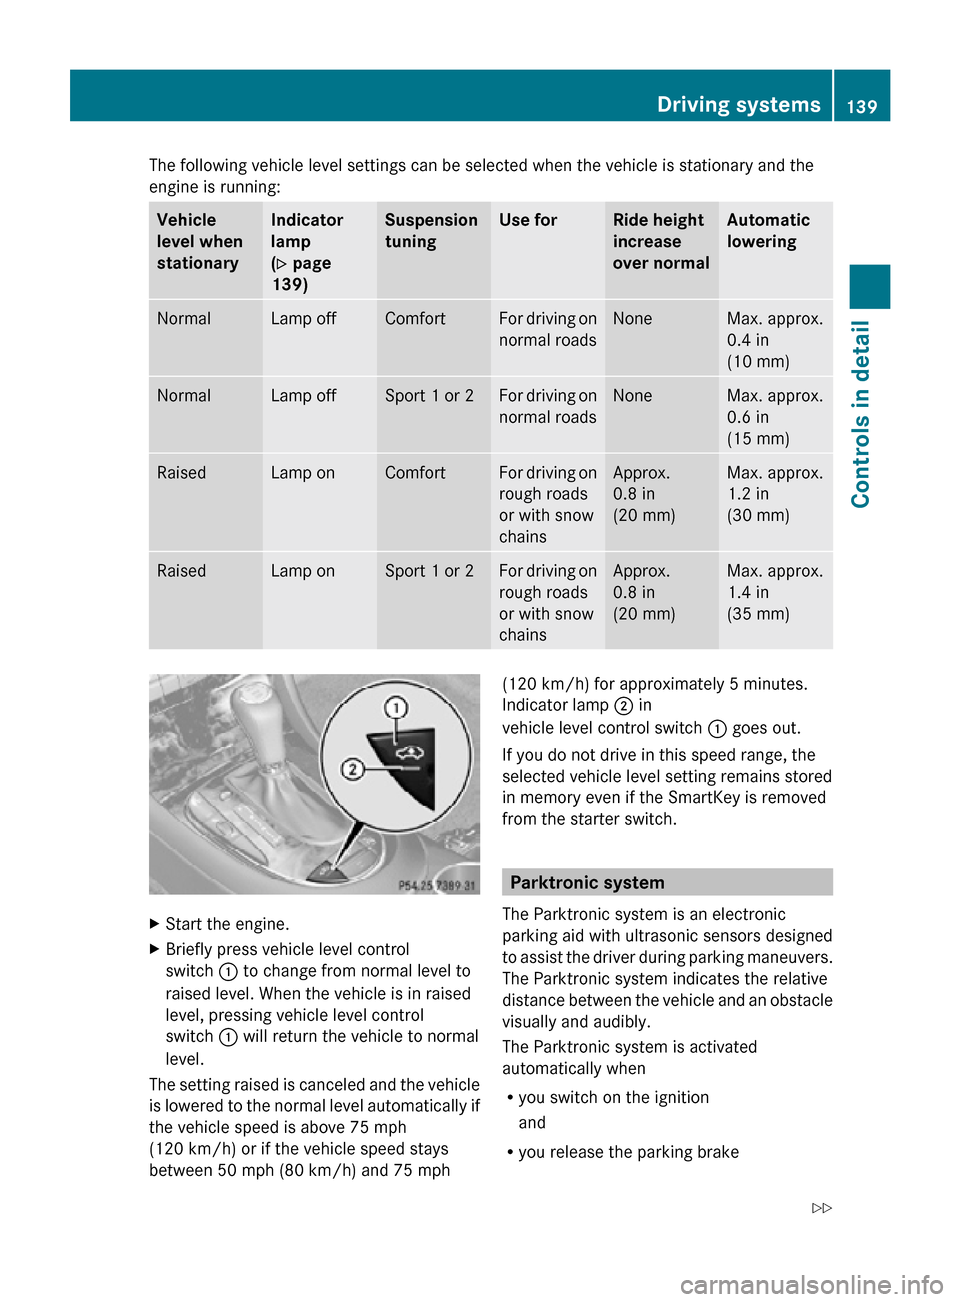
The following vehicle level settings can be selected when the vehicle is stationary and the
engine is running:
Vehicle
level when
stationary Indicator
lamp
(Y page
139) Suspension
tuning Use for Ride height
increase
over normal Automatic
lowering
Normal Lamp off Comfort For driving on
normal roads None Max. approx.
0.4 in
(10 mm)
Normal Lamp off Sport 1 or 2 For driving on
normal roads None Max. approx.
0.6 in
(15 mm)
Raised Lamp on Comfort For driving on
rough roads
or with snow
chains Approx.
0.8 in
(20 mm) Max. approx.
1.2 in
(30 mm)
Raised Lamp on Sport 1 or 2 For driving on
rough roads
or with snow
chains Approx.
0.8 in
(20 mm) Max. approx.
1.4 in
(35 mm)
X
Start the engine.
X Briefly press vehicle level control
switch : to change from normal level to
raised level. When the vehicle is in raised
level, pressing vehicle level control
switch : will return the vehicle to normal
level.
The setting raised is canceled and the vehicle
is lowered to the normal level automatically if
the vehicle speed is above 75 mph
(120 km/h) or if the vehicle speed stays
between 50 mph (80 km/h) and 75 mph (120 km/h) for approximately 5 minutes.
Indicator lamp ; in
vehicle level control switch : goes out.
If you do not drive in this speed range, the
selected vehicle level setting remains stored
in memory even if the SmartKey is removed
from the starter switch. Parktronic system
The Parktronic system is an electronic
parking aid with ultrasonic sensors designed
to assist the driver during parking maneuvers.
The Parktronic system indicates the relative
distance between the vehicle and an obstacle
visually and audibly.
The Parktronic system is activated
automatically when
R you switch on the ignition
and
R you release the parking brake Driving systems
139Controls in detail
219_AKB; 4; 54, en-US
d2ureepe, Version: 2.11.8.1 2009-05-11T16:21:02+02:00 - Seite 139 Z
Page 142 of 308
and
R the automatic transmission is in drive
position D, reverse gear R, or neutral
position N
The Parktronic system deactivates at speeds
above approximately 11 mph (18 km/h). At
lower speeds, the Parktronic system
activates again.
The Parktronic system also deactivates when
you shift the automatic transmission into
park position P or engage the parking brake.
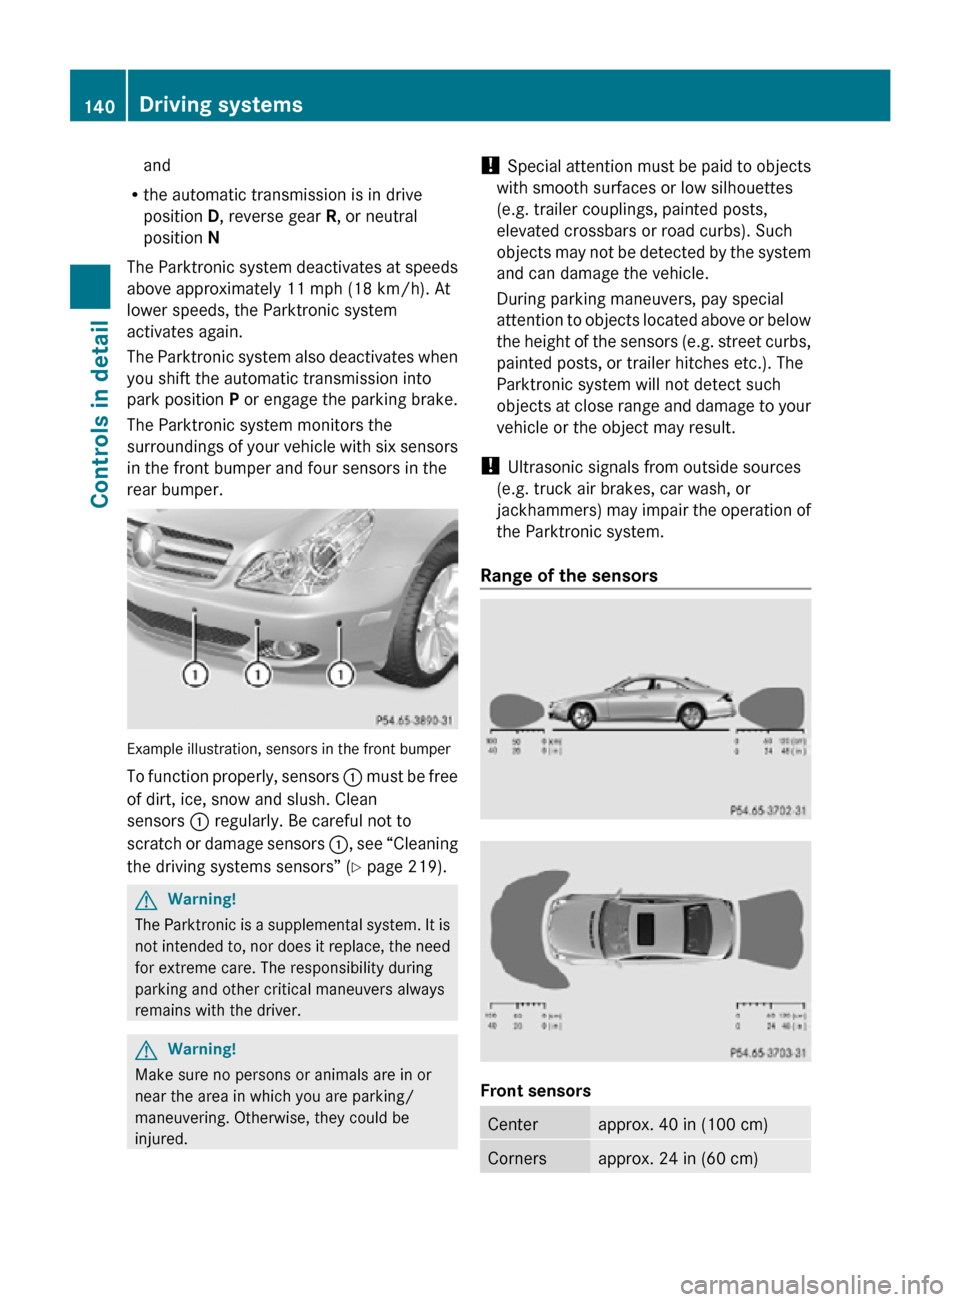
The Parktronic system monitors the
surroundings of your vehicle with six sensors
in the front bumper and four sensors in the
rear bumper. Example illustration, sensors in the front bumper
To function properly, sensors
: must be free
of dirt, ice, snow and slush. Clean
sensors : regularly. Be careful not to
scratch or damage sensors :, see “Cleaning
the driving systems sensors” (Y page 219). G
Warning!
The Parktronic is a supplemental system. It is
not intended to, nor does it replace, the need
for extreme care. The responsibility during
parking and other critical maneuvers always
remains with the driver. G
Warning!
Make sure no persons or animals are in or
near the area in which you are parking/
maneuvering. Otherwise, they could be
injured. !
Special attention must be paid to objects
with smooth surfaces or low silhouettes
(e.g. trailer couplings, painted posts,
elevated crossbars or road curbs). Such
objects may not be detected by the system
and can damage the vehicle.
During parking maneuvers, pay special
attention to objects located above or below
the height of the sensors (e.g. street curbs,
painted posts, or trailer hitches etc.). The
Parktronic system will not detect such
objects at close range and damage to your
vehicle or the object may result.
! Ultrasonic signals from outside sources
(e.g. truck air brakes, car wash, or
jackhammers) may impair the operation of
the Parktronic system.
Range of the sensors Front sensors
Center approx. 40 in (100 cm)
Corners approx. 24 in (60 cm)140
Driving systemsControls in detail
219_AKB; 4; 54, en-US
d2ureepe,
Version: 2.11.8.1 2009-05-11T16:21:02+02:00 - Seite 140
Page 162 of 308

X
Opening: Press the handle upwards and
fold the rear armrest lid up.
Storage bags G
Warning!
Do not place objects with a combined weight
of more than 4.4 lb (2 kg) into the storage bag.
Otherwise, the Occupant Classification
System (OCS) may not be able to properly
approximate the occupant weight category.
The storage bag is intended for storing light-
weight items only.
Heavy objects, objects with sharp edges or
fragile objects may not be transported in the
storage bag. In an accident, during hard
braking, or sudden maneuvers, they could be
thrown around inside the vehicle and cause
injury to vehicle occupants.
The storage bag cannot protect transported
goods in the event of an accident.
Storage bags are located on the back of the
front seats. Useful features
Cup holders
G
Warning!
In order to help prevent spilling liquids on
vehicle occupants and/or vehicle equipment,
only use containers that fit into the cup
holder. Use lids on open containers and do
not fill containers to a height where the
contents, especially hot liquids, could spill
during braking, vehicle maneuvers, or in an
accident. Liquids spilled on vehicle occupants
may cause serious personal injury. Liquids
spilled on vehicle equipment may cause
damage not covered by the Mercedes-Benz
Limited Warranty.
The cup holder must be extended when in use
with bottles. When not in use, keep the cup holder closed.
An open cup holder may cause injury to you
or others when contacted during braking,
vehicle maneuvers, or in an accident.
Keep in mind that objects placed in the cup
holder may come loose during braking,
vehicle maneuvers, or in an accident and be
thrown around in the vehicle interior. Objects
thrown around in the vehicle interior may
cause an accident and/or serious personal
injury.
Cup holder in front center console The cup holder can be removed for cleaning
purposes.
X
Extending: Briefly press mark on cup
holder.
The cup holder automatically extends
upward.
X Removing: Extend cup holder.
X Press mark on cup holder and remove cup
holder by pulling it upward.
X Reinstalling: Insert cup holder into
opening.
X Retracting: Press mark on cup holder and
push cup holder in until it engages.
! Make sure that the cup holder is correctly
positioned in the guide while you are
reinstalling it. Otherwise the cup holder can
be damaged.
X Press mark on cup holder and press cup
holder downward until it engages. 160
Useful featuresControls in detail
219_AKB; 4; 54, en-US
d2ureepe,
Version: 2.11.8.1 2009-05-11T16:21:02+02:00 - Seite 160
Page 180 of 308

R
Washer system and headlamp cleaning
system (Y page 181)
R Brake fluid ( Y page 182) Engine compartment
Hood
G
Warning!
Do not pull the release lever while the vehicle
is in motion. Otherwise the hood could be
forced open by passing air flow.
This could cause the hood to come loose and
injure you and/or others.
Opening G
Warning!
If you see flames or smoke coming from the
engine compartment, or if the coolant
temperature indicator indicates that the
engine is overheated, do not open the hood.
Move away from vehicle and do not open the
hood until the engine has cooled. If necessary,
call the fire department. G
Warning!
You could be injured when the hood is open –
even when the engine is turned off.
Parts of the engine can become very hot. To
prevent burns, let the engine cool completely
before touching any components on the
vehicle. Comply with all relevant safety
precautions. G
Warning!
To help prevent personal injury, stay clear of
moving parts when the hood is open and the
engine is running.
The radiator fan may continue to run for
approximately 30 seconds or may even
restart after the engine has been turned off.
Stay clear of fan blades. G
Warning!
The engine is equipped with a transistorized
ignition system. Because of the high voltage
it is dangerous to touch any components
(ignition coils, spark plug sockets, diagnostic
socket) of the ignition system
R with the engine running
R while starting the engine
R when the ignition is switched on and the
engine is turned manually X
Pull hood lock release lever :.
The hood is unlocked.
! Never open the hood if the wiper arms are
folded forward away from the windshield.
Otherwise the windshield wipers or the
hood could be damaged. X
Push handle ; under the hood upwards.
X Pull up on the hood and then release it.
The hood will be held open at shoulder
height by gas-filled struts automatically. 178
Engine compartmentOperation
219_AKB; 4; 54, en-US
d2ureepe,
Version: 2.11.8.1 2009-05-11T16:21:02+02:00 - Seite 178
Page 181 of 308
Closing
G
Warning!
When closing the hood, use extreme caution
not to catch hands or fingers. Be careful that
you do not close the hood on anyone.
Make sure the hood is securely engaged
before driving off. Do not continue driving if
the hood can no longer engage after an
accident, for example. The hood could
otherwise come loose while the vehicle is in
motion and injure you and/or others.
X Let the hood drop from a height of
approximately 8 in (20 cm).
X Check to make sure the hood is fully
closed.
If you can raise the hood at a point above
the headlamps, then it is not properly
closed. Open it again and let it drop with
somewhat greater force. Engine oil
The amount of oil your engine consumes will
depend on a number of factors, including
driving style. Increased oil consumption can
occur when the vehicle is new or the vehicle
is driven frequently at higher engine speeds.
Engine oil consumption checks should only
be made after the vehicle break-in period.
! Do not use any special lubricant additives,
as these may damage the drive assemblies.
Using special additives not approved by
Mercedes-Benz may cause damage not
covered by the Mercedes-Benz Limited
Warranty.
For further information contact an
authorized Mercedes-Benz Center.
Notes on checking engine oil level When checking the oil level
R
the vehicle must be parked on level ground
R with the engine at operating temperature,
the vehicle must have been stationary for at least 5 minutes with the engine turned
off
R with the engine not at operating
temperature, the vehicle must have been
stationary for at least 30 minutes with the
engine turned off
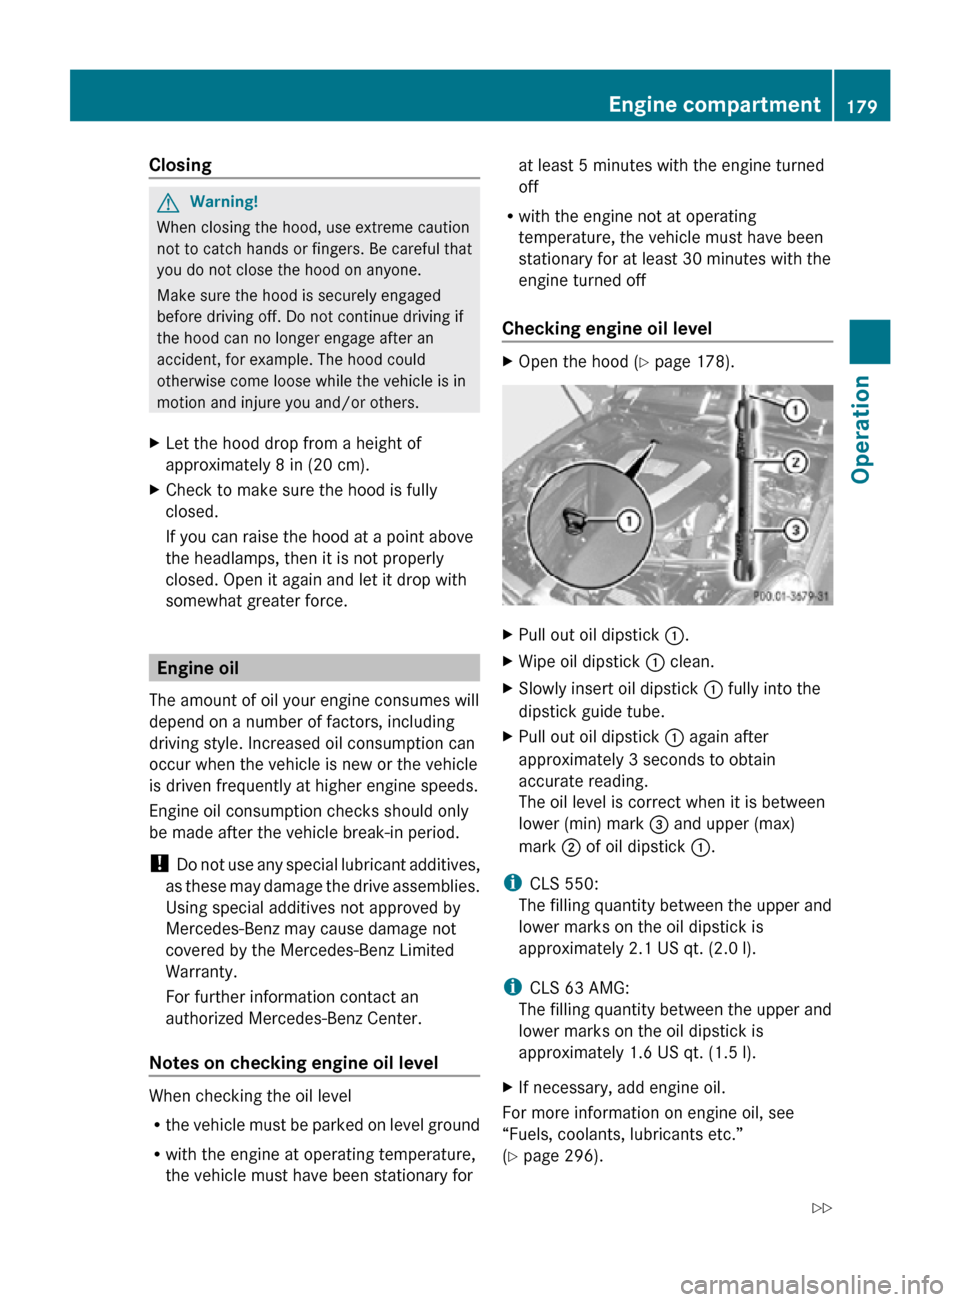
Checking engine oil level X
Open the hood (Y page 178). X
Pull out oil dipstick :.
X Wipe oil dipstick : clean.
X Slowly insert oil dipstick : fully into the
dipstick guide tube.
X Pull out oil dipstick : again after
approximately 3 seconds to obtain
accurate reading.
The oil level is correct when it is between
lower (min) mark = and upper (max)
mark ; of oil dipstick :.
i CLS 550:
The filling quantity between the upper and
lower marks on the oil dipstick is
approximately 2.1 US qt. (2.0 l).
i CLS 63 AMG:
The filling quantity between the upper and
lower marks on the oil dipstick is
approximately 1.6 US qt. (1.5 l).
X If necessary, add engine oil.
For more information on engine oil, see
“Fuels, coolants, lubricants etc.”
(Y page 296). Engine compartment
179Operation
219_AKB; 4; 54, en-US
d2ureepe, Version: 2.11.8.1 2009-05-11T16:21:02+02:00 - Seite 179 Z