2010 MERCEDES-BENZ CLS550 door open
[x] Cancel search: door openPage 120 of 308
X
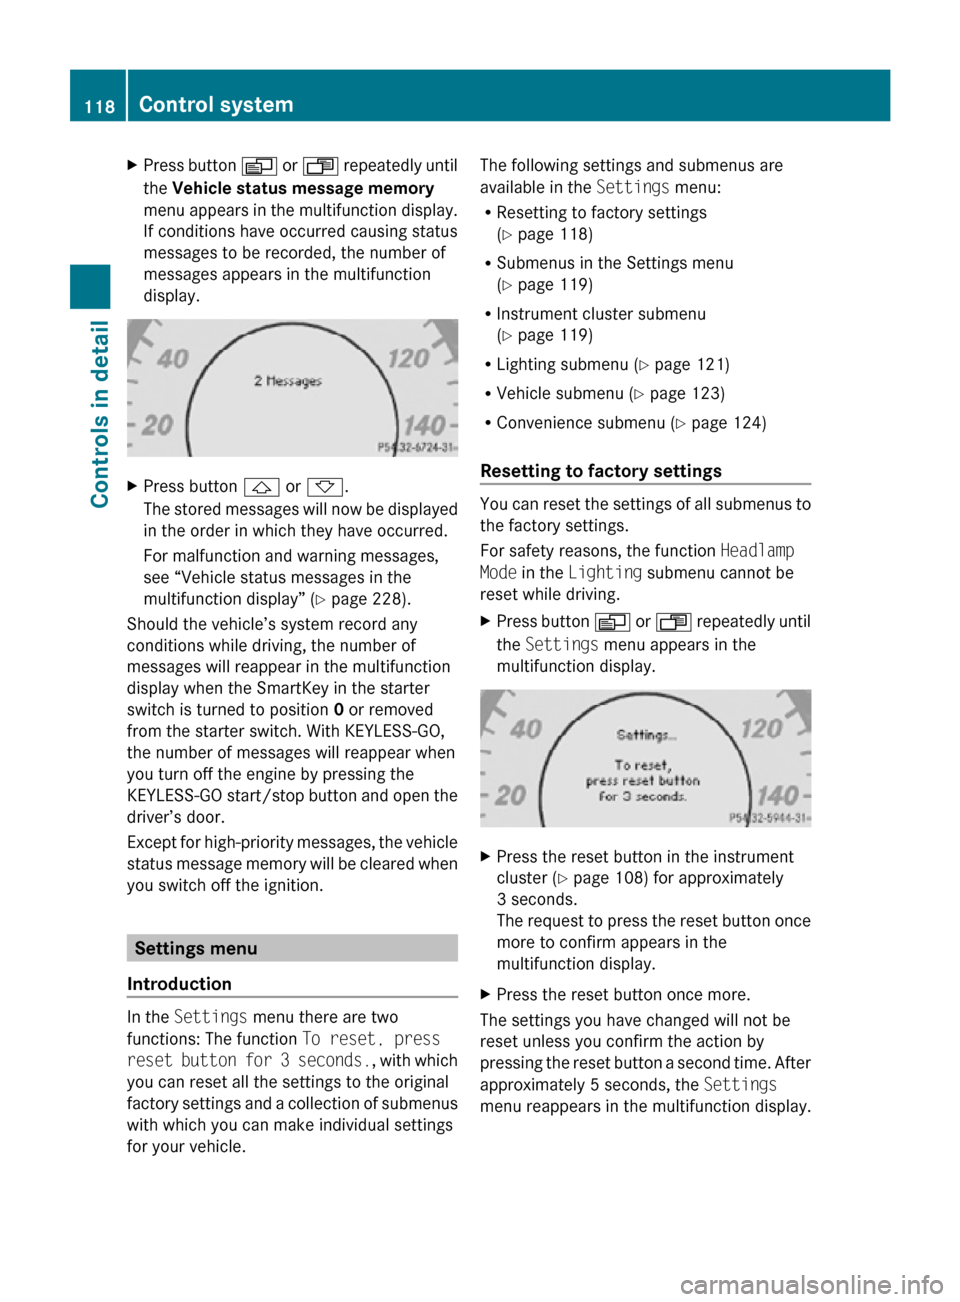
Press button V or U repeatedly until
the Vehicle status message memory
menu appears in the multifunction display.
If conditions have occurred causing status
messages to be recorded, the number of
messages appears in the multifunction
display. X
Press button & or *.
The stored messages will now be displayed
in the order in which they have occurred.
For malfunction and warning messages,
see “Vehicle status messages in the
multifunction display” ( Y page 228).
Should the vehicle’s system record any
conditions while driving, the number of
messages will reappear in the multifunction
display when the SmartKey in the starter
switch is turned to position 0 or removed
from the starter switch. With KEYLESS-GO,
the number of messages will reappear when
you turn off the engine by pressing the
KEYLESS-GO start/stop button and open the
driver’s door.
Except for high-priority messages, the vehicle
status message memory will be cleared when
you switch off the ignition. Settings menu
Introduction In the
Settings menu there are two
functions: The function To reset, press
reset button for 3 seconds. , with which
you can reset all the settings to the original
factory settings and a collection of submenus
with which you can make individual settings
for your vehicle. The following settings and submenus are
available in the
Settings menu:
R Resetting to factory settings
(Y page 118)
R Submenus in the Settings menu
(Y page 119)
R Instrument cluster submenu
(Y page 119)
R Lighting submenu ( Y page 121)
R Vehicle submenu ( Y page 123)
R Convenience submenu ( Y page 124)
Resetting to factory settings You can reset the settings of all submenus to
the factory settings.
For safety reasons, the function
Headlamp
Mode in the Lighting submenu cannot be
reset while driving.
X Press button V or U repeatedly until
the Settings menu appears in the
multifunction display. X
Press the reset button in the instrument
cluster (Y page 108) for approximately
3 seconds.
The request to press the reset button once
more to confirm appears in the
multifunction display.
X Press the reset button once more.
The settings you have changed will not be
reset unless you confirm the action by
pressing the reset button a second time. After
approximately 5 seconds, the Settings
menu reappears in the multifunction display. 118
Control systemControls in detail
219_AKB; 4; 54, en-US
d2ureepe,
Version: 2.11.8.1 2009-05-11T16:21:02+02:00 - Seite 118
Page 124 of 308
R
Side marker lamps
R Front fog lamps
The locator lighting goes out when the driver’s
door is opened.
If you do not open the driver’s door after
unlocking the vehicle with the SmartKey, the
lamps will go out automatically after
approximately 40 seconds.
X Press button V or U repeatedly until
the Settings menu appears in the
multifunction display.
X Press button &.
X Move the selection marker with button
W or X to the Lighting submenu.
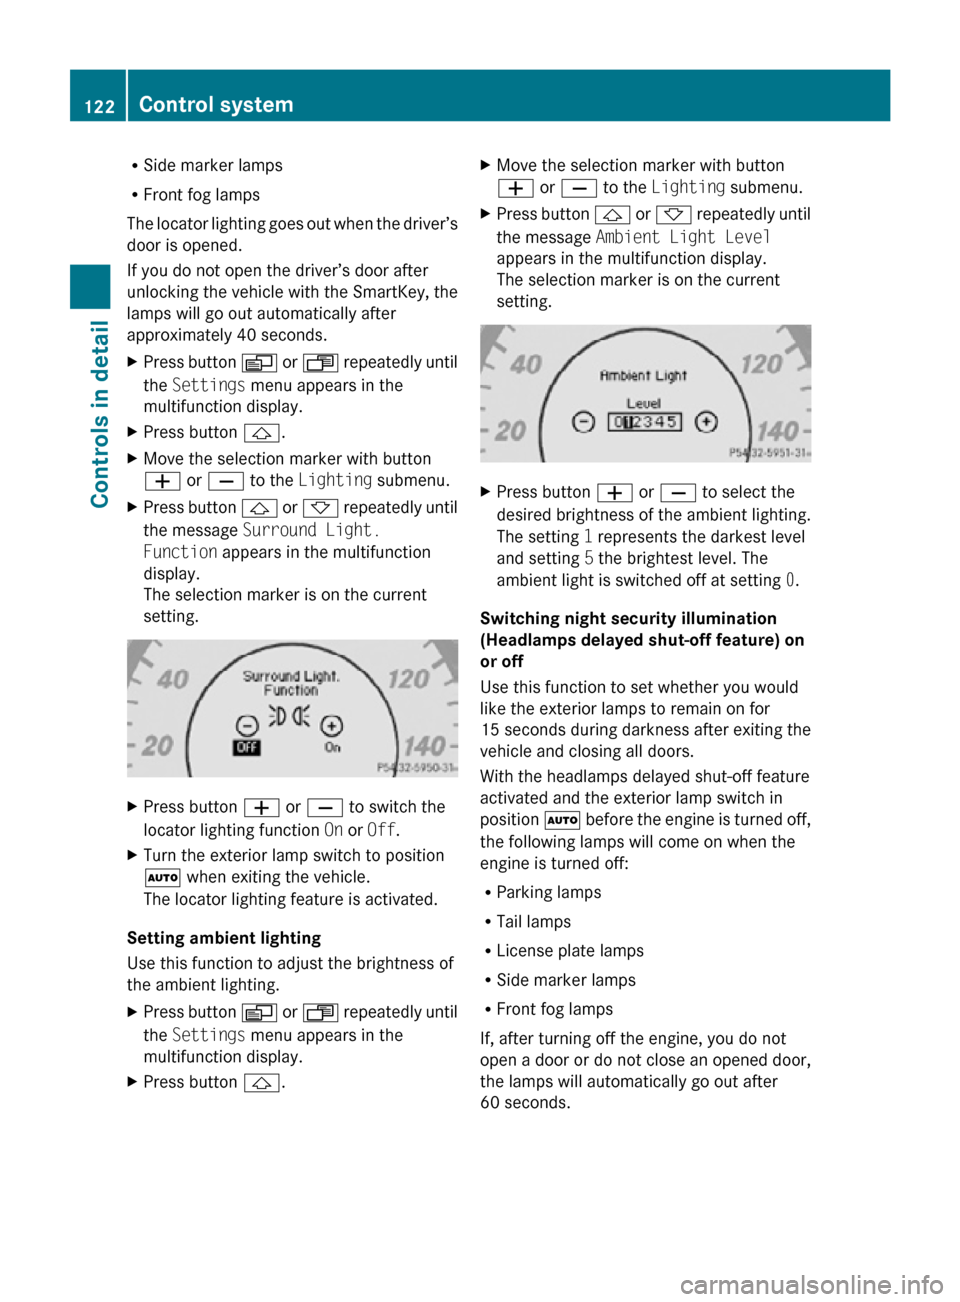
X Press button & or * repeatedly until
the message Surround Light.
Function appears in the multifunction
display.
The selection marker is on the current
setting. X
Press button W or X to switch the
locator lighting function On or Off.
X Turn the exterior lamp switch to position
à when exiting the vehicle.
The locator lighting feature is activated.
Setting ambient lighting
Use this function to adjust the brightness of
the ambient lighting.
X Press button V or U repeatedly until
the Settings menu appears in the
multifunction display.
X Press button &. X
Move the selection marker with button
W or X to the Lighting submenu.
X Press button & or * repeatedly until
the message Ambient Light Level
appears in the multifunction display.
The selection marker is on the current
setting. X
Press button W or X to select the
desired brightness of the ambient lighting.
The setting 1 represents the darkest level
and setting 5 the brightest level. The
ambient light is switched off at setting 0.
Switching night security illumination
(Headlamps delayed shut-off feature) on
or off
Use this function to set whether you would
like the exterior lamps to remain on for
15 seconds during darkness after exiting the
vehicle and closing all doors.
With the headlamps delayed shut-off feature
activated and the exterior lamp switch in
position à before the engine is turned off,
the following lamps will come on when the
engine is turned off:
R Parking lamps
R Tail lamps
R License plate lamps
R Side marker lamps
R Front fog lamps
If, after turning off the engine, you do not
open a door or do not close an opened door,
the lamps will automatically go out after
60 seconds. 122
Control systemControls in detail
219_AKB; 4; 54, en-US
d2ureepe,
Version: 2.11.8.1 2009-05-11T16:21:02+02:00 - Seite 122
Page 126 of 308
X
Move the selection marker with button
W or X to the Vehicle submenu.
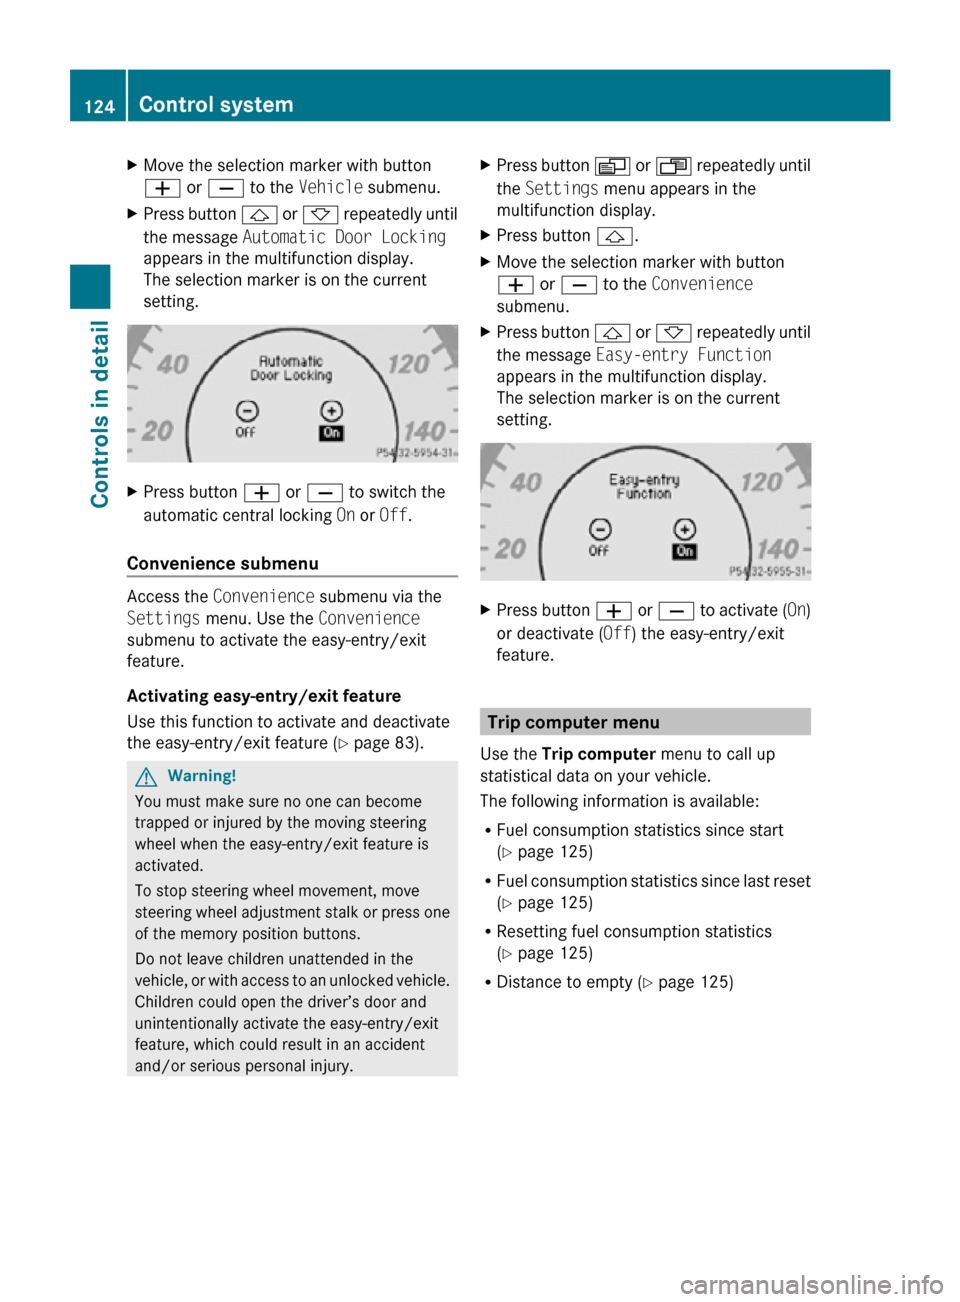
X Press button & or * repeatedly until
the message Automatic Door Locking
appears in the multifunction display.
The selection marker is on the current
setting. X
Press button W or X to switch the
automatic central locking On or Off.
Convenience submenu Access the
Convenience submenu via the
Settings menu. Use the Convenience
submenu to activate the easy-entry/exit
feature.
Activating easy-entry/exit feature
Use this function to activate and deactivate
the easy-entry/exit feature (Y page 83). G
Warning!
You must make sure no one can become
trapped or injured by the moving steering
wheel when the easy-entry/exit feature is
activated.
To stop steering wheel movement, move
steering wheel adjustment stalk or press one
of the memory position buttons.
Do not leave children unattended in the
vehicle, or with access to an unlocked vehicle.
Children could open the driver’s door and
unintentionally activate the easy-entry/exit
feature, which could result in an accident
and/or serious personal injury. X
Press button V or U repeatedly until
the Settings menu appears in the
multifunction display.
X Press button &.
X Move the selection marker with button
W or X to the Convenience
submenu.
X Press button & or * repeatedly until
the message Easy-entry Function
appears in the multifunction display.
The selection marker is on the current
setting. X
Press button W or X to activate ( On)
or deactivate (Off) the easy-entry/exit
feature. Trip computer menu
Use the Trip computer menu to call up
statistical data on your vehicle.
The following information is available:
R Fuel consumption statistics since start
(Y page 125)
R Fuel consumption statistics since last reset
(Y page 125)
R Resetting fuel consumption statistics
(Y page 125)
R Distance to empty ( Y page 125)124
Control systemControls in detail
219_AKB; 4; 54, en-US
d2ureepe,
Version: 2.11.8.1 2009-05-11T16:21:02+02:00 - Seite 124
Page 151 of 308
X
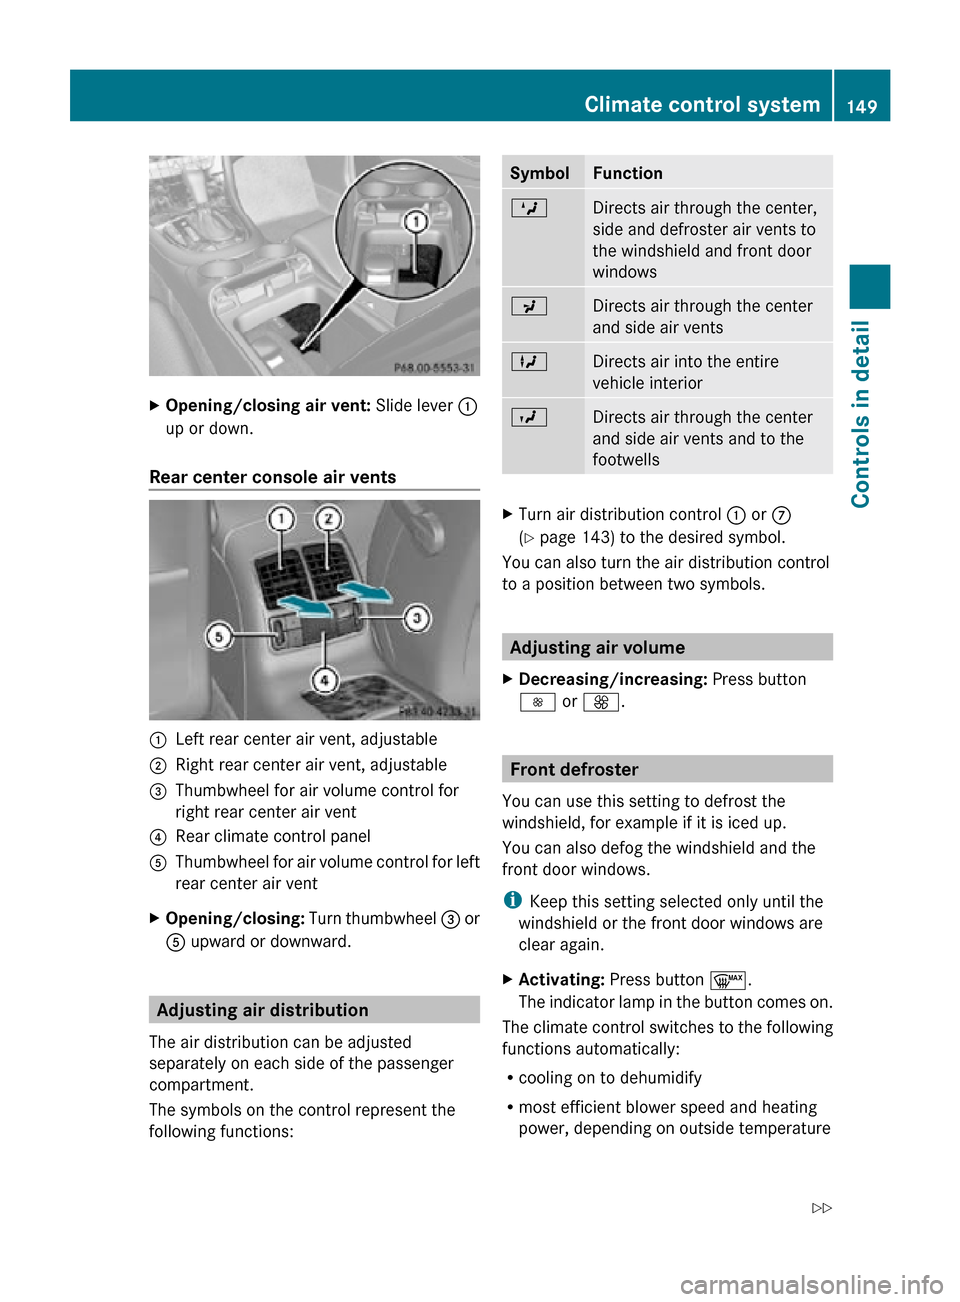
Opening/closing air vent: Slide lever :
up or down.
Rear center console air vents :
Left rear center air vent, adjustable
; Right rear center air vent, adjustable
= Thumbwheel for air volume control for
right rear center air vent
? Rear climate control panel
A Thumbwheel for air volume control for left
rear center air vent
X Opening/closing: Turn thumbwheel = or
A upward or downward. Adjusting air distribution
The air distribution can be adjusted
separately on each side of the passenger
compartment.
The symbols on the control represent the
following functions: Symbol Function
M
Directs air through the center,
side and defroster air vents to
the windshield and front door
windows
P
Directs air through the center
and side air vents
L
Directs air into the entire
vehicle interior
O
Directs air through the center
and side air vents and to the
footwells
X
Turn air distribution control : or C
(Y page 143) to the desired symbol.
You can also turn the air distribution control
to a position between two symbols. Adjusting air volume
X Decreasing/increasing: Press button
I or K. Front defroster
You can use this setting to defrost the
windshield, for example if it is iced up.
You can also defog the windshield and the
front door windows.
i Keep this setting selected only until the
windshield or the front door windows are
clear again.
X Activating: Press button ¬.
The indicator lamp in the button comes on.
The climate control switches to the following
functions automatically:
R cooling on to dehumidify
R most efficient blower speed and heating
power, depending on outside temperature Climate control system
149Controls in detail
219_AKB; 4; 54, en-US
d2ureepe, Version: 2.11.8.1 2009-05-11T16:21:02+02:00 - Seite 149 Z
Page 154 of 308
Power tilt/sliding sunroof
Opening and closing
G
Observe Safety notes, see page 52. G
Warning!
When opening or closing the tilt/sliding
sunroof, make sure there is no danger of
anyone being harmed by the opening/closing
procedure.
The tilt/sliding sunroof is equipped with the
express operation and automatic reversal
function. If the movement of the tilt/sliding
sunroof is blocked during the closing
procedure, the tilt/sliding sunroof will stop
and open slightly.
The tilt/sliding sunroof operates differently
when the sunroof switch is pressed and held.
See the “Closing when the tilt/sliding sunroof
is blocked” section for details.
The opening/closing procedure of the tilt/
sliding sunroof can be immediately halted by
releasing the sunroof switch or, if the sunroof
switch was moved past the resistance point
and released, by moving the sunroof switch in
any direction. G
Warning!
The tilt/sliding sunroof is made out of glass.
In the event of an accident, the glass may
shatter. This may result in an opening in the
roof.
In a vehicle rollover, occupants not wearing
their seat belts or not wearing them properly
may be thrown out of the opening. Such an
opening also presents a potential for injury for
occupants wearing their seat belts properly as
entire body parts or portions of them may
protrude from the passenger compartment.
! To avoid damaging the seals, do not
transport any objects with sharp edges
which can stick out of the tilt/sliding
sunroof. Do not open the tilt/sliding sunroof if there
is snow or ice on the roof, as this could
result in malfunctions.
If you cannot open or close the tilt/sliding
sunroof due to a malfunction contact
Roadside Assistance or an authorized
Mercedes-Benz Center.
! Please keep in mind that weather
conditions can sometimes change rapidly.
Make sure to close the tilt/sliding sunroof
when leaving the vehicle. If water enters
the vehicle interior, vehicle electronics
could be damaged which is not covered by
the Mercedes-Benz Limited Warranty.
i You can also open or close the tilt/sliding
sunroof using the SmartKey or the
KEYLESS-GO function, see “Summer
opening feature” ( Y page 96) and
“Convenience closing feature”
(Y page 96).
i After switching off the ignition or
removing the SmartKey from the starter
switch, you can operate the tilt/sliding
sunroof until you open the driver’s or front
passenger door. If no door was opened you
can operate the tilt/sliding sunroof for up
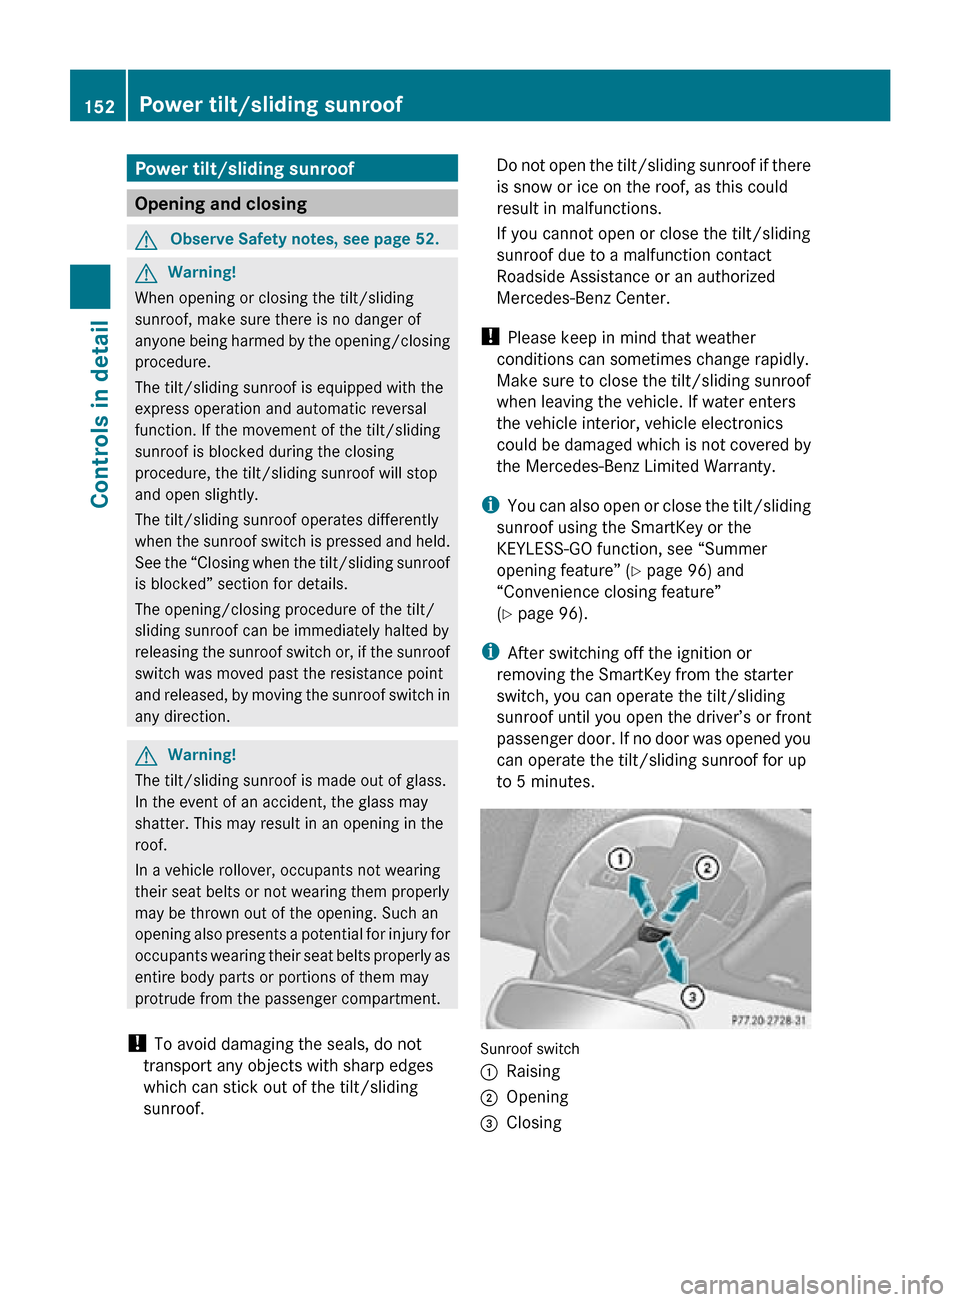
to 5 minutes. Sunroof switch
:
Raising
; Opening
= Closing 152
Power tilt/sliding sunroofControls in detail
219_AKB; 4; 54, en-US
d2ureepe,
Version: 2.11.8.1 2009-05-11T16:21:02+02:00 - Seite 152
Page 156 of 308
in direction of arrow
= until the tilt/sliding
sunroof is fully closed.
The tilt/sliding sunroof closes with greater
force.
If the tilt/sliding sunroof is blocked again and
opens slightly:
X Immediately after the tilt/sliding sunroof
was
blocked and has opened, pull and hold
the sunroof switch in direction of arrow
= until the tilt/sliding sunroof is fully
closed.
The tilt/sliding sunroof closes without
automatic reversal function. G
Warning!
Pulling and holding the sunroof switch to
close the tilt/sliding sunroof immediately
after
it had been blocked two times will cause
the tilt/sliding sunroof to close without any
reversal function for as long as you hold the
sunroof switch. Synchronizing
The
tilt/sliding sunroof must be synchronized
R after the battery has been disconnected or
discharged
R after a malfunction
R if the tilt/sliding sunroof does not open
smoothly
! If the tilt/sliding sunroof cannot be closed
or synchronized, contact an authorized
Mercedes-Benz Center or call Roadside
Assistance.
X Vehicles with SmartKey: Switch off the
ignition
and remove the SmartKey from the
starter switch.
X Vehicles with KEYLESS-GO: Switch off the
ignition and open the driver’s door. This
puts the starter switch in position 0, same
as with the SmartKey removed from the starter switch. The driver’s door then can
be closed again.
X Remove the fuse for the tilt/sliding sunroof
from the fuse box (Y page 284).
X Reinsert the fuse in the fuse box.
X Switch on the ignition.
X Press and hold the sunroof switch in
direction
of arrow : (Y page 152) until the
tilt/sliding sunroof is fully raised at the
rear.
X Keep holding the sunroof switch in
direction of arrow : for approximately
1 second.
X Check the express operation feature
(Y page 153).
If
the tilt/sliding sunroof opens and closes
completely, the roof is synchronized.
Otherwise repeat the above steps. Loading and storing
Loading instructions
G
Warning!
Always fasten items being carried as securely
as possible using cargo tie-down hooks and
fastening
materials appropriate for the weight
and size of the load.
In an accident, during hard braking or sudden
maneuvers, loose items will be thrown around
inside the vehicle. This can cause injury to
vehicle occupants unless the items are
securely fastened in the vehicle.
To help avoid personal injury during a collision
or sudden maneuver, exercise care when
transporting cargo. Do not pile luggage or
cargo higher than the seat backrests.
The trunk is the preferred place to carry
objects. Always use cargo tie-down hooks
when transporting cargo. Do not place
anything on the rear-window shelf.
Never drive a vehicle with the trunk open.
Deadly carbon monoxide (CO) gases may 154
Loading and storing
Controls in detail
219_AKB; 4; 54, en-US
d2ureepe,
Version: 2.11.8.1 2009-05-11T16:21:02+02:00 - Seite 154
Page 157 of 308
enter vehicle interior resulting in
unconsciousness and death.
Load distribution The total load weight including vehicle
occupants and luggage/cargo should not
exceed the total load limit indicated on the
corresponding Tire and Loading Information
placard located on the driver’s door B-pillar
(Y page 194).
The handling characteristics of a fully loaded
vehicle depends greatly on the load
distribution. It is therefore recommended to
load the vehicle accordingly with the heaviest
items being placed towards the front of the
vehicle.
Please pay attention to and comply with the
following instructions when loading the
vehicle and transporting cargo:
R
Always place items being carried against
front or rear seat backrests, and fasten
them as securely as possible.
R The heaviest portion of the cargo should
always be kept as low as possible against
front or rear seat backrests. Roof rack
For information about further roof rack
equipment, contact an authorized Mercedes-
Benz Center. G
Warning!
Only use roof racks approved by Mercedes-
Benz for your vehicle model to avoid damage
to the vehicle.
Follow the manufacturer’s installation
instructions. Otherwise, an improperly
attached roof rack system or its load could
become detached from the vehicle.
Do not exceed the maximum roof load of
220 lb (100 kg).
Take into consideration that when the roof
rack is loaded, the handling characteristics are different from those when operating the
vehicle without the roof rack loaded.
Make sure
R you can raise the tilt/sliding sunroof
completely
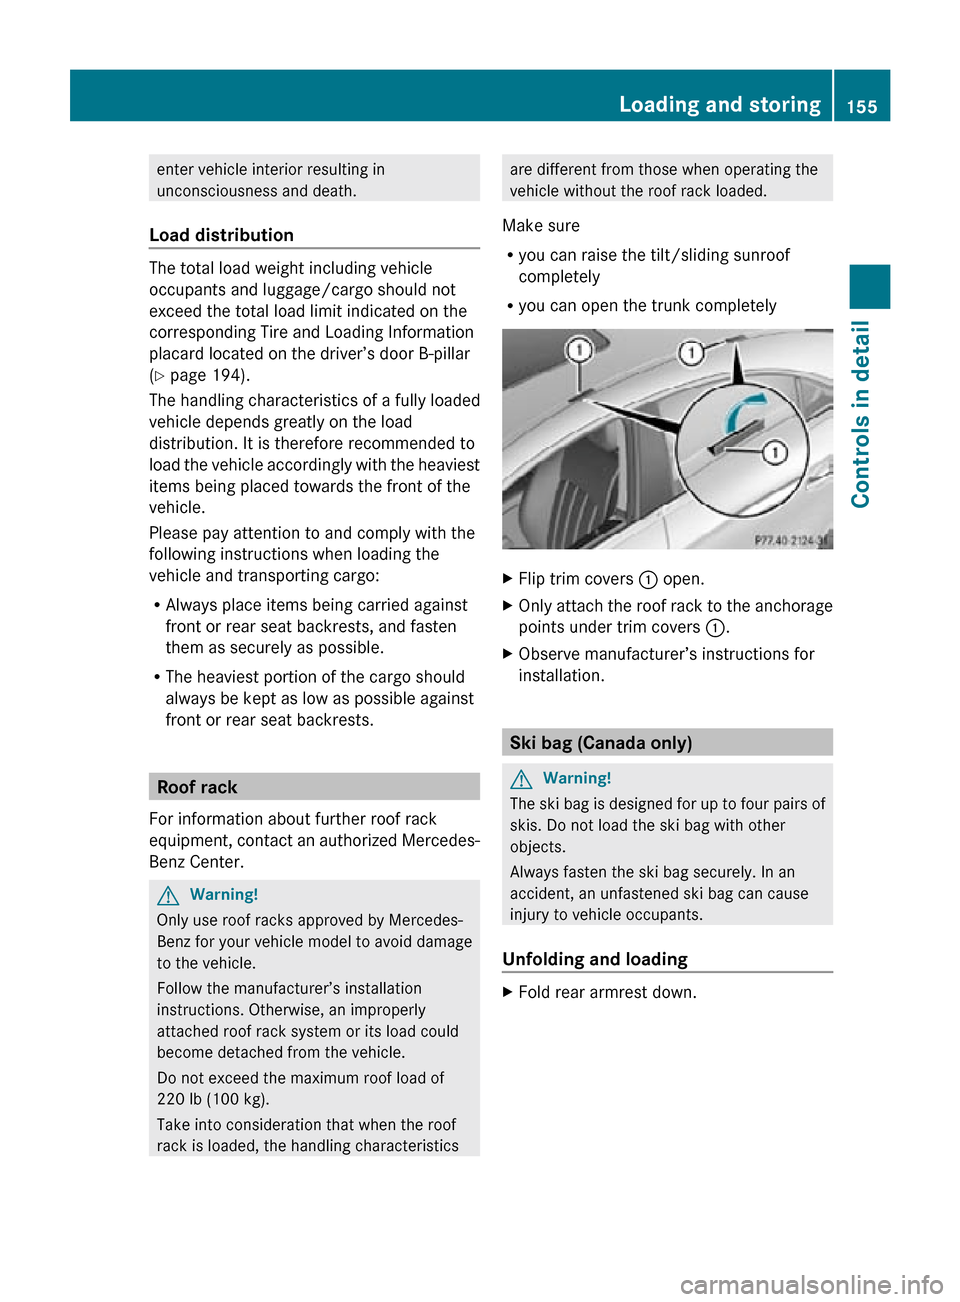
R you can open the trunk completely X
Flip trim covers : open.
X Only attach the roof rack to the anchorage
points under trim covers :.
X Observe manufacturer’s instructions for
installation. Ski bag (Canada only)
G
Warning!
The ski bag is designed for up to four pairs of
skis. Do not load the ski bag with other
objects.
Always fasten the ski bag securely. In an
accident, an unfastened ski bag can cause
injury to vehicle occupants.
Unfolding and loading X
Fold rear armrest down. Loading and storing
155Controls in detail
219_AKB; 4; 54, en-US
d2ureepe, Version: 2.11.8.1 2009-05-11T16:21:02+02:00 - Seite 155 Z
Page 164 of 308
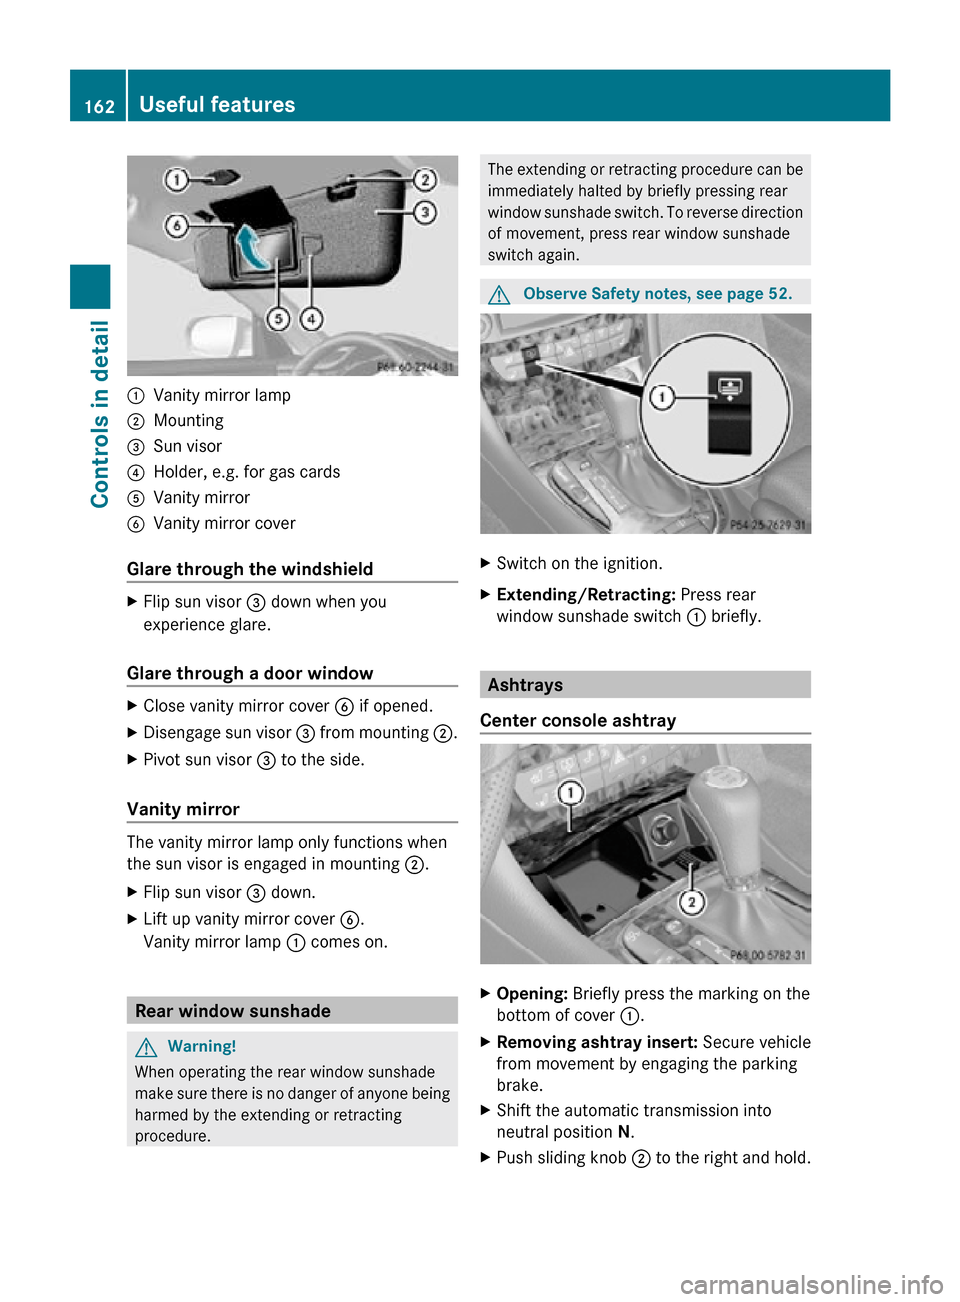
:
Vanity mirror lamp
; Mounting
= Sun visor
? Holder, e.g. for gas cards
A Vanity mirror
B Vanity mirror cover
Glare through the windshield X
Flip sun visor = down when you
experience glare.
Glare through a door window X
Close vanity mirror cover B if opened.
X Disengage sun visor = from mounting ;.
X Pivot sun visor = to the side.
Vanity mirror The vanity mirror lamp only functions when
the sun visor is engaged in mounting ;.
X
Flip sun visor = down.
X Lift up vanity mirror cover B.
Vanity mirror lamp : comes on.Rear window sunshade
G
Warning!
When operating the rear window sunshade
make sure there is no danger of anyone being
harmed by the extending or retracting
procedure. The extending or retracting procedure can be
immediately halted by briefly pressing rear
window sunshade switch. To reverse direction
of movement, press rear window sunshade
switch again.
G
Observe Safety notes, see page 52. X
Switch on the ignition.
X Extending/Retracting: Press rear
window sunshade switch : briefly. Ashtrays
Center console ashtray X
Opening: Briefly press the marking on the
bottom of cover :.
X Removing ashtray insert: Secure vehicle
from movement by engaging the parking
brake.
X Shift the automatic transmission into
neutral position N.
X Push sliding knob ; to the right and hold.162
Useful featuresControls in detail
219_AKB; 4; 54, en-US
d2ureepe,
Version: 2.11.8.1 2009-05-11T16:21:02+02:00 - Seite 162