2010 MERCEDES-BENZ C350S trunk
[x] Cancel search: trunkPage 79 of 364
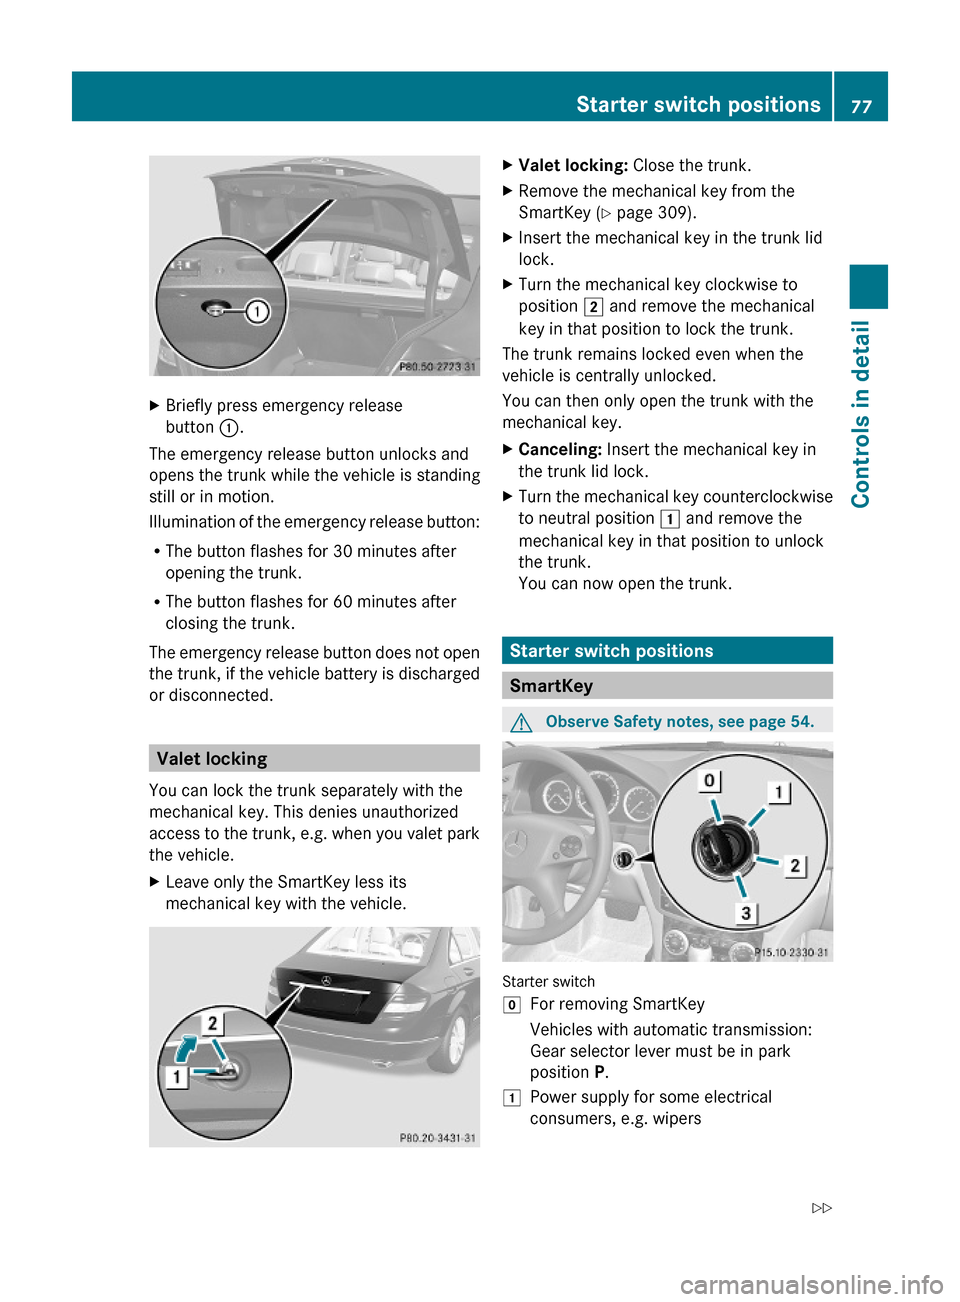
XBriefly press emergency release
button :.
The emergency release button unlocks and
opens the trunk while the vehicle is standing
still or in motion.
Illumination of the emergency release button:
RThe button flashes for 30 minutes after
opening the trunk.
RThe button flashes for 60 minutes after
closing the trunk.
The emergency release button does not open
the trunk, if the vehicle battery is discharged
or disconnected.
Valet locking
You can lock the trunk separately with the
mechanical key. This denies unauthorized
access to the trunk, e.g. when you valet park
the vehicle.
XLeave only the SmartKey less its
mechanical key with the vehicle.
XValet locking: Close the trunk.XRemove the mechanical key from the
SmartKey (Y page 309).
XInsert the mechanical key in the trunk lid
lock.
XTurn the mechanical key clockwise to
position 2 and remove the mechanical
key in that position to lock the trunk.
The trunk remains locked even when the
vehicle is centrally unlocked.
You can then only open the trunk with the
mechanical key.
XCanceling: Insert the mechanical key in
the trunk lid lock.
XTurn the mechanical key counterclockwise
to neutral position 1 and remove the
mechanical key in that position to unlock
the trunk.
You can now open the trunk.
Starter switch positions
SmartKey
GObserve Safety notes, see page 54.
Starter switch
gFor removing SmartKeyVehicles with automatic transmission:
Gear selector lever must be in park
position P.
1Power supply for some electrical
consumers, e.g. wipers
Starter switch positions77Controls in detail204_AKB; 5; 23, en-USd2ureepe,Version: 2.11.8.12009-07-16T17:54:06+02:00 - Seite 77Z
Page 190 of 364

XSwitch off the ignition.XClean the Parktronic system sensors
(Y page 263).
XSwitch on the ignition.
or
XCheck the Parktronic system operation at
another location to rule out interference
from outside radio or ultrasonic signals.
Rear view camera
The rear view camera is an optical parking aid.
The area behind the vehicle appears in the
COMAND system display as a mirror image,
like in the rear view mirror.
GWarning!
Make sure no persons or animals are in or
near the area in which you are parking/
maneuvering. Otherwise, they could be
injured.
GWarning!
The rear view camera is only an aid and may
display obstacles
Rfrom a distorted perspective
Rinaccurately
Rmay not display obstacles at all
The rear view camera does not relieve you of
the responsibility to be cautious. Take care
and pay careful attention. The rear view
camera may not show objects which are
Rvery close to the rear bumper
Runder the rear bumper
Rabove the trunk handle
You are responsible for safety at all times and
must continue to pay attention to the
immediate surroundings when parking and
maneuvering. This includes the area behind,
in front of, and beside the vehicle. Otherwise
you could endanger yourself and/or others.
GWarning!
The rear view camera either will not function
or will not function to its full capability if
Rthe trunk lid is open
Rit is raining very hard, snowing or foggy
Rit is night or you are parking/maneuvering
your vehicle in an area where it is very dark
Rthe camera is exposed to a very bright white
light
Rthe immediate surroundings are
illuminated with fluorescent light (the
COMAND system display can flicker)
Rthere is a sudden change in temperature,
e.g. if you drive into a heated garage from
the cold (lens condensation)
Rthe camera lens is dirty or covered
Rthe rear of your vehicle is damaged
In this case, have the position and setting
of the camera checked by a qualified
specialist workshop. Mercedes-Benz
recommends that you contact a Mercedes-
Benz Center for this purpose.
Do not use the rear view camera in these
situations. Otherwise you could injure
yourself or others and/or damage property
including your vehicle while parking/
maneuvering.
Camera lens : must be free of dirt, ice,
snow, and slush to function properly. Clean
the camera lens regularly. Being careful not
to scratch or damage the camera lens, see
188Driving systemsControls in detail
204_AKB; 5; 23, en-USd2ureepe,Version: 2.11.8.12009-07-16T17:54:06+02:00 - Seite 188
Page 204 of 364
XSwitch on the ignition.XPush and hold the roof panel switch in
direction of arrow ; (Y page 199) until the
roller sunblinds are fully retracted.
XPush and hold the roof panel switch in
direction of arrow ; until the tilt/sliding
panel is opened approximately 4 inch
(10 cm).
XPull and hold the roof panel switch in
direction of arrow = until the tilt/sliding
panel is fully closed.
XKeep holding the roof panel switch in
direction of arrow = for approximately
1 second.
XPull and hold the roof panel switch in
direction of arrow = (Y page 199) until the
roller sunblinds are fully extended.
XKeep holding the roof panel switch in
direction of arrow = for approximately
1 second.
XCheck the express operation feature of the
tilt/sliding panel (Y page 200).
If the tilt/sliding panel opens completely,
the roof is synchronized. Otherwise repeat
the above steps.
Loading and storing
Loading instructions
GWarning!
Always fasten items being carried as securely
as possible using fastening materials
appropriate for the weight and size of the
load.
In an accident, during hard braking or sudden
maneuvers, loose items will be thrown around
inside the vehicle. This can cause injury to
vehicle occupants unless the items are
securely fastened in the vehicle.
To help avoid personal injury during a collision
or sudden maneuver, exercise care when
transporting cargo. Do not pile luggage or
cargo higher than the seat backrests.
The trunk is the preferred place to carry
objects. Do not place anything on the rear-
window shelf.
Never drive a vehicle with the trunk open.
Deadly carbon monoxide (CO) gases may
enter vehicle interior resulting in
unconsciousness and death.
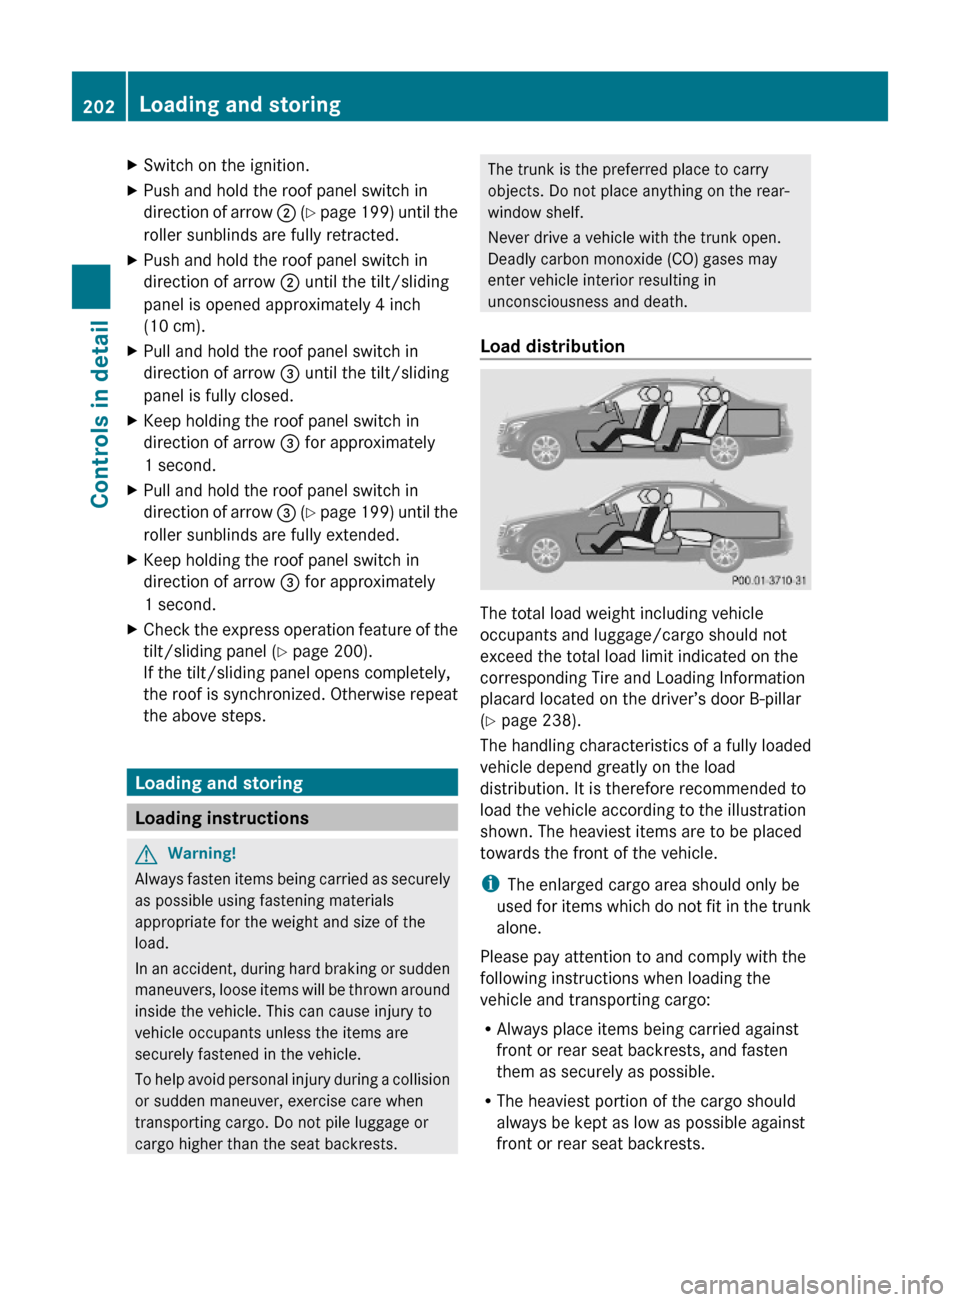
Load distribution
The total load weight including vehicle
occupants and luggage/cargo should not
exceed the total load limit indicated on the
corresponding Tire and Loading Information
placard located on the driver’s door B-pillar
(Y page 238).
The handling characteristics of a fully loaded
vehicle depend greatly on the load
distribution. It is therefore recommended to
load the vehicle according to the illustration
shown. The heaviest items are to be placed
towards the front of the vehicle.
iThe enlarged cargo area should only be
used for items which do not fit in the trunk
alone.
Please pay attention to and comply with the
following instructions when loading the
vehicle and transporting cargo:
RAlways place items being carried against
front or rear seat backrests, and fasten
them as securely as possible.
RThe heaviest portion of the cargo should
always be kept as low as possible against
front or rear seat backrests.
202Loading and storingControls in detail
204_AKB; 5; 23, en-USd2ureepe,Version: 2.11.8.12009-07-16T17:54:06+02:00 - Seite 202
Page 205 of 364
Roof rack
For information about further roof rack
equipment, contact an authorized Mercedes-
Benz Center.
GWarning!
Only use roof racks approved by Mercedes-
Benz for your vehicle model to avoid damage
to the vehicle.
Follow the manufacturer’s installation
instructions. Otherwise, an improperly
attached roof rack system or its load could
become detached from the vehicle.
Do not exceed the maximum roof load of
220 lb (100 kg).
Take into consideration that when the roof
rack is loaded, the handling characteristics
are different from those when operating the
vehicle without the roof rack loaded.
Make sure
Ryou can raise the power tilt/sliding sunroof
or the panorama roof with tilt/sliding panel
completely
Ryou can open the trunk completely
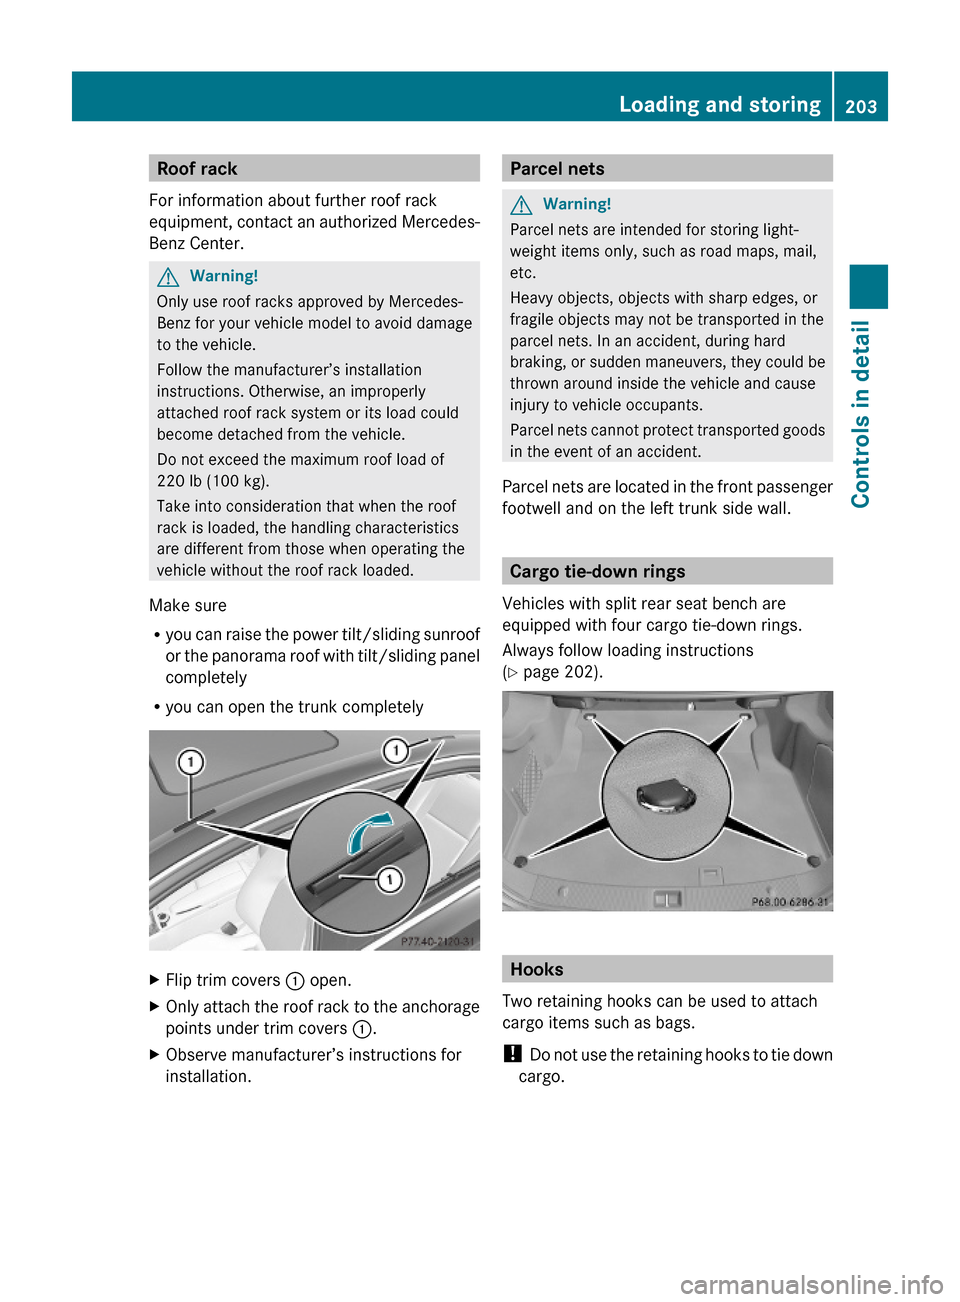
XFlip trim covers : open.XOnly attach the roof rack to the anchorage
points under trim covers :.
XObserve manufacturer’s instructions for
installation.Parcel netsGWarning!
Parcel nets are intended for storing light-
weight items only, such as road maps, mail,
etc.
Heavy objects, objects with sharp edges, or
fragile objects may not be transported in the
parcel nets. In an accident, during hard
braking, or sudden maneuvers, they could be
thrown around inside the vehicle and cause
injury to vehicle occupants.
Parcel nets cannot protect transported goods
in the event of an accident.
Parcel nets are located in the front passenger
footwell and on the left trunk side wall.
Cargo tie-down rings
Vehicles with split rear seat bench are
equipped with four cargo tie-down rings.
Always follow loading instructions
(Y page 202).
Hooks
Two retaining hooks can be used to attach
cargo items such as bags.
! Do not use the retaining hooks to tie down
cargo.
Loading and storing203Controls in detail204_AKB; 5; 23, en-USd2ureepe,Version: 2.11.8.12009-07-16T17:54:06+02:00 - Seite 203Z
Page 206 of 364
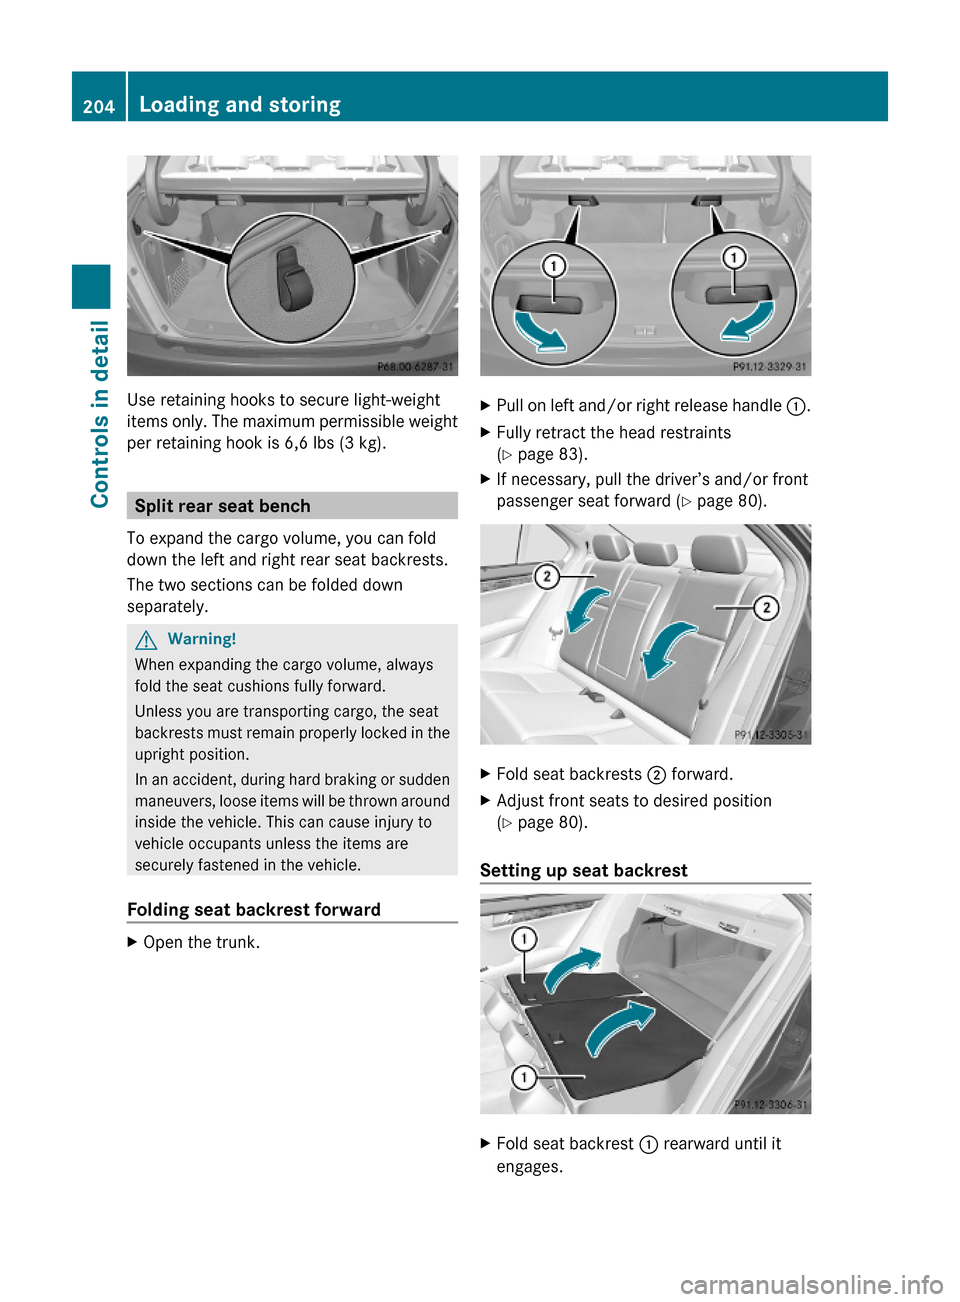
Use retaining hooks to secure light-weight
items only. The maximum permissible weight
per retaining hook is 6,6 lbs (3 kg).
Split rear seat bench
To expand the cargo volume, you can fold
down the left and right rear seat backrests.
The two sections can be folded down
separately.
GWarning!
When expanding the cargo volume, always
fold the seat cushions fully forward.
Unless you are transporting cargo, the seat
backrests must remain properly locked in the
upright position.
In an accident, during hard braking or sudden
maneuvers, loose items will be thrown around
inside the vehicle. This can cause injury to
vehicle occupants unless the items are
securely fastened in the vehicle.
Folding seat backrest forward
XOpen the trunk.XPull on left and/or right release handle :.XFully retract the head restraints
(Y page 83).
XIf necessary, pull the driver’s and/or front
passenger seat forward (Y page 80).
XFold seat backrests ; forward.XAdjust front seats to desired position
(Y page 80).
Setting up seat backrest
XFold seat backrest : rearward until it
engages.
204Loading and storingControls in detail
204_AKB; 5; 23, en-USd2ureepe,Version: 2.11.8.12009-07-16T17:54:06+02:00 - Seite 204
Page 207 of 364
! Make sure that the seat belt is not
pinched.
XCheck for secure locking by pushing and
pulling on the seat backrest.
XAdjust head restraints, if necessary
(Y page 83).
XAdjust front seats to desired position
(Y page 80).
GWarning!
Always lock the seat backrest in its upright
position when the rear seat bench is
occupied, or the extended cargo volume is not
in use.
Check for secure locking by pushing and
pulling on the seat backrest.
In an accident, during hard braking or sudden
maneuvers, loose items will be thrown around
inside the vehicle. This can cause injury to
vehicle occupants unless the items are
securely fastened in the vehicle.
To help avoid personal injury during a collision
or sudden maneuver, exercise care when
transporting cargo.
iTo prevent unauthorized persons from
access to the trunk, always lock the seat
backrests in its upright position.
Front storage compartments
GWarning!
To help avoid personal injury during a collision
or sudden maneuver, exercise care when
storing objects in the vehicle. Put luggage or
cargo in the trunk if possible.
Do not pile luggage or cargo higher than the
seat backrests.
Keep compartment lids closed. This will help
to prevent stored objects from being thrown
about and injuring vehicle occupants during
Rbraking
Rvehicle maneuvers
Ran accident
Glove box
Depending on vehicle equipment, an AUX
socket or a media interface is located in the
glove box. For information on Audio AUX
mode, see (Y page 166) or on media
interface, see separate COMAND system
operating instructions.
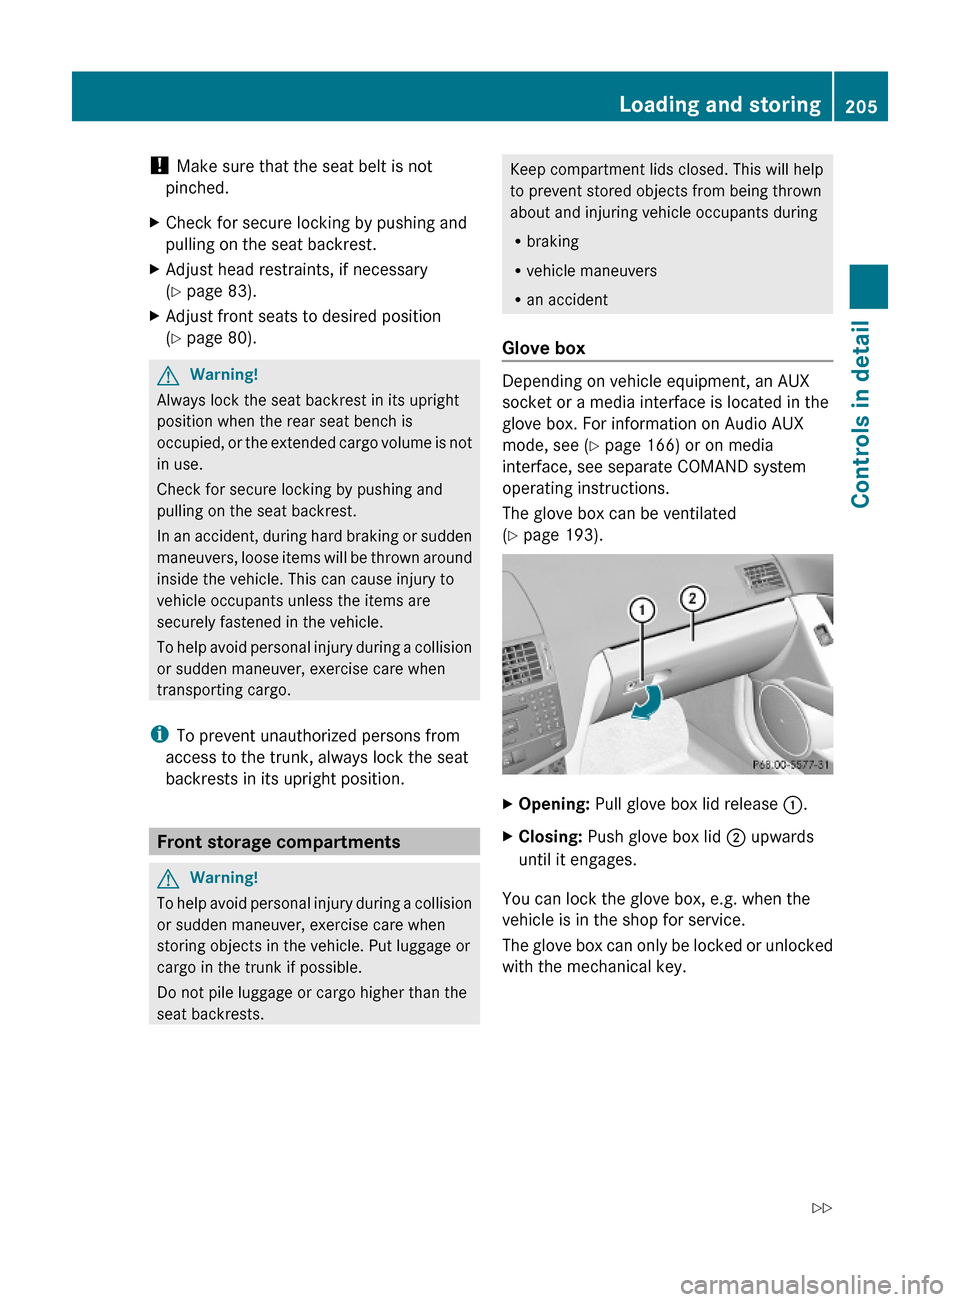
The glove box can be ventilated
(Y page 193).
XOpening: Pull glove box lid release :.XClosing: Push glove box lid ; upwards
until it engages.
You can lock the glove box, e.g. when the
vehicle is in the shop for service.
The glove box can only be locked or unlocked
with the mechanical key.
Loading and storing205Controls in detail204_AKB; 5; 23, en-USd2ureepe,Version: 2.11.8.12009-07-16T17:54:06+02:00 - Seite 205Z
Page 208 of 364
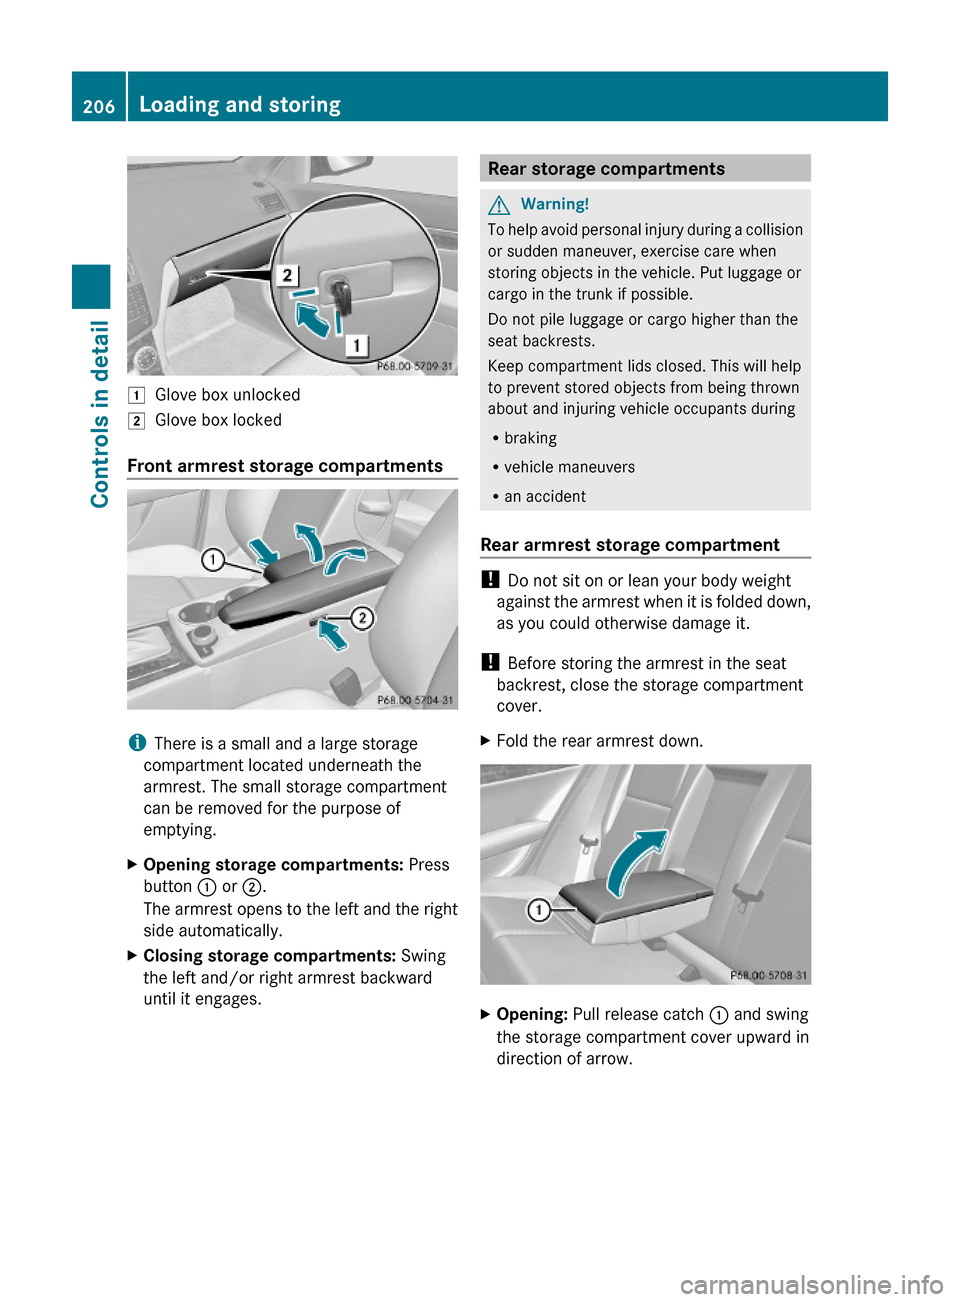
1Glove box unlocked2Glove box locked
Front armrest storage compartments
iThere is a small and a large storage
compartment located underneath the
armrest. The small storage compartment
can be removed for the purpose of
emptying.
XOpening storage compartments: Press
button : or ;.
The armrest opens to the left and the right
side automatically.
XClosing storage compartments: Swing
the left and/or right armrest backward
until it engages.
Rear storage compartmentsGWarning!
To help avoid personal injury during a collision
or sudden maneuver, exercise care when
storing objects in the vehicle. Put luggage or
cargo in the trunk if possible.
Do not pile luggage or cargo higher than the
seat backrests.
Keep compartment lids closed. This will help
to prevent stored objects from being thrown
about and injuring vehicle occupants during
Rbraking
Rvehicle maneuvers
Ran accident
Rear armrest storage compartment
! Do not sit on or lean your body weight
against the armrest when it is folded down,
as you could otherwise damage it.
! Before storing the armrest in the seat
backrest, close the storage compartment
cover.
XFold the rear armrest down.XOpening: Pull release catch : and swing
the storage compartment cover upward in
direction of arrow.
206Loading and storingControls in detail
204_AKB; 5; 23, en-USd2ureepe,Version: 2.11.8.12009-07-16T17:54:06+02:00 - Seite 206
Page 213 of 364
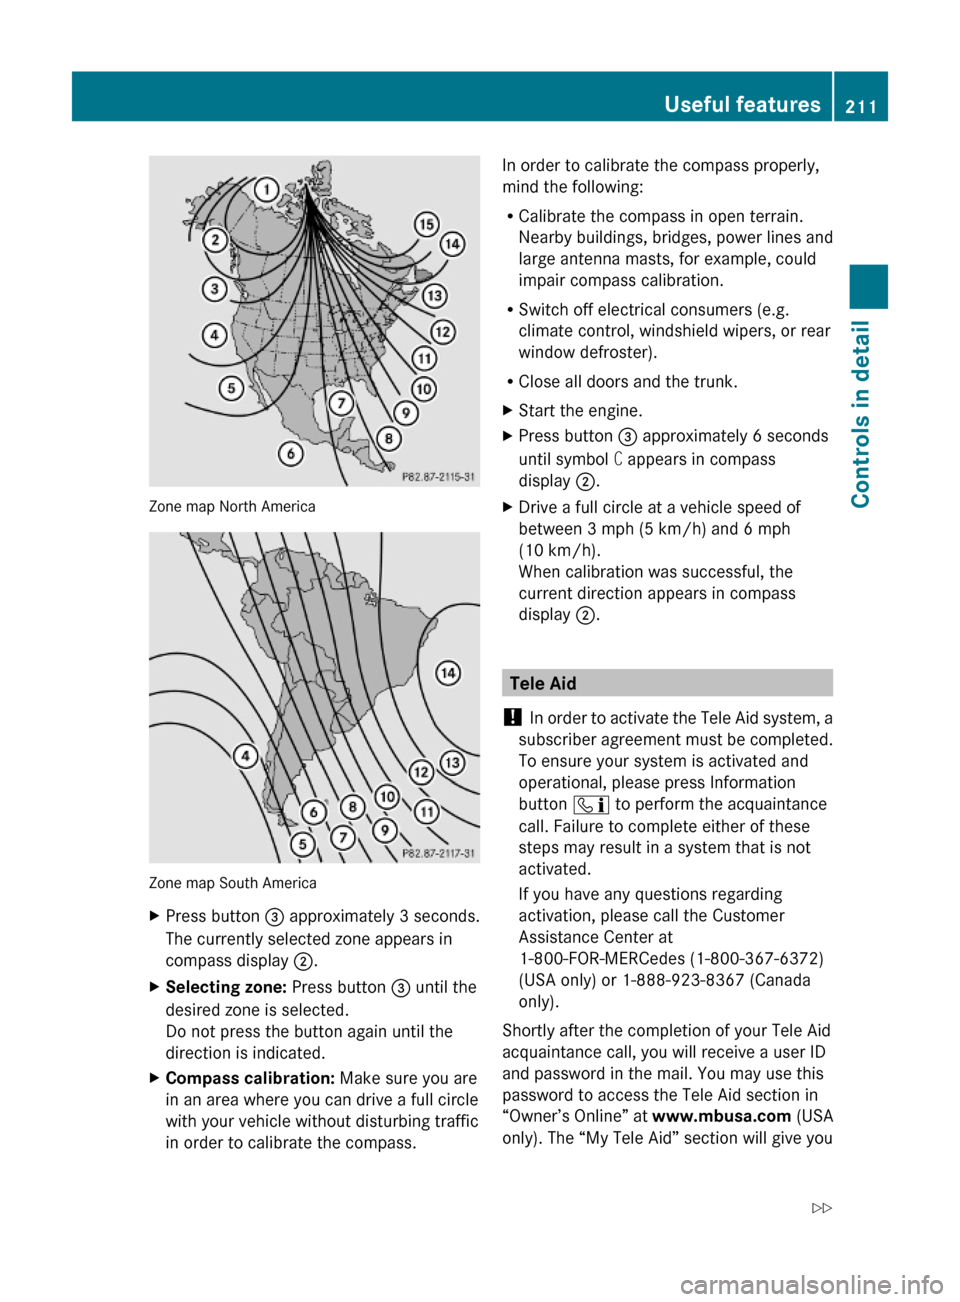
Zone map North America
Zone map South America
XPress button = approximately 3 seconds.
The currently selected zone appears in
compass display ;.
XSelecting zone: Press button = until the
desired zone is selected.
Do not press the button again until the
direction is indicated.
XCompass calibration: Make sure you are
in an area where you can drive a full circle
with your vehicle without disturbing traffic
in order to calibrate the compass.
In order to calibrate the compass properly,
mind the following:
RCalibrate the compass in open terrain.
Nearby buildings, bridges, power lines and
large antenna masts, for example, could
impair compass calibration.
RSwitch off electrical consumers (e.g.
climate control, windshield wipers, or rear
window defroster).
RClose all doors and the trunk.
XStart the engine.XPress button = approximately 6 seconds
until symbol C appears in compass
display ;.
XDrive a full circle at a vehicle speed of
between 3 mph (5 km/h) and 6 mph
(10 km/h).
When calibration was successful, the
current direction appears in compass
display ;.
Tele Aid
! In order to activate the Tele Aid system, a
subscriber agreement must be completed.
To ensure your system is activated and
operational, please press Information
button ï to perform the acquaintance
call. Failure to complete either of these
steps may result in a system that is not
activated.
If you have any questions regarding
activation, please call the Customer
Assistance Center at
1-800-FOR-MERCedes (1-800-367-6372)
(USA only) or 1-888-923-8367 (Canada
only).
Shortly after the completion of your Tele Aid
acquaintance call, you will receive a user ID
and password in the mail. You may use this
password to access the Tele Aid section in
“Owner’s Online” at www.mbusa.com (USA
only). The “My Tele Aid” section will give you
Useful features211Controls in detail204_AKB; 5; 23, en-USd2ureepe,Version: 2.11.8.12009-07-16T17:54:06+02:00 - Seite 211Z