2010 MERCEDES-BENZ C350S change time
[x] Cancel search: change timePage 135 of 364

Vehicles with COMAND system:
For information on setting the time in the
COMAND system, refer to the separate
COMAND system operating instructions.
XPress button = or ; to select the
Settings menu.
XPress button : or 9 to select the
Time/date submenu.
XPress button a.XPress button : or 9 to select the
Time function.
XPress button a.
The current time appears in the
multifunction display.
XTo set a new time press button a again.XPress button = or ; to select the
setting you wish to change: hours or
minutes.
XPress button : or 9 to change the
setting which is highlighted.
XPress button a to store the entry.
Setting the date
This function is not available if your vehicle is
equipped with the COMAND system and
navigation module.
Vehicles with COMAND system:
For information on setting the date in the
COMAND system, refer to the separate
COMAND system operating instructions.
XPress button = or ; to select the
Settings menu.
XPress button : or 9 to select the
Time/date submenu.
XPress button a.XPress button : or 9 to select the
Date function.
XPress button a.
The current date appears in the
multifunction display.
XTo set a new date press button a again.XPress button = or ; to select the
setting you wish to change: month, day or
year.
XPress button : or 9 to change the
setting which is highlighted.
XPress button a to store the entry.
Lights submenu
Access the Lights submenu via the
Settings menu. Use the Lights submenu to
change the lamp and lighting settings on your
vehicle.
The following functions are available:
RSwitching daytime running lamp mode on
or off (USA only) (Y page 133)
RSwitching locator lighting function on or off
(Y page 134)
RSwitching interior lighting delayed shut-off
on or off (Y page 135)
Switching daytime running lamp mode on
or off (USA only)
XPress button = or ; to select the
Settings menu.
XPress button : or 9 to select the
Lights submenu.
Control system133Controls in detail204_AKB; 5; 23, en-USd2ureepe,Version: 2.11.8.12009-07-16T17:54:06+02:00 - Seite 133Z
Page 136 of 364
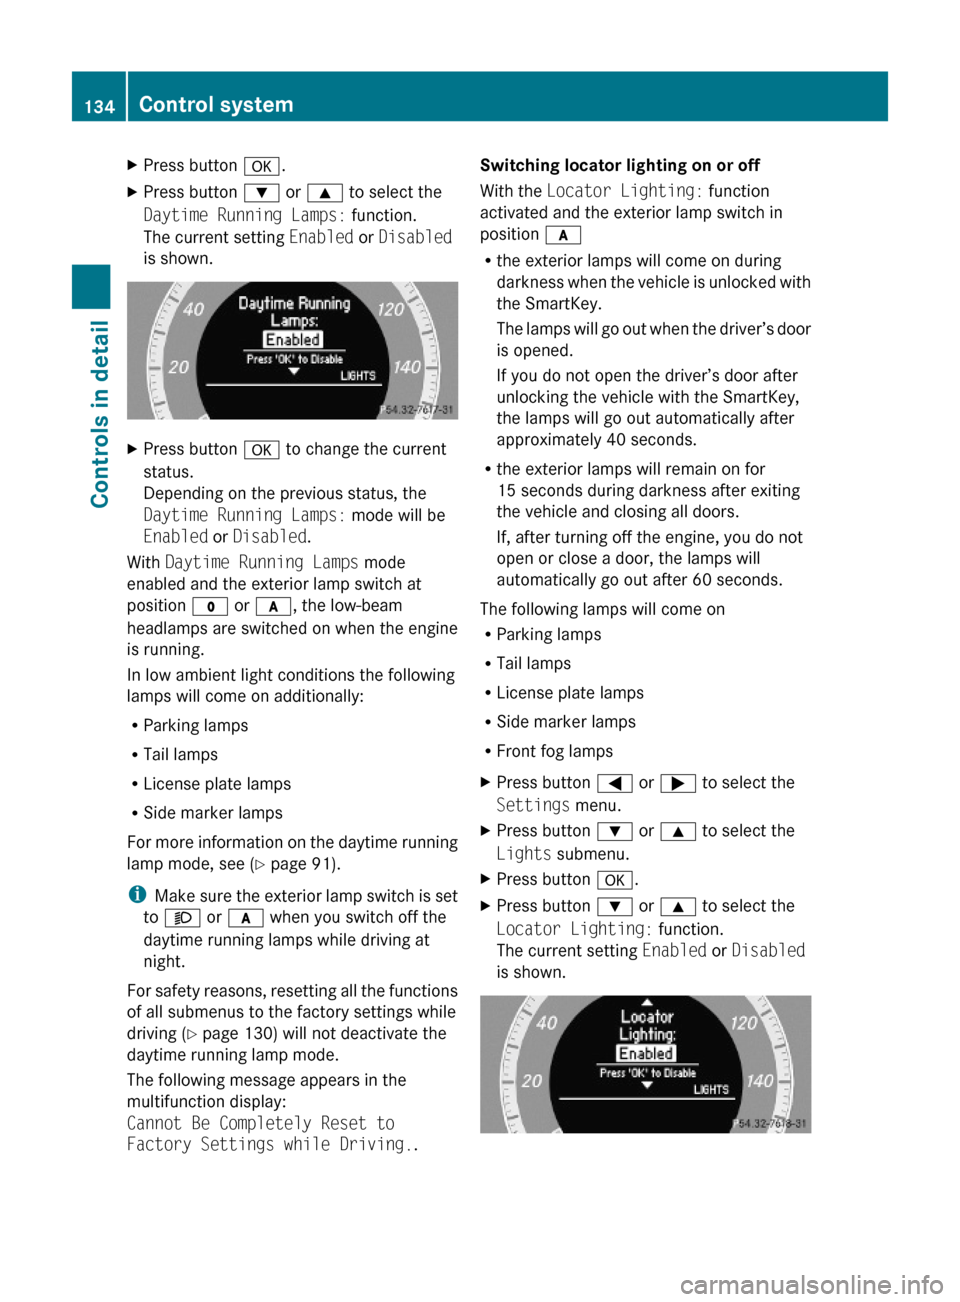
XPress button a.XPress button : or 9 to select the
Daytime Running Lamps: function.
The current setting Enabled or Disabled
is shown.
XPress button a to change the current
status.
Depending on the previous status, the
Daytime Running Lamps: mode will be
Enabled or Disabled.
With Daytime Running Lamps mode
enabled and the exterior lamp switch at
position $ or c, the low-beam
headlamps are switched on when the engine
is running.
In low ambient light conditions the following
lamps will come on additionally:
RParking lamps
RTail lamps
RLicense plate lamps
RSide marker lamps
For more information on the daytime running
lamp mode, see (Y page 91).
iMake sure the exterior lamp switch is set
to M or c when you switch off the
daytime running lamps while driving at
night.
For safety reasons, resetting all the functions
of all submenus to the factory settings while
driving (Y page 130) will not deactivate the
daytime running lamp mode.
The following message appears in the
multifunction display:
Cannot Be Completely Reset to
Factory Settings while Driving..
Switching locator lighting on or off
With the Locator Lighting: function
activated and the exterior lamp switch in
position c
Rthe exterior lamps will come on during
darkness when the vehicle is unlocked with
the SmartKey.
The lamps will go out when the driver’s door
is opened.
If you do not open the driver’s door after
unlocking the vehicle with the SmartKey,
the lamps will go out automatically after
approximately 40 seconds.
Rthe exterior lamps will remain on for
15 seconds during darkness after exiting
the vehicle and closing all doors.
If, after turning off the engine, you do not
open or close a door, the lamps will
automatically go out after 60 seconds.
The following lamps will come on
RParking lamps
RTail lamps
RLicense plate lamps
RSide marker lamps
RFront fog lamps
XPress button = or ; to select the
Settings menu.
XPress button : or 9 to select the
Lights submenu.
XPress button a.XPress button : or 9 to select the
Locator Lighting: function.
The current setting Enabled or Disabled
is shown.
134Control systemControls in detail
204_AKB; 5; 23, en-USd2ureepe,Version: 2.11.8.12009-07-16T17:54:06+02:00 - Seite 134
Page 141 of 364
BKeypad
Tuning to a station via the station
memory (Y page 150)
Storing stations manually
(Y page 151)
Entering a passcode (Y page 171)
Entering a phone number
(Y page 177)
Sending DTMF tones (Y page 180)
CD changer: Selecting a CD
(Y page 162)
CD: Entering a track number directly
(Y page 164)
CTuning to a station via station search
(Y page 150)
Fast forward (Y page 165)
Skipping forwards to a track
(Y page 165)
DSwitching audio system on/off
(Y page 144)
EAdjusting the volume (Y page 144)FTuning to a station via station search
(Y page 150)
Fast rewind (Y page 165)
Skipping backwards to a track
(Y page 165)
GConfirming a passcode
(Y page 171)
Accepting a call (Y page 179)
Initiating a call (Y page 177)
Redial (Y page 178)
HRejecting a call (Y page 179)
Ending an active call (Y page 179)
IOpening system settings menu
(Y page 147)
JSwitching sound on/off
(Y page 145)
Switching hands-free microphone
on/off (Y page 179)
KSwitching to telephone mode
(Y page 167)
LSound settings (Y page 145)
Audio display
The audio display has a protective cover.
! Do not place any objects on the cover of
the audio display. This may obstruct the
movement when the cover is being
opened/closed. The cover could be
damaged. Do not place any objects in front
of the audio display and/or secure any
objects to the audio display itself. The
audio display could be damaged.
Avoid touching the audio display at all
times. The display has a very sensitive high-
gloss surface, there is a risk of it being
scratched. Do not press directly in the
display face. Otherwise, the audio display
will be damaged.
iFor information about cleaning and care
of the audio display, see “Audio or
COMAND display” (Y page 265).
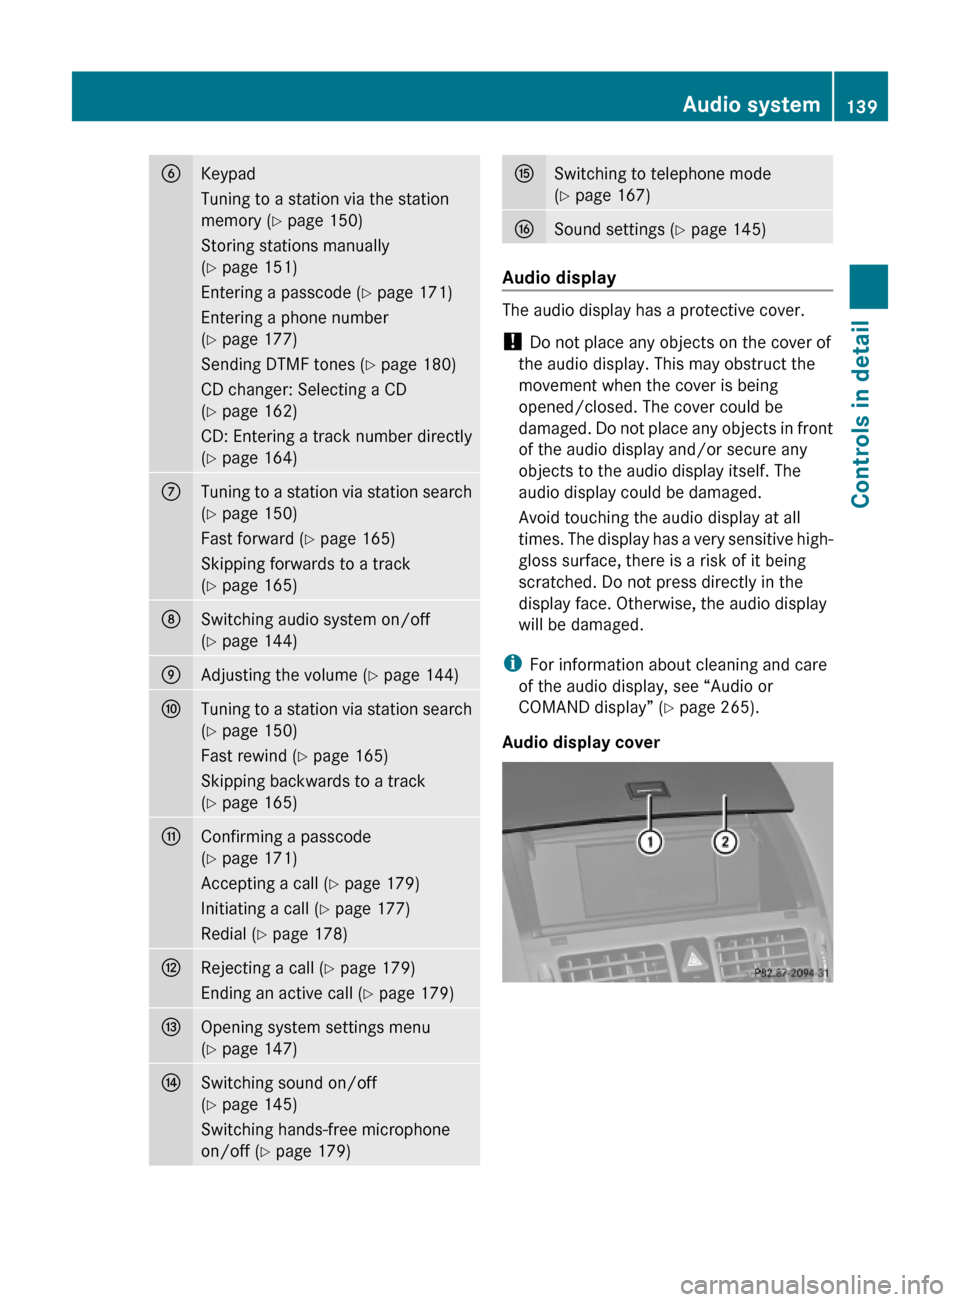
Audio display cover
Audio system139Controls in detail204_AKB; 5; 23, en-USd2ureepe,Version: 2.11.8.12009-07-16T17:54:06+02:00 - Seite 139Z
Page 155 of 364
satellites to broadcast 24 hours per day,
coast to coast, in the contiguous U. S. and
Canada.
This diverse, satellite-delivered programming
is available for a monthly subscription fee.
For more information and service availability
call the SIRIUS XM Service Center at
1-888-539-7474 (Y page 157), or visit
www.sirius.com (USA) or
www.siriuscanada.ca (Canada).
iNote that categories and channels shown
in illustrations are dependent on
programming content delivered by the
service provider. Programming content is
subject to change. Therefore, channels and
categories shown in illustrations and
descriptions contained in this manual may
differ from the channels and categories
delivered by the service provider.
iSatellite radio service may be unavailable
or interrupted from time to time for a
variety of reasons, such as environmental
or topographic conditions and other things
we cannot control. Service might also not
be available in certain places (e.g. in
tunnels, parking garages, under leafy trees,
or within or next to buildings) or near other
obstructions. In such situations, the
satellite radio’s main menu shows the No
Service screen. At this point, the radio’s
functions are restricted.
Subscribing to satellite radio
XPress button $ on audio control unit
repeatedly until Sat is selected.
The following conditions are possible:
RSatellite radio service is not activated
(only the preview channel is displayed).
RSatellite radio service is activated.
iIf a satellite receiver is not installed or not
properly installed:
The message Device Unavailable will
appear.
If the satellite radio service is not activated,
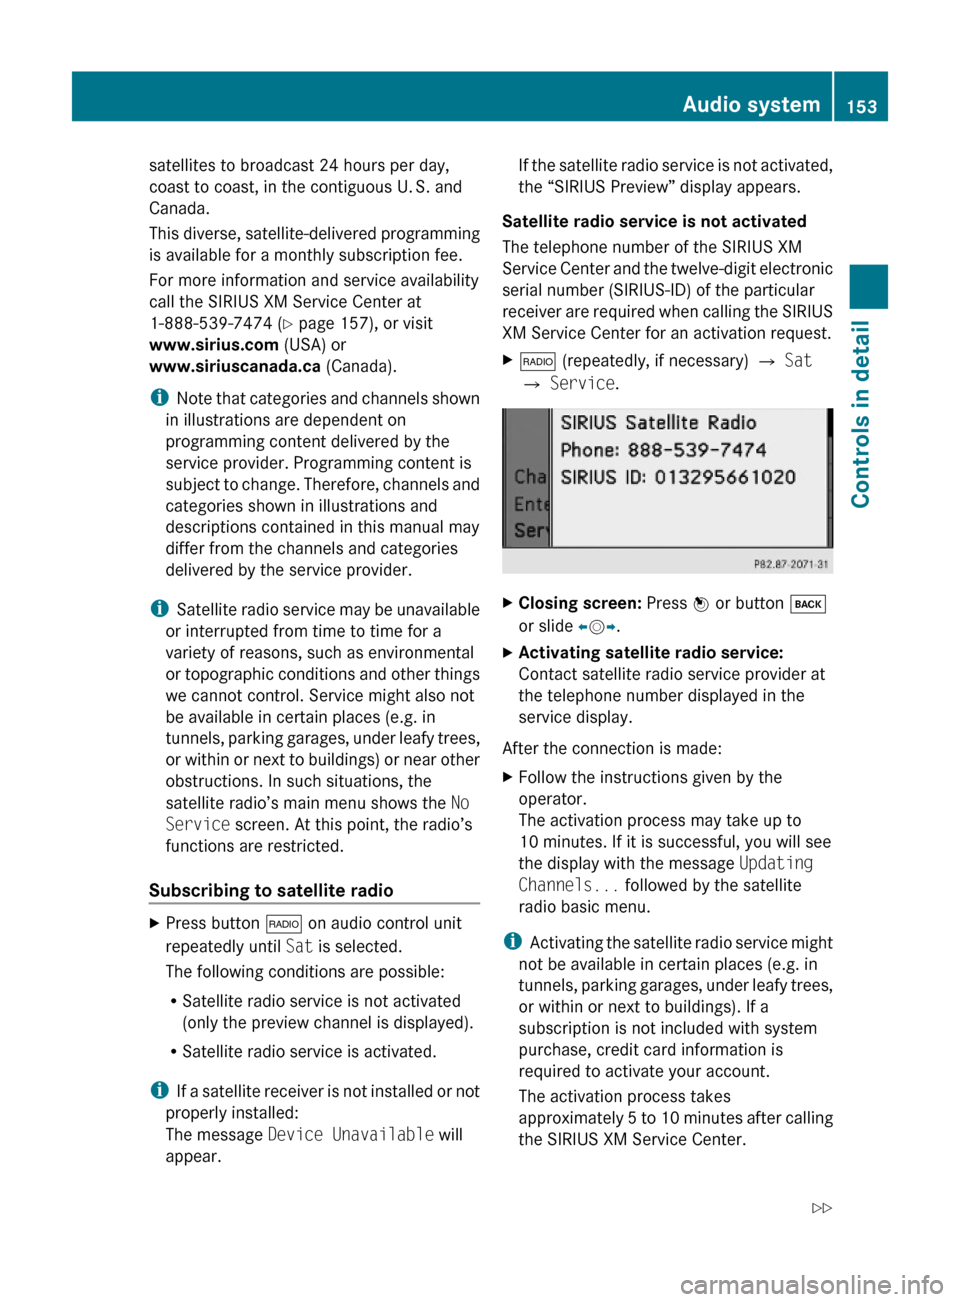
the “SIRIUS Preview” display appears.
Satellite radio service is not activated
The telephone number of the SIRIUS XM
Service Center and the twelve-digit electronic
serial number (SIRIUS-ID) of the particular
receiver are required when calling the SIRIUS
XM Service Center for an activation request.
X$ (repeatedly, if necessary) Q Sat
Q Service.
XClosing screen: Press W or button k
or slide XVY.
XActivating satellite radio service:
Contact satellite radio service provider at
the telephone number displayed in the
service display.
After the connection is made:
XFollow the instructions given by the
operator.
The activation process may take up to
10 minutes. If it is successful, you will see
the display with the message Updating
Channels... followed by the satellite
radio basic menu.
iActivating the satellite radio service might
not be available in certain places (e.g. in
tunnels, parking garages, under leafy trees,
or within or next to buildings). If a
subscription is not included with system
purchase, credit card information is
required to activate your account.
The activation process takes
approximately 5 to 10 minutes after calling
the SIRIUS XM Service Center.
Audio system153Controls in detail204_AKB; 5; 23, en-USd2ureepe,Version: 2.11.8.12009-07-16T17:54:06+02:00 - Seite 153Z
Page 161 of 364
! Do not affix stickers or labels to the CDs,
they can become warped due to the heat
that develops in the CD drive or CD
changer.
In certain situations, the CDs can then no
longer be ejected and cause damage to the
drive. Such damage is not covered by the
Mercedes-Benz Limited Warranty.
! Your CD drive or CD changer has been
designed to play CDs which correspond to
the IEC 60908 standard. You can therefore
only use CDs with a maximum thickness of
1.3 mm.
If you insert thicker discs, e.g. ones that
have data on both sides (one side with DVD
data, the other side with audio data), they
cannot be ejected and will damage the
drive.
Do not use CDs with a diameter of 8 cm.
Attempting to play CDs with a diameter of
8 cm or playing such CDs with an adapter may
cause damage to the CD drive. Such damage
is not covered by the Mercedes-Benz Limited
Warranty.
Only use round discs with a diameter of
12 cm.
Should excessively high or low temperatures
occur while in CD changer mode, a message
will appear in the display, and the CD will be
muted until the temperature has reached an
acceptable level for the system to continue
operation.
Tips on handling CDs
R Only touch the CDs at the edges.
R Handle CDs carefully to prevent
interference during playback.
R Avoid scratches, fingerprints and dust on
the CDs.
R The CDs must only be labeled using pens
specially designed for this purpose.
R Clean CDs from time to time with a
commercially available cleaning cloth.
Never wipe the CD in a circular motion;instead, wipe it in a straight line starting in
the center and moving outward. Do not use
solvents, anti-static sprays, etc. for
cleaning.
R Replace the CD in its case after use.
R Protect CDs from heat and direct sunlight.
Notes about MP3 mode
The single CD player and the CD changer can
play audio CDs as well as CDs with MP3/
WMA files.
i Due to the branched data structure,
playback of the first track may be delayed
slightly.
Permissible media for MP3/WMA files
R CD-R
R CD-RW
Permissible file systems
R ISO9660/Joliet for CDs
Multisession CDs
For multisession CDs, the first session type
of the CD determines how the audio system
will process the CD.
For example, if the first session type is
according to the audio CD standard and the
second session type is according to the data
CD standard containing MP3/WMA tracks,
the audio system will treat the CD as a
conventional audio CD. This means that it is
only possible to access the audio CD tracks.
Access to the MP3/WMA tracks is not
possible.
Similarly, if the first session type is according
to the data CD standard containing MP3/
WMA tracks and the second session type is
according to the audio CD standard, the audio
system will treat the CD as a data CD. This
means that it is only possible to access the
MP3/WMA tracks. Access to the audio CD
tracks is not possible.
Audio system159Controls in detail204_AKB; 5; 23, en-USd2ureepe,Version: 2.11.8.12009-07-16T17:54:06+02:00 - Seite 159Z
Page 167 of 364
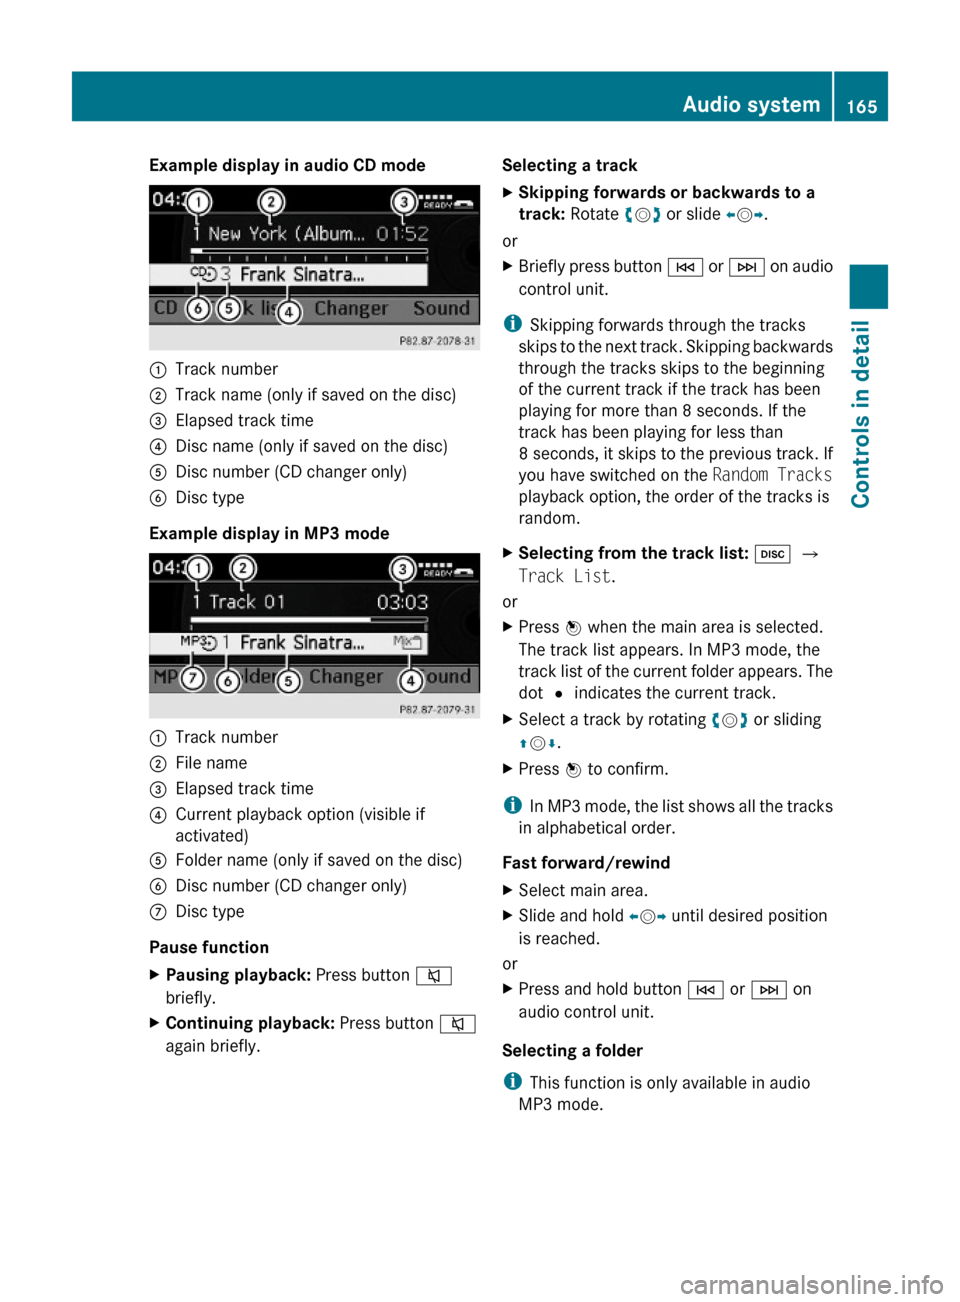
Example display in audio CD mode:Track number;Track name (only if saved on the disc)=Elapsed track time?Disc name (only if saved on the disc)ADisc number (CD changer only)BDisc type
Example display in MP3 mode
:Track number;File name=Elapsed track time?Current playback option (visible if
activated)
AFolder name (only if saved on the disc)BDisc number (CD changer only)CDisc type
Pause function
XPausing playback: Press button 8
briefly.
XContinuing playback: Press button 8
again briefly.
Selecting a trackXSkipping forwards or backwards to a
track: Rotate cVd or slide XVY.
or
XBriefly press button E or F on audio
control unit.
iSkipping forwards through the tracks
skips to the next track. Skipping backwards
through the tracks skips to the beginning
of the current track if the track has been
playing for more than 8 seconds. If the
track has been playing for less than
8 seconds, it skips to the previous track. If
you have switched on the Random Tracks
playback option, the order of the tracks is
random.
XSelecting from the track list: h Q
Track List.
or
XPress W when the main area is selected.
The track list appears. In MP3 mode, the
track list of the current folder appears. The
dot # indicates the current track.
XSelect a track by rotating cVd or sliding
ZVÆ.
XPress W to confirm.
iIn MP3 mode, the list shows all the tracks
in alphabetical order.
Fast forward/rewind
XSelect main area.XSlide and hold XVY until desired position
is reached.
or
XPress and hold button E or F on
audio control unit.
Selecting a folder
iThis function is only available in audio
MP3 mode.
Audio system165Controls in detail204_AKB; 5; 23, en-USd2ureepe,Version: 2.11.8.12009-07-16T17:54:06+02:00 - Seite 165Z
Page 182 of 364
Sending DTMF tones
iThis function is not possible with all
mobile phones.
Answering machines or other devices can be
controlled via DTMF tones, e.g. for remote
query functions.
XTransmitting individual characters:
During a call select the required
characters.
or
XPress the corresponding button on the
audio control unit.
Every selected character is transmitted
immediately.
XTransmitting a phone number of a
phone book entry as a sequence of
characters: Select Name.
XSelect the desired phone book entry.
The entry is transmitted immediately as a
sequence of characters.
XSwitching back to call display: Select
Back.
Driving systems
Introduction
This section describes the following driving
systems of your vehicle:
RCruise control
RHill-start assist system
RAll-wheel drive (4MATIC)
RDynamic handling package with sport
driving mode
RParktronic system, Canada only
RRear view camera
The driving safety systems ABS, Adaptive
Brake, BAS, EBP and ESP® are described in
the “Safety and security” section
(Y page 60).
Cruise control
The cruise control maintains the speed you
set for your vehicle automatically.
The use of the cruise control is recommended
for driving at a constant speed for extended
periods of time.
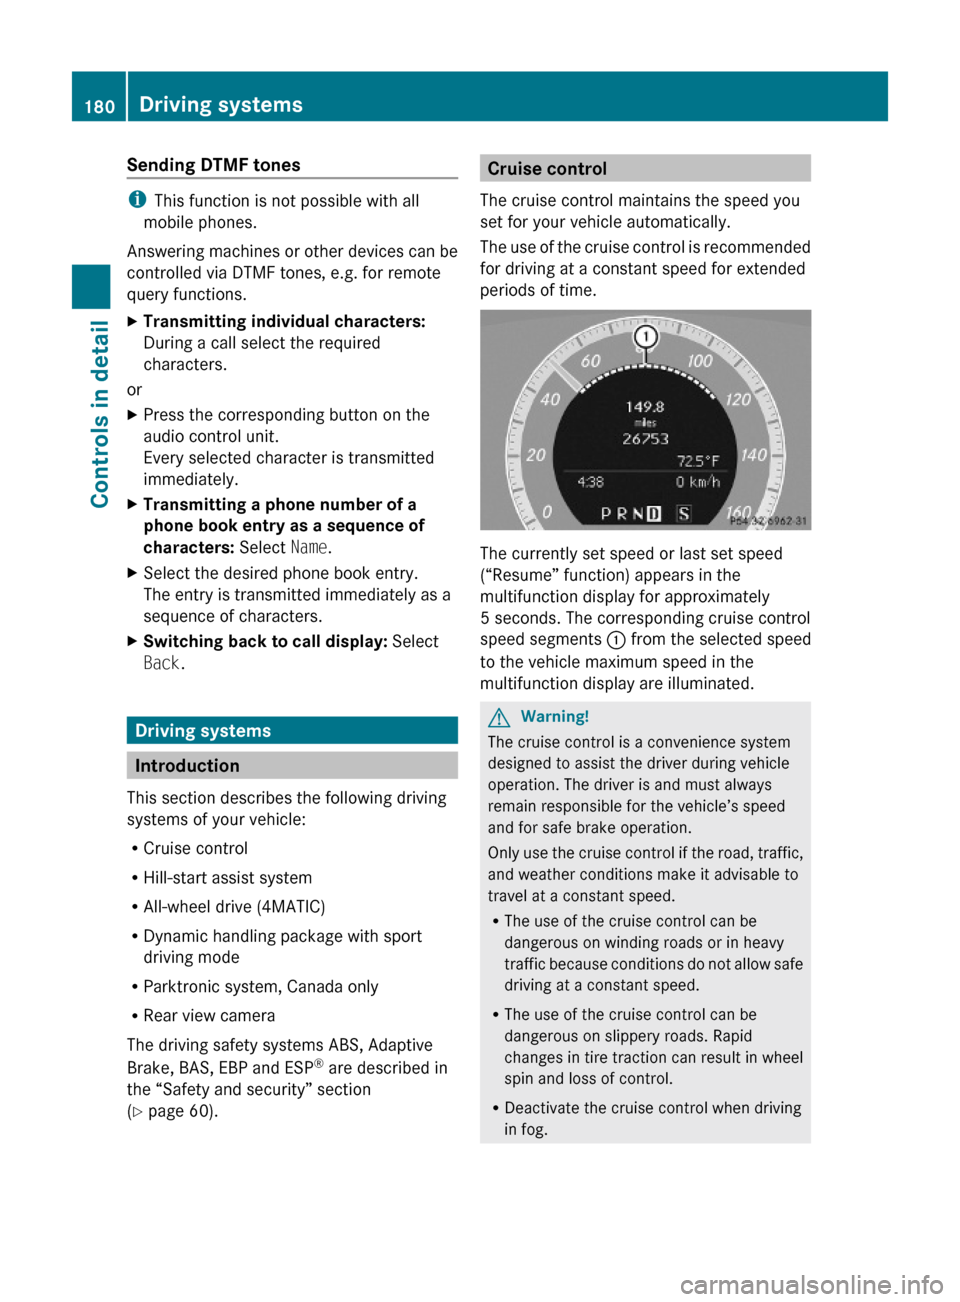
The currently set speed or last set speed
(“Resume” function) appears in the
multifunction display for approximately
5 seconds. The corresponding cruise control
speed segments : from the selected speed
to the vehicle maximum speed in the
multifunction display are illuminated.
GWarning!
The cruise control is a convenience system
designed to assist the driver during vehicle
operation. The driver is and must always
remain responsible for the vehicle’s speed
and for safe brake operation.
Only use the cruise control if the road, traffic,
and weather conditions make it advisable to
travel at a constant speed.
RThe use of the cruise control can be
dangerous on winding roads or in heavy
traffic because conditions do not allow safe
driving at a constant speed.
RThe use of the cruise control can be
dangerous on slippery roads. Rapid
changes in tire traction can result in wheel
spin and loss of control.
RDeactivate the cruise control when driving
in fog.
180Driving systemsControls in detail
204_AKB; 5; 23, en-USd2ureepe,Version: 2.11.8.12009-07-16T17:54:06+02:00 - Seite 180
Page 190 of 364

XSwitch off the ignition.XClean the Parktronic system sensors
(Y page 263).
XSwitch on the ignition.
or
XCheck the Parktronic system operation at
another location to rule out interference
from outside radio or ultrasonic signals.
Rear view camera
The rear view camera is an optical parking aid.
The area behind the vehicle appears in the
COMAND system display as a mirror image,
like in the rear view mirror.
GWarning!
Make sure no persons or animals are in or
near the area in which you are parking/
maneuvering. Otherwise, they could be
injured.
GWarning!
The rear view camera is only an aid and may
display obstacles
Rfrom a distorted perspective
Rinaccurately
Rmay not display obstacles at all
The rear view camera does not relieve you of
the responsibility to be cautious. Take care
and pay careful attention. The rear view
camera may not show objects which are
Rvery close to the rear bumper
Runder the rear bumper
Rabove the trunk handle
You are responsible for safety at all times and
must continue to pay attention to the
immediate surroundings when parking and
maneuvering. This includes the area behind,
in front of, and beside the vehicle. Otherwise
you could endanger yourself and/or others.
GWarning!
The rear view camera either will not function
or will not function to its full capability if
Rthe trunk lid is open
Rit is raining very hard, snowing or foggy
Rit is night or you are parking/maneuvering
your vehicle in an area where it is very dark
Rthe camera is exposed to a very bright white
light
Rthe immediate surroundings are
illuminated with fluorescent light (the
COMAND system display can flicker)
Rthere is a sudden change in temperature,
e.g. if you drive into a heated garage from
the cold (lens condensation)
Rthe camera lens is dirty or covered
Rthe rear of your vehicle is damaged
In this case, have the position and setting
of the camera checked by a qualified
specialist workshop. Mercedes-Benz
recommends that you contact a Mercedes-
Benz Center for this purpose.
Do not use the rear view camera in these
situations. Otherwise you could injure
yourself or others and/or damage property
including your vehicle while parking/
maneuvering.
Camera lens : must be free of dirt, ice,
snow, and slush to function properly. Clean
the camera lens regularly. Being careful not
to scratch or damage the camera lens, see
188Driving systemsControls in detail
204_AKB; 5; 23, en-USd2ureepe,Version: 2.11.8.12009-07-16T17:54:06+02:00 - Seite 188