2010 MERCEDES-BENZ C300LUX 4MATIC key
[x] Cancel search: keyPage 118 of 364

Deactivating manual shift programXVehicles with dynamic handling package:
Press the program mode selector switch
once more.
The last selected automatic program mode
C or S appears in the multifunction display.
or
XRestart the engine.
The automatic transmission will go to the
last selected automatic program mode ( C
or S).XC 63 AMG: Press the program mode
selector switch repeatedly until C or S
appears in the multifunction display.
or
XRestart the engine.
The automatic transmission will go to
automatic program mode ( C or S).
Manual program mode M is not stored.
Emergency operation (limp-home
mode)
If vehicle acceleration becomes less
responsive or sluggish or the automatic
transmission no longer shifts, the automatic
transmission is most likely operating in limp-
home (emergency operation) mode. In this
mode only second gear and reverse gear R
can be selected.
XStop the vehicle in a safe location.XShift the automatic transmission into park
position P.XTurn off the engine.XWait at least 10 seconds before restarting.XRestart the engine.XShift the automatic transmission into drive
position D (for second gear) or reverse gear
R .XHave the automatic transmission checked
at an authorized Mercedes-Benz Center as
soon as possible.Transfer case
This section applies to vehicles equipped with
all-wheel drive (4MATIC) only. Both the front
and rear axles are powered at all times when
the vehicle is being operated.
! Only conduct operational or performance
tests on a two-axle dynamometer. If such
tests are necessary, contact an authorized
Mercedes-Benz Center. You could
otherwise seriously damage the brake
system or the transfer case which is not
covered by the Mercedes-Benz Limited
Warranty.
! Because the ESP ®
operates
automatically, the engine and ignition must
be shut off (SmartKey in starter switch
position 0 or 1 or KEYLESS-GO start/stop
button in position 0 or 1) when the parking
brake is being tested on a brake test
dynamometer.
Active braking action through the ESP ®
may otherwise seriously damage the brake
system which is not covered by the
Mercedes-Benz Limited Warranty.
Instrument cluster
Introduction
For a full view illustration of the instrument
cluster, see “Instrument cluster”
( Y page 28).
GWarning!
No messages will be displayed if either the
instrument cluster or the multifunction
display is inoperative.
As a result, you will not be able to see
information about your driving conditions,
such as
R speed
R outside temperature
R warning/indicator lamps
116Instrument clusterControls in detail
204_AKB; 5; 23, en-USd2ureepe,Version: 2.11.8.12009-07-16T17:54:06+02:00 - Seite 116
Page 124 of 364
XPress button % repeatedly until the
standard display appears.
or
XPress and hold button % until the
standard display appears.
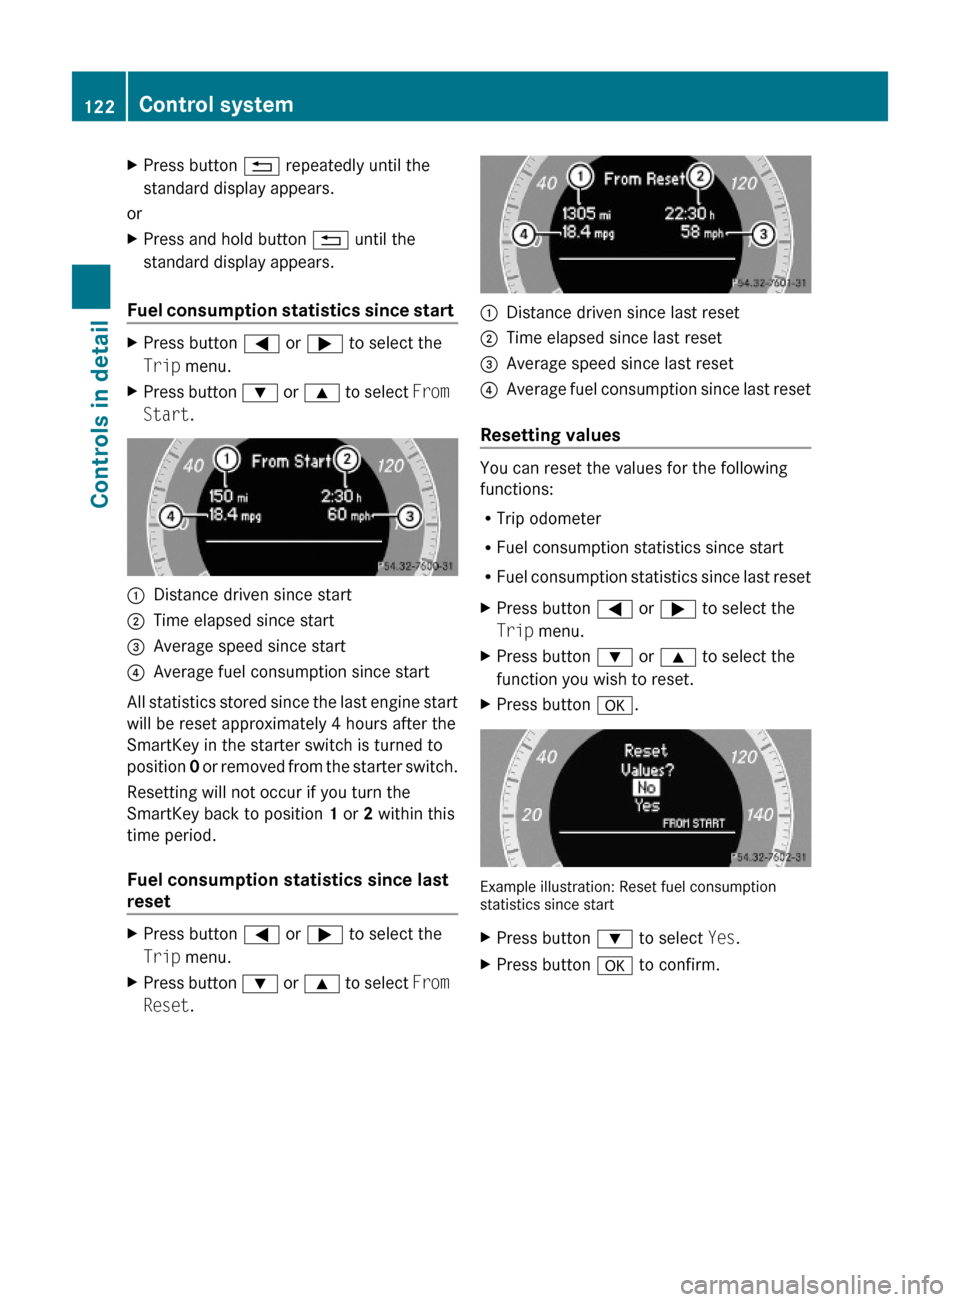
Fuel consumption statistics since start
XPress button = or ; to select the
Trip menu.
XPress button : or 9 to select From
Start.
:Distance driven since start;Time elapsed since start=Average speed since start?Average fuel consumption since start
All statistics stored since the last engine start
will be reset approximately 4 hours after the
SmartKey in the starter switch is turned to
position 0 or removed from the starter switch.
Resetting will not occur if you turn the
SmartKey back to position 1 or 2 within this
time period.
Fuel consumption statistics since last
reset
XPress button = or ; to select the
Trip menu.
XPress button : or 9 to select From
Reset.
:Distance driven since last reset;Time elapsed since last reset=Average speed since last reset?Average fuel consumption since last reset
Resetting values
You can reset the values for the following
functions:
RTrip odometer
RFuel consumption statistics since start
RFuel consumption statistics since last reset
XPress button = or ; to select the
Trip menu.
XPress button : or 9 to select the
function you wish to reset.
XPress button a.
Example illustration: Reset fuel consumptionstatistics since start
XPress button : to select Yes.XPress button a to confirm.122Control systemControls in detail
204_AKB; 5; 23, en-USd2ureepe,Version: 2.11.8.12009-07-16T17:54:06+02:00 - Seite 122
Page 126 of 364
RSETUP (Y page 124)
RRACETIMER (Y page 124)
ROverall analysis (Y page 125)
RLap analysis (Y page 126)
SETUP
XPress button = or ; to select the
AMG menu.
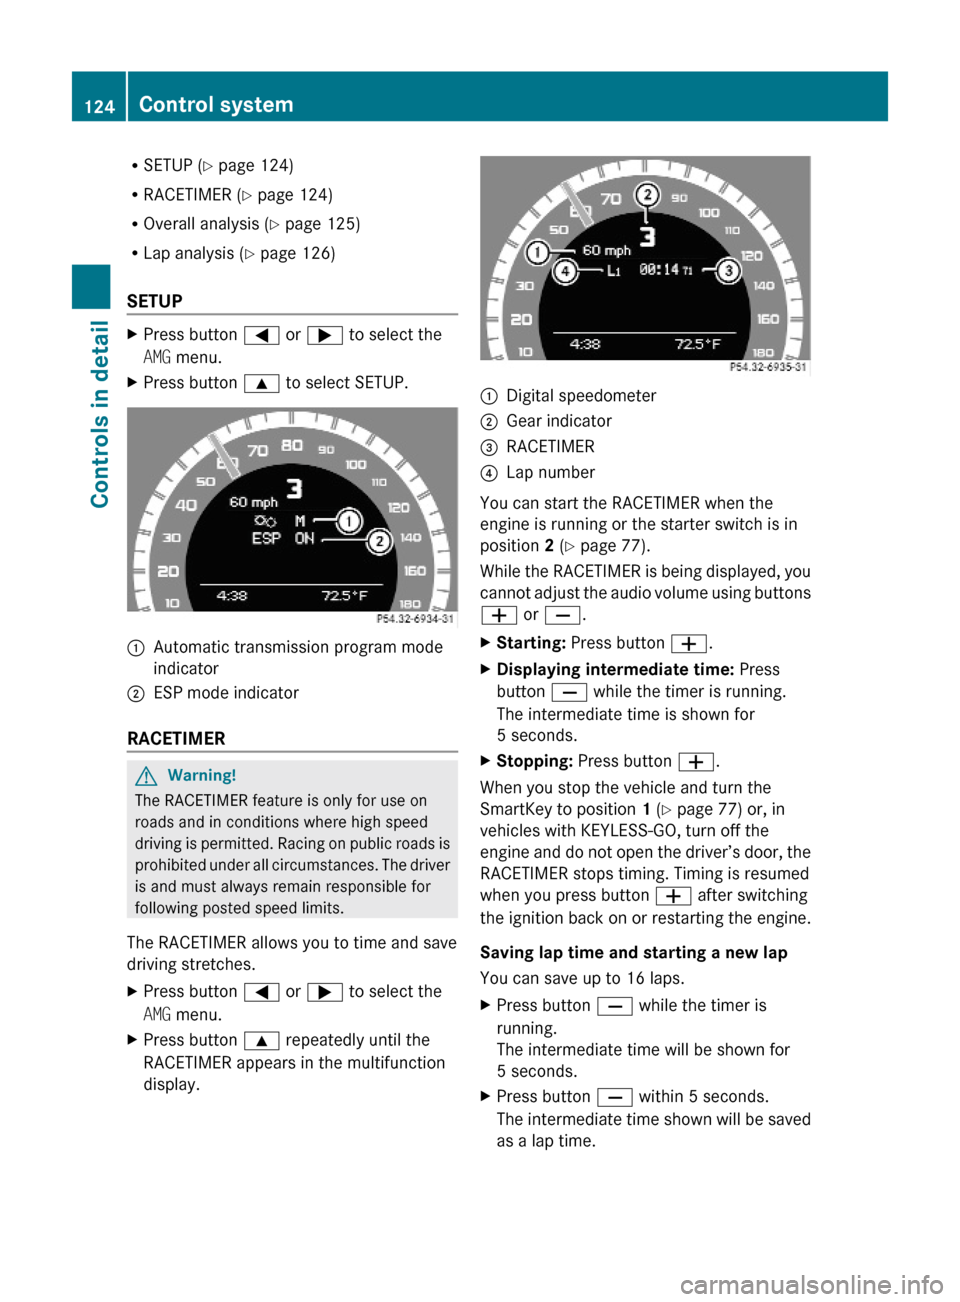
XPress button 9 to select SETUP.:Automatic transmission program mode
indicator
;ESP mode indicator
RACETIMER
GWarning!
The RACETIMER feature is only for use on
roads and in conditions where high speed
driving is permitted. Racing on public roads is
prohibited under all circumstances. The driver
is and must always remain responsible for
following posted speed limits.
The RACETIMER allows you to time and save
driving stretches.
XPress button = or ; to select the
AMG menu.
XPress button 9 repeatedly until the
RACETIMER appears in the multifunction
display.
:Digital speedometer;Gear indicator=RACETIMER?Lap number
You can start the RACETIMER when the
engine is running or the starter switch is in
position 2 (Y page 77).
While the RACETIMER is being displayed, you
cannot adjust the audio volume using buttons
W or X.
XStarting: Press button W.XDisplaying intermediate time: Press
button X while the timer is running.
The intermediate time is shown for
5 seconds.
XStopping: Press button W.
When you stop the vehicle and turn the
SmartKey to position 1 (Y page 77) or, in
vehicles with KEYLESS-GO, turn off the
engine and do not open the driver’s door, the
RACETIMER stops timing. Timing is resumed
when you press button W after switching
the ignition back on or restarting the engine.
Saving lap time and starting a new lap
You can save up to 16 laps.
XPress button X while the timer is
running.
The intermediate time will be shown for
5 seconds.
XPress button X within 5 seconds.
The intermediate time shown will be saved
as a lap time.
124Control systemControls in detail
204_AKB; 5; 23, en-USd2ureepe,Version: 2.11.8.12009-07-16T17:54:06+02:00 - Seite 124
Page 132 of 364
operation of certain systems. They do not
replace the owner’s and/or driver’s
responsibility to maintain the vehicle’s
operating safety. Have all required
maintenance and safety checks performed on
the vehicle. Bring the vehicle to an authorized
Mercedes-Benz Center to address the
malfunction and warning messages.
XPress button = or ; to select the
Service menu.
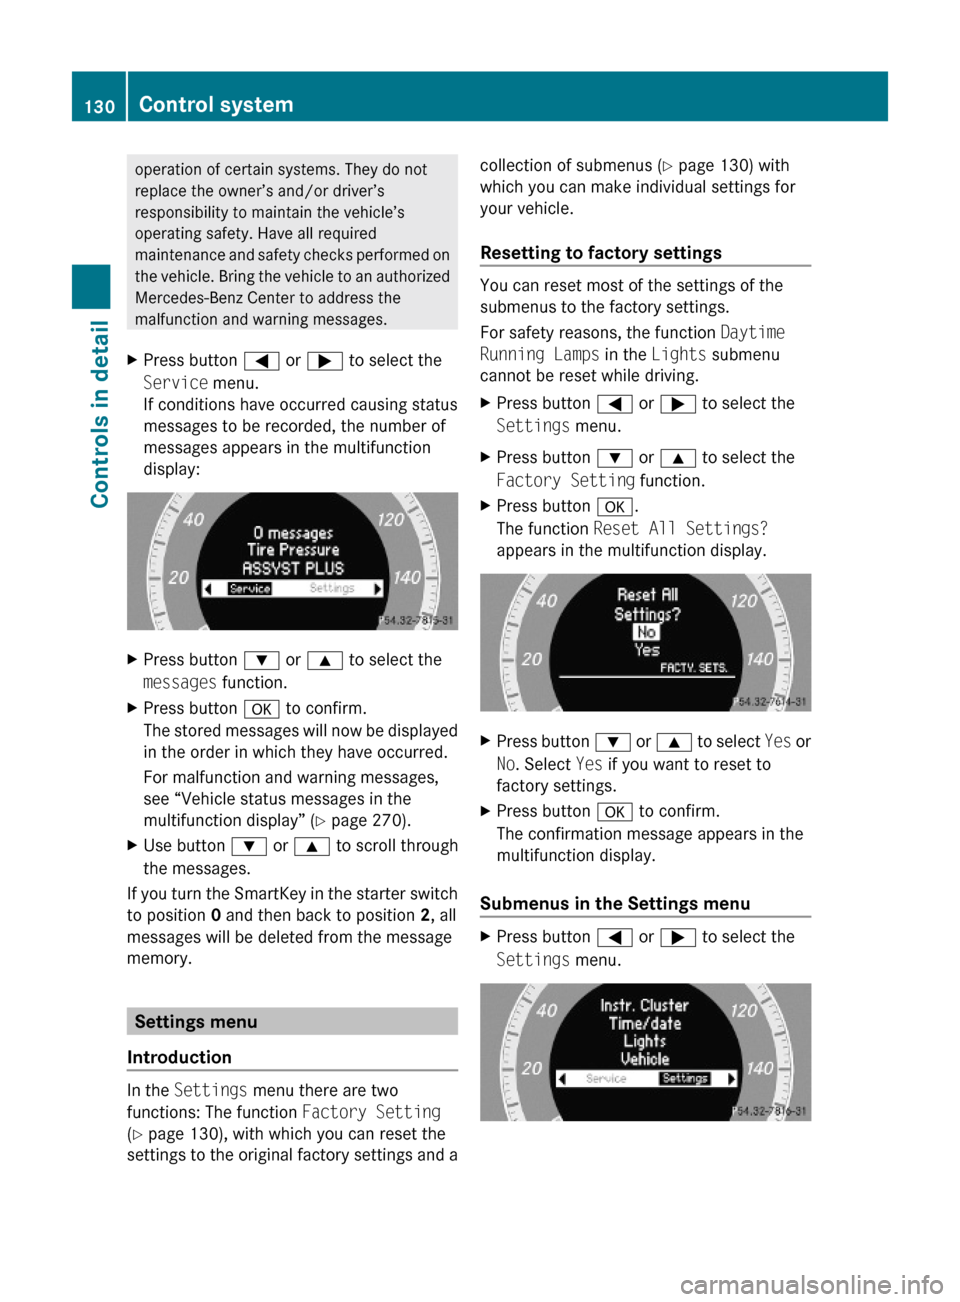
If conditions have occurred causing status
messages to be recorded, the number of
messages appears in the multifunction
display:
XPress button : or 9 to select the
messages function.
XPress button a to confirm.
The stored messages will now be displayed
in the order in which they have occurred.
For malfunction and warning messages,
see “Vehicle status messages in the
multifunction display” (Y page 270).
XUse button : or 9 to scroll through
the messages.
If you turn the SmartKey in the starter switch
to position 0 and then back to position 2, all
messages will be deleted from the message
memory.
Settings menu
Introduction
In the Settings menu there are two
functions: The function Factory Setting
(Y page 130), with which you can reset the
settings to the original factory settings and a
collection of submenus (Y page 130) with
which you can make individual settings for
your vehicle.
Resetting to factory settings
You can reset most of the settings of the
submenus to the factory settings.
For safety reasons, the function Daytime
Running Lamps in the Lights submenu
cannot be reset while driving.
XPress button = or ; to select the
Settings menu.
XPress button : or 9 to select the
Factory Setting function.
XPress button a.
The function Reset All Settings?
appears in the multifunction display.
XPress button : or 9 to select Yes or
No. Select Yes if you want to reset to
factory settings.
XPress button a to confirm.
The confirmation message appears in the
multifunction display.
Submenus in the Settings menu
XPress button = or ; to select the
Settings menu.
130Control systemControls in detail
204_AKB; 5; 23, en-USd2ureepe,Version: 2.11.8.12009-07-16T17:54:06+02:00 - Seite 130
Page 136 of 364
XPress button a.XPress button : or 9 to select the
Daytime Running Lamps: function.
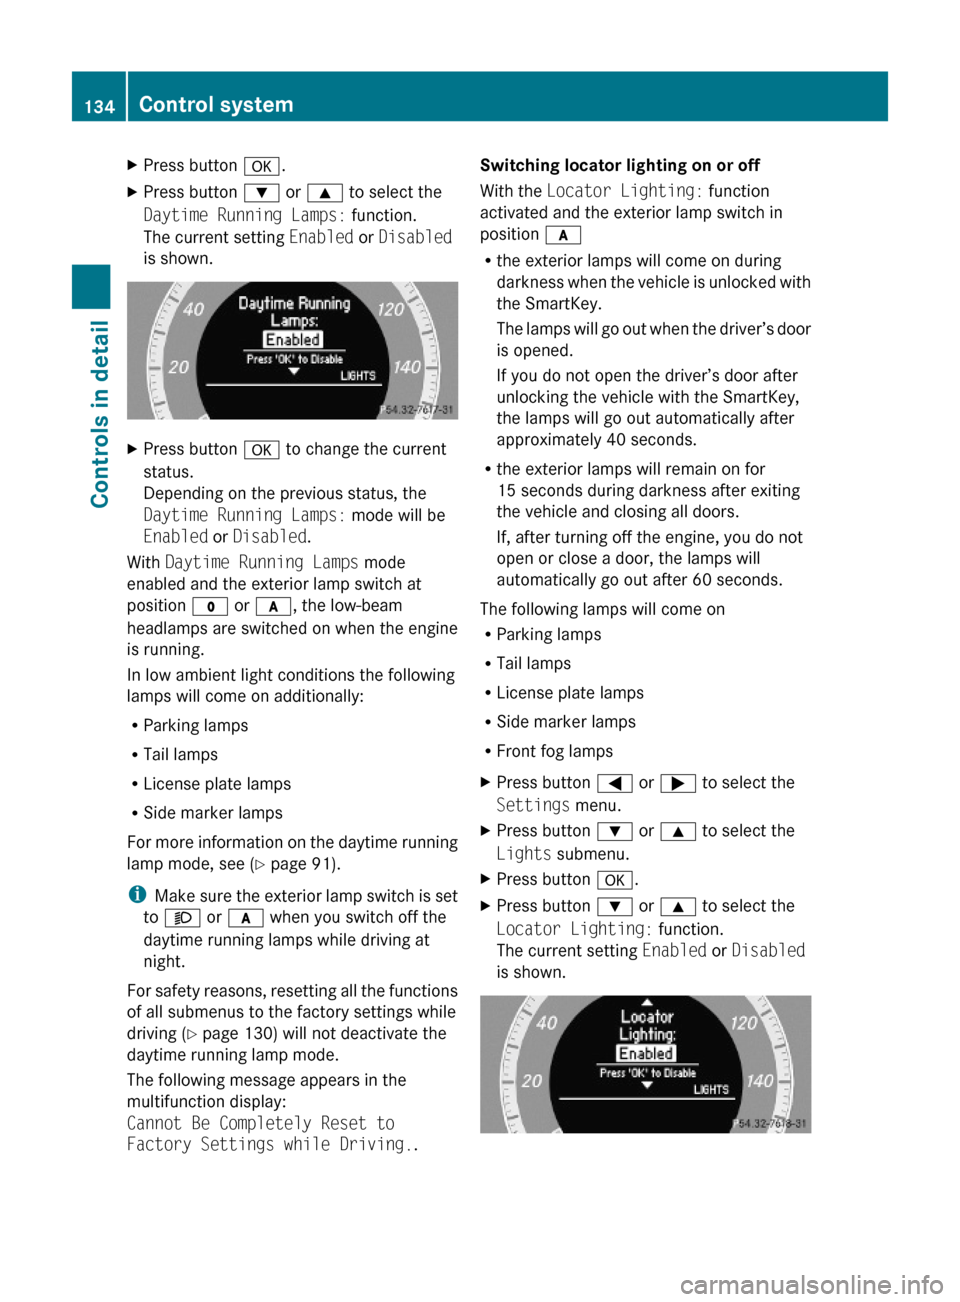
The current setting Enabled or Disabled
is shown.
XPress button a to change the current
status.
Depending on the previous status, the
Daytime Running Lamps: mode will be
Enabled or Disabled.
With Daytime Running Lamps mode
enabled and the exterior lamp switch at
position $ or c, the low-beam
headlamps are switched on when the engine
is running.
In low ambient light conditions the following
lamps will come on additionally:
RParking lamps
RTail lamps
RLicense plate lamps
RSide marker lamps
For more information on the daytime running
lamp mode, see (Y page 91).
iMake sure the exterior lamp switch is set
to M or c when you switch off the
daytime running lamps while driving at
night.
For safety reasons, resetting all the functions
of all submenus to the factory settings while
driving (Y page 130) will not deactivate the
daytime running lamp mode.
The following message appears in the
multifunction display:
Cannot Be Completely Reset to
Factory Settings while Driving..
Switching locator lighting on or off
With the Locator Lighting: function
activated and the exterior lamp switch in
position c
Rthe exterior lamps will come on during
darkness when the vehicle is unlocked with
the SmartKey.
The lamps will go out when the driver’s door
is opened.
If you do not open the driver’s door after
unlocking the vehicle with the SmartKey,
the lamps will go out automatically after
approximately 40 seconds.
Rthe exterior lamps will remain on for
15 seconds during darkness after exiting
the vehicle and closing all doors.
If, after turning off the engine, you do not
open or close a door, the lamps will
automatically go out after 60 seconds.
The following lamps will come on
RParking lamps
RTail lamps
RLicense plate lamps
RSide marker lamps
RFront fog lamps
XPress button = or ; to select the
Settings menu.
XPress button : or 9 to select the
Lights submenu.
XPress button a.XPress button : or 9 to select the
Locator Lighting: function.
The current setting Enabled or Disabled
is shown.
134Control systemControls in detail
204_AKB; 5; 23, en-USd2ureepe,Version: 2.11.8.12009-07-16T17:54:06+02:00 - Seite 134
Page 137 of 364
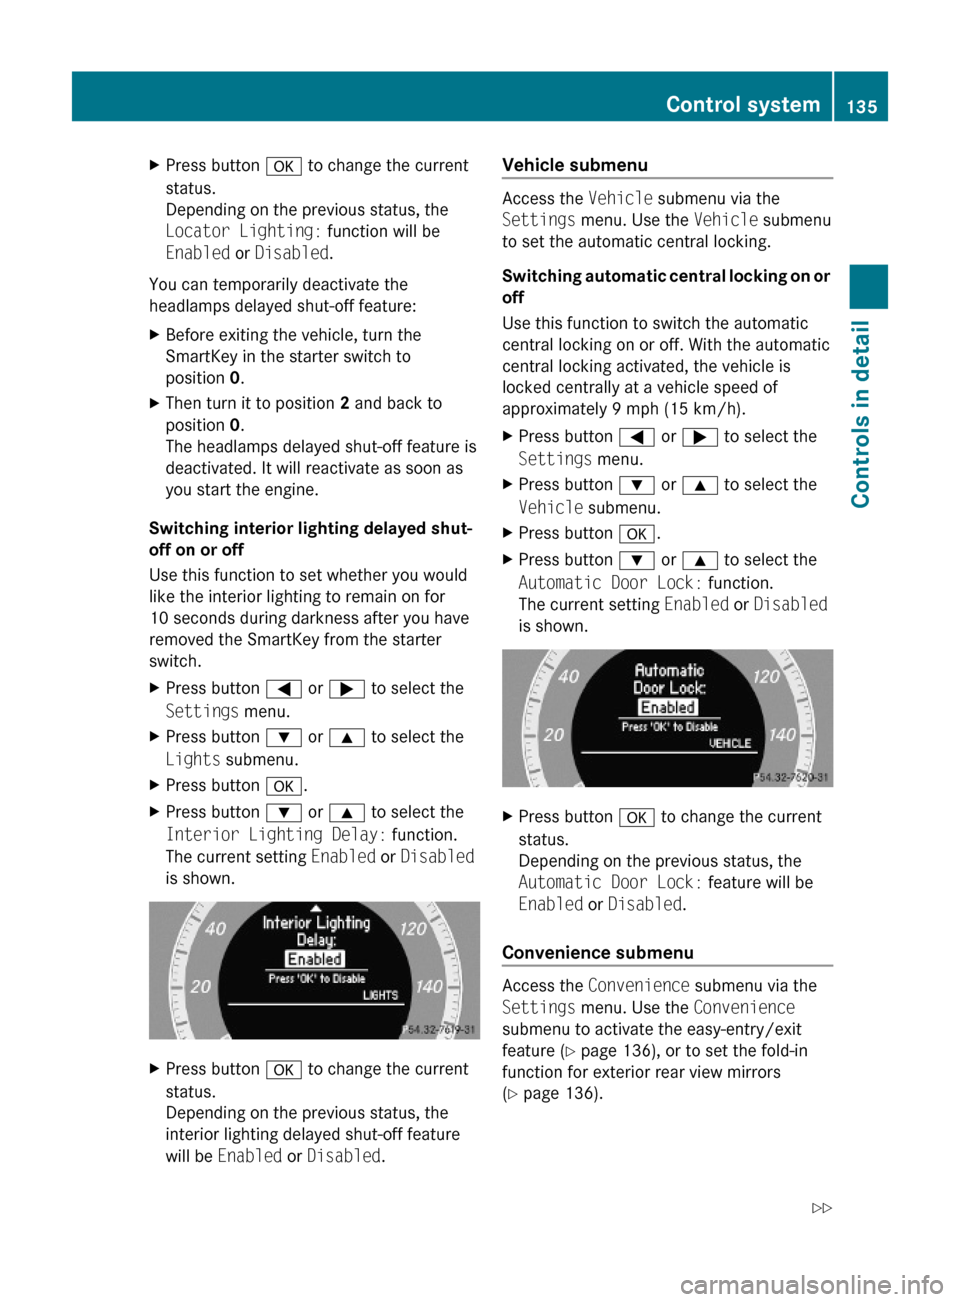
XPress button a to change the current
status.
Depending on the previous status, the
Locator Lighting: function will be
Enabled or Disabled.
You can temporarily deactivate the
headlamps delayed shut-off feature:
XBefore exiting the vehicle, turn the
SmartKey in the starter switch to
position 0.
XThen turn it to position 2 and back to
position 0.
The headlamps delayed shut-off feature is
deactivated. It will reactivate as soon as
you start the engine.
Switching interior lighting delayed shut-
off on or off
Use this function to set whether you would
like the interior lighting to remain on for
10 seconds during darkness after you have
removed the SmartKey from the starter
switch.
XPress button = or ; to select the
Settings menu.
XPress button : or 9 to select the
Lights submenu.
XPress button a.XPress button : or 9 to select the
Interior Lighting Delay: function.
The current setting Enabled or Disabled
is shown.
XPress button a to change the current
status.
Depending on the previous status, the
interior lighting delayed shut-off feature
will be Enabled or Disabled.
Vehicle submenu
Access the Vehicle submenu via the
Settings menu. Use the Vehicle submenu
to set the automatic central locking.
Switching automatic central locking on or
off
Use this function to switch the automatic
central locking on or off. With the automatic
central locking activated, the vehicle is
locked centrally at a vehicle speed of
approximately 9 mph (15 km/h).
XPress button = or ; to select the
Settings menu.
XPress button : or 9 to select the
Vehicle submenu.
XPress button a.XPress button : or 9 to select the
Automatic Door Lock: function.
The current setting Enabled or Disabled
is shown.
XPress button a to change the current
status.
Depending on the previous status, the
Automatic Door Lock: feature will be
Enabled or Disabled.
Convenience submenu
Access the Convenience submenu via the
Settings menu. Use the Convenience
submenu to activate the easy-entry/exit
feature (Y page 136), or to set the fold-in
function for exterior rear view mirrors
(Y page 136).
Control system135Controls in detail204_AKB; 5; 23, en-USd2ureepe,Version: 2.11.8.12009-07-16T17:54:06+02:00 - Seite 135Z
Page 140 of 364
The audio system consists of the following:
RAudio control unit
RAudio display
RAudio controller with buttons k and
2
In addition, the audio system can also be
operated with the multifunction steering
wheel (Y page 118).
In these instructions, the keypad (right side
of audio control unit) and the function buttons
are referred to as “buttons”.
Audio control unit
With the audio control unit you can
Rswitch the audio system on/off
Radjust the volume
Rselect the operating modes
Renter telephone numbers and accept,
reject, initiate and end telephone calls
Rload and eject CDs
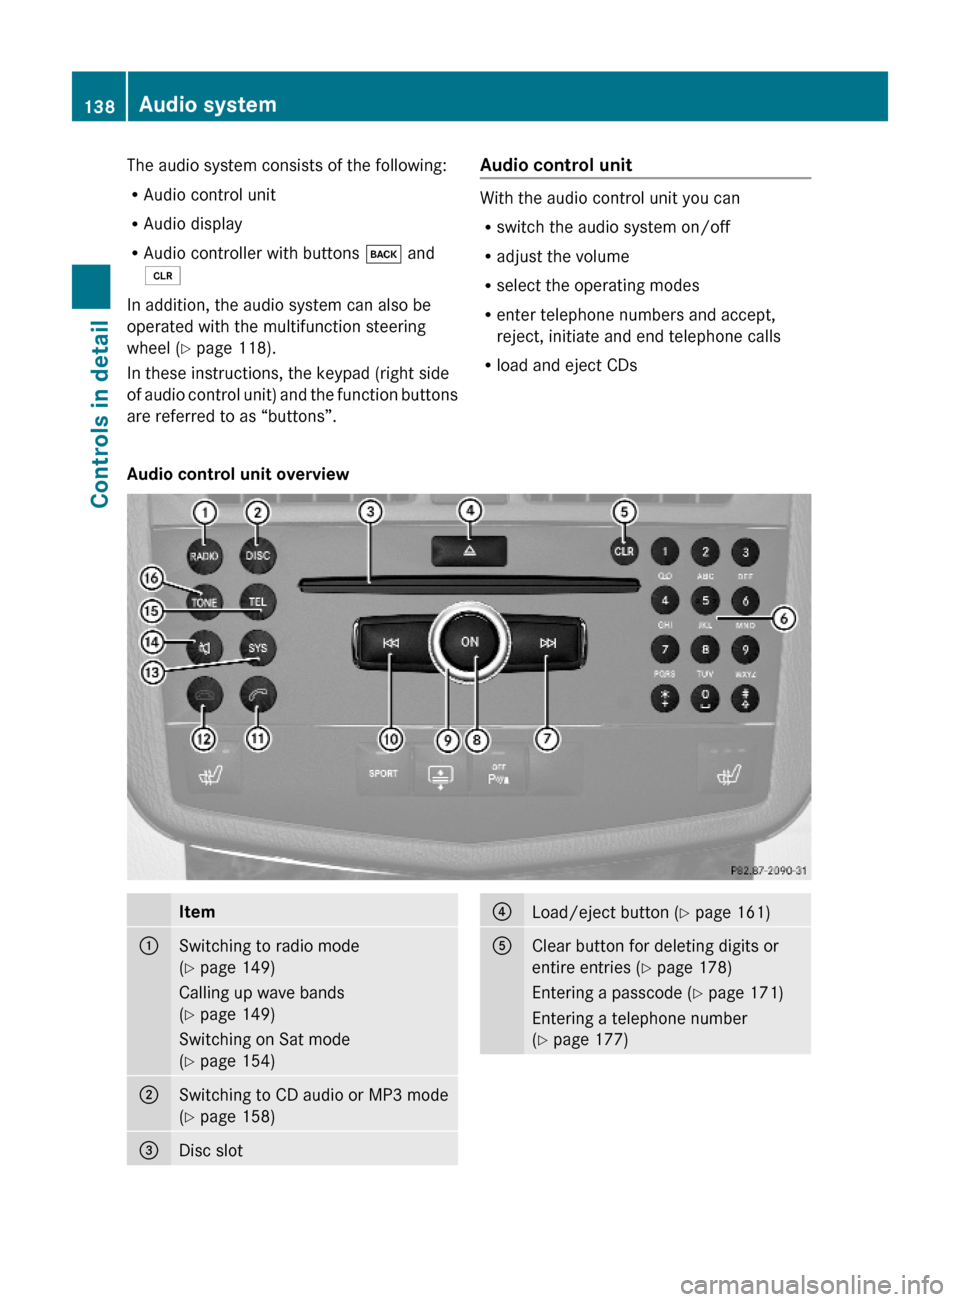
Audio control unit overviewItem:Switching to radio mode
(Y page 149)
Calling up wave bands
(Y page 149)
Switching on Sat mode
(Y page 154)
;Switching to CD audio or MP3 mode
(Y page 158)
=Disc slot?Load/eject button (Y page 161)AClear button for deleting digits or
entire entries (Y page 178)
Entering a passcode (Y page 171)
Entering a telephone number
(Y page 177)
138Audio systemControls in detail
204_AKB; 5; 23, en-USd2ureepe,Version: 2.11.8.12009-07-16T17:54:06+02:00 - Seite 138
Page 141 of 364
BKeypad
Tuning to a station via the station
memory (Y page 150)
Storing stations manually
(Y page 151)
Entering a passcode (Y page 171)
Entering a phone number
(Y page 177)
Sending DTMF tones (Y page 180)
CD changer: Selecting a CD
(Y page 162)
CD: Entering a track number directly
(Y page 164)
CTuning to a station via station search
(Y page 150)
Fast forward (Y page 165)
Skipping forwards to a track
(Y page 165)
DSwitching audio system on/off
(Y page 144)
EAdjusting the volume (Y page 144)FTuning to a station via station search
(Y page 150)
Fast rewind (Y page 165)
Skipping backwards to a track
(Y page 165)
GConfirming a passcode
(Y page 171)
Accepting a call (Y page 179)
Initiating a call (Y page 177)
Redial (Y page 178)
HRejecting a call (Y page 179)
Ending an active call (Y page 179)
IOpening system settings menu
(Y page 147)
JSwitching sound on/off
(Y page 145)
Switching hands-free microphone
on/off (Y page 179)
KSwitching to telephone mode
(Y page 167)
LSound settings (Y page 145)
Audio display
The audio display has a protective cover.
! Do not place any objects on the cover of
the audio display. This may obstruct the
movement when the cover is being
opened/closed. The cover could be
damaged. Do not place any objects in front
of the audio display and/or secure any
objects to the audio display itself. The
audio display could be damaged.
Avoid touching the audio display at all
times. The display has a very sensitive high-
gloss surface, there is a risk of it being
scratched. Do not press directly in the
display face. Otherwise, the audio display
will be damaged.
iFor information about cleaning and care
of the audio display, see “Audio or
COMAND display” (Y page 265).
Audio display cover
Audio system139Controls in detail204_AKB; 5; 23, en-USd2ureepe,Version: 2.11.8.12009-07-16T17:54:06+02:00 - Seite 139Z