2010 Lexus GX460 change time
[x] Cancel search: change timePage 288 of 428

AUDIO/VIDEO SYSTEM
287
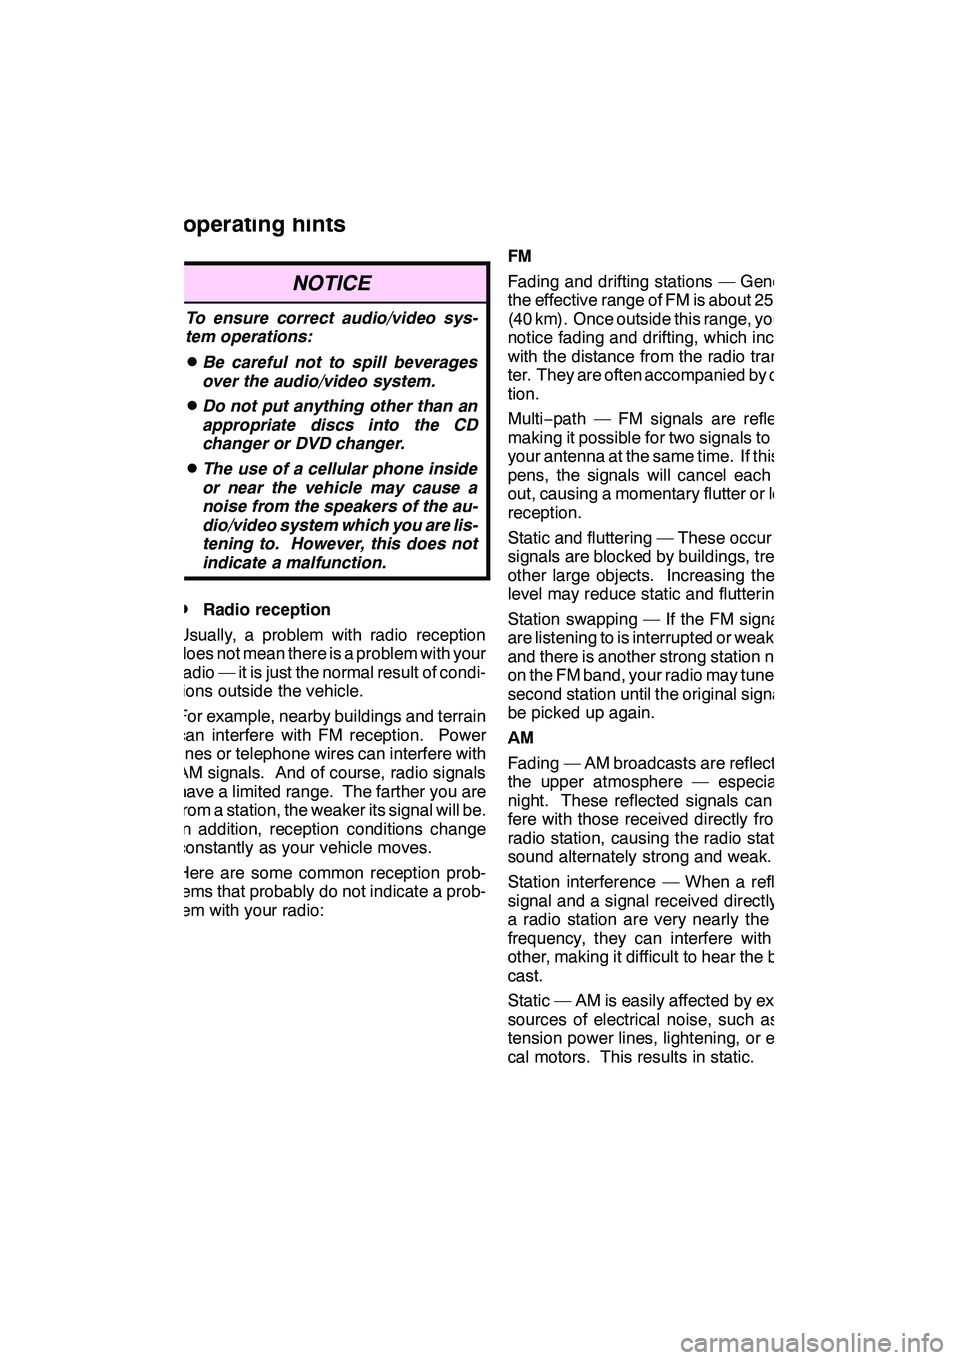
NOTICE
To ensure correct audio/video sys-
tem operations:
DBe careful not to spill beverages
over the audio/video system.
DDo not put anything other than an
appropriate discs into the CD
changer or DVD changer.
DThe use of a cellular phone inside
or near the vehicle may cause a
noise from the speakers of the au-
dio/video system which you are lis-
tening to. However, this does not
indicate a malfunction.
DRadio reception
Usually, a problem with radio reception
does not mean there is a problem with your
radio — it is just the normal result of condi-
tions outside the vehicle.
For example, nearby buildings and terrain
can interfere with FM reception. Power
lines or telephone wires can interfere with
AM signals. And of course, radio signals
have a limited range. The farther you are
from a station, the weaker its signal will be.
In addition, reception conditions change
constantly as your vehicle moves.
Here are some common reception prob-
lems that probably do not indicate a prob-
lem with your radio: FM
Fading and drifting stations — Generally,
the effective range of FM is about 25 miles
(40 km). Once outside this range, you may
notice fading and drifting, which increase
with the distance from the radio transmit-
ter. They are often accompanied by distor-
tion.
Multi−
path — FM signals are reflective,
making it possible for two signals to reach
your antenna at the same time. If this hap-
pens, the signals will cancel each other
out, causing a momentary flutter or loss of
reception.
Static and fluttering — These occur when
signals are blocked by buildings, trees, or
other large objects. Increasing the bass
level may reduce static and fluttering.
Station swapping — If the FM signal you
are listening to is interrupted or weakened,
and there is another strong station nearby
on the FM band, your radio may tune in the
second station until the original signal can
be picked up again.
AM
Fading — AM broadcasts are reflected by
the upper atmosphere — especially at
night. These reflected signals can inter-
fere with those received directly from the
radio station, causing the radio station to
sound alternately strong and weak.
Station interference — When a reflected
signal and a signal received directly from
a radio station are very nearly the same
frequency, they can interfere with each
other, making it difficult to hear the broad-
cast.
Static — AM is easily affected by external
sources of electrical noise, such as high
tension power lines, lightening, or electri-
cal motors. This results in static.
GX460 Navi (U)
OM60E73U
Finish
09.09.24
Audio/video system
operating hints
7
Page 310 of 428

AIR CONDITIONING
309
(h) Rear window and outside rear view
mirror defogging
To turn the electric rear window and
outside rear view mirror defogger on,
push the button above.
The “ENGINE START STOP” switch must
be in IGNITION ON mode.
The thin heater wires on the inside of the
rear window and the heater panels in the
outside rear view mirrors will quickly clear
the surface.
Keep your hands off the mirror faces when
the system is on.
The indicator light is on when the defogger
is operating.
CAUTION
When the outside rear view mirror de-
foggers are on, do not touch the out-
side surface of the rear view mirror as
it can become very hot and burn you.
The defoggers will automatically turn off
after 15 to 270 minutes. The operation
time changes according to the ambient
temperature and vehicle speed.
If further defrosting or defogging is de-
sired, simply actuate the switch again.
When the surface has cleared, push the
button once again to turn the defogger off.
Continuous use may cause the battery to
discharge, especially during stop−and− go
driving. The defogger is not designed to
dry rain water or to melt snow.
If the outside rear view mirrors are heavily
coated with ice, use a spray de −icer before
operating the system.
NOTICE
DWhen cleaning the inside of the
rear window, be careful not to
scratch or damage the heater wires
or connectors.
DTo prevent the battery from being
discharged, turn the switch off
when the engine is not running.
GX460 Navi (U)
OM60E73U
Finish
09.09.24
8
Page 315 of 428

WIDE VIEW FRONT & SIDE MONITOR
314
This system can display the wide view
front monitor and the side monitor sepa-
rately or at the same time.
The wide view front monitor uses a super−
wide angle lens to display on screen the
areas to the left and right of the vehicle and
the blind spots to the front of the vehicle.
This system helps the driver check for ap-
proaching cars, bicycles and pedestrians
when at intersections with poor visibility.
The side monitor uses a camera installed
in the passenger ’s side outside rear view
mirror to display on screen the area to the
front− right of the vehicle, helping the driver
check this area.
CAUTION
DWhen using the wide view front &
side monitor system, observe
these precautions to avoid an acci-
dent that could result in death or
serious injuries.
DNever depend solely on the mon-
itor system.
DAlways check visually to confirm
your intended path is clear.
DDepicted distances between ob-
jects and flat surfaces differ from
actual distances.
DDo not use the system if the hood
or the front passenger ’s door is
not completely closed.
DThe displayed image may be darker
and moving images may be slightly
distorted when the system is cold.
DDo not use the system in the follow-
ing cases:
DOn icy or slick road surfaces, or
in snow.
DWhen using tire chains or emer-
gency tires.
DOn roads that are not flat or
straight, such as curves or slo-
pes.
NOTICE
D If the front of the vehicle or the pas-
senger side outside rear view mir-
ror is hit, the camera’s position
and mounting angle may change.
Contact your Lexus dealer.
D As the camera has a water proof
construction, do not detach, dis-
assemble or modify it. This may
cause incorrect operation.
D If the temperature changes rapid-
ly, such as when hot water is
poured on the vehicle in cold
weather, the system may not oper-
ate normally.
D Do not strongly rub the camera
lens. If the camera lens is
scratched, it can not transmit a
clear image.
D Do not allow organic solvent, car
wax, window cleaner or glass coat
to adhere to the camera. If this hap-
pens, wipe it off as soon as pos-
sible.
D When replacing the tires, please
consult your Lexus dealer. If you
replace the tires, the area dis-
played on the screen may change.
D Even if an obstacle is no longer
visible on the side monitor, do not
turn the steering wheel further in
the direction the vehicle is turning
until the vehicle has moved com-
pletely past the obstacle. If the
steering wheel is turned to full
lock, the vehicle will turn in the
smallest possible turning circle,
and may collide with the obstacle.
D When washing the vehicle, do not
apply intensive bursts of water to
the camera or camera area. Doing
so may result in the camera mal-
functioning.
GX460 Navi (U)
OM60E73U
Finish
09.09.24
Wide view front & side
monitor —
Page 330 of 428

SECTION11
SETUP
329
SETUP
DGeneral settings 330 .......................................
(Used for language selection and the on/off settings of
operation sounds and automatic screen change.)
D Clock settings 335 .........................................
(Used for changing time zones and the on/off settings of
daylight saving time.)
D Voice settings 337 .........................................
(Voice guidance can be set.)
D Navigation settings 340 ....................................
(“Home” and “Preset Destinations” can be set and edited.)
D Detailed navigation settings 340 .............................
(Average cruising speed, displayed screen contents,
and POI icon categories can be set.)
D Telephone settings 349 .....................................
(Bluetooth rphones can be registered.)
D Audio settings 388 .........................................
(Settings are available for portable audio devices and
Bluetooth raudio devices players.)
D Vehicle settings 395 .......................................
(Vehicle information can be set.)
D Other settings 403 .........................................
(Used for changing settings for Lexus Insider and
XM rSports and Stocks.)
GX460 Navi (U)
OM60E73U
Finish
09.09.24
11
Page 336 of 428

SETUP
335
Used for changing time zones and the on/
off settings of daylight saving time.
1. Push the “SETUP” button.
2. Touch “Clock”.
3. Touch the items to be set.
4. Touch “Save”.SCREEN FOR CLOCK SETTINGS
On this screen, the following functions can
be performed.
No.
Function
1Time zone can be changed. (See
“DTime zone” on page 336.)
2“On” or“Off” can be selected for
daylight savings time.
3“On” or“Off” can be selected for
automatic adjustment of the clock.
4
When “Auto Adjust Clock” is
turned “Off”, the clock can be
manually adjusted. (See “
DManu-
al clock setting” on page 336.)
GX460 Navi (U)
OM60E73U
Finish
09.09.24
Clock settings
11
Page 343 of 428

SETUP
342
No.Function
6
Displayed POI icon categories can
be set. (See “DPOI category
change (Select POI icons)” on
page 345.)
7
Buttons displayed on the map
screen when “ AAOff” is selected
can be set. (See “
DScreen layout
function (“ AAOff” function)” on
page 346.)
8
The current vehicle position mark
can be adjusted manually. Miscal-
culation of the distance caused by
tire replacement can also be ad-
justed. (See “
DCurrent position/
tire change calibration” on page
346.)
9
Display of pop −up information can
be set to “On”or“Off” . (See “DPop−up information” on the page
348.)
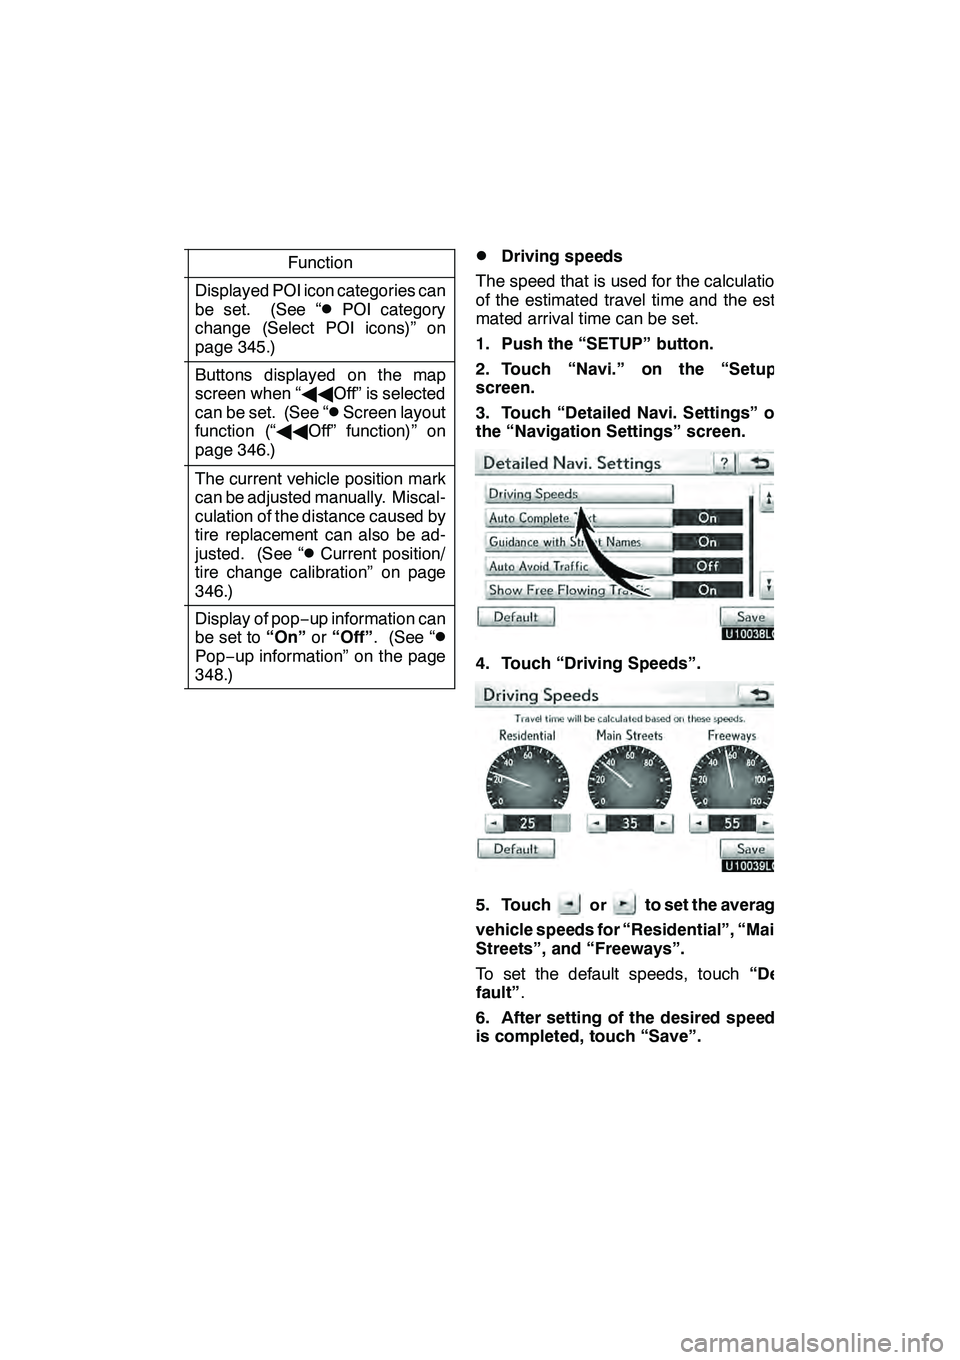
DDriving speeds
The speed that is used for the calculation
of the estimated travel time and the esti-
mated arrival time can be set.
1. Push the “SETUP” button.
2. Touch “Navi.” on the “Setup”
screen.
3. Touch “Detailed Navi. Settings” on
the “Navigation Settings” screen.
4. Touch “Driving Speeds”.
5. Touchorto set the average
vehicle speeds for “Residential”, “Main
Streets”, and “Freeways”.
To set the default speeds, touch “De-
fault” .
6. After setting of the desired speeds
is completed, touch “Save”.
GX460 Navi (U)
OM60E73U
Finish
09.09.24
Page 344 of 428

SETUP
343
INFORMATION
DThe displayed time to the destina-
tion is the approximate driving
time that is calculated based on the
selected speeds and the actual
position along the guidance route.
D The time shown on the screen may
vary greatly depending on prog-
ress along the route, which may be
affected by conditions such as
traffic jams and construction work.
D It is possible to display up to 99
hours 59 minutes.
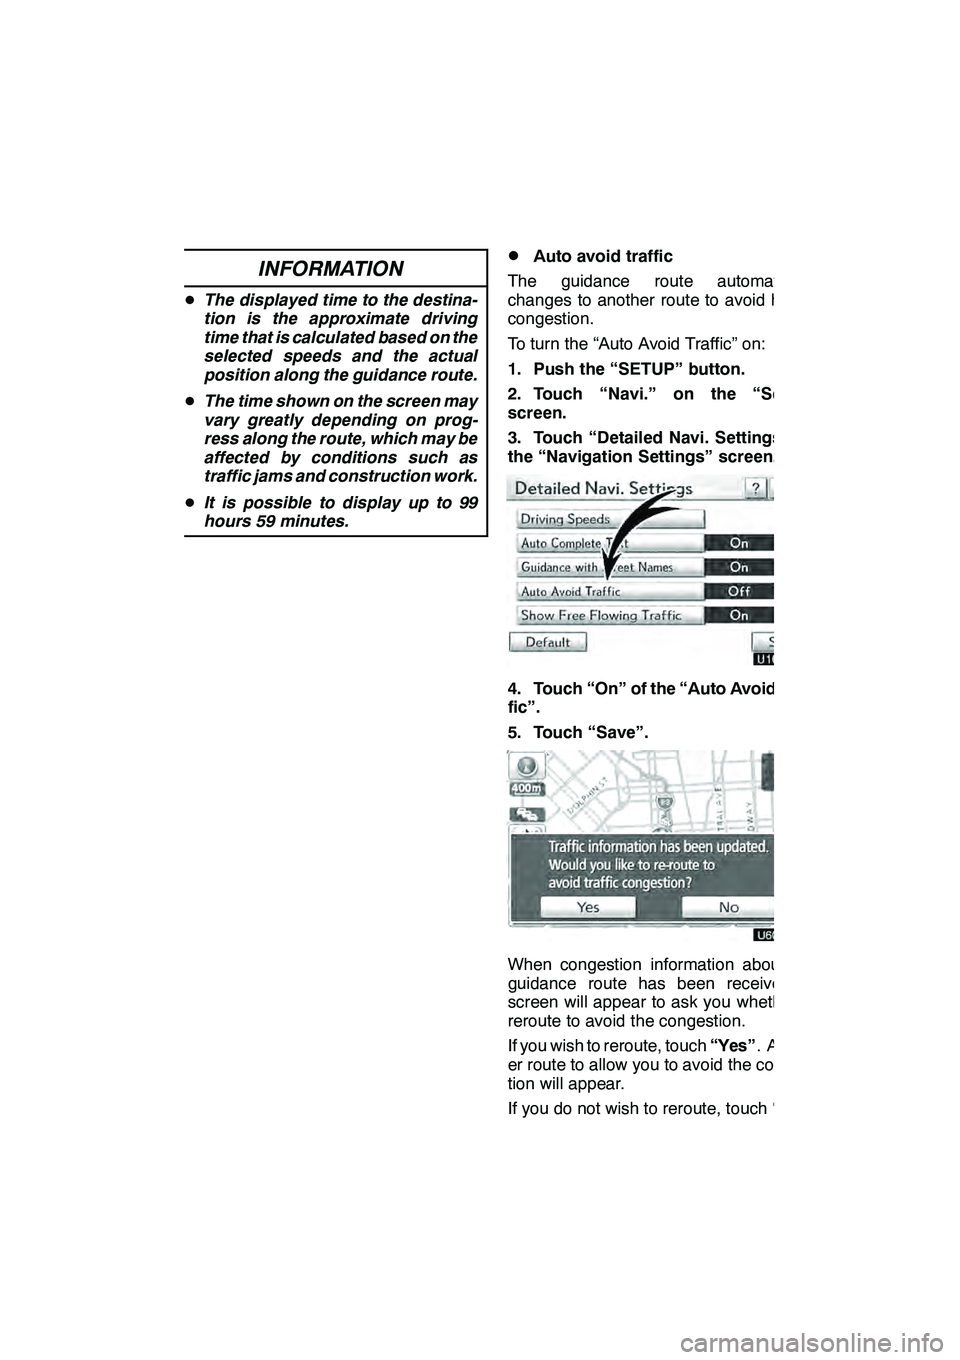
DAuto avoid traffic
The guidance route automatically
changes to another route to avoid heavy
congestion.
To turn the “Auto Avoid Traffic” on:
1. Push the “SETUP” button.
2. Touch “Navi.” on the “Setup”
screen.
3. Touch “Detailed Navi. Settings” on
the “Navigation Settings” screen.
4. Touch “On” of the “Auto Avoid Traf-
fic”.
5. Touch “Save”.
When congestion information about the
guidance route has been received, a
screen will appear to ask you whether to
reroute to avoid the congestion.
If you wish to reroute, touch “Yes”. Anoth-
er route to allow you to avoid the conges-
tion will appear.
If you do not wish to reroute, touch “No”.
GX460 Navi (U)
OM60E73U
Finish
09.09.24
11
Page 357 of 428

SETUP
356
Setting the handsfree power
You can select the state of “Handsfree
Power”.
The state changes between “On” and
“Off” every time you touch “Handsfree
Power”.
For the “Handsfree Power”, see
“Changing the handsfree power” on
page 381.
DEditing the Bluetoothrphone
You can see the information of the
Bluetooth rphone on the system or
edit.
“Device Name” The name of Bluetooth r
....
phone which is displayed on
the screen. You can change it
into a desired name.
If you change a device name,
the name registered in your
cellular phone is not changed.
“Device Address” The address peculiar to the
....
system. You cannot change it.
If you have registered two
Bluetooth rphones with the
same device name and you
cannot distinguish one from
the other, refer to it.
1. Touch “Options”.
2. Touch “Edit Phones”.
GX460 Navi (U)
OM60E73U
Finish
09.09.24