2010 KIA Rio ESP
[x] Cancel search: ESPPage 69 of 236
Knowing your vehicle
60
3
Air bag system operation
Air bags only operate when the ignition
switch is turned to the ON or START
positions.
Air bags inflate instantly in the event of serious frontal or side collision (if
equipped with side air bag or curtain
air bag) in order to help protect the
occupants from serious physical injury.
There is no single vehicle speed at which the air bags will inflate.
Air bag deployment depends on a number of factors including vehicle
speed, angles of impact and the densi-
ty and stiffness of the vehicles or
objects which your vehicle hits in the
collision. However, factors are not limit-
ed to those mentioned above.
The front air bags will completely inflate and deflate in an instant.
It is virtually impossible for you to see
the air bags inflate during an accident.
It is much more likely that you will sim-
ply see the deflated air bags hanging
out of their storage compartments after
the collision. In order to help provide protection in a
severe collision, the air bags must
inflate rapidly. The speed of air bag
inflation is a consequence of the
extremely short time in which a collision
occurs and the need to get the air bag
between the occupant and the vehicle
structures before the occupant impacts
those structures. This speed of inflation
reduces the risk of serious or life-
threatening injuries in a severe collision
and is thus a necessary part of air bag
design.
However, air bag inflation can also
cause injuries which normally can
include facial abrasions, bruises and
broken bones, and sometimes more
serious injuries because the inflation
speed also causes the air bags to
expand with a great deal of force.
There are even circumstances under which contact with the steer-
ing wheel air bag can cause fatal
injuries, especially if the occupant
is positioned excessively close to
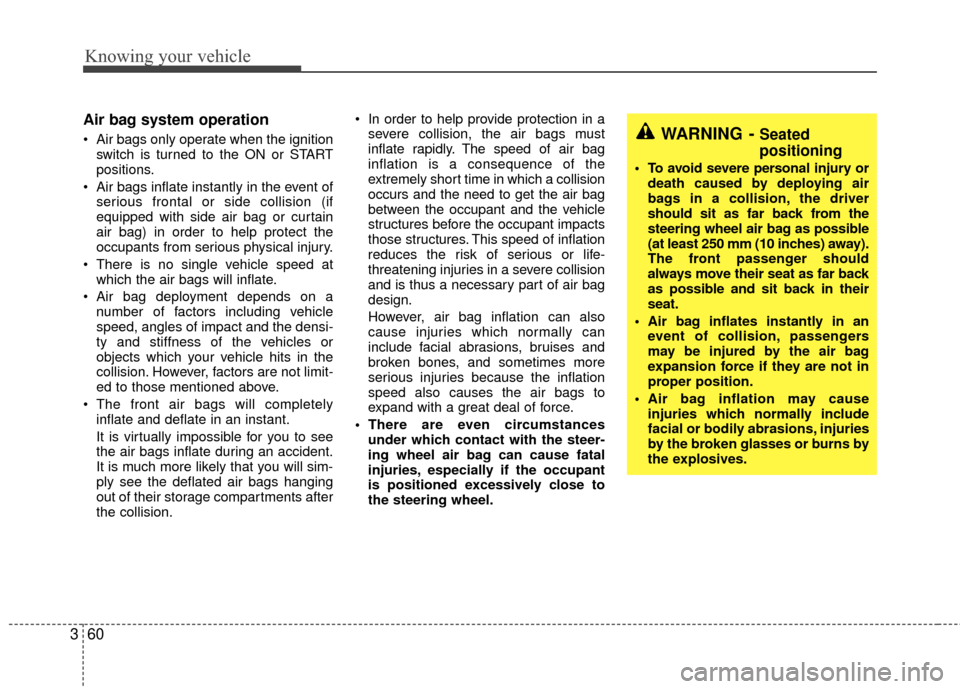
the steering wheel.WARNING - Seated
positioning
To avoid severe personal injury ordeath caused by deploying air
bags in a collision, the driver
should sit as far back from the
steering wheel air bag as possible
(at least 250 mm (10 inches) away).
The front passenger should
always move their seat as far back
as possible and sit back in their
seat.
Air bag inflates instantly in an event of collision, passengers
may be injured by the air bag
expansion force if they are not in
proper position.
Air bag inflation may cause injuries which normally include
facial or bodily abrasions, injuries
by the broken glasses or burns by
the explosives.
Page 78 of 236

369
Knowing your vehicle
✽
✽NOTICE
• Make sure to refuel your vehicle
according to the "Fuel requirements"
suggested in section 5.
• Check to make sure the fuel filler cap is securely closed after refueling. A
loose fuel filler cap may cause the
“Check fuel filler cap ( )” light in
the instrument panel to illuminate
unnecessarily.
• If the fuel filler cap requires replace- ment, use only a genuine Kia cap or
the equivalent specified for your vehi-
cle. An incorrect fuel filler cap can
result in a serious malfunction of the
fuel system or emission control sys-
tem.
• Do not spill fuel on the exterior sur- faces of the vehicle. Any type of fuel
spilled on painted surfaces may dam-
age the paint. (Continued)
DO NOT use matches or a lighter
and DO NOT SMOKE or leave a lit
cigarette in your vehicle while at a
gas station especially during
refueling. Automotive fuel is high-
ly flammable and can, when ignit-
ed, result in fire.
If a fire breaks out during refuel- ing, leave the vicinity of the vehi-
cle, and immediately contact the
manager of the gas station and
then contact the local fire depart-
ment or 911.(Continued)
Static electricity discharge from
the container can ignite fuel
vapors causing a fire. Once refu-
eling has begun, contact with the
vehicle should be maintained
until the filling is complete.
Use only portable plastic fuel
containers designed to carry and
store gasoline.
Do not use cellular phones while refueling. Electric current and/or
electronic interference from cellu-
lar phones can potentially ignite
fuel vapors causing a fire.
When refueling, always shut the engine off. Sparks produced by
electrical components related to
the engine can ignite fuel vapors
causing a fire. Once refueling is
complete, check to make sure the
filler cap and filler door are
securely closed, before starting
the engine.
(Continued)
Page 80 of 236
371
Knowing your vehicle
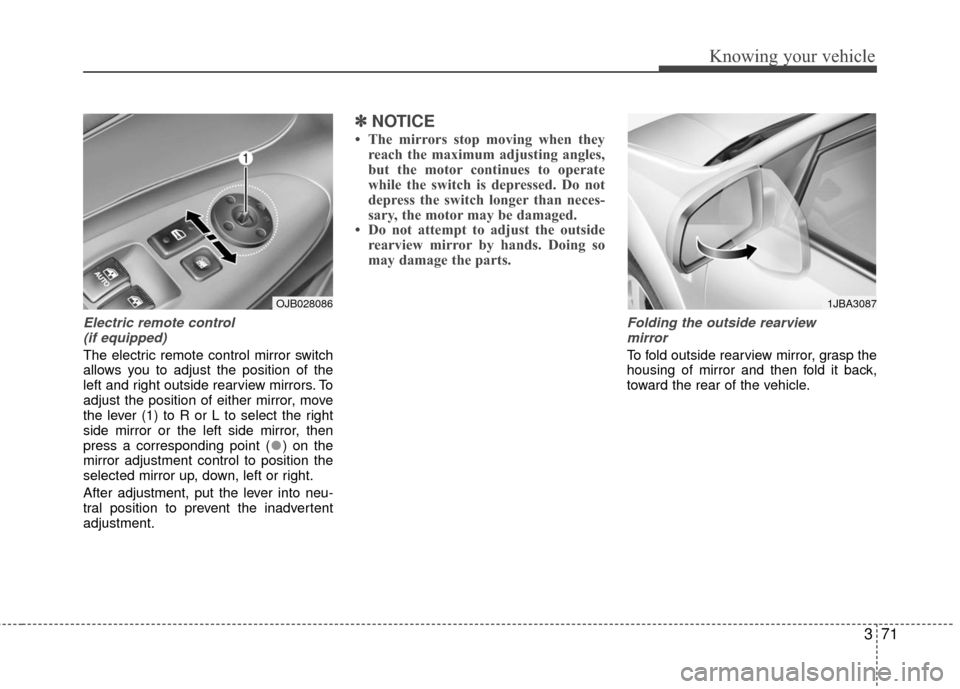
Electric remote control (if equipped)
The electric remote control mirror switch
allows you to adjust the position of the
left and right outside rearview mirrors. To
adjust the position of either mirror, move
the lever (1) to R or L to select the right
side mirror or the left side mirror, then
press a corresponding point ( ) on the
mirror adjustment control to position the
selected mirror up, down, left or right.
After adjustment, put the lever into neu-
tral position to prevent the inadvertent
adjustment.
✽ ✽ NOTICE
• The mirrors stop moving when they
reach the maximum adjusting angles,
but the motor continues to operate
while the switch is depressed. Do not
depress the switch longer than neces-
sary, the motor may be damaged.
• Do not attempt to adjust the outside rearview mirror by hands. Doing so
may damage the parts.
Folding the outside rearview
mirror
To fold outside rearview mirror, grasp the
housing of mirror and then fold it back,
toward the rear of the vehicle.
1JBA3087OJB028086
Page 82 of 236
373
Knowing your vehicle
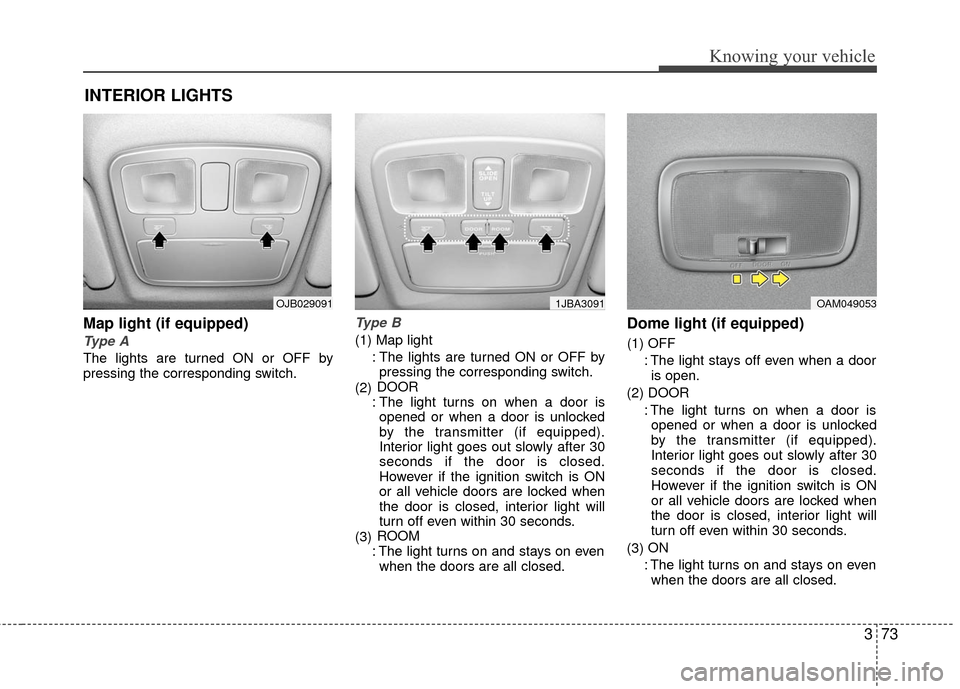
Map light (if equipped)
Type A
The lights are turned ON or OFF by
pressing the corresponding switch.
Type B
(1) Map light: The lights are turned ON or OFF bypressing the corresponding switch.
(2) DOOR
: The light turns on when a door is opened or when a door is unlocked
by the transmitter (if equipped).
Interior light goes out slowly after 30
seconds if the door is closed.
However if the ignition switch is ON
or all vehicle doors are locked when
the door is closed, interior light will
turn off even within 30 seconds.
(3) ROOM
: The light turns on and stays on even when the doors are all closed.
Dome light (if equipped)
(1) OFF
: The light stays off even when a dooris open.
(2) DOOR : The light turns on when a door isopened or when a door is unlocked
by the transmitter (if equipped).
Interior light goes out slowly after 30
seconds if the door is closed.
However if the ignition switch is ON
or all vehicle doors are locked when
the door is closed, interior light will
turn off even within 30 seconds.
(3) ON
: The light turns on and stays on even when the doors are all closed.
INTERIOR LIGHTS
OAM0490531JBA3091OJB029091
Page 89 of 236
Knowing your vehicle
80
3
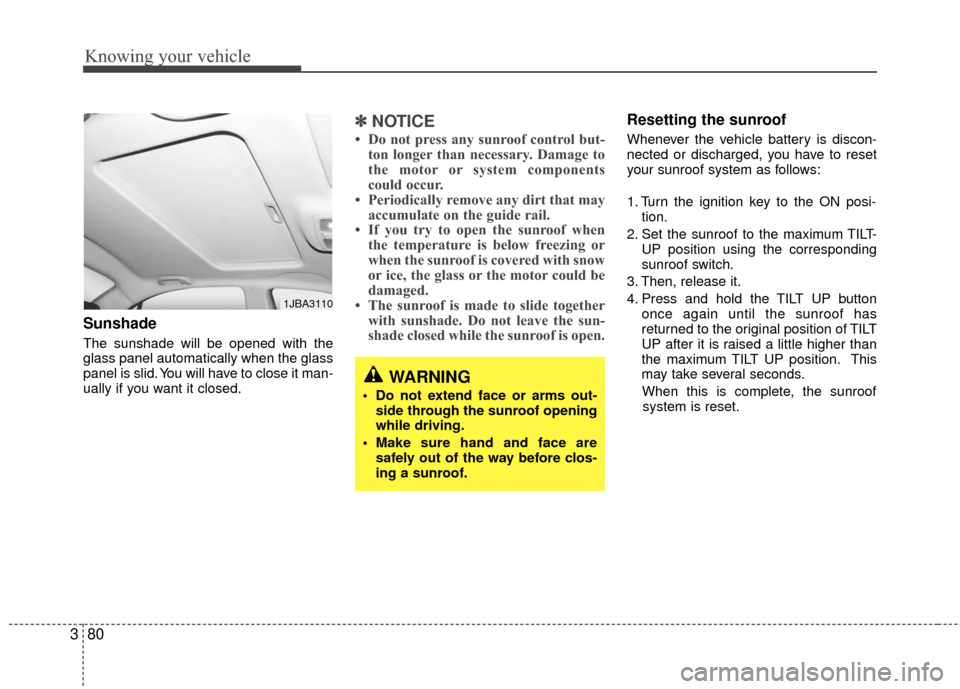
Sunshade
The sunshade will be opened with the
glass panel automatically when the glass
panel is slid. You will have to close it man-
ually if you want it closed.
✽ ✽
NOTICE
• Do not press any sunroof control but-
ton longer than necessary. Damage to
the motor or system components
could occur.
• Periodically remove any dirt that may accumulate on the guide rail.
• If you try to open the sunroof when the temperature is below freezing or
when the sunroof is covered with snow
or ice, the glass or the motor could be
damaged.
• The sunroof is made to slide together with sunshade. Do not leave the sun-
shade closed while the sunroof is open.
Resetting the sunroof
Whenever the vehicle battery is discon-
nected or discharged, you have to reset
your sunroof system as follows:
1. Turn the ignition key to the ON posi-
tion.
2. Set the sunroof to the maximum TILT- UP position using the corresponding
sunroof switch.
3. Then, release it.
4. Press and hold the TILT UP button once again until the sunroof has
returned to the original position of TILT
UP after it is raised a little higher than
the maximum TILT UP position. This
may take several seconds.
When this is complete, the sunroof system is reset.
1JBA3110
WARNING
Do not extend face or arms out- side through the sunroof opening
while driving.
Make sure hand and face are safely out of the way before clos-
ing a sunroof.
Page 97 of 236
Knowing your vehicle
88
3
Satellite radio channels:
SIRIUS Satellite Radio has over 130 chan-
nels, including 69 channels of 100% com-
mercial-free music, plus sports, news, talk
and entertainment available nationwide in
your vehicle. For more information and a
complete list of SIRIUS Satellite Radio
channels, visit sirius.com in the United
States, sirius-canada.ca in Canada, or call
SIRIUS at 1-888-539-7474.
Satellite radio reception factors:
To receive the satellite signal, your vehi-
cle has been equipped with a satellite
radio antenna located on the roof of your
vehicle. The vehicle roof provides the
best location for an unobstructed, open
view of the sky, a requirement of a satel-
lite radio system. Like AM/FM, there are
several factors that can affect satellite
radio reception performance:
Antenna obstructions: For optimal
reception performance, keep the anten-
na clear of snow and ice build-up and
keep luggage and other material as far
away from the antenna as possible.
Terrain: Hills, mountains, tall buildings, bridges, tunnels, freeway overpasses,
parking garages, dense tree foliage
and thunderstorms can interfere with
your reception.
SIRIUS Satellite Radio service:
SIRIUS Satellite Radio is a subscription-
based satellite radio service that broad-
casts music, sports, news and entertain-
ment programming to radio receivers,
which are available for installation in
motor vehicles or factory installed, as
well as for the home, portable and wire-
less devices, and through an Internet
connection on personal computer.
Vehicles that are equipped with a factory
installed SIRIUS Satellite Radio system
include:
Hardware and an introductory trial sub-scription term, which begins on the
date of sale or lease of the vehicle.
For a small upgrade fee, access to SIRIUS music channels, and other
select channels over the Internet using
any computer connected to the
Internet (U.S. customers only).
For information on extended subscrip-
tion terms, contact SIRIUS at 1-888-
539-7474.
✽ ✽ NOTICE
Satellite Radio requires SIRIUS®com-
patible receiver and a subscription serv-
ice fee after trial period.
Vehicles without a factory-installed
radio receiver require hardware pur-
chase and installation. Please see your
dealer for further details. All fees and
programming subject to change.
Subscriptions governed by the SIRIUS
Terms & Conditions available at
www
.sirius.com/ serviceterms.
Available only in the 48 contiguous
United States and the District of
Columbia. Service available in Canada;
see www
.siriuscanada.caChrysler LLC shall not be responsible
for any such programming changes.
Satellite Radio Electronic Serial
Number (ESN): This 12-digit Satellite
Serial Number is needed to re-activate,
modify or track your satellite radio
account. You will need this number when
communicating with SIRIUS.
SIRIUS SATELLITE RADIO INFORMATION (IF EQUIPPED)
Page 99 of 236

Knowing your vehicle
90
3
1. FM/AM Selection Button
Turns to FM or AM mode, and toggles in
the order of FM1
➟ FM2 ➟ AM ➟ FM1...
when the button is pressed each time.
2. Automatic Channel Selection Button
When the [SEEK ] button is pressed,
it increases the band frequency to auto-
matically select a channel. Stops at the
previous frequency if no channel is
found.
When the [TRACK ] button is press- ed, it reduces the band frequency to
automatically select a channel. Stops
at the previous frequency if no channel
is found.
3. Power ON/OFF Button & Volume Control Knob
Turns the set on/off when the IGNITION
SWITH is on ACC or ON. If the button is
turned to the right, it increases the vol-
ume and left,decreases the volume.
4. Preset Button
Push [1]~[6] buttons less than 0.8 sec-
ond to play the channel saved in each
button. Push [Preset] button for 0.8 sec-
ond or longer to save current channel to
the respective button with a beep.
5. Manual Channel Selection &Sound Quality Control Knob
Turn this control while listening to a radio
channel to manually adjust frequency.
Turn clockwise to increase frequency and
counterclockwise to reduce frequency.
Pressing the button changes the BASS,
MIDDLE, TREBLE, FADER and BAL-
ANCE TUNE mode. The mode selected
is shown on the display. After selecting
each mode, rotate the Audio control knob
clockwise or counterclockwise.
BASS Control
To increase the BASS, rotate the knob
clockwise, while to decrease the BASS,
rotate the knob counterclockwise.
MIDDLE Control
To increase the Midrange, rotate the
knob clockwise, while to decrease the
Midrange, rotate the knob counterclock-
wise. TREBLE Control
To increase the TREBLE, rotate the knob
clockwise, while to decrease the
TREBLE, rotate the knob counterclock-
wise.
FADER Control
Turn the control knob clockwise to
emphasize rear speaker sound(front
speaker sound will be attenuated). When
the control knob is turned counterclock-
wise, front speaker sound will be empha-
sized(rear speaker sound will be attenu-
ated).
BALANCE Control
Rotate the knob clockwise to emphasize
right speaker sound(left speaker sound
will be attenuated). When the control
knob is turned counter clockwise, left
speaker sound will be emphasized(right
speaker sound will be attenuated).
Page 100 of 236
391
Knowing your vehicle
6. SETUP Button
Press this button to access the SIRIUS
option, TEXT SCROLL, and adjustment
mode. If no action is taken for 5 seconds
after pressing the button, it will return to the
play mode.(After entering SETUP mode,
move between items using the left, right and
PUSH functions of the [TUNE] button.)
The setup item changes from TEXT
SCROLL
➟SATELLITE ➟RETURN ➟SIRIUS...
7. SCAN Button
If this button is pressed, the frequencies
will become increased and receive the
corresponding broadcasts. This function
will play the frequencies for 5 seconds
each and find other broadcasts as the
frequency increases. Press the button
again when desiring to continue listening
to the currently playing broadcast.