Page 200 of 496

Lo tIrE
When tire pressure is low, the odometer display will
toggle between Lo and tIrE for three cycles.
CHAngE OIL Message
Your vehicle is equipped with an engine oil change
indicator system. The “CHAngE OIL” message will flash
in the instrument cluster odometer for approximately
12 seconds after a single chime has sounded to indicate
the next scheduled oil change interval. The engine oil
change indicator system is duty cycle based, which
means the engine oil change interval may fluctuate
dependent upon your personal driving style. Unless
reset, this message will continue to display each time you
turn the ignition switch to the ON/RUN position. To turn
off the message temporarily, press and release the Trip
Odometer button on the instrument cluster. To reset the
oil change indicator system (after performing the sched-
uled maintenance), refer to the following procedure:1. Turn the ignition switch to the ON position.
Do not
start the engine.
2. Fully depress the accelerator pedal slowly three
times within 10 seconds.
3. Turn the ignition switch to the OFF/LOCK position.
NOTE: If the indicator message illuminates when you
start the vehicle, the oil change indicator system did not
reset. If necessary repeat this procedure.
24. OFF ROAD Indicator — If Equipped
The symbol illuminates (is armed) when the 4WD lock
switch is activated and the shift lever is in LOW or
REVERSE position.
25. Malfunction Indicator Light (MIL) The Malfunction Indicator Light (MIL) is part of
an Onboard Diagnostic system called OBD II that
monitors emissions, engine, and automatic trans-
mission control systems. The light will illuminate when
4
UNDERSTANDING YOUR INSTRUMENT PANEL 199
Page 201 of 496

the key is in the ON/RUN position before engine start. If
the light does not come on when turning the key from
OFF to ON/RUN, have the condition checked promptly.
Certain conditions such as a loose or missing gas cap,
poor fuel quality, etc., may illuminate the light after
engine start. The vehicle should be serviced if the light
stays on through several of your typical driving cycles. In
most situations, the vehicle will drive normally and will
not require towing.
CAUTION!
Prolonged driving with the MIL on could cause
damage to the engine control system. It also could
affect fuel economy and drivability. If the MIL is
flashing, severe catalytic converter damage and
power loss will soon occur. Immediate service is
required.
WARNING!
A malfunctioning catalytic converter, as referenced
above, can reach higher temperatures than in normal
operating conditions. This can cause a fire if you
drive slowly or park over flammable substances such
as dry plants or wood or cardboard, etc. This could
result in death or serious injury to the driver, occu-
pants or others.
26. Hill Descent Indicator — If Equipped The symbol illuminates (is armed) when the
4WD Lock switch is activated and the trans-
mission range indicator is in LOW or REVERSE
position (Off-Road Mode).
27. Front Fog Light Indicator — If Equipped This indicator will illuminate when the front fog
lights are on.
200 UNDERSTANDING YOUR INSTRUMENT PANEL
Page 202 of 496
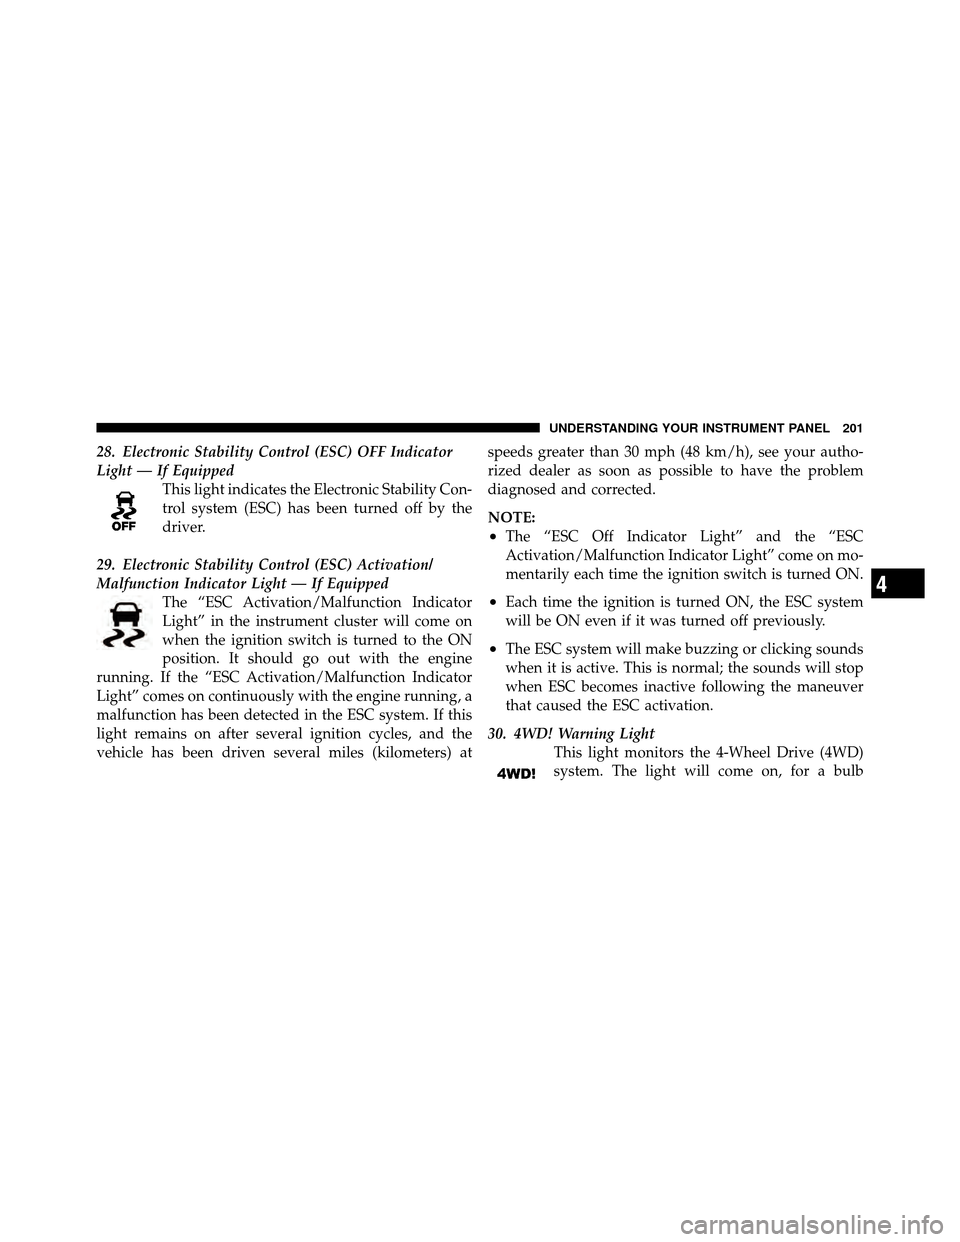
28. Electronic Stability Control (ESC) OFF Indicator
Light — If EquippedThis light indicates the Electronic Stability Con-
trol system (ESC) has been turned off by the
driver.
29. Electronic Stability Control (ESC) Activation/
Malfunction Indicator Light — If Equipped The “ESC Activation/Malfunction Indicator
Light” in the instrument cluster will come on
when the ignition switch is turned to the ON
position. It should go out with the engine
running. If the “ESC Activation/Malfunction Indicator
Light” comes on continuously with the engine running, a
malfunction has been detected in the ESC system. If this
light remains on after several ignition cycles, and the
vehicle has been driven several miles (kilometers) at speeds greater than 30 mph (48 km/h), see your autho-
rized dealer as soon as possible to have the problem
diagnosed and corrected.
NOTE:
•The “ESC Off Indicator Light” and the “ESC
Activation/Malfunction Indicator Light” come on mo-
mentarily each time the ignition switch is turned ON.
•Each time the ignition is turned ON, the ESC system
will be ON even if it was turned off previously.
•The ESC system will make buzzing or clicking sounds
when it is active. This is normal; the sounds will stop
when ESC becomes inactive following the maneuver
that caused the ESC activation.
30. 4WD! Warning Light This light monitors the 4-Wheel Drive (4WD)
system. The light will come on, for a bulb
4
UNDERSTANDING YOUR INSTRUMENT PANEL 201
Page 204 of 496
The EVIC consists of the following:
•System status
•Vehicle information warning message displays
•Personal Settings (Customer-Programmable Features)
•Compass heading
•Outside temperature display
•Trip computer functions
•Uconnect™ Phone displays (if equipped)
•Audio mode display
•Tire Pressure Monitor (TPM)
When the appropriate conditions exist, the EVIC displays
the following messages:
•Turn Signal On (with a continuous warning chime
after 1 mile (1.6 km) of distance travelled)
•Left Front Turn Signal Light Out (with a single chime)
•Left Rear Turn Signal Light Out (with a single chime)
•Right Front Turn Signal Light Out (with a single
chime)
Electronic Vehicle Information Center (EVIC)
4
UNDERSTANDING YOUR INSTRUMENT PANEL 203
Page 205 of 496
•Right Rear Turn Signal Light Out (with a single chime)
•RKE Battery Low (with a single chime)
•Personal Settings Not Available – Vehicle not in PARK
(automatic transmission) or vehicle is in motion
(manual transmission).
•Left/Right Front Door Ajar (one or more, with a single
chime if speed is above 1 mph/1 km/h)
•Left/Right Rear Door Ajar (one or more, with a single
chime if speed is above 1 mph/1 km/h)
•Door(s) Ajar (with a single chime if vehicle is in
motion)
•Gate Ajar (with a single chime)
•Headlamps or Park Lamps On
•Key In Ignition
•Check TPM System
Engine Oil Change Indicator System — If
Equipped
Oil Change Required
Your vehicle is equipped with an engine oil change
indicator system. The “Oil Change Required” message
will flash in the EVIC display for approximately five
seconds after a single chime has sounded, to indicate the
next scheduled oil change interval. The engine oil change
indicator system is duty-cycle based, which means the
engine oil change interval may fluctuate dependent upon
your personal driving style.
Unless reset, this message will continue to display each
time you turn the ignition switch to the ON/RUN
position. To turn off the message temporarily, press and
release the Trip Odometer button on the instrument
cluster. To reset the oil change indicator system (after
performing the scheduled maintenance) refer to the fol-
lowing procedure.
204 UNDERSTANDING YOUR INSTRUMENT PANEL
Page 210 of 496
and hold the EVIC button when in this display until
“ON” or “OFF” appears to make your selection.
Sound Horn with Lock
When ON is selected, a short horn sound will occur when
the RKE transmitter LOCK button is pressed. This feature
may be selected with or without the Flash Lights with
Lock feature. Press and hold the EVIC button when in
this display until “ON” or “OFF” appears to make your
selection.
Headlamp Off Delay
When this feature is selected the driver can choose to
have the headlights remain on for 0, 30, 60, or 90 seconds
when exiting the vehicle. Press and hold the EVIC button
when in this display until 0, 30, 60, or 90 appears to make
your selection.
Key Off Power Delay
When this feature is selected the power window
switches, radio, Uconnect™ Phone, power sunroof, andpower outlets will remain active for up to 10 minutes
after the ignition switch has been turned OFF. Opening a
vehicle door will cancel this feature. Press and hold the
EVIC button when in this display until “OFF”, “45 sec.”,
“5 min.”, or “10 min.” appears to make your selection.
Illuminated Approach
When this feature is selected the headlights will activate
and remain on for up to 90 seconds when the doors are
unlocked using the RKE transmitter. Press and hold the
EVIC button when in this display until “OFF”, “30 sec.”,
“60 sec.”, or “90 sec.” appears to make your selection.
Hill Start Assist (HSA) — If Equipped
When on is selected, the HSA system is active. Refer to
“Electronic Brake Control System” in “Starting And
Operating” for system function and operating informa-
tion. To make your selection, press and release the EVIC
button until “On” or “Off” appears.
4
UNDERSTANDING YOUR INSTRUMENT PANEL 209
Page 218 of 496
Program Type16-Digit Character
Display
Rhythm and Blues R & B
Religious Music Rel Musc
Religious Talk Rel Talk
Rock Rock
Soft Soft
Soft Rock Soft Rck
Soft Rhythm and Blues SoftR&B Sports Sports
Talk Talk
Top 40 Top 40
Weather Weather
By pressing the SEEK button when the Music Type icon
is displayed, the radio will be tuned to the next frequency station with the same selected Music Type name. The
Music Type function only operates when in the FM
mode.
If a preset button is activated while in the Music Type
(Program Type) mode, the Music Type mode will be
exited and the radio will tune to the preset station.
SETUP Button
Pressing the SETUP button allows you to select between
the following items:
NOTE:
Turn the TUNE/SCROLL control knob to scroll
through the entries. Push the AUDIO/SELECT button to
select an entry and make changes.
•DVD Enter - When the disc is in DVD Menu mode,
selecting DVD Enter will allow you to play the current
highlighted selection. Use the remote control to scroll
up and down the menu (if equipped).
4
UNDERSTANDING YOUR INSTRUMENT PANEL 217
Page 230 of 496
Clock Setting Procedure — RBZ Radio
To Manually Set the Clock
1. Turn on the radio.
2. Touch the screen where the time is displayed, the clock
setting menu will appear on the screen.
3. To move the hour forward, touch the screen where the
word “Hour” with the arrow pointing upward is dis-
played. To move the hour backward, touch the screen
where the word “Hour” with the arrow pointing down-
ward is displayed.
4. To move the minute forward, touch the screen where
the word “Min” with the arrow pointing upward is
displayed. To move the minute backward, touch the
screen where the word “Min” with the arrow pointing
downward is displayed.5. To save the new time setting, touch the screen where
the word “Save” is displayed.Changing Daylight Savings Time
When selected, this feature will display the time of day in
daylight savings time. Proceed as follows to change the
current setting:
1. Turn on the radio.
2. Touch the screen where the time is displayed. The
clock setting menu will appear on the screen.
3. When this feature is on, a check mark will appear in
the box next to the words “Daylight Savings.” Touch the
screen where the words “Daylight Savings” are dis-
played to change the current setting.
4
UNDERSTANDING YOUR INSTRUMENT PANEL 229