2010 HYUNDAI VERACRUZ set clock
[x] Cancel search: set clockPage 198 of 425
Features of your vehicle
116 4
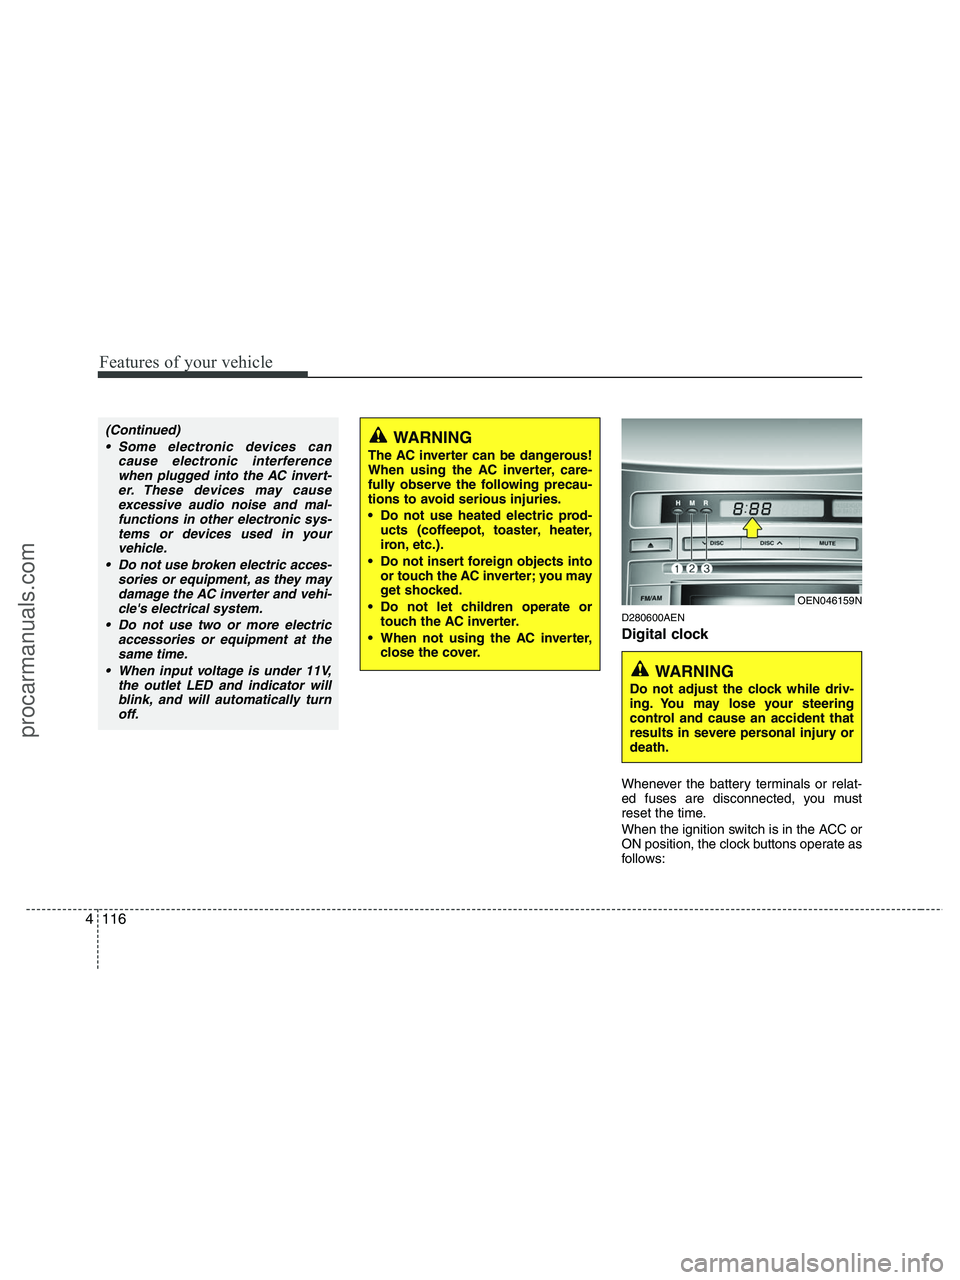
D280600AEN
Digital clock
Whenever the battery terminals or relat-
ed fuses are disconnected, you must
reset the time.
When the ignition switch is in the ACC or
ON position, the clock buttons operate as
follows:
WARNING
The AC inverter can be dangerous!
When using the AC inverter, care-
fully observe the following precau-
tions to avoid serious injuries.
Do not use heated electric prod-
ucts (coffeepot, toaster, heater,
iron, etc.).
Do not insert foreign objects into
or touch the AC inverter; you may
get shocked.
Do not let children operate or
touch the AC inverter.
When not using the AC inverter,
close the cover.
(Continued)
Some electronic devices can
cause electronic interference
when plugged into the AC invert-
er. These devices may cause
excessive audio noise and mal-
functions in other electronic sys-
tems or devices used in your
vehicle.
Do not use broken electric acces-
sories or equipment, as they may
damage the AC inverter and vehi-
cle's electrical system.
Do not use two or more electric
accessories or equipment at the
same time.
When input voltage is under 11V,
the outlet LED and indicator will
blink, and will automatically turn
off.
OEN046159N
WARNING
Do not adjust the clock while driv-
ing. You may lose your steering
control and cause an accident that
results in severe personal injury or
death.
procarmanuals.com
Page 199 of 425
4117
Features of your vehicle
D280601AUN
Hour (1)
Pressing the H button with your finger, a
pencil or similar object will advance the
time displayed by one hour.
D280602AUN
Minute (2)
Pressing the M button with your finger, a
pencil or similar object will advance the
time displayed by one minute.
D280603AUN
Reset (3)
To clear away minutes, press the R but-
ton with your finger, a pencil or similar
object. Then the clock will be set precise-
ly on the hour.
For example, if the R button is pressed
while the time is between 9:01 and 9:29,
the display will be reset to 9:00.
9:01 ~ 9:29 display changed to 9:00
9:30 ~ 9:59 display changed to 10:00
D280604AEN
Display conversion
To change the 12 hour format to the 24
hour format, press the R button until the
display blinks.
For example, if the R button is pressed
while the time is 10:15 p.m., the display
will be changed to 22:15.
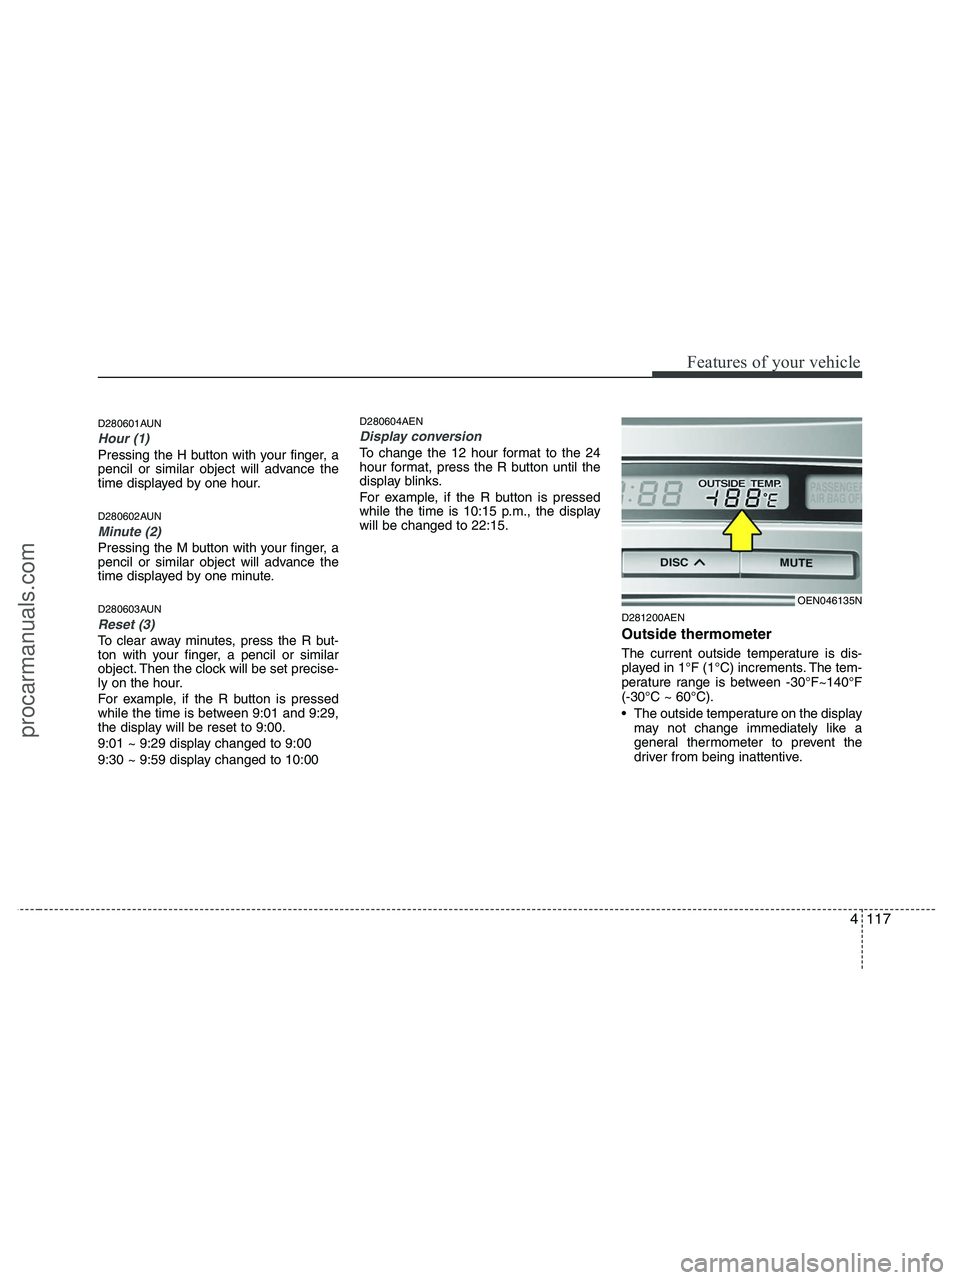
D281200AEN
Outside thermometer
The current outside temperature is dis-
played in 1°F (1°C) increments. The tem-
perature range is between -30°F~140°F
(-30°C ~ 60°C).
The outside temperature on the display
may not change immediately like a
general thermometer to prevent the
driver from being inattentive.
OEN046135N
procarmanuals.com
Page 211 of 425
4129
Features of your vehicle
1. Power ON/OFF Button &
Volume Control Knob
Turns the set on/off when the ignition
switch is on ACC or ON. If the button is
turned to the right, it increases the vol-
ume and left, it decreases the volume.
2. FM/AM Selection Button
Turns to FM or AM mode, and toggles in
the order of FM1
➟ FM2 ➟ AM ➟ FM1...
when the button is pressed each time.
3. Automatic Channel Selection
Button
] button is pressed,
it increases the band frequency to auto-
matically select a channel.
Stops at the previous frequency if no
channel is found.
] button is press-
ed, it reduces the band frequency to
automatically select a channel.
Stops at the previous frequency if no
channel is found.
4. Preset Button
Push [1]~[6] buttons less than 0.8 sec-
ond to play the channel saved in each
button. Push Preset button for 0.8 sec-
ond or longer to save current channel to
the respective button with a beep.
5. Manual Channel Selection
Knob & SETUP Button
Manual Channel Selection knob
Turn this control while listening to a radio
channel to manually adjust frequency.
Turn clockwise to increase frequency and
counterclockwise to reduce frequency.
SETUP Button
Press this button to turn to the XM
option, SCROLL and adjustment mode. If
no action is taken for 5 seconds after
pressing the button, it will return to the
play mode.(After entering SETUP mode,
move between items using the left, right
and PUSH functions of the [TUNE] but-
ton.)
The setup item changes from SCROLL
➟ XM...
Press this button to turn to the XM option,
SCROLL, SURROUND and adjustment
mode. If no action is taken for 5 seconds
after pressing the button, it will return to
the play mode.(After entering SETUP
mode, move between items using the left,
right and PUSH functions of the [TUNE]
button.)
The setup item changes from SCROLL
➟SURROUND ➟ XM...
Sound Quality Control Knob
Pressing the button changes the TONE
and POSITION mode. The mode select-
ed is shown on the display. After select-
ing each mode, rotate the Audio control
knob clockwise or counterclockwise.
BASS Control
To increase the BASS, rotate the knob
clockwise, while to decrease the BASS,
rotate the knob counterclockwise.
MIDDLE Control
To increase the MIDDLE, rotate the knob
clockwise, while to decrease the MID-
DLE, rotate the knob counterclockwise.
procarmanuals.com
Page 232 of 425
Features of your vehicle
150 4
1. XM Selection Button
Turns to XM Satellite Radio Mode. XM
mode toggles in order to XM1 ➟ XM2 ➟XM3 ➟ XM1... when the button is
pressed each time.
2. INFO Button
Displays the information of the current
channel in the order of Artist/Song title ➟Category/Channel name ➟ Current Play
Channel ➟ Artist/Song title ➟ Category/
Channel name... when the button is
pressed each time. If it can not display
the whole text information, rotate the
tune button to see the next page.
3. Automatic Channel Selection
Button
] button for less than
0.8 second to select previous channel.
] button for less than 0.8
second to select next channel.
Seek or Tune to XM channel
0 to display the Radio ID.
4. SCAN Button
Press to hear a brief sampling of all
channels.
To cancel the scan mode, press the but-
ton once again.
5. CATEGORY Search Button
Push [FLDR ] button to search previ-
ous category.
] button to search next
category. To listen to the displayed cat-
egory, press the TUNE/ENTER knob. To
scan channel in displayed category,
press the scan button.
To search channel in displayed category,
press seek buttons or turn the tune but-
ton clockwise/counterclockwise.(CATE-
GORY icon will be turned on in Category
mode)
6. Manual Channel Selection
Knob
While listening to XM broadcast, rotate
this control to the right or left to search
other channels while listening to current
channel. (Turn to the right to searchhigh-
er channels and left, lower channels.)
7. Preset Button
Push [1]~[6] buttons less than 0.8 sec-
ond to play the channel saved in each
button. Push Preset button for 0.8 sec-
ond or longer to save current channel to
the respective button with a beep.
8. MUTE Button
Press [MUTE] button to stop sound and
“Audio Mute” is displayed on the LCD.
procarmanuals.com
Page 331 of 425
615
What to do in an emergency
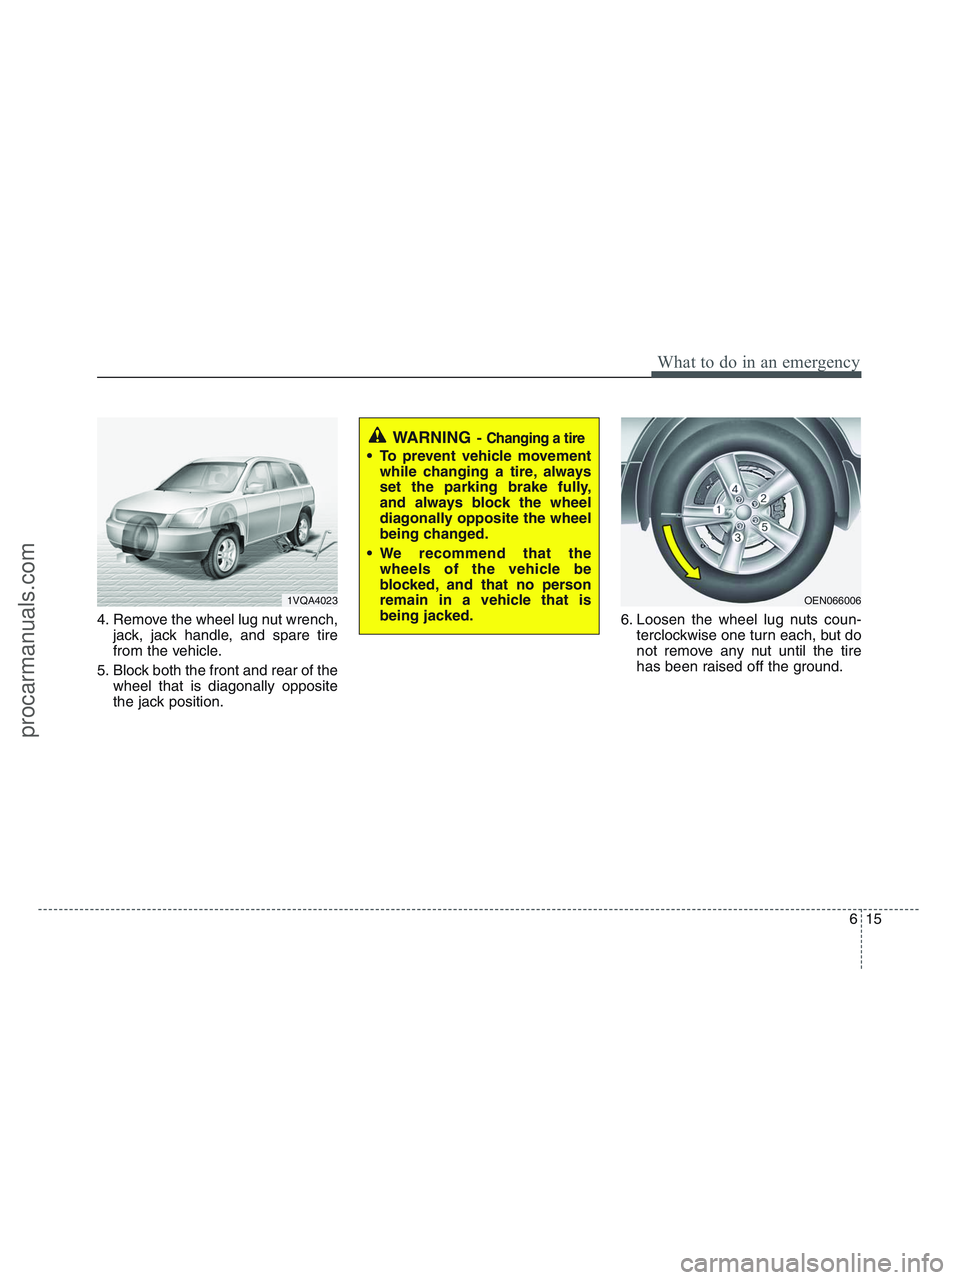
4. Remove the wheel lug nut wrench,
jack, jack handle, and spare tire
from the vehicle.
5. Block both the front and rear of the
wheel that is diagonally opposite
the jack position.6. Loosen the wheel lug nuts coun-
terclockwise one turn each, but do
not remove any nut until the tire
has been raised off the ground.
1VQA4023OEN066006
WARNING- Changing a tire
To prevent vehicle movement
while changing a tire, always
set the parking brake fully,
and always block the wheel
diagonally opposite the wheel
being changed.
We recommend that the
wheels of the vehicle be
blocked, and that no person
remain in a vehicle that is
being jacked.
procarmanuals.com
Page 338 of 425
What to do in an emergency
22 6
When towing your vehicle in an emer-
gency without wheel dollies :
1. Set the ignition switch in the ACC posi-
tion.
2. Place the transaxle shift lever in N
(Neutral).
3. Release the parking brake.
F080200AUN
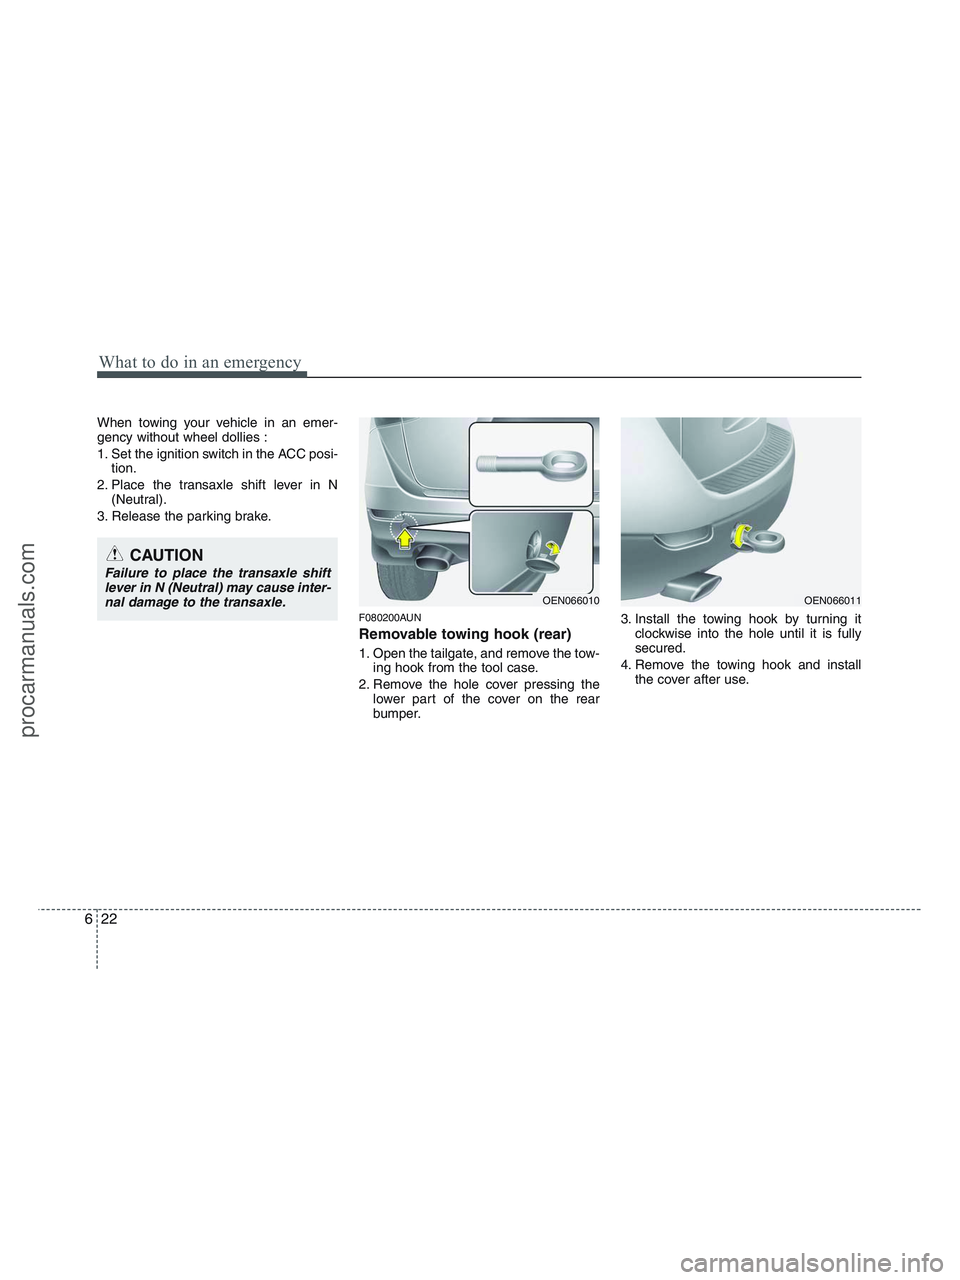
Removable towing hook (rear)
1. Open the tailgate, and remove the tow-
ing hook from the tool case.
2. Remove the hole cover pressing the
lower part of the cover on the rear
bumper.3. Install the towing hook by turning it
clockwise into the hole until it is fully
secured.
4. Remove the towing hook and install
the cover after use.
CAUTION
Failure to place the transaxle shift
lever in N (Neutral) may cause inter-
nal damage to the transaxle.
OEN066010OEN066011
procarmanuals.com
Page 370 of 425
729
Maintenance
G190400AEN
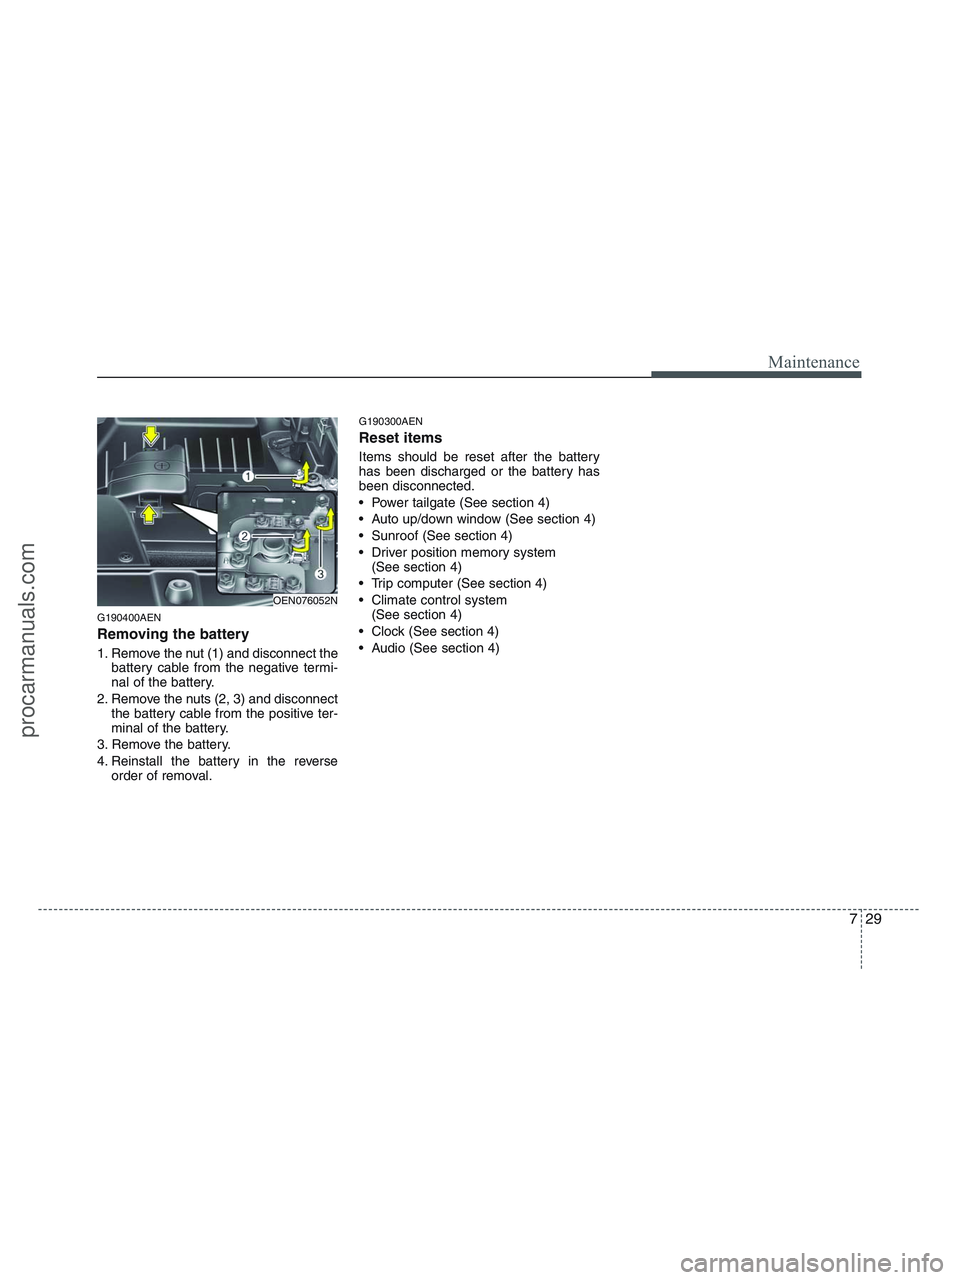
Removing the battery
1. Remove the nut (1) and disconnect the
battery cable from the negative termi-
nal of the battery.
2. Remove the nuts (2, 3) and disconnect
the battery cable from the positive ter-
minal of the battery.
3. Remove the battery.
4. Reinstall the battery in the reverse
order of removal.
G190300AEN
Reset items
Items should be reset after the battery
has been discharged or the battery has
been disconnected.
Power tailgate (See section 4)
Auto up/down window (See section 4)
Sunroof (See section 4)
Driver position memory system
(See section 4)
Trip computer (See section 4)
Climate control system
(See section 4)
Clock (See section 4)
Audio (See section 4)
OEN076052N
procarmanuals.com
Page 386 of 425
745
Maintenance
G210101AUN
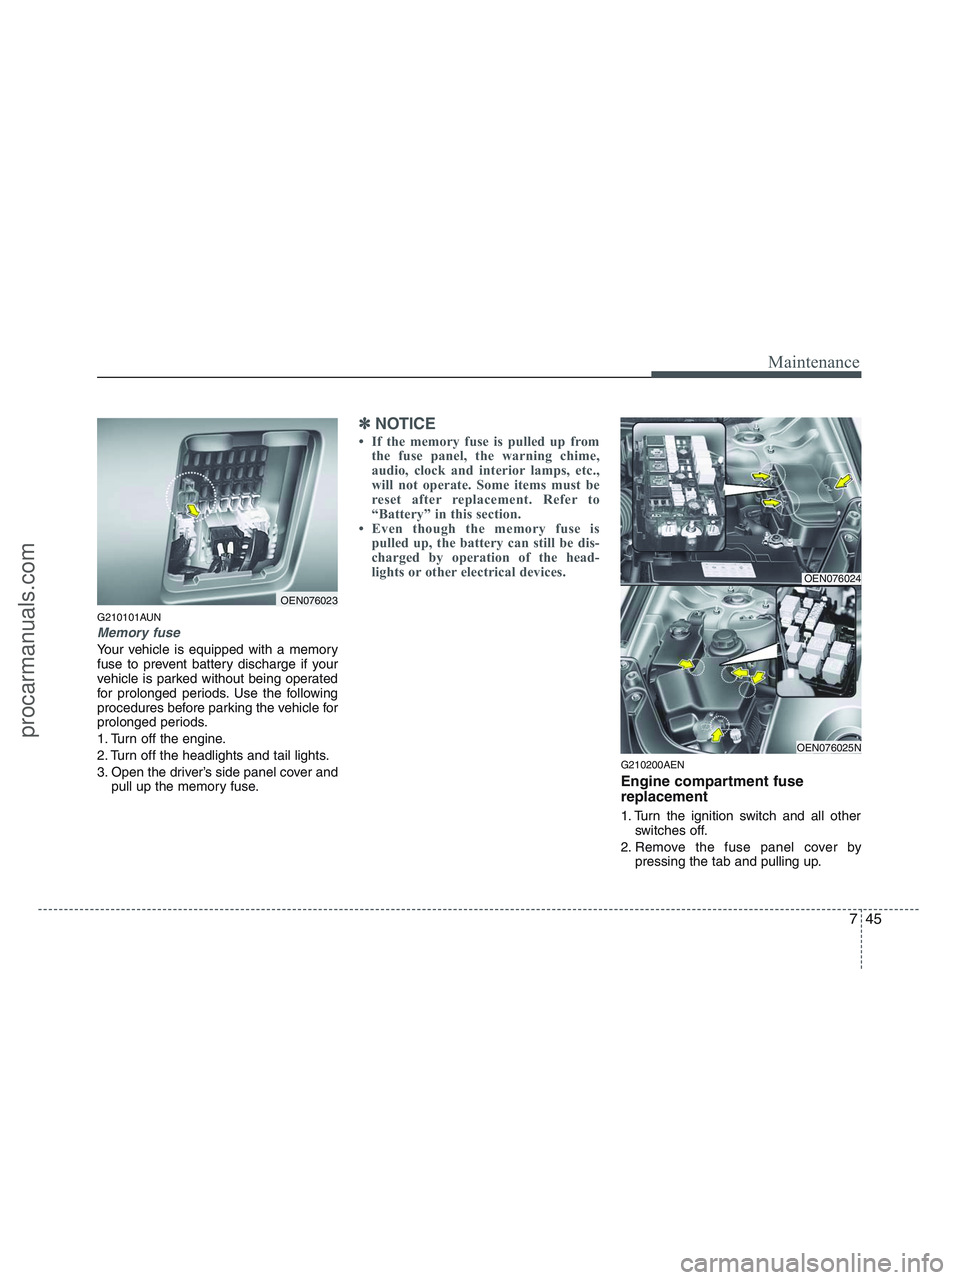
Memory fuse
Your vehicle is equipped with a memory
fuse to prevent battery discharge if your
vehicle is parked without being operated
for prolonged periods. Use the following
procedures before parking the vehicle for
prolonged periods.
1. Turn off the engine.
2. Turn off the headlights and tail lights.
3. Open the driver’s side panel cover and
pull up the memory fuse.
✽ ✽
NOTICE
• If the memory fuse is pulled up from
the fuse panel, the warning chime,
audio, clock and interior lamps, etc.,
will not operate. Some items must be
reset after replacement. Refer to
“Battery” in this section.
• Even though the memory fuse is
pulled up, the battery can still be dis-
charged by operation of the head-
lights or other electrical devices.
G210200AEN
Engine compartment fuse
replacement
1. Turn the ignition switch and all other
switches off.
2. Remove the fuse panel cover by
pressing the tab and pulling up.
OEN076023
OEN076024
OEN076025N
procarmanuals.com