2010 HYUNDAI VERACRUZ change time
[x] Cancel search: change timePage 199 of 425
4117
Features of your vehicle
D280601AUN
Hour (1)
Pressing the H button with your finger, a
pencil or similar object will advance the
time displayed by one hour.
D280602AUN
Minute (2)
Pressing the M button with your finger, a
pencil or similar object will advance the
time displayed by one minute.
D280603AUN
Reset (3)
To clear away minutes, press the R but-
ton with your finger, a pencil or similar
object. Then the clock will be set precise-
ly on the hour.
For example, if the R button is pressed
while the time is between 9:01 and 9:29,
the display will be reset to 9:00.
9:01 ~ 9:29 display changed to 9:00
9:30 ~ 9:59 display changed to 10:00
D280604AEN
Display conversion
To change the 12 hour format to the 24
hour format, press the R button until the
display blinks.
For example, if the R button is pressed
while the time is 10:15 p.m., the display
will be changed to 22:15.
D281200AEN
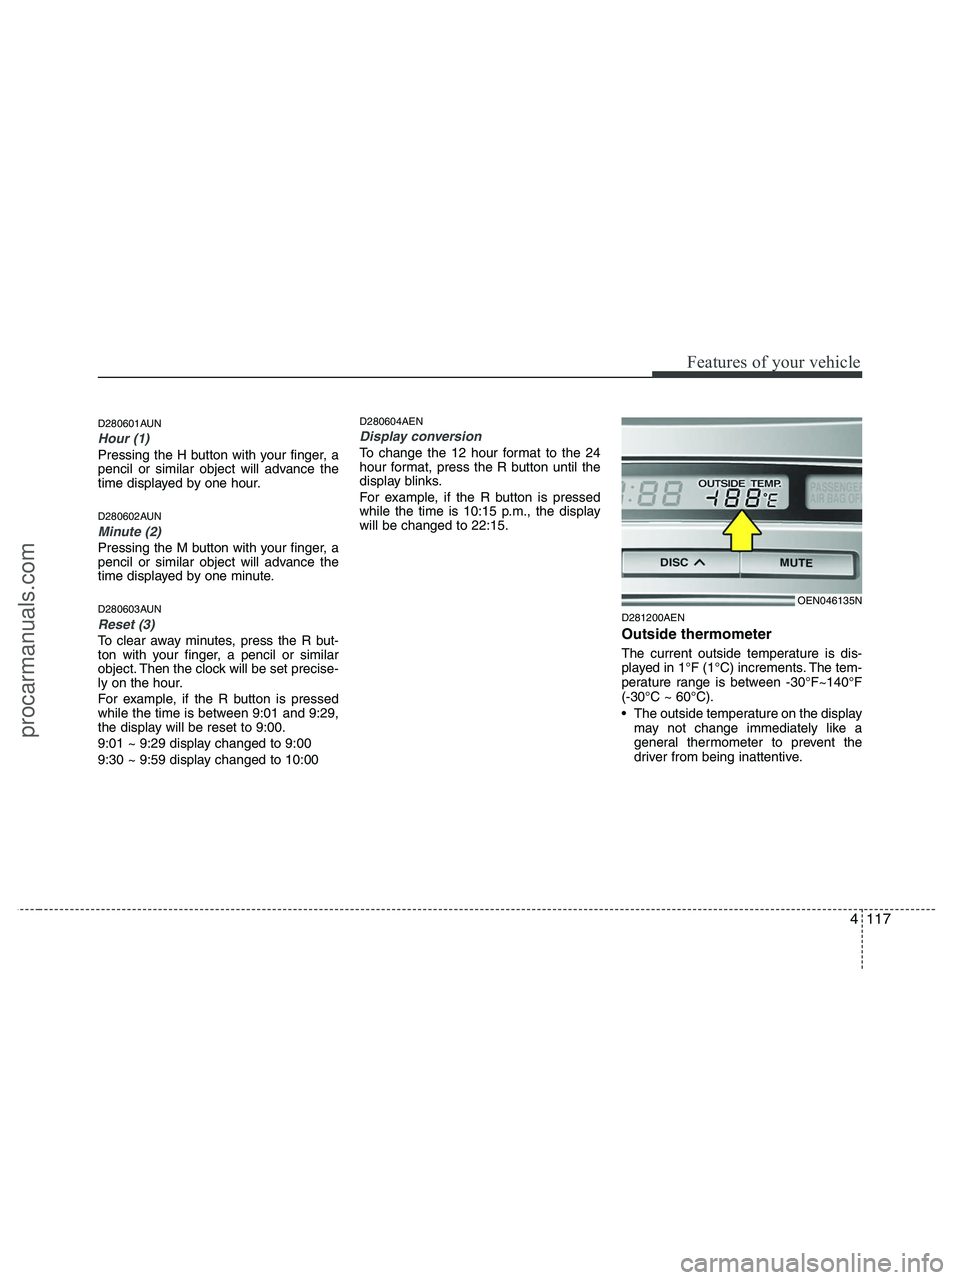
Outside thermometer
The current outside temperature is dis-
played in 1°F (1°C) increments. The tem-
perature range is between -30°F~140°F
(-30°C ~ 60°C).
The outside temperature on the display
may not change immediately like a
general thermometer to prevent the
driver from being inattentive.
OEN046135N
procarmanuals.com
Page 211 of 425
4129
Features of your vehicle
1. Power ON/OFF Button &
Volume Control Knob
Turns the set on/off when the ignition
switch is on ACC or ON. If the button is
turned to the right, it increases the vol-
ume and left, it decreases the volume.
2. FM/AM Selection Button
Turns to FM or AM mode, and toggles in
the order of FM1
➟ FM2 ➟ AM ➟ FM1...
when the button is pressed each time.
3. Automatic Channel Selection
Button
] button is pressed,
it increases the band frequency to auto-
matically select a channel.
Stops at the previous frequency if no
channel is found.
] button is press-
ed, it reduces the band frequency to
automatically select a channel.
Stops at the previous frequency if no
channel is found.
4. Preset Button
Push [1]~[6] buttons less than 0.8 sec-
ond to play the channel saved in each
button. Push Preset button for 0.8 sec-
ond or longer to save current channel to
the respective button with a beep.
5. Manual Channel Selection
Knob & SETUP Button
Manual Channel Selection knob
Turn this control while listening to a radio
channel to manually adjust frequency.
Turn clockwise to increase frequency and
counterclockwise to reduce frequency.
SETUP Button
Press this button to turn to the XM
option, SCROLL and adjustment mode. If
no action is taken for 5 seconds after
pressing the button, it will return to the
play mode.(After entering SETUP mode,
move between items using the left, right
and PUSH functions of the [TUNE] but-
ton.)
The setup item changes from SCROLL
➟ XM...
Press this button to turn to the XM option,
SCROLL, SURROUND and adjustment
mode. If no action is taken for 5 seconds
after pressing the button, it will return to
the play mode.(After entering SETUP
mode, move between items using the left,
right and PUSH functions of the [TUNE]
button.)
The setup item changes from SCROLL
➟SURROUND ➟ XM...
Sound Quality Control Knob
Pressing the button changes the TONE
and POSITION mode. The mode select-
ed is shown on the display. After select-
ing each mode, rotate the Audio control
knob clockwise or counterclockwise.
BASS Control
To increase the BASS, rotate the knob
clockwise, while to decrease the BASS,
rotate the knob counterclockwise.
MIDDLE Control
To increase the MIDDLE, rotate the knob
clockwise, while to decrease the MID-
DLE, rotate the knob counterclockwise.
procarmanuals.com
Page 217 of 425
4135
Features of your vehicle
7. REPEAT Button
Press this button for less than 0.8 second
to activate ‘RPT’ mode and more than 0.8
second to activate ‘FLD RPT’ mode.
Only a track(file) is repeatedly
played back.
Only files
in a folder are repeatedly played back.
8. CD Indicator(CDP Only)
When the ignition switch is in ACC or ON
and if the CD is loaded, this indicator is
lighted. If the CD is ejected the light is
turned off.
9. SCAN Play Button
Plays first 10 seconds of each song in
the DISC. To cancel the mode, press the
button once again.
10. INFO Button
Displays the information of the current
CD TRACK(FILE) as below when the
button is pressed each time.
DISC TITLE
➟ DISC ARTIST ➟TRACK TITLE ➟ TRACK ARTIST ➟TOTAL TRACK... FILE NAME
➟ TITLE ➟ARTIST ➟ ALBUME ➟ FOLDER NAME➟TOTAL FILE... (not displayed if the
information is not available on the
DISC.)
11. SEARCH Knob & ENTER
Button
Turn this button clockwise to display the
songs next to the currently played song.
Turn the button counterclockwise to dis-
play the songs before the currently
played song. Press the button to skip and
play the selected song.
12. FOLDER Moving Button
], [PTY ] button child
folder of the current folder and displays
the first song in the folder. Press
TUNE/ENTER knob to move to the fold-
er displayed. It will play the first song in
the folder.
], [FLDR ] button par-
ent folder and displays the first song in
the folder.
Press TUNE/ENTER knob to move to
the folder displayed.
13. DISC Selection Button
] Change button
Changes disc to the previous disc.
] Change button
Changes disc to the next disc.
14. MUTE Button
Press [MUTE] button to stop sound and
“Audio Mute” is displayed on the LCD.
15. CD LOAD Button
Push [LOAD] button to load CDs to avail-
able CDC deck (from 1~6).
Push [LOAD] button for more than 2 sec-
onds to load into all available decks.
The last CD will play. 10 seconds idle sta-
tus will disable loading process.
procarmanuals.com
Page 235 of 425
4153
Features of your vehicle
D320000AEN
Important Safety Information
It is always important to operate your
vehicle in a safe manner and to avoid dis-
traction while driving. This manual pro-
vides information that will help you safely
operate your Rear Seat Entertainment
System (RSE). Please read it completely
before using the system.
This device complies with part 15 of
the FCC rules.
Operation is subject to the following two
conditions:
1. This device may not cause harmful
interference, and
2. This device must accept any interfer-
ence received, including interference
that may cause undesired operation.
Welcome
The Rear Seat Entertainment System is
a compact, built-in, easy-to-use enter-
tainment system designed to provide
family fun while you are on the road.
Enjoy great quality sound from the vehi-
cle speakers, or have a private, quiet lis-
tening with the wireless headphones.
The overhead display unit is mounted to
the ceiling in the rear passenger area of
the vehicle, allowing rear-seat passen-
gers to play DVD movies, video CDs or
music CDs. Users may also plug in a
game platform or VHS player into an aux-
iliary input to show the programs through
the RSE display. The RSE can also
access to the vehicle's front radio pro-
grams.
System Overview
Connections / Setup
Your Rear Seat Entertainment system
will play DVD movies, video CDs, music
CDs or music MP3 discs and Mix CD
(Regarding Mix CD, only the CD track
can be played by system.), and is
designed to make your time on the road
more enjoyable. Please follow these
instructions carefully to get the most out
of your RSE.
REAR SEAT ENTERTAINMENT SYSTEM (RSE) (IF EQUIPPED)
CAUTION
Avoid having food or drinks near,
in or on the RSE, the wireless
headphones or the remote con-
troller.
Direct sunlight may interfere with
the headphone's operation and
performance.
Normal RSE operation cannot be
guaranteed with unofficially
duplicated discs.
(Continued)
WARNING
Changes or modifications not
expressly approved by the party
responsible for compliance could
void the user's authority to operate
the equipment.
procarmanuals.com
Page 244 of 425
Features of your vehicle
162 4
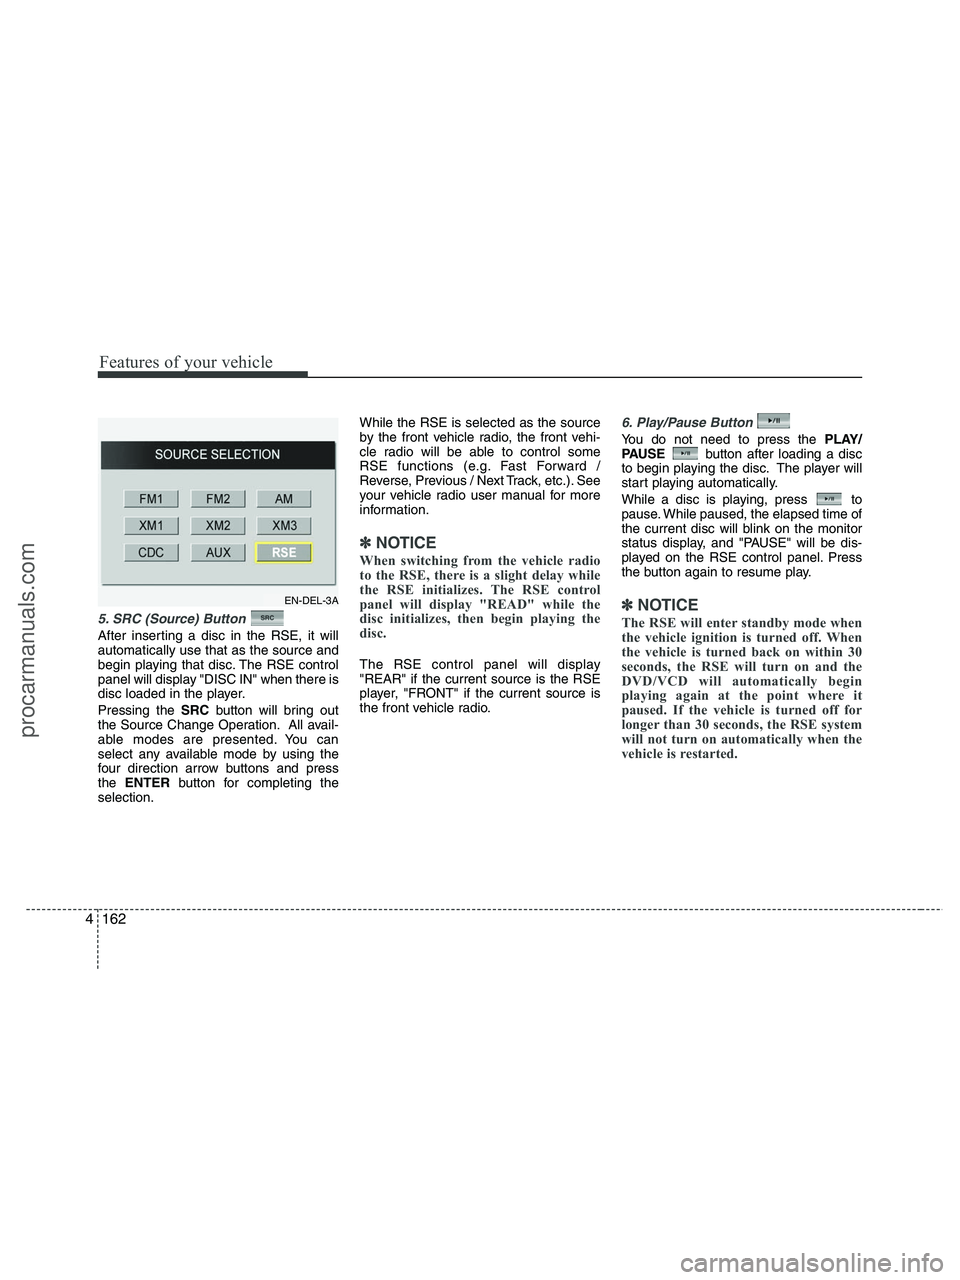
5. SRC (Source) Button
After inserting a disc in the RSE, it will
automatically use that as the source and
begin playing that disc. The RSE control
panel will display "DISC IN" when there is
disc loaded in the player.
Pressing the SRCbutton will bring out
the Source Change Operation. All avail-
able modes are presented. You can
select any available mode by using the
four direction arrow buttons and press
the ENTERbutton for completing the
selection.While the RSE is selected as the source
by the front vehicle radio, the front vehi-
cle radio will be able to control some
RSE functions (e.g. Fast Forward /
Reverse, Previous / Next Track, etc.). See
your vehicle radio user manual for more
information.
✽ ✽
NOTICE
When switching from the vehicle radio
to the RSE, there is a slight delay while
the RSE initializes. The RSE control
panel will display "READ" while the
disc initializes, then begin playing the
disc.
The RSE control panel will display
"REAR" if the current source is the RSE
player, "FRONT" if the current source is
the front vehicle radio.
6. Play/Pause Button
You do not need to press the PLAY/
PAUSEbutton after loading a disc
to begin playing the disc. The player will
start playing automatically.
While a disc is playing, press to
pause. While paused, the elapsed time of
the current disc will blink on the monitor
status display, and "PAUSE" will be dis-
played on the RSE control panel. Press
the button again to resume play.
✽ ✽
NOTICE
The RSE will enter standby mode when
the vehicle ignition is turned off. When
the vehicle is turned back on within 30
seconds, the RSE will turn on and the
DVD/VCD will automatically begin
playing again at the point where it
paused. If the vehicle is turned off for
longer than 30 seconds, the RSE system
will not turn on automatically when the
vehicle is restarted.
EN-DEL-3A
procarmanuals.com
Page 258 of 425
Features of your vehicle
176 4
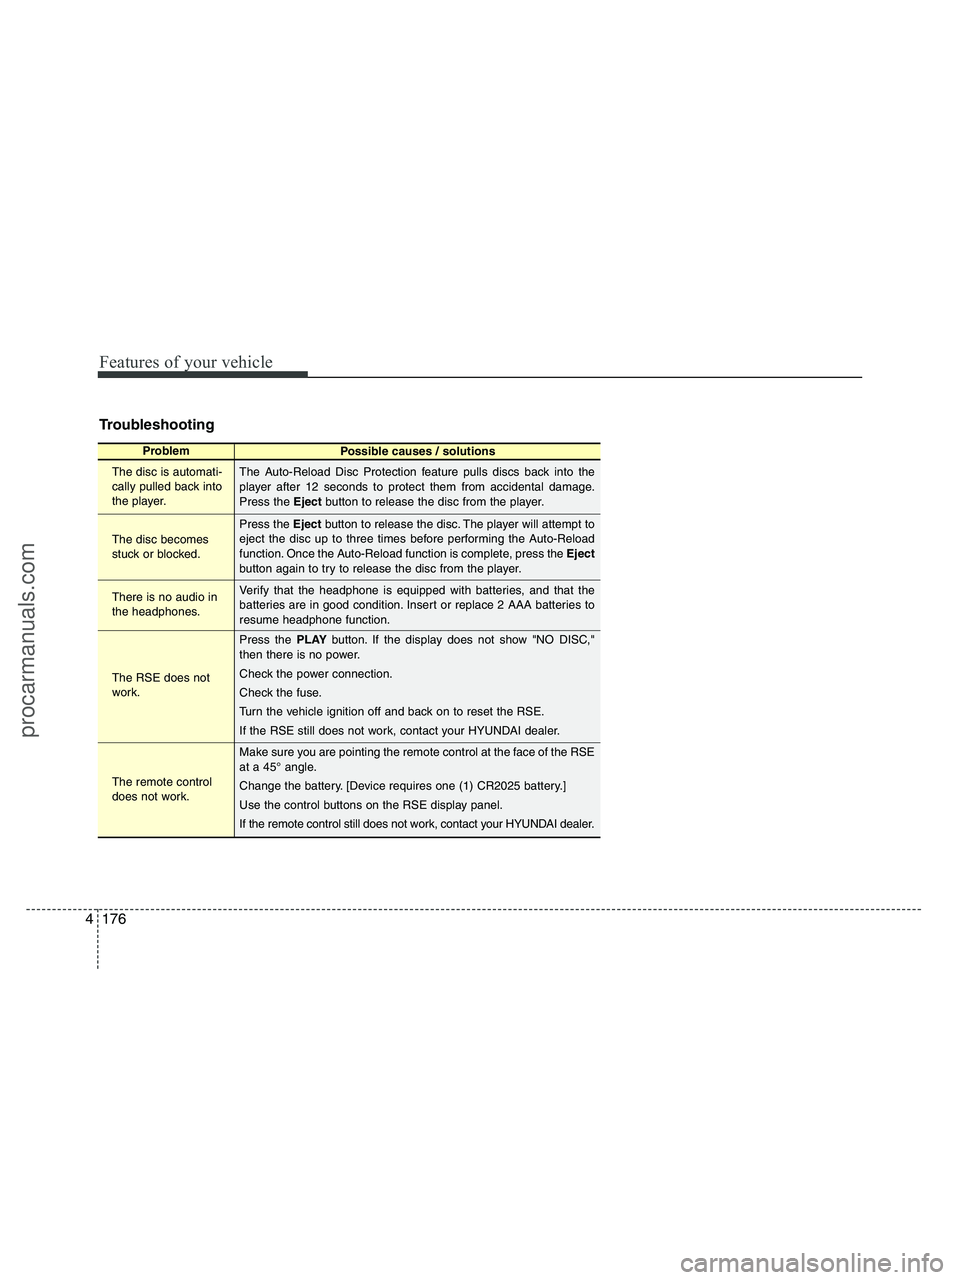
Troubleshooting
Problem
Possible causes / solutions
The disc is automati-
cally pulled back into
the player.
The disc becomes
stuck or blocked.
There is no audio in
the headphones.
The RSE does not
work.
The remote control
does not work.The Auto-Reload Disc Protection feature pulls discs back into the
player after 12 seconds to protect them from accidental damage.
Press the Ejectbutton to release the disc from the player.
Press the Ejectbutton to release the disc. The player will attempt to
eject the disc up to three times before performing the Auto-Reload
function. Once the Auto-Reload function is complete, press the Eject
button again to try to release the disc from the player.
Verify that the headphone is equipped with batteries, and that the
batteries are in good condition. Insert or replace 2 AAA batteries to
resume headphone function.
Press the PLAYbutton. If the display does not show "NO DISC,"
then there is no power.
Check the power connection.
Check the fuse.
Turn the vehicle ignition off and back on to reset the RSE.
If the RSE still does not work, contact your HYUNDAI dealer.
Make sure you are pointing the remote control at the face of the RSE
at a 45° angle.
Change the battery. [Device requires one (1) CR2025 battery.]
Use the control buttons on the RSE display panel.
If the remote control still does not work, contact your HYUNDAI dealer.
procarmanuals.com
Page 260 of 425
Driving your vehicle
2 5
E010000AEN-EU
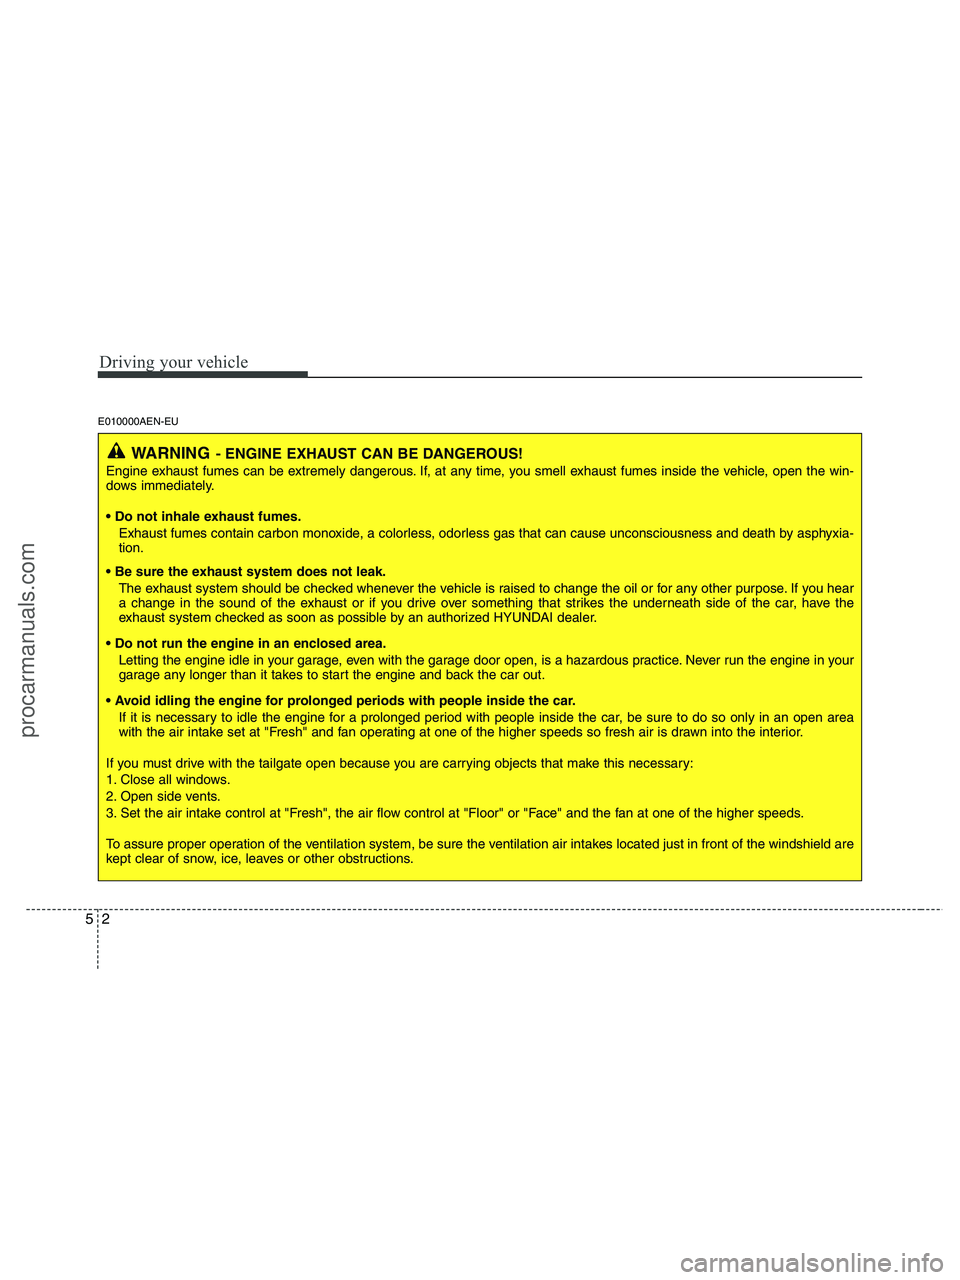
WARNING- ENGINE EXHAUST CAN BE DANGEROUS!
Engine exhaust fumes can be extremely dangerous. If, at any time, you smell exhaust fumes inside the vehicle, open the win-
dows immediately.
• Do not inhale exhaust fumes.
Exhaust fumes contain carbon monoxide, a colorless, odorless gas that can cause unconsciousness and death by asphyxia-
tion.
The exhaust system should be checked whenever the vehicle is raised to change the oil or for any other purpose. If you hear
a change in the sound of the exhaust or if you drive over something that strikes the underneath side of the car, have the
exhaust system checked as soon as possible by an authorized HYUNDAI dealer.
Letting the engine idle in your garage, even with the garage door open, is a hazardous practice. Never run the engine in your
garage any longer than it takes to start the engine and back the car out.
If it is necessary to idle the engine for a prolonged period with people inside the car, be sure to do so only in an open area
with the air intake set at "Fresh" and fan operating at one of the higher speeds so fresh air is drawn into the interior.
If you must drive with the tailgate open because you are carrying objects that make this necessary:
1. Close all windows.
2. Open side vents.
3. Set the air intake control at "Fresh", the air flow control at "Floor" or "Face" and the fan at one of the higher speeds.
To assure proper operation of the ventilation system, be sure the ventilation air intakes located just in front of the windshield are
kept clear of snow, ice, leaves or other obstructions.
procarmanuals.com
Page 275 of 425
517
Driving your vehicle
E170300AEN-EU
For safe all wheel drive operation
Do not try to drive in deep standing
water or mud since such conditions
can stall your engine and clog your
exhaust pipes. Do not drive down
steep hills since it requires extreme
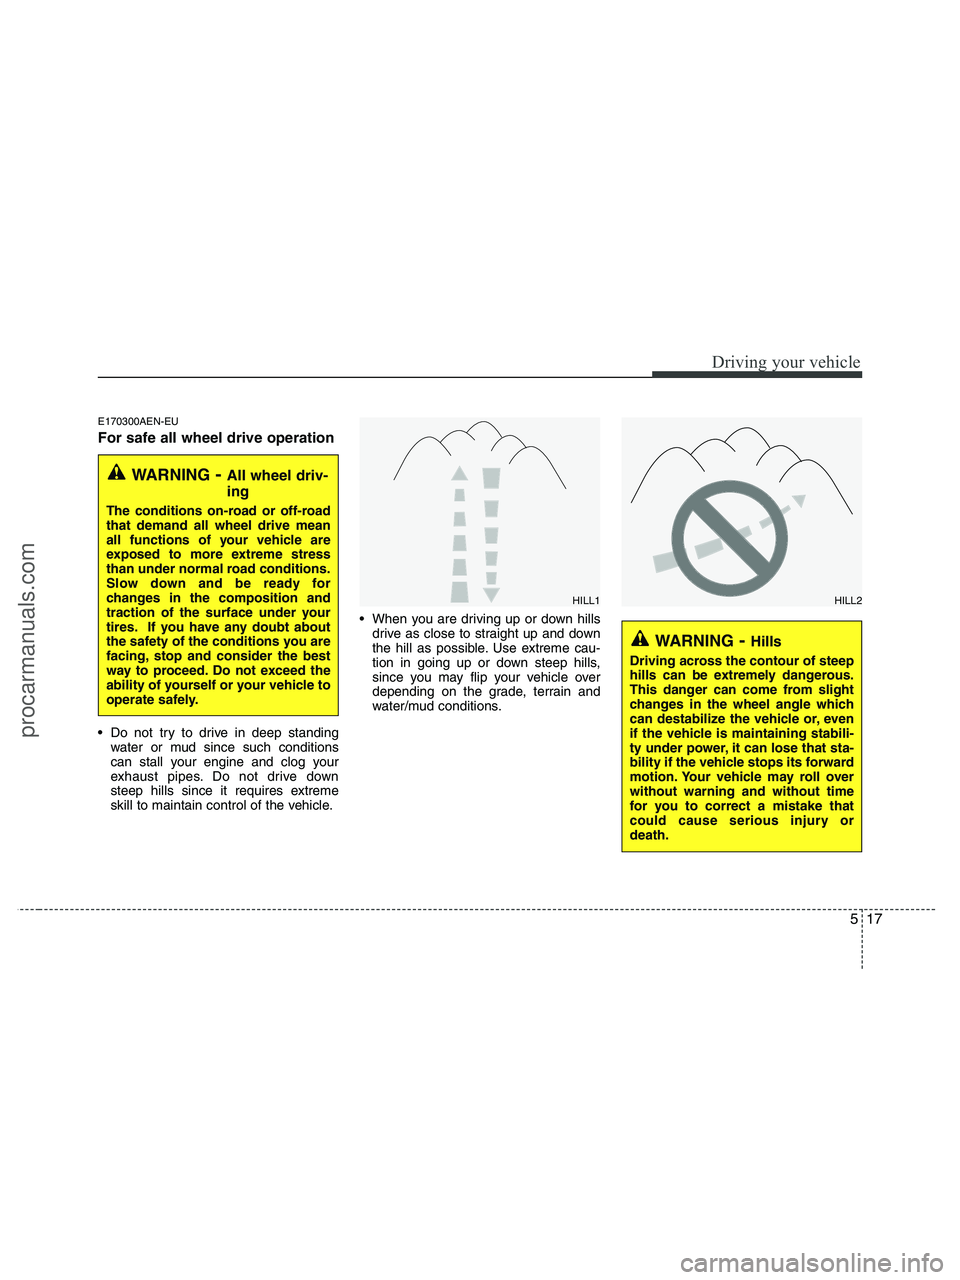
skill to maintain control of the vehicle. When you are driving up or down hills
drive as close to straight up and down
the hill as possible. Use extreme cau-
tion in going up or down steep hills,
since you may flip your vehicle over
depending on the grade, terrain and
water/mud conditions.
WARNING- All wheel driv-
ing
The conditions on-road or off-road
that demand all wheel drive mean
all functions of your vehicle are
exposed to more extreme stress
than under normal road conditions.
Slow down and be ready for
changes in the composition and
traction of the surface under your
tires. If you have any doubt about
the safety of the conditions you are
facing, stop and consider the best
way to proceed. Do not exceed the
ability of yourself or your vehicle to
operate safely.
WARNING- Hills
Driving across the contour of steep
hills can be extremely dangerous.
This danger can come from slight
changes in the wheel angle which
can destabilize the vehicle or, even
if the vehicle is maintaining stabili-
ty under power, it can lose that sta-
bility if the vehicle stops its forward
motion. Your vehicle may roll over
without warning and without time
for you to correct a mistake that
could cause serious injury or
death.
HILL1HILL2
procarmanuals.com