2010 HYUNDAI VERACRUZ lock
[x] Cancel search: lockPage 212 of 425
Features of your vehicle
130 4
TREBLE Control
To increase the TREBLE, rotate the knob
clockwise, while to decrease the TRE-
BLE, rotate the knob counterclockwise.
FADER Control
Turn the control knob clockwise to empha-
size rear speaker sound(front speaker
sound will be attenuated). When the con-
trol knob is turned counterclockwise, front
speaker sound will be emphasized(rear
speaker sound will be attenuated).
BALANCE Control
Rotate the knob clockwise to emphasize
right speaker sound(left speaker sound
will be attenuated). When the control
knob is turned counterclockwise, left
speaker sound will be emphasized(right
speaker sound will be attenuated).6. SCAN Button
If this button is pressed, the frequencies
will become increased and receive the
corresponding broadcasts. This function
will play the frequencies for 5 seconds
(XM MODE:10 seconds) each and find
other broadcasts as the frequency
increases. Press the button again when
desiring to continue listening to the cur-
rently playing broadcast.
7. MUTE Button
Press [MUTE] button to stop sound and
“Audio Mute” is displayed on the LCD.
procarmanuals.com
Page 217 of 425
4135
Features of your vehicle
7. REPEAT Button
Press this button for less than 0.8 second
to activate ‘RPT’ mode and more than 0.8
second to activate ‘FLD RPT’ mode.
Only a track(file) is repeatedly
played back.
Only files
in a folder are repeatedly played back.
8. CD Indicator(CDP Only)
When the ignition switch is in ACC or ON
and if the CD is loaded, this indicator is
lighted. If the CD is ejected the light is
turned off.
9. SCAN Play Button
Plays first 10 seconds of each song in
the DISC. To cancel the mode, press the
button once again.
10. INFO Button
Displays the information of the current
CD TRACK(FILE) as below when the
button is pressed each time.
DISC TITLE
➟ DISC ARTIST ➟TRACK TITLE ➟ TRACK ARTIST ➟TOTAL TRACK... FILE NAME
➟ TITLE ➟ARTIST ➟ ALBUME ➟ FOLDER NAME➟TOTAL FILE... (not displayed if the
information is not available on the
DISC.)
11. SEARCH Knob & ENTER
Button
Turn this button clockwise to display the
songs next to the currently played song.
Turn the button counterclockwise to dis-
play the songs before the currently
played song. Press the button to skip and
play the selected song.
12. FOLDER Moving Button
], [PTY ] button child
folder of the current folder and displays
the first song in the folder. Press
TUNE/ENTER knob to move to the fold-
er displayed. It will play the first song in
the folder.
], [FLDR ] button par-
ent folder and displays the first song in
the folder.
Press TUNE/ENTER knob to move to
the folder displayed.
13. DISC Selection Button
] Change button
Changes disc to the previous disc.
] Change button
Changes disc to the next disc.
14. MUTE Button
Press [MUTE] button to stop sound and
“Audio Mute” is displayed on the LCD.
15. CD LOAD Button
Push [LOAD] button to load CDs to avail-
able CDC deck (from 1~6).
Push [LOAD] button for more than 2 sec-
onds to load into all available decks.
The last CD will play. 10 seconds idle sta-
tus will disable loading process.
procarmanuals.com
Page 223 of 425
4141
Features of your vehicle
1. INFO Selection Button
Displays the information of the file cur-
rently played in the order of FILE NAME
➟ TITLE ➟ ARTIST ➟ ALBUM ➟ FOLD-
ER ➟ TOTAL FILE ➟ NORMAL DISPLAY➟ FILE NAME ➟... (Displays no informa-
tion if the file has no song information.)
2. TRACK Moving Button
] button for less
than 0.8 second to play from the begin-
ning of the song currently played. Press
the button for less than 0.8 second and
press it again within 1 seconds to move
and play the previous track.
] button for less
than 0.8 second to move to the next-
track.
3. RANDOM Playback Button
Press this button for less than 0.8 second
to activate 'RDM' mode and more than
0.8 second to activate 'ALL RDM' mode.
Only files in a folder are played
back in a random sequence.
All files in a USB memory
are played back in the random
sequence.
4. REPEAT Button
Press this button for less than 0.8 second
to activate 'RPT' mode and more than
0.8 second to activate 'FLD RPT' mode.
Only a file is repeatedly played
back.
Only files in a folder are
repeatedly played back.
5. USB Selection Button
If USB is connected, it switches to the
USB mode from the other mode to play
the song files stored in the USB.
If no CD and auxiliary device is connect-
ed, it displays "No Media" for 3 seconds
and returns to the previous mode.
6. FOLDER Moving Button
], [PTY ] button sub
folder of the current folder and displays
the first song in the folder.
Press TUNE/ENTER knob to move to
the folder displayed. It will play the first
song in the folder.
], [FLDR ] button main
folder and displays the first song in the
folder.
Press TUNE/ENTER knob to move to
the folder displayed.
7. SEARCH Knob & ENTER
Button
Turn this button clockwise to display the
songs next to the currently played song.
Turn the button counterclockwise to dis-
play the songs before the currently
played song.
Press the button to skip and play the
selected song.
8. SCAN Selection Button
Plays 10 seconds of each song in the
USB device.
Press the button once again to cancel
scanning.
9. Fast Search Button
Push [FF] button for 0.8 second or longer
to initiate high speed sound search of
current song.
Push [REW] button for 0.8 second or
longer to initiate reverse direction high
speed sound search of current song.
10. MUTE Button
Press [MUTE] to stop sound and “Audio
Mute” is displayed on the LCD.
procarmanuals.com
Page 227 of 425
4145
Features of your vehicle
Using an iPod when the exclusive cable is
connected to the multiple terminal inside
the consol on the right hand side of the
driver's seat.
When the iPod is connected, the 'iPod'
icon will be displayed on the top left cor-
ner of the display screen.
1. INFO Selection Button
Displays the information of the file cur-
rently played in the order of TITLE ➟ARTIST ➟ ALBUM ➟ NORMAL DISPLAY➟ TITLE ➟... (Displays no information if
the file has no song information.)
2. TRACK Moving Button
] button for less
than 0.8 second to play from the begin-
ning of the song currently played. Press
the button for less than 0.8 second and
press it again within 1 seconds to move
and play the previous track.
] button for less
than 0.8 second to move to the next
track.
3. RANDOM Playback Button
Press the button for less than 0.8 second
to activate or deactivate the random play-
back of the songs within the current cat-
egory. Press the button for longer than
0.8 second to randomly play all songs in
the entire album of the iPod.
Press the button once again to cancel
the mode.
4. REPEAT Button
Repeats the song currently played.
5. iPod Selection Button
If iPod is connected, it switches to the
iPod mode from the CD mode to play the
song files stored in the iPod. If no CD and
auxiliary device is connected, it displays
"No Media" for 3 seconds and returns to
the previous mode.
6. CATEGORY Selection Button
Moves to the upper category from cur-
rentlyplayed category of the iPod.
To move to the category displayed, press
SEARCH/ENTER Button. You will be able
to search through the lower category of
the selected category.
The order of iPod's category is SONG,
ALBUMS, ARTISTS, GENRES, and iPod.
7. SEARCH Knob & ENTER
Button
When you turn the button clockwise, it
will display the songs(category) next to
the song currently played(category in the
same level).
Also, when you turn the button counter-
clockwise, it will display the songs(cate-
gory) before the song currently played
(category in the same level).
If you want to listen to the song displayed
in the song category, press the button,
then it will skip to the selected song and
play.
8. Fast Search Button
longer to initiate high speed sound
search of current song.
longer to initiate reverse direction high
speed sound search of current song.
9. MUTE Button
Press [MUTE] button to stop sound and
“Audio Mute” is displayed on the LCD.
procarmanuals.com
Page 232 of 425
Features of your vehicle
150 4
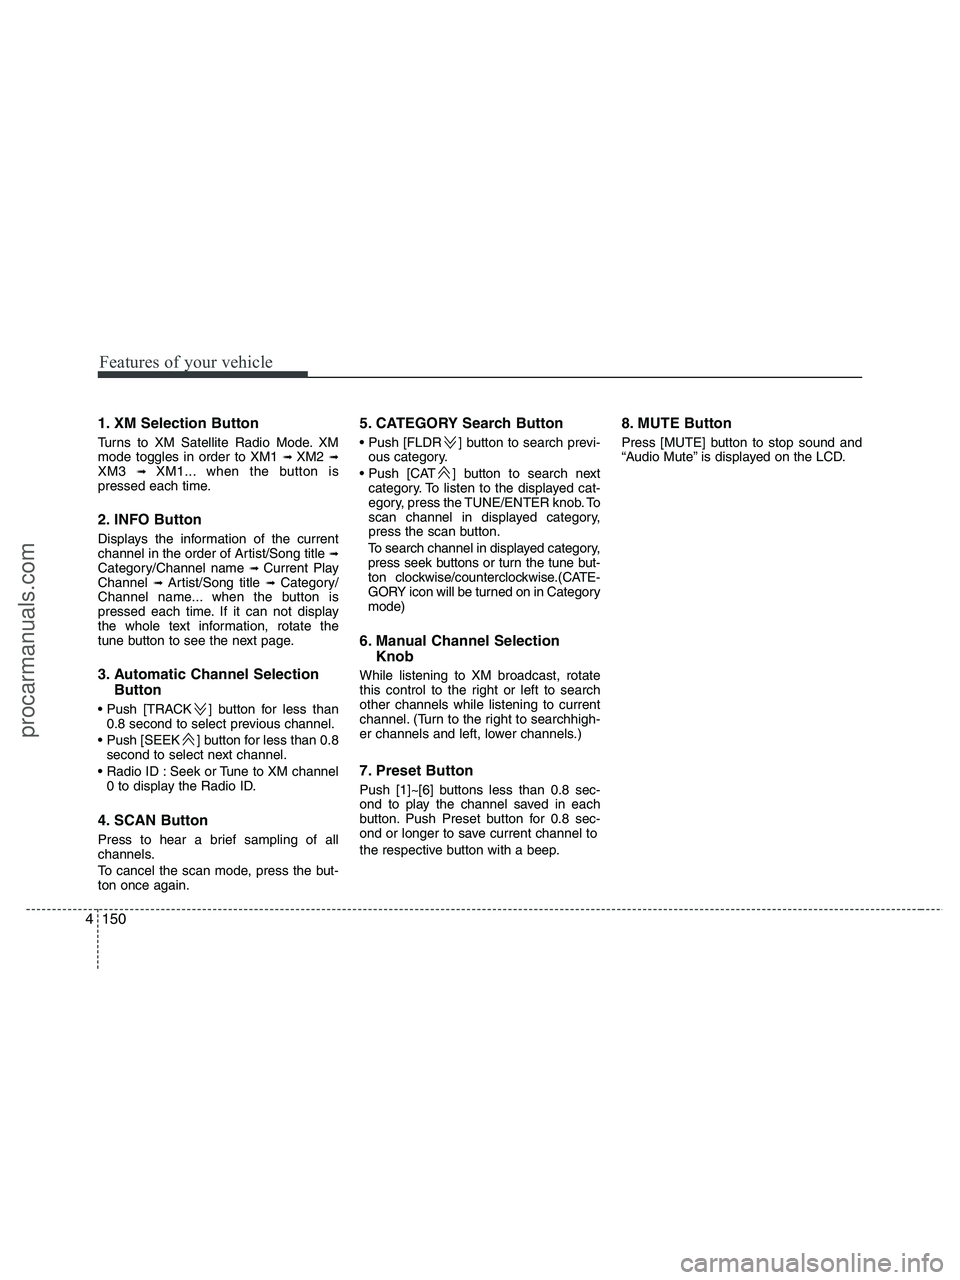
1. XM Selection Button
Turns to XM Satellite Radio Mode. XM
mode toggles in order to XM1 ➟ XM2 ➟XM3 ➟ XM1... when the button is
pressed each time.
2. INFO Button
Displays the information of the current
channel in the order of Artist/Song title ➟Category/Channel name ➟ Current Play
Channel ➟ Artist/Song title ➟ Category/
Channel name... when the button is
pressed each time. If it can not display
the whole text information, rotate the
tune button to see the next page.
3. Automatic Channel Selection
Button
] button for less than
0.8 second to select previous channel.
] button for less than 0.8
second to select next channel.
Seek or Tune to XM channel
0 to display the Radio ID.
4. SCAN Button
Press to hear a brief sampling of all
channels.
To cancel the scan mode, press the but-
ton once again.
5. CATEGORY Search Button
Push [FLDR ] button to search previ-
ous category.
] button to search next
category. To listen to the displayed cat-
egory, press the TUNE/ENTER knob. To
scan channel in displayed category,
press the scan button.
To search channel in displayed category,
press seek buttons or turn the tune but-
ton clockwise/counterclockwise.(CATE-
GORY icon will be turned on in Category
mode)
6. Manual Channel Selection
Knob
While listening to XM broadcast, rotate
this control to the right or left to search
other channels while listening to current
channel. (Turn to the right to searchhigh-
er channels and left, lower channels.)
7. Preset Button
Push [1]~[6] buttons less than 0.8 sec-
ond to play the channel saved in each
button. Push Preset button for 0.8 sec-
ond or longer to save current channel to
the respective button with a beep.
8. MUTE Button
Press [MUTE] button to stop sound and
“Audio Mute” is displayed on the LCD.
procarmanuals.com
Page 234 of 425
![HYUNDAI VERACRUZ 2010 Owners Manual Features of your vehicle
152 4
In case RSE is loaded DVD disc and con-
nected auxiliary device at RSE unit that
is located the rear seat.
1. TRACK UP/DOWN Button
] button for less than
0.8 second to HYUNDAI VERACRUZ 2010 Owners Manual Features of your vehicle
152 4
In case RSE is loaded DVD disc and con-
nected auxiliary device at RSE unit that
is located the rear seat.
1. TRACK UP/DOWN Button
] button for less than
0.8 second to](/manual-img/35/57923/w960_57923-233.png)
Features of your vehicle
152 4
In case RSE is loaded DVD disc and con-
nected auxiliary device at RSE unit that
is located the rear seat.
1. TRACK UP/DOWN Button
] button for less than
0.8 second to play from the beginning
of current song.
] button for less than
0.8 second and press again within 1
seconds to play the previous song.
] button for 0.8 or
longer to initiate reverse direction high
speed sound search of current song.
] button for less than 0.8
second to play the next song.
] button for 0.8 or longer
to initiate high speed sound search of
current song.
2. RSE Selection Button
When you press this button, the system
will switch to RSE mode and you will be
able to listen to the source played in the
RSE unit. (If RSE unit has no disc, can
not select)
3. RSE Hold and RSE Power Off
If you press and hold this button for less
than 0.8 second, the LED of the button
will light and RSE unit will be locked. If
you press and hold this button for more
than 0.8 second, RSE unit will be turned
off with a beep and [RSE] will disappear
from LCD.
4. Folder Moving Button
], button child folder of
the current folder and displays the first
song in the folder.
] button parent folder
and displays the first song in the folder.
CAUTION - Using RSE
device
When listening to the CD on the
Audio H/UNIT in RSE, the mode can-
not be converted to USB on the
Audio H/UNIT and will be dis-
played on the LCD.
procarmanuals.com
Page 238 of 425
Features of your vehicle
156 4
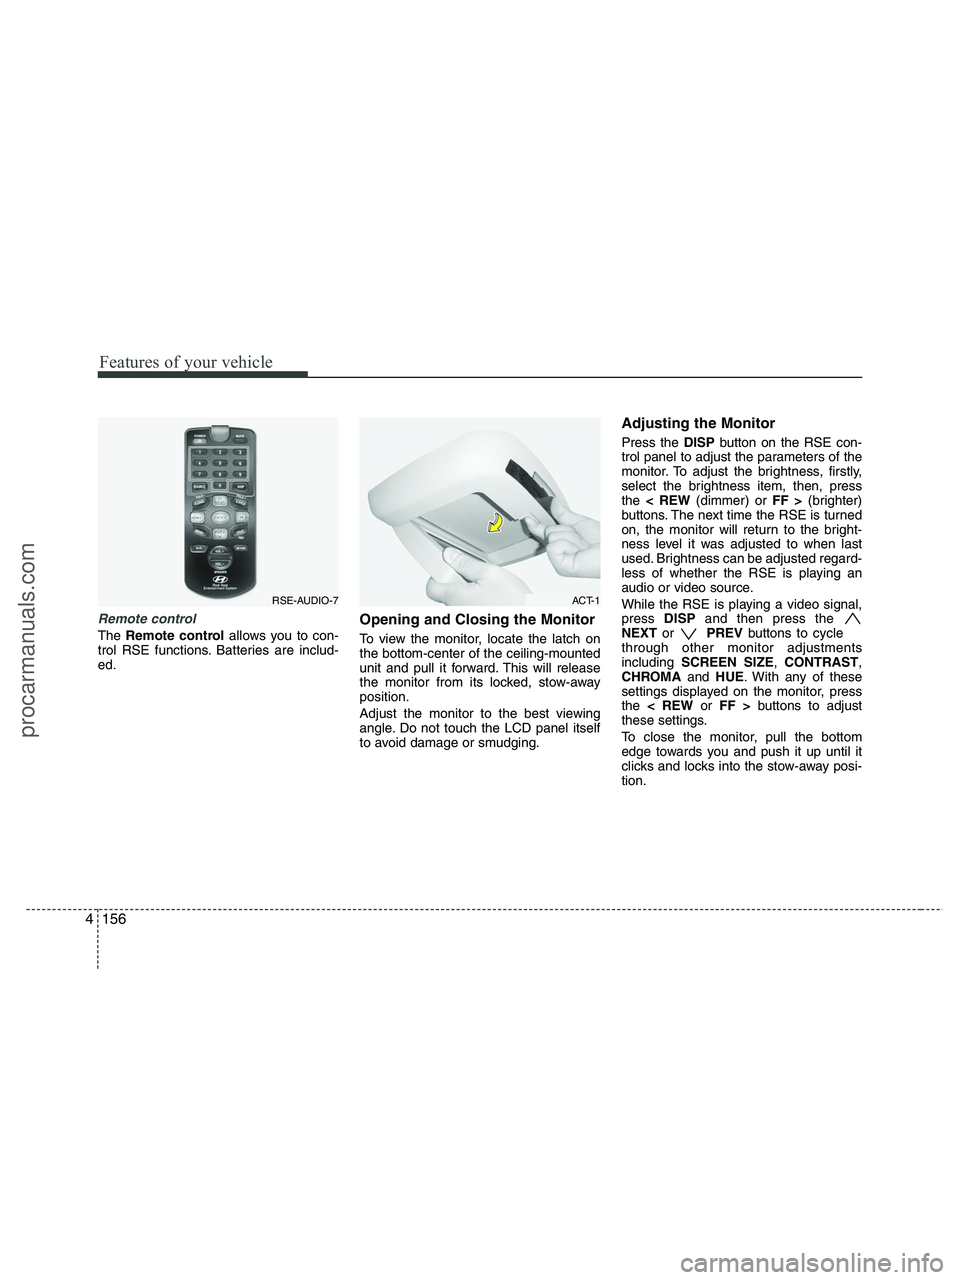
Remote control
The Remote controlallows you to con-
trol RSE functions. Batteries are includ-
ed.
Opening and Closing the Monitor
To view the monitor, locate the latch on
the bottom-center of the ceiling-mounted
unit and pull it forward. This will release
the monitor from its locked, stow-away
position.
Adjust the monitor to the best viewing
angle. Do not touch the LCD panel itself
to avoid damage or smudging.
Adjusting the Monitor
Press the DISPbutton on the RSE con-
trol panel to adjust the parameters of the
monitor. To adjust the brightness, firstly,
select the brightness item, then, press
the < REW(dimmer) or FF >(brighter)
buttons. The next time the RSE is turned
on, the monitor will return to the bright-
ness level it was adjusted to when last
used. Brightness can be adjusted regard-
less of whether the RSE is playing an
audio or video source.
While the RSE is playing a video signal,
press DISPand then press the
NEXTor PREVbuttons to cycle
through other monitor adjustments
including SCREEN SIZE,CONTRAST,
CHROMAand HUE. With any of these
settings displayed on the monitor, press
the < REWor FF >buttons to adjust
these settings.
To close the monitor, pull the bottom
edge towards you and push it up until it
clicks and locks into the stow-away posi-
tion.
RSE-AUDIO-7ACT-1
procarmanuals.com
Page 241 of 425
4159
Features of your vehicle
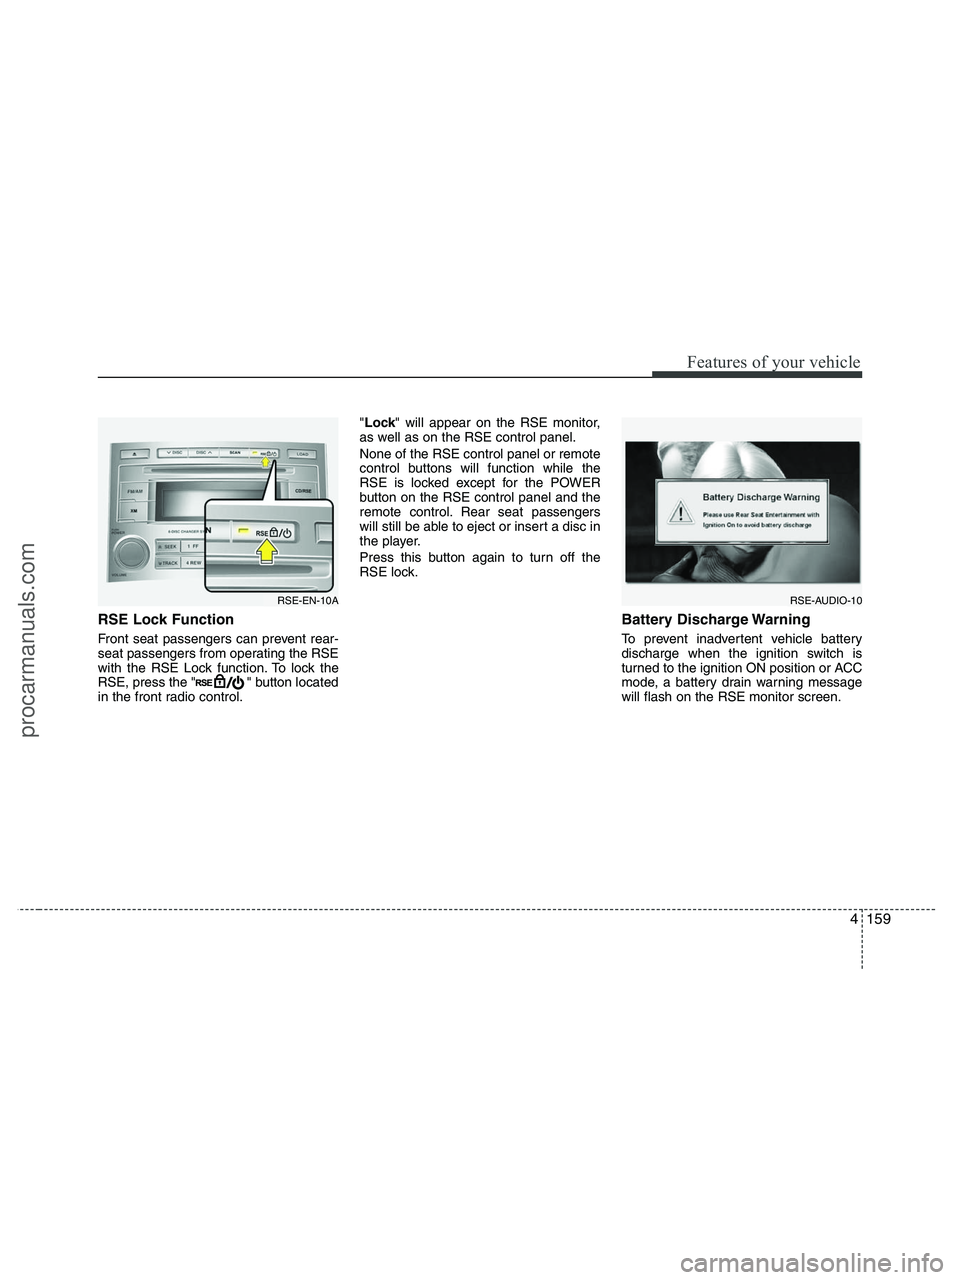
RSE Lock Function
Front seat passengers can prevent rear-
seat passengers from operating the RSE
with the RSE Lock function. To lock the
RSE, press the " " button located
in the front radio control."Lock" will appear on the RSE monitor,
as well as on the RSE control panel.
None of the RSE control panel or remote
control buttons will function while the
RSE is locked except for the POWER
button on the RSE control panel and the
remote control. Rear seat passengers
will still be able to eject or insert a disc in
the player.
Press this button again to turn off the
RSE lock.
Battery Discharge Warning
To prevent inadvertent vehicle battery
discharge when the ignition switch is
turned to the ignition ON position or ACC
mode, a battery drain warning message
will flash on the RSE monitor screen.
RSE-AUDIO-10RSE-EN-10A
procarmanuals.com