2010 Hyundai Sonata ignition
[x] Cancel search: ignitionPage 95 of 285
1FEATURES OF YOUR HYUNDAI82
!
Integrated HomeLink
® Wireless
Control System
The HomeLink
® Wireless Control System
provides a convenient way to replace up to
three hand-held radio-frequency (RF)
transmitters with a single built-in device.
This innovative feature will learn the radio
frequency codes of most current
transmitters to operate devices such as
gate operators, garage door openers, entry
door locks, security systems, even home
lighting. Both standard and rolling code-
equipped transmitters can be programmed
by following the outlined procedures.
Additional HomeLink
® information can be
found at: www.homelink.com or by calling
1-800-355-3515.
CAUTION:
Before programming HomeLink
® to a
garage door opener or gate operator,
make sure that people and objects are
out of the way of the device to prevent
potential harm or damage. Do not use
HomeLink
® with any garage door opener
that lacks the safety stop and reverse
features as required by U.S. federal
safety standards (this includes any
garage door opener model manufactured
before April 1, 1982). A garage door that
cannot detect an object - signaling the
door to stop and reverse - does not meet
current U.S. federal safety standards.
Using a garage door opener without these
features increases the risk of serious
injury or death.Programming HomeLink
®
NOTE:o When programming a garage door
opener, it is advised to park the vehicle
outside of the garage.
o It is recommended that a new battery
be placed in the hand-held transmitter
of the device being programmed to
HomeLink
® for quicker training and
accurate transmission of the radio-
frequency signal.
o Some vehicles may require the ignition
switch to be turned to the second (or
"accessories") position for program-
ming and/or operation of HomeLink.
o In the event that there are still pro-
gramming difficulties or questions
after following the programming steps
listed below, contact HomeLink
® at:
www.homelink.com or 1-800-355-
3515.
Retain the original transmitter of the RF
device you are programming for use in
other vehicles as well as for future
HomeLink
® programming. It is also
suggested that upon the sale of the vehicle,
the programmed HomeLink
® buttons be
erased for security purposes.
Page 111 of 285

1FEATURES OF YOUR HYUNDAI98
MAX A/C-Level (B, D) *
1
Air is discharged through the face level
vents.
If the "MAX A/C" mode is selected, the A/C
will turn on automatically and
"Recirculation" mode will be activated.
*1 : See page 1-97
NOTE:o The air intake control switch will
change to " " mode when the ignition
switch is turned "ON" with the MAX A/
C mode selected.
o When you change to another mode
from MAX A/C, the A/C and the air
intake control switch are set as shown
in the following chart.
* The A/C or the air intake control switch
returns to its former setting.
A/C
ON
ON or OFF *
ON or OFF *
ON
ONAir Intake
Control Switch
or *
Floor-Level (C, E, A, D) *
1
Air is discharged through the floor vents,
windshield defroster nozzle, side defroster
nozzle and side ventilator.
If the "Floor" mode is selected, the "Fresh"
mode will be activated.
Floor-Defrost Level (A, C, E, D) *
1
Air is discharged through the windshield
defroster nozzle, the floor vents, side
defroster nozzle and side ventilator.
If the "Floor-Defrost" mode is selected,
"Fresh" mode will be activated.
Defrost-Level (A, D) *
1
Air is discharged through the windshield
defroster nozzle, side defroster nozzle and
side ventilator.
If the "Defrost" mode is selected, the "Fresh"
mode will be activated to improve
windshield defrosting.
Face-Level (B, D) *
1
Air is discharged through the face level
vents.
Bi-Level (B, D, C, E) *
1
Air is discharged through the face vents
and the floor vents. This makes it possible
to have cooler air from the dashboard
vents and warmer air from the floor outlets
at the same time.
Page 123 of 285
1FEATURES OF YOUR HYUNDAI
110
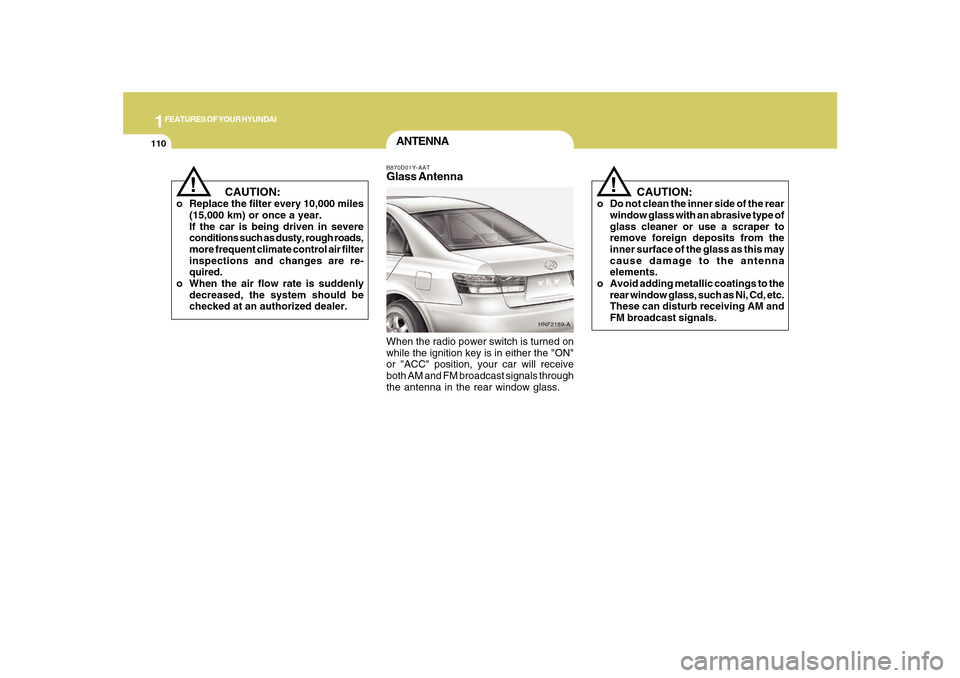
ANTENNAB870D01Y-AATGlass AntennaWhen the radio power switch is turned on
while the ignition key is in either the "ON"
or "ACC" position, your car will receive
both AM and FM broadcast signals through
the antenna in the rear window glass.
HNF2189-A
CAUTION:
o Do not clean the inner side of the rear
window glass with an abrasive type of
glass cleaner or use a scraper to
remove foreign deposits from the
inner surface of the glass as this may
cause damage to the antenna
elements.
o Avoid adding metallic coatings to the
rear window glass, such as Ni, Cd, etc.
These can disturb receiving AM and
FM broadcast signals.
!
CAUTION:
o Replace the filter every 10,000 miles
(15,000 km) or once a year.
If the car is being driven in severe
conditions such as dusty, rough roads,
more frequent climate control air filter
inspections and changes are re-
quired.
o When the air flow rate is suddenly
decreased, the system should be
checked at an authorized dealer.
!
Page 129 of 285
1FEATURES OF YOUR HYUNDAI
116
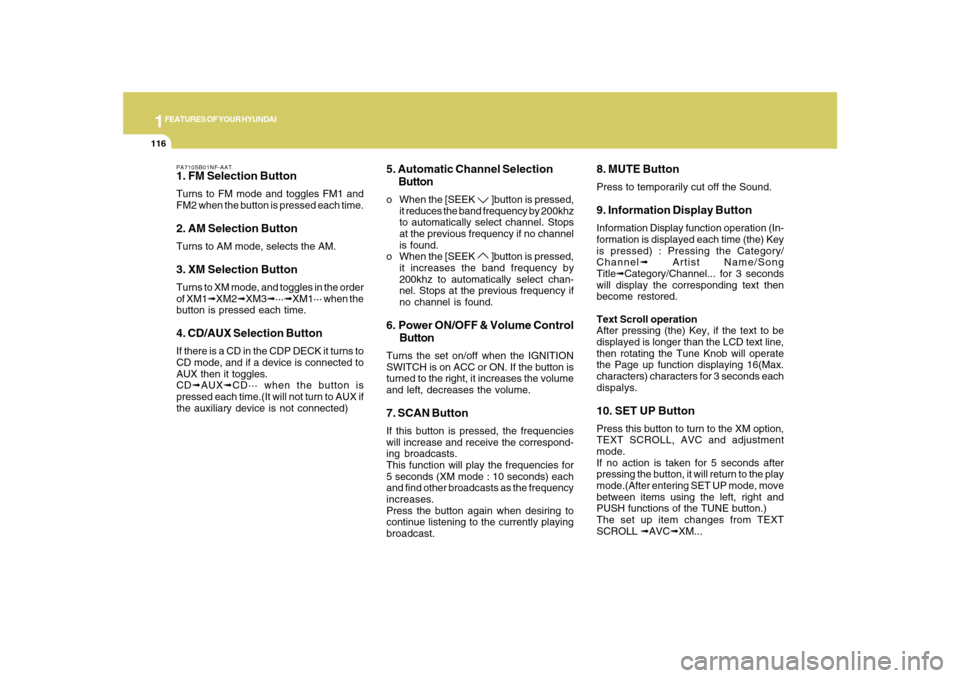
PA710SB01NF-AAT1. FM Selection ButtonTurns to FM mode and toggles FM1 and
FM2 when the button is pressed each time.2. AM Selection ButtonTurns to AM mode, selects the AM.3. XM Selection ButtonTurns to XM mode, and toggles in the order
of XM1➟XM2➟XM3➟···➟XM1··· when the
button is pressed each time.4. CD/AUX Selection ButtonIf there is a CD in the CDP DECK it turns to
CD mode, and if a device is connected to
AUX then it toggles.
CD➟AUX➟CD··· when the button is
pressed each time.(It will not turn to AUX if
the auxiliary device is not connected)
5. Automatic Channel Selection
Buttono When the [SEEK
]button is pressed,
it reduces the band frequency by 200khz
to automatically select channel. Stops
at the previous frequency if no channel
is found.
o When the [SEEK ]button is pressed,
it increases the band frequency by
200khz to automatically select chan-
nel. Stops at the previous frequency if
no channel is found.
6. Power ON/OFF & Volume Control
ButtonTurns the set on/off when the IGNITION
SWITCH is on ACC or ON. If the button is
turned to the right, it increases the volume
and left, decreases the volume.7. SCAN ButtonIf this button is pressed, the frequencies
will increase and receive the correspond-
ing broadcasts.
This function will play the frequencies for
5 seconds (XM mode : 10 seconds) each
and find other broadcasts as the frequency
increases.
Press the button again when desiring to
continue listening to the currently playing
broadcast.
8. MUTE ButtonPress to temporarily cut off the Sound.9. Information Display ButtonInformation Display function operation (In-
formation is displayed each time (the) Key
is pressed) : Pressing the Category/
Channel➟ Artist Name/Song
Title➟Category/Channel... for 3 seconds
will display the corresponding text then
become restored.
Text Scroll operation
After pressing (the) Key, if the text to be
displayed is longer than the LCD text line,
then rotating the Tune Knob will operate
the Page up function displaying 16(Max.
characters) characters for 3 seconds each
dispalys.10. SET UP ButtonPress this button to turn to the XM option,
TEXT SCROLL, AVC and adjustment
mode.
If no action is taken for 5 seconds after
pressing the button, it will return to the play
mode.(After entering SET UP mode, move
between items using the left, right and
PUSH functions of the TUNE button.)
The set up item changes from TEXT
SCROLL ➟AVC➟XM...
Page 132 of 285
1
FEATURES OF YOUR HYUNDAI
119
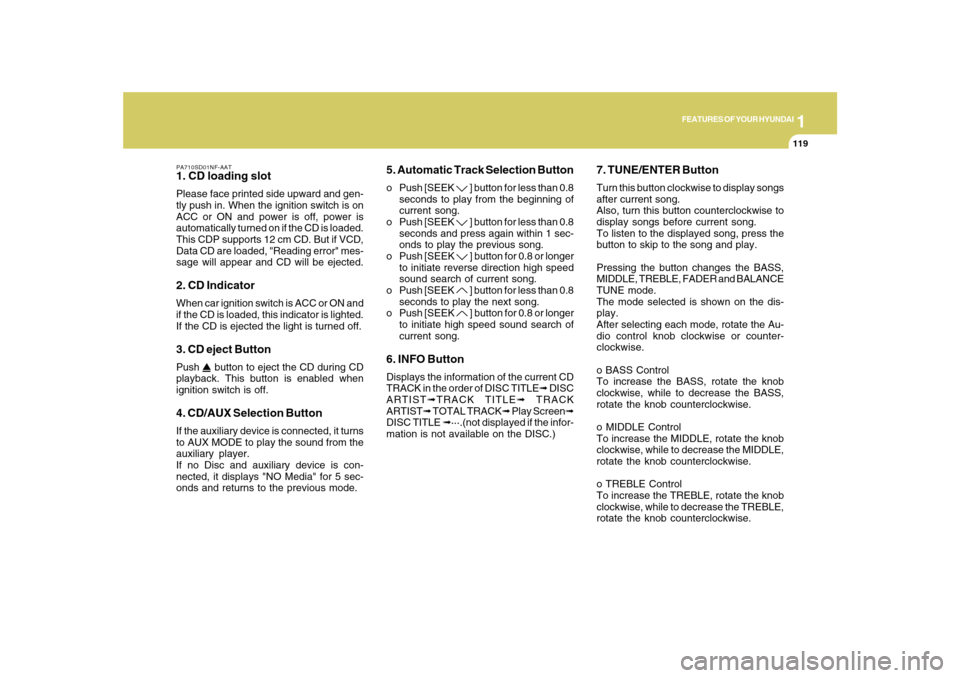
PA710SD01NF-AAT1. CD loading slotPlease face printed side upward and gen-
tly push in. When the ignition switch is on
ACC or ON and power is off, power is
automatically turned on if the CD is loaded.
This CDP supports 12 cm CD. But if VCD,
Data CD are loaded, "Reading error" mes-
sage will appear and CD will be ejected.2. CD IndicatorWhen car ignition switch is ACC or ON and
if the CD is loaded, this indicator is lighted.
If the CD is ejected the light is turned off.3. CD eject ButtonPush
button to eject the CD during CD
playback. This button is enabled when
ignition switch is off.
4. CD/AUX Selection ButtonIf the auxiliary device is connected, it turns
to AUX MODE to play the sound from the
auxiliary player.
If no Disc and auxiliary device is con-
nected, it displays "NO Media" for 5 sec-
onds and returns to the previous mode.
5. Automatic Track Selection Buttono Push [SEEK
] button for less than 0.8
seconds to play from the beginning of
current song.
o Push [SEEK ] button for less than 0.8
seconds and press again within 1 sec-
onds to play the previous song.
o Push [SEEK ] button for 0.8 or longer
to initiate reverse direction high speed
sound search of current song.
o Push [SEEK ] button for less than 0.8
seconds to play the next song.
o Push [SEEK ] button for 0.8 or longer
to initiate high speed sound search of
current song.
6. INFO ButtonDisplays the information of the current CD
TRACK in the order of DISC TITLE➟ DISC
ARTIST➟TRACK TITLE➟ TRACK
ARTIST➟ TOTAL TRACK➟ Play Screen➟
DISC TITLE ➟···.(not displayed if the infor-
mation is not available on the DISC.)
7. TUNE/ENTER ButtonTurn this button clockwise to display songs
after current song.
Also, turn this button counterclockwise to
display songs before current song.
To listen to the displayed song, press the
button to skip to the song and play.
Pressing the button changes the BASS,
MIDDLE, TREBLE, FADER and BALANCE
TUNE mode.
The mode selected is shown on the dis-
play.
After selecting each mode, rotate the Au-
dio control knob clockwise or counter-
clockwise.
o BASS Control
To increase the BASS, rotate the knob
clockwise, while to decrease the BASS,
rotate the knob counterclockwise.
o MIDDLE Control
To increase the MIDDLE, rotate the knob
clockwise, while to decrease the MIDDLE,
rotate the knob counterclockwise.
o TREBLE Control
To increase the TREBLE, rotate the knob
clockwise, while to decrease the TREBLE,
rotate the knob counterclockwise.
Page 142 of 285
1
FEATURES OF YOUR HYUNDAI
129
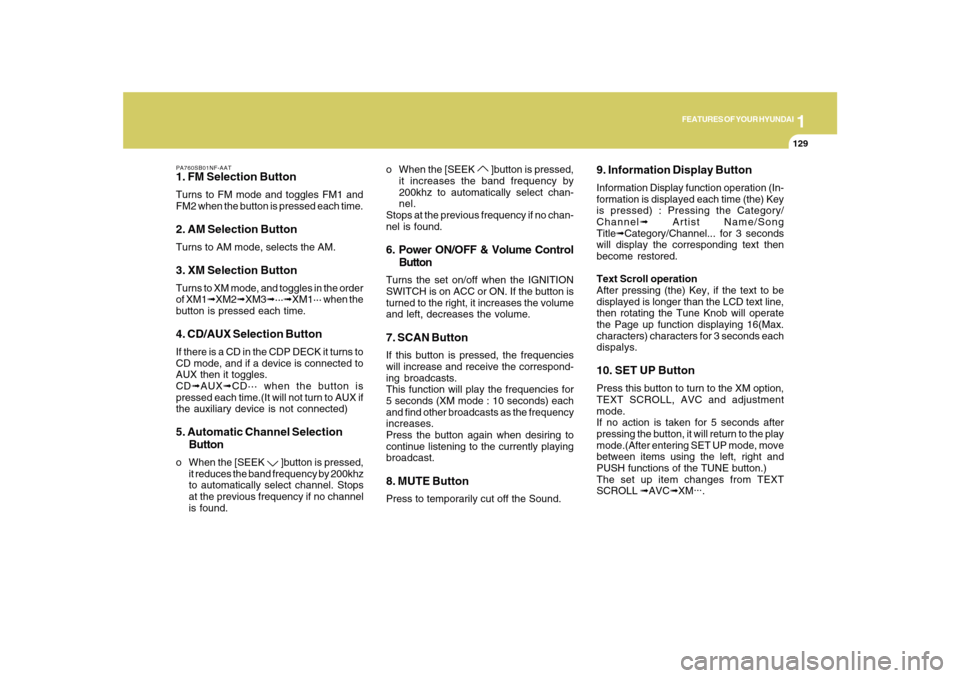
PA760SB01NF-AAT1. FM Selection ButtonTurns to FM mode and toggles FM1 and
FM2 when the button is pressed each time.2. AM Selection ButtonTurns to AM mode, selects the AM.3. XM Selection ButtonTurns to XM mode, and toggles in the order
of XM1➟XM2➟XM3➟···➟XM1··· when the
button is pressed each time.4. CD/AUX Selection ButtonIf there is a CD in the CDP DECK it turns to
CD mode, and if a device is connected to
AUX then it toggles.
CD➟AUX➟CD··· when the button is
pressed each time.(It will not turn to AUX if
the auxiliary device is not connected)5. Automatic Channel Selection
Buttono When the [SEEK
]button is pressed,
it reduces the band frequency by 200khz
to automatically select channel. Stops
at the previous frequency if no channel
is found.o When the [SEEK
]button is pressed,
it increases the band frequency by
200khz to automatically select chan-
nel.
Stops at the previous frequency if no chan-
nel is found.
6. Power ON/OFF & Volume Control
ButtonTurns the set on/off when the IGNITION
SWITCH is on ACC or ON. If the button is
turned to the right, it increases the volume
and left, decreases the volume.7. SCAN ButtonIf this button is pressed, the frequencies
will increase and receive the correspond-
ing broadcasts.
This function will play the frequencies for
5 seconds (XM mode : 10 seconds) each
and find other broadcasts as the frequency
increases.
Press the button again when desiring to
continue listening to the currently playing
broadcast.8. MUTE ButtonPress to temporarily cut off the Sound.
9. Information Display ButtonInformation Display function operation (In-
formation is displayed each time (the) Key
is pressed) : Pressing the Category/
Channel➟ Artist Name/Song
Title➟Category/Channel... for 3 seconds
will display the corresponding text then
become restored.
Text Scroll operation
After pressing (the) Key, if the text to be
displayed is longer than the LCD text line,
then rotating the Tune Knob will operate
the Page up function displaying 16(Max.
characters) characters for 3 seconds each
dispalys.10. SET UP ButtonPress this button to turn to the XM option,
TEXT SCROLL, AVC and adjustment
mode.
If no action is taken for 5 seconds after
pressing the button, it will return to the play
mode.(After entering SET UP mode, move
between items using the left, right and
PUSH functions of the TUNE button.)
The set up item changes from TEXT
SCROLL ➟AVC➟XM...
.
Page 145 of 285
1FEATURES OF YOUR HYUNDAI
132
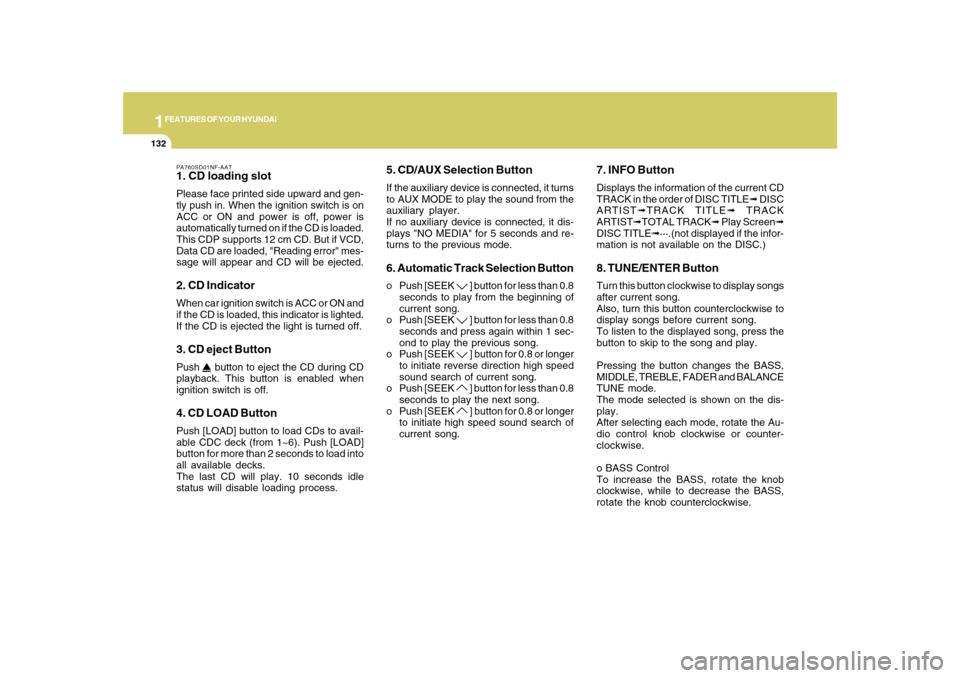
PA760SD01NF-AAT1. CD loading slotPlease face printed side upward and gen-
tly push in. When the ignition switch is on
ACC or ON and power is off, power is
automatically turned on if the CD is loaded.
This CDP supports 12 cm CD. But if VCD,
Data CD are loaded, "Reading error" mes-
sage will appear and CD will be ejected.2. CD IndicatorWhen car ignition switch is ACC or ON and
if the CD is loaded, this indicator is lighted.
If the CD is ejected the light is turned off.3. CD eject ButtonPush
button to eject the CD during CD
playback. This button is enabled when
ignition switch is off.
4. CD LOAD ButtonPush [LOAD] button to load CDs to avail-
able CDC deck (from 1~6). Push [LOAD]
button for more than 2 seconds to load into
all available decks.
The last CD will play. 10 seconds idle
status will disable loading process.
5. CD/AUX Selection ButtonIf the auxiliary device is connected, it turns
to AUX MODE to play the sound from the
auxiliary player.
If no auxiliary device is connected, it dis-
plays "NO MEDIA" for 5 seconds and re-
turns to the previous mode.6. Automatic Track Selection Buttono Push [SEEK
] button for less than 0.8
seconds to play from the beginning of
current song.
o Push [SEEK ] button for less than 0.8
seconds and press again within 1 sec-
ond to play the previous song.
o Push [SEEK ] button for 0.8 or longer
to initiate reverse direction high speed
sound search of current song.
o Push [SEEK ] button for less than 0.8
seconds to play the next song.
o Push [SEEK ] button for 0.8 or longer
to initiate high speed sound search of
current song.
7. INFO ButtonDisplays the information of the current CD
TRACK in the order of DISC TITLE➟ DISC
ARTIST➟TRACK TITLE➟ TRACK
ARTIST➟TOTAL TRACK➟ Play Screen➟
DISC TITLE➟···.(not displayed if the infor-
mation is not available on the DISC.)8. TUNE/ENTER ButtonTurn this button clockwise to display songs
after current song.
Also, turn this button counterclockwise to
display songs before current song.
To listen to the displayed song, press the
button to skip to the song and play.
Pressing the button changes the BASS,
MIDDLE, TREBLE, FADER and BALANCE
TUNE mode.
The mode selected is shown on the dis-
play.
After selecting each mode, rotate the Au-
dio control knob clockwise or counter-
clockwise.
o BASS Control
To increase the BASS, rotate the knob
clockwise, while to decrease the BASS,
rotate the knob counterclockwise.
Page 156 of 285
2
DRIVING YOUR HYUNDAI
3
!
BEFORE STARTING
THE ENGINEC020A01NF-AATBefore you start the engine, you should
always:
1. Look around the vehicle to be sure
there are no flat tires, puddles of oil,
water or other indications of possible
trouble.
2. After entering the car, check to be sure
the parking brake is engaged.
3. Check that all windows and lights are
clean.
4. Check that the interior and exterior
mirrors are clean and in position.
5. Check your seat, seatback and head-
rest to be sure they are in their proper
positions.
6. Lock all the doors.
7. Fasten your seat belt and be sure that all
other occupants have fastened theirs.
8. Turn off all lights and accessories that
are not needed.
9. When you turn the ignition switch to
"ON", check that all appropriate warning
lights are operating and that you have
sufficient fuel.
10. Check the operation of warning lights
and all bulbs when key is in the "ON"
position.
TO START THE ENGINEC030A01E-AATCOMBINATION IGNITION SWITCHo If your Hyundai is equipped with a
manual transaxle, place the shift lever
in neutral and depress the clutch pedal
fully.
o If your Hyundai has an automatic
transaxle, place the shift lever in "P"
(Park).
o To start the engine, insert the ignition
key and turn it to the "START" position.
Release it as soon as the engine starts.
Do not hold the key in the "START"
position for more than 15 seconds.NOTE:o For safety, the engine will not start if
the clutch pedal is not depressed fully
(Manual Transaxle) or the shift lever
is not in "P" or "N" Position (Automatic
Transaxle).
o The ignition key cannot be turned from
"ACC" position to "LOCK" position
unless the shift lever is in the "P"
(Park) position or the negative battery
terminal is disconnected from the bat-
tery. To remove the key, always
confirm that the shift lever is securely
positioned in "P" (Park) (For Automatic
Transaxle).
o For additional information about start-
ing, see page 2-5.
WARNING:
o All passengers must be properly
belted whenever the vehicle is moving.
Refer to pages: 1-22 through 1-34 for
more information on their proper use.
o Always check the surrounding areas
near your vehicle for people,
especially children, before putting a
car into 'drive'.
!
WARNING:
Always wear appropriate shoes when
operating your vehicle.
Unsuitable shoes (high heels, ski boots,
etc.) may interfere with your ability to
use the brake and accelerator pedal,
and the clutch (if installed).
!
WARNING:
When you intend to park or stop the
vehicle with the engine on, be careful not
to depress the accelerator pedal for a
long period of time. It may overheat the
engine or exhaust system and cause
fire.